
Tool Tutorial
This tutorial outlines how to use the Pantorouter for making repeatable, accurate, and even non-orthogonal joints in wood—including box joints. Follow these guidelines to set up, operate, and maintain the tool safely and efficiently.
Overview
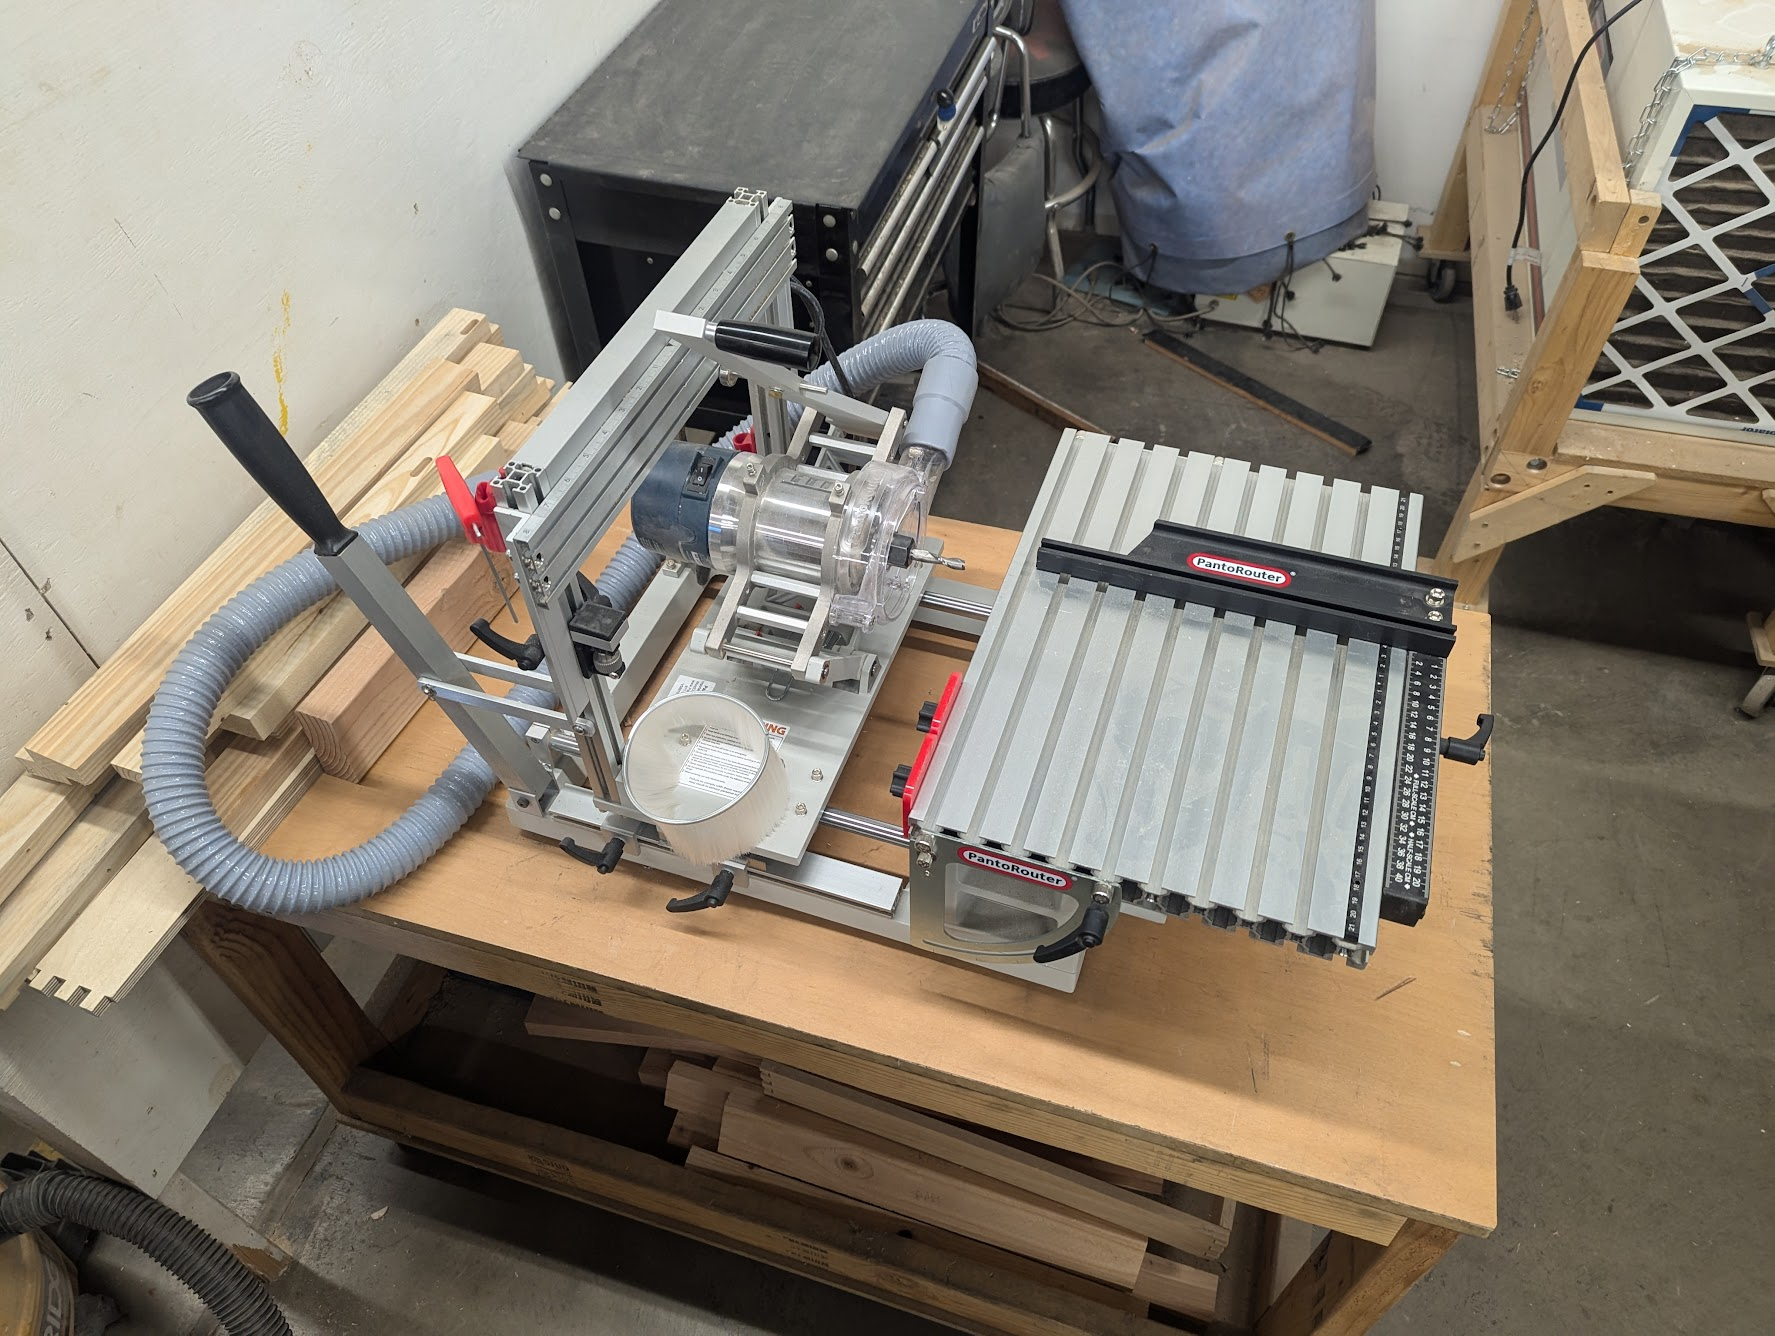
The Pantorouter is designed for precise woodworking joinery. It allows you to cut mortises, tenons, and box joints with high repeatability. Its features, including a programmable table and adjustable templates, enable both standard and custom joinery operations.
The Pantopouter is extensively documented on their website, including a video tutorial library for particular operations. You should use them!
Controls & Components
Table & Movement
- Table:
- Holds the workpiece securely and can be angled as needed.
- Equipped with a lockable miter gauge for repeated operations.
- Axes of Motion:
- Plunge Axis: Controls the router’s vertical movement.
- XY Axis: Provides horizontal movement with a 2:1 reduction (1 inch on the template equals ½ inch of router movement).
Template Holder & Templates
- Template Holder:
- Fixed to the Z slide with vertical height adjustment.
- Templates are stored in the rolling cart.
- Templates:
- Feature a centered hole for using a stylus or pin to align with the template holder.
- Internal steps allow for extremely fine adjustments by varying the stylus depth.
- Tapered exterior edges permit adjustment of the final tenon width.
Miter Gauge
- Dual Unit Scales:
- Includes full and half-size scales.
- To center a board for tenon cutting, measure its width with the full scale and adjust the gauge so that the zero mark aligns with the measurement.
- Note on Gauges:
- The opposite side of each gauge uses different units (inch/mm), so verify your settings before proceeding.
Operating Procedures
Preparation & Setup
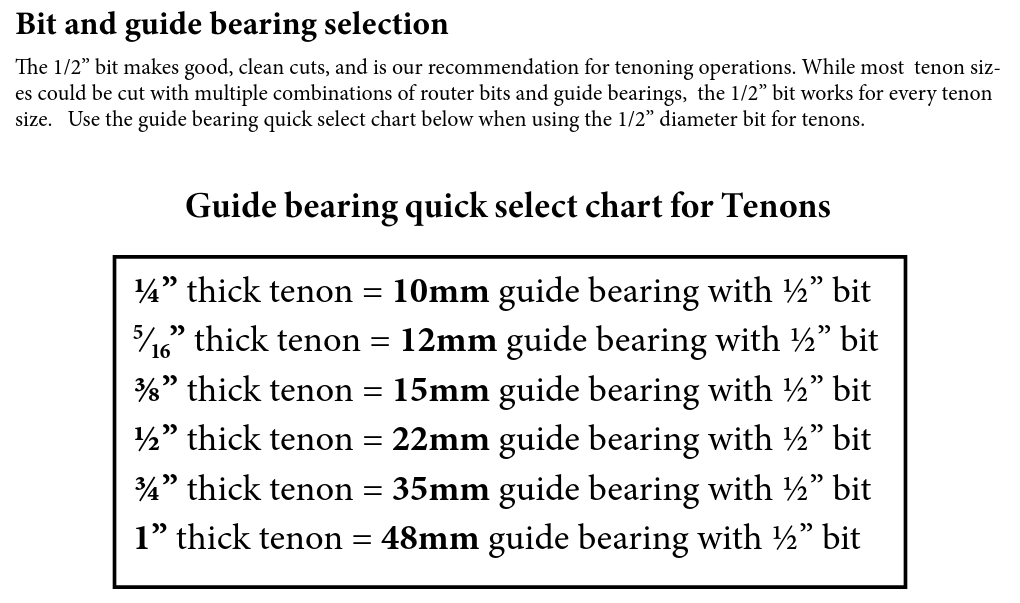
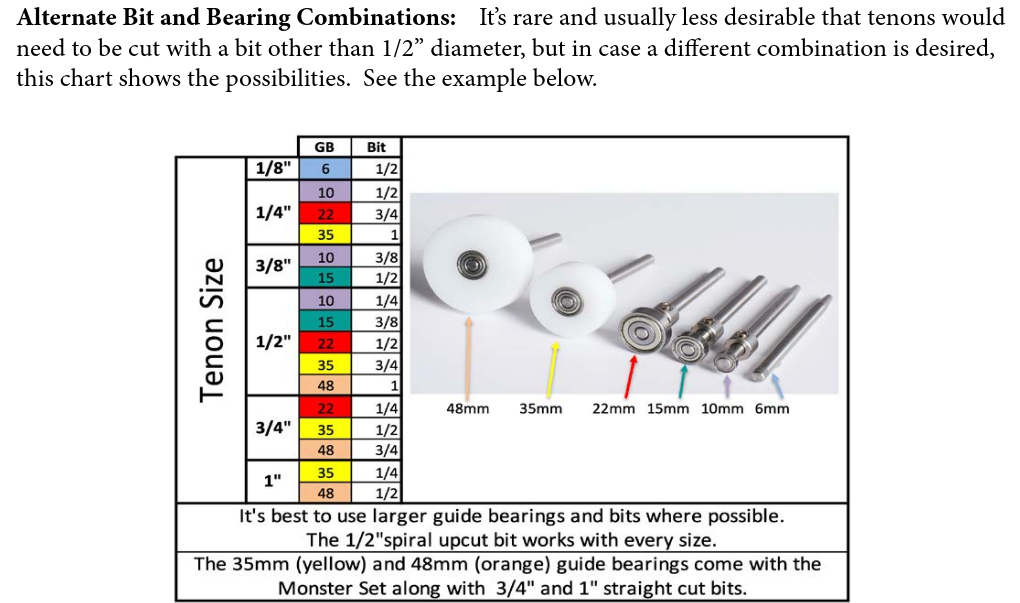
Bearing selection: p13 and p14 of the how-to guide is copied below for reference:

Workpiece Positioning: Place the board against the front fence to zero the depth for a mortise, or place your piece against the miter gauge with some stickout for a tenon.
Always secure your part with at least two clamps, otherwise the force of the router can cause your part to shift.
Template Positioning: Insert the board into the vertical height adjustment section to properly set the template holder.
Do not fine adjust the vertical axis unless experienced. This can lead to misalignment when cutting your piece.
Cutting Operations
- Sequence:
- First: Cut the mortises.
- Next: Cut the tenons.
- Cutting Process:
- Make several passes into the wood rather than trying to cut the full depth in one go.
- For tenon cuts, start with the largest setting (closest to the template holder) and then fine-tune gradually while checking with a precut mortise.
- Use the end mill with the “retracted” plunge depth stop to set the starting height by aligning the wood against the machine when the router is at its limit.
Dust and Spindle Access
- Dust Cover:
- Open the hinged dust cover at the top to access the back of the spindle.
- Collet Adjustment:
- Use the provided pair of wrenches to loosen or tighten the collet.
- Dust Collection:
- Attach the dust boot to the outside of the plastic guard (behind the lip) and use a shop vac to collect dust during operation.
Tool Anatomy, Safety, and Care
- Tool Anatomy: Detailed diagrams are available in the full manual.
- Tool Safety: Always follow standard woodworking safety procedures.
- Tool Care: Regular maintenance ensures long-term precision.
- Allowed Materials: Refer to the material guidelines provided in the manual.
- Basic Operation: This tutorial covers the fundamental steps; consult the manual for complete operational details.
Future Enhancements & Extra Tasks
- Documentation:
- Add a laminated chart (pages 13 and 14 of the walkthrough guide) near the tool. This chart helps decide on the guide bearing and bit size for various tenon sizes.
- 3D Printed Accessories:
- Create a holder for guide bearings that arranges them in order and displays their sizes.
- Tool Accessories:
- Consider fabricating a cover for the fine vertical adjustment on the template holder.
- Label slide locks to indicate the “mortising” region.
- Use bright colors for collet wrenches for better visibility.
- Dust Collection:
- Obtain or fabricate an adapter to connect the Pantorouter dust collector hose to available shop vacs.
- Template Design:
- Design a template and create one with 3D printing or similar.
No Comments