
Tool Tutorial
The blacksmithing area is a collection of very simple tools. The work of learning forging is practice:
- trying things
- figuring things out
- refining technique
Safety
When forging, always wear appropriate safety gear:
- Leather apron
- Eye protection
- Hearing protection
Always wear well-fitted clothing made of natural fibers (cotton, denim, wool) in the blacksmithing area. Do not wear clothing made of plastic: if the clothing gets too hot, it will melt into your skin, causing severe burns.
Always wear closed-toed shoes in the blacksmithing area. Boots are recommended. Wear shoes or boots made of natural materials (leather or canvas).
Assume all objects on the large forge table are hot.]) Always use tongs to pick up or manipulate objects on the large forge table.
Never leave a forge unattended while lit.
Common Hazards
Do not use tongs that fit loosely to your workpiece; this may cause a heated workpiece to move unexpectedly in the tongs or fall out, possibly resulting in injury.
Tooling
Protohaven has a good range of common smithing tools available for use in the tool crib. You are welcome to bring (or make!) your own tools for use in the blacksmithing area.
Materials
Materials approved for use in the forge:
- carbon steel (unpainted, uncoated, ungalvanized)
Materials prohibited for use in the forge:
- painted metal
- coated metal
- galvanized metal
- brass
- bronze
- chromium steel
- stainless steel
A small selection of steel rod suitable for blacksmithing is available at the Protohaven shop.
Parts of the Blacksmithing Area
Propane Tank
The tank isolation valve controls the flow of propane from the tank into the hose line.

Do not adjust the propane regulator. If you think the flow rate is low, tell a tech on duty.
Forge
The forge isolation valve controls the flow of propane from the hose line into the forge.
Press the ignition switch to ignite the forge.
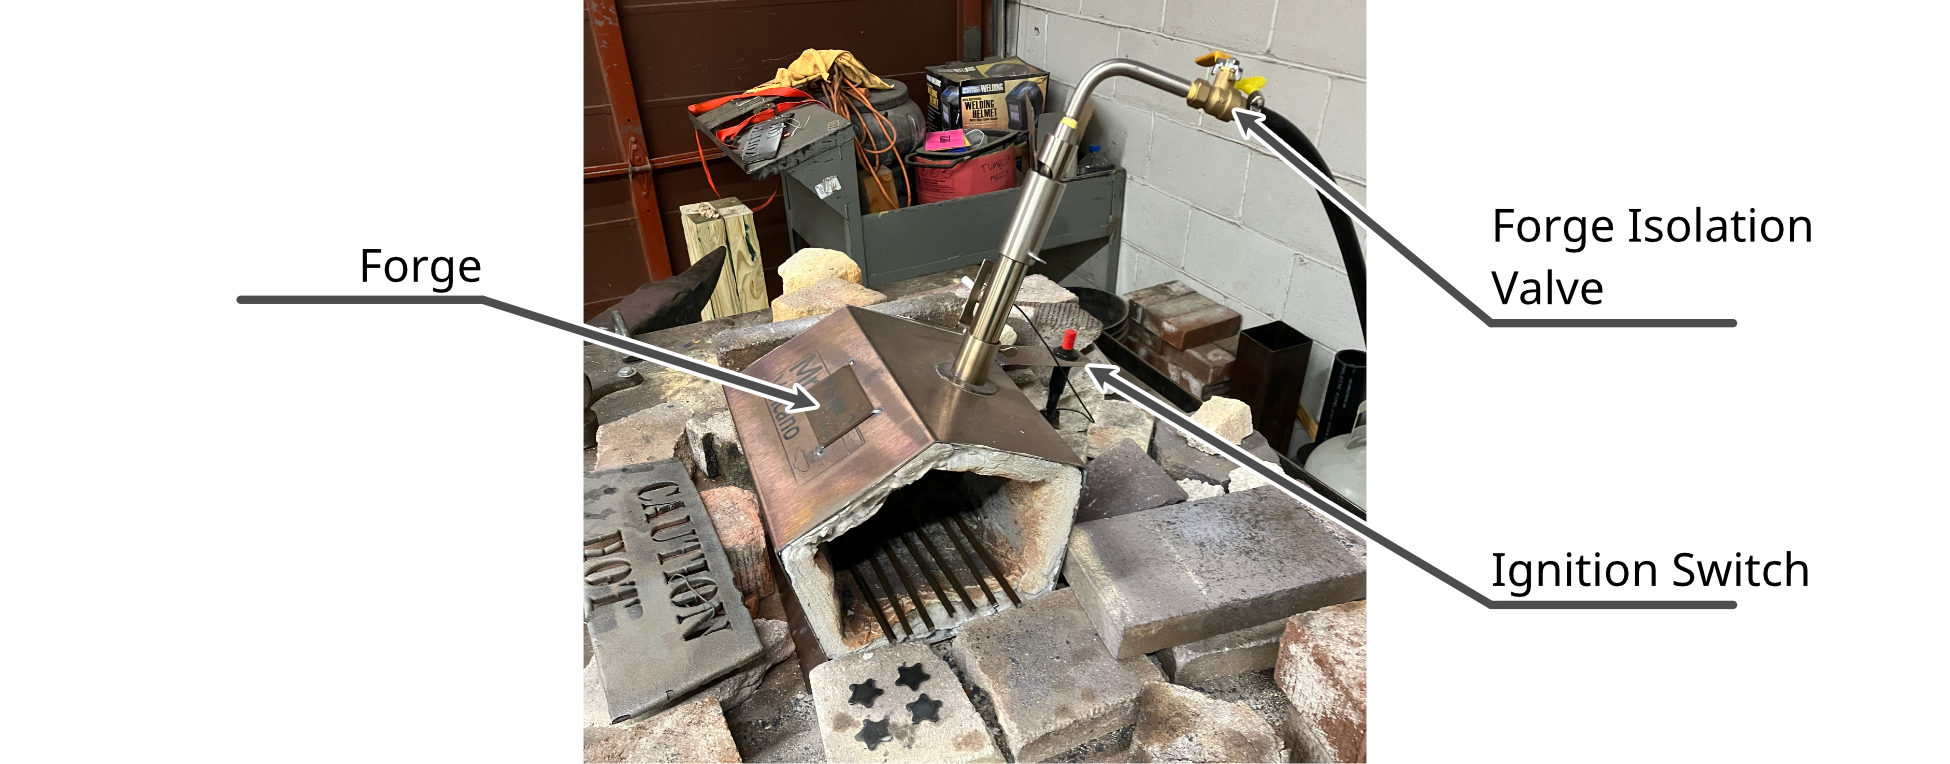
The firebrick inside the forge protects the refractory material from damage.
Anvil
The anvil is a work surface for many forging tasks.
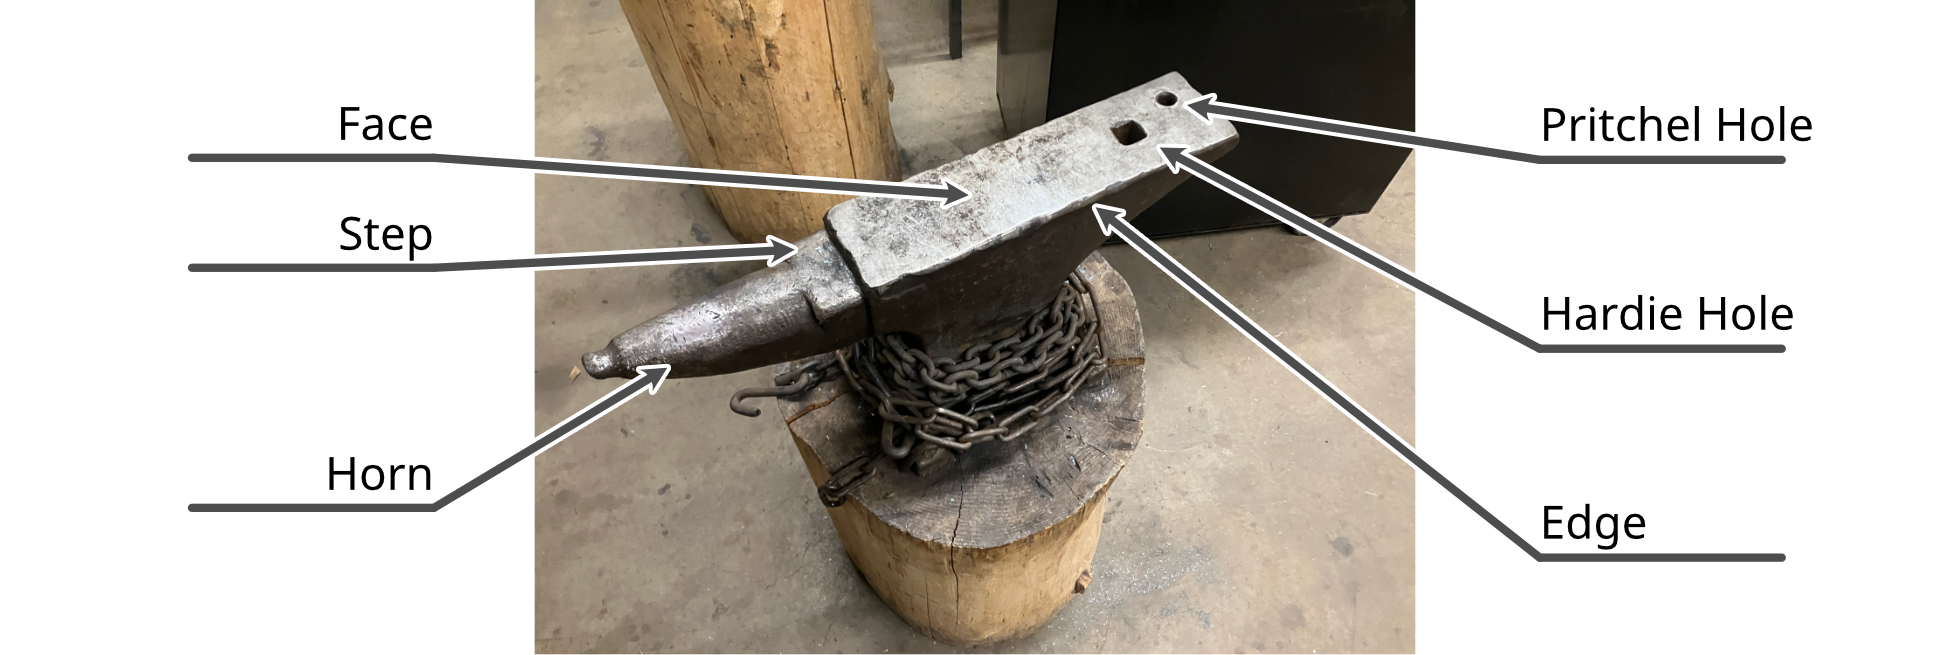
Face. The face is the flat area at the top of the anvil. The top of the face is used to flatten and shape material. The edge of the face can be used to bend material. Face edges can be sharp or rounded to achieve different kinds of bends.
Step. The step (also known as the cutting table) is a small area between the face and the horn. The step is slightly lower than the face. The metal of the step is softer than the face for better absorbing chisel blows during cutting operations.
Horn. The horn is the rounded, tapered end of the anvil. The horn is used to bend material into curves. Different parts of the horn can be used to shape the material into various curves.
Hardie hole. The hardie hole is a square hole at the rear if the face, extending clear through the body of the anvil. The hardie hole accepts hardie tools, which rest in the hole without rotating.
Pritchel hole. The pritchel hole is a round hole at the rear if the face, extending clear through the body of the anvil. The pritchel hole provides clearance for punching tools. It can also be used to hold tools that have round shanks, such as the hold fasts.
Quench Tub
The quench tub filled with water is on the floor of the forge.
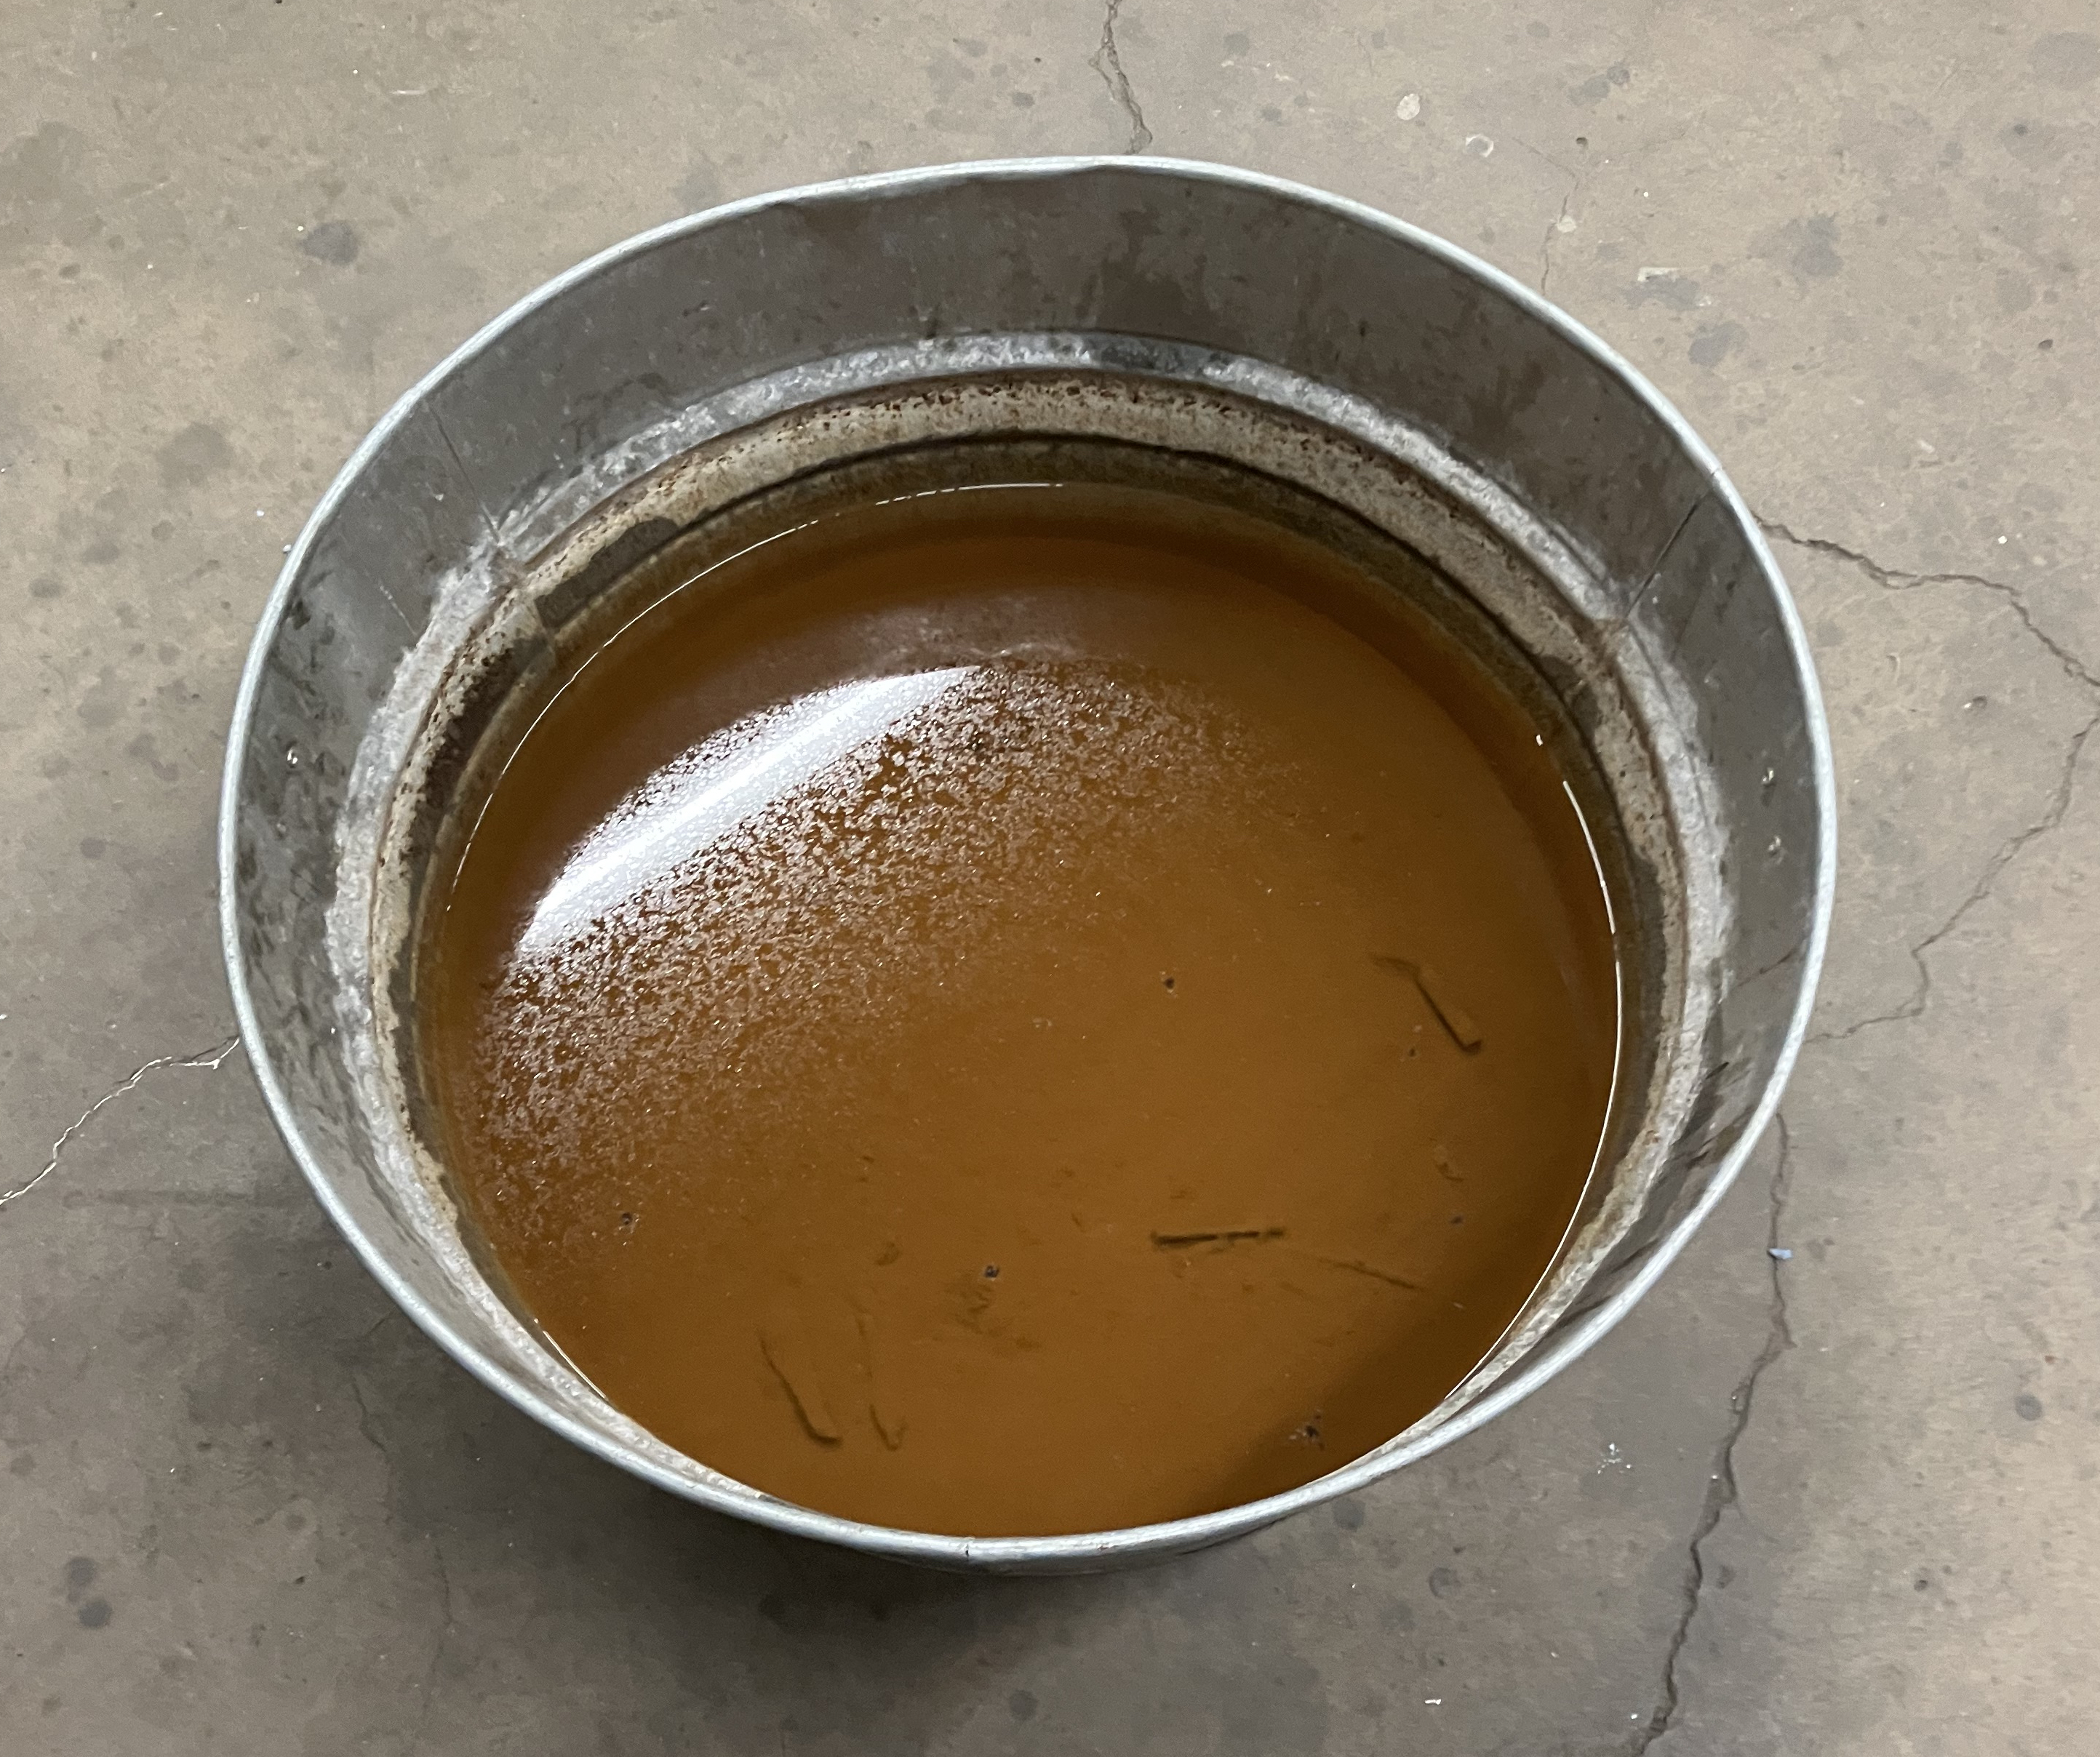
The quench tub is used to quickly cool tools and forged workpieces.
The quench tub can be a tripping hazard. Be very careful moving around the shop, especially so when manipulating a hot piece of metal.
Large Forge Table
the large forge table is by the the gas bottles, and holds the primary working forge in the blacksmithing area.
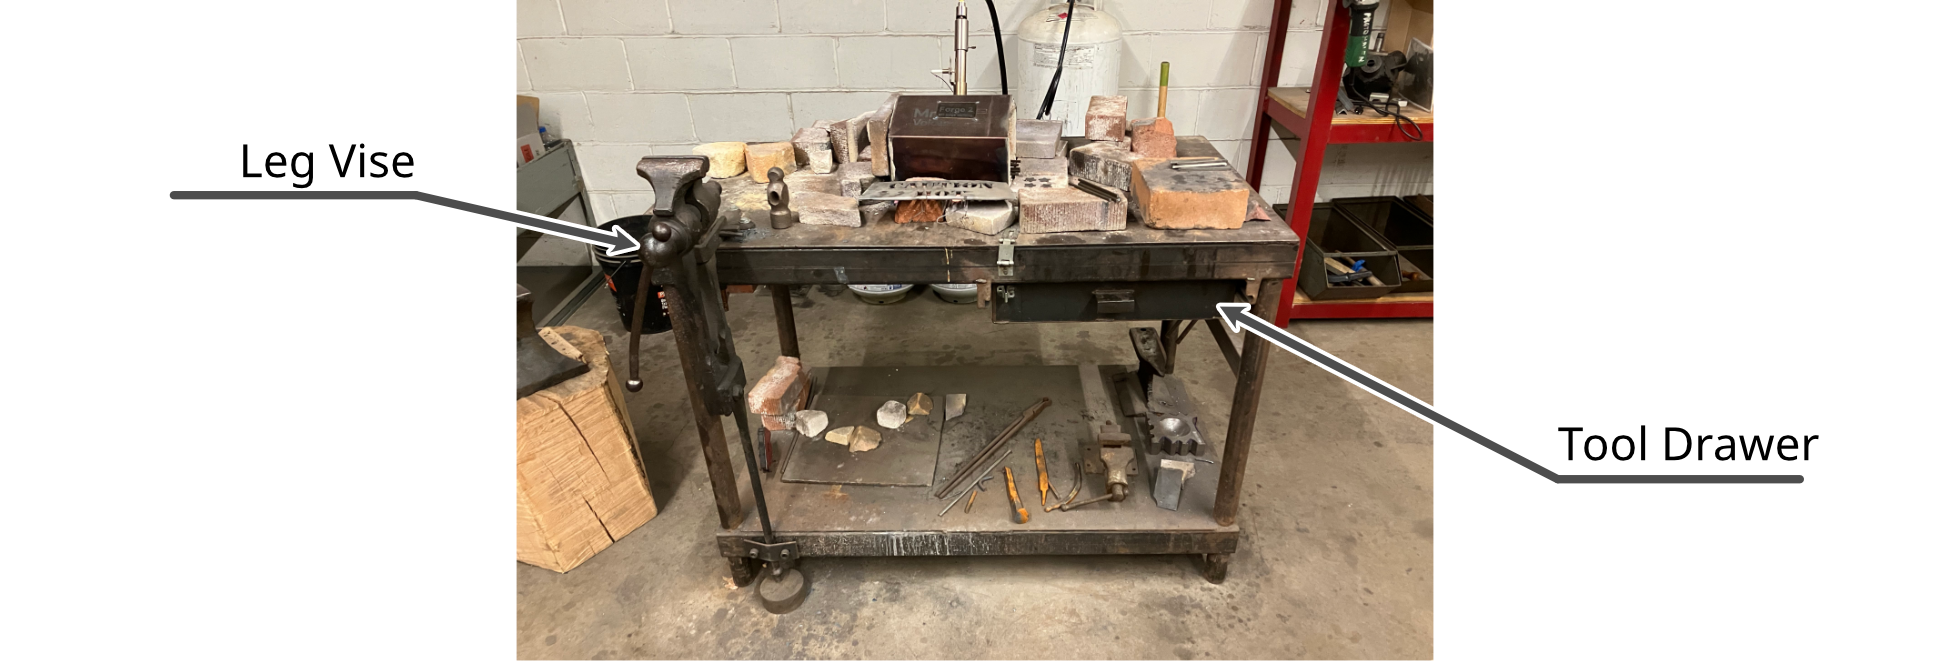
The large forge table can be used to rest heated workpieces and tools.
The large forge table as an attached leg vise, and a drawer for hand tools.
Leg Vise
The leg vise is attached to the forge table.
The leg vise can be used to hold workpieces for hand bending and twisting. Workpieces should not be forged in the vise.
Garage Door
The garage door must be opened for ventilation while a forge is lit.
Tool Crib
The blacksmithing area tool crib holds various hand tools.
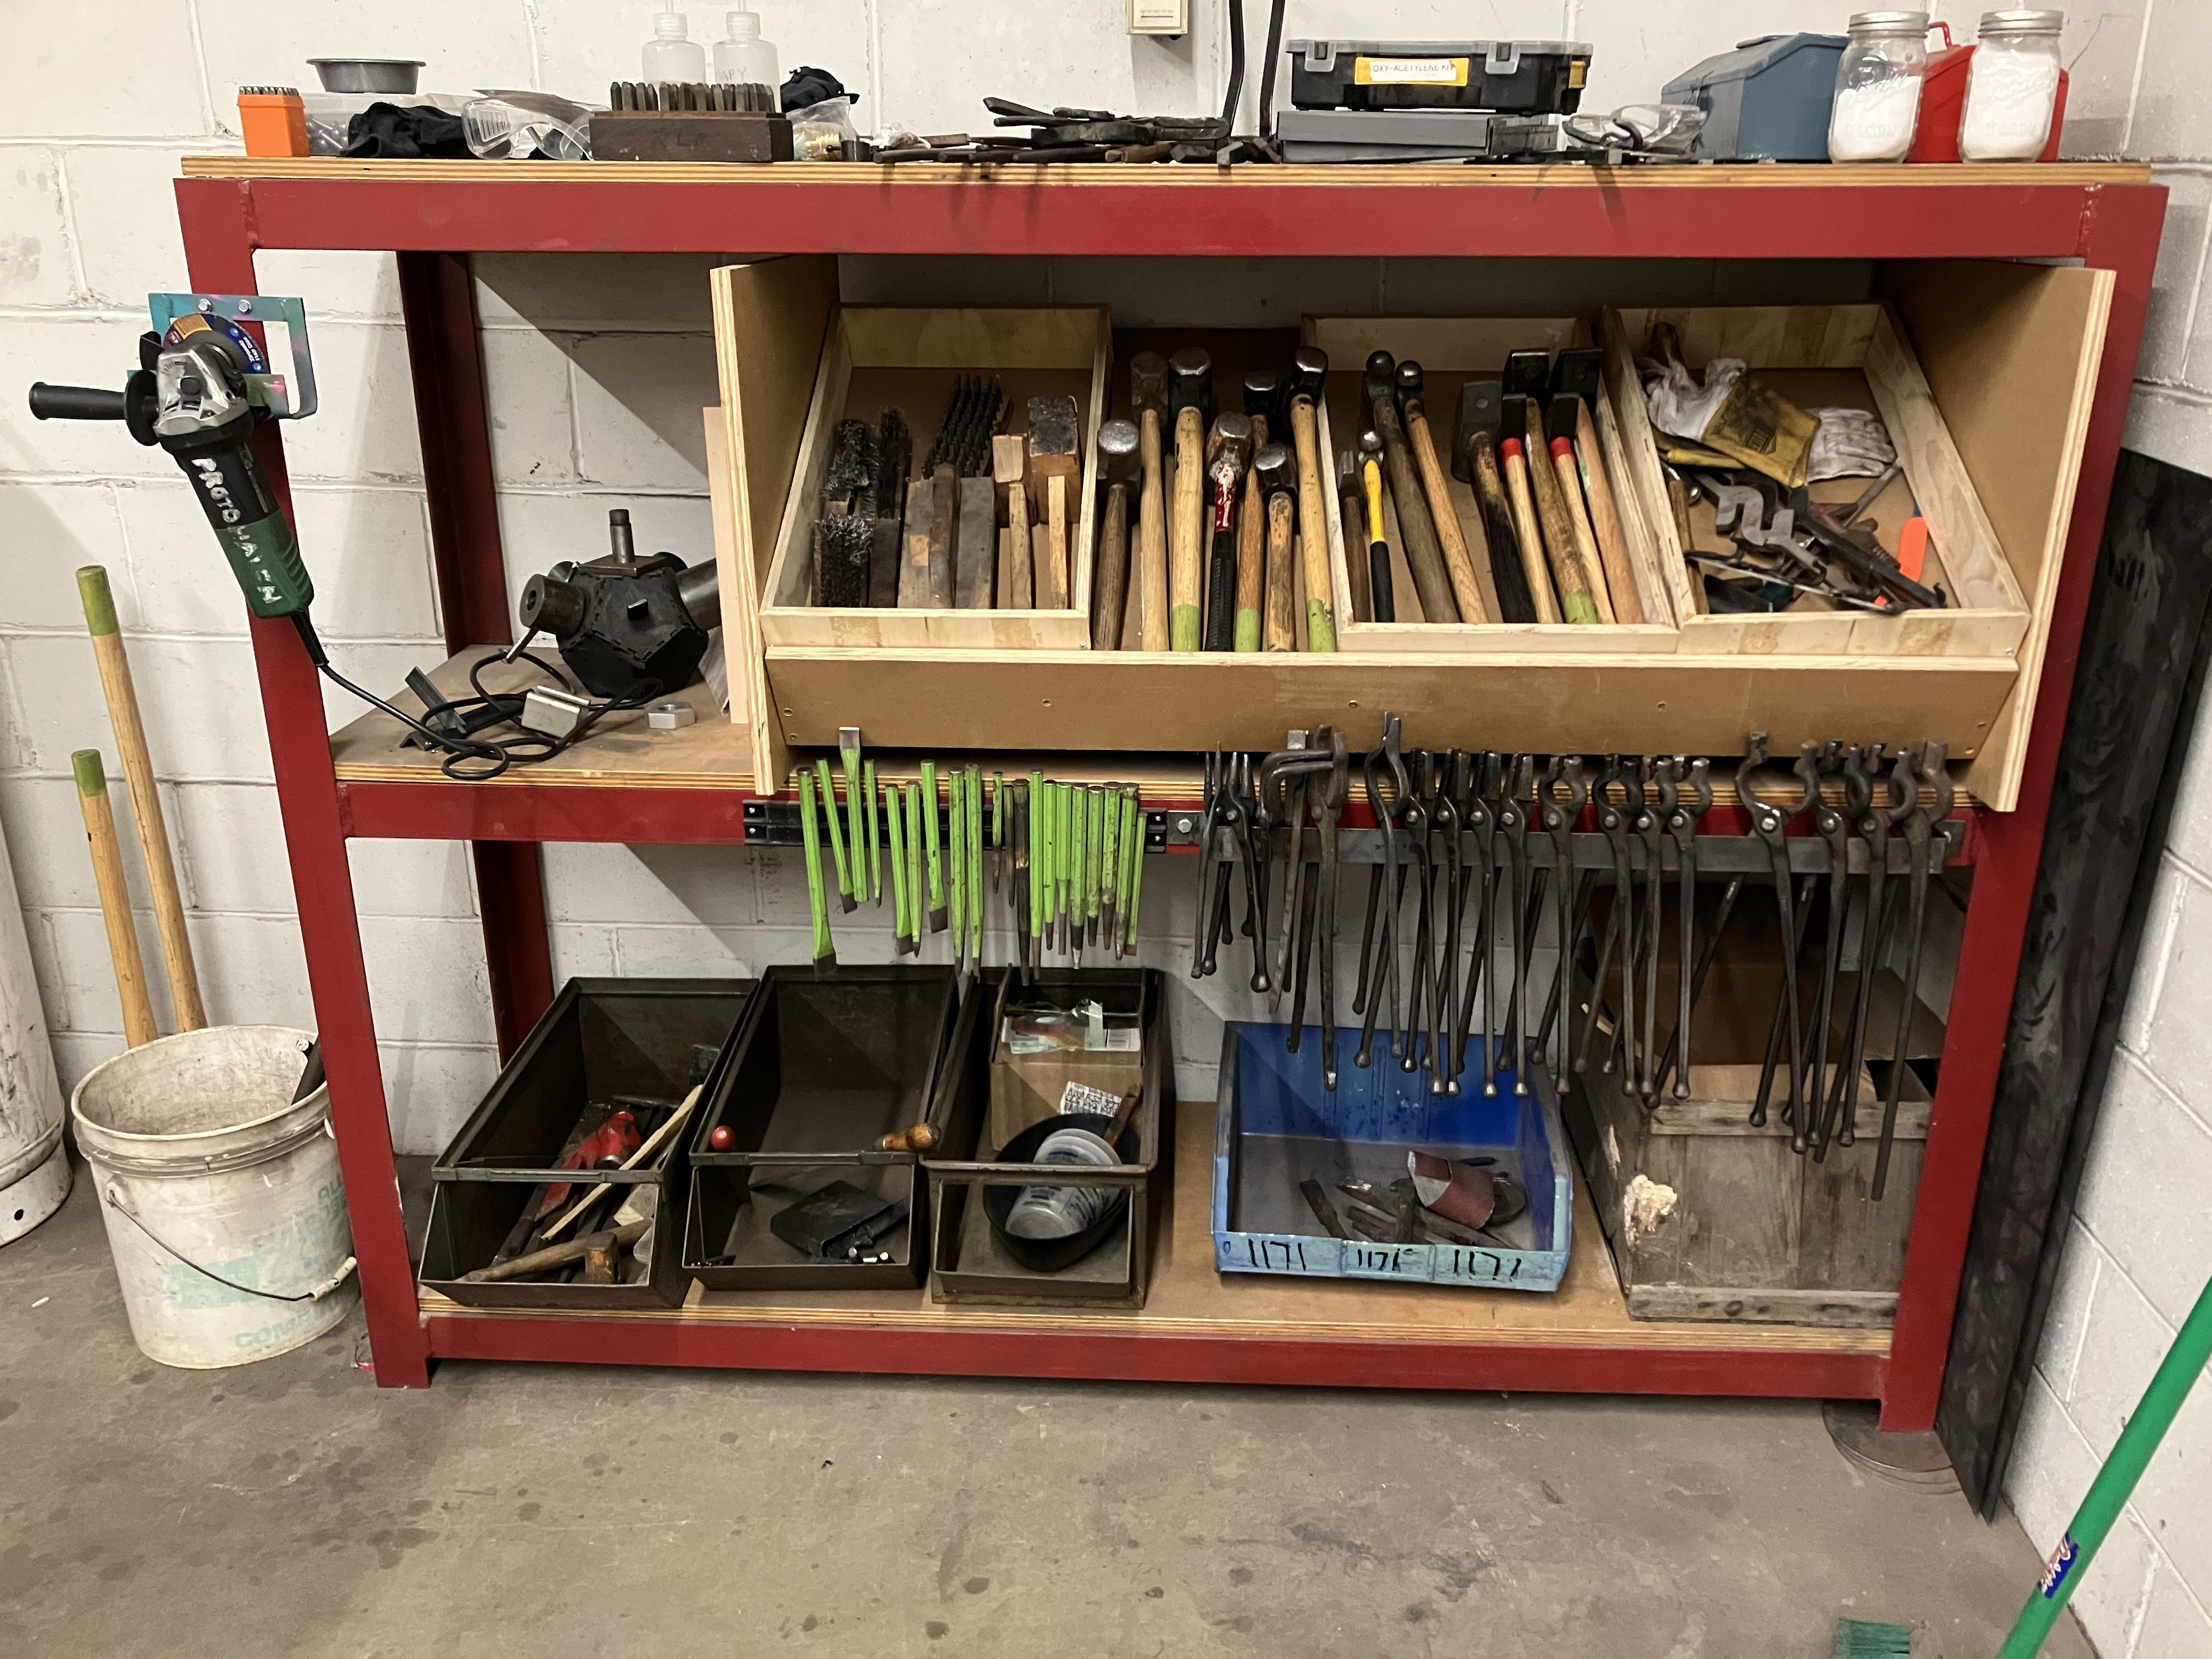
Hand Tools
Hammers
The blacksmithing area tool crib holds forging hammers of various sizes.
Tongs
The blacksmithing area tool crib holds tongs of various shapes and sizes.
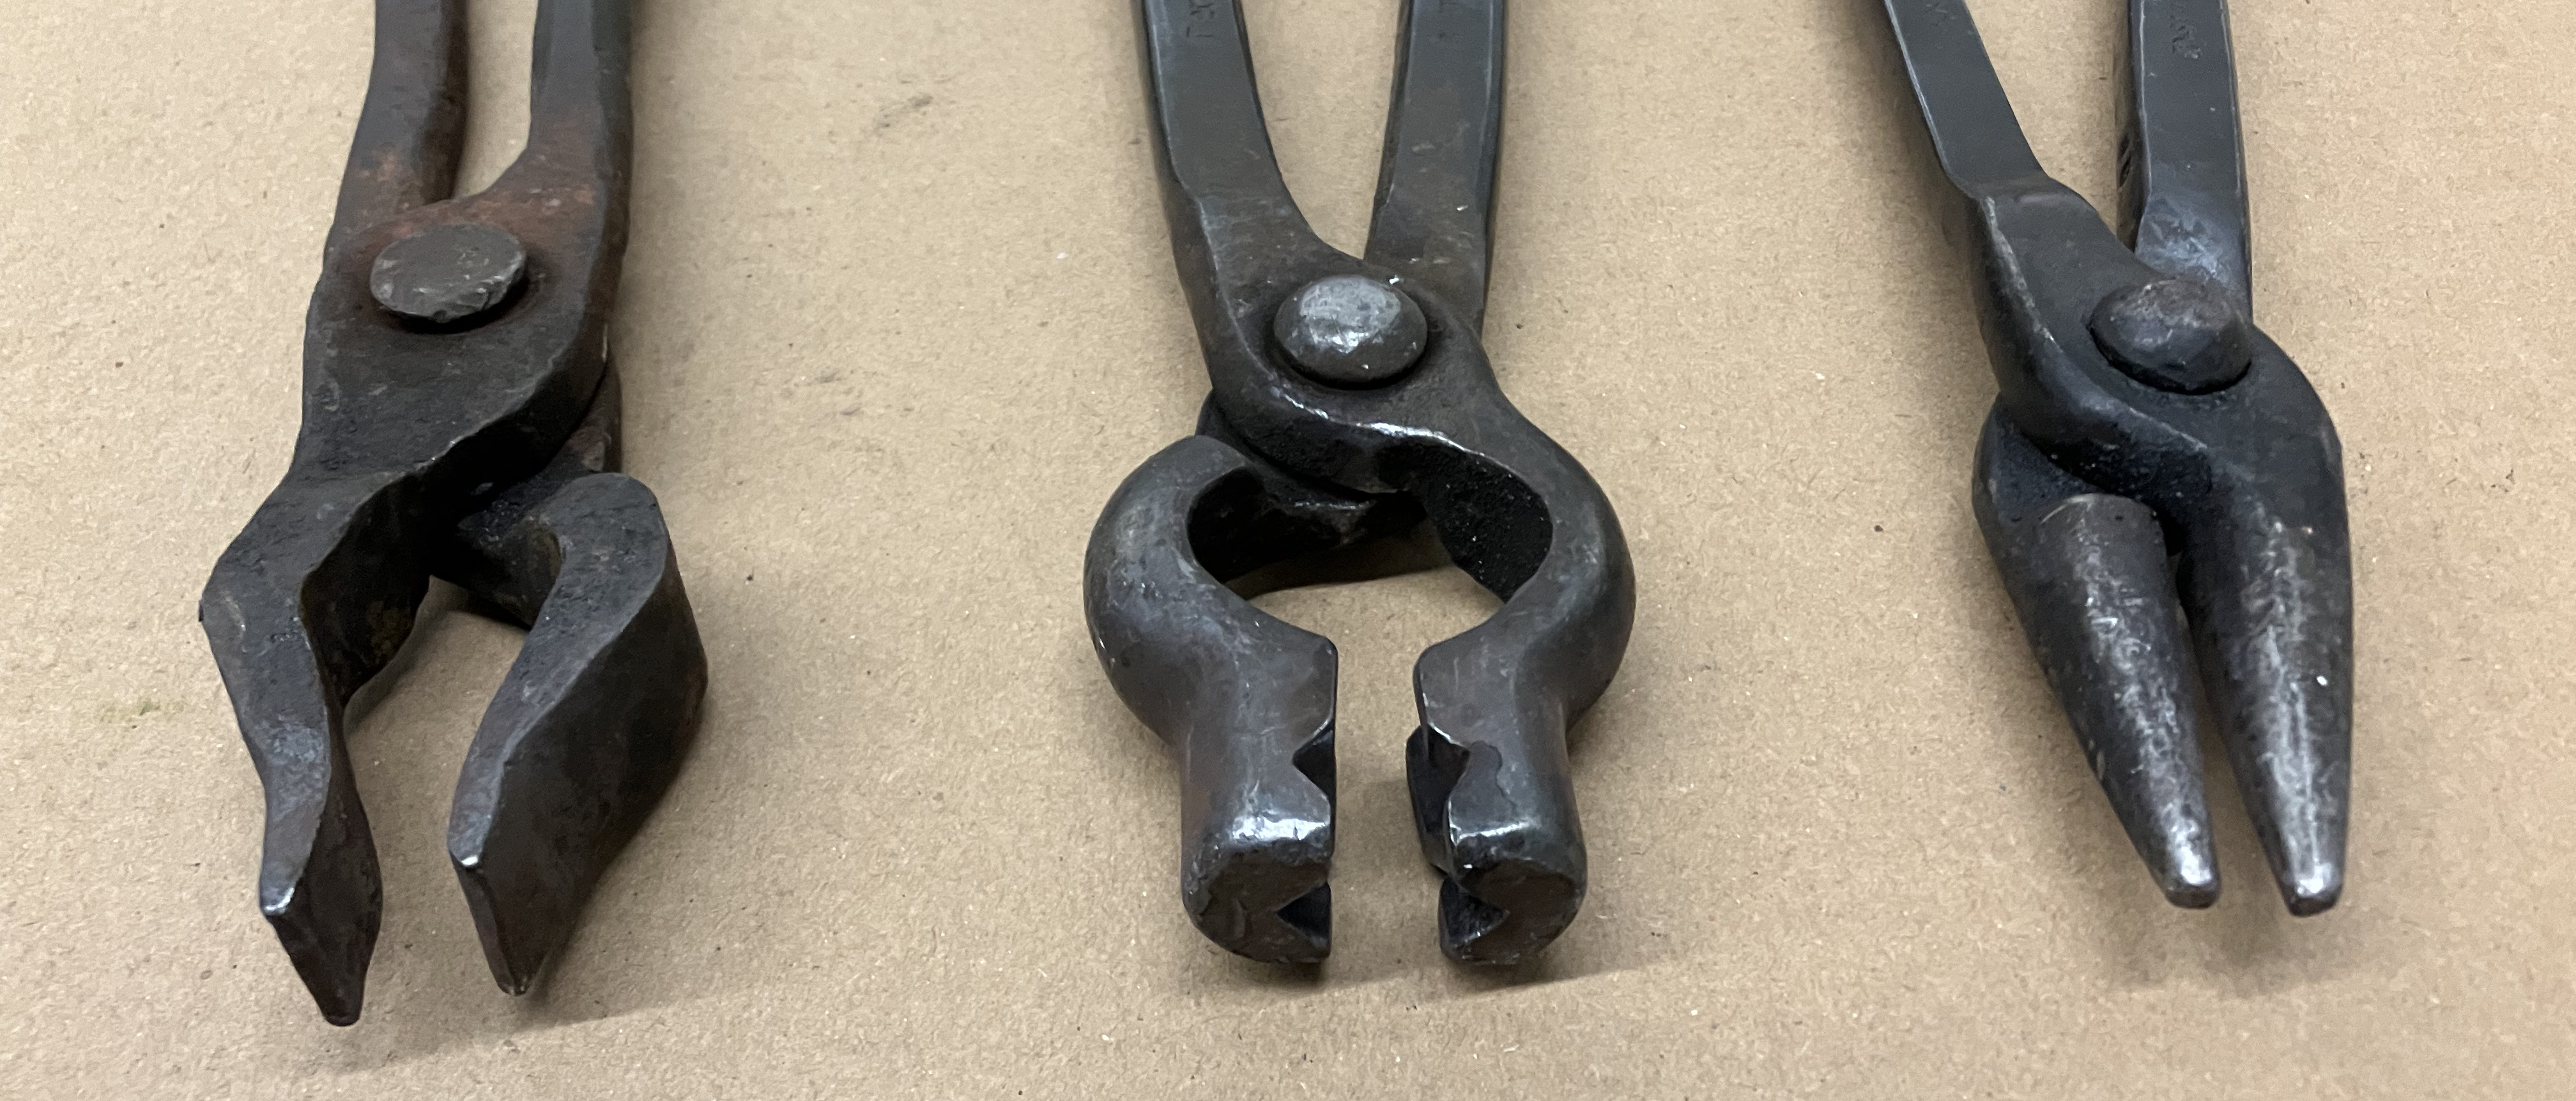
Always choose tongs that will have strong, positive contact with the workpiece.
Brushes
The blacksmithing area tool crib holds various wire brushes.
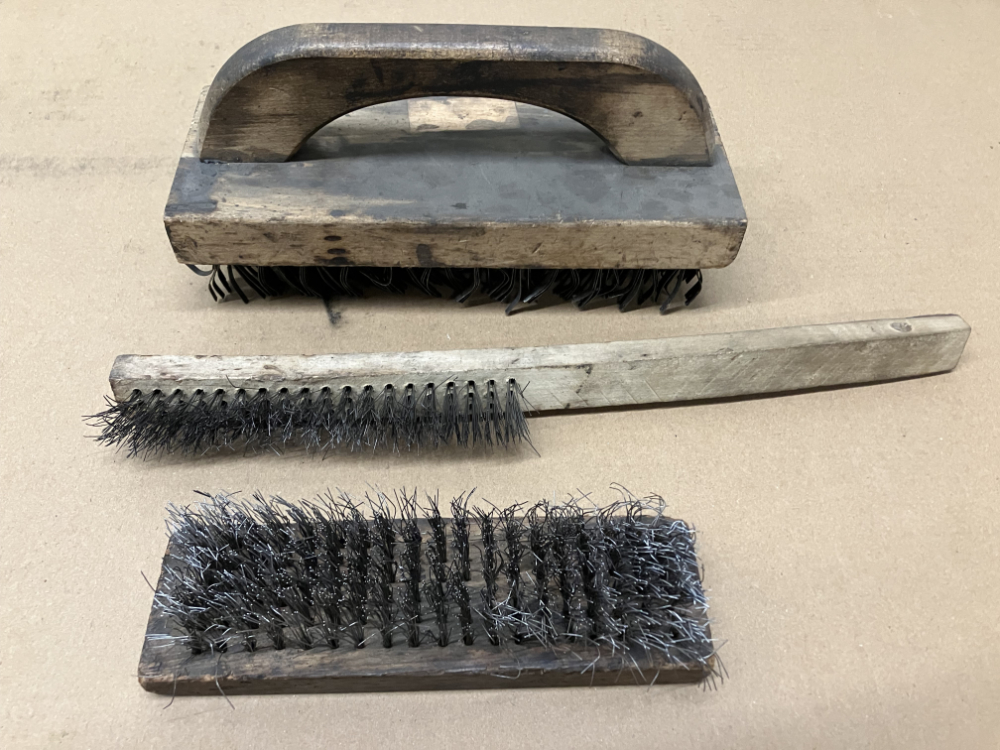
Brushes are used to clean the scale off of forged material.
Punches
The blacksmithing area tool crib holds various punches for cutting material, making holes, and manipulating surfaces.
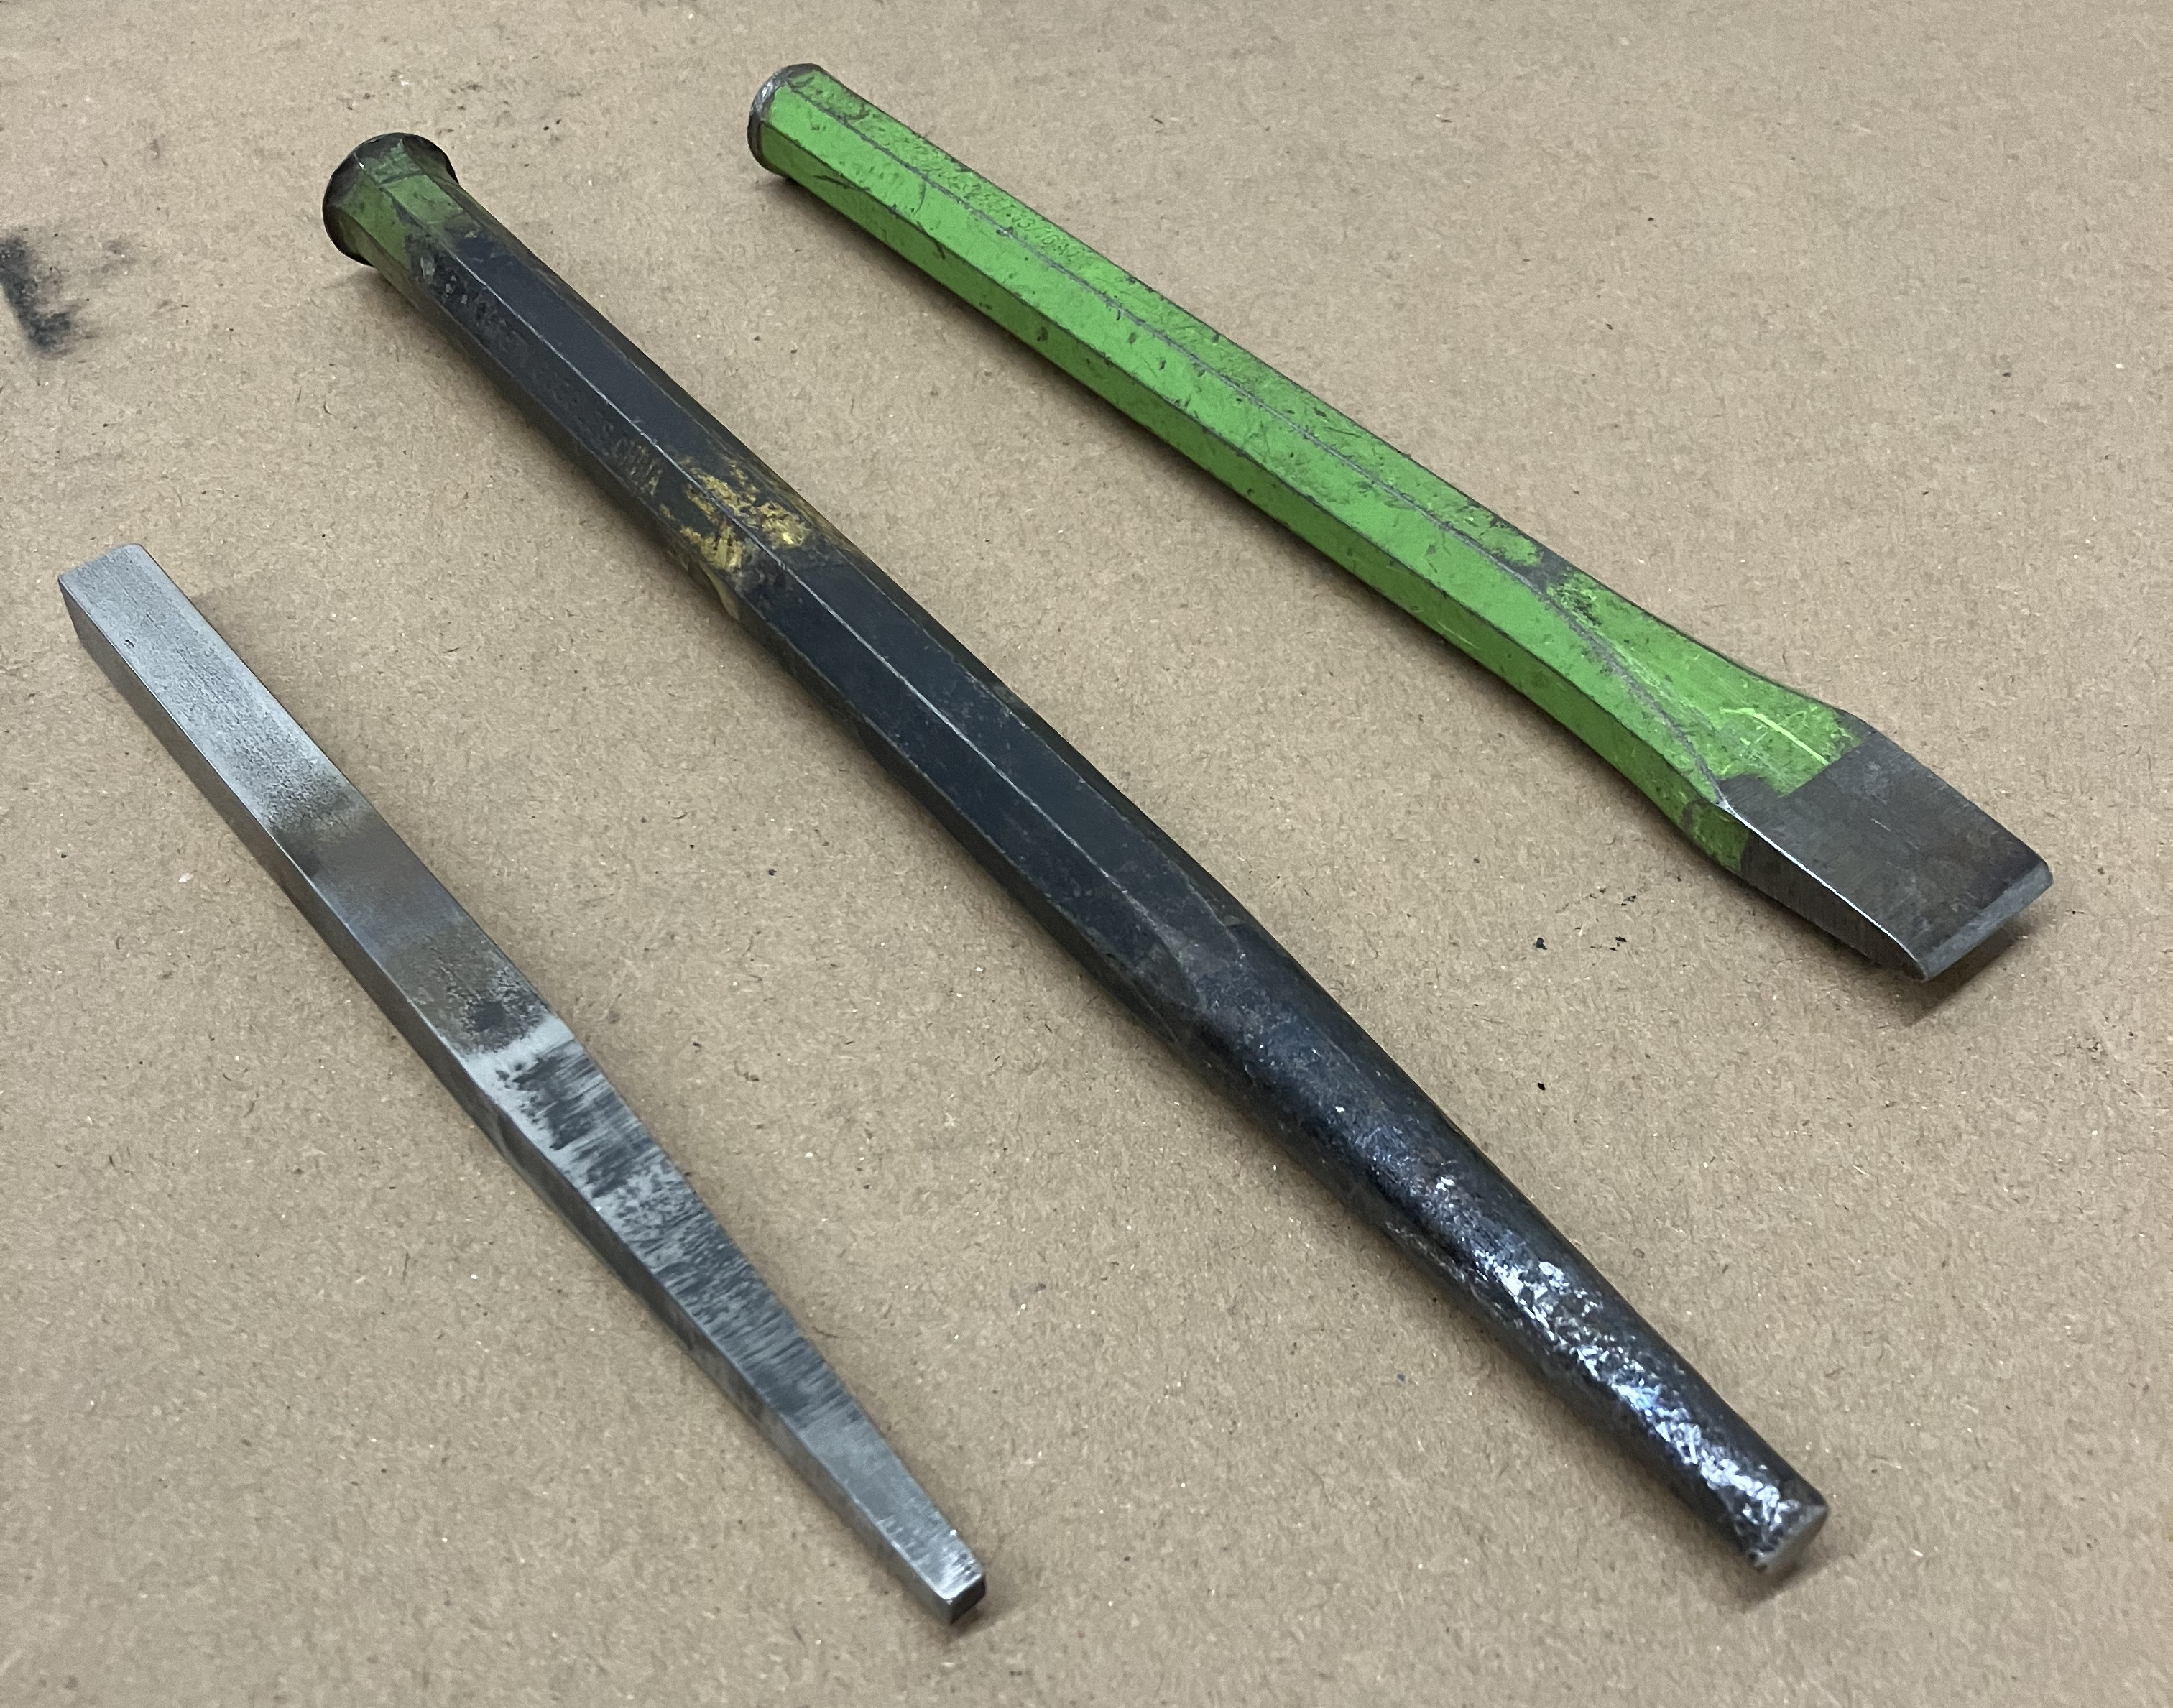
Cutting. Various chisels can be used to cut material.
Making holes. Various punches and drifts can be used to make square or round holes in material. For through holes, use the pritchel hole for clearance underneath the workpiece.
Manipulating surfaces. Chisels can be used to mark material prior to forging. The shop also has several sets of letter and number punches, for embossing the surface of a workpiece with text.
Hardie Tools
The drawer in the metal forge table holds hardie tools. These tools are meant to be used with the hardie hole on an anvil.
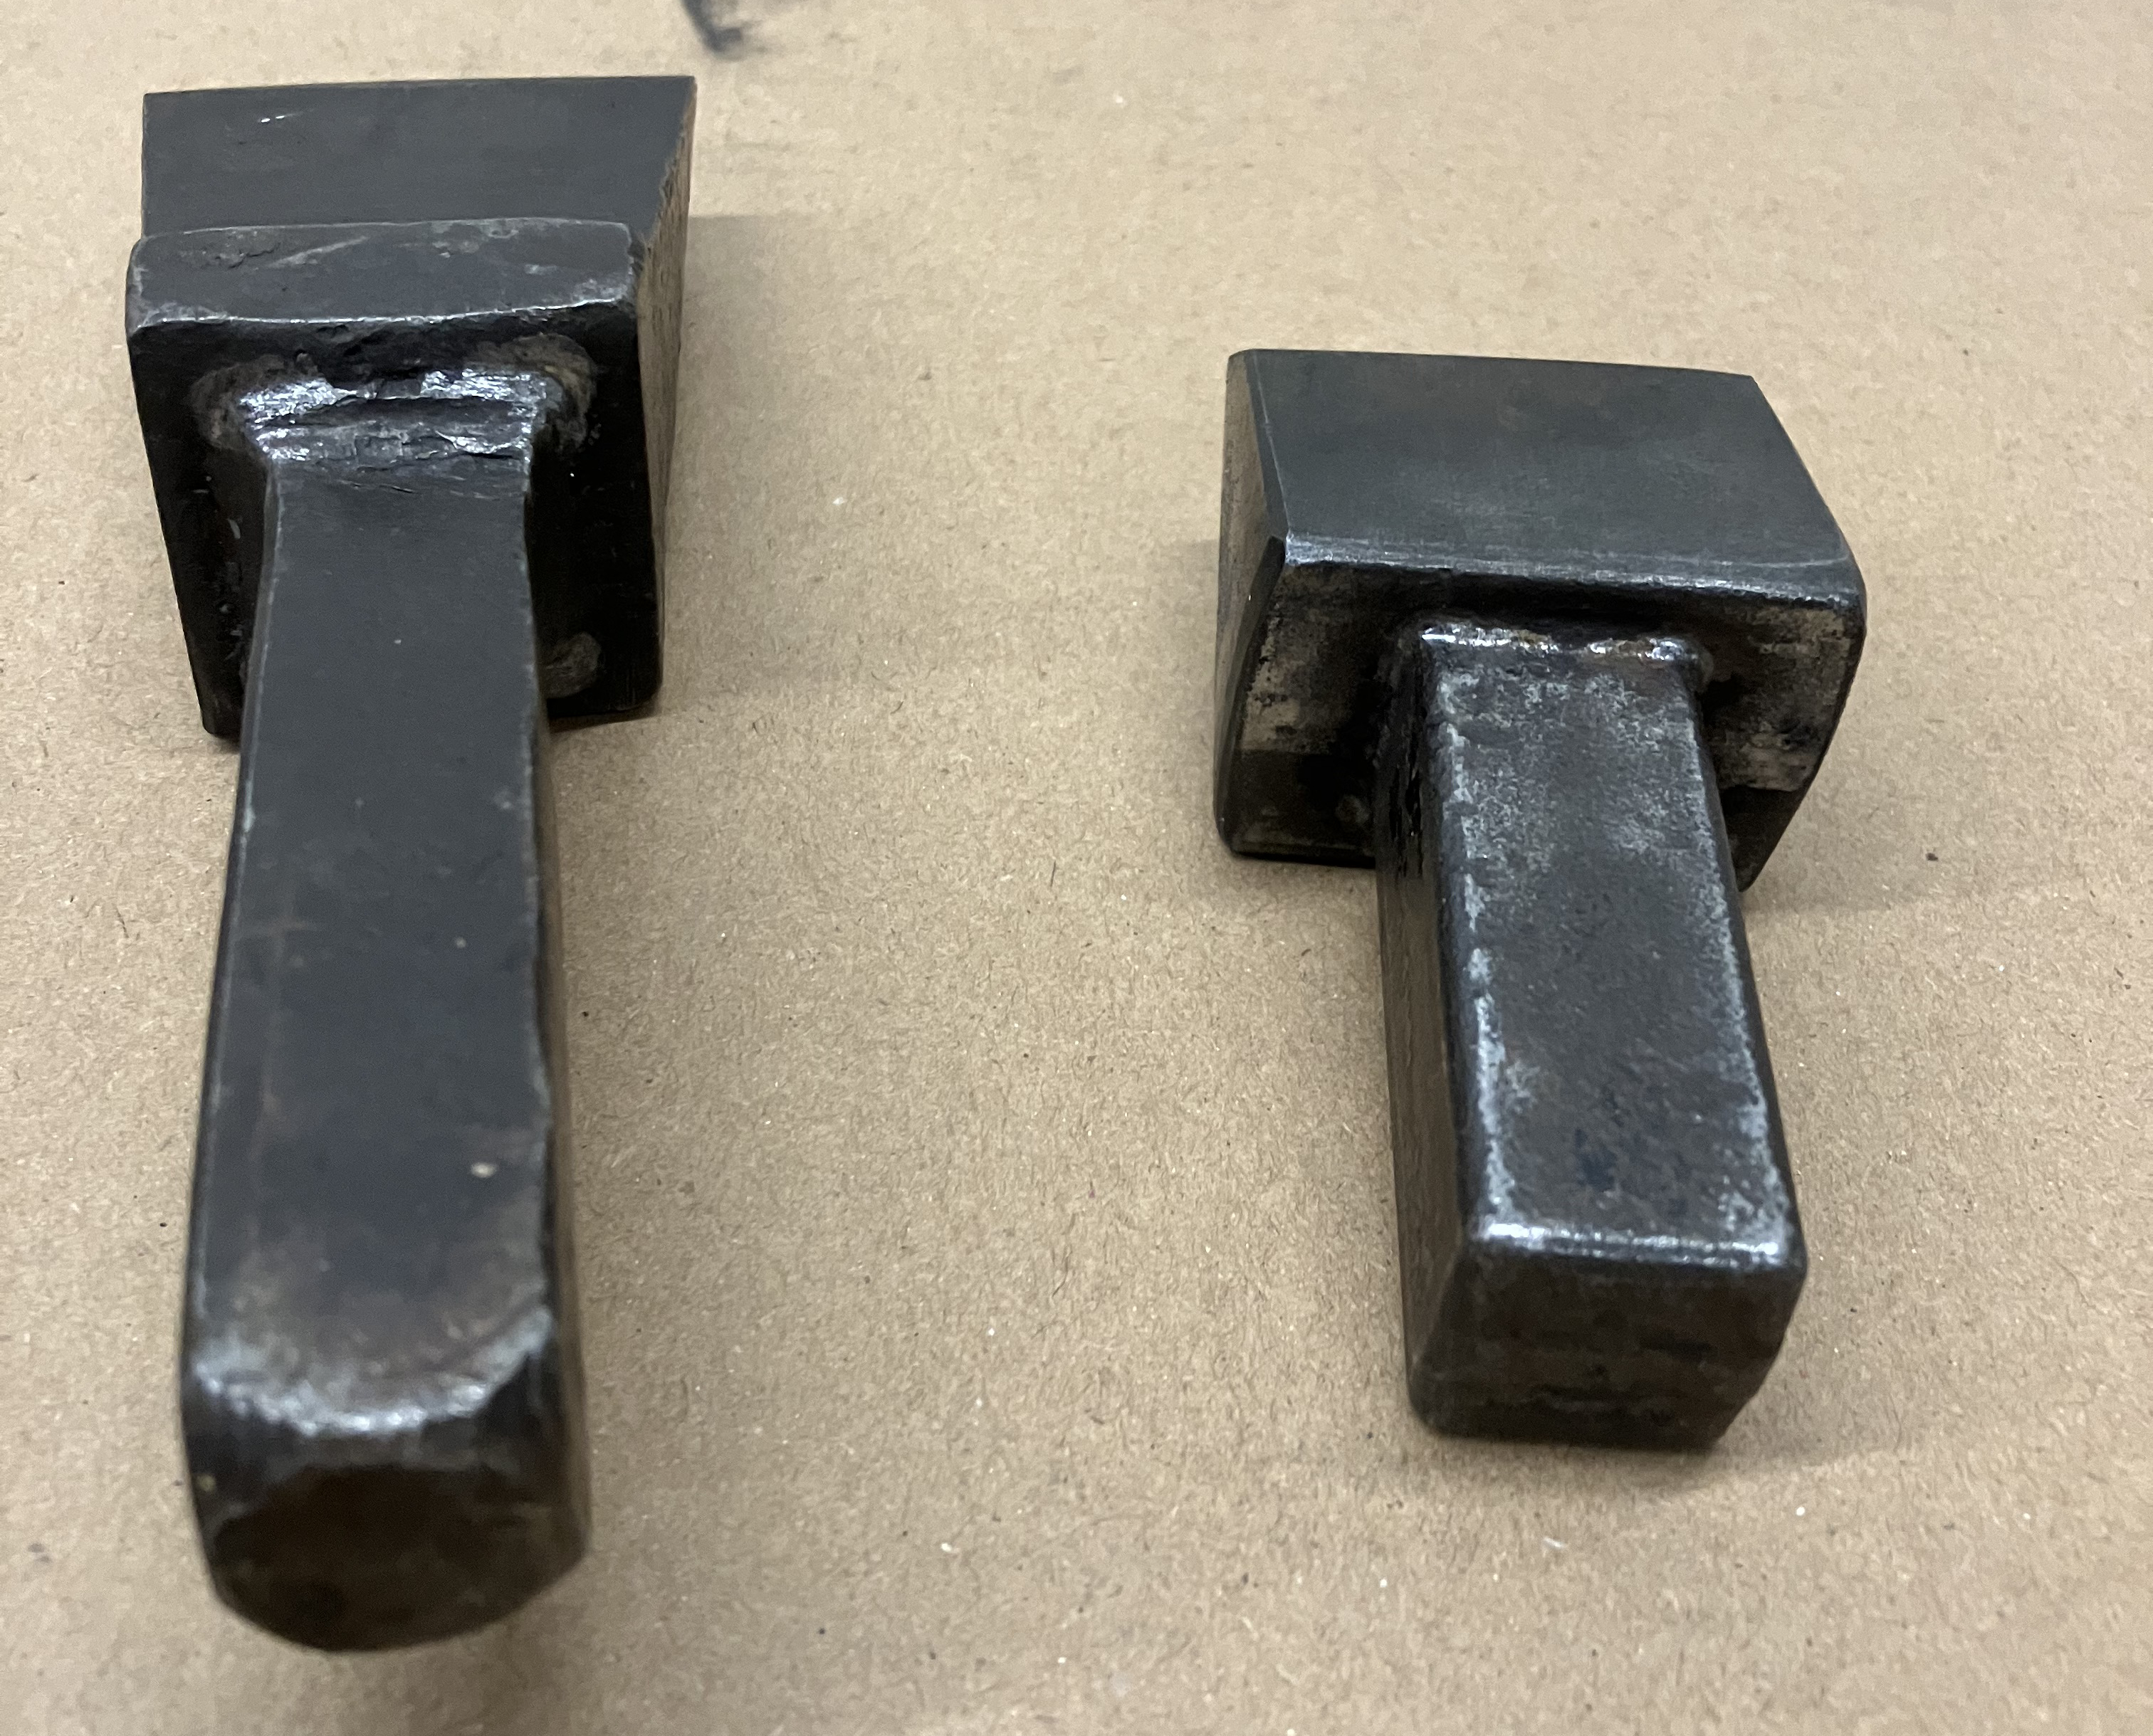
Only use a hardie tool if it fits loosely in the hardie hole of an anvil. You may need to use a different anvil for a particular tool.
Do not leave hardie tools in the anvil when the hardie tools are no longer in use. This has led to amputation in other shops from a smith not noticing the tool is installed and then proceeding to hammer down on it.
Cut-off hardie. The cut-off hardie is an edged tool that presents a cutting edge. Fixing the cutting edge lets you use your hands to manipulate the material and the hammer while cutting, for an easier cut.
Pritchel Tools
The metal forge table also holds tools for use with the pritchel hole on an anvil.

Holdfasts are hung from the large forge table. Holdfasts can be used in pritchel holes to hold a workpiece to the anvil.
Basic Operation
Setting Up
- Make sure that all of the materials and tools you will need for forging your workpieces are available and within easy reach.
If you need to get something from outside the blacksmithing area and the forge is lit, turn off the forge. Never leave a lit forge unattended. - Check both the tank isolation valve and the forge isolation valve to make sure they are closed.
When checking valve positions, always turn the valve towards the closed position (clockwise). - Open the vent.
- Turn on the vent fan.
- Open the garage door.
Workholding
Always use tongs that have a snug and secure fit to your workpiece.
Use the leg vise to hold pieces for bending or twisting.
Use holdfasts to clamp a workpiece to the anvil.
Lighting the Forge with the Igniter
- Open both ends of the forge for good airflow.
If one end of the forge is sealed with bricks, flame may sputter during ignition. Once the forge is at temperature, one side may be closed. - Open the tank isolation valve to allow gas to flow from the tank.
Do not wear hearing protection for this step: immediately close the tank isolation valve if you hear gas escaping. - Open the forge isolation valve and immediately press the ignition switch. Press the button repeatedly until the gas ignites, as needed.
If the gas does not ignite within three seconds, shut off the forge isolation valve immediately. Let the blacksmithing area ventilate for a minute before next attempting to start the forge.
Do not adjust the regulator. If you believe the regulator is faulty, alert the tech on duty.
Lighting the Forge with the Blowtorch
+ Open both ends of the forge for good airflow.\
_If one end of the forge is sealed with bricks, flame may sputter during ignition. Once the forge is at temperature, one side may be closed._
+ Open the tank isolation valve to allow gas to flow from the tank.\
_Do not wear hearing protection for this step: immediately close the tank isolation valve if you hear gas escaping._
+ Stand between the tank and the forge.\
_Do not stand in front of the open ends of the forge._
+ Light the blowtorch, and send the flame across one open end of the forge.\
#image("images/smithy-blowtorch_lighting.jpeg", width: 60%)
+ Open the forge isolation valve, and angle the flame slightly into the forge.\
_The forge should ignite._
If the gas does not ignite within three seconds, shut off the forge isolation valve immediately. Let the blacksmithing area ventilate for a minute before next attempting to start the forge.
Do not adjust the regulator. If you believe the regulator is faulty, alert the tech on duty.
Forging
- Heat your material by placing it in the lit forge on the firebrick.
- Let the material soak until the area you want to forge is glowing yellow.
- Use tongs to transfer the material to the anvil or leg vise for working.
- Work the material as needed.
If the material cools too much to continue working, repeat the above steps. Material will be too cool to work when it reaches a dull red, sometimes noted as "medium cherry red" (1400°F).
Clean the anvil off between heats. If scale is left on the anvil, forging a workpiece on top of the scale will pound the scale into the anvil, damaging the face.
Quenching
The quench tub has multiple uses in the blacksmithing area.
Use the quench tub to cool areas of your workpiece that you do not want to bend while you are working the heated areas.
If the material no longer needs to be worked, cool it in the quench tub until it can be safely handled.
When you pull material out of the water, note how quickly it dries. If the material dries immediately, it is still too hot to handle with bare hands. If the material stays wet, it _might_ be safe to touch: proceed with caution.
Cleaning Up
- Close the tank isolation valve.
- Close the forge isolation valve.
- Turn off the vent fan.
- Close the garage door.
- Return all tools to their places in the tool crib or the large forge table.
- Sweep the blacksmithing area floor for any slag and debris and discard.
- Recycle any waste by placing it in the scrap metal bins.
No Comments