
Tool Tutorial
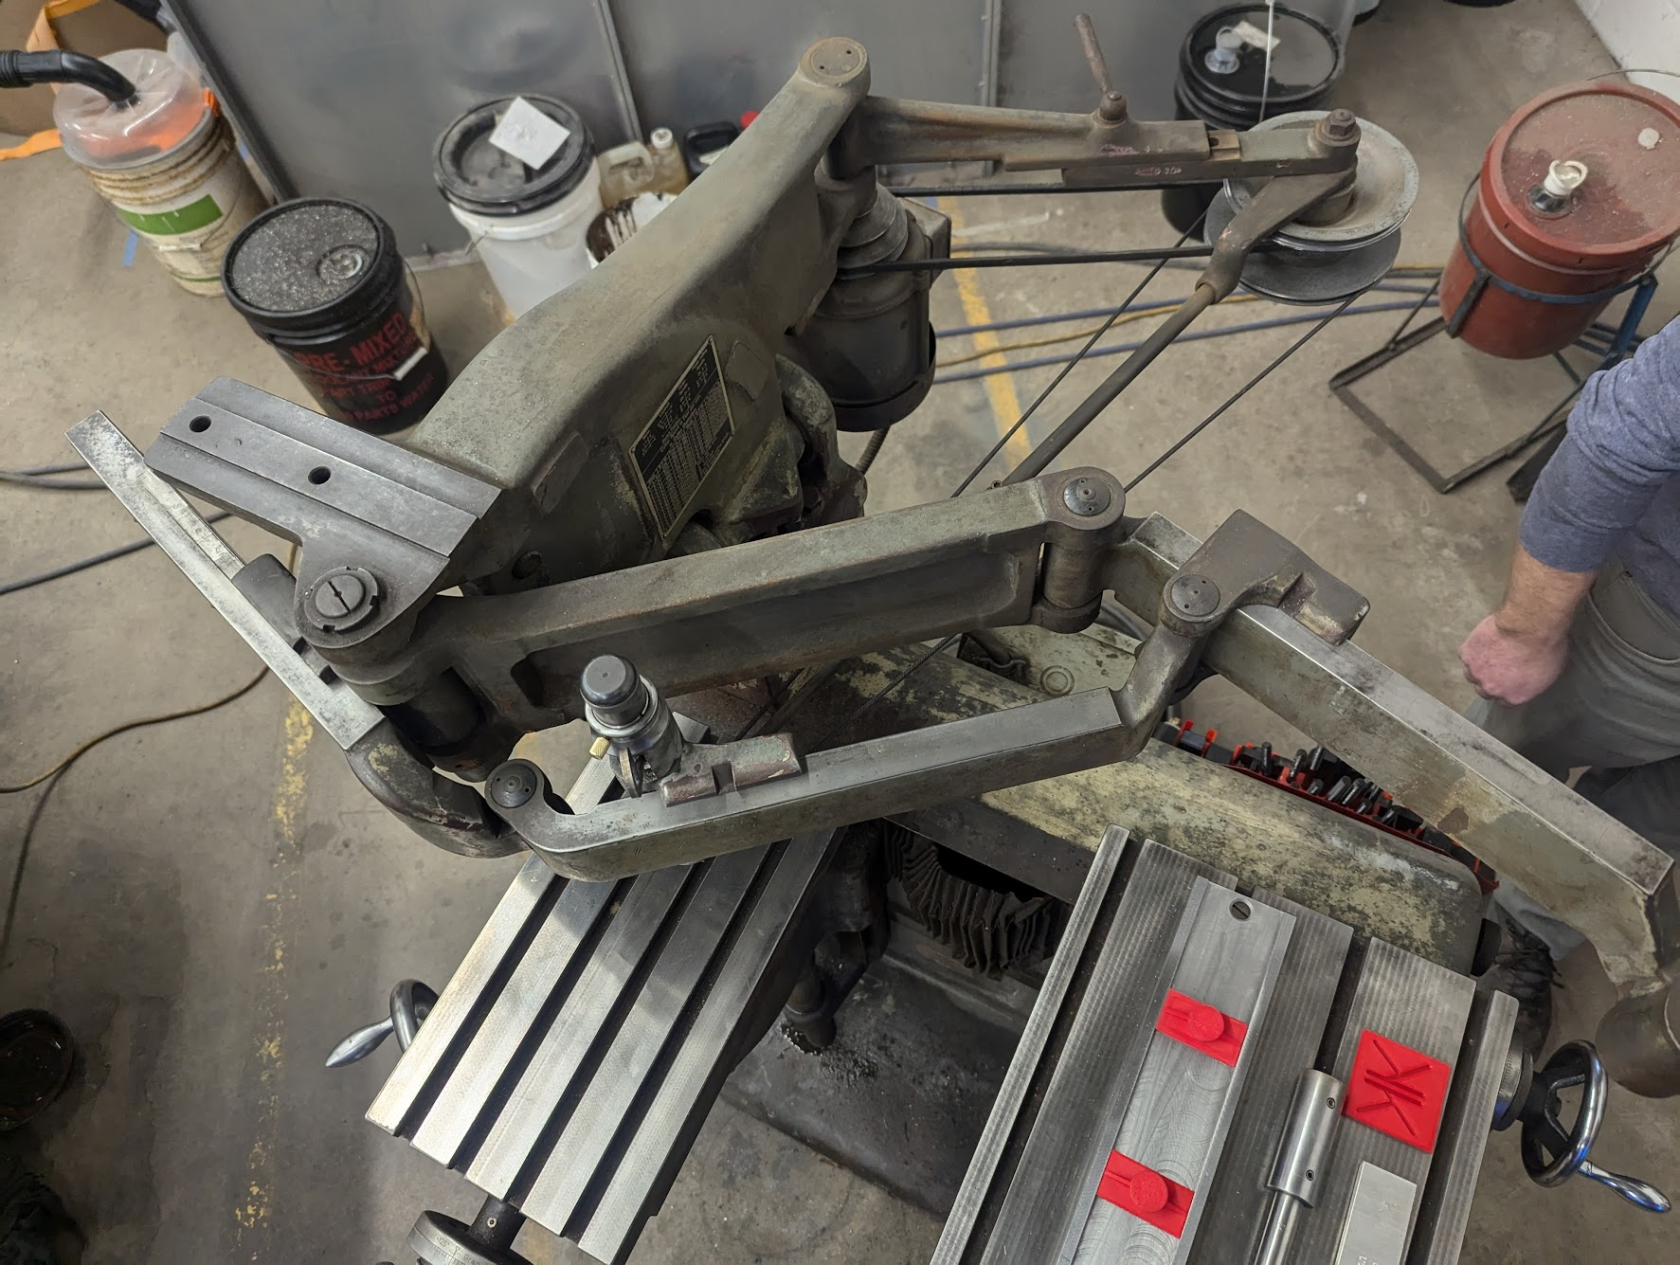
HandyThe pantograph is a tool that's especially useful for engraving - maker's marks etc. usingIt uses a template and a 1.5x-10x reduction linkage.
Canto zeroachieve very precise motion over a very small space without the gauges on the hand wheels by loosening the large knurled nut and hand placing the gauge at 0", before tightening it again
There are axis locks but you typically won't need to use them when engraving - X lock is undersideaid of thea CNC machine.
Basic Info
- This machine
below the knee, Knee lock is to the left of the knee wheel, Y is on the left side of the worktable.Machinehas two tables: Pattern table (which holds the pattern) and work table (which holds the piece being engraved). - All user adjustments
userequire the 3/4" wrench, or the two small collet wrenches for changing end millbits.bits,Letterslocated in the drawer of the adjacent desk. - letter stencils and operator's manual are also located in the right side desk
drawerdrawer. - 3/8" collet is holding a reducer collet that
usually contains a collet for 1/8" end mills and engraving bits.
2D Mode
Warning: 2D mode only works on FLAT surfaces - make sure your stock material is flat where you are about to engrave.
- Decide on the reduction ratio - how small the result is. All three segments of the arm should be set to the same value indicated on the top of the segment. All 5's for 5:1, all 3's for 3:1 etc.
- To change reductions, make sure the stylus is NOT loaded; changing while the stylus is loaded risks breaking the stylus
- Use the 3/4" wrench to loosen the nuts on the back of each of the arm segments, then slide the gauge to the correct number and re-tighten - only a little tightness is needed, don't crank these down.
- Crank the pattern table handwheel out so that the end of the arm is appropriately located over the top of the pattern table - the two tables must be farther apart for a larger reduction, and closer together for a smaller reduction.
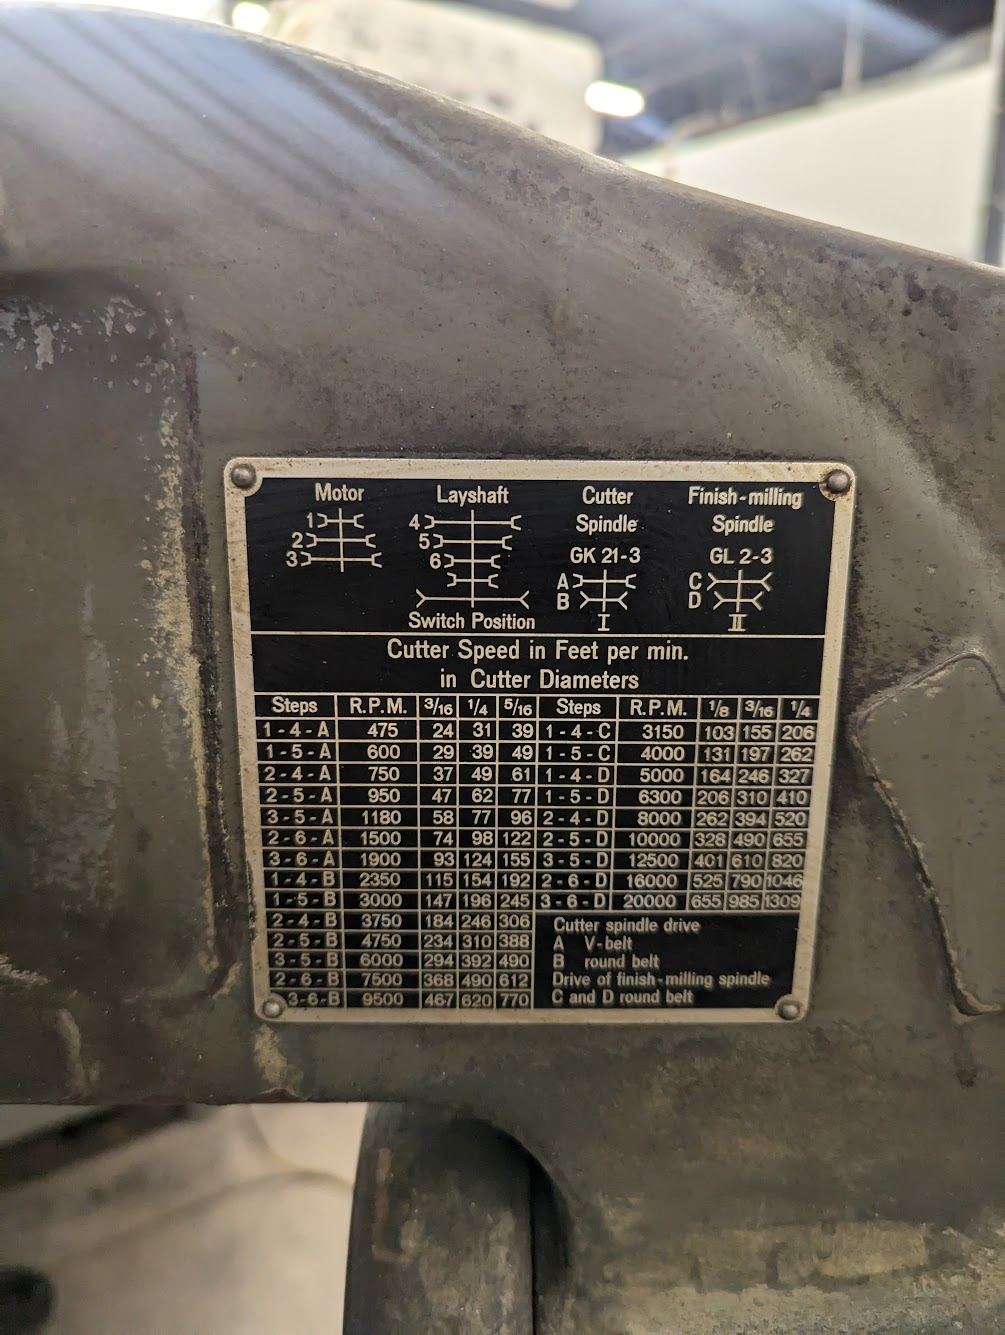
Styluses are 1/8" delrin.- Ensure it's at the highest speed if engraving (20k RPM); for larger bits consult the table on the plaque on the side of the machine
- Ensure all the axes are
ulnockedunlocked as you typically won't need to use them when engraving - X lock is underside of the machine below the knee, Knee lock is to the left of the knee wheel, Y is on the left side of the worktable.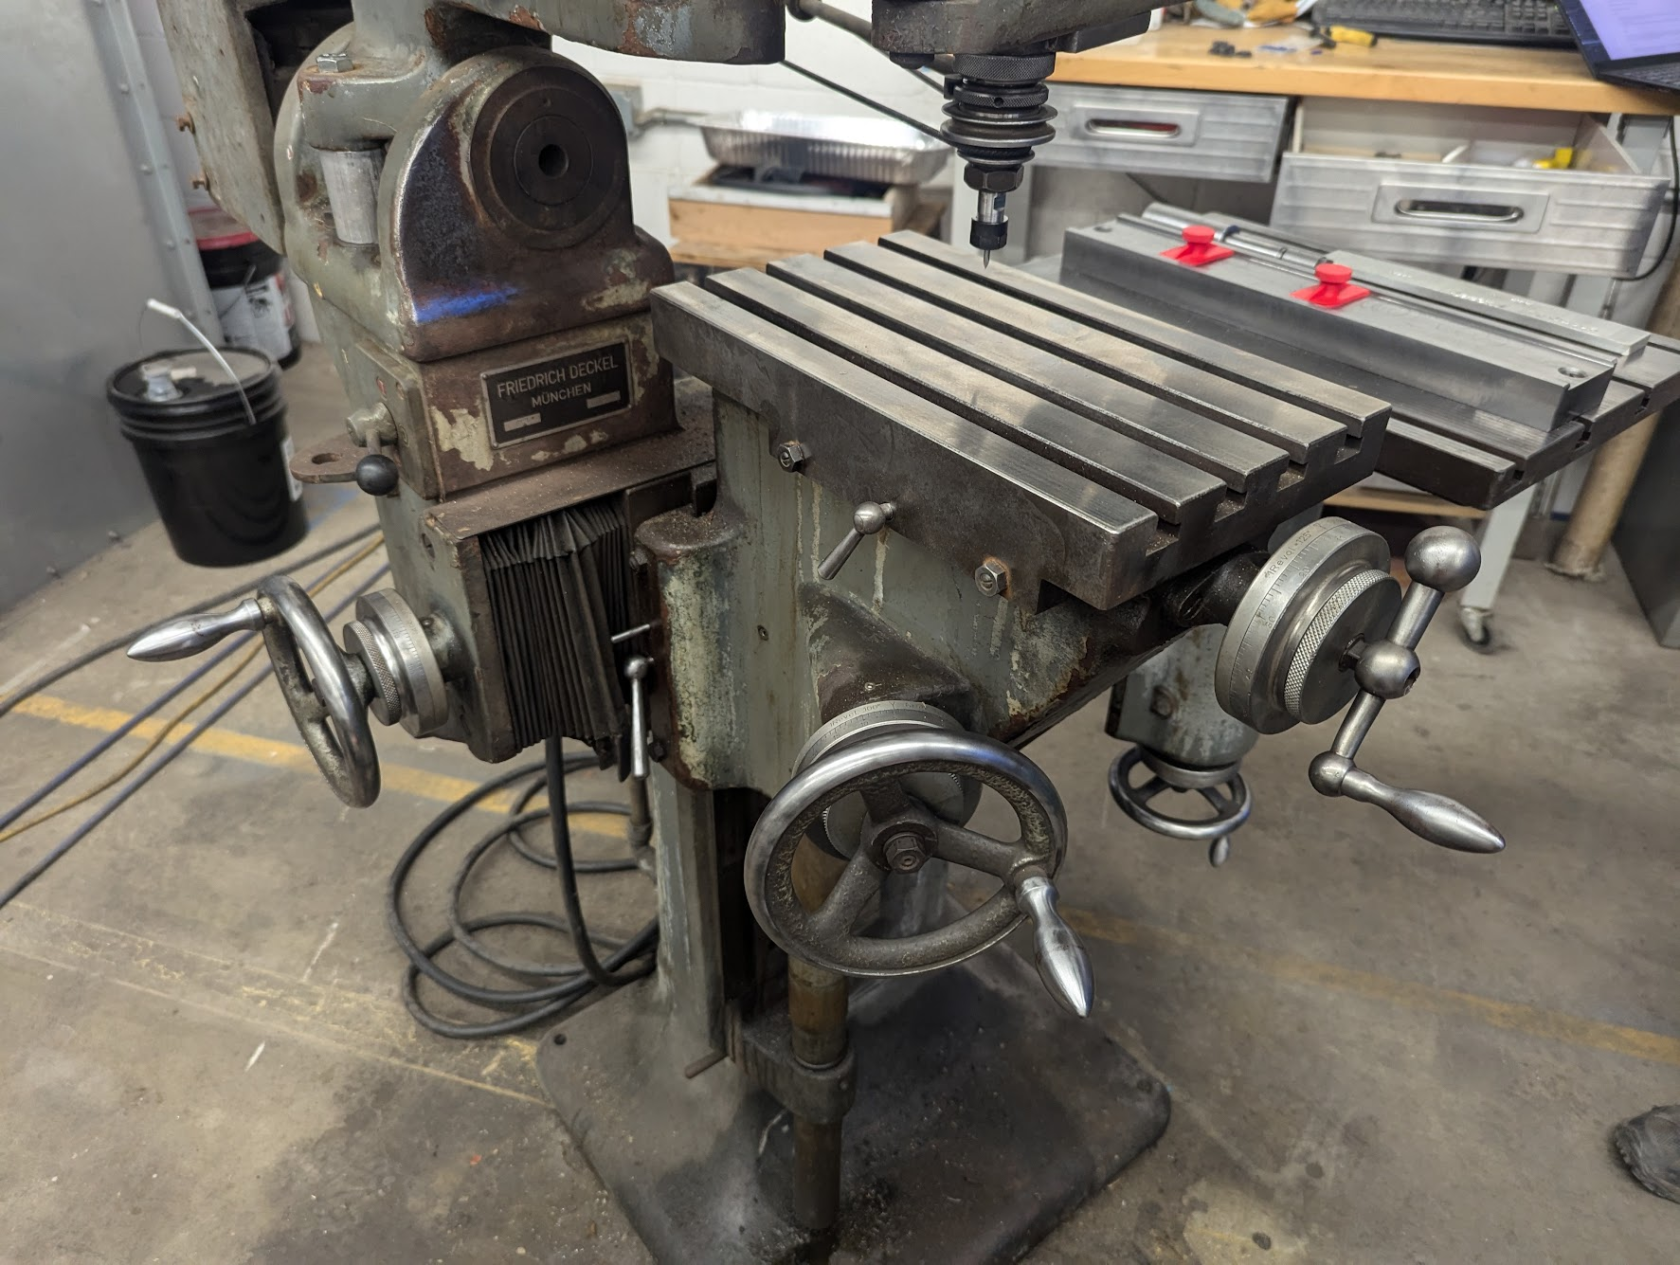
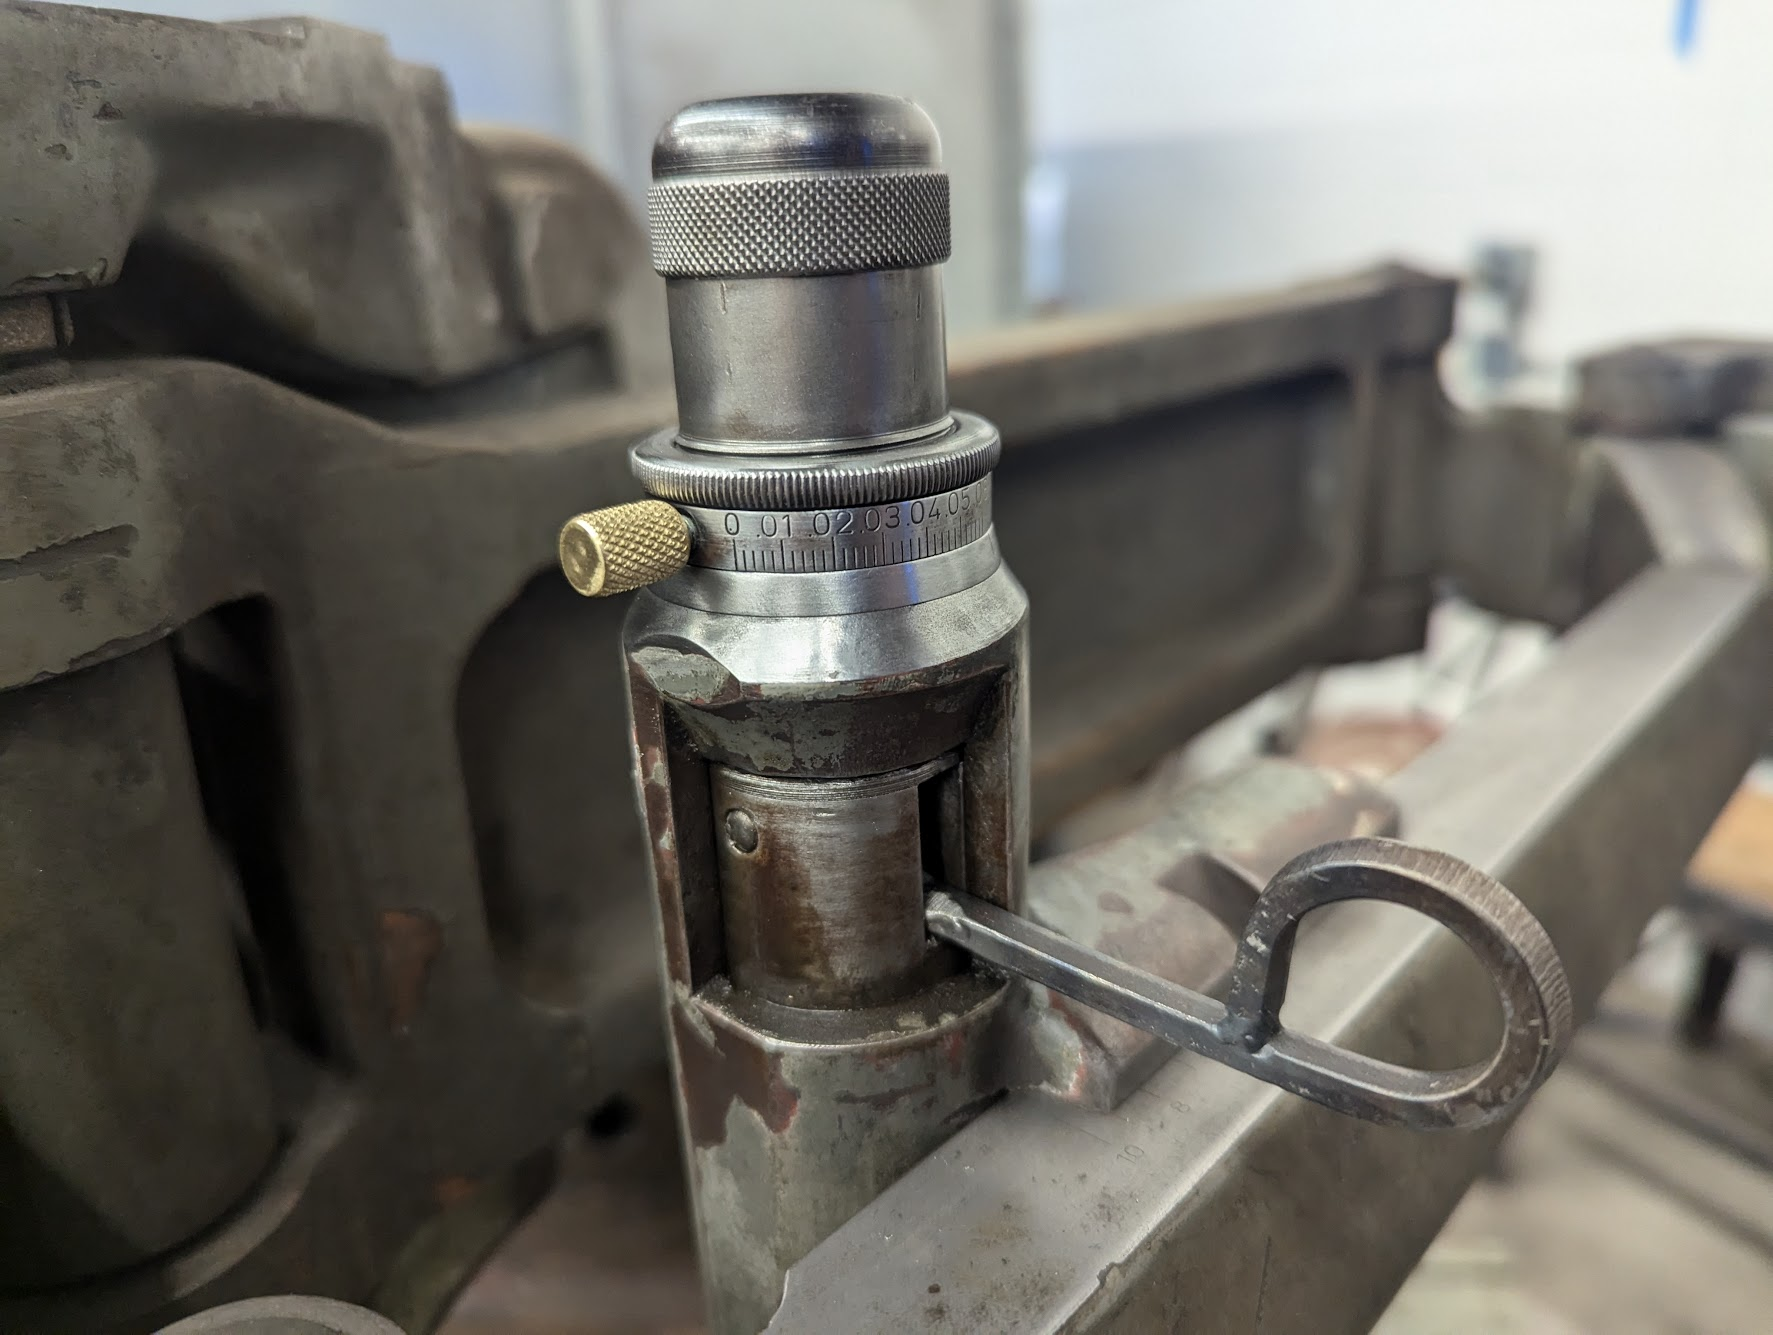
- If needed, zero the gauges on the hand wheels by loosening the large knurled nut and hand placing the gauge at 0", before tightening it again. In basic usage, you probably won't need to do this.
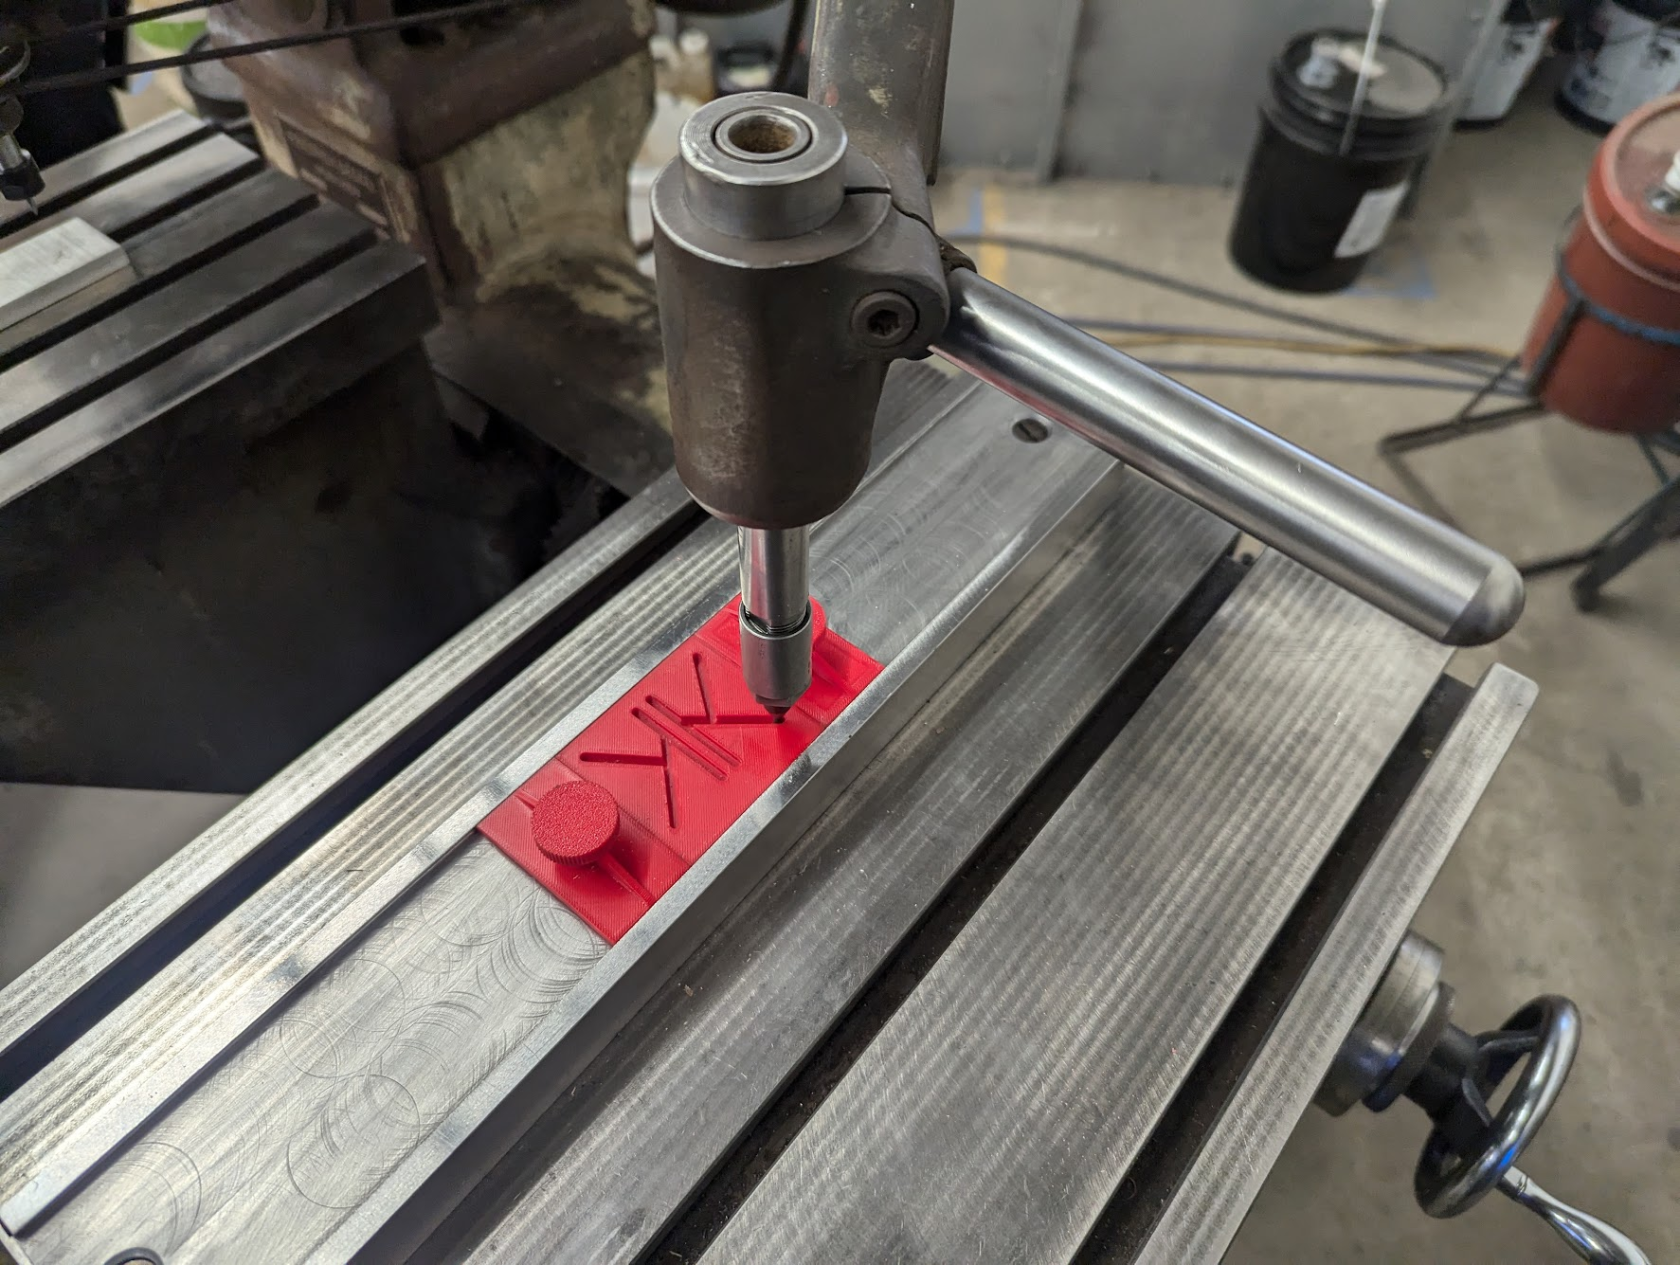
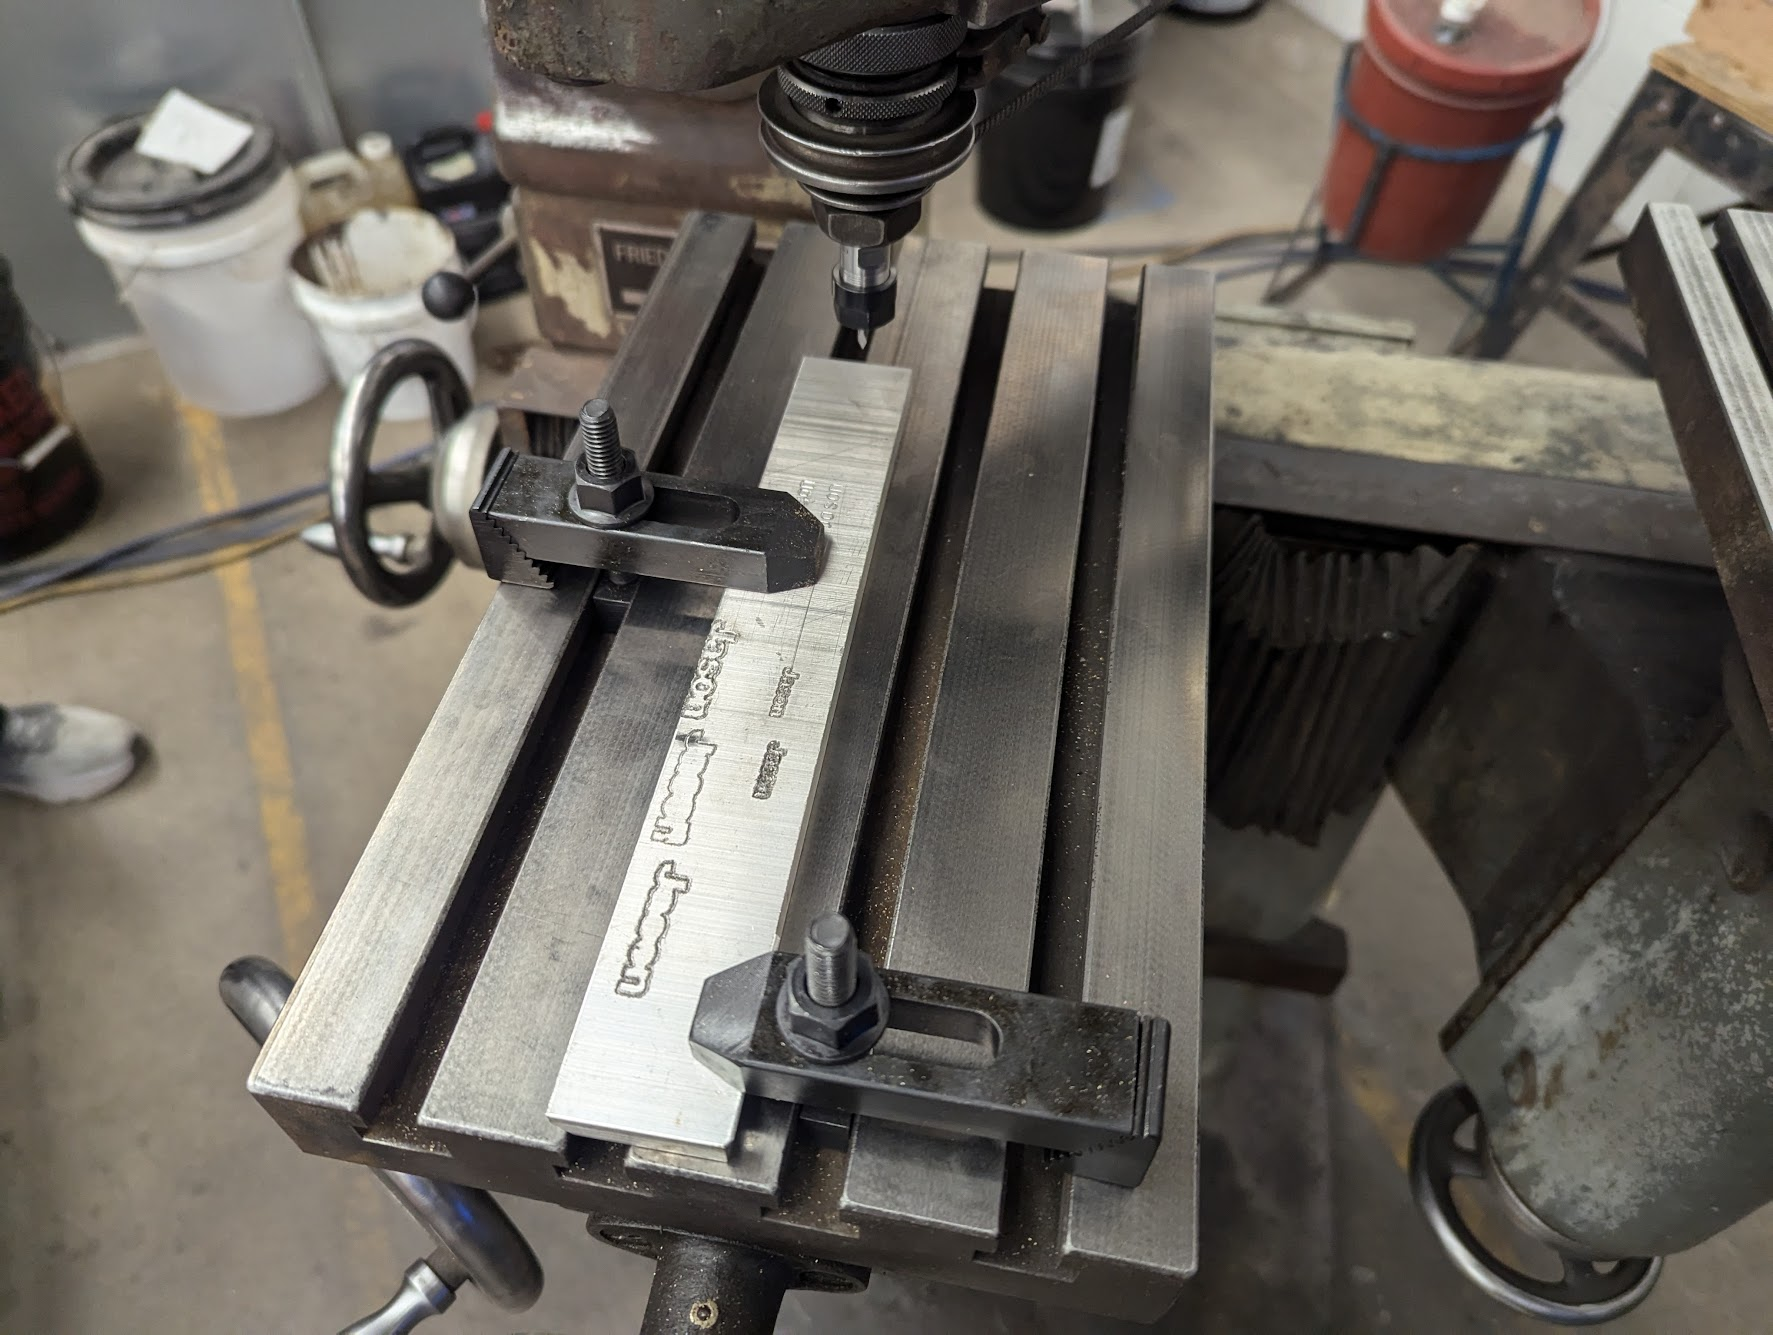
- Firmly attach your engraving pattern to the pattern table. If using the pattern jig, add the end stops and ensure the knurled knobs are tightened so the pattern stays in place.
- Insert stylus; note the collar holding it in place is intentionally loose so it can be raised and lowered out of the design.
- Load the desired engraving bit using the two collet wrenches located in the desk drawer. Use only one hand when loosening/tightening collets - snug is good, heavy cranked down is no good.
- Clamp down your stock material - you may use the stylus and the pattern jig to better align the stock to be engraved, and the toe clamp kit mounted to the side of the machine for holding it down.

-
teethe red switch at the back of hte machine to turn on power, then the power switch is on the left side by the engraving table to start the spindle. NOTE: Low speed (i.e. "I") does not work, just use high speed ("II").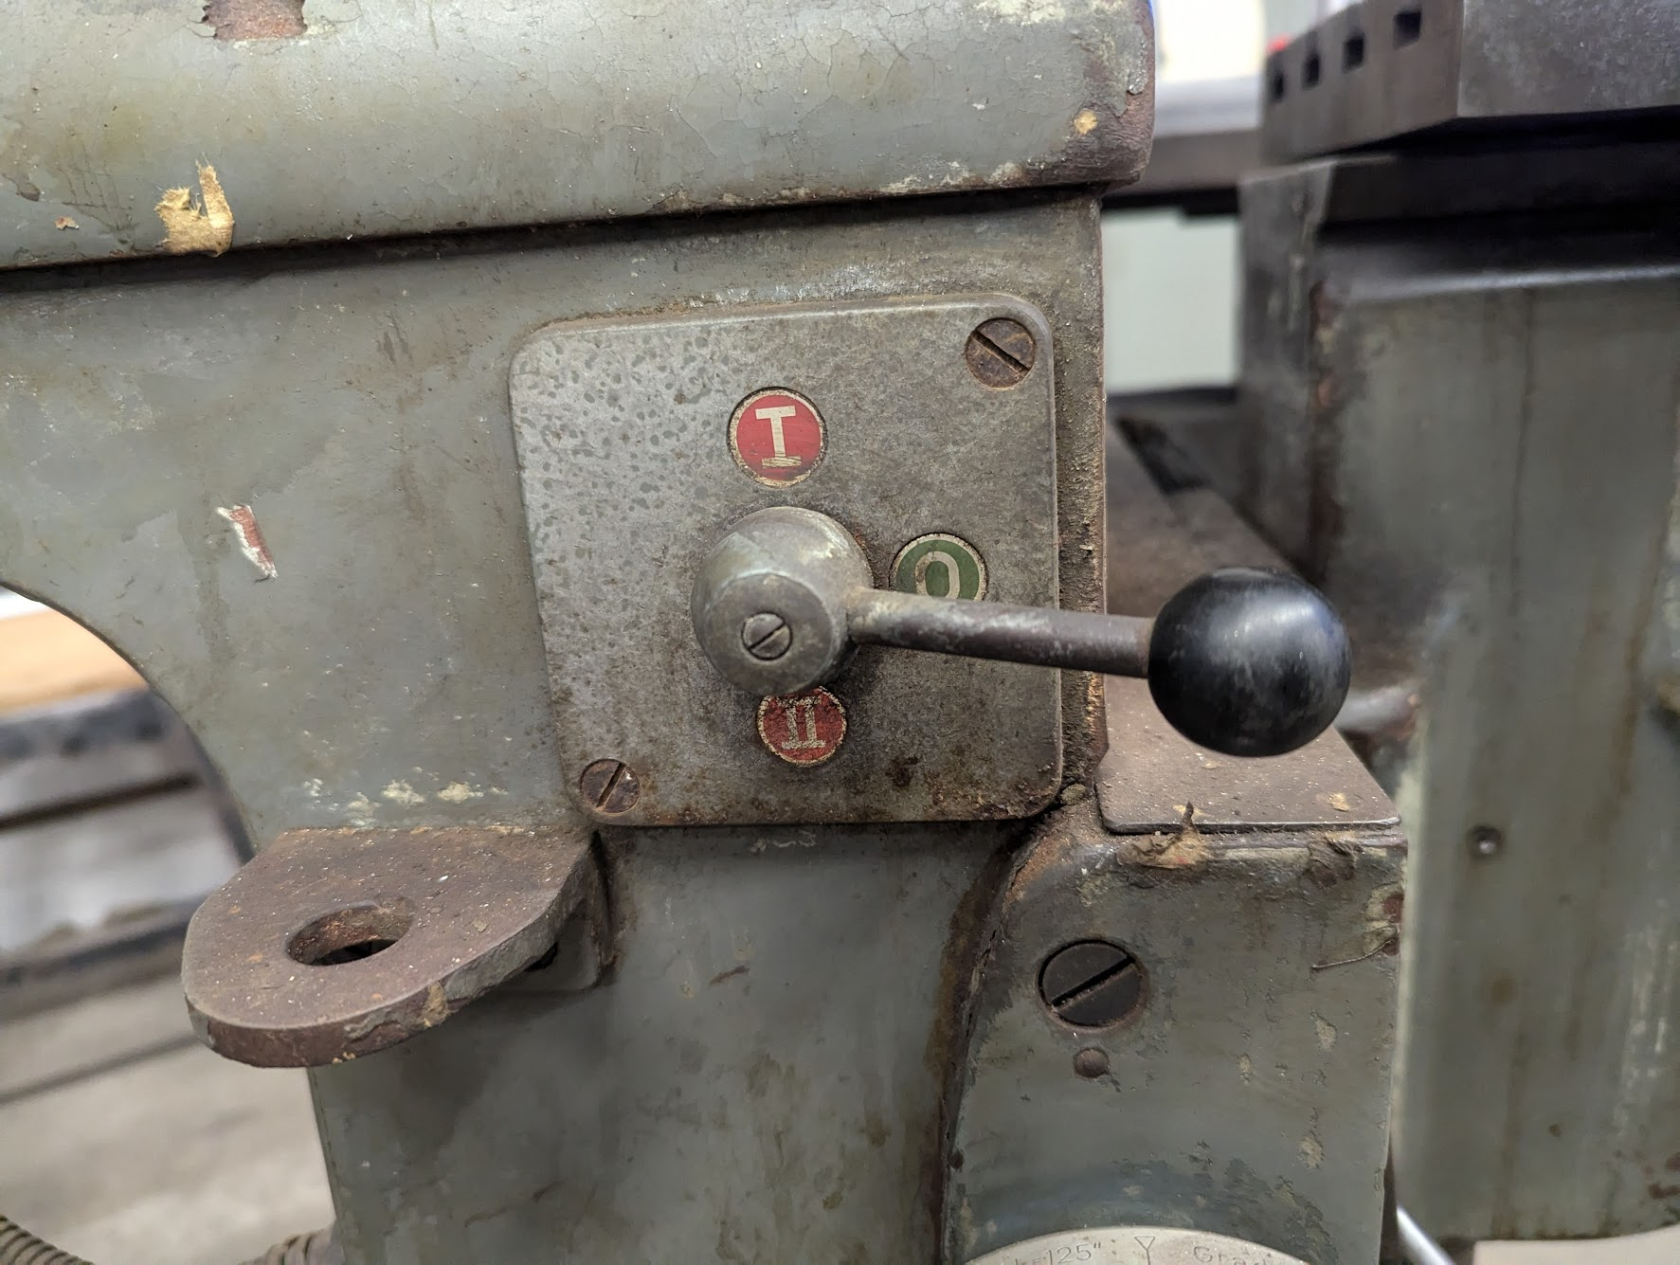
- Wait for the motor to come up to speed - it takes a couple seconds.
- Use cutting fluid while engaving (WD-40 for aluminum, trim-sol for mild steel)
- For fine depth adjustment, lower the loop on the front of the spindle and slide it left/right to fine adjust depth, also loosen the knurled lock ring on top of the spindle (above the brass knob) to adjust the maximum depth of cut.

- Raise the knee to the engraving
eephdepth. - When switching to a different part of the engrave, always raise the spindle before raising the stylus (otherwise it will cut through the part)
- Hold the stylus like a pencil, DON'T use the handle of the pantograph when engraving.


Recommend ~60deg cutting bits; lower than this is easily broken.
Teardown
Cleanup
- Turn off power to the machine via the red lever on the back
- Remove stylus and put it in the drawer, along with any patterns that were used
- remove and return toe clamps to the holder attached to the machine
- Wipe down the work table with a shop rag/towel
- Remove engraving bit from the collet and ensure all wrenches are returned to the drawer
Special Setups
3D Mode
Discouraged for the time being - need some special alignment between the main Z pivot, the milling spindle end, and the stylus, which is easy to get wrong. Also requires the stylus to be the same ratio larger than the end mill (e.g. 5x larger for 5:1) and to match the topology (ball for ball nose etc.) which is also confusing and weird.
IFIf tyringtrying thisthis:
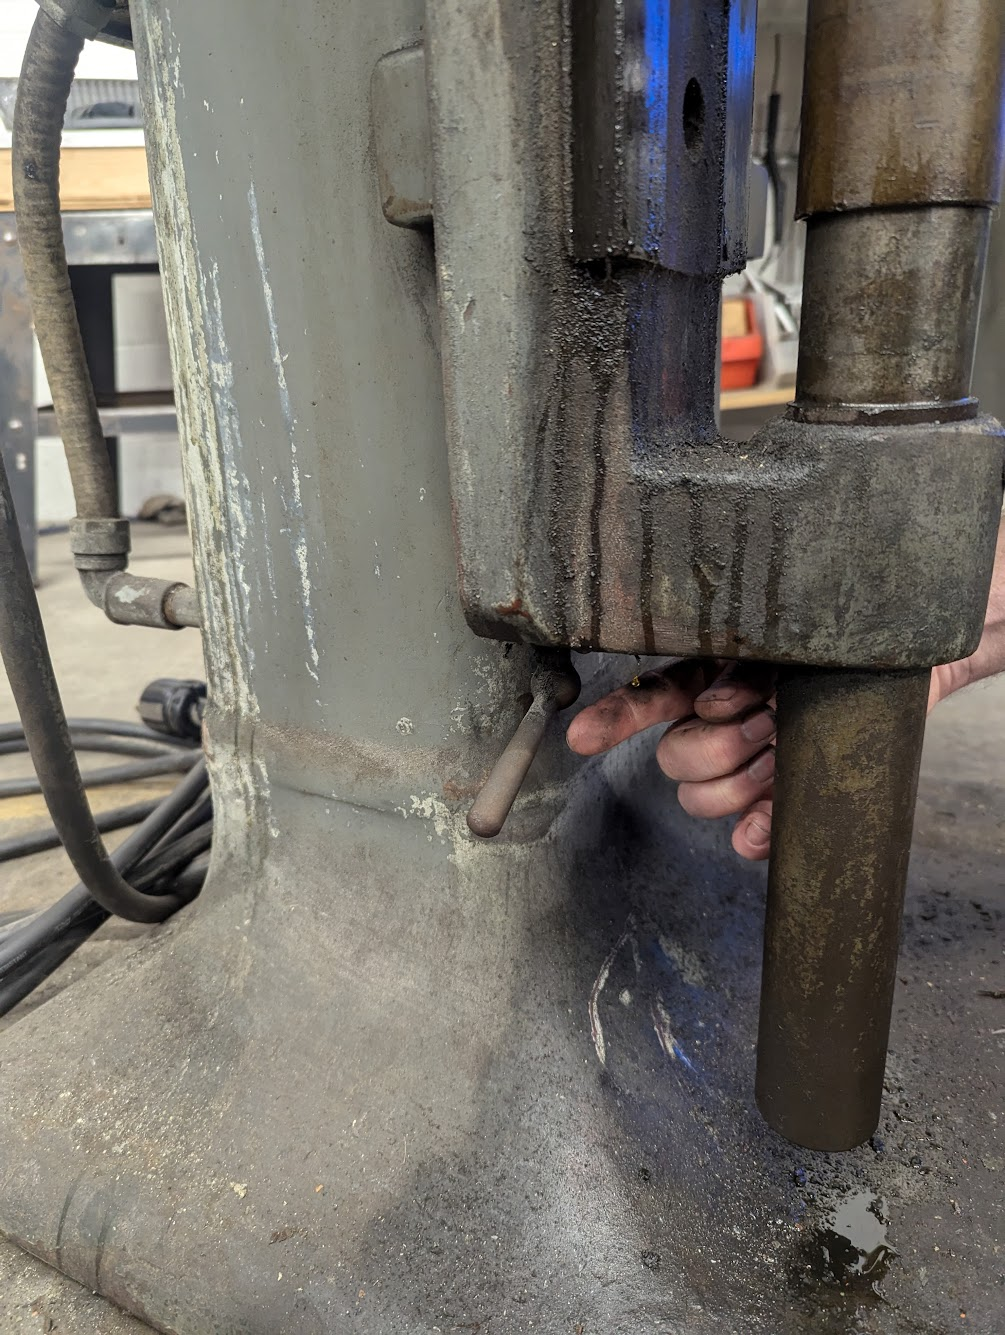
- remove the bolt and spacer/cylinder from the left side of the machine, place in the "storage" flange with hole below it.\
- Also loosen the travel limiter bolt on the right side of the main body. The arm will now travel freely in the Z axis
- Adjust the Loading/unloading dial to adjust the counter spring which supports the arm. "Loading" makes the arm lighter and want to lift, "Unloading" makes the arm heavier and want to drop.
- Proceed with 3D engraving
- Make sure that you've converted the machine back into 2D mode when done.
Size increases
Could swap the spindle and the stylus to do larger things, but it adds error and isn't the strong point of the machine. Requires moving the spindle and the whole tension bar etc. Never been attempted.
DIYCustom 3D printed patterns for the pattern jig/bar
2.5" wide, 0.150" thick, with 0.040" clipped off the end, with a 60deg dovetail. You may need to file it down to size for it to fit smoothly.
Maintenance (for techs)
Missing / potential machining projects
- There's supposed to be a bar that slides into the hole in the front of the machine to align the spindle and the engraver.
- There is an optional addition that mounts onto the top slide of hte machine to provide a profile to push the engraver up/down to handle circular engraving and such.
- Styluses are machined in-house out of 1/8" delrin
Oiling~2 -months, for shop tech maintenance
Pumppump a squirt of oil into the ball oilers on each of the 5 handwheels on the machinemachine.