
Tool Tutorial
CNC Metal Mill (Tormach 770)
The Tormach can cut a diverse range of materials from aluminum, brass, copper and Delrin. Steels can be cut but are tricky because of machine flex.
A mill is used to machine surfaces, cut slots and pockets, and drill holes to precise dimensions. In the case of the Tormach mill, the spindle holds the tool and moves in the Z axis, while a clamp on the table holds your work and moves the X and Y axes.
A CNC mill is controlled by a program created by CAM software such as Fusion 360. The recommended Fusion post processor is Mach3Mill. The CNC Router Parts Mach 3 post will work too.
When programming speeds and feeds for this machine, keep in mind that this is a hobbyist grade machine and the speeds and feeds that end mill manufacturer's specify are for much more robust machines. The speeds and feeds need to be much lower on this machine.
This tool can deliver enough force to break brittle tools, crush bones, and tear flesh.
Electronic devices within the electrical cabinet may retain dangerous levels of electrical charge even after power has been turned off.
Tool Anatomy
Power Switch - Key switch turns the machine on and off
Emergency Stop - Reserved for emergencies. To deactivate and reset, you must twist the spring-loaded knob.
Maintenance Tag - Manually tracks the usability status with Green/Yellow/Red cards
Equipment Controls
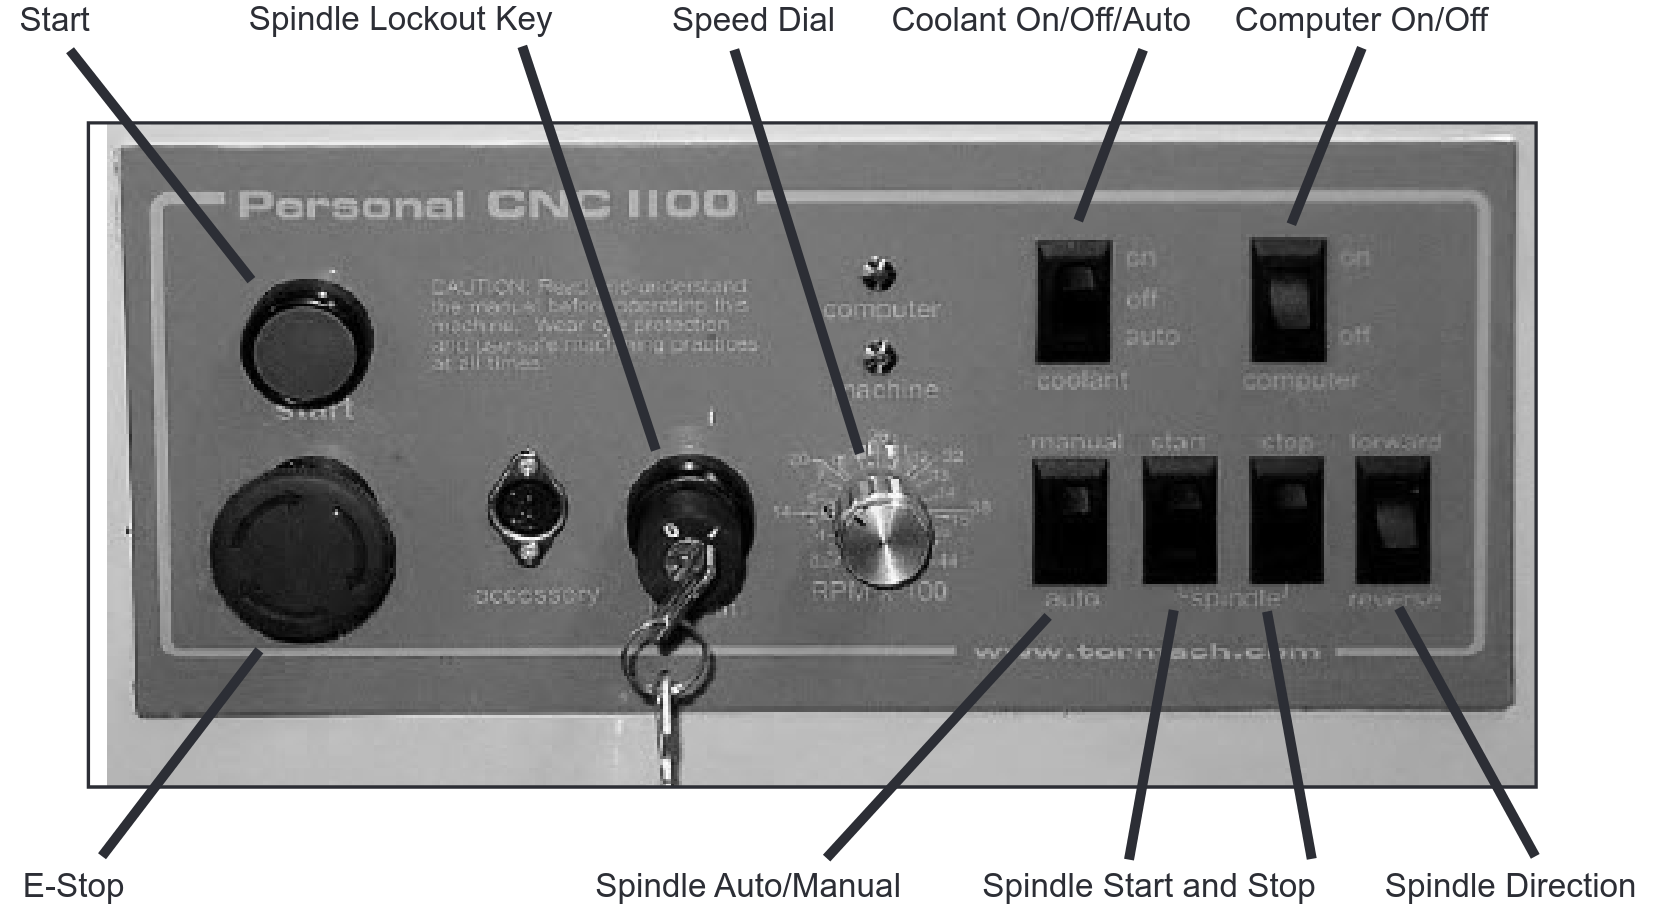
- Start: The Start button turns on the circuits for the axis drives and the spindle motor.
- E-Stop: The Emergency Stop button stops all motion and is locked when pressed. To release, turn the button head a quarter-turn clockwise.
- Spindle Lockout Key (Not normally used) Power to the spindle motor can be disabled using the Spindle Key switch, while still allowing the Z axis to move.
- Speed Dial (Not normally used): Controls the speed of the spindle when the spindle is under manual control.
- Coolant On/Off/AutoCoolant On/Off/Auto: Setting this switch to Auto gives control of the coolant over to the computer, Off turns the coolant OFF altogether, and On turns the coolant on. It is preferred to leave this switched to Auto.
- Computer On/Off (Not normally used): This is a rocker switch that controls the power to the two outlets for the computer and monitor.
- Spindle Auto/Manual (Not normally used): In the Auto position, the computer controls the spindle speed, while in the Manual position, the user controls the spindle speed.
- Spindle Start and Stop (Not normally used): These switches allow you to start and stop the spindle when the spindle is under manual control.
- Spindle Direction (Not normally used): This sets the rotation direction of the spindle. Forward spins the spindle clockwise, while Reverse spins it counterclockwise.
Tool Safety
Safety Checklist
-
Never leave the machine unattended while it is running
-
Power off the spindle before changing tooling. Once the spindle has stopped spinning, the upper door has safety switches to prevent it from turning on.
-
Ensure that your clothing and PPE is safe for operation
- Making Z errors or not accounting for how deep a part will be cut away can damage the vice or the table. Soft Jaws are highly recommended.
Personal Protective Equipment
At the Tormach, Well-fitted Clothes, Closed-toed Shoes, and Safety Goggles are required. Hearing protection is recommended.
Loose sleeves must be rolled up and long hair and scarves must be tied back. Avoid any dangling drawstrings or other articles of clothing that may come in contact with the mill.
Tool Care
-
Take small cuts at slow speeds.
-
Be prepared to stop the machine at any time using the e-stop.
-
Submit a maintenance request when needed.
Tool Operation
Inspection
Before you start using the mill you are expected to do an initial inspection of the mill and access its readiness for use. Notify a shop tech if you notice anything amiss.
Startup
- Turn the large red and yellow rotating power switch on the side of the cabinet to the On position (clockwise). This doesn’t actually turn anything on; it’s more like switching on the power strip that everything else is plugged into.
- The computer needs to boot up before activating the drive motors. Open the side cabinet underneath the machine and press the computer's power button.
- When the computer has booted up, double-click the Mach3 icon to launch Mach3, the program that runs the Tormach.
- Install a tool holder with a tool or edge finder installed (set screws or collet nuts that not tight can come loose)
- Run the spindle at 1000rpm to warm up the spindle. 10-15 min is good for a warm up. Other steps can be completed while the machine is warming up.
- Copy your part program to the Tormach desktop to avoid any errors that may occur in the USB interface.
- Load your G-code program into Mach3.
- Release the E-stop on the cabinet by turning it clockwise and press the green Start button to power up the motors.
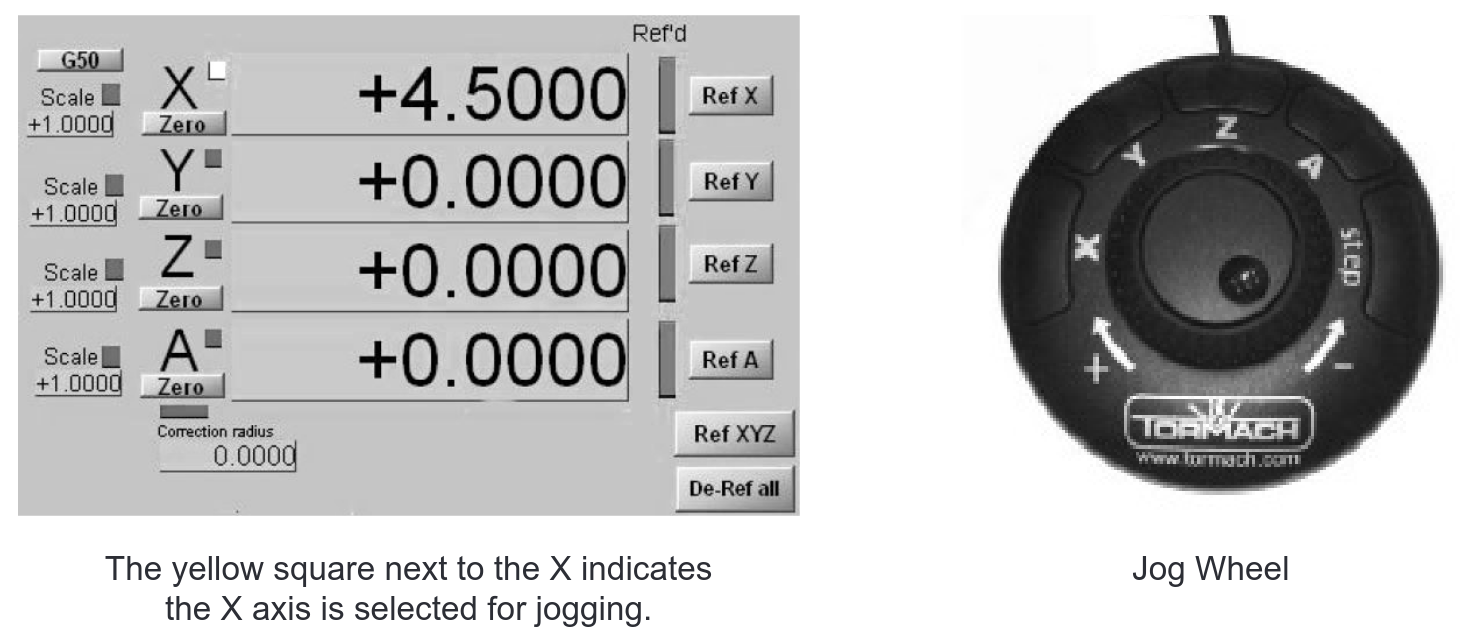
Jog Wheel
Jogging the machine the direction you intend takes some practice, so be careful around any parts, stock or fixtures.
Tooling
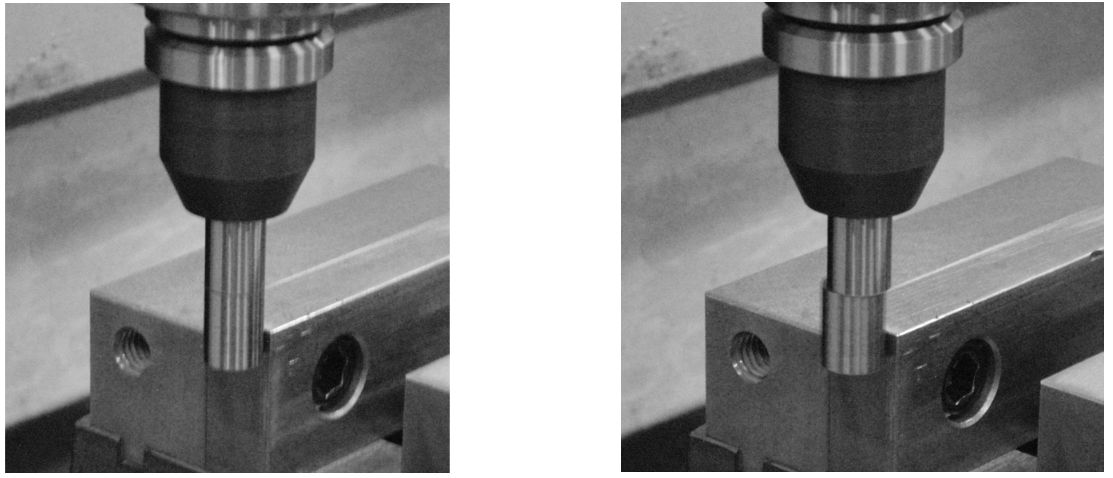
The Tormach mill uses a standard R8 spindle and collet that do not fit any other machines at Protohaven. The Tormach Tooling System allows you to set up a series of tools in different holders that can be easily changed as needed. The holders and other Tormach tools can be found on the nearby cart.
Operation
- Check the coolant level in the machine and alert a shop tech if it’s low. It must not be below 2/3 full and ideally be near the top.
- Check that the motor belts are in the speed setting that you expect, and that the belt position matches on the Mach 3 screen.
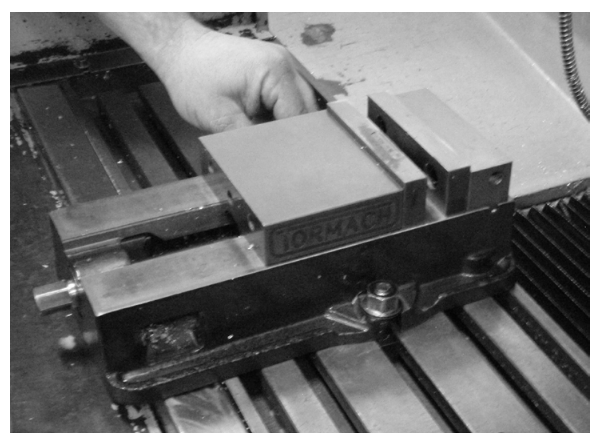
- Mount your work piece securely in the machine. A vice is a common work holding method, while fixtures or the work itself may clamped to the bed of the machine using step blocks, clamps and T-nuts.
- Making or buying your own Aluminum Soft jaws to put in the vice is highly recommended.

- Locate the X and Y axis zeros for your part. Depending on the accuracy desired, this can be done by eye or by using an edge finder. If using an edge finder, follow these steps:
- Open the front door of the spindle and move the spindle lock arm down to hold the draw bar tight. Our lock bar is different than what is pictured.
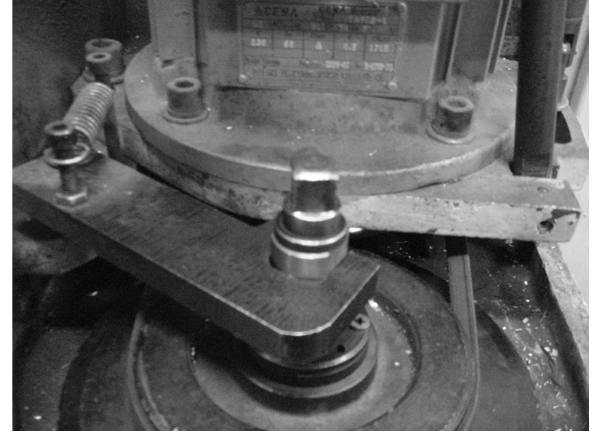
- Use a 13mm wrench to loosen the draw bar nut, insert the edge finder into the end of the spindle, and tighten the drawbar nut. Keep a hold of the tool to make sure it doesn’t fall out of the machine.
- Move the spindle lock arm back and close the door.
- Set the spindle speed to 1,000 RPM, set spindle control to Manual, and start the spindle.
- Jog the machine so that the tip of the edge finder is outside and below the top of your work. Move the edge finder towards your work, slowly. Use a .001” step and the inner wheel on the jog wheel for precise control. When the two parts of the edge finder come together, it means you’re close to the edge of your part. When the two halves pop apart, that means you’re at the edge of your material.
- Set the zero for the axis you’re locating by clicking the Zero button in the Digital Readout.
- Repeat for the other axis.
- Move the edge finder above the top of your work, enter G0 X0 Y0 in the MDI (manual data input) field, and press Enter. Adjust the values to read half the diameter of the edge finder by double-clicking in the X and Y fields and manually entering a number. Remember to use negative numbers, where appropriate.
- Recheck your zeros by entering G0 X0 Y0 in the MDI field.
- Open the front door of the spindle and move the spindle lock arm down to hold the draw bar tight. Our lock bar is different than what is pictured.
- Locate the top of your part.
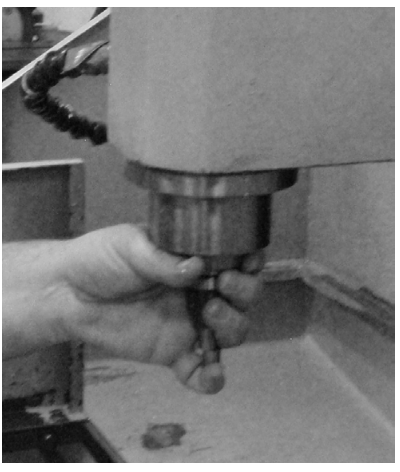
- Following the same procedure as the edge finder, above, insert the cutting tool you’ll be using into the collet. When removing tools from the collet, keep your hand under the tool to catch it and avoid damaging it.
- Once the tool is inserted, jog the tool down to the top of the part. A common way to set the zero to the top of your part is to insert a piece of paper between the tool and the part. Use a .001” step and the inner wheel on the jog wheel for precise control. When the paper does not slide under the tool, the tip of the tool is about .003” above the part.
- Zero the Z axis by clicking the Zero button in the DRO, then remove the paper, double-click in the Z field, and enter .003”.
- The same steps can be taken by using the .020 feeler gauge that is at the computer keyboard.
- Following the same procedure as the edge finder, above, insert the cutting tool you’ll be using into the collet. When removing tools from the collet, keep your hand under the tool to catch it and avoid damaging it.
- Place the shield on the front of the machine to protect yourself from coolant, chips or other things that may fly out of the machine.
- If you’re using a manually-controlled spindle speed, use the speed dial to set the correct spindle speed, flip the spindle auto/manual switch to Manual, and use the spindle Start switch to start the spindle.
- Place one hand over the E-Stop button, then click the Cycle Start button on the computer screen twice to start the program. Use the space bar to pause your program, if necessary. The space bar pauses the program but does not stop the spindle. Do not hesitate to push the E-Stop button if things aren’t going along as planned. It’s much easier to restart a program than explain how you broke the machine.
- Once you’re confident that the machine is set up properly and will not crash into anything like a vice or the table, you can remove your hand from the E-Stop button.
- Turn the coolant on by setting the coolant button to Auto to keep the tool and workpiece cool and lubed for a quality finish and longer tool life.


Make sure you never leave the machine unattended while it is running.
Troubleshooting
Extensive troubleshooting information is available in section 9.6 of the manual, on page 156 of the PDF.
Shutdown & Cleanup
-
Deactivate the drive motors by pushing the e-stop
-
Exit Mach3
-
Delete any files copied to the computer
-
Remove your usb/flash drives, and shut down the computer
-
When the computer has shut down, turn off the power to the whole Tormach by turning the red and yellow power switch on the side of the cabinet to the OFF position (counter-clockwise).
-
Vacuum and sweep any chips and debris (sometimes it can be help to do this first, being able to use the computer to move the table around is helpful in cleaning) Pay attention to the way covers behind the table.
- Sweep chips off of the windows and out of the sliding door tracks.
- Vacuum chips from the screen on top of the coolant tank.
-
Wipe any excess coolant with a rag
-
Return any vice, hold-downs, or cutting tools to their home
-
Note any maintenance needs or concerns on the tag and at protohaven.org/maintenance
-
Recycle waste in the scrap bins
Scrap Breakdown
We try to save scrap and recycle it. There are bins for Aluminum and Steel. Place scrap in the appreciate bin and avoid mixing metals. Avoid mixing steel chips into the aluminum chips.
Special Setups
The Internet...
Is full of unique operations done on machine shop tools. Use caution and consult other users of the machine to see if these operations are valid or if there is a better way to get a job done.
Advanced Workholding
Making soft jaws is needed to hold oddly shaped parts.