
Table Saw Tool Tutorial
The Setup, Operation, and Cleanup Checklists of this guide are what instructors use to ensure that you can use the equipment according to community expectations.
The tablesaw is the main workhorse of the modern workshop and can be used to cut nominally sized lumber to precise lengths and widths. Some of the most common uses are making rip and crosscuts on boards and cutting panels to size. With appropriate setups and jigs, more complex joinery can be accomplished like cutting dadoes and rabbets on panels, tenons, bridle joints, box joints, and splines.
Usage Highlights
Table Saw Clearance or Class Equivalent Required Before Use
Personal Protective Equipment
Safety glasses must always be worn. Hearing protection is highly recommended in the workshop, especially when the dust collection fan is active.
Tool Anatomy
MACHINE ANATOMY
-
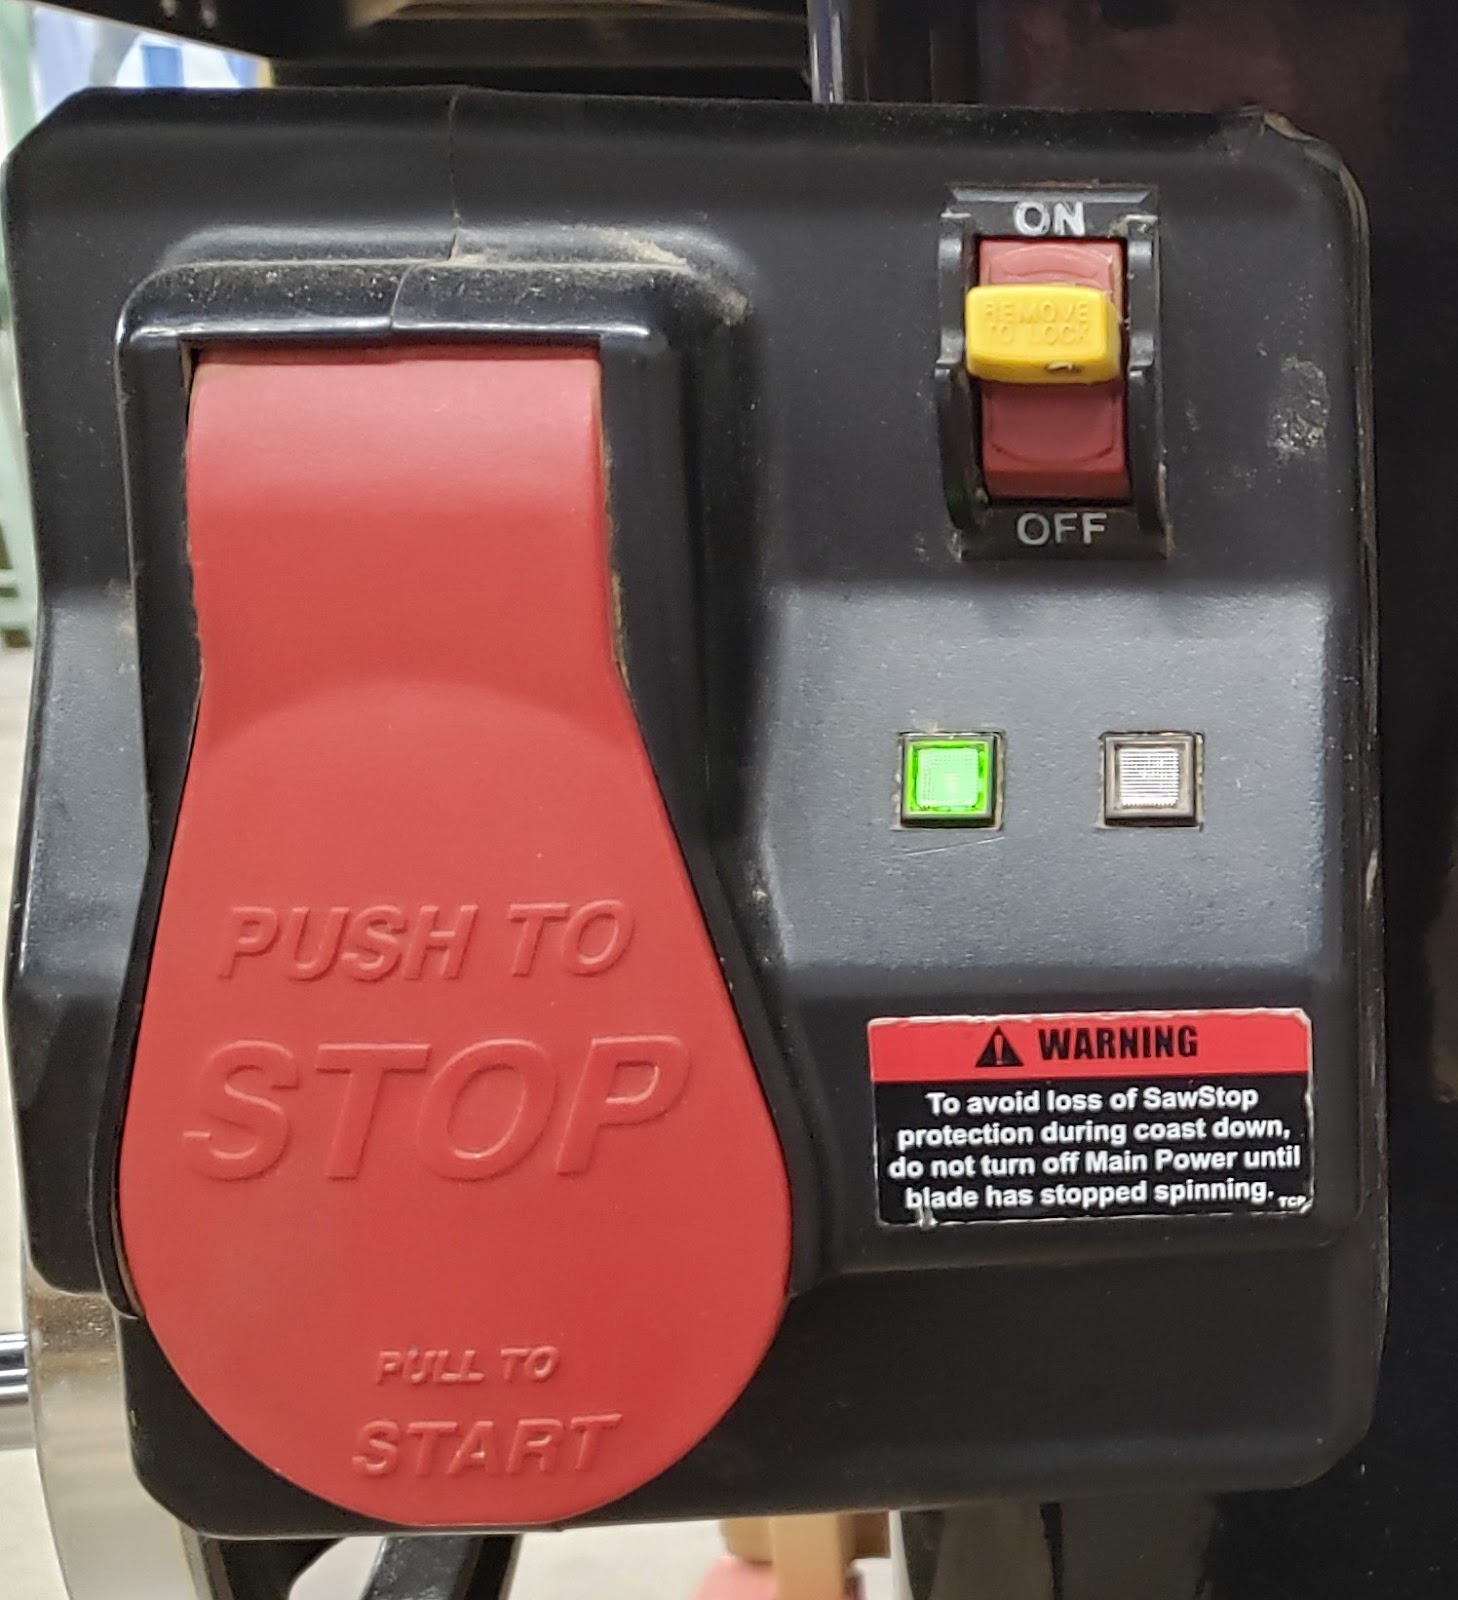
Power Box Switch - Switch for the electrical box. The yellow switch must be ‘on’ for the motor switch to work. Each time it is turned ‘on’, the box will go through a boot process. When the boot process is complete the green light will glow solid.
-
Start/Stop Paddle - Switch for the motor. Pull out to turn on, push to turn off.
-
Maintenance Tag - Manually tracks the usability status with Green/Yellow/Red cards
-
Table - This is precision ground cast iron and will rust and damage easily. Do not expose to moisture, use for hammering, or as a glue-up surface.
-
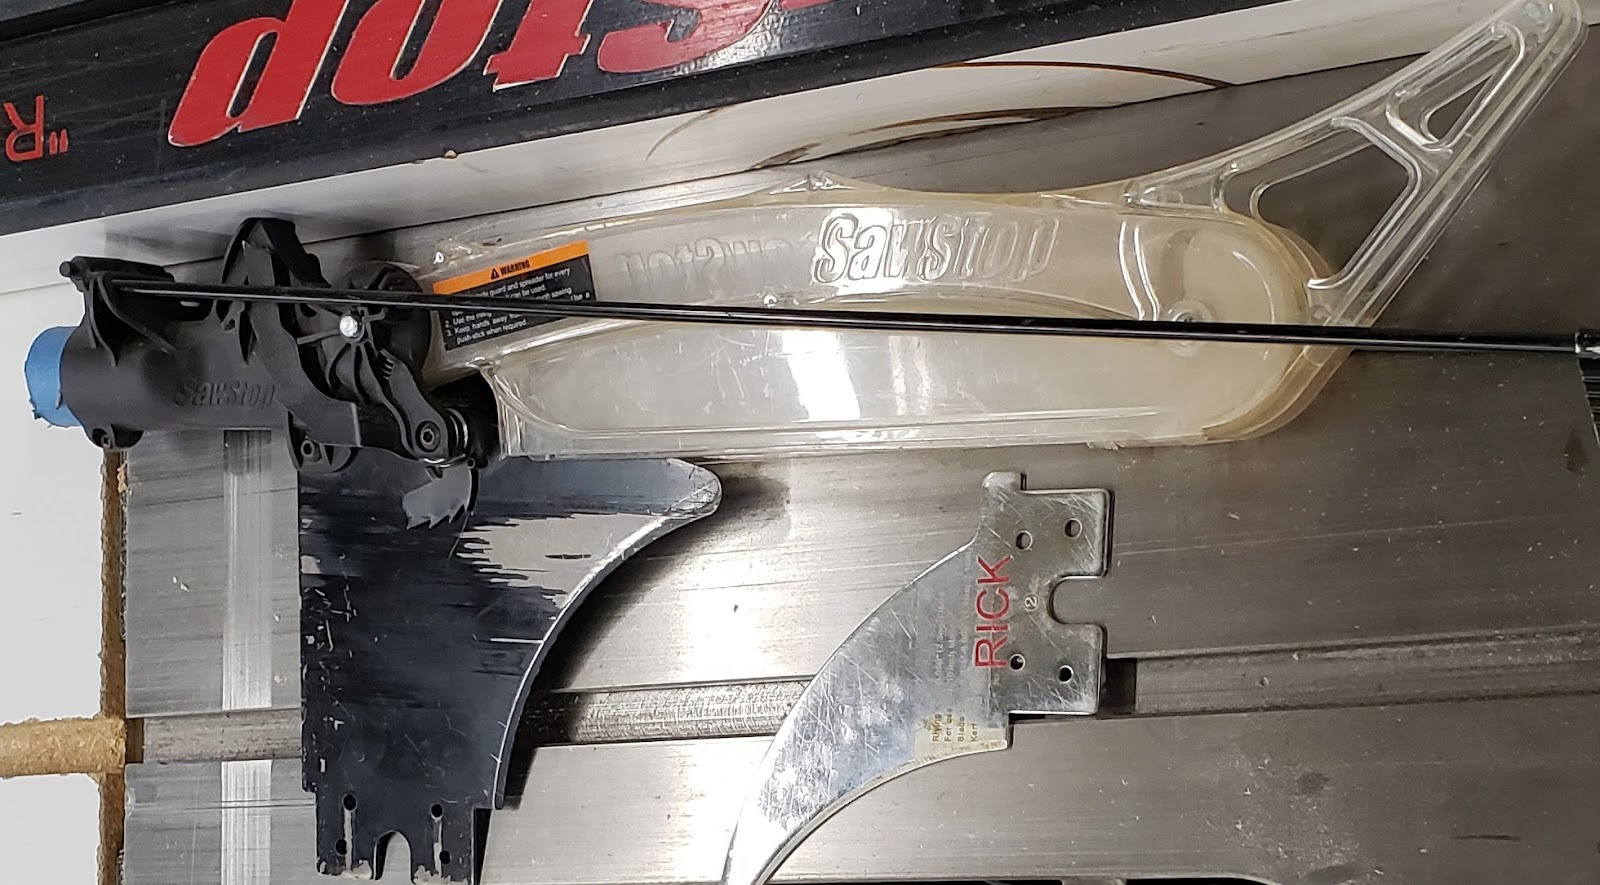
Blade - Can be raised and lowered, and tilted up to 45 degrees to the left.
-
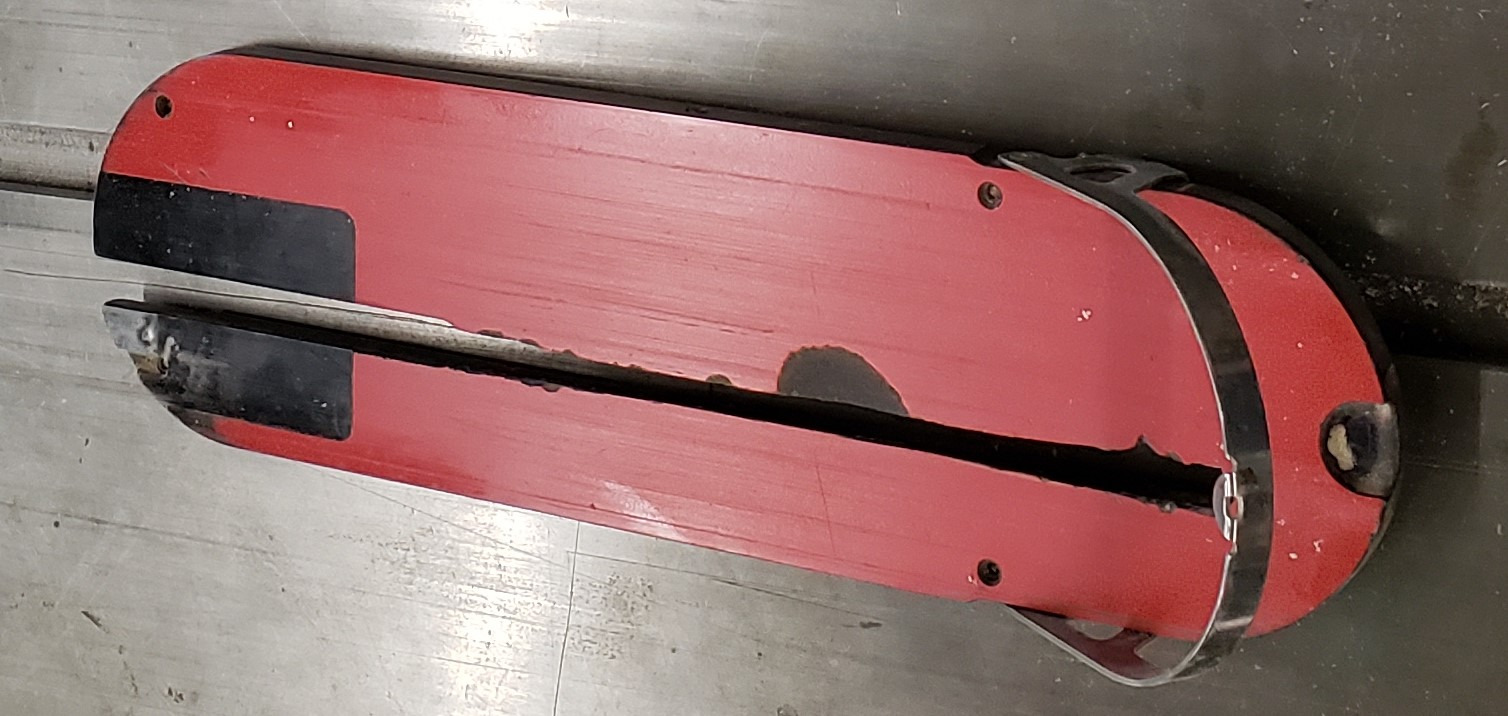
Blade Guard - Covers the blade as a safety measure and has an integrated splitter. Cannot be used when making dadoes or rabbets, or for cuts very close to the fence.
-
Riving Knife - Used as a splitter that follows the height of the blade. Must be installed if not using the blade guard.
-
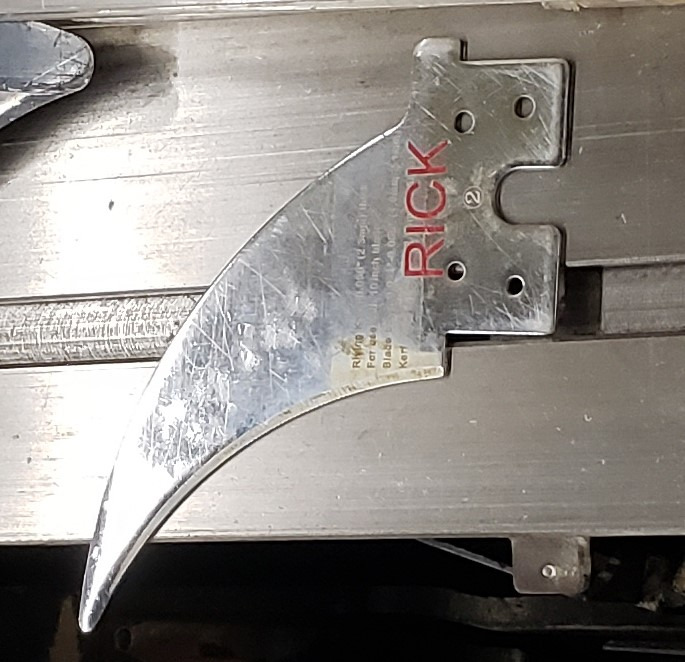
Throat Plate - Maintains a tight clearance between the blade and the table surface. There is a separate throat plate for use with dado stacks.
-
Brake Module - Sits below the blade and is activated whenever the blade senses something that might be contact with flesh.
-
Height Adjustment Crank - Raises and lowers the blade. Found on the front of the cabinet. Unlock the knob before turning, and lock the knob in place when adjustment is complete.

-
Angle Adjustment Crank - Tilts the blade between 45 degrees and 90 degrees from the table. Found on the side of the cabinet. Unlock the knob before turning, and lock the knob in place when adjustment is complete.
-
Fence - Provides a surface parallel to the blade to use as a reference when making long cuts. The fence should never be pushed up against the blade.
-
Miter Gauge - a small jig that allows cross-cuts and miter cuts.
-
Push Stick - A stick to help push stock through the saw to help keep your fingers away from the blade.
-
Featherboard - Flexible fingers that clamp into the miter slot and help push the stock against the fence.
Tool Safety
COMMON HAZARDS
Lacerations - The stories of fingers lost to tablesaws are plentiful. Keeping your fingers at least six inches away will help prevent accidental contact with the blade. Do not reach across the blade to prevent contact with your arms.
Entanglement - Do not wear long sleeve shirts or bracelets. Tuck in any necklaces, and tie back long hair.
Kickback - Anytime a workpiece binds on the blade it runs the risk of violently kicking the work out the front of the saw. When this happens it can pull the user’s hand into the path of the blade.
There are several ways kickback can happen:
-
Kerf closing mid-cut. Due to internal forces in the wood, the stock may warp as it is cut, and the resulting pieces may close in on the path that the blade has made through the wood, known as the kerf. When the kerf closes on the blade, it will bind on the blade and stall the saw or eject the workpiece. If you feel the blade start to provide resistance as you cut, stop the saw immediately. Remove the workpiece from the blade and inspect the cut. It may be possible to re-make the cut now that some of the tension has been released.
-
Wood twisting mid-cut. If wood is not perfectly flat, it may tip back and forth as it is pushed through the cut. If the kerf tilts against the blade it will pinch and bind. Only use stock that lays perfectly flat to the table.
-
Stock rotating into the back of the blade will lift the stock with the rear tooth, then shoot it out the front of the saw. In order to prevent this, stock must be locked in place rotationally either by having one straight edge against the fence, or by holding the workpiece firmly using the miter gauge, a sled, or some other jig. Even with those aids in place, an unexpected shift while feeding due to a knot in the wood or some other hiccup may still result in the wood turning into the saw. To mitigate this risk a splitter must always be used, either the splitter built into the blade guard or if the blade guard is removed, the riving knife MUST be installed.
-
Stock riding on top of the blade - Sometimes the stock will be pushed up the front of the blade, and then be thrown when the teeth at the top of the blade re-engage with the stock. This can happen more easily when the blade height is very low to the table, creating a low ramp. A dull blade will also make it more likely that the stock will ride up the blade instead of being cut as expected. Make sure the blade is set to a minimum height of one inch when cutting very thin stock. Check the blade sharpness. Maintain firm downward pressure to keep the stock against the table at all time.
PROHIBITED MATERIALS
Reclaimed wood often has embedded nails or screws which can damage the blade, cause the workpiece to kick, and can scratch the table. All reclaimed wood should be checked with the hand-held metal detector before being sawn.
Reclaimed materials may be painted with lead paints. Lead paints are prohibited in the shop as the dust created is toxic.
No metals shall be cut on the table saws. They will trigger the brake system, and potentially shatter the saw blade, throwing debris at the user.
Initial Setup
SETUP BREAKDOWN
Check the dust port
Remove the throat plate and look past the blade to the bottom of the blade housing. The dust port should be visible with no dust build-up. If there is dust and debris blocking the port, unplug the saw and use a shop-vac to remove the blockage. It may be necessary to open the left access panel and remove the dust hose from the blade housing in order to remove heavy blockages from the hose itself.
Turn on the electronics box switch
Turning on the yellow switch will cause the electronics to boot up. The red light will flash slowly until the bootup process is complete, at which point the green light will go solid. If the electronics box finds a fault with the machine setup it will flash a series of lights. The light code can be looked up on the chart on the left side of the electronics box in order to determine the cause of the fault.
CONSUMABLES
General purpose 10” diameter ⅛” thick saw blades are provided by the shop. Any specialty blades like thin-kerf blades or flat-toothed blades needed for a lot of joinery cuts must be provided by members.
Basic Operation
OPERATION BREAKDOWN
Check the dust gate
Verify that the dust gate that corresponds to the table saw you are using is open.
Turn on the dust collector
Mark the cut line on the workpiece
At the back, bottom edge of the workpiece, make a mark at the start of the cut. Making the mark on the back, bottom edge will allow you to perfectly line up the edge of a blade tooth with your mark, which would be impossible to do if you make your mark on the top surface. It is good practice to indicate which side of the mark is the waste side so that you do not accidentally remove the kerf width from the piece you want to keep.
Raise the saw blade to the proper height
Place your stock on the table surface next to the blade and raise or lower the blade so that the entire tooth profile of the highest teeth completely clear the top of the workpiece.
Line up the cut line with the saw blade
With the workpiece held appropriately for whatever operation you will be performing (rip, crosscut, etc), line up the hash mark you made to delineate the cut with the frontmost tooth on the saw blade. Lock the fence in place if using the fence, otherwise move the fence out of the way. Be aware that locking the fence may cause the angle of the fence to shift, changing it’s distance from the blade. Double check your alignment after locking the fence and adjust if necessary.
Turn on the blade
Make sure there are a few inches of clearance between the workpiece and the blade so it is not thrown as soon as the saw is turned on. Pull the red paddle gently towards you until it clicks and the blade turns on. Allow the blade to come up to full speed. If the blade does not turn on, check the lights for error codes and push the paddle back to its off position.
Make the cut
Push the workpiece at a constant speed into and past the blade. Be sure to keep your hands out of the path of the blade, and at least six inches away from the blade as you push the workpiece past the blade. As the blade reaches the front edge of the stock, the left and right halves of the cut will separate. If one of those pieces is between the blade and the fence, be sure to push that piece completely past the back tooth of the blade to prevent the piece from pinching and being ejected forcefully from the saw. Small pieces sitting next to the blade may be able to be knocked away from the blade by a push stick, but should not be picked up by hand unless the blade has come to a complete stop.
Unless you are working with large stock it will be necessary to use a push stick to push the stock past the blade while keeping your fingers at a safe distance.
Stop the blade
Push the paddle back to its original ‘off’ position and wait for it to come to a complete stop.
Cleanup
SCRAP BREAKDOWN
Place any scrap larger than 2”x4”x2’ in the black scrap bin next to the back door. Any scrap smaller than that in any dimension should be thrown in the trash. If you notice any unusable scrap or trash in the scrap bin, please move it to a trash can.
Troubleshooting
Special Setups
Round stock should be placed in a sled or v-block to prevent it from being spun by the blade.
Dado stacks may be used, but the special dado brake for 8” blade stacks must be installed instead of the standard 10” brake module.
Additional Resources
Tablesaw kickback prevention - Stumpy Nubs - (in-depth discussion of the causes of kickback) https://www.youtube.com/watch?v=8f8VWwtaudU
Tablesaw kickback - 42 fab - (accident breakdown of thrown sheet stock)