
Tool Tutorial
Powder Coating
Safety and Procedures
•
Dustproof safety goggles and a NIOSH-approved respirator are recommended•
Never touch the tip of the gun to the part while coating it. This may cause a painful static
discharge or even ignite the powder coating media•
Powder coating dust can ignite, so do not coat parts near an open flame•
The powder coating system uses extremely high voltages so members with pacemakers are
not allowedpermitted to use the systemsystem.
Typical curing temperatures are around 400 degrees F. Anything that cannot handle such
temperatures (rubber seals, grease, paint, etc.) must be removed before putting it in the oven
Overview
Overview
While powder coating seems like a relatively recent invention, it has been around for about 50 years.
Powder coating yields a superior finish with excellent durability. Powder coating is recognized as an
environmentally friendly method of applying a quality finish. Unlike paint, powder coating releases
almost no volatile organic compounds (VOCs) into the environment. The powder is easily cleaned up
with a broom and dust pan or vacuum cleaner.
Powder coating is a process in which a dry, powdered polyester resin is sprayed on to the item to be
coated. The powder is positively charged as it exits the powder coating gun. The item to be coated
is grounded and attracts the positively charged particles to the surface. Once cured in an oven, the
surface is smooth and tough.
Virtually any type of metal can be powder coated, including steel, aluminum, magnesium, cast iron,
brass, copper, bronze and titanium.
The key to a long-lasting and good-looking finish is the preparation of the metal. The best way to
prep the surface is by abrasive blasting it down to bare metal with aluminum oxide or glass beads.
Once the part is bare metal, the part is washed with a chemical cleaner to remove any dirt or leftover
abrasive from the blasting process. The part is then baked in the oven for a short period to fully dry it
before coating it.
Part Prep: Abrasive Blasting
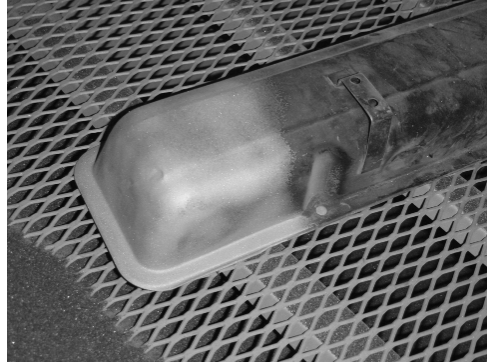
https://wiki.protohaven.org/books/tool-guides/page/sandblaster-tool-tutorialThe abrasive blast cabinet works by using compressed air across the top of a tube to draw theabrasive media up from the bottom of the blast cabinet. Media enters the air stream where it is forcedat high speed towards the work piece. The rate that material is removed can be changed by adjustingthe air pressure to the blaster, holding the blaster closer or farther away from your work piece, orchanging the media type. TechShop keeps 60 or 80 grit aluminum oxide in the blast cabinet, butwalnut shells and glass beads are also available, which tend to be less abrasive.
Abrasive blasting cleans paint, rust or corrosion, and other finishes from the part quickly and easily.1. ConnectSee anour airSandblaster supplyTool to the regulator. Set the pressure using the adjustment screw. Ninetypsi is goodTutorial for steel parts, while 45 psi works well for aluminum.2. Open the doordetails on the end of the cabinet byreleasing the two latches and placesandblasting your partinside. Make sure your part has been cleanedof dirt and grease and dried before blasting it.3. Flip the switch on top of the cabinet to turnon the lights and start up the vacuum. Thevacuum helps keep down the dust generatedby the blasting operation.4. Put your hands into the gloves on the front.5. Locate your part in the machine and hold itsecurely. The flat surface of the part should beabout 45 degrees to the abrasive gun.part.
Part Prep: Chemical Cleaning
Once the item has been cleaned down to bare metal, it will need a chemical cleaning. The chemical
cleaning helps remove any dust or other media left over from the abrasive blasting as well as any
skin oils left where you may have picked up the part with your bare hands. Clean steel parts with an
alkaline cleaner such as soda ash or trisodium phosphate
(TSP), while aluminum, brass and zinc may be cleaned with
Simple Green.1.
- Preheat the powder coating oven to the temperature
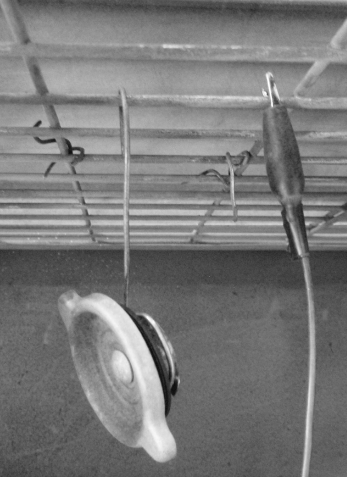
specified by your powder media. See our Powder Coating Oven Tool Tutorial for details.2. - Fashion hooks from steel wire to hang your part from
in both the paint booth and the powder coating oven.
Once your part is clean, you don’t want to get any
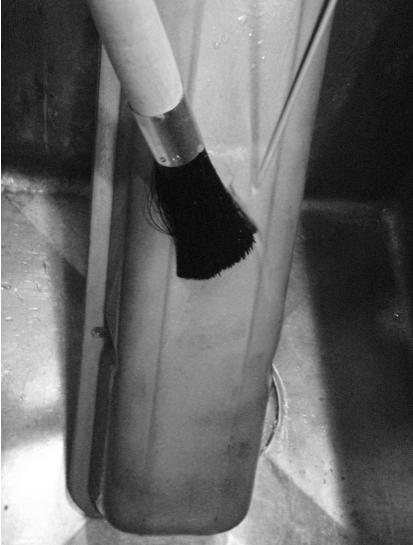
oils on it that may make for a poor finish.3. - Rinse your part under running water thoroughly.
Spray it generously with the appropriate cleaner,
scrub it well with a brush, and then rinse it
thoroughly under running water again.4. - Holding the part by the hook, hang the part in
the preheated powder coating oven for five to 30
minutes, depending on the size, thickness and
porousness of your part. Open the oven door slowly
to avoid a blast of hot air in your face.
Powder Coating Setup
While your part is drying out in the oven, it’s a good time to get the powder coating gun and
surrounding area set up.
Make
- Turn on the
areaboothyou’lllights - Connect
coating in is clean andfree of dust. Use a compressedthe airblowhosegun(on the wall) togetanytheloosecontroldustboxoff(via thespraytransparentbooth.2.tube) - Turn the control box on
- With no powder loaded, confirm the control box has correct KVA and air pressure:
- Remove the powder
coatinggun fromtheitskit anduse the blow gun to clean any leftover powder fromprevious users.3. Connect the compressed air supply to the regulator,connect the powder coating gun to the regulator,and open any closed valves to supply air to thepowder coating gun.4. Pull the triggerholster andadjust the regulator to between10 and 15 psi.Fill the powder cup about 1/3 of the way with powderand attachbring it to thegun.controlOverfillingbox - Point
resultthe gun away from you and any electronics, then squeeze the trigger - Adjust the displayed air pressure to between 2-4 PSI
- Adjust the KVA as recommended by your powder's spec sheet (default: 70KVA)
- Replace the powder gun in
anundesirableits holster - Inspect the gun, ground clamp wires, and other areas of the booth for leftover powder
streamandthatperformmayanyleavemissedunsightlylumpscleanup steps as needed to prevent cross-contamination. - Insert your powder into the cup (no more than 1/3 full)
- Screw the cup into the lid that's mounted on
yourthepart.6.side of the booth. - Turn on the air filter
- Test the spray pattern of the powder coating gun. It
should come out in a light fog. Adjust the air pressure
as necessary.
Powder Application
TODO picture of powder coating controls
Once your parts have dried and the powder coating gun is set up, you can remove your part from the
oven and powder coat it.1.
- Open the over door slowly, use a pair of heat resistant gloves to remove your part from the
oven, and hang it in the spray booth. If you have any masking to do, let your part cool before
applying any tape.2. - Attach the ground lead
to something metal that makes a complete circuit to your
part. Since powder coating is an electrostatic process, it’s
very important that the part be properly grounded. If
powder does not stick to your part, then it’s likely the part
is not well grounded.3. - Move the tip of the gun to between six and 12 inches from
your part, click the voltage switch and pull the trigger,
and move the gun to apply powder to your part. Similar
to using spray paint, keep the gun moving while applying
powder to make an even coat.
SAFETY NOTE: The tip of the powder coating gun is holding a
very high voltage charge. Due to this high voltage, it is extremely
important that you do not bring the tip of the gun too close to the
grounded part.
At distances less than six inches, electricity may arc between the gun and part. If powder is being
applied when an arc occurs, it could result in a flash fire of powder.
If this happens, immediately release the voltage switch and trigger to stop the flow of powder. Unplug
the powder coating gun and clean any fused powder from the gun. You may also have to remove fused
powder from the part.
Curing
Curing
Once your part is coated, it will need to be placed in the oven. Each powder has different cure times
and temperatures, so be sure to read the directions carefully.1.carefully - see our Powder Coating Oven Tool Tutorial for details.
Transfer your part from the spray booth to the oven. Be careful, since knocking parts into each
other may create a poor finish.
Applying a Second Coat
When applying a second coat or re-coating a part, modifications in equipment settings and/or
technique are needed. The electrostatic charge should be reduced (either by lowering voltage or
limiting current) and/or the gun-to-part distance should be increased.
Be aware that the application
will require more time. The equipment will not be as efficient (i.e., transfer efficiency will decrease
when doing re-coats), but the application can be achieved. Sanding the base coat prior to powder
application can aid in second-coat adhesion.
Applying a second coat to a part that has a cured powder coat finish requires adjustments in charge
setting, time and technique. With patience and proper technique, you should be able to achieve the
finish you desire.
Coating Hot Parts
Powders can be applied to hot surfaces. To use this technique, pre-heat the part to cure temp, 10
to 40 minutes, depending on size. After pre-heating, remove part from oven and immediately apply
powder.
You will notice that powder will flow immediately upon contact. Exercise care to avoid drips
and runs.
Place coated part back into pre-heated oven set at cure temp for an additional 20 minutes
to complete the cure.
Cleanup
1.
Keep the powderair coatingfilter gunrunning OFFduring andcleanup unplugto itcontain fromairborne powder!
- Turn off the
wall.2.control box. - Detach the cup, return remaining powder to your supply, then wash and dry thoroughly. Store the cup
andupside-downpour any unused powder back intoon theoriginalconicalcontainer.3.dryingUserack next to thecompressedcontrolairbox. - Detach the air
supplyhose from the control box. With the air filter running, use the air hose in a sweeping motion to push any loose powder towards the filter at the back of the booth. - Place the gun on the floor and oriented towards the rear wall, then use the air hose to blow air into the intake of the powder gun (the larger opening in the cup mount) for 2-3 seconds to eject remaining powder from the line.
- Using a slightly damp paper towel, wipe down any loose powder on the ground clamp, cable, and all surfaces of the powder gun and its hoses. Holster the powder gun.
- Use the shop vac to clean up any remaining loose powder from the filter, booth walls, floor, powder cup mount area, ground clamp and cable, and anywhere else you find it.
- Turn off the booth light and the
powderaircoatingfiltrationgun from the regulator. Put the gunsystem, andglovesbacktidyinuptheanykitcables.
Care of the Finished Part
A powder coated finish requires very little care. Powder coating produces a very scratch resistant
finish.
If you get scratches in a powder coated finish, gently sand the affected area with 600-1000
grit wet sandpaper. Then use a buffing wheel with appropriate compound to remove the sandpaper
scratches and achieve your desired shine. Generally, waxing is not recommended for powder coated
finishes. If you contaminate the powder finish with waxwax, you,you can no longer re-coat the part with
powder and will have to strip the part back to bare metal and start over.
Removing Powder Coating
Most organic solvents (acetone, thinners, etc.) are completely ineffective for removing powder coated
finishes. Aircraft remover is generally effective at removing powder coating, as is abrasive blasting,
though this is a time-consuming process due to the adhesion quality of powder.
Troubleshooting Tips
Pitted Finish
1.
- Make sure the gun is thoroughly cleaned before starting or changing to another powder.
2. - Make sure the part is completely cleaned of all contaminants.
3. - After cooling, wet sand the areas with 600-1000 grit to level the pits. A second coat of powder
can then be applied to the entire part.
Coating Porous Materials
In some cases, contaminants in porous materials will cause pits in the powder. Porous cast iron, die-
cast metal, cast aluminum, and magnesium parts trap contaminants that outgas when heated and
cause porosity problems as the powder is curing. To avoid this, preheat the part to 400°F for 30-60
minutes.Note:
Die-cast metal and solders vary widely in formulation, many of which can be difficult to powder
coat and, in some cases, may even melt at the 400°F typically used to cure most powder coat media.
Orange Peel
Orange peel is when the coated surface resembles the surface texture of an orange or other citrus
fruit. A certain amount of orange peel is unavoidable, especially with polyester-based powders.
Orange peel can often be removed by sanding the part with 400-600 grit sand paper (wet or dry) and
then buffing the part to achieve a good shine.
The main causes of orange peel are insufficient coating, over-baking or excessive powder buildup.
Powder buildup is easy to see because the powder will start to stand on its end like hair. If this
happens, stop applying powder and, with light air pressure, blow off some of the powder.
If the powder does not apply evenly, replace moisture trap on the gun and use fresh powder.
Poor Spray Pattern
If the gun does not spray, the air pressure could be too low or moisture may be clogging the filter. The
level of powder in the cup should be at least one inch deep to flow efficiently through the gun.
No Coverage or Poor Coverage in Recessed Areas
Hold the gun so that the side or peripheral discharge of powder goes into crevices, recesses and
sharp angles. Exercise care to maintain at least a six-inch clearance from the part being coated in
order to avoid an arc.