# Tool Guides
# Conference room teleconferencing
### Overview
The teleconferencing equipment in the conference room consists of:
- A rolling stand with a TV
- A linux-based controller box that runs Zoom (other software maybe installed if needed)
- A wide-angle camera (located on top of the TV)
- An EMEET speaker/microphone unit that lives plugged into a USB charger on the conference room table
### Starting a zoom meeting
1. Ensure the TV and the controller are both plugged in and turned on. The TV has a power switch behind the screen on the left side; the controller has a power switch on the front right side:
[](https://wiki.protohaven.org/uploads/images/gallery/2025-03/pxl-20250314-213052168.jpg)
2. Mash a few buttons on the keyboard or click the mouse if the screen is inactive, to wake the system up.
3. If Zoom is not already open, click the icon on the left side of the menu to open it.
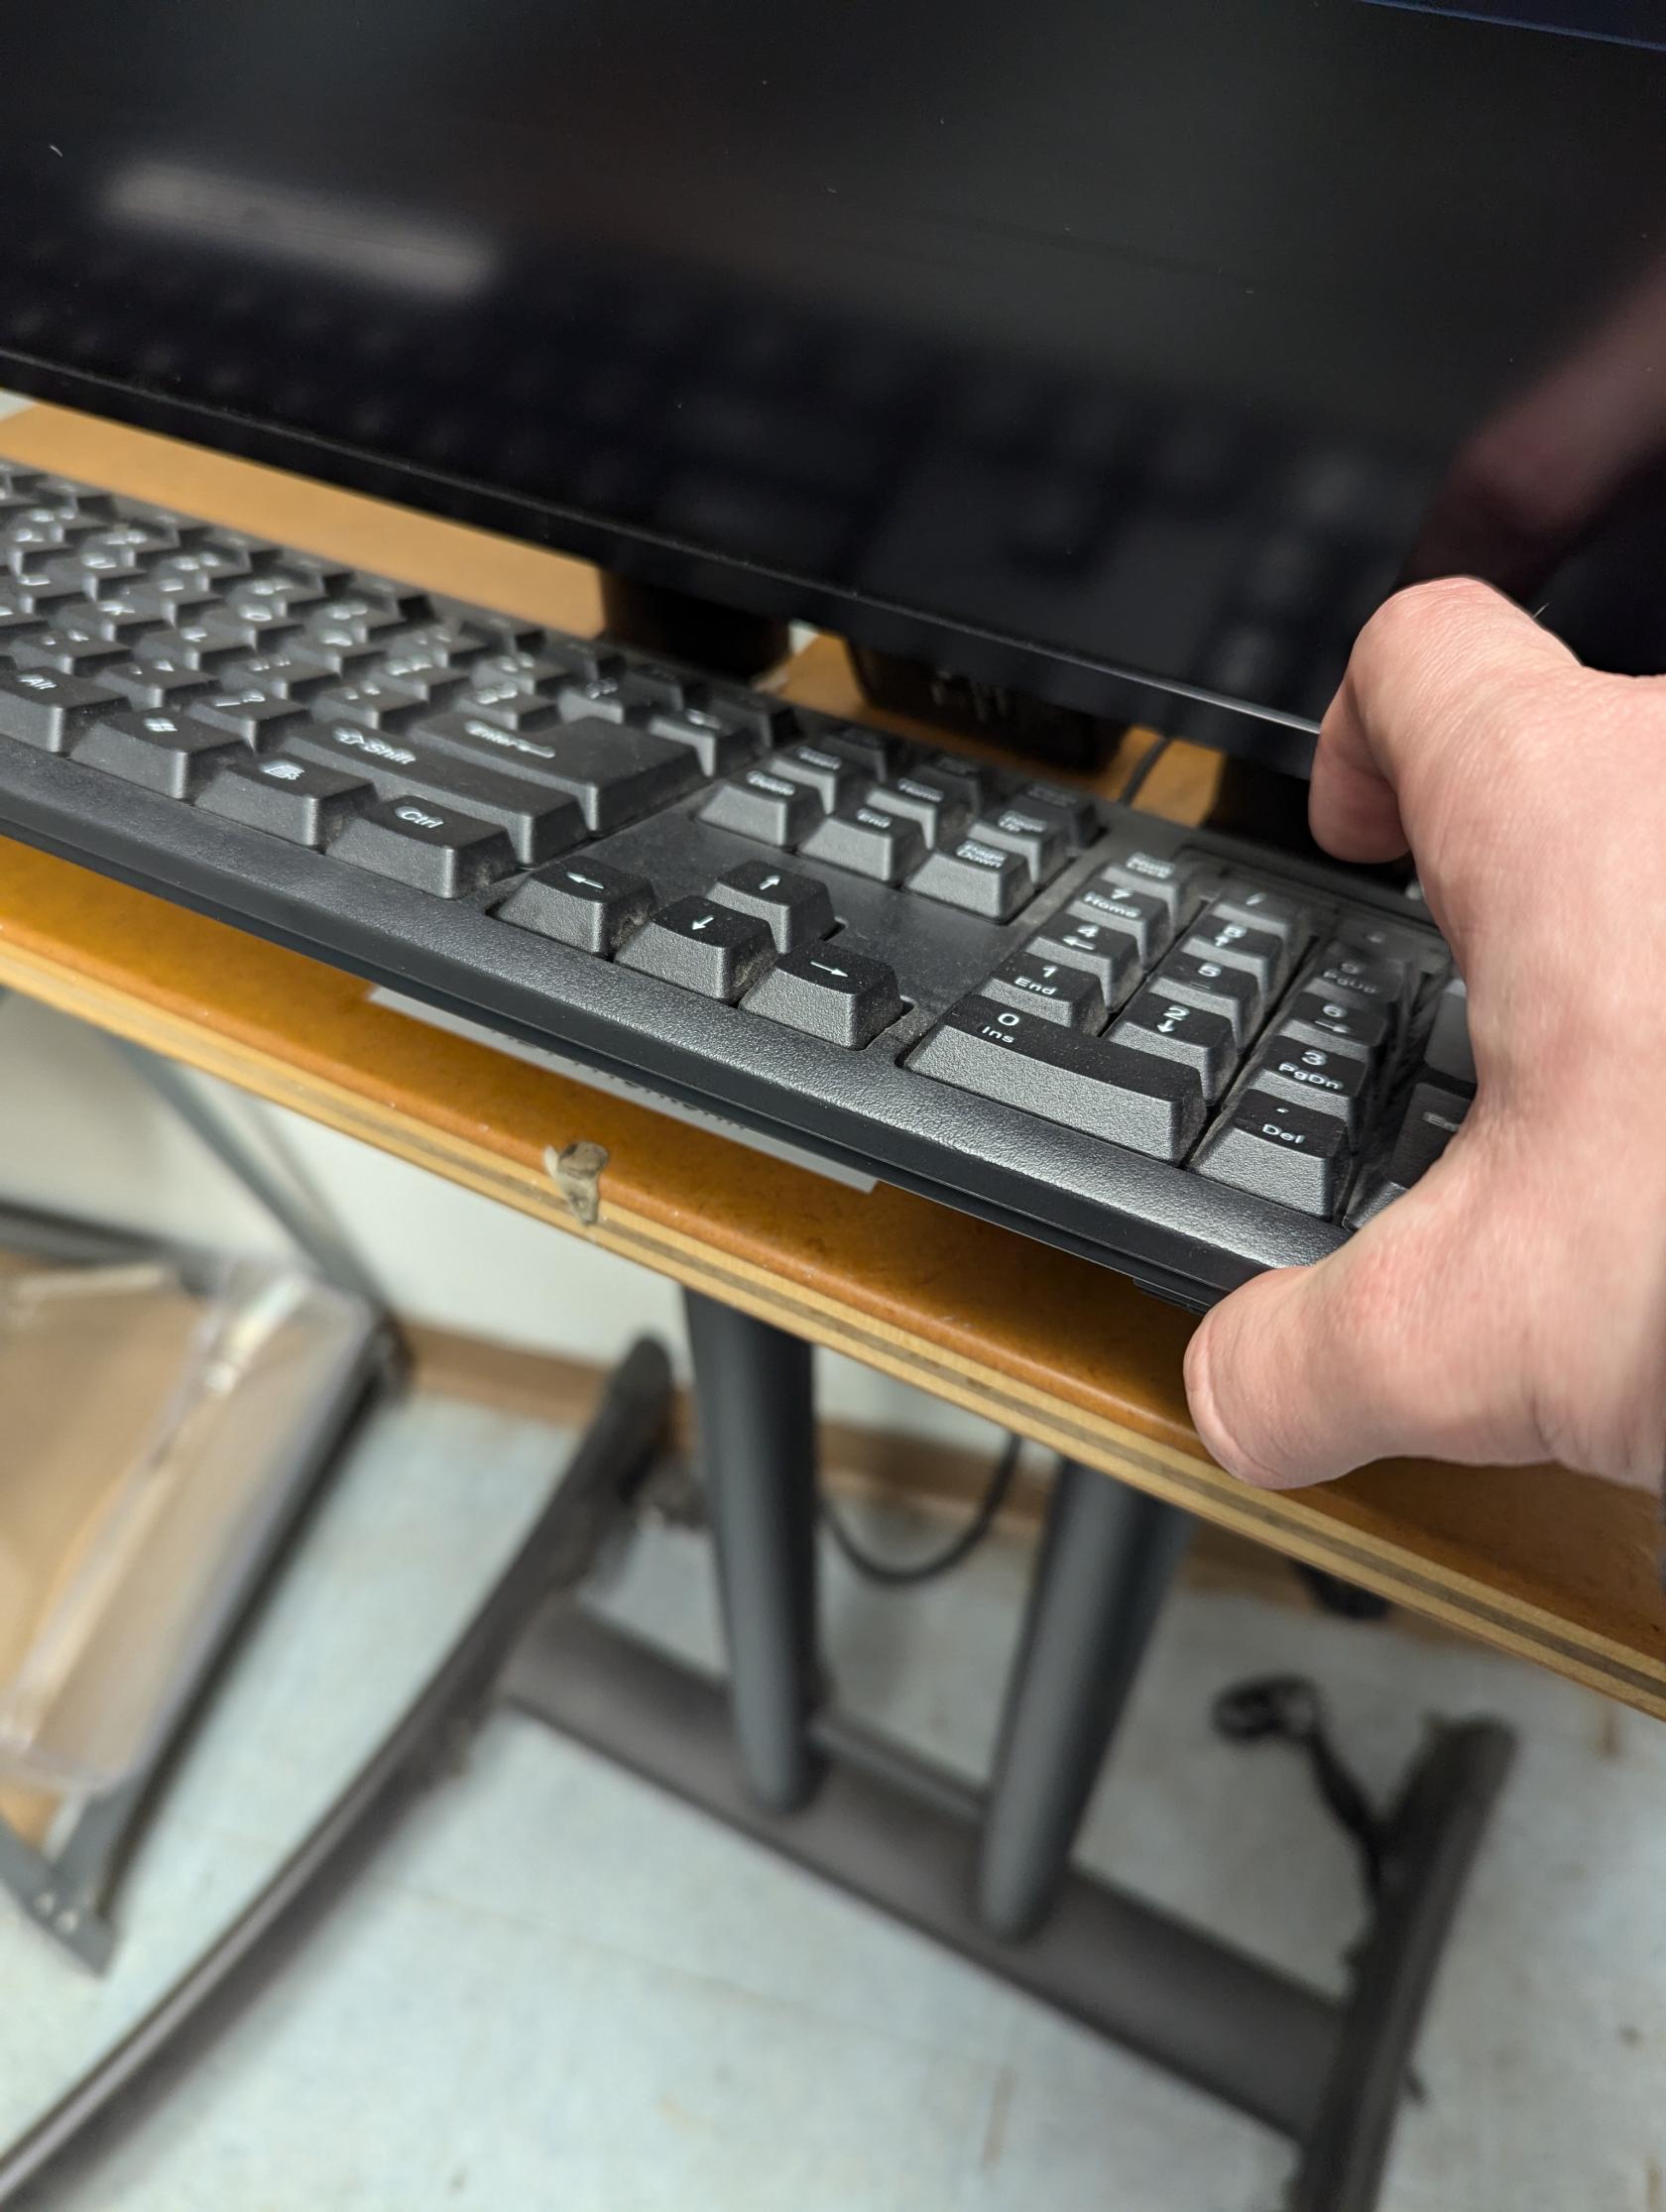
4. If Zoom is not already logged in, use the username `purchasing@protohaven.org` and the password located on the wooden stand beneath the keyboard to do so:
[](https://wiki.protohaven.org/uploads/images/gallery/2025-03/pxl-20250314-213100683.jpg)
5. On the table, you'll find a circular device labeled EMEET. This is a combo microphone/speaker which provides directional "listening" and better removes noise in the shop than what the camera's microphone would otherwise provide: [](https://wiki.protohaven.org/uploads/images/gallery/2025-03/BR0image.png)
Turn this device on by pressing and holding the power button for 5 seconds. You will hear a startup beep, a "sonar ping" sound as it tries to connect to the controller via bluetooth, and finally a happy chirp when it connects. The light next to the power icon will turn blue.
6. Proceed to connect to your meeting using the Zoom app interface.
### Troubleshooting
#### The TV is not showing anything
The controller may be frozen. Press and hold the controller's power button until the blue light is replaced by a yellow one - then release, and press/release the button to turn it back on.
#### No video appears when in a call
The camera has a physical shutter switch on top to block video - ensure it's slid all the way to the right side so that the lens is visible.
[](https://wiki.protohaven.org/uploads/images/gallery/2025-03/D5jpxl-20250314-213111466.jpg)
# Quick Views
Find tools by area:
- [View all tool areas](https://wiki.protohaven.org/tags?name=tool_area)
- Studio
- [Hand Tools](https://wiki.protohaven.org/search?term=%5Btool_area%3Dhand+tools%5D)
- [Graphics](https://wiki.protohaven.org/search?term=%5Btool_area%3DGraphics%5D)
- [3D Printing](https://wiki.protohaven.org/search?term=%5Btool_area%3D3d+printing%5D)
- [Lasers](https://wiki.protohaven.org/search?term=%5Btool_area%3Dlasers%5D)
- [Textiles](https://wiki.protohaven.org/search?term=%5Btool_area%3DTextiles%5D)
- [Electronics](https://wiki.protohaven.org/search?term=%5Btool_area%3Delectronics%5D)
- [Shop](https://wiki.protohaven.org/search?term=%5Btool_area%3Dshop%5D)
- [General Wood](https://wiki.protohaven.org/search?term=%5Btool_area%3Dgeneral+wood%5D)
- [Millwork](https://wiki.protohaven.org/search?term=%5Btool_area%3Dmillwork%5D)
- [Wood Lathe](https://wiki.protohaven.org/search?term=%5Btool_area%3Dwood+lathe%5D)
- [CNC Router](https://wiki.protohaven.org/search?term=%5Btool_area%3Dcnc+router%5D)
- [Sheet Metal](https://wiki.protohaven.org/search?term=%5Btool_area%3Dsheet+metal%5D)
- [Plastics](https://wiki.protohaven.org/search?term=%5Btool_area%3Dplastics%5D)
- [CNC Plasma](https://wiki.protohaven.org/search?term=%5Btool_area%3Dcnc+plasma%5D)
- [General Metals](https://wiki.protohaven.org/search?term=%5Btool_area%3Dgeneral+metals%5D)
- [Finishing](https://wiki.protohaven.org/search?term=%5Btool_area%3Dfinishing%5D)
- [Industrial Metals](https://wiki.protohaven.org/search?term=%5Btool_area%3Dindustrial+metals%5D)
- [Precision Metals](https://wiki.protohaven.org/search?term=%5Btool_area%3Dprecision+metals%5D)
- [Smithy](https://wiki.protohaven.org/search?term=%5Btool_area%3Dsmithy%5D)
- [Jewelry](https://wiki.protohaven.org/search?term=%5Btool_area%3Djewelry%5D)
# Tool guide missing?
If you clicked a link somewhere to get to this page, the tool guide likely does not exist for this tool. Contact or mention this in #documentation or #software on our Discord.
#### Tool Guide Smart Links
See this [pull request](https://github.com/protohaven/protohaven_api/pull/291) for implementation - tool guide pages are auto-linked with the URL path `/tool_tutorial/{tool_code}` based on the `tool_code` tag of the page.
Set this value based on the Tool Code field for the tool in Airtable, visible at [protohaven.org/equipment](https://wiki.protohaven.org/protohaven.org/equipment)
# 3D Printing - 3D Printers
Chopper: Prusa MK2s by Prusa 3D
Artoo, Threepio: Prusa MK3s by Prusa 3D
Kaytoo: CR10 MAX + Hemera by Creality
Clearance: Required
# Manual(s)
- [Prusa Mk2s Manual](https://www.prusa3d.com/downloads/manual/prusa3d_manual_mk2s_en.pdf)
- [Prusa Mk3s Manual](https://www.prusa3d.com/downloads/manual/prusa3d_manual_mk3s_en.pdf)
- [Creality CR10 Manual](https://www.creality.com/pages/download-cr-10-smart)
# Member Notes
[3DBenchy File](https://wiki.protohaven.org/attachments/274)
Kaytoo Print bed settings: 440x440mm. X -15mm, Y -25
# Resources
[3DPPGH Discord Server](https://discord.gg/2gC8CYFR5z "https://discord.gg/2gC8CYFR5z") - Local 3D Printing Club
[](https://wiki.protohaven.org/uploads/images/gallery/2026-04/img-0892.JPG)
# Tool Tutorial
(Link to PDF Tutorial)
# Warnings
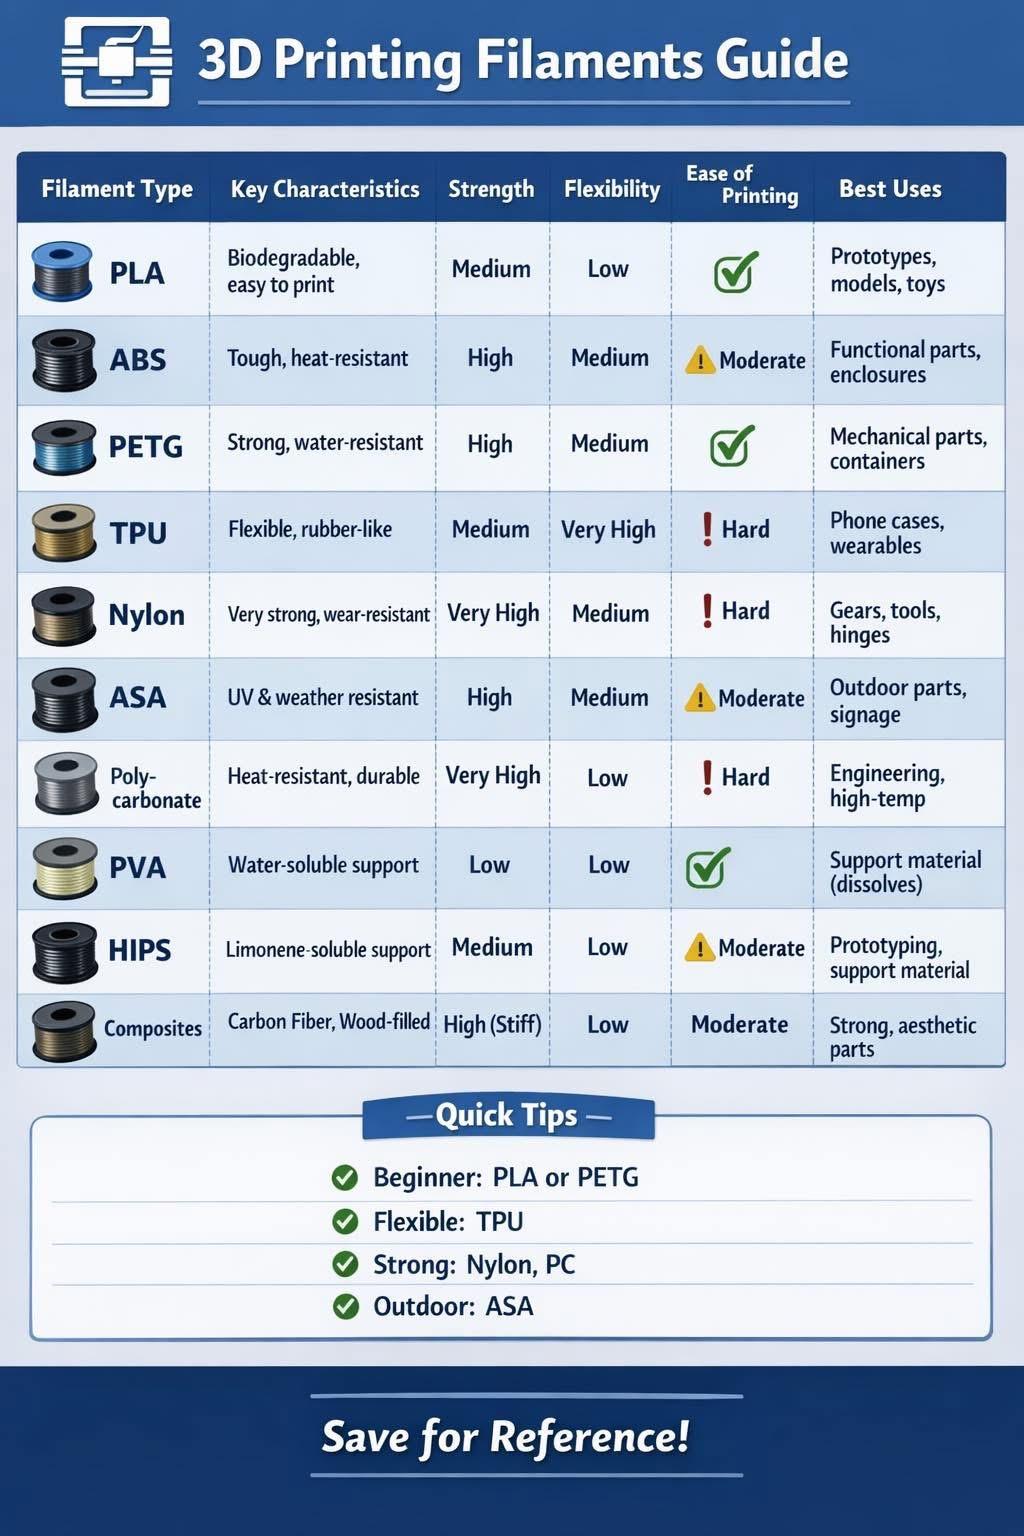
🚫Do not use unapproved filaments at Protohaven. It could lead to damage to the printer or emit particles or fumes irritating to people working in the studio.
🚫Do not use metal tools on the build sheet. There are plastic scrapers provided, do not use any metal razor blades, Spatulas, or Putty knives. If your print is very stuck, heat the build plate up slightly above the normal temp at which it should be for the filament that you are using.
🚫Do not use adhesives on any shop build sheets; do not use spray mount, masking tape, glue stick, or any other adhesives on shop build sheets. You may purchase your own build sheet if you want to make modifications.
⚠️ The hotend component on the printer operates at over 200C (400F) which will cause immediate burns if it contacts your skin
⚠️There is a small but present risk of fire when using 3D printers ensure that prints are monitored and that the additional smoke detectors are present and working.
See the Safety Section for more information.
# Tool Anatomy
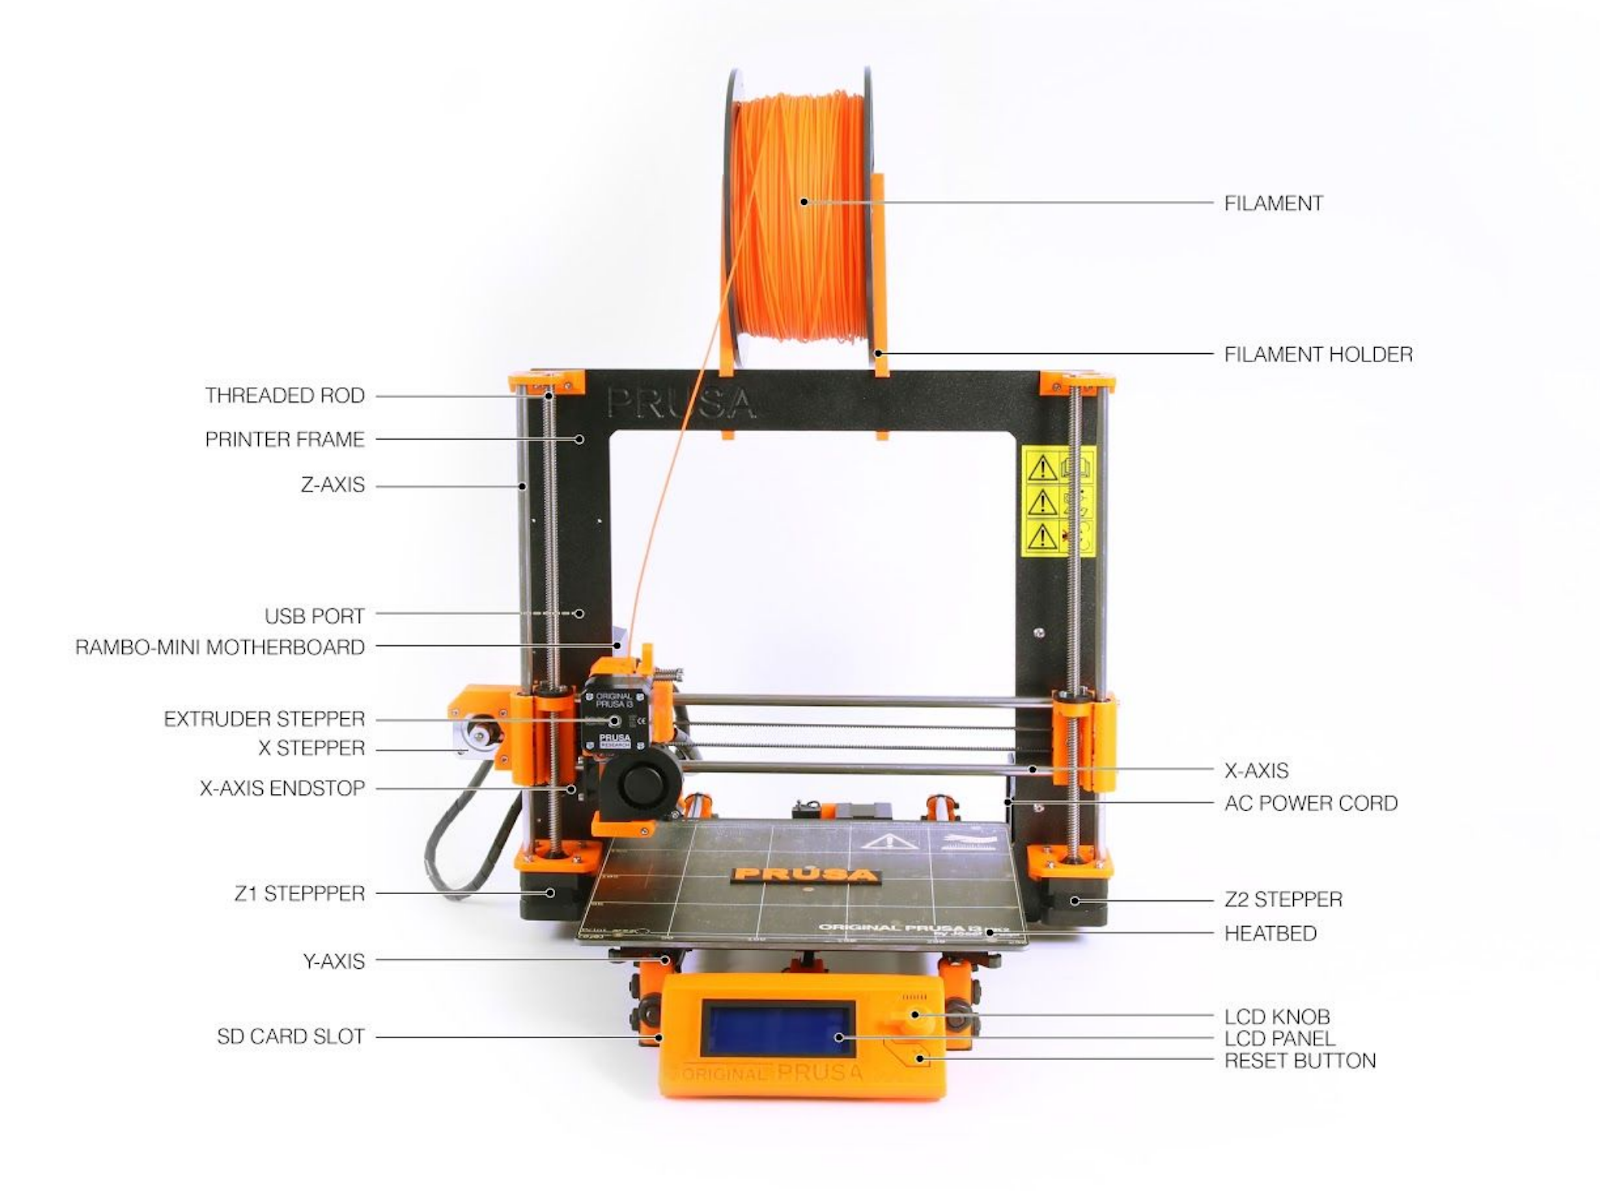
[](https://protohaven.org/wiki/_detail/tools/3d_printer_prusa_1.png?id=tools%3A3d_printer%3Astart "tools:3d_printer_prusa_1.png")
1.
Power Switch - This is located on the right side of the printer next to the label for AC Power Cord in the diagram.
2.
LCD Panel & Knob - This is how you will interface with and control the printer, adjust settings and load print jobs.
3.
Maintenance Tag - Manually tracks the usability status with Green/Yellow/Red cards (not pictured)
4.
Hotend - A component group that includes a heater element, nozzle, extruder and some cooling fans. (Contains the part labeled Extruder Stepper in the diagram above.)
5.
Heatbed - The surface that the hot end extrudes plastic onto. It consists of an aluminum plate integrated with a heating element and a PEI plastic sheet affixed to it.
6.
USB Port - Used as one method to send printing commands to the printer.
7.
SD Card Slot - Used as one method to load printing command files onto the printer.
8.
Printer control board / Motherboard- Interprets the printing commands and turns those into stepper motor movements.
9.
Stepper motors / Rods / Belts - These are the parts that move or facilitate movement of the hotend or heatbed.
For more visit the manufacturers website and user manual both linked at the top of this document.
# Tool Safety
## Burns ♨️
The Hotend heater block and nozzle run at temperatures around 200C / 400F and present a significant burn hazard during operation.
The heatbed commonly runs at 60C / 140F. This has a small burn risk but it’s something to be aware of. There is the potential for it to run up to 90C for some kinds of plastics and that is hot enough to burn skin.
Pay Attention to the temperature readings represented on the LCD to ensure the components are cool enough for you to touch if you intend on touching them.
## Fire 🔥
There is a small risk of fire when using 3D printers. In the event of a thermal runaway a component in the printer control board called a mosfet malfunctions and gets “stuck open” supplying energy to and heating the hotend well beyond what the printer is designed to handle. The heater cartridge is capable of getting hot enough to melt the insulation off the wires and start a fire. In some cases it can even melt the aluminum heather block.
To help mitigate the risk of thermal runaway printer firmware have implemented algorithms that will notice when the measured temperature does not align with the amount of energy it thinks it’s putting into the system. If the firmware sees this discrepancy it will halt the printer and sound an alarm.
## Emissions of UFP and VOC 🌫️
Operating a filament 3D printer is known to emit Ultrafine Particles (UFP) and Volatile Organic Compounds (VOC) both of which can contribute adverse health effects. The amounts and kinds of chemicals emitted varies based on the material being printed. PLA filaments approved for use at Protohaven tend to emit the fewest out of popular filament types. The compound found to be emitted from PLA is lactide and isn't known to be carcinogenic. The research makes the following recommendation:
>
*…we continue to suggest that caution should be used when operating many printer and filament combinations in enclosed or poorly ventilated spaces or without the aid of gas and particle filtration systems.*
>
> [(Emissions of Ultrafine Particles and Volatile Organic Compounds from Commercially Available Desktop Three-Dimensional Printers with Multiple Filaments)](https://pubs.acs.org/doi/10.1021/acs.est.5b04983 "https://pubs.acs.org/doi/10.1021/acs.est.5b04983")
## Crush Risk
There is also a low risk that you could pinch or crush a finger or other body part if you put it in the wrong place while the machine is operating. The motors on the printer are not very strong and likely won’t cause damage but the risk should be stated. And it’s a good practice to always stay away from motion systems for when you start using bigger things that can hurt you.
# Tool Care
## Inspection
Before you start using the printer you are expected to do an initial inspection of the printer and access its readiness for use. Consult the checklist at the end of this document as well as the detailed processes here.
**Maintenance Requests**
If you encounter any of the issues listed in the Inspection area or have any other issues with the printer not working properly
-
Update the physical Maintenance Tag at the machine
-
🟢Green can be used without issue
-
🟡Yellow can be used with caution
-
⛔Red cannot be used without hazard to either the user or the equipment
-
Record issues at [https://protohaven.org/maintenance](https://protohaven.org/maintenance "https://protohaven.org/maintenance"). This notifies our staff and volunteer maintenance crew of any issues.
### Heatbreak Fan
There are two fans on the hotend of the printer. There is a small one on the left side of the hot end this one runs once the printer starts to warm up and blows onto a heatsink attached to the heatbreak. Before powering on the printer observe the fan Dust or plastic build-up can decrease their efficiency or even damage them.
A cotton swab can also be used to clean off dust and debris from the propeller or canned air will clear the dust. Tweezers can be used to take out any plastic strands. With the printer powered off, hold the propeller of the fan to prevent it from spinning while cleaning it with canned air. Otherwise, it can get damaged. Clear away any debris that may be stuck and check that it can rotate freely.
If when the fan starts to spin ensure that it runs smoothly and quietly. If it's making a lot of noise, or if you are unable to clear debris 🟡 [file yellow maintenance request](https://protohaven.org/maintenance "https://protohaven.org/maintenance").
If the fan is not running at all or running slow when the hotend starts to heat ⛔ [file a red maintenance request](https://protohaven.org/maintenance "https://protohaven.org/maintenance") and don’t use the printer A print will likely halt when the printer detects the fan has stopped, or fail due to heat creep.
### Wire whips
There are 3 wrapped bundles of wires on the printer. Inspect each wire bundle and make sure they are unobstructed so that the printer elements can move freely. If any unusual wear is noted 🟡 [file yellow maintenance request](https://protohaven.org/maintenance "https://protohaven.org/maintenance").
### Nozzle
Inspect the nozzle and confirm that it is clean and mostly free from debris. If you find that the nozzle is dirty you can clean it with the Copper Toothbrush from the tool tray.
⚠️ WARNING: You will be working in close proximity to something that can give you a 2nd degree burn upon contact. Be careful of the Heater Block and Nozzle when doing this step.
-
Preheat the nozzle to 160C
-
Raise the Z level so that it’s about 150mm off of the bed. This will give you room to see and access the nozzle.
-
*LIGHTLY* brush the nozzle with the copper toothbrush. You will find that the debris will come off with little effort leaving the nozzle bright and shiny again.
-
Once the nozzle is clean, make sure you set the printer to cooldown.
If the nozzle has significant blobby buildup or if it is encased in plastic you will need to file a ⛔ [file a red maintenance request](https://protohaven.org/maintenance "https://protohaven.org/maintenance")
### Buildsheet
Inspect the build sheet for debris and damage. If the sheet is damaged 🟡 [file yellow maintenance request](https://protohaven.org/maintenance "https://protohaven.org/maintenance").
PLA sticks excellently to a clean PEI buildsheet. Oils from skin prevent prints from adhering to the buildsheet. A clean build plate is a happy build plate. You should always wipe down the build plate with 90% Isopropyl Alcohol before you start using the printer.
On a cool printer bed, *alcohol is flammable remember*?, squeeze out enough alcohol in the center of the build plate to create a puddle about 2 inches across. With a clean paper towel wipe from the center to the edges working in a circle, each time picking up a little alcohol from the puddle.
Once you’ve swept all of the oils and debris away from the center to the edge of the bed then you can use a second towel to wipe and dry the bed.
Once it is clean keep your grimy fingers off of the build plate. 😁
You do not need to clean the plate between prints as long as you don’t touch the plate when removing the previous print.
🚫**Do not use Acetone**🚫
Acetone is to be used by the maintenance group only on rare occasions. It can be used to refresh a PEI surface by removing oxidation, but repeated use will cause the PEI to get brittle and crack, shortening its life. It should not be needed more than twice a year if bed adhesion becomes problematic.
### Motion Test
Once the printer is on use the knob and the LCD to run a homing sequence if it does not behave as expected ⛔ [file a red maintenance request](https://protohaven.org/maintenance "https://protohaven.org/maintenance")
## Permitted Filament Material
The following Materials are permitted for use in the Protohaven 3D printers:
-
✅PLA
-
✅PLA+
-
✅ABS
-
✅PETG
-
✅TPU
**The following materials are not permitted:**
-
🚫Abrasive Filaments including:
-
🚫 Glow in the Dark PLA
-
🚫Wood-Fill or Bronze-Fill PLA
- 🚫Carbon fiber or glass fiber reinforced
### PLA / PLA+
The easiest filament material to work with and is recommended for all users unless there is a requirement that makes one of the other materials a better choice.
🚫 Abrasive PLA like glow in the dark filaments or ones with filler or reinforcements will contribute to quicker wear and replacement of the nozzle. If you wish to print with an abrasive filament speak to an Instructor and we will see what we can do in so far as providing the ability to print with a hardened nozzle.
### PETG
PETG is a little more challenging than PLA but it offers more durability. It must be printed on a textured print bed. It adheres too well to the smooth print beds. PETG absorbs moisture from the air, if you are getting stinging or blobs, the filament is probably wet. We currently do not have a way to dry filament in the shop. Use caution with toaster ovens or home ovens as they do not maintain a constant temperature.
### ABS
ABS is great for projects that require even more durability. It produces an oder when printing and should not be used in the shop unless your parts need the features that it has.
### TPU
TPU is great for printing rubber gaskets and o-rings with. It is extremely durable but is also challenging to print with. It is extremely hydroscopic and will rapidly absorb moisture from the air. That will cause a host of printing issues, including stringing and failed prints.
## Changing Nozzles
The printer is installed with a 0.4mm standard nozzle from Prusa. If you would like to see different diameters or the ability to print with abrasive material lets discuss on Discord.
🚫 **Members are not permitted to change the nozzle.**
Proper installation of a nozzle requires working in close proximity to very hot parts. And require a specific technique to set the appropriate torque. Too loose and the nozzle will leak out of the heater block potentially damaging the hot end. Overtightening could strip threads on the heater block or break the neck of the thermal tube disabling the printer.
## Tools at the printers
-
Squeeze / Spray Bottle of 90% Isopropyl Alcohol
-
Copper Bristle Toothbrush
-
Plastic Blade Scraper
-
3D Printed removal wedges
-
Deburring Knife
-
Flush Cut Trimmers
-
Needle Nose Pliers
-
SD Card
-
USB SD Card Reader
# Printer Operation
## Model Selection
This document isn’t going to get into too much details about models beyond the fact that the STL file format is by far the most common file format to use when taking a digital 3D model and preparing it for 3D printing. The rest of the tutorial assumes STL files.
For more information check out the 3D Printing 101 class.
## Preparing Gcode aka Slicing
### Slicer Setup
The design computers will all have a recent version of PrusaSlicer installed; this is the recommended slicer for people who don’t have preferred requirements. It’s easy to get going on PrusaSlicer since it’s default settings are tested and maintained by the same company who makes the printer.
You can skip to the next section if you don’t need to install and configure PrusaSlicer.
When setting up PrusaSlicer it will set up a wizard you will want to select the MK2S with the 0.4mm nozzle option. These Match the printer available.
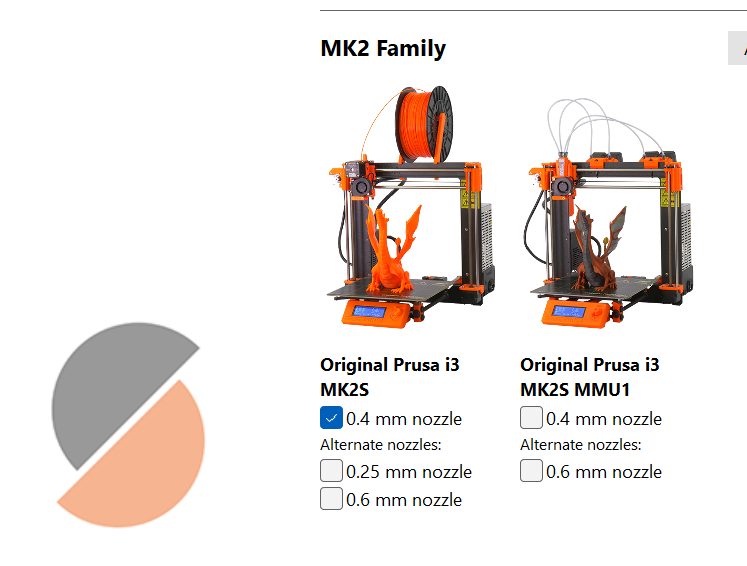
When you get to Filiment selection you can look for what you’re using. Otherwise just use the pre-selected Generic PLA option.
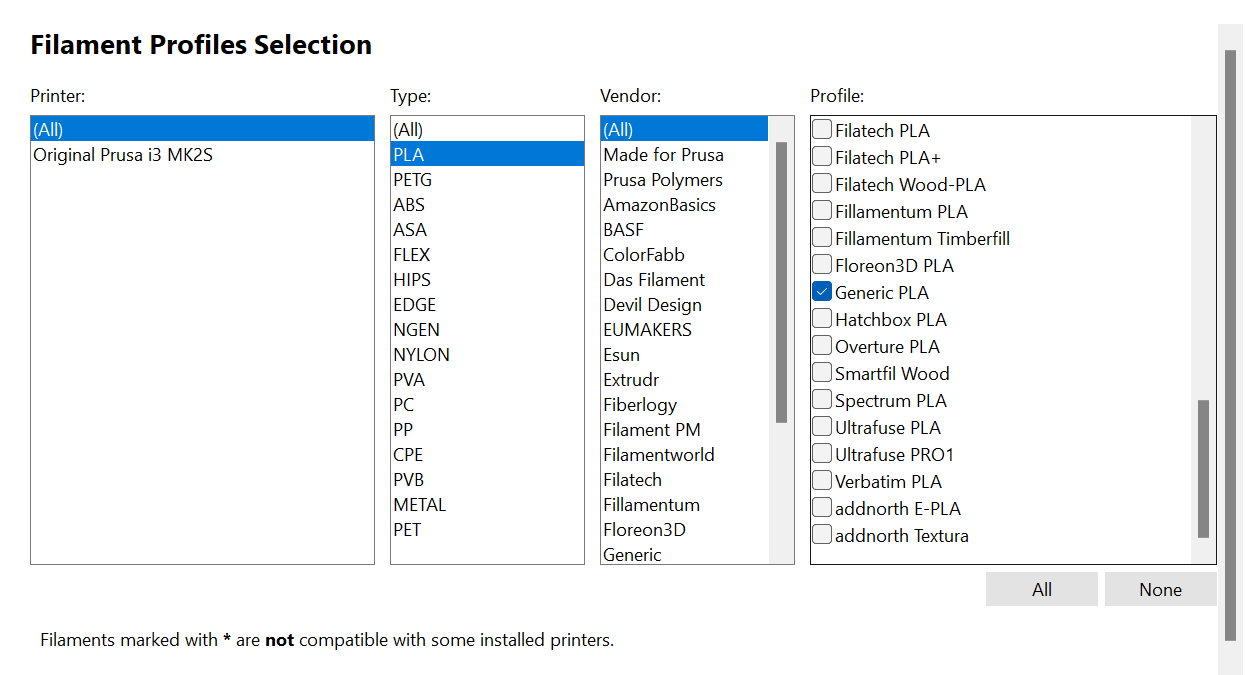
Finish up the install wizard and continue on to the sections below.
### Slicer Use
This is the step that turns a digital 3D model into CNC instructructions so that the printer can make it.
When you get to the PrusaSlicer UI you will find that you can pick your settings on the right side Use the 0.20mm NORMAL setting while you’re still new. It’s perfectly suitable for most models with a good balance between print time and detail reproduction.
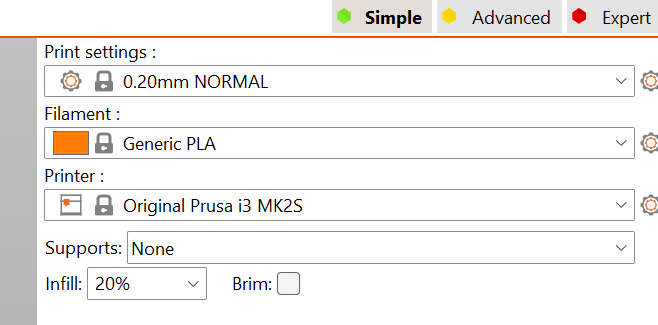
The nice thing about using PrusaSlicer with a Prusa Printer is that it comes with optimized settings tested by Prusa Research and they should be very reliable.
For the Filimanet however we should check the temperature settings. Click on the gear icon beside “Generic PLA” and inspect the temperatures used:

Those might be a little hot from some filaments. Check out what the manufacturer suggests on the side of the spool. 180-220C are all valid ranges for various brands or colors of PLA; you should have little to no need to stray from that range.
🚫DO NOT try to print over 240C. It will cause increased wear on the printer.
60C for the bed is a universal setting for PLA and won’t need to be changed.
Next Import your model into the slicer with the add button.

Then click preview

This will have the slicer “slice” the model and show you a preview of the layers and paths the printer will take.
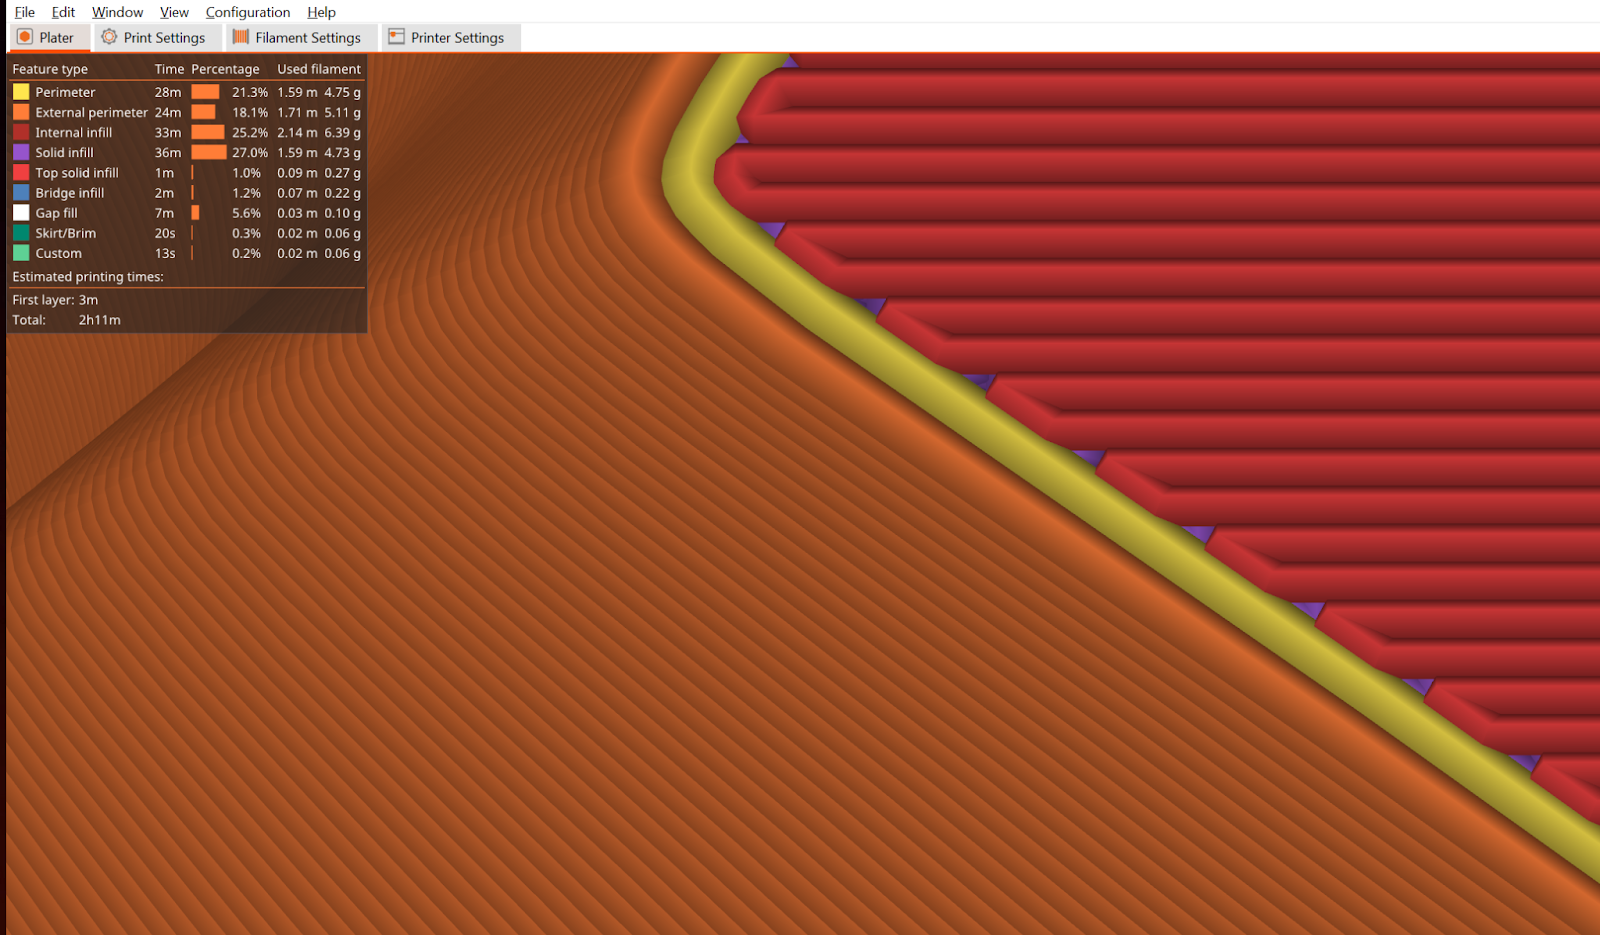
*Note: If your model has overhangs it will show up in the preview. You may need to print with supports when physics comes into play in those overhangs and you’re trying to make plastic float on thin air.*
Make sure you check out the estimated printing time to ensure you have the printer reserved for long enough.
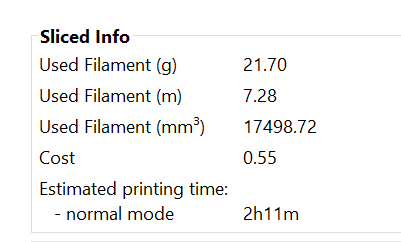
Click Export Gcode in PrusaSlicer and save it to a file.
## Transferring Gcode to Printer
Now that you have the gcode that will tell the printer how to move to make your print you need to transfer it to the printer. There are a few options but this document will start with the basic one of using a SD card and having the printer read the file from the card.
The computer next to the printer has a SD card reader plugged into it if not there will be one in your tools tray. Insert an SD card into the reader. Click Export Gcode in Prusa Slicer and save it to the SD Card, currently the F: Drive.
Once you have copied the file remove the SD card from the card reader and insert it into the printer. The slot is on the left side of the LCD housing, The card goes in **label facing away from you.**
## Loading Filament
If you need to load or change filament follow these directions. You will be able to preheat the hot end and load and unload filament via options in the menu on the LCD Screen.
-
Heat the hotend to a temp that matches the filament that you are using.
-
Snip the new filament with the flush cut snips to a 45 degree angle.
-
Load the new filament and extrude around 100mm to ensure that it is loaded and has flushed out the remaining previous filament from the nozzle.
- If filament refuses to load, it is possible that the previous user was using a higher temp filament, pick a higher temp and see if you can get it to load. Do not allow it to linger at the higher temp for very long, the lower temp filament can melt in the extruder and cause a mess.
## Start Print
When you insert the SD card into the printer it will detect it and update the LCD display to the Print from SD Menu. Navigate to your file and start the print.
## Observe the first layer
Ensuring your first layer is correct is a huge part of achieving a successful print. Observing and adjusting how well your first layer is going down is important to protect the build surface if the nozzle is too low and digging into the PEI sheet or too high and you won't have enough stick for a successful print.
If you find that the nozzle is digging into the build sheet SMASH THAT RESET BUTTON to stop the print and minimize the damage.
It’s also important that you have the right amount of squish in that first layer. This is also one of those skills that comes with practice but you’re looking to make sure the plastic is sticking to the bed and has a flat top and is oval in shape. [Prusa Knowledgebase for first layer calibraration.](https://help.prusa3d.com/article/first-layer-calibration-i3_112364 "https://help.prusa3d.com/article/first-layer-calibration-i3_112364")
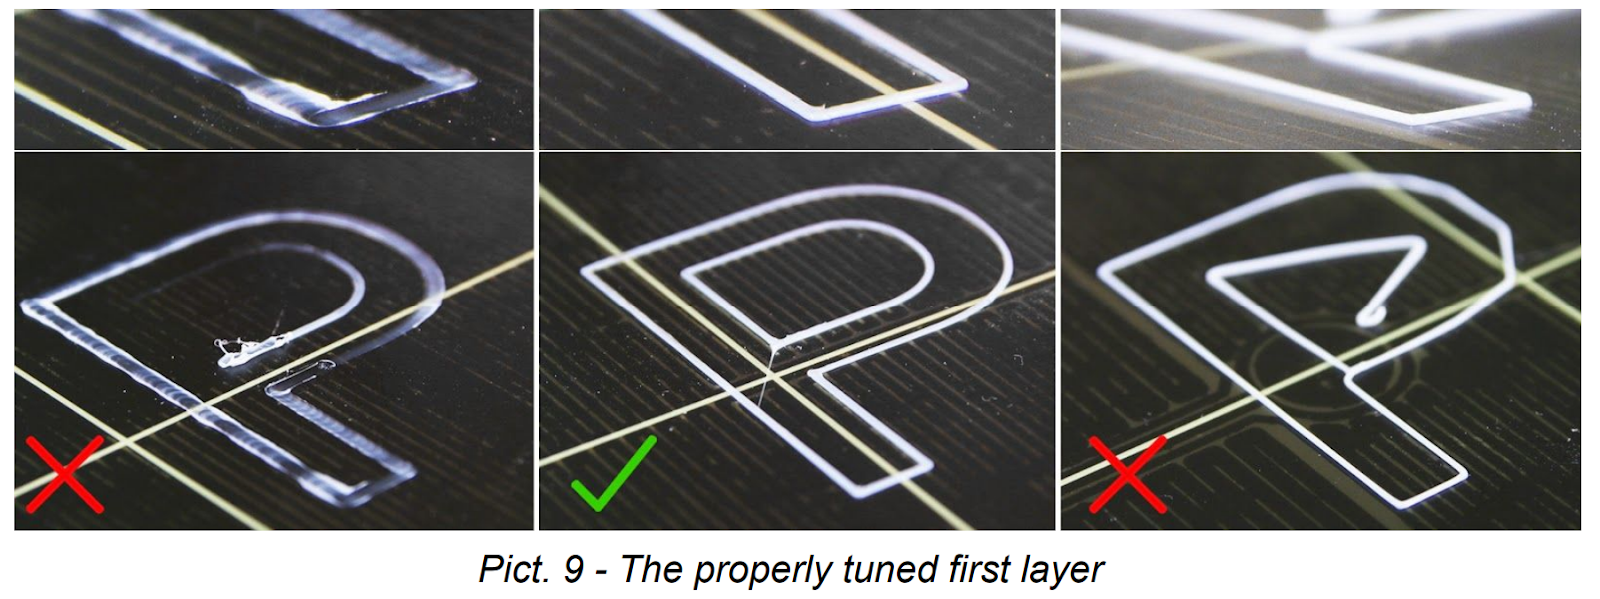
You can also adjust the z offset live during the first layer to make small adjustments to the squish. Check out this video for an example for [Live Adjust Z](https://youtu.be/GE-lrRbU124?t=522 "https://youtu.be/GE-lrRbU124?t=522") or there is more in the manual.
The Z numbers can be a little confusing, they are negative, so the smaller the value, the further the print head is from the bed. -0.5 is further from the bed than -0.6.
## [](https://wiki.protohaven.org/uploads/images/gallery/2025-04/screenshot-2025-04-20-at-7-12-03-pm.png)
## Overnight prints
3d printing is the only place in the shop where overnight/unsupervised operation is allowed. Watching the first few layers go down is mandatory. After that, the print 'should' be ok but there is risk involved. Many things can cause a failed 3d print and doing overnight prints is not recommended until you become more experienced at it. At best, the pint can fail and cause some spaghetti. At worst, the blob of death will encase the print head and destroy parts. By doing an overnight print, you are accepting responsibly for broken parts.
## Removing prints
When the print finishes. You need to be patient. I know the desire to get the print off and the next one started. But if you wait 5-8 minutes for the bed to cool, the expansion differential will release the print from the bed. This will keep you from getting your finger grease all over the bed. See above.
There is a plastic scraper tool and 3D printed wedges that you can use to help lift the print off of the bed. Don’t use a metal putty knife, just wait for the bed to cool and the print will release.
Once cool, the printers with removable metal build plates can have the plate removed and flexed to remove the print. The other printers will need the print removed by a plastic scraper.
## Cleanup
When you’re done using the printer please consider the following:
-
⚠️Ensure that both the Hot End and the Bed have their heaters off. It could be on if you did some manual operations during your use.
-
Clean all skirting and debris from the build plate.
-
Dispose of waste and clear area
-
Remove your file from the Tool Tray SD Card. The SD cards should not be relied upon to store files long term.
## Troubleshooting
### Bed Adhesion Problems
This is where either your first layer does not stick or that your print becomes detached from the bed before your print is finished. Sometimes this makes some beautiful pieces of art called Spaghetti.
-
Ensure you have a clean build plate, by following the above listed handling and cleaning directions
-
Ensure the first layer “squish” looks good and adjust the z offset for the bed leveling as described above.
-
If your model just does not have a surface area in contact with the bed you can in the slicer settings add a brim. This will increase surface area but the brim will need to be manually removed/cut away after printing.
### Filament Jams
This is where the printer keeps moving but it’s stopped extruding plastic. Sometimes accompanied by an awful grinding noise from the extruder gear chomping on the filament.
1\. There could be dirt or debris in the hot end.
-
Run through about 30cm/12 inches of cleaning filament if it’s not completely clogged.
-
Do a “Cold Pull” load in some filament, let the nozzle cool down to at least 120C. Then heat it back up to 200C all the while gently pulling on the filament with some pliers. IF YOU ARE CAUSING THE PRINTER TO BEND YOU’RE PULLING TOO HARD. When the hotend heats up enough to release it often will pull out the gunk causing your problems. If you do it well you will see the shape of the inside of the nozzle at the end of the cold pull.
2\. Your Retraction settings in the slicer profile you used are too high. Make sure your retraction settings are no more than 1mm.
### Printer Stops Mid-print
-
Make sure the power didn’t go out :)
-
Make sure your SD Card is healthy or try a different SD card.
### Thermal Runaway Fault
If the printer halts with a thermal runaway fault the printer will need to be looked at by a tech. Mark it as red and file a maintenance request. It could be something as little as a breeze on the heater block that caused it to trip, but it could also be something dangerous like a faulty heater cartridge or broken thermistor either of which could lead to fire.
### Incorrect Bed Leveling
If the Automatic Bed Leveling has a glitch it could cause the nozzle’s first layer to be set too low and drag it across the build sheet. This could scratch, tear and otherwise ruin the surface so that it will be unsuitable for printing.
Always monitor the first layer of your print to ensure good layer height and that the printer isn’t wrecking itself.
# Printing Checklist
-
Inspection and Power On
-
Heartbreak Fan does not have excessive dust buildup. (Inspect with printer power off)
-
Power on and perform a homing sequence.
-
Nozzle is clean and free from debris.
-
Bed wires are free from obstruction.
-
Hotend wires are free from obstruction.
-
Smoke Detector is present and working.
-
Clean Build Plate
-
Wipe down build plate with Isopropyl Alcohol when still cool.
-
Avoid touching PEI surface with bare hands.
-
Load and test filament
-
Preheat and unload old filament if necessary.
-
Load and run approx 100mm of desired filament.
-
Cooldown hotend.
-
Bed Leveling and First Layer
-
Run manual bed leveling sequence.
-
Observe the first layer of print for proper printing.
-
Cleanup
-
⚠️Ensure heaters are off⚠️
-
Inspect nozzle for debris
-
Once the hotend is below 130C you can turn off the printer.
-
Ensure the build plate is cleared.
-
Clean up work area
-
Ensure Tool Tray is complete
-
Return Tool Tray
# Filament Dryer
#### The filament dryer can be used to remove moisture from you filament to produce better prints.
- Maximum temperature of dryer is 90ºC
- Temperature can vary +/- 5ºC but tends to run hotter
- Rotate button should be pressed to increase airflow
- Suggested drying temperatures and times are in the chart below
- Check with your filament manufacturer for specific recommendations for drying.
[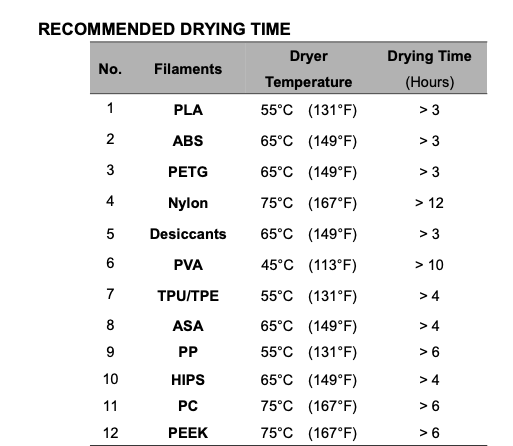](https://wiki.protohaven.org/uploads/images/gallery/2026-09/recommended-drying-times.png)
# Air Tools - Air Compressor
Eaton PRS0070003
Clearance: everybody can use the air, but only techs and maintenance crew should touch the machine.
# Manual(s)
*Manuals and other reference materials from the manufacturer or other sources.*
-
PLC Manual: [PDF](https://images.thdstatic.com/catalog/pdfImages/d9/d923bf09-945b-4933-8326-0271501dc40b.pdf "https://images.thdstatic.com/catalog/pdfImages/d9/d923bf09-945b-4933-8326-0271501dc40b.pdf") / Local PDF: [logik-25\_s.pdf](https://wiki.protohaven.org/attachments/586)
-
Motor Manual: [PDF](https://tazewellpumps.com/wp-content/uploads/2013/07/HYUNDAI_PARTS_AND_MAINTENANCE_MANUAL.pdf "https://tazewellpumps.com/wp-content/uploads/2013/07/HYUNDAI_PARTS_AND_MAINTENANCE_MANUAL.pdf") / Local PDF: [HYUNDAI\_PARTS\_AND\_MAINTENANCE\_MANUAL.pdf](https://wiki.protohaven.org/attachments/584)
# Member Notes
# Resources
*3d Print file for the air filter cages: [Air Comp Filter.step](https://wiki.protohaven.org/attachments/565)*
# Tool Tutorial
(Link to PDF Tool Tutorial)
## Pressures and Regulators
⛔ Do not adjust pressures of regulators or the air compressor. Start a conversation on Discord or [file a maintenance request](https://www.protohaven.org/maintenance/ "https://www.protohaven.org/maintenance/") if you have a need not addressed below.
There is a regulator manifold on the outlet of the tank that has 3 regulators. We found that there are needs that require supplying at 3 different pressures. Also adding this manifold allows us to store higher pressure air in the tank reducing the duty cycle of the compressor and buffering more air to cover high demand bursts.
Below is the current set pressures and flow rates.
The math gets tricky from hare, for example if the Plasma was cutting a long job and the sand blaster was at almost a full duty cycle, and someone was powder coating the consumption would outrun the compressor. But the tank would have a buffer before the tank drained to below 135 PSI starving out the plasma. How long would that take? Calculus knows. I don’t.
## Usage
🚫 Do not open the compressor cabinet without following the appropriate power lockout procedures specified below. The machine can turn on automatically and could cause serious injury.
🚫 Do not bypass or ignore Lockout Tagout procedures to energize the equipment.
⚠️To avoid fires, keep all flammable, combustible, poisonous and noxious materials away from operating area. Make sure there are no oily rags, trash, leaves, litter or other combustible materials in the operating area. Keep suitable, fully charged fire extinguishers nearby when servicing and operating the compressor.
⚠️Wear appropriate eye and hearing protection before using air tools.
### Controls
⛔ Members shouldn’t need to adjust any settings on the air compressor, [Fill out a maintenance request](https://www.protohaven.org/maintenance/ "https://www.protohaven.org/maintenance/") if you would like to have a change made.
### Tank
-
120 Gallon (19.26 cubic feet)
-
Max Allowable Working Pressure 200PSI @ 400F
-
Not to operate below 20F
-
Inspected and certified in 2012
I don’t think there is a regulation that these tanks have to be inspected. They would need to be in NY but not California PA seems to have no rules like those states.
### Air Paths and Routing
The Air compressor connects to the storage tank. From the tank there is a ¾” pipe to the regulator manifold. There are 3 regulators. The first one connected to the hard piping shop air. The second goes to the sand blaster, and the third goes to the cnc plasma.
The manifold has a shop air coupler on it. This connected the hose for the woodshop which is hung on a hook by the CNC router.
The hard pipe coupler behind the plasma table has a 4:1 manifold on it. 2 hoses are connected to it. One goes to a hook in the welding area and one to a hook in the machine shop.
The Hard pipe traverses the shop overhead and there are two more couplers connected to hoses on hooks. One in the plastics area and one for the powder coating booth.
The hard pipe has several roughed out runs that are currently incomplete. That can be used to extend hard piping to the woodshop. Metalshop, spray booth, and the studio side of the woodshop.
## Troubleshooting
[Page 34](https://www.manualslib.com/manual/1571102/Eaton-Prs0100001.html?page=34#manual "https://www.manualslib.com/manual/1571102/Eaton-Prs0100001.html?page=34#manual") of the manual has a troubleshooting guide.
## Maintenance
TODO - sort into maintenance log
[Maintenance History](https://airtable.com/shrb58zUuDBmcmTNQ/tblZbQcalfrvUiNM6?filter_Equipment+Record=Air+Compressor "https://airtable.com/shrb58zUuDBmcmTNQ/tblZbQcalfrvUiNM6?filter_Equipment+Record=Air+Compressor")
⚠️ AUTHORIZED MAINTENANCE GROUP ONLY ⚠️
-
Air Filter Last Changed: Feb 23, 2023
-
Oil Filter Last Changed: July 10, 2022
-
Separator Filter Last Changed: July 10, 2022
-
Belts last changed: November 15, 2022
-
Oil Last Changed: Feb 23, 2023
If you are part of the maintenance group please log on to the #maintenance channel of our Discord server to:
-
Perform a Maintenance Action
-
Request a Maintenance Purchase
-
Review complete Maintenance Logs for each machine
-
Generally chit-chat about maintenance
### Warnings
🚫Do not use the E-Stop for routine stopping of the compressor. Use the control panel to stop the compressor before energizing equipment..
⚠️This unit can automatically start! Before attempting any repairs or adjustments, disconnect, lock out and verify all power is off to all circuits to minimize the possibility of accidental startup or operation. This is especially important for remotely controlled compressors. Serious injury could result.
⚠️ *When cleaning, use air pressure less than 30 psig (2.1bar)*. Also use effective chip guarding and personal protective equipment per OSHA standard 29 CFR 1910.242 (b) Tools The following should be in a Maintenance tool kit for the printer
-
Cabinet Key
-
Oil Funnel
-
ShopVac
-
Air Hose
-
Crescent Wrench for oil fill port
### Replacement Parts List
-
Compressor Oil: [Oil003](https://eatoncompressor.com/product/air-compressor-oil-synthetic-rotary-screw-oil003/ "https://eatoncompressor.com/product/air-compressor-oil-synthetic-rotary-screw-oil003/") Our compressor has a 1.3 gallon capacity
-
There is almost 2 gallons in the Machine Shop Cabinet
-
Air Intake Filter: [Filter006](https://eatoncompressor.com/product/air-compressor-filter-rotary-screw-filter006/ "https://eatoncompressor.com/product/air-compressor-filter-rotary-screw-filter006/")
### Circuit and Breaker Information
The Air Compressor is plugged into a receptacle on the left side of the air tank. The plug can be unplugged when you need to de-energize the air compressor. The circuit for the air compressor is in the shop electric panel which is located behind the plasma table. The circuit breaker is a 3 phase 30A circuit in sports 10,12,14
### Lockout Tagout Procedure
In order to have safe maintenance please follow these steps when opening the access panels on the air compressor.
1.
Stop the compressor with the red button on the control panel. Don’t use the e-stop.
2.
Unplug compressor from wall receptacle.
3.
Put a lockout tag on the power plug.
### Checking and Filling Oil
There is a window on the back right side of the machine, with a light you will be able to observe the oil level in a sight glass. The machine needs to be stopped for at least 10 minutes before checking the oil level.
If the oil is below halfway it needs to be topped off. Turn off the machine with the above approved lockout procedure. Use the cabinet key to take off the right side panel.
When the machine is stopped it has a valve to automatically unload pressure from this part of the system. You don’t have to worry about pressure in the sump if the machine is stopped and the unload valve is working properly
On the oil sump you will see a 1” hex nut fill cap. Use a crescent wrench to remove this cap. Use the funnel so that oil is more than half but not more than ¾ full in the sight glass. Put the cap back on, attach the side of the cabinet and turn the compressor back on.
### Checking and Draining Moisture
-
Use hearing protection it can be very loud.
-
There is a drain valve on the pipe manifold below the regulators. Open the valve and purge any water that has accumulated.
-
On the bottom of the tank there is a second valve, purge any water that has accumulated in the bottom of the tank.
-
If there is more than a small mist of moisture file a tool report that the air compressor dryer may not be working.
### Maintenance Schedule
TODO - sort into maintenance books
-
Daily
-
Check that the compressor area is free of all flammable, combustible, poisonous and noxious materials in the operating area.
-
Check for proper oil level
-
Drain any condensate from manifold, tank, receiver and traps
-
Check for any unusual noise or vibration
-
Check that the fire extinguisher is nearby and charged.
-
Weekly
-
Clean air filter
-
Clean all external parts of compressor and dryer
-
Check for unusual noises or vibration
-
Monthly
-
Inspect the entire air system for leaks.
-
Inspect dust accumulation on radiator fan and clean if necessary.
-
Inspect oil for contamination and change if necessary
-
Check belt tension and wear
-
Belt tension on each individual belt in the center of each pulley, and should have ¼“deflection up and ¼” deflection down, for ½“ total.
-
6 Months
-
Inspect all Piping
-
Clean Sight Glass
-
Check and Tighten all electrical connections
-
Yearly
-
Change oil separator filter every 4000 hours
-
Changes oil filter every 4000 hours
-
Change oil
-
Clean Suction Valve
## Appendix
### Calculating Consumption SCFM for any operating pressure
[https://www.youtube.com/watch?v=Ky\_5SDoKkgc](https://www.youtube.com/watch?v=Ky_5SDoKkgc "https://www.youtube.com/watch?v=Ky_5SDoKkgc")
Protohaven is 915 ft above Sea Level with a resulting atmospheric pressure of 14.2 PSI
Operating SCFM = Rated SCFM Operating Pressure + 14.2Rated Pressure + 14.2
For Supply SCFM flip the division problem putting rated pressure as the numerator.
-
[PSI on copper pipes](https://www.ehow.com/info_12157484_pressure-limits-copper-pipe.html "https://www.ehow.com/info_12157484_pressure-limits-copper-pipe.html")
-
[Compressed Air Tanks Explained - Sizing, Ratings, Portable Vs Stationary - About Air Compressors.com (about-air-compressors.com)](https://www.about-air-compressors.com/air-tanks/ "https://www.about-air-compressors.com/air-tanks/")
**t = V (p1-p2)/C pa**
Where:
-
V = volume of the receiver tank (cubic feet)
-
t = time for the receiver tank to go from upper to lower pressure limits (sec/min)
-
C = free air needed ([scfm](https://www.about-air-compressors.com/difference-between-scfm-for-tools-and-compressors/ "https://www.about-air-compressors.com/difference-between-scfm-for-tools-and-compressors/"))
-
pa = atmospheric pressure (14.696 psia)
-
p1 = maximum tank pressure (psia)
-
p2 = minimum tank pressure (psia)
This formula can then be rearranged to give you an approximate ideal volume of your receiver tank:
**V = t C Pa/(p1-p2)**
t=19.26 (133/100)/25 14.2
# Backup (Forge) Air Compressor
**This air compressor has been modified** - a brass tee was installed between the tank and the check valve to allow it to act as a buffer tank for the forge's power hammer.
- Model: Central Pneumatic 61489, 2HP
- Capacity: 29 gal
- Pump oil: 11.4oz of SAE 40 is required
- Factory set points: on at 120PSI, off at 150PSI
- Manual: [central\_pneumatic\_61489.pdf](https://wiki.protohaven.org/attachments/594)
### Switching to the backup compressor
This guide assumes that the [semi-annual maintenance on the compressor](https://wiki.protohaven.org/books/maintenance-admin-required/page/backup-air-compressor-maintenance-6-months) has been performed. If it's been more than a year between servicing, it's recommended to do those maintenance steps before using the compressor as a backup.
These steps have never been performed. Read these instructions fully and very carefully think about missing steps before proceeding. Document everything you learn.
#### 1. Check oil
Before running the compressor, check the sight glass to make sure there's oil in the compressor. Only the middle circle around the red dot shows the oil level - NOT the rest of the hexagonal clear plug. If you can't get a clear read, have someone (carefully) tilt the compressor forwards and then back again and see if the level moves. If you still can't get a clear read, drain and refill the oil tank as per the [semi-annual maintenance instructions](https://wiki.protohaven.org/books/maintenance-admin-required/page/backup-air-compressor-maintenance-6-months).
#### 2. Switch valves
As of 2026-07-09, the black air compressor is downstream of the "Shop 80 PSI" line from the main compressor. The regulator is not made for back-flow, and must be isolated by turning the ball valve immediately downstream of it.
[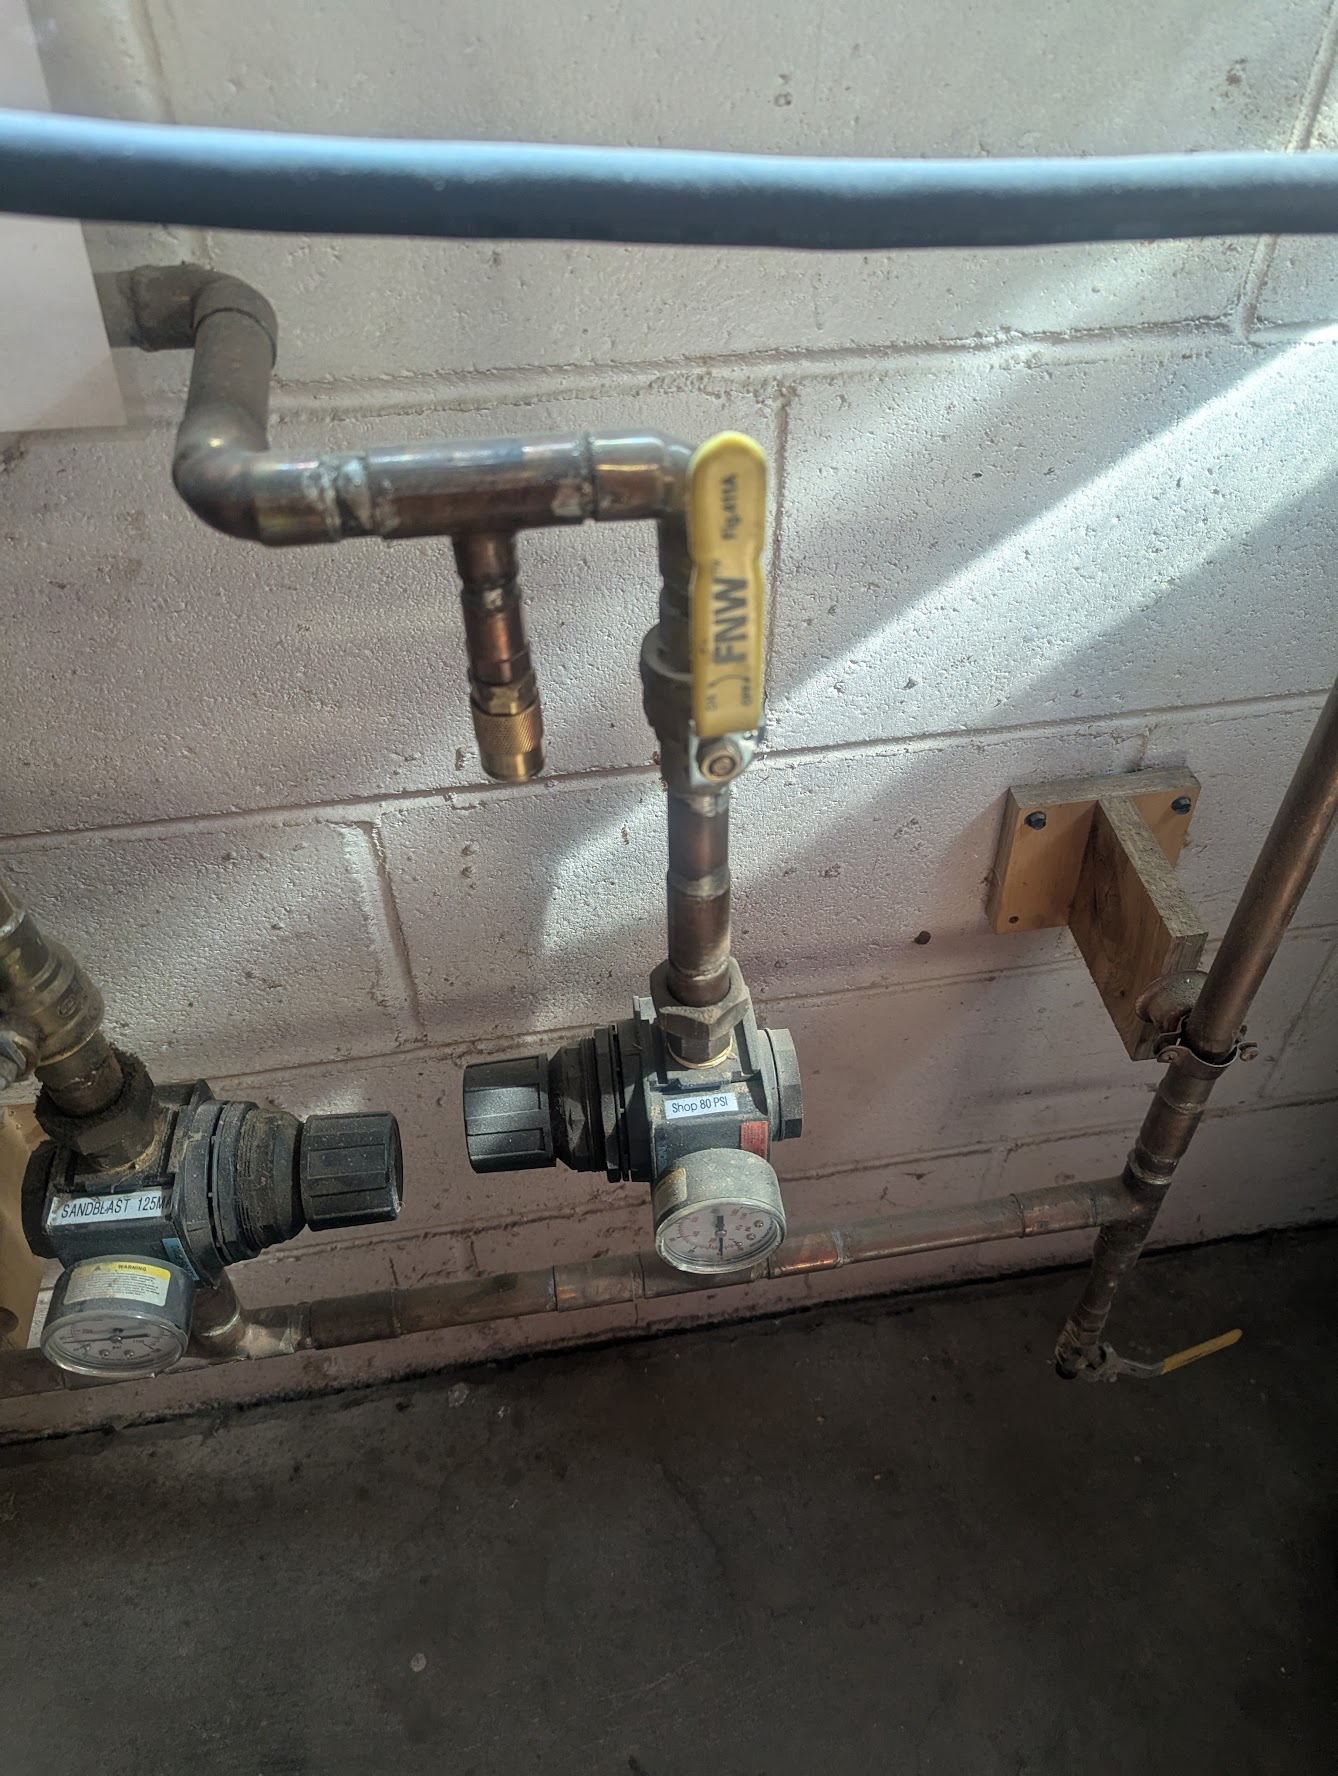](https://wiki.protohaven.org/uploads/images/gallery/2026-07/image.png)
Speculative note assuming we've added a push connect fitting upstream of the isolation valve by the FORGE air compressor:
The forge compressor swings by 30 PSI when in operation, so it's best to use a push-connect-to-push-connect hose from the compressor's "normal" regulated outlet into the push connector on the copper line. This way, we can smooth out the pressure swings and deliver consistent pressure to tools.
#### 3. Set expectations
The backup compressor is less powerful significantly further away from the majority of shop tools. It may take longer to replenish air, and as a result some tools (e.g. the sandblaster) will under-perform compared to when the main air compressor is online.
Be sure to announce this (email + Discord) and post a notice at the front desk.
### Returning to normal (default off)
1. Turn the compressor off, and make sure to reattach any lockout systems used on the black compressor so that it cannot accidentally be plugged in while the other compressor is running.
2. Carefully undo all valve changes from above, in reverse order. The final state should be:
1. Forge air compressor OFF
2. Forge air compressor's "normal" regulated outlet is walked all the way out and no hose is connected
3. Ball valve of the forge compressor's copper line is OPEN
4. Ball valve just downstream of the "Shop 80 PSI" regulator is OPEN
5. Yellow air compressor is ON
# Air Tools - Brad Nailer
# Manual(s)
*Manuals and other reference materials from the manufacturer or other sources.*
- Model: [Harbor Freight 18 gauge Air Nailer/Pneumatic Stapler](https://www.harborfreight.com/18-gauge-2-in-1-air-nailerstapler-68019.html)
- Manufacturer: [Harbor Freight](https://www.harborfreight.com)
- Manual: [brad\_nailer-harbor\_freight-68019.pdf](https://wiki.protohaven.org/attachments/177)
# Member Notes
# Resources
*Where to obtain materials, consumables, and tooling.*
# Tool Tutorial
(Link to PDF Tool Tutorial)
# Requirements
Brad Nailer can be used without a clearance.
# Warnings
🚫 Never connect to an air source that is capable of exceeding 200 PSI.
🚫 Do not fire fastener on top of another fastener, into surfaces too hard to penetrate, or too close to the edge of the workpiece.
🚫 Do not hold tool near body while firing. Tool recoil can cause injury.
⚠️ Wear appropriate PPE.
⚠️ Remove finger from the trigger when not driving fasteners.
⚠️ Disconnect the tool from the air supply when a. Unattended, b. Performing any maintenance or repair, c. Clearing a jam, d. Moving the tool to a new location.
See the [Safety Section](https://www.protohaven.org/wiki/tools/hand_tools/brad_nailer#tool-safety "tools:hand_tools:brad_nailer ↵") for more information.
# Tool Anatomy
[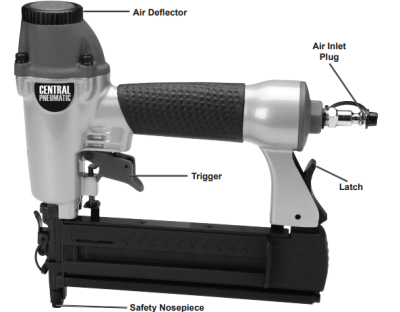](https://www.protohaven.org/wiki/_detail/tools/nailer_brad.png?id=tools%3Ahand_tools%3Abrad_nailer "tools:nailer_brad.png")
\* **Air Deflector**
\* **Air Inlet Plug** - This is attached to the hose connected to the compressor.
\* **Latch** - This is pressed to load or unload brads in the magazine (horizontal black bar).
\* **Trigger** - This is pressed to fire a brad when the safety nosepiece is pressed against an object.
\* **Safety Nosepiece** - Also called the workpiece contact, the Safety Nosepiece helps prevent the tool from firing unless it is pressed against an object.
For more visit the [manufacturers website](https://www.harborfreight.com/ "https://www.harborfreight.com/") and [user manual](https://manuals.harborfreight.com/manuals/68000-68999/68019.pdf "https://manuals.harborfreight.com/manuals/68000-68999/68019.pdf").
# Tool Safety
### Personal Protective Equipment
⚠️ Safety glasses, hearing protection, heavy duty gloves, and closed-toed shoes are required.
⚠️ All hair, clothing and accessories should be secured close to the body.
### Common Hazards
**Unintentional Firing**
-
Be sure the trigger is released before connecting to the air supply.
-
Keep fingers away from trigger when not firing.
-
Always assume the tool contains fasteners.
**Balance and Tool Control**
-
Do not overreach. Keep proper footing and balance at all times.
-
Do not attach the hose or tool to your body.
-
Use clamps or another practical way to secure and support the workpiece to a stable platform. Holding the work by hand or against the body is unstable and can lead to loss of control.
# Tool Care
## Care
If an automatic oiler system is not used, add a few drops of Pneumatic Tool Oil into the airline connection before operation. Add a few more drops after each hour of continual use.
**BEFORE EACH USE**, inspect the general condition of the tool. Check for:
-
proper safety trip mechanism operation,
-
free safety nosepiece and trigger movement,
-
loose hardware or housing,
-
misalignment or binding of moving parts,
-
cracked or broken parts, and
-
any other condition that may affect its safe operation.
**Daily** - Air Supply Maintenance:
Every day, perform maintenance on the air supply according to the component manufacturers' instructions. Maintain the lubricator's oil level. Drain the moisture filter regularly. Performing routine maintenance on the air supply will allow the tool to operate more safely and will also reduce wear on the tool.
# Operation
### Set Up
-
Route the air hose along a safe route to reach the work area without creating a tripping hazard or exposing the air hose to possible damage. The air hose must be long enough to reach the work area with enough extra length to allow free movement while working.
-
Secure loose workpieces using a vise or clamps (not included) to prevent movement while working.
### Inspection
Before you start using the nailer you are expected to do an initial inspection and assess its readiness for use. Consult the checklist above as well as the detailed processes here.
**Single Sequential Safety Trip Mechanism Test**
The single sequential safety trip mechanism is designed to prevent inadvertent firing. The tool should only fire if the Safety Nosepiece is pressed against the workpiece prior to pulling the Trigger. It should only fire again if the trigger is released and squeezed again. The Tool should not fire if the Safety Nosepiece is not pressed against an object.
1.
Disconnect the tool from the air supply.
2.
Empty the magazine of fasteners.
3.
Check that the Trigger and the Safety Nosepiece move freely, without sticking.
4.
Connect the air supply to the tool and set within the Operating Air Pressure indicated on the Specification chart.
5.
Test the tool by pressing the Safety Nosepiece against the workpiece without pulling the Trigger. **The tool must not cycle (fire)**. If it cycles (fires), stop immediately and have it repaired by a qualified service technician.
6.
Hold the tool away, or off of the workpiece. The Safety Nosepiece should return to its original position. Squeeze the Trigger. **The tool must not cycle (fire).** If it cycles (fires), stop immediately and take the tool to a qualified service technician.
7.
Press the Safety Nosepiece against the workpiece and squeeze the Trigger. **The tool must cycle (fire) only once.**
8.
Release the trigger, slide the nailer to a fresh piece of wood, and squeeze it again. **The tool must cycle (fire) again only once.** With the Trigger depressed, carefully lift the tool and press it against the workpiece again. **The tool must not cycle (fire).** If it fails to act in the manner explained in bold, have it repaired by a qualified service technician.
### Loading
⚠️Release the trigger.
⚠️Detach the air supply.
⚠️Attempt to fire the Tool into a piece of scrap wood to ensure that it is disconnected and is incapable of firing any fasteners.
1.
Depress the Latch (64) and pull back on the Moveable Magazine (55), pulling it out of Fixed Magazine (52).
2.
Insert the fasteners into the Moveable Magazine. If loading staples, fit the crown of the staples so they fit over and ride on the rail of the Magazine.
3.
After the nails or staples are loaded, slide the Moveable Magazine back into Fixed Magazine until the Latch snaps back into place, locking the Moveable Magazine.
Note: The small window gauge on the left side of the Moveable Magazine indicates how many fasteners remain inside Nailer-Stapler.
### General Operating Instructions
1.
Before each use, test the tool as directed in the prior section.
2.
If an automatic oiler is not used, add a few drops of Pneumatic Tool Oil to the airline connection before use. Add a few drops more after each hour of continual use.
3.
Position tool at desired fastener location and depress the Safety Nosepiece fully against the workpiece. Squeeze the trigger to fire a fastener.
4.
If the tool requires more force to accomplish the task, verify that the tool receives sufficient, unobstructed airflow (CFM) and increase the pressure (PSI) output of the regulator up to the maximum air pressure rating of this tool.
5.
After use, to prevent accidents:
1.
Release the trigger.
2.
Detach the air supply.
3.
Attempt to fire the Tool into a piece of scrap wood to ensure that it is disconnected and is incapable of firing any fasteners.
4.
Release the trigger again.
5.
Clean external surfaces with clean, dry cloth.
6.
Store indoors out of children’s reach.
⚠️Keep second hand away from tool discharge area, especially if holding workpiece. Tool applies extreme force to fastener, and fasteners may deflect or fire in an unexpected direction.
⚠️Do not hold tool near body while firing. Tool recoil can cause injury.
⚠️Do not exceed the tool’s maximum air pressure rating. If the tool still does not have sufficient force at maximum pressure and sufficient airflow, then a larger tool may be required.
#### Consumables
Brads are consumables. Plastic brads may be purchased at the Protohaven shop or you can bring your own. This tool can accept:
-
18 Gauge 5/8″ - 2″ Brad
-
18 Gauge 5/8″ - 1-1/2″ Narrow Crown Staples
### Maintenance Requests
If you encounter any of the issues listed in the Inspection area or have any other issues with the tool not working properly:
-
Update the physical Maintenance Tag at the machine
-
🟢Green can be used without issue
-
🟡Yellow can be used with caution
-
⛔Red cannot be used without hazard to either the user or the equipment
-
Record issues at [https://protohaven.org/maintenance](https://protohaven.org/maintenance "https://protohaven.org/maintenance"). This notifies our staff and volunteer maintenance crew of any issues.
## Troubleshooting
### Clearing Jams
1\. If a fastener is jammed in the discharge area, remove it with pliers.
2\. If a fastener is jammed in the Magazine, depress the Latch [Manual p 19](https://manuals.harborfreight.com/manuals/68000-68999/68019.pdf "https://manuals.harborfreight.com/manuals/68000-68999/68019.pdf")(64) and pull back on the Moveable Magazine (55), and remove the Position Seat (54). Then pull out of Fixed Magazine (52).
3\. Pull out the jammed fastener and the remainder of the fastener strip that is still in the magazine. Dispose of the remaining fastener strip; it may be bent or damaged in some other way.
4\. If a fastener is jammed in the Drive Guide (40), pull out the Quick Release Lever (44) and disengage the Quick Release Spring (45).
5\. Remove the jammed fastener; pliers may be necessary to remove a stuck fastener.
6\. Inspect the Drive Guide for any bends or breakage. If it is damaged, do not use the tool until it is repaired by a qualified technician.
7\. Lightly oil the Drive Guide, engage the Quick Release Spring, and snap the Quick Release Lever back into place.
8\. Make sure that the Safety Tip moves smoothly without binding.
9\. Reload the Nailer/Stapler and then reconnect it to the air supply.
10\. Press the Safety of the Nailer/Stapler against an appropriate piece of scrap wood.
11\. Test fire the Nailer/Stapler several times, checking for proper operation.
12\. Disconnect the Nailer/Stapler, remove the fasteners, and store in a location out of children’s reach.
13\. If the jam cannot be cleared using the method above, have the tool serviced by a qualified technician.
Problem
Possible Causes
Likely Solutions
**Insufficient fastener depth.**
1. Not enough air pressure; Incorrect lubrication or not enough lubrication. 2. Blocked air inlet screen (if equipped). 3. Mechanism contaminated.
1. Check for loose connections and make sure that air supply is providing enough air pressure (PSI) to the tool’s air inlet. Do not exceed maximum air pressure. 2. Lubricate using air tool oil and grease according to directions. 3. Clean air inlet screen of buildup. 4. Have qualified technician clean and lubricate mechanism. Install in-line filter in air supply as stated in Initial Set Up: Air Supply.
**Fasteners drive too deeply.**
1. Incorrect tool depth setting. 2. Too much air pressure.
1. Adjust depth setting, if available. 2. Reduce air supply pressure (PSI).
**Tool cycles without firing fastener.**
1. Jammed fastener. 2. Tool empty. 3. Incorrect fasteners used. 4. Magazine dirty or not lubricated properly. 5. Insufficient air flow.
1. Clear jammed fastener according to Clearing Jams instructions. 2. Reload with correct fasteners. 3. Empty, then reload with correct fasteners. 4. Clean and lubricate magazine and pusher. 5. Check for loose connections and make sure that air supply is providing enough air flow (CFM) and pressure (PSI) to the tool’s air inlet. Do not exceed maximum air pressure.
**Frequent jamming.**
Incorrect nail / staple type.
Confirm nail / staple collation type, diameter, angle, gauge, crown, type, and length. Correct as needed.
**Severe air leakage.**(Slight air leakage is normal, especially on older tools.)
1. Cross-threaded housing components. 2. Loose housing. 3. Damaged valve or housing. 4. Dirty, worn or damaged valve.
1. Check for incorrect alignment and uneven gaps. If cross-threaded, disassemble and replace damaged parts before use. 2. Tighten housing assembly. If housing cannot tighten properly, internal parts may be misaligned. 3. Replace damaged components. 4. Clean or replace valve assembly.
# Member Notes
# Resources
*Where to obtain materials, consumables, and tooling.*
# Tool Tutorial
(Link to PDF Tool Tutorial)
Narrow crown construction staplers are used for cabinets, casebacks, drawers, insulation sheathing, underlayment, molding and trim. Unlike larger staplers designed to go around cables or wire without penetrating, a narrow crown stapler fastens material flush. It is best used on materials softer than hardwoods like oak.
The [Tool Safety](https://www.protohaven.org/wiki/tools/hand_tools/crown_stapler_18ga?s[]=stapler#tool-safety "tools:hand_tools:crown_stapler_18ga ↵"), [Tool Care](https://www.protohaven.org/wiki/tools/hand_tools/crown_stapler_18ga?s[]=stapler#tool-care "tools:hand_tools:crown_stapler_18ga ↵"), [Operation](https://www.protohaven.org/wiki/tools/hand_tools/crown_stapler_18ga?s[]=stapler#operation "tools:hand_tools:crown_stapler_18ga ↵"), section of this guide are what instructors use to ensure that you can use the equipment according to community expectations.
# Requirements
[Crown Stapler](https://protohaven.org/wiki/tools/crown_stapler_18ga "https://protohaven.org/wiki/tools/crown_stapler_18ga") can be used without a clearance.
# Warnings
🚫 Never connect to an air source that is capable of exceeding 175 PSI.
🚫 Only use an air hose that is rated for a maximum working pressure of at least 150 psi (10.3 bar) or 150% of the maximum system pressure, whichever is greater.
🚫 Keep hands and body parts clear of immediate work area.
🚫 Do not drive fasteners near edge of material, on top of other fasteners, at too great of an angle, or with the grain. ⚠️ Wear appropriate PPE.
⚠️ Remove finger from the trigger when not driving fasteners.
⚠️ Disconnect the tool from the air supply when a. Unattended, b. Performing any maintenance or repair, c. Clearing a jam, d. Moving the tool to a new location.
See the [Safety Section](https://www.protohaven.org/wiki/tools/hand_tools/crown_stapler_18ga?s[]=stapler#tool-safety "tools:hand_tools:crown_stapler_18ga ↵") for more information.
# Tool Anatomy
[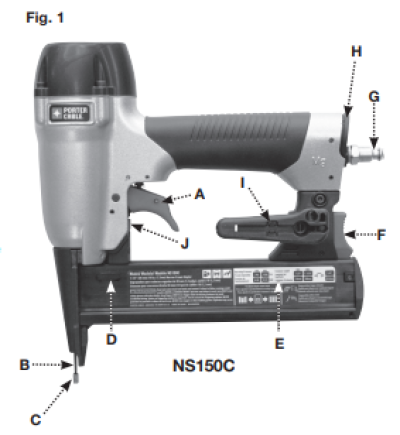](https://www.protohaven.org/wiki/_detail/tools/stapler.png?id=tools%3Ahand_tools%3Acrown_stapler_18ga "tools:stapler.png")
A. Trigger
B. Contact trip
C. No-mar pad
D. Low nail indicator window
E. Magazine
F. Magazine Release
G. Air Inlet
H. Rear exhaust
I. Adjustable belt hook
J. Depth adjustment wheel
For more visit the manufacturers website and user manual both linked at the top of this document.
# Tool Safety
### Personal Protective Equipment
⚠️ Safety glasses, hearing protection, heavy duty gloves, and closed-toed shoes are required.
⚠️ All hair, clothing and accessories should be secured close to the body.
### Common Hazards
**Unintentional Firing**
-
Be sure the trigger is released before connecting to the air supply.
-
Keep fingers away from trigger when not firing.
-
Always assume the tool contains fasteners.
**Double Firing**
-
When using the bump action trigger, be careful of unintentional double fires resulting from tool recoil. Unwanted fasteners may be driven if the contact trip is allowed to accidentally re-contact the work surface.
To Avoid Double Fires:
-
Do not engage the tool against the work surface with a strong force.
-
Allow the tool to recoil fully after each actuation.
-
Use sequential action trigger.
-
When bump actuating the nailer, always keep tool in control. Inaccurate placement of tool can result in misdirected discharge of a fastener.
**Protruding Fasteners**
-
Drive the nail perpendicular to the grain to reduce risk of unexpected protrusion.
-
Be aware that when the tool is being utilized at pressures on the high end of its operating range, nails can be driven completely through thin or very soft work material. Be aware of material thickness and set depth appropriately.
-
Always disconnect air supply and avoid contact with trigger during depth adjustments.
# Tool Care
## Care
Disconnect the tool from the air supply and remove fasteners from magazine before making adjustments or personal injury may result.
##### Daily Maintenance
Action
Why
How
Drain compressor tanks and hoses daily.
Prevents accumulation of moisture in compressor and nailer.
Open petcocks or other drain valves on compressor tanks. Allow any accumulated water to drain from hoses.
Clean magazine, magazine release and contact trip mechanism.
Permits smooth operation of magazine, reduces wear and prevents jams.
Blow clean with compressor air. The use of oils, lubricants periodically or solvents is not recommended as they tend to attract debris.
Before each use, check to insure all screws, nuts and fasteners are tight and undamaged.
Prevents jams, leaks and premature failure of tool parts.
Tighten loose screws or other fasteners using the appropriate hex wrench or screwdriver.
##### Cleaning
Never use solvents or other harsh chemicals for cleaning the non-metallic parts of the tool. These chemicals may weaken the materials used in these parts. Use a cloth dampened only with water and mild soap. Never let any liquid get inside the tool; never immerse any part of the tool into a liquid.
# Operation
### Set Up
*This nailer is designed to be used without oil.*
1.
Before you use the nailer, be sure that the compressor tanks have been properly drained.
2.
Wear proper eye, hearing and respiratory protection.
3.
Lock the magazine release in the back position and remove all fasteners from the magazine.
4.
Check for smooth and proper operation of contact trip and pusher assemblies. Do not use tool if either assembly is not functioning properly. NEVER use a tool that has the contact trip restrained in the up position.
5.
Check air supply. Ensure that air pressure does not exceed recommended operating limits; 70 to 120 psi, (4.9 to 8.3 bar, 5 to 8.5 kg/cm2).
6.
Connect air hose.
7.
Check for audible leaks around valves and gaskets. Never use a tool that leaks or has damaged parts.
## Inspection
Before you start using the stapler you are expected to do an initial inspection and access its readiness for use. Consult the checklist at the end of this document as well as the detailed processes here.
### Loading
⚠️Release the trigger and contact trip.
⚠️Detach the air supply.
1.
Read all Safety Warnings before using tool.
2.
Connect the tool to air supply.
3.
Push the magazine release (F) and slide magazine (E) to open chamber.
4.
Position nailer on a stable surface so contact trip is pointing upward and away from you.
5.
Insert fasteners into the chamber.
6.
Slide magazine until it clicks, securing the magazine.
### General Operating Instructions
*The tool can be actuated using one of two modes: single sequential action trigger mode and bump action trigger mode.*
**Sequential action trigger - Red trigger**
The sequential action trigger’s intended use is for intermittent fastening where very careful and accurate placement is desired.
To operate the nailer in sequential action mode:
\- Depress the contact trip firmly against the work surface.
\- Pull the trigger.
*A fastener will be driven each time the trigger is pulled as long as the contact trip remains depressed which could result in accidental driving.*
**Bump action trigger - Black trigger**
*The bump action trigger’s intended use is for rapid fastening on flat, stationary surfaces.*
Using the bump action trigger, two methods are available: place actuation and bump actuation.
To operate the tool using the place actuation method:
\- Pull the contact trip against the work surface.
\- Pull the trigger.
To operate the tool using the bump actuation method:
\- Pull the trigger.
\- Push the contact trip against the work surface. As long as the trigger is pulled, the tool will drive a fastener every time the contact trip is depressed. This allows the user to drive multiple fasteners in sequence.
##### Adjusting Depth
⚠️Release the trigger and contact trip.
⚠️Detach the air supply.
The depth that the fastener is driven can be adjusted using the depth adjustment next to the trigger of the tool. - To drive the fastener shallower, rotate the depth setting wheel (J) to the right. - To drive a fastener deeper, rotate the depth setting wheel (J) to the left.
#### Consumables
Staples are consumables. They may be purchased at the Protohaven shop or you can bring your own. This tool can accept:
### Maintenance Requests
If you encounter any of the issues listed in the Inspection area or have any other issues with the printer not working properly
-
Update the physical Maintenance Tag at the machine
-
🟢Green can be used without issue
-
🟡Yellow can be used withcaution
-
⛔Red cannot be used without hazard to either the user or the equipment
-
Record issues at [protohaven.org/maintenance](https://protohaven.org/maintenance "https://protohaven.org/maintenance"). This notifies our staff and volunteer maintenance crew of any issues.
## Troubleshooting
### Clearing Jams
1.
Disconnect the tool from the air supply.
2.
Push the magazine release (F) and slide magazine to open chamber.
3.
Position stapler on a stable surface so contact trip is pointing upward and away from you.
4.
Remove all fasteners in the top chamber of the magazine.
5.
Remove bent fastener, using pliers if necessary.
6.
If driver blade is in the down position, insert screwdriver or other rod into nosepiece and push driver blade back in position.
7.
Reinsert fasteners into the top chamber of the magazine (see Loading the Tool).
8.
Slide magazine until it clicks, securing the magazine.
9.
Reattach air supply.
NOTE: Should fasteners continue to jam frequently in nosepiece, have tool serviced by an authorized PORTER-CABLE service center.
Problem
Likely Cause
Potential Solution
Trigger valve housing leaks
O-ring or valve stem failure
Replace valve using: Trigger Valve Kit
Top cap leaks air
Loose cap screws
Tighten cap screws using appropriate hex wrench
Damaged or worn gasket or o-ring
Replace gasket/o-rings using: O-ring Repair Kit
Exhaust leaks
Main seal or o-ring damaged, debris in tool
Replace gasket/o-rings using: O-ring Repair Kit
Air leaks around nose when tool is at rest (Driver blade in up position)
Damaged or worn o-rings
Replace gasket/o-rings using: O-ring Repair Kit
Air leaks around nose when tool is in actuated position (Driver blade in down position)
Damaged or worn bumper
Replace bumper using: Bumper Kit
Tool does not cycle in cold weather
Tool not receiving air
Check air supply
Valve may be frozen
Warm up tool
Damaged or worn o-rings
Replace gasket/o-rings using: O-ring Repair Kit
Broken or damaged driver blade
Replace Driver Blade Kit
Lack of power; sluggish
Low air pressure
Check air supply
Damaged or worn o-rings
Replace gasket/o-rings using: O-ring Repair Kit
Exhaust port blocked or clogged
Disconnect the tool from the air supply, remove exhaust plate from top of tool, clean port
Skipping fasteners; intermittent feed
Air restricted
Check air supply and couplers
Nosepiece screws loose
Tighten nosepiece screws using appropriate hex wrench
Wrong size/angle fasteners
Use only recommended fasteners
Dirty magazine
Clean magazine track and nosepiece
Worn magazine
Replace magazine
Broken or damaged driver blade
Replace Driver Blade Kit
Trigger valve o-ring worn or damaged
Replace valve using: Trigger Valve Kit
Worn or damaged pusher spring
Replace spring
Magazine loose
Check that magazine latch is holding firmly
Fasteners jam in tool
Driver channel in nose piece worn
Replace nosepiece
Wrong size/angle fasteners
Use only recommended fasteners
Magazine loose
Check that magazine screws are holding firmly
Worn driver blade
Replace Driver Blade Kit
Nosepiece screws loose
Tighten nosepiece screws using appropriate hex wrench
Fasteners not feeding properly
Ensure fasteners are feeding properly into nose
## Additional Resources
# Air Tools - Finish Nailer
# Manual(s)
*Manuals and other reference materials from the manufacturer or other sources.*
-
# Member Notes
# Resources
*Where to obtain materials, consumables, and tooling.*
# Tool Tutorial
(Link to PDF Tool Tutorial)
Finishing nail guns are powerful tools that can handle basic home improvement tasks as well as professional jobs. Use finishing nailers (also known as trim nail guns) to complete flooring and molding projects without one swing of a hammer. Finishing nails are thicker (15 or 16 gauge) and have a larger head than brad nails, which are used for light trim projects. While they may be more visible than brad nails, finishing nails are strong enough to secure large and heavy pieces of wood. You can cover them with putty to make them less noticeable. Use finishing nailers to attach heavy crown molding, affix large baseboards or install a new hardwood floor. You can also use them to put together cabinets and furniture.
The [Tool Safety](https://www.protohaven.org/wiki/tools/hand_tools/finish_nailer_16ga?s[]=nailer#tool-safety "tools:hand_tools:finish_nailer_16ga ↵"), [Tool Care](https://www.protohaven.org/wiki/tools/hand_tools/finish_nailer_16ga?s[]=nailer#tool-care "tools:hand_tools:finish_nailer_16ga ↵"), [Operation](https://www.protohaven.org/wiki/tools/hand_tools/finish_nailer_16ga?s[]=nailer#operation "tools:hand_tools:finish_nailer_16ga ↵"), section of this guide are what instructors use to ensure that you can use the equipment according to community expectations.
# Requirements
No Clearance Required. If you don't know how to use the tool ask for help.
# Warnings
🚫 Do not use this nailer for fastening electrical cables. 🚫 Do not fire fastener on top of another fastener, into surfaces too hard to penetrate, or too close to the edge of the workpiece.
🚫 Do not hold tool near body while firing. Tool recoil can cause injury.
⚠️ Wear appropriate PPE.
⚠️ Ensure the switch is in the off position before connecting to power source and/ or battery pack, picking up or carrying the tool.
⚠️ Remove finger from the trigger when not driving nails.
⚠️ Disconnect the tool from the power supply when a. Unattended, b. Performing any maintenance or repair, c. Clearing a jam, d. Moving the tool to a new location.
See the [Safety Section](https://www.protohaven.org/wiki/tools/hand_tools/finish_nailer_16ga?s[]=nailer#tool-safety "tools:hand_tools:finish_nailer_16ga ↵") for more information.
# Tool Anatomy
[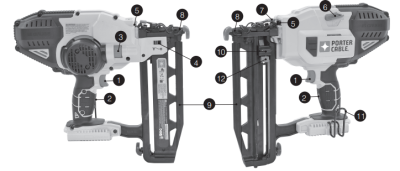](https://www.protohaven.org/wiki/_detail/tools/nailer.png?id=tools%3Ahand_tools%3Afinish_nailer_16ga "tools:nailer.png")
1.
Trigger Switch
2.
Trigger Lock-Off switch
3.
Depth adjustment wheel
4.
Depth adjustment indicator
5.
Worklights/low battery/jam/stall indicator
6.
Stall release lever
7.
Jam clearing latch
8.
Contact trip
9.
Magazine
10.
Pusher latch
11.
Hang hook
12.
Pusher latch release
For more visit the manufacturers website and user manual both linked at the top of this document.
# Tool Safety
### Personal Protective Equipment
⚠️ Safety glasses, hearing protection, heavy duty gloves, and closed-toed shoes are required.
⚠️ All hair, clothing and accessories should be secured close to the body.
### Common Hazards
**Unintentional Firing**
-
Be sure the trigger is released before connecting to power.
-
Keep fingers away from trigger when not firing.
-
Always assume the tool contains nails.
**Balance and Tool Control**
-
Do not overreach. Keep proper footing and balance at all times.
-
Do not attach the tool to your body.
-
Use clamps or another practical way to secure and support the workpiece to a stable platform. Holding the work by hand or against the body is unstable and can lead to loss of control.
# Tool Care
## Daily Cleaning
Clean magazine, pusher, and contact trip mechanism. This permits smooth operation of magazine, reduces wear, and prevents jams. Clean tool with a clean, damp cloth. Do not oil or lubricate this tool. The use of oils, lubricants or solvents is not recommended as they tend to attract debris.
## Weekly Cleaning
Blow dirt and dust out of all air vents with clean, dry air at least once a week.
## Inspection
Before you start using the nailer you are expected to do an initial inspection and assess its readiness for use.
1.
Remove battery pack from tool and engage trigger lock-off.
2.
Lock the pusher in the back position and remove all nail strips from the magazine.
3.
Check for smooth and proper operation of contact trip and pusher assemblies.
4.
Do not use tool if either assembly is not functioning properly.
5.
NEVER use a tool that has damaged parts.
# Operation
### Set Up
Secure loose workpieces using a vise or clamps to prevent movement while working.
⚠️Make certain the trigger lock-off button is engaged to prevent switch actuation before removing or installing battery.
**TO INSTALL BATTERY PACK:** Insert battery pack firmly into tool until an audible click is heard. Ensure battery pack is fully seated and fully latched into position.
**TO REMOVE BATTERY PACK:** Depress the battery release button and pull battery pack out of tool.
### Loading
⚠️Keep the tool pointed away from yourself and others.
⚠️Never load nails with the contact trip or trigger activated.
⚠️The battery should always be removed and the trigger lock-off is engaged whenever any adjustments are made or when tool is not in use.
⚠️Keep fingers clear of pusher to prevent injury.
1.
Insert fasteners into the bottom of the magazine.
2.
Pull pusher downward until the nail follower falls behind the nails.
3.
Release the pusher.
### General Operation
⚠️The contact trip needs to be depressed followed by a full trigger pull for each nail followed by a release of both the contact trip and trigger after each nail.
1.
Fully depress contact trip against the work surface.
2.
Fully pull trigger and motor will start. (nail will drive into work surface).
3.
Release trigger.
4.
Lift contact trip off work surface.
5.
Repeat steps 1 through 4 for next application.
Note: There are work lights located on each side of the nailer. Work lights turn on upon depressing the contact trip. These work lights are for illuminating the immediate work surface only.
-
The work lights will flash and then turn off completely to indicate **low battery.**
-
The work lights will flash continually if a nail becomes **jammed** in the nose piece.
#### Adjusting Depth
⚠️Always remove battery pack, engage trigger lock-off, and avoid contact with trigger during adjustments. The depth that the fastener is driven can be adjusted using the depth adjustment wheel on the side of the tool. Depth settings are on a sliding scale. The left side indicating the deepest and the right side indicating the shallowest.
1.
To drive a nail deeper, rotate the depth adjustment wheel (3) downwards. This will slide the depth adjustment indicator (4) to the left on the scale.
2.
To drive a nail shallower, rotate the depth adjustment wheel (3) upwards. This will slide the depth adjustment indicator (4) to the right on the scale.
### Unloading
1.
Press pusher latch release button.
2.
Manually slide nails towards the bottom of the magazine.
3.
Open the jam clear door on the nosepiece to verify there are no nails remaining.
#### Consumables
Nails are consumables. Please bring your own. This tool can accept 16 Gauge 1″ - 2.5″ nails.
### Maintenance Requests
If you encounter any of the issues listed in the Inspection area or have any other issues with the printer not working properly
-
Update the physical Maintenance Tag at the machine
-
🟢Green can be used without issue
-
🟡Yellow can be used withcaution
-
⛔Red cannot be used without hazard to either the user or the equipment
-
Record issues at [protohaven.org/maintenance](https://protohaven.org/maintenance "https://protohaven.org/maintenance"). This notifies our staff and volunteer maintenance crew of any issues.
## Troubleshooting
### Clearing Jams
-
Remove battery pack from tool and engage trigger lock-off.
-
Rotate the stall release lever (6) on the tool to release the driver blade and clear the jam. If tool is still jammed follow steps 3-11 listed below.
-
Pull pusher downward until it locks in place then tip the tool over so the nails slide freely out from the bottom of the magazine.
-
Lift the jam clearing latch (7) then pull up to open front door (14).
-
Remove bent nail, using pliers if necessary.
-
If driver blade is in the down position, insert screwdriver or other rod into nosepiece and push driver blade back in position.
-
Close the front door and engage the wire form (13) under the two arms (15) on the contact trip. Push jam clearing latch down (7) until it locks in place.
-
Reinsert nails into magazine (see Loading the Tool).
-
Pull pusher (10) downward until the nail follower (D1) falls behind the nails as shown in figure D.
-
Reinsert battery pack.
-
Disengage trigger lock-off (2), allowing the trigger to be actuated.
### Stall Release
If the nailer is used in a rigorous application where all available energy in the motor is used to drive a fastener, the tool may stall. The driver blade did not complete the drive cycle and the jam/stall indicator will flash. Rotate the stall release lever (6) on the tool and the mechanism will release.
NOTE: The tool will disable itself and not reset until the battery pack has been removed and reinserted. If the unit continues to stall please review the material and fastener length to be sure that it is not too rigorous an application. If the driver blade does not automatically return to the home position after rotating the stall release lever, follow the instructions for clearing a jammed nail.
Problem
Possible Cause
Possible Solution
Unit will not start.
Battery pack not installed properly.
Check battery pack installation.
Battery pack not charged.
Check battery pack charging requirements.
Trigger lock-off is engaged.
Disengage trigger lock-off.
Tool doesn’t actuate. (Headlights on, motor does not run)
Motor stops running after 2 seconds.
Normal operation; release trigger or contact trip and re-depress.
Remove the battery, rotate the stall release lever. Clear the jammed fastener, and reinsert battery pack.
Jammed mechanism.
See authorized service center.
Tool doesn’t actuate.(Headlights on, motor runs)
Jammed fastener/tool stalled.
Remove the battery, rotate the stall release lever. Clear the jammed fastener, and reinsert battery pack.
Tool doesn’t actuate. (Headlights on, motor runs, driver blade stuck down)
See authorized service center.
Tool operates, but does not drive the fastener fully.
Low battery charge or damaged battery.
Charge or replace battery.
Depth adjustment set too shallow.
Rotate depth adjustment wheel to a deeper setting.
Tool not firmly applied to workpiece.
Read instruction manual.
Material and fastener length too rigorous an application.
Choose appropriate material or fastener length.
Tool operates, but no fastener driven.
No fasteners in magazine.
Load fasteners into magazine.
Wrong size or angle fasteners.
Use only recommended fasteners.
Debris in contact trip or magazine.
Remove debris.
Jammed fastener.
Read “Clearing a Jammed Nail”.
Jammed fastener.
Wrong size or angle fasteners.
Use only recommended fasteners.
Material and fastener length too rigorous an application.
Choose appropriate material or fastener length.
Low battery charge or damaged battery.
Charge or replace battery.
Debris in nose piece or magazine.
Remove debris.
Battery pack will not charge.
Battery pack not inserted into charger.
Insert battery pack into charger until LED lights.
Charger not plugged in.
Plug charger into a working outlet. Refer to “Important Charging Notes” for more details.
Surrounding air temperature too hot or too cold.
Move charger and battery pack to a surrounding air temperature of above 40 degrees F (4,5°C) or below 105 degrees F (+40,5°C)
Unit shuts off abruptly.
Battery pack has reached its maximum thermal limit.
Allow battery pack to cool down.
Out of charge. ( To maximize the life of the battery pack it is designed to shutoff abruptly when the charge is depleted.)
Place on charger and allow to charge.
## Additional Resources
# Electronics - Digital Microscope
WKR Model 367 Digital Microscope
# Manual(s)
*Manuals and other reference materials from the manufacturer or other sources.*
- [Amazon link](https://www.amazon.com/dp/B0D6G6R2P9?ref=fed_asin_title)
- [WKR367 digital microscope.pdf](https://wiki.protohaven.org/attachments/315)
# Member Notes
# Resources
*Where to obtain materials, consumables, and tooling.*
Software per the guide*:*
- AMCAP for windows 7/8 systems
- Windows Camera for windows 10 systems
- Smart camera application from [http://www.inskam.com/download/camera.zip](http://www.inskam.com/download/camera.zip) - stored on wiki at [camera.zip](https://wiki.protohaven.org/attachments/314)
# Digital Microscope Tool Tutorial
A digital microscope, like a standard microscope, makes it easier to inspect small objects. This is very useful for precision work in textiles, electronics, jewelry, machining, and elsewhere.
Our digital microscope includes a built-in display and can take pictures and video as you work!
[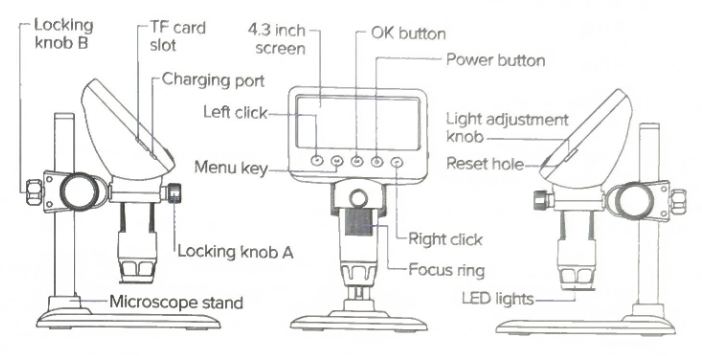](https://wiki.protohaven.org/uploads/images/gallery/2026-07/EHximage.png)
- Power Button - press and hold to turn the device on or off
- Menu Key - use this to switch between observation mode, resolution page, settings, page, and deletion page
- OK button - takes a picture when short-pressed in observation mode,
- You can also long press to enter "Camera" mode; in this mode, short pressing will start and stop video recording.
- Left and right click - use these to zoom in and out in observation mode, or navigate menus in other modes.
- Long press the left click to "integrate" i.e. reset the zoom.
- Light Adjustment Knob - use this to adjust the light brightness
- Locking Knob A/B - use these to adjust the height and position of the microscope on the stand.
- Focus ring - use this to adjust the microscope focus
## Troubleshooting
**Problem**
**Solution**
Device frozen
Press the "reset hole" with a fine needle or pin to force a shutdown
Blurry image
Rotate the focus ring until the image clears
## Special Setups
#### PC Connection
Connect a USB cable between a computer's USB port and the charging port on the microscope to allow direct transfer of data to a PC. For Windows computers, the manufacturer recommends downloading and installing a custom application from this zip file: [camera.zip](https://wiki.protohaven.org/attachments/596)
# Electronics - Hot Air Rework Station
# Manual(s)
*Manuals and other reference materials from the manufacturer or other sources.*
Documentation: Obsolete, [link to 4040 Pro-X Manual](https://xtronicusa.com/support/manuals/11-x-tronic-4040-pro-x-instructions/file "https://xtronicusa.com/support/manuals/11-x-tronic-4040-pro-x-instructions/file")
# Member Notes
# Resources
*Where to obtain materials, consumables, and tooling.*
# Tool Tutorial
# Warnings
⚠️ The air coming out of the rework station is hot enough to burn and to catch things on fire always be mindful in where the air it’s making is going.
⚠️ Solder may contain Lead, Always use proper ventilation or fume extraction when working with the soldering equipment. Flux vapors can also be irritating to people.
🚫Do not leave the rework station plugged in when not in use.
# Tool Anatomy
[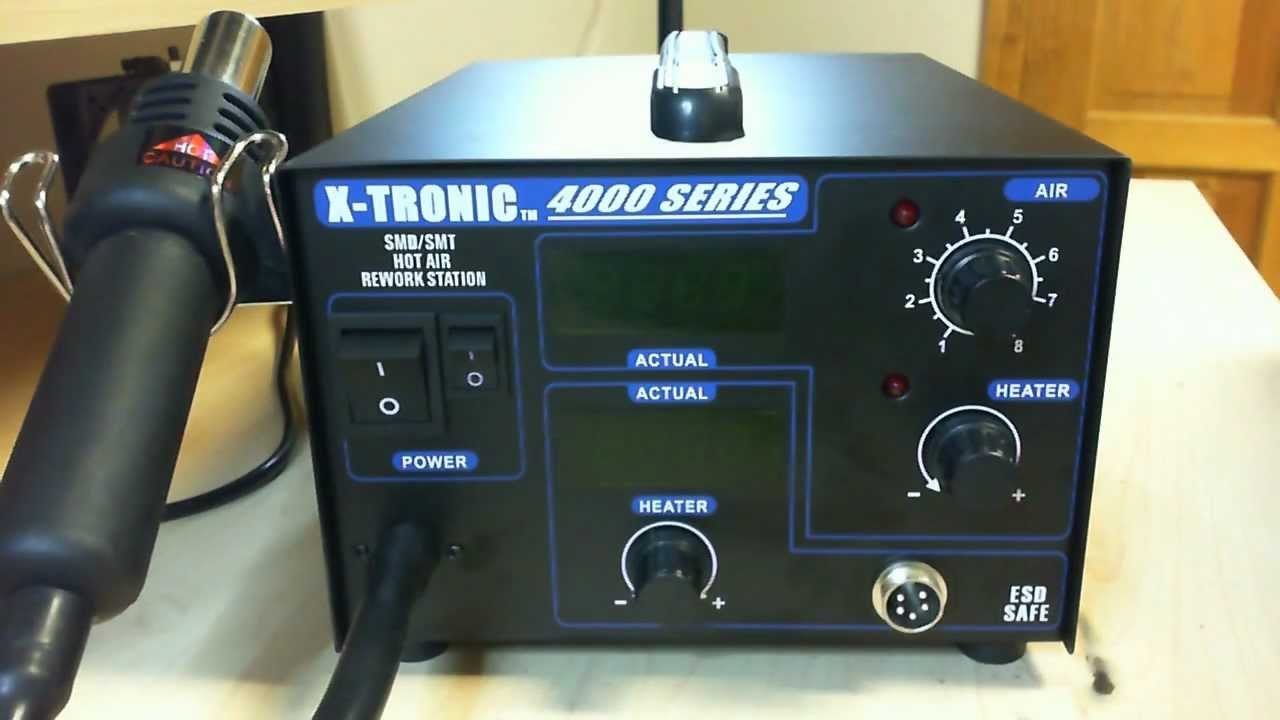](https://wiki.protohaven.org/uploads/images/gallery/2026-06/image.png)
## Soldering Safety Guidelines
### General Soldering Safety
-
Never touch the nozzle end of the rework wand.
-
Hold wires to be heated with tweezers or clamps.
-
Always return the rework wand to it’s stand when not in use. Never put it down on your workbench. Be sure that the stand is weighted enough or attached to your work table so that it doesn’t topple over if you brush against the cord.
-
**Turn the unit off or unplug it when not in use.**
-
Different boards and solders need different temperatures don’t start out too hot
-
Give any soldered surface a minute or two to cool down before you touch it.
### Work Safely with Solder, Flux, and Cleaners
1.
Wear eye protection. Solder can “spit” (an air pocket or impurity can pop as you heat the solder and send bits of solder flying).
2.
Use lead free solder.
3.
Keep cleaning solvents in dispensing bottle to reduce inhalation hazards.
4.
Always wash your hands with soap and water after soldering.
5.
Read and understand the MSDS (Material Safety Data Sheets) for all materials before beginning work (e.g., http://jr.chemwatch.net/chemwatch.web/account/login).
### Dangers of Lead Exposure
Lead [(http:%%//%%www.cdc.gov/niosh/topics/lead/](http://www.cdc.gov/niosh/topics/lead/ "http://www.cdc.gov/niosh/topics/lead/")) on your skin can be ingested and lead fumes can be given off during soldering. Other metal (https://[www.osha.gov/SLTC/metalsheavy/index.html](http://www.osha.gov/SLTC/metalsheavy/index.html "http://www.osha.gov/SLTC/metalsheavy/index.html")) fumes can also be hazardous. Lead can have serious chronic health effects, such as reproductive problems, digestive problems, nerve disorders, memory and concentration problems, muscle and joint pain.
### Avoid Toxic Fumes
1.
Work in a well‐ventilated area, to prevent the mildly caustic and toxic fumes from building up and causing eye or throat irritation.. The smoke formed is mostly from the flux which can be irritating, a sensitizer and aggravates asthma. Avoid breathing it by keeping your head to the side of, not above, your work.
2.
A benchtop fume extractor may be necessary to remove harmful fumes caused by solder and flux from the soldering workstation by filtering the air. If the lab is equipped with a snorkel fume extractor, always use it when soldering.
### Reduce Risk From Electricity
1.
Always use a grounded outlet and grounding prong to reduce the risk of electrical damage if a short circuit occurs in the equipment.
2.
Prevent damage to electrical cords during soldering. Keep them away from where the nozzle is pointed.
3.
Never use on a live circuit (one that is energized).
### Fire Prevention
1.
Work on a fire‐proof or nonflammable surface that is not easily ignited.
2.
Never place a the wand on your work surface: you could start a fire. Never leave flammable items (such as paper) near your rework station.
3.
Wear nonflammable or 100% cotton clothing that covers your arms and legs to help prevent burns.
4.
Know where your fire extinguisher is and how to use it.
### First Aid
1.
Immediately cool the affected area under cold water for 15 minutes.
2.
Do not apply any creams or ointments. Cover with a band‐aid.
3.
Seek medical attention if the burn covers an area bigger than 3 inches across.
### Waste
1.
Discard lead and silver solder and dross in a container with a lid.
2.
Label the container: “Lead (Silver) Solder Waste for Recycling”.
3.
Used solder sponges and contaminated rags must be disposed of as hazardous waste.
4.
Keep a lid on waste solder containers when not adding or removing material.
# Tool Care
## Inspection
-
Ensure that the cables are in good shape and the insulation is not broken or fraying.
-
Ensure your workspace is clear from debris and clutter.
-
Ensure that the nozzle is fastened securely.
## Cleaning
Wipe down the work area with a damp cloth and dispose of all scraps.
# Recommended Procedure
[Watch this video on using a hotair rework station](https://www.youtube.com/watch?v=9D0oTGeheBA "https://www.youtube.com/watch?v=9D0oTGeheBA")
### Nozzle Selection
You will want to select a nozzle that directs the air to where you need it.
# Electronics - OtherMill
# Manual(s)
*Manuals and other reference materials from the manufacturer or other sources.*
- Manufacturer: [Bantam Tools](https://www.bantamtools.com/)
- Model: [PCB Mill](https://www.bantamtools.com/pcb-milling-machine)
- Manual: [Support Site](https://support.bantamtools.com/hc/en-us/categories/115000803206-Operating-the-Desktop-PCB-Milling-Machine)
- Clearance Required: PCB Mill
# Member Notes
# Resources
*Where to obtain materials, consumables, and tooling.*
- [Scotch Double Sided Tape](https://www.amazon.com/Scotch-Brand-Engineered-Dispensered-6137H-2PC-MP/)
- [FR-1 Copper Clad from Spark Fun](https://www.sparkfun.com/products/14979)
- [FR-1 Copper Clad on Amazon](https://www.amazon.com/uxcell-7X10cm-Single-Laminate-Circuit/dp/B07DJYWTSK/)
- [Bantam Tool PCB Bit Bundle](https://store.bantamtools.com/products/electronics-bit-bundle)
- [Amazon PCB Engraving Bits](https://www.amazon.com/BQLZR-Degree-Carbide-Engraving-Router/dp/B00EQ1X1GY/)
- [1/32 endmill on Amazon](https://www.amazon.com/SpeTool-2-Flute-Square-Carbide-Machine/dp/B07S5HX5NS/)
- [PCB Probing Kit](https://store.bantamtools.com/products/pcb-probing-system)
- [Fine Dust Collection](https://store.bantamtools.com/products/fine-dust-collection-system)
- [Noisebridge Wiki on Othermill](https://www.noisebridge.net/wiki/Othermill)
- [Bantam Project Library](https://www.bantamtools.com/desktop-cnc-project-library)
- [Othermill â › bit fan](https://www.thingiverse.com/thing:3532047)
- [Bantam Fusion 360 Tool Library](https://support.bantamtools.com/hc/en-us/articles/115001671594-Fusion-360-Tool-Library)
- [Github Wiki](https://github.com/synthetos/g2/wiki)
- [Fusion 360 Guide](http://makerspace.engineering.nyu.edu/wp-content/uploads/2018/09/Othermill_Guide_Fusion360.pdf)
# Tool Tutorial
# Warnings
Operators must supervise the Othermill whenever it is in use.
Operators must vacuum and clean the Othermill after each use.
Operators should wash their hands after use.
Do not use unapproved materials in the mill. Ensure your PCBs are FR-1
Do not let the Othermill operate unattended.
Never put your hand near moving machinery, make sure to allow the machine to stop fully before trying to work inside the chamber.
See the [Safety Section](https://wiki.api.protohaven.org/books/dokuwiki/page/#tool-safety) for more information..
# Tool Anatomy
## Othermill
[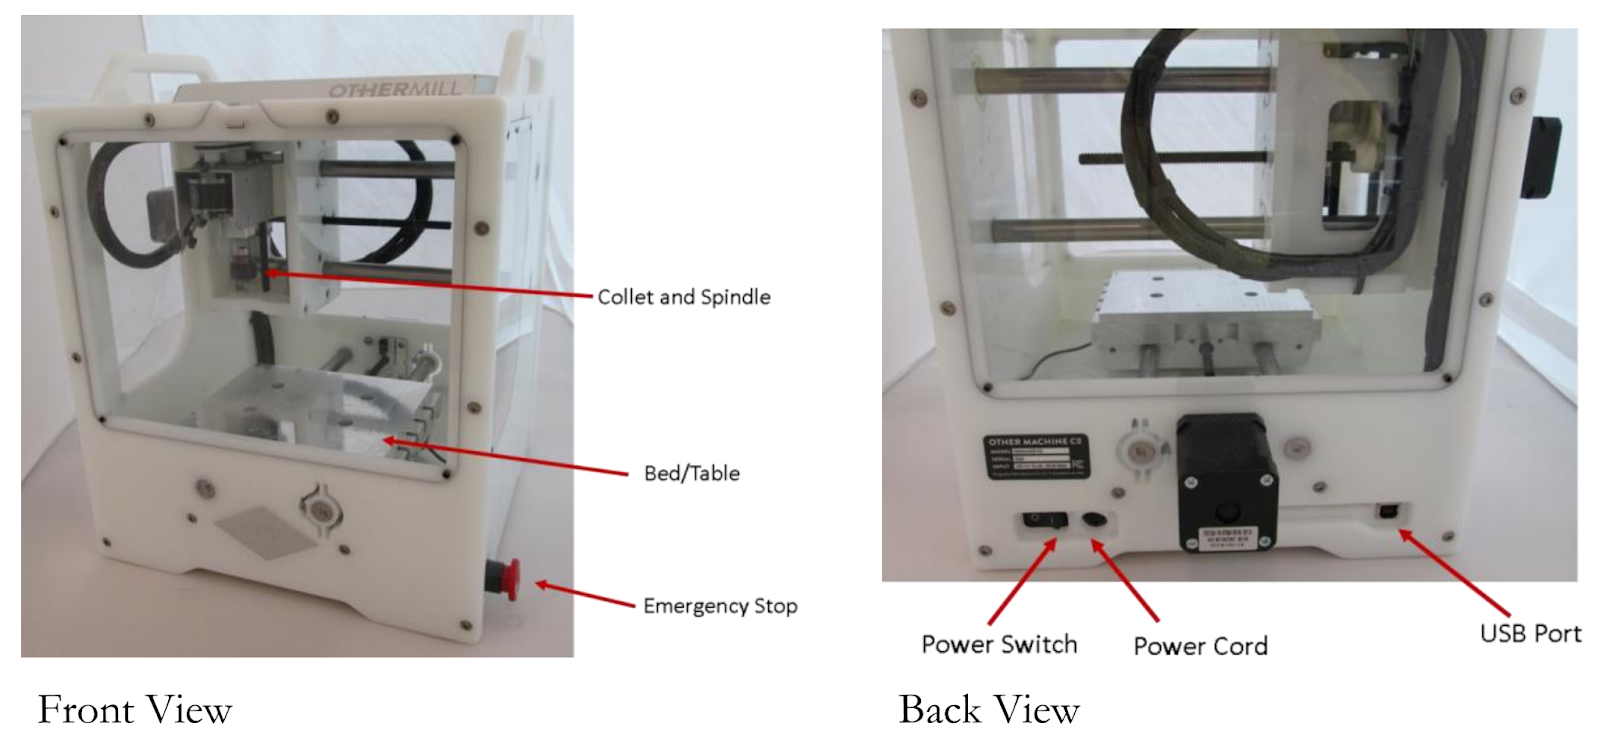](https://wiki.protohaven.org/uploads/images/gallery/2026-06/eRBimage.png)
- **Emergency Stop** - If the machine starts operating in a dangerous or unexpected way this button on the right front side will stop the machine.
- **Power Switch** - On the right side on the back bottom next to the power cord.
- **Power Cord Port** - The port for the power supply.
- **Spindle** - The electric motor that spins the end mills.
- **Cullet** - Clamp that holds the bits and end mills it’s a ⠛†collet.
- **Cullet Wrenches** - Not Pictured, the wrenches sit in pockets secured by magnets on the top of the othermill.
- **USB Port** - USB Type A port on the back of the Othermill connects to a PC running the Bantam Desktop CNC software.
- **Safety Panels** - Clear Acrylic panels that attach magnetically to the sides of the machine to keep dust and debris in.
- **Bed / Table** - Machined plate your workpiece is attached with double sided tape.
## End Mills and Bits
Protohaven does not provide end mills and engraving bits for the Othermill. Members are to bring their own. They are easily broken. And using community end mills of unknown sharpness is simply not a good practice. End mills and bits can be purchased from your seller of choice or from Bantam Tools if you want ones that the tool paths are calibrated for.
The Othermill has a 1/8 “ Collet The following end mills and bits are appropriate to use on the Othermill.
- Ball End Mill, 1/8"
- Ball End Mill, 1/16"
- Flat End Mill, 1/8"
- Flat End Mill, 1/16"
- Flat End Mill, 1/32"
- Flat End Mill, 1/64"
- Metal Engraving Bit, 0.005"
- PCB Engraving Bit, 0.005"
## Tool Tray
The Tool Tray for the othermill contains the following items:
- Safety Glasses
- Double Sided Tape
- Small Paint Brush
- Scraper
- Digital calipers
- Collet Wrenches (Attached to top of Othermill)
- Tool Safety
- Eye Protection
# Tool Safety
## Eye Protection
Even though the othermill has a window that encloses the work area when running eye protection is still required for those operating or observing the operation of the Othermill.
## Cut and Crush Risk
Keep your hands and fingers out of the enclosure when the machine is running, wait for it to come to a complete stop before removing the guards and accessing the machine. This also means no cutting fluid or other coolant/lubrication.
## Speeds and Feeds
Part of safety is to understand appropriate feeds and speeds for your particular end mail and material. The Bantam software will control the feed rates based on material and bit selection. Check out the links below to see what are recommended for various materials.
## Permitted Materials
It's important that you only use permitted material in the Othermill
- ✅ [FR-1 or FR-2 printed circuit board blanks](https://support.bantamtools.com/hc/en-us/articles/115001671734-FR-1-PCB-Blanks-) (**not FR-3,4**)
- ✅ [Machining wax](https://support.bantamtools.com/hc/en-us/articles/115001668653-Machining-Wax)
- [✅ Linoleum](https://www.bantamtools.com/wax-linoleum-rubber-collection/linoleum-blocks)
- [✅ ABS](https://support.bantamtools.com/hc/en-us/articles/115001668373-ABS)
- [✅ Acrylic](https://support.bantamtools.com/hc/en-us/articles/115001668393-Acrylic)
- [✅ Polycarbonate](https://support.bantamtools.com/hc/en-us/articles/115001671854-Polycarbonate)
- [✅ Brass](https://support.bantamtools.com/hc/en-us/articles/115001671714-Brass) (C360 alloy / free-machining)
- [✅ Aluminum](https://support.bantamtools.com/hc/en-us/articles/115001668413-Aluminum) (6061 alloy)
- ✅ Hard plastics (e.g., [Delrin](https://support.bantamtools.com/hc/en-us/articles/115001668553-Delrin) and [HDPE](https://support.bantamtools.com/hc/en-us/articles/115001671754-HDPE))
- [✅ Hardwood](https://support.bantamtools.com/hc/en-us/articles/115001671894-Wood) (e.g., mahogany)
- ✅ Soft stone (e.g., soapstone)
- ✅ Silver (for engraving)
- ✅ Leather (for engraving)
The following materials are not permitted.
- 🚫FR-3 or FR-4 PCB boards (fiberglass hazard)
- 🚫Carbon Fiber
- 🚫Steel, stainless or otherwise
- 🚫Iron
- 🚫Magnesium
- 🚫Titanium
- 🚫Lead
- 🚫Aluminum or Brass of unknown alloy
- 🚫Fiberglass
- 🚫Hard stone and precious gems
- 🚫Glass
- 🚫Silver chloride or other powdery materials
- 🚫Chocolate, cheese, or other food products
# Tool Care
## Inspection
Before you start using the Othermill you are expected to do an initial inspection of it and access its readiness for use. Consult the checklist at the end of this document as well as the detailed processes here.
Make sure your machine is clean. Use a good vacuum after each milling job to remove as much of the resulting material debris (called swarf, which is just the best word ever) in and around the machine as possible. Use a small paint brush to loosen any debris that accrues around the inside of the spindle housing.
Before and after milling, inspect the six metal rods. These rods, also called rails or ways, hold up the carriages in the milling machine. Make sure the rails and the bed are clear of dust, tape, or glue, and make sure you have a tidy working environment. Sticky substances on the rails can cause the machining bed to dislodge the rails from the frame and will impact your milling project.
Note the left side panel, the one with the honeycomb engraved on it. It’s missing the factory magnet that activates the safety lockout on the enclosure. There is a small magnet glued to the inside that satisfies the lockout. If the software is saying that a safety panel is open but all 4 panels look ok then this magnet might have come loose. Dull and Worn out end mills and bits Keep track of all cutting tools in order to know how long they’ve been in service. A dull end mill will make fuzzy or jagged cuts and can cause the machine to cut incorrectly. Old tools are also more likely to break while cutting.
## Operation
### Software Setup
[Download](https://www.bantamtools.com/software-download) and install the Bantam Tools Desktop Milling Machine Software
The Bantam Tools software is the application that controls the Othermill. Load your design files into the Bantam Tools software and the program will figure out the most efficient toolpaths to complete yoru milling project. You can use the Bantam Tools software on any of the Makerspace laptops, or you can download it on your own computer.
#### Compatible File Formats
- Bantam Tools Desktop Milling Machine Software supports files from many popular design tools:
- Vectors (.svg)
- EAGLE (.brd)
- Gerbers
- G-code (.nc, .tap, .gcode)
Bantam Tools Desktop Milling Machine Software is free and can be used without any hardware. So load up your files and see what it would look like to mill them.
## PCB Design Considerations
You need to have enough space between the components on your board that the OtherMill’s tool can cut between them. For example, if you’ll be using a 1/32" endmill, your traces, pads, vias, etc. need to be larger than 0.03125" apart.
You can use smaller tools, like a 1/64" endmill, which will allow you to place objects closer together. Use large tooling whenever possible to complete the job more quickly. Note, smaller bits are more prone to breaking.
If you’ll be using surface-mount (SMD) components, the pads need to have enough space between them for the tool to fit. Check the SMD package compatibility list to make sure. If your package isn’t listed, you can test if it will work by making an EAGLE board file, importing it into Bantam Tools, and looking to see if there are cut lines between the pads.
If your board has vias (electrical connections between the front and back of the board), you’ll need to create a connection between them. The simplest way is to put a piece of wire in the via hole and solder both ends, but you can also use via eyelets (aka rivets), which sit neatly in the holes as you solder them. You can also use tinned wire, which you can thread through all the holes much more quickly than eyelets or individual bits of wire.
Your holes for pads and vias need to be large enough that your tool can drill them. If you’ll be using eyelets, your holes also need to be large enough for the eyelets to fit. Bantam Tools will render what it thinks the machine can cut. If it looks like something’s been left out, add a smaller tool or change element sizes.
You can have the autorouter avoid certain areas and not use through-hole pins on components as vias. This is handy when you are using components that can’t be soldered
Recommended settings Recommended settings (spindle speed, cutting feedrate, plunge rate, maximum pass depth) are on the Othermachine support site under the “Materials†section. Follow these closely. We speak from experience. Do not use CAM software that cannot customize these settings.
Milling settings are constrained by: Bit strength. Cutting material too fast or too deep will break bits, especially smaller ones. Spindle power. If the bit goes too deep, it may get stuck and stall the spindle. Material properties. Cutting too aggressively may cause the material to deform or melt, including onto the bit (which will break the bit). Fixturing strength. The workpiece may get flung loose from the table, especially if using only tape. Keep in mind that continuous cutting may heat up the material so much that the tape loosens just from the heat.
## Setting up Othermill
- Ensure the other mill is clean and free of debris. Vacuum out any materials leftover from previous use;
- Plug the Othermil into a power outlet and connect it via USB to a computer, then turn on the machine;
- Open up the Bantam Tools software;
- Remove the safety window;
- Measure the thickness of your material accurately with digital calipers.
- In the Bantam Tools software, locate the fixturing, changing if necessary for your job;
- Set the material thickness that was measured.
- Affix your material to the Othermill base, using double-sided tape.
- Insert the correct end mill for your milling project:
- Use flat end mills for cutting 2D shapes like circuit boards, flat-sided 3D shapes, and for detail work
- Use ball end mills for cutting curves and 3D shapes into woods, waxes, and plastics
- Use engraving bits for fine detail work
- Put the safety windows back into place.
- Start the job and monitor the machine as it cuts..
When you are trying to remove a bit from the collet there is a trick to it. Loosen the nut with the wrenches then it will spin free 2 or 3 turn and stop. The bit will still be firmly held in place. Use the wrenches again to open the nut more. Hold the endmill while you’re doing this. The nug will give way and the end mill will drop. It could break a small one so make sure you have a finger on it. Fixturing Or how you affix your workpiece to the bed. There are several options beyond the directions to use Scotch 3m double sided tape. There is also heavy-duty Nitto Permacel P-02 double-sided tape which is said to stick better
For even more fixturing power, apply hot glue around the edges of the material (never under, otherwise the material will be much taller than expected). Keep in mind that hot glue is hot and will melt many plastics. Avoid cutting through hot glue; it will melt onto bits.
Extreme fixturing can be accomplished by removing the spoilboard entirely and bolting your piece into the slots in the bed. You will probably not need this.
Locating the tool tip [Check out this guide on the Bantam site](https://support.bantamtools.com/hc/en-us/articles/115001656553-Insert-and-Locate-a-Tool) for how to locate / determine the length of the too.
### Longer running jobs
For longer milling jobs, every 30 minutes, pause the job and vacuum out the machine. Use a small brush to loosen the debris, and then use the vacuum to remove the debris. Focus on the rails, the limit switches, and the linear bearings. The linear bearings are the circular pieces that the rails pass through. There are four linear bearings in each axis, so 12 total in the milling machine. To pause the job, you can either press the pause icon in the software or just pull one of the four windows off of the machine. Cleanup Always use the cleanup wizard in the Bantam software. Remove end mill from machine, return collet wrenches. Use the spatula to remove the work piece from the bed. Clean tape and residue from spoilboard Vacuum out any materials leftover from previous use; Put Safety windows back into place
### CAM
CAM is the process of going from a CAD model to machine-specific instructions on where to put the tool (in this case, Othermill G-code).
Otherplan (excluding the beta) can do its own CAM for PCBs (Gerbers or EAGLE .brd files) or for 2D cutting (from SVGs), including engraving. For anything else, you must (very carefully) generate G-code using external CAM software and load it into Otherplan.
We highly recommend Autodesk Fusion 360 for CAM. Othermachine has a tutorial on getting started in Fusion 360 here.
Special note: when generating toolpaths, make sure the tool does not go out of bounds. Otherplan will not catch the error and the preview will look correct, but your cut will silently end up offset and you will be confused and sad. Additional Resources Scotch Double Sided Tape FR-1 Copper Clad from Spark Fun FR-1 Copper Clad on Amazon Bantam Tool PCB Bit Bundle Amazon PCB Engraving Bits 1/32 endmill on Amazon PCB Probing Kit Fine Dust Collection [https://www.noisebridge.net/wiki/Othermill\_CNC](https://www.noisebridge.net/wiki/Othermill_CNC) Bantam Project Library Othermill â › bit fan [https://support.bantamtools.com/hc/en-us/articles/115001671594-Fusion-360-Tool-Library](https://support.bantamtools.com/hc/en-us/articles/115001671594-Fusion-360-Tool-Library) [https://github.com/synthetos/g2/wiki](https://github.com/synthetos/g2/wiki)
[http://makerspace.engineering.nyu.edu/wp-content/uploads/2018/09/Othermill\_Guide\_Fusion360.pdf](http://makerspace.engineering.nyu.edu/wp-content/uploads/2018/09/Othermill_Guide_Fusion360.pdf)
## CNC PCB Mill Checklist
- [ ] Ensure the other mill is clean and free of debris. Vacuum out any materials leftover from previous use and report improper cleaning on equipment log.
- [ ] Measure thickness of workpiece
- [ ] Affix your material to the Othermill base, using double-sided tape.
- [ ] Load and tighten end mill into collet.
- [ ] Set the appropriate material, size and thickness in the software for the workpiece
- [ ] Put the safety windows back into place and wear safety goggles.
- [ ] Start and monitor cut.
- [ ] After machine is no longer operating remove safety panel
- [ ] Pry workpiece off of the bed and remove all tape and residue.
- [ ] Vacuum inside of mill, use paintbrush to clean around spindle
- [ ] Ensure collet wrenches are back in their spots.
- [ ] Poweroff Othermill
- [ ] Return Tool Tray.
# Electronics - Reflow Oven
# Manual(s)
*Manuals and other reference materials from the manufacturer or other sources.*
- Model: [T-962](http://www.tech168.cn/en/Item/Show.asp?m=2&d=584)
- Manufacturer: [Puhui](http://www.tech168.cn/en)
- Documentation: [Original Manual](https://excento.pl/e-pionier/wp-content/uploads/2019/01/infrareo_ic_heater_user_manual_t962.pdf)
- Open Source Software: [Unified Engineering Open Source Software](https://github.com/UnifiedEngineering/T-962-improvements/wiki)
# Member Notes
## ModsThis printer has a series of community mods that improve it’s performance and safety
[https://github.com/UnifiedEngineering/T-962-improvements](https://github.com/UnifiedEngineering/T-962-improvements)
[https://www.youtube.com/watch?v=bgVey2O3W2k](https://www.youtube.com/watch?v=bgVey2O3W2k)
We should check the oven to see if the tape has been replaced and the ground has been fixed.we should consider if we install the open source firmware and install the temperature sensor for better performance.
# Resources
*Where to obtain materials, consumables, and tooling.*
# Tool Tutorial
## Warnings
The oven software has been replaced with the open source software from unified engineering. Consult that instead of the manufacturers manual.
Solder may contain Lead, Always use proper ventilation or fume extraction when working with the soldering equipment. Flux vapors can also be irritating to people. Use in a well ventilated area
Do not leave the reflow oven plugged in when not in use.
Do not power off the oven until it has cooled.
Ensure that your components are safe to use in the oven
- Are highly reflective, like clock crystals can'€™t be headed by infrared light.
- Plastic terminals that can'€™t withstand 250C
## Tool Anatomy
[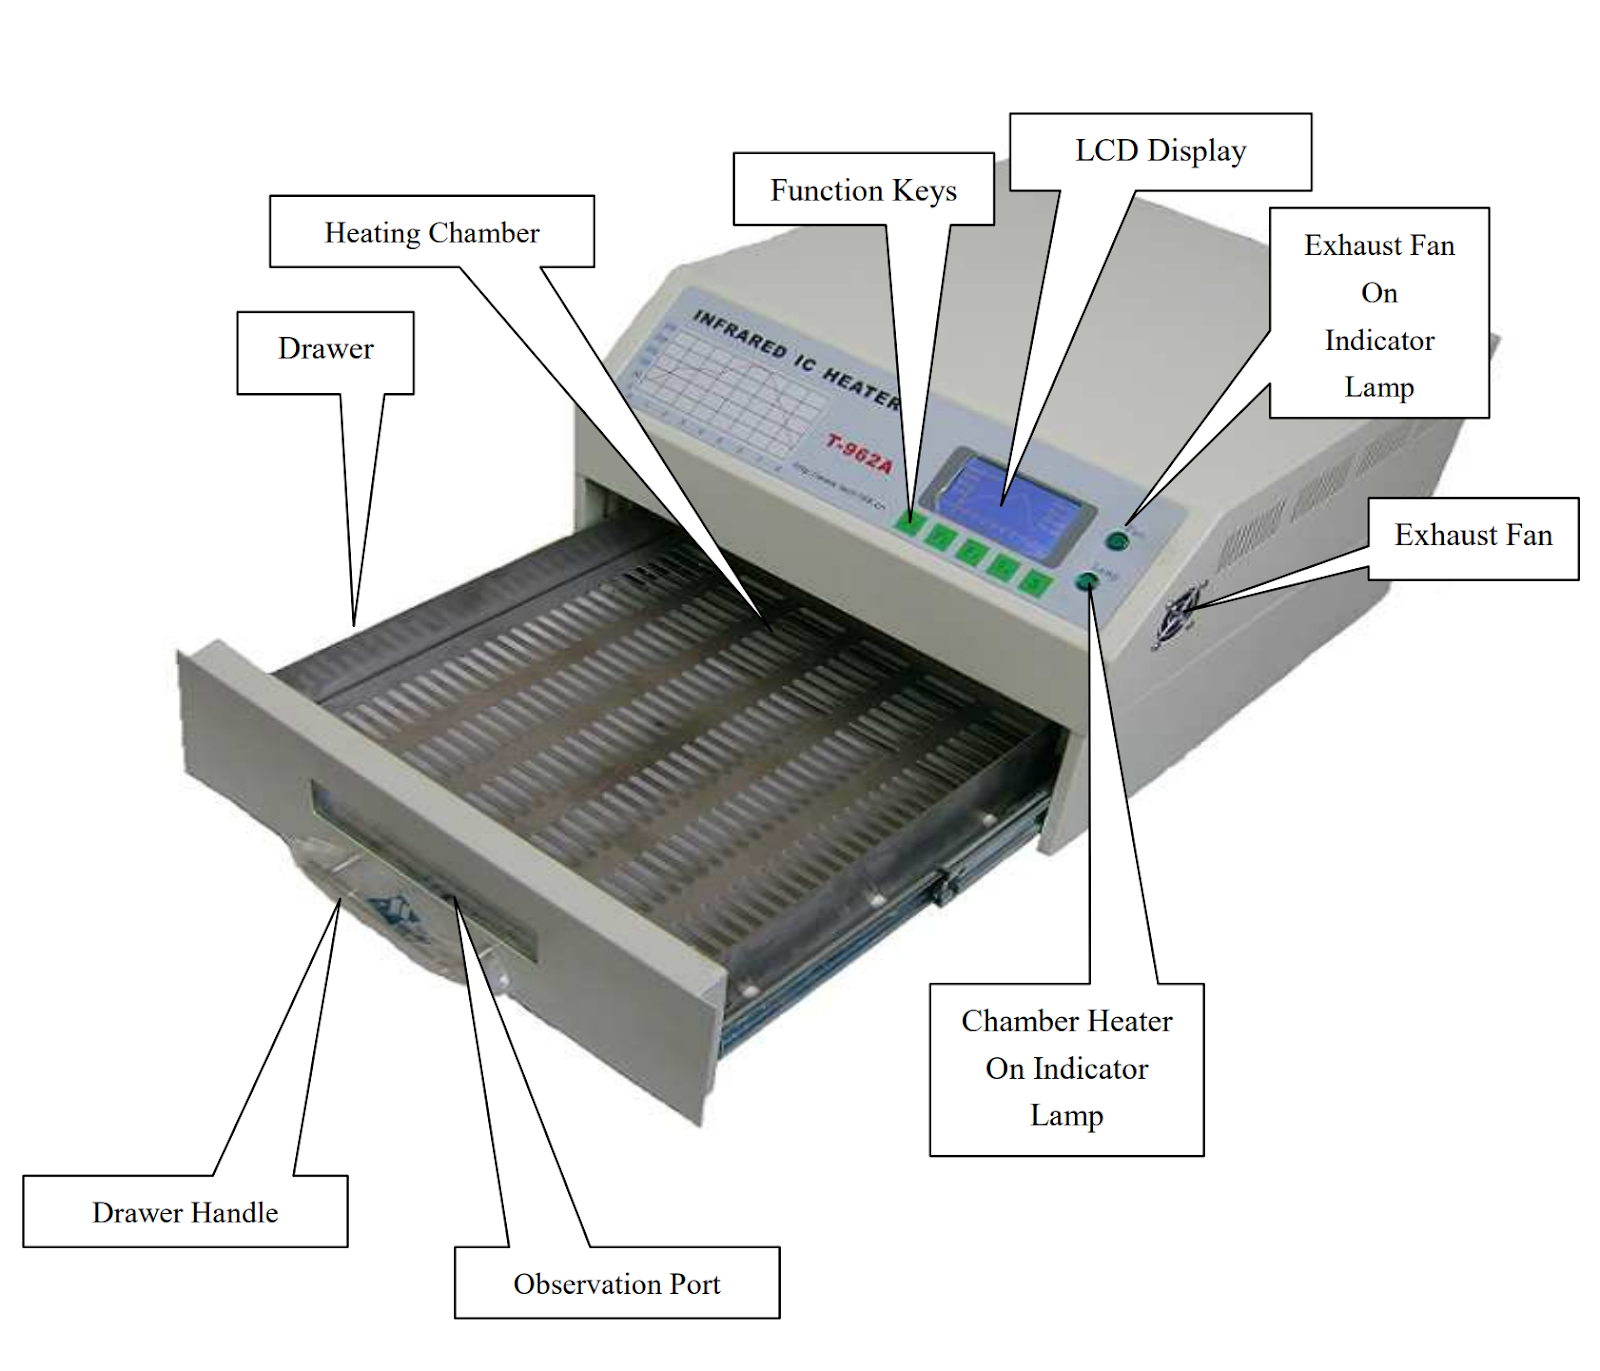](https://wiki.protohaven.org/uploads/images/gallery/2026-06/c7bimage.png)
### Soldering Safety Guidelines
#### General Soldering Safety
1. Turn the unit off or unplug it when not in use.
2. Different boards and soldiers need different temperatures don’t start out too hot
3. Give any soldered surface a minute or two to cool down before you touch it.
4.
#### Work Safely with Solder, Flux, and Cleaners
1. Use lead free solder paste
2. Keep cleaning solvents in dispensing bottle to reduce inhalation hazards.
3. Always wash your hands with soap and water after soldering.
4. Read and understand the MSDS (Material Safety Data Sheets) for all materials before beginning work (e.g., [http://jr.chemwatch.net/chemwatch.web/account/login](http://jr.chemwatch.net/chemwatch.web/account/login)).
#### Dangers of Lead Exposure
Lead ([http://www.cdc.gov/niosh/topics/lead/](http://www.cdc.gov/niosh/topics/lead/)) on your skin can be ingested and lead fumes can be given off during soldering. Other metal ([https://www.osha.gov/SLTC/metalsheavy/index.html](https://www.osha.gov/SLTC/metalsheavy/index.html)) fumes can also be hazardous. Lead can have serious chronic health effects, such as reproductive problems, digestive problems, nerve disorders, memory and concentration problems, muscle and joint pain.
#### Avoid Toxic Fumes
Work in a wellâ€ventilated area, to prevent the mildly caustic and toxic fumes from building up and causing eye or throat irritation.. The smoke formed is mostly from the flux which can be irritating, a sensitizer and aggravates asthma. Avoid breathing it by keeping your head to the side of, not above, your work.
#### Reduce Risk From Electricity
Always use a grounded outlet and grounding prong to reduce the risk of electrical damage if a short circuit occurs in the equipment.
#### Fire Prevention
Work on a fireâ€proof or nonflammable surface that is not easily ignited.
Never leave flammable items (such as paper) near the reflow oven. Know where your fire extinguisher is and how to use it.
#### First Aid
Immediately cool the affected area under cold water for 15 minutes.
Do not apply any creams or ointments. Cover with a bandâ€aid.
Seek medical attention if the burn covers an area bigger than 3 inches across.
#### Waste
1. Discard lead and silver solder and dross in a container with a lid.
2. Label the container: “Lead (Silver) Solder Waste for Recyclingâ€.
3. Used solder sponges and contaminated rags must be disposed of as hazardous waste.
4. Keep a lid on waste solder containers when not adding or removing material.
## Tool Care
### Inspection
- Ensure that the cables are in good shape and the insulation is not broken or fraying.
- Ensure your workspace is clear from debris and clutter.
- Place this machine on an even surface with good ventilation and no combustible items nearby.
- Make sure to leave adequate space in front of the machine for opening the drawer.
- Leave at least 20 mm on either side because the machine will emit heat when in use.
- Ensure the power selector switch on the power supply is set to the 110V setting.
### Cleaning
- Always keeps the drawer clean
- Clean the observation window of the drawer periodically.
- Wipe down the work area with a damp cloth and dispose of all scraps.
## Tool Operation
Consult the Unified Engineering Wiki for information on how to use the firmware. [https://github.com/UnifiedEngineering/T-962-improvements/wiki](https://github.com/UnifiedEngineering/T-962-improvements/wiki)
# Electronics - Soldering Iron
# Manual(s)
*Manuals and other reference materials from the manufacturer or other sources.*
- Model: WES51
- Manufacturer: [Weller/ Apex Tool Group](https://www.apextoolgroup.com/brands/weller)
- Manual: [Datasheet](https://www.jameco.com/Jameco/Products/ProdDS/217461.pdf)
# Member Notes
# Resources
*Where to obtain materials, consumables, and tooling.*
# Tool Tutorial
The soldering irons at Protohaven are basic analog soldering stations that are suitible for both beginners and advanced users alike. They are used to attach various components to printed circuit boards and similar to create electrical junctions between components.
The [Tool Safety](https://wiki.api.protohaven.org/books/dokuwiki/page/#tool-safety), [Tool Care](https://wiki.api.protohaven.org/books/dokuwiki/page/#tool-care), [Operation](https://wiki.api.protohaven.org/books/dokuwiki/page/#operation), section of this guide are what instructors use to ensure that you can use the equipment according to community expectations.
# Requirements
No clearance is required to use this tool if user has prior soldering experience. If you have never soldered we suggest you take one of the electronics soldering classes to be set up for success with soldering.
# Warnings
The soldering iron operates at temperatures from 350F to 850F which poses a significant burn risk if not used properly.
Solder may contain Lead, Always use proper ventilation or fume extraction when working with the soldering equipment. Flux vapors can also be irritating to people.
Do not leave the soldering iron plugged in when not in use.
See the [Safety Section](https://wiki.api.protohaven.org/books/dokuwiki/page/#tool-safety) for more information.
# Tool Anatomy
[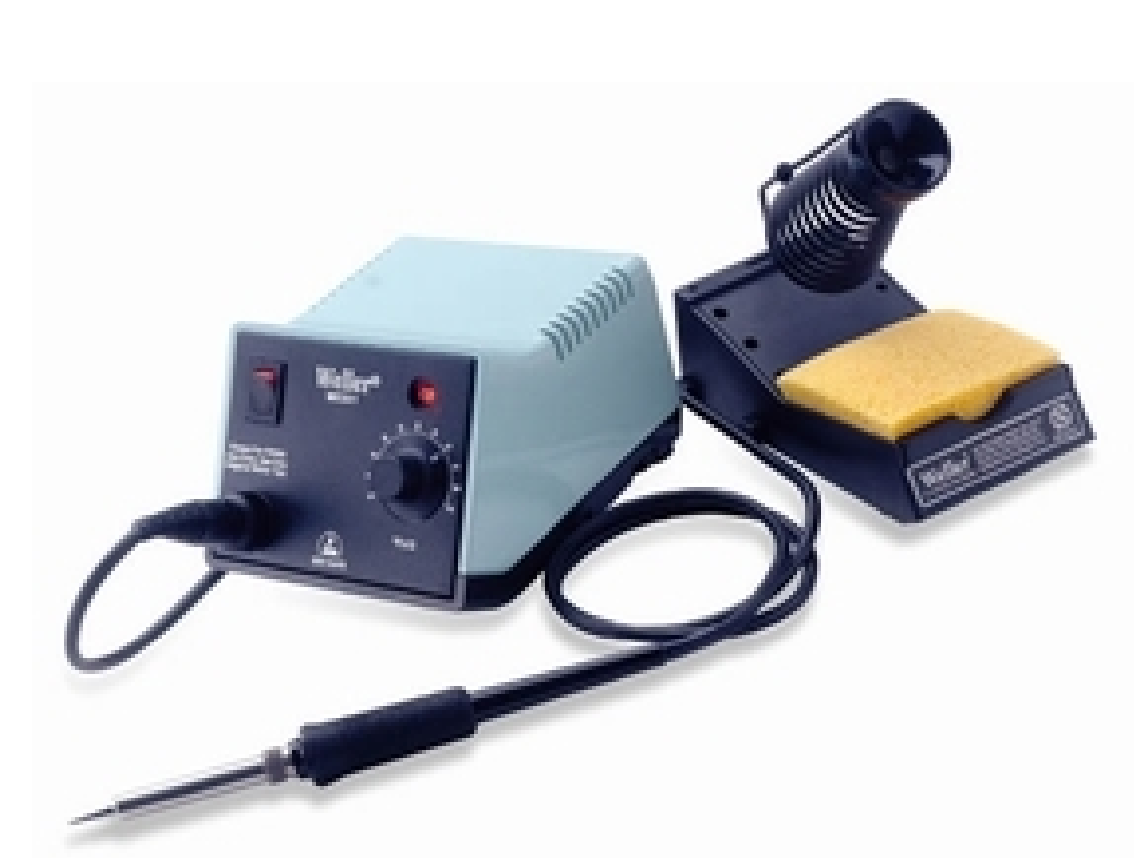](https://wiki.protohaven.org/uploads/images/gallery/2026-06/xB5image.png)
- Soldering Station Base
- Soldering Iron Pen
- Iron Holder
For more visit the manufacturers website and user manual both linked at the top of this document.
# Tool Safety
## General Soldering Safety
- Never touch the element or tip of the soldering iron. They are very hot 400-800F and will burn. The solder itself also gets hot.
- Hold wires to be heated with tweezers or clamps.
- If using a cleaning sponge, keep it wet during use.
4. Always return the soldering iron to its stand when not in use. Never put it down on your workbench. Be sure that the stand is weighted enough or attached to your work table so that it doesn’t topple over if you brush against the cord.
- Turn the unit off or unplug it when not in use.
- Soldering irons come in models that use different wattages. Use the right size soldering iron for your projects; too much heat can ruin your board or components.
- Never, ever try to catch a hot soldering iron if you drop it. Let it fall, buy a new one if you have to — just don’t grab it!
- Give any soldered surface a minute or two to cool down before you touch it.
## Work Safely with Solder, Flux, and Cleaners
- Wear eye protection. Solder can “spit†(an air pocket or impurity can pop as you heat the solder and send bits of solder flying).
- Use lead free solder.
- Keep cleaning solvents in dispensing bottle to reduce inhalation hazards.
- Always wash your hands with soap and water after soldering.
- Read and understand the MSDS (Material Safety Data Sheets) for all materials before beginning work (e.g., [http://jr.chemwatch.net/chemwatch.web/account/login](http://jr.chemwatch.net/chemwatch.web/account/login)).
## Dangers of Lead Exposure
Lead ([http://www.cdc.gov/niosh/topics/lead/](http://www.cdc.gov/niosh/topics/lead/)) on your skin can be ingested and lead fumes can be given off during soldering. Other metal ([https://www.osha.gov/SLTC/metalsheavy/index.html](https://www.osha.gov/SLTC/metalsheavy/index.html)) fumes can also be hazardous. Lead can have serious chronic health effects, such as reproductive problems, digestive problems, nerve disorders, memory and concentration problems, muscle and joint pain.
## Avoid Toxic Fumes
- Work in a wellâ€ventilated area, to prevent the mildly caustic and toxic fumes from building up and causing eye or throat irritation.. The smoke formed is mostly from the flux which can be irritating, a sensitizer and aggravates asthma. Avoid breathing it by keeping your head to the side of, not above, your work.
- A benchtop fume extractor may be necessary to remove harmful fumes caused by solder and flux from the soldering workstation by filtering the air. If the lab is equipped with a snorkel fume extractor, always use it when soldering.
## Reduce Risk From Electricity
- Always use a grounded outlet and grounding prong to reduce the risk of electrical damage if a short circuit occurs in the equipment.
- Prevent damage to electrical cords during soldering. Keep them away from heated tips.
- Never solder a live circuit (one that is energized).
## Fire Prevention
- Work on a fireâ€proof or nonflammable surface that is not easily ignited.
- Never place a hot soldering iron on your work surface: you could start a fire. Never leave flammable items (such as paper) near your soldering iron.
- Wear nonflammable or 100% cotton clothing that covers your arms and legs to help prevent burns.
- Know where your fire extinguisher is and how to use it.
## First Aid
- Immediately cool the affected area under cold water for 15 minutes.
- Do not apply any creams or ointments. Cover with a bandâ€aid.
- Seek medical attention if the burn covers an area bigger than 3 inches across.
## Waste
- Discard lead and silver solder and dross in a container with a lid.
- Label the container: “Lead (Silver) Solder Waste for Recyclingâ€.
- Used solder sponges and contaminated rags must be disposed of as hazardous waste.
- Keep a lid on waste solder containers when not adding or removing material.
# Tool Care
## Inspection
- Ensure that the cables are in good shape and the insulation is not broken or fraying.
- Ensure your workspace is clear from debris and clutter.
- Ensure that the tip is fastened securely.
- If the tip can’t be cleaned with the sponge and won’t take on a tinning file a maintenance request to have the tip replaced.
## Cleaning
When you are done and the tip is cooling down, clean it in the copper tip cleaning sponge, it will clear of oxidation and debris and tin the tip for the next user.
Wipe down the work area with a damp cloth and dispose of all scraps.
[](https://wiki.protohaven.org/uploads/images/gallery/2026-06/u4Mimage.png)
## Recommended Soldering Procedure
1. Turn on the fume extractor
2. Put on safety goggles
3. Make sure the iron is in the stand. Always return the soldering iron to its stand when not in use.
4. Turn on the main switch to the iron (never touch the tip of the iron)
5. If using a cleaning sponge, Dampen the sponge in the stand
6. Wipe the tip of the iron on the cleaning sponge, either brass or natural to clean the tip.
7. Melt a little solder on the tip of the iron. This 'tinning' will help the heat to flow from the iron's tip to the joint. This is necessary when you first turn on the iron and occasionally while soldering if you need to wipe the tip clean on the sponge.
8. Hold the soldering iron like a pen, near the base of the handle. Imagine you are going to write your name! DO NOT touch the hot element or tip.
9. Touch the soldering iron onto the joint to be made. Make sure it touches both the component lead and the track. Hold the tip there for a few seconds.
10. Feed a little solder onto the joint. It should flow smoothly onto the lead and track to form a volcano shape. Apply the solder to the joint, not the iron.
11. Remove the solder, then the iron, while keeping the joint still. Allow the joint a few seconds to cool before you move the circuit board.
12. Remember to return the iron to the stand.
13. Inspect the joint closely. It should look shiny and have a 'volcano' shape. If not, you will need to reheat it and feed in a little more solder. This time ensure that both the lead and track are heated fully before applying solder.
14. **Switch off and unplug the soldering station**.
[](https://wiki.protohaven.org/uploads/images/gallery/2026-06/yt5image.png)
## Tip Selection
[|Check out this Guide on soldering Iron tips](https://www.electronicshub.org/soldering-iron-tip/). But unless you know you need a different style tip you should stick with the Chisel tip.
[](https://wiki.protohaven.org/uploads/images/gallery/2026-06/g0bimage.png)
# Finishing - Powder Coating Booth
Model: SpectraCoat ES-01
Manufacturer: PowderBuyThePound
# Manual
Stub!
# Member Notes
[Powder\_Coatings\_Troubleshooting\_Guide.pdf](https://wiki.protohaven.org/attachments/588)
# Resources
## Accessories
If you want to buy your own powder containers to use with the shop powder coating booth, these are recommended:
[https://powderbuythepound.com/products/1-lb-spectracoat-powder-container-sku2340](https://powderbuythepound.com/products/1-lb-spectracoat-powder-container-sku2340)
[www.eastwood.com](https://www.eastwood.com) - Another supplier of powder coating media and guns.
[www.powdermarket.com](https://www.powdermarket.com) - Masking supplies and filler materials.
[www.prismaticpowders.com](https://www.prismaticpowders.com) - Offers more than 6,500 powder colors to choose from.
[www.powdercoatingonline.com](https://www.powdercoatingonline.com) - Powder coating information for the beginner and expert
# Powder Coating Booth Tool Tutorial
## Safety and Procedures
Dustproof safety goggles and a NIOSH-approved respirator are recommended
Never touch the tip of the gun to the part while coating it. This may cause a painful static discharge or even ignite the powder coating media
Powder coating dust can ignite, so do not coat parts near an open flame
The powder coating system uses extremely high voltages so members with pacemakers are not permitted to use the system.
Typical curing temperatures are around 400 degrees F. Anything that cannot handle such temperatures (rubber seals, grease, paint, etc.) must be removed before putting it in the oven
## Overview
While powder coating seems like a relatively recent invention, it has been around for about 50 years. Powder coating yields a superior finish with excellent durability. Powder coating is recognized as an environmentally friendly method of applying a quality finish. Unlike paint, powder coating releases almost no volatile organic compounds (VOCs) into the environment. The powder is easily cleaned up
with a broom and dust pan or vacuum cleaner.
Powder coating is a process in which a dry, powdered polyester resin is sprayed on to the item to be coated. The powder is positively charged as it exits the powder coating gun. The item to be coated is grounded and attracts the positively charged particles to the surface. Once cured in an oven, the surface is smooth and tough.
Virtually any type of metal can be powder coated, including steel, aluminum, magnesium, cast iron, brass, copper, bronze and titanium.
The key to a long-lasting and good-looking finish is the preparation of the metal. The best way to prep the surface is by abrasive blasting it down to bare metal with aluminum oxide or glass beads. Once the part is bare metal, the part is washed with a chemical cleaner to remove any dirt or leftover abrasive from the blasting process. The part is then baked in the oven for a short period to fully dry it before coating it.
## Part Prep: Abrasive Blasting
Abrasive blasting cleans paint, rust or corrosion, and other finishes from the part quickly and easily. See our [Sandblaster Tool Tutorial](https://wiki.protohaven.org/books/tool-guides/page/sandblaster-tool-tutorial) for details on sandblasting your part.
## Part Prep: Chemical Cleaning
Once the item has been cleaned down to bare metal, it will need a chemical cleaning. The chemical cleaning helps remove any dust or other media left over from the abrasive blasting as well as any skin oils left where you may have picked up the part with your bare hands. Clean steel parts with an alkaline cleaner such as soda ash or trisodium phosphate (TSP), while aluminum, brass and zinc may be cleaned with Simple Green.
1. Preheat the powder coating oven to the temperature specified by your powder media. See our [Powder Coating Oven Tool Tutorial](https://wiki.protohaven.org/books/tool-guides/page/powder-coating-oven-tool-tutorial) for details.
2. Fashion hooks from steel wire to hang your part from in both the paint booth and the powder coating oven. Once your part is clean, you don’t want to get any oils on it that may make for a poor finish.
3. Rinse your part under running water thoroughly. Spray it generously with the appropriate cleaner,
scrub it well with a brush, and then rinse it thoroughly under running water again.
4. Holding the part by the hook, hang the part in the preheated powder coating oven for five to 30 minutes, depending on the size, thickness and porousness of your part. Open the oven door slowly to avoid a blast of hot air in your face.
[](https://wiki.protohaven.org/uploads/images/gallery/2026-07/p7timage.png)
## Powder Coating Setup
While your part is drying out in the oven, it’s a good time to get the powder coating gun and surrounding area set up.
1. Turn on the booth lights
2. Connect the air hose (on the wall) to the control box (via the transparent tube)
3. Turn the control box on
4. With no powder loaded, confirm the control box has correct KVA and air pressure:
5. Remove the powder gun from its holster and bring it to the control box
6. Point the gun away from you and any electronics, then squeeze the trigger
7. Adjust the displayed air pressure to between 2-4 PSI
8. Adjust the KVA as recommended by your powder's spec sheet (default: 70KVA)
9. Replace the powder gun in its holster
10. Inspect the gun, ground clamp wires, and other areas of the booth for leftover powder and perform any missed cleanup steps as needed to prevent cross-contamination.
11. Insert your powder into the cup (no more than 1/3 full)
12. Screw the cup into the lid that's mounted on the side of the booth.
13. Turn on the air filter
14. Test the spray pattern of the powder coating gun. It should come out in a light fog. Adjust the air pressure as necessary.
## Powder Application
TODO picture of powder coating controls
Once your parts have dried and the powder coating gun is set up, you can remove your part from the
oven and powder coat it.
1. Open the over door slowly, use a pair of heat resistant gloves to remove your part from the oven, and hang it in the spray booth. If you have any masking to do, let your part cool before applying any tape.
2. Attach the ground lead to something metal that makes a complete circuit to your part. Since powder coating is an electrostatic process, it’s very important that the part be properly grounded. If powder does not stick to your part, then it’s likely the part is not well grounded.
3. Move the tip of the gun to between six and 12 inches from your part, click the voltage switch and pull the trigger, and move the gun to apply powder to your part. Similar to using spray paint, keep the gun moving while applying powder to make an even coat.
**SAFETY NOTE:** The tip of the powder coating gun is holding a very high voltage charge. Due to this high voltage, it is extremely important that you **do not bring the tip of the gun too close to the grounded part.** At distances less than six inches, electricity may arc between the gun and part. If powder is being applied when an arc occurs, it could result in a flash fire of powder. If this happens, immediately release the voltage switch and trigger to stop the flow of powder. Unplug
the powder coating gun and clean any fused powder from the gun. You may also have to remove fused powder from the part.
[](https://wiki.protohaven.org/uploads/images/gallery/2026-07/yp9image.png)
## Curing
Once your part is coated, it will need to be placed in the oven. Each powder has different cure times and temperatures, so be sure to read the directions carefully - see our [Powder Coating Oven Tool Tutorial](https://wiki.protohaven.org/books/tool-guides/page/powder-coating-oven-tool-tutorial) for details.
Transfer your part from the spray booth to the oven. Be careful, since knocking parts into each other may create a poor finish.
### Applying a Second Coat
When applying a second coat or re-coating a part, modifications in equipment settings and/or technique are needed. The electrostatic charge should be reduced (either by lowering voltage or limiting current) and/or the gun-to-part distance should be increased.
Be aware that the application will require more time. The equipment will not be as efficient (i.e., transfer efficiency will decrease when doing re-coats), but the application can be achieved. Sanding the base coat prior to powder application can aid in second-coat adhesion.
Applying a second coat to a part that has a cured powder coat finish requires adjustments in charge setting, time and technique. With patience and proper technique, you should be able to achieve the finish you desire.
### Coating Hot Parts
Powders can be applied to hot surfaces. To use this technique, pre-heat the part to cure temp, 10 to 40 minutes, depending on size. After pre-heating, remove part from oven and immediately apply powder.
You will notice that powder will flow immediately upon contact. Exercise care to avoid drips and runs.
Place coated part back into pre-heated oven set at cure temp for an additional 20 minutes to complete the cure.
## Cleanup
Keep the air filter running during cleanup to contain airborne powder!
1. Turn off the control box.
2. Detach the cup, return remaining powder to your supply, then wash and dry thoroughly. Store the cup upside-down on the conical drying rack next to the control box.
3. Detach the air hose from the control box. With the air filter running, use the air hose in a sweeping motion to push any loose powder towards the filter at the back of the booth.
4. Place the gun on the floor and oriented towards the rear wall, then use the air hose to blow air into the intake of the powder gun (the larger opening in the cup mount) for 2-3 seconds to eject remaining powder from the line.
5. Using a slightly damp paper towel, wipe down any loose powder on the ground clamp, cable, and all surfaces of the powder gun and its hoses. Holster the powder gun.
6. Use the shop vac to clean up any remaining loose powder from the filter, booth walls, floor, powder cup mount area, ground clamp and cable, and anywhere else you find it.
7. Turn off the booth light and the air filtration system, and tidy up any cables.
## Care of the Finished Part
A powder coated finish requires very little care. Powder coating produces a very scratch resistant finish.
If you get scratches in a powder coated finish, gently sand the affected area with 600-1000 grit wet sandpaper. Then use a buffing wheel with appropriate compound to remove the sandpaper scratches and achieve your desired shine. Generally, waxing is not recommended for powder coated finishes. If you contaminate the powder finish with wax, you can no longer re-coat the part with
powder and will have to strip the part back to bare metal and start over.
### Removing Powder Coating
Most organic solvents (acetone, thinners, etc.) are completely ineffective for removing powder coated finishes. Aircraft remover is generally effective at removing powder coating, as is abrasive blasting, though this is a time-consuming process due to the adhesion quality of powder.
## Troubleshooting Tips
#### Pitted Finish
1. Make sure the gun is thoroughly cleaned before starting or changing to another powder.
2. Make sure the part is completely cleaned of all contaminants.
3. After cooling, wet sand the areas with 600-1000 grit to level the pits. A second coat of powder can then be applied to the entire part.
#### Coating Porous Materials
In some cases, contaminants in porous materials will cause pits in the powder. Porous cast iron, die-cast metal, cast aluminum, and magnesium parts trap contaminants that outgas when heated and cause porosity problems as the powder is curing. To avoid this, preheat the part to 400°F for 30-60 minutes.
Die-cast metal and solders vary widely in formulation, many of which can be difficult to powder coat and, in some cases, may even melt at the 400°F typically used to cure most powder coat media.
#### Orange Peel
Orange peel is when the coated surface resembles the surface texture of an orange or other citrus fruit. A certain amount of orange peel is unavoidable, especially with polyester-based powders.
Orange peel can often be removed by sanding the part with 400-600 grit sand paper (wet or dry) and then buffing the part to achieve a good shine.
The main causes of orange peel are insufficient coating, over-baking or excessive powder buildup. Powder buildup is easy to see because the powder will start to stand on its end like hair. If this happens, stop applying powder and, with light air pressure, blow off some of the powder. If the powder does not apply evenly, replace moisture trap on the gun and use fresh powder.
#### Poor Spray Pattern
If the gun does not spray, the air pressure could be too low or moisture may be clogging the filter. The level of powder in the cup should be at least one inch deep to flow efficiently through the gun.
#### No Coverage or Poor Coverage in Recessed Areas
Hold the gun so that the side or peripheral discharge of powder goes into crevices, recesses and sharp angles. Exercise care to maintain at least a six-inch clearance from the part being coated in order to avoid an arc.
# Finishing - Powder Coating Ovens
# Manual(s)
*Manuals and other reference materials from the manufacturer or other sources.*
Small Powder Coating Oven:
- Model: [Bench Top Powder Coating Oven](https://www.jegs.com/i/JEGS/555/81430/10002/-1)
- Manufacturer: [Jegs](https://www.jegs.com/)
- Manual: [Download](https://www.jegs.com/InstallationInstructions/500/555/555-81430.pdf)
Large Powder Coating Oven:
- Manufacturer: [PowderX ](https://powderx.com)
- Manual: [Large-Oven-Temperature-Controls-.pdf](https://wiki.protohaven.org/attachments/156)
# Member Notes
# Resources
*Where to obtain materials, consumables, and tooling.*
# Powder Coating Oven Tool Tutorial
We provide a large and a small powder coating oven for curing powder coated metal parts. The small oven is used for any powder coating job that will fit, to save time and electricity as the large oven takes a long time to heat up.
This tutorial focuses on operation of the ovens. For more details on the powder powder coating process, see the [Powder Coating Booth Tool Tutorial](https://wiki.protohaven.org/books/tool-guides/page/powder-coating-booth-tool-tutorial "Powder Coating Booth Tool Tutorial")
# Tool Anatomy
### Small Oven
### [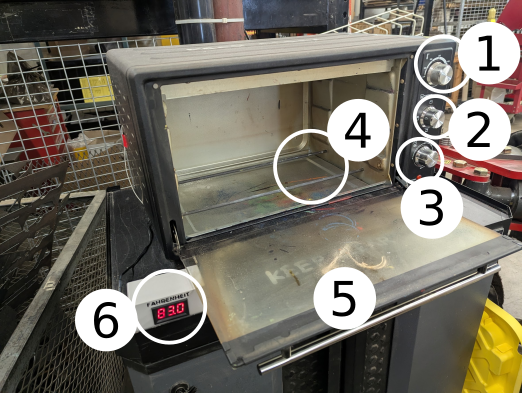](https://wiki.protohaven.org/uploads/images/gallery/2026-07/small-oven-anatomy.png)
1. Thermostat dial
2. Selector dial
3. Timer dial
4. Heating elements
5. Glass Door
6. Temperature Display (Fahrenheit)
### Large Oven
[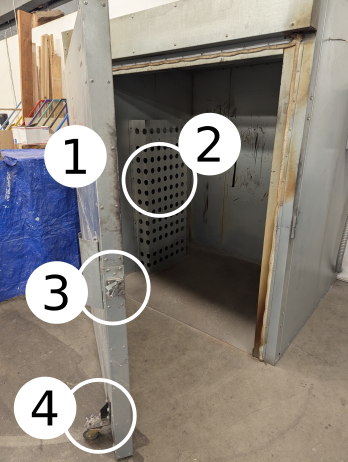](https://wiki.protohaven.org/uploads/images/gallery/2026-07/large-oven-anatomy.png)
1. Door
2. Heating elements (behind the perforated metal screen, on both sides of the interior of the oven)
3. Door latch
4. Door caster
#### Large Oven Controller
[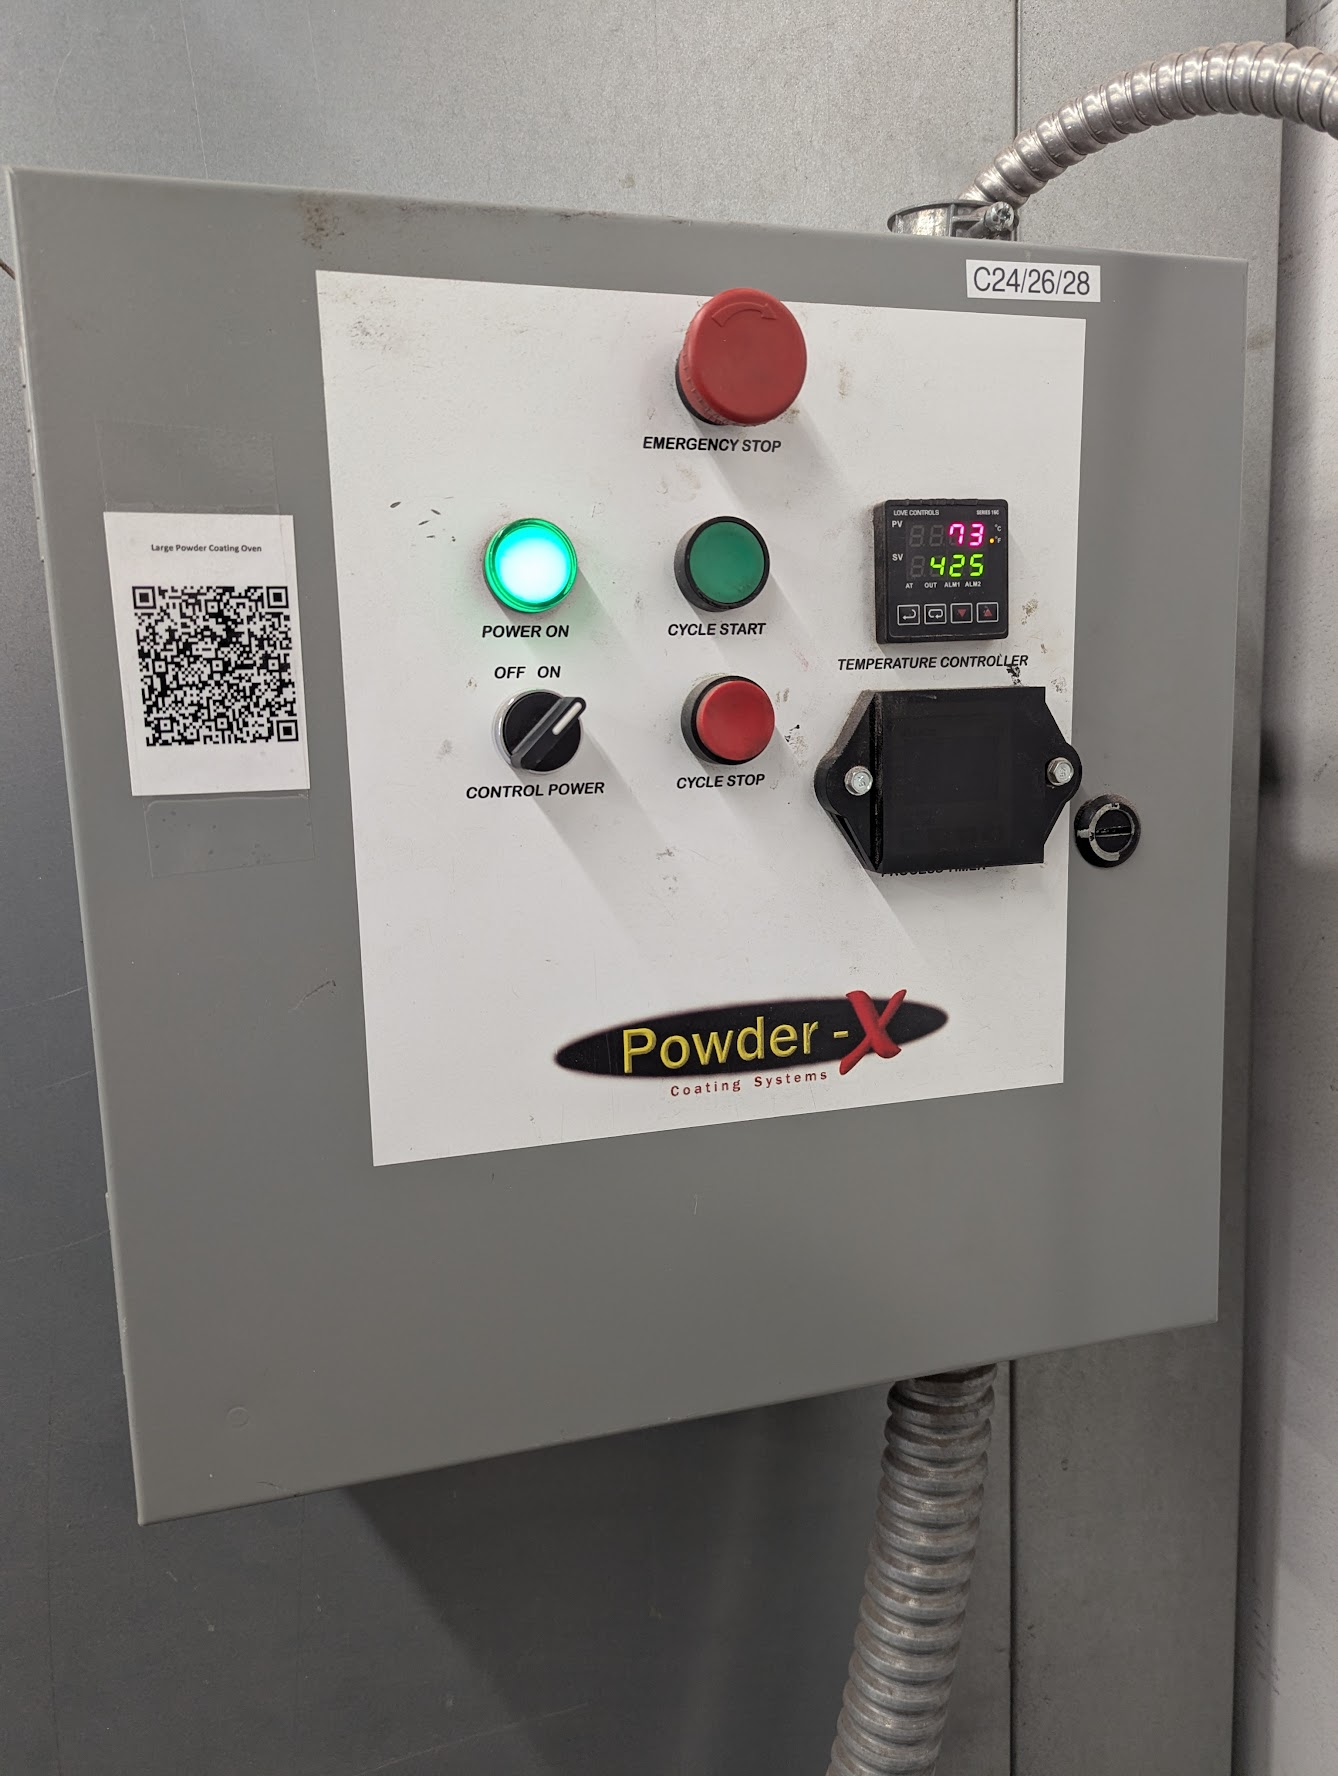](https://wiki.protohaven.org/uploads/images/gallery/2026-07/ZfYimage.png)
- Emergency Stop Button (rotate counter-clockwise to release)
- Power On Indicator
- Cycle Start Button
- Cycle Stop Button
- Control Power Switch
- Temperature Controller
- Timer Indicator (bottom right, below temp controller)
# Safety
- Always wear protective insulated oven gloves when inserting or removing items from the hot oven.
- Unplug the small oven from the outlet when not in use and before cleaning. To disconnect, turn the control to OFF before removing the plug. Always hold the plug - never pull the cord.
- Clean, dry, and uncoated conductive metals that can withstand curing temps are permitted (e.g. steel, aluminum, brass)
- Flammable or toxic materials (or coatings on top of metal) are prohibited
# Basic Operation
### Startup & Usage
Typical curing temperatures are around 400 degrees F. Anything that cannot handle such temperatures (rubber seals, grease, paint, etc.) must be removed before putting it in the oven.
#### Large Oven
1. Twist the Emergency Stop button to ensure it is in the "out" position.
2. Rotate the Control Power switch to the ON position
3. Using the up-down chevron buttons on the temperature controller, adjust the green temperature set point as desired (usually around 400F)
4. Press the green "Cycle Start" button. You should hear a "kerchunk" sound as the controller switches on power to the heating elements.
5. Monitor the oven as it comes up to temperature. When the red value (measured temperature) on the temperature controller is a few degrees away the green value (set point), you can use the oven.
6. Carefully open and swing the latch bar free of the door - it can catch on the frame and prevent the door from opening.
7. Quickly roll the door open, insert your project, and close and latch the door.
8. When finished, take out your part in the same manner and follow the Cleanup steps below to turn off the oven.
#### Small Oven
1. Ensure that there is enough ventilation around the oven (at least four inches of space on all sides).
2. Ensure that the oven is completely dry
3. Turn the thermostat dial clockwise to the desired temperature.
4. Turn the selector dial to the desired position.
5. Turn the timer dial clockwise to the desired cooking time.
6. The indicate light will light up until the desired temperature is reached.
7. Transfer the whole rack in and out - allow parts to cool before putting them on or taking them off, and before cleaning.
8. When the cooking procedure is done, turn the timer back to turn off the oven.
### Cleanup
#### Large Oven
1. Move the control power switch to the OFF position
2. Press the Emergency Stop button
3. Double check inside the oven and remove any project materials or debris
4. Leave the oven door closed and latched
#### Small Oven
- Turn off the oven to allow it to cool off.
- Set the selector dial to off position.
- Unplug the oven
- Once the oven is cool, clean the interior with a damp cloth or paper towel
Do not use a hard brush or abrasive cleaners like thinner or solvent on oven surfaces.
# Finishing - Sandblaster
SkatblastUSA 1536 Champion Abrasive Blasting Cabinet
# Manual(s)
*Manuals and other reference materials from the manufacturer or other sources.*
- Model: [SkatblastUSA 1536 Champion Abrasive Blasting Cabinet](https://www.skatblast.com/product/usa-1536-abrasive-blasting-cabinet/)
- Manufacturer: [SkatblastUSA](https://example.com)
- [DustCollector-InstructionManual\_compressed.pdf](https://wiki.protohaven.org/attachments/558)
- [SkatBlast-Cabinet\_InstructionsAndSafetyManual\_2011 (1)\_compressed.pdf](https://wiki.protohaven.org/attachments/559)
# Member Notes
# Resources
*Where to obtain materials, consumables, and tooling.*
## Additional Resources
[Manufacturer€'s website](https://skatblast.com/&sa=D&source=editors&ust=1676742608395285&usg=AOvVaw205FvGcDaCCVzDs6lSO38R) and [FAQ](https://skatblast.com/blast-cabinet-faq/&sa=D&source=editors&ust=1676742608395491&usg=AOvVaw2od3pf6gT--wl6dBM2KLIQ)
[Skat Blast on Youtube](https://www.youtube.com/channel/UCcMZgQvRfwgIN2qbBEHNbmQ/videos&sa=D&source=editors&ust=1676742608395772&usg=AOvVaw0T5OKISfljlW0hbMTdDNyc)
### Supply Resources
[Grimco Pittsburgh](https://www.grimco.com/info/Locations/pittsburgh&sa=D&source=editors&ust=1676742608396279&usg=AOvVaw0O_JirrJyDnjSxzAxH1kNu) ($)
[Buttercut Resist](https://www.hisglassworks.com/bond-and-etch/acid-etching/buttercut-resist.html&sa=D&source=editors&ust=1676742608396700&usg=AOvVaw0-2UVei_GNlDHcmBmD_zXD) (local vinyl cut supplier, $$$)
Highly resilient, rubber sandblast masking used for creating stencils that can be sandblasted. Can be cut by hand or with a [Vinyl Cutter](https://www.protohaven.org/equipment/&sa=D&source=editors&ust=1676742608397015&usg=AOvVaw3L4lVd7GKsjDAx_Ycv0AFq).
[Photo Resist Film](https://ikonicsimaging.com/films/pbvinyl-sheets.html&sa=D&source=editors&ust=1676742608397356&usg=AOvVaw0z3wk5ghV_LwC_lzHhvg5F) ($$$)
An advanced photo-imageable film alternative to hand-cut and plotter-cut vinyl. Allows for a finer image quality without the hassle of weeding.
# Sandblaster Tool Tutorial
The [Setup](https://docs.google.com/document/d/112TET4cJDh7Fsg_i3Sz1wWPevySFR8Ml90wAZxndKaI/edit#heading=h.ex7lrkf7dm2k), [Operation](https://docs.google.com/document/d/112TET4cJDh7Fsg_i3Sz1wWPevySFR8Ml90wAZxndKaI/edit#heading=h.w363ck6j8o52), and [Cleanup](https://docs.google.com/document/d/112TET4cJDh7Fsg_i3Sz1wWPevySFR8Ml90wAZxndKaI/edit#heading=h.4s5ijlcmnku) Checklists of this guide are what instructors use to ensure that you can use the equipment according to community expectations.The sandblaster uses pressurized air to spray abrasive against your material inside a protective cabinet. This helps you to remove old coatings, surface corrosion and oxidation; prepare parts for painting or powder coating; or even etch patterns into your material.
##
## Usage Highlights
[Sandblaster Clearance](https://www.protohaven.org/equipment/) or [Class Equivalent](https://www.protohaven.org/product-category/classes-events/) Required Before Use
2. Ensure all doors are closed and properly latched before use
2. Do not point the gun at the window, gauntlets, or anything other than the item being abraded
2. Gently wipe the interior of the window
3. Always disconnect air before working on blasting gun
3. Submit a [maintenance request](http://protohaven.org/maintenance) when needed.
3. Allow the gauntlets to dry if they’ve become moist due to sweat
## Personal Protective EquipmentFace Masks & Cleaning Kits are required at all times during the Pandemic. While using the Sandblaster, safety goggles and a dust mask are also required. A respirator with replaceable cartridges, particle filter mask, or vapor mask is recommended, but a nuisance dust mask is sufficient for shorter tasks.Closed-toed shoes (preferably boots) are required in the workshop.Disposable gloves, although not required, may be used inside the gauntlets that are permanently affixed to the sandblaster. 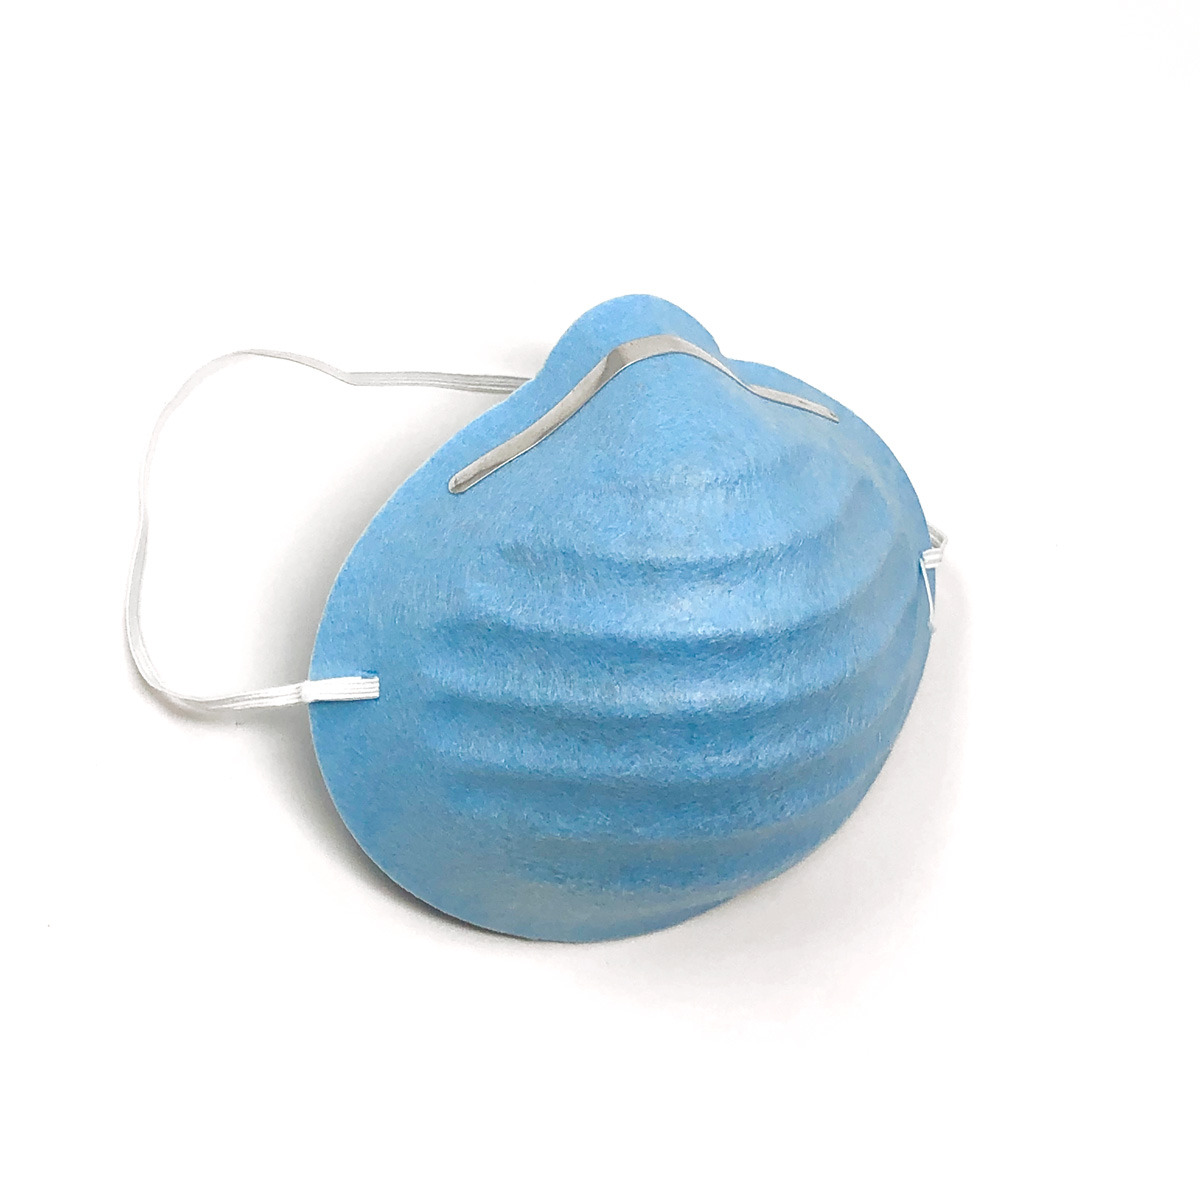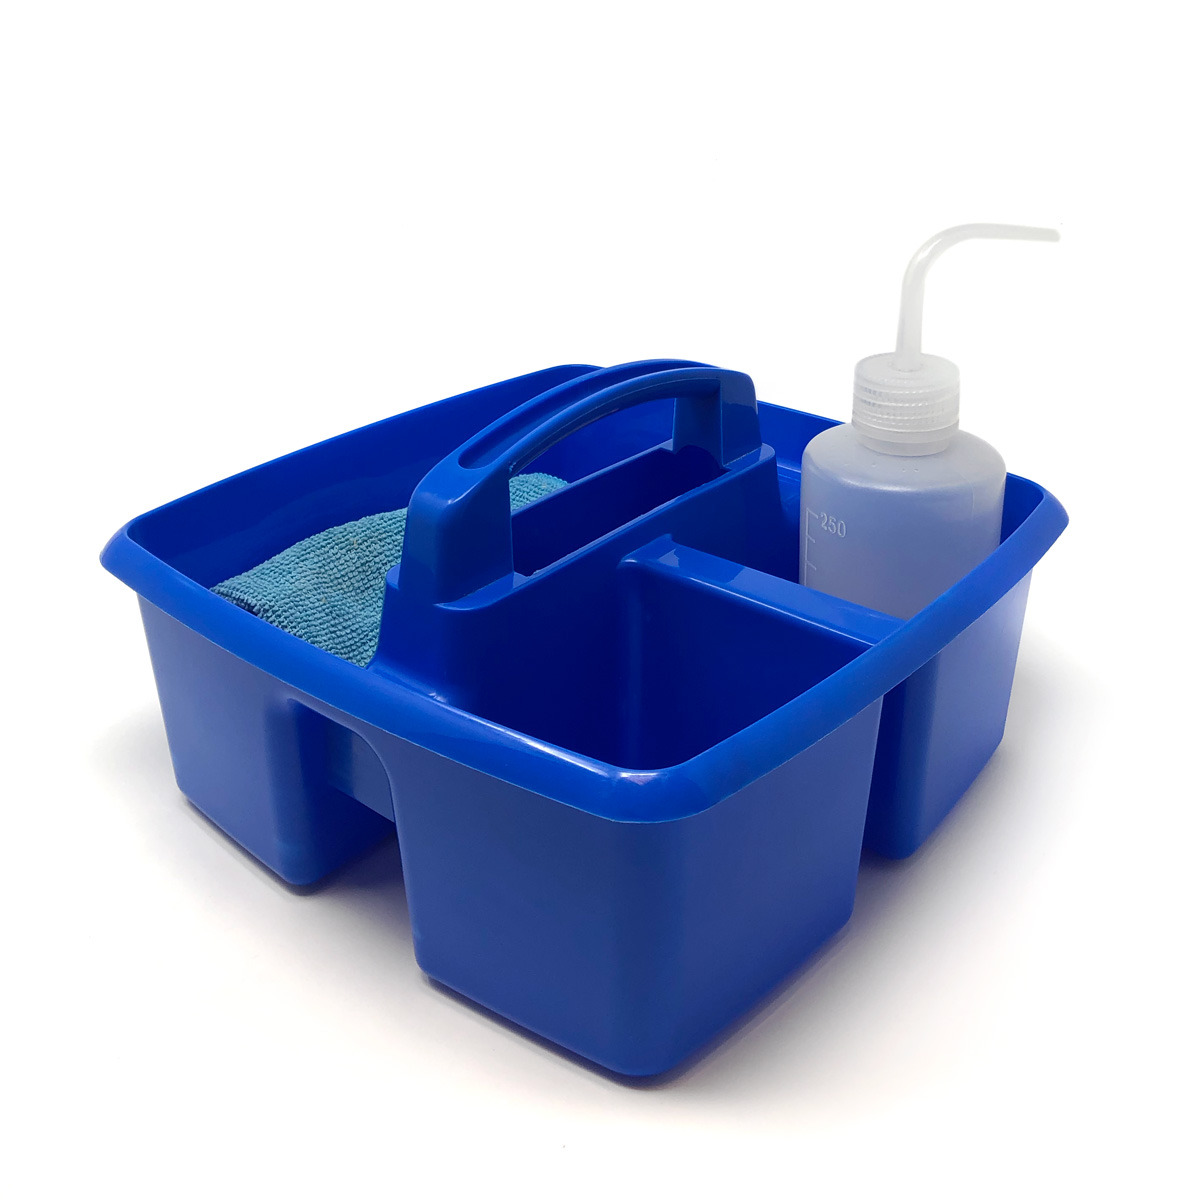
## Tool Anatomy
### MACHINE ANATOMY
1. Power Switch - on/off switch
2. E-Stop - Reserved for emergencies. To deactivate and reset, you must twist the spring-loaded knob.
3. Maintenance Tag - Manually tracks the usability status with Green/Yellow/Red cards
4. Viewport and protective film - allows the user to see what they’re doing. The replaceable protective film helps preserve the viewport from abrasive damage.
5. Access Doors and Latches - allow access to the interior of the cabinet
6. Siphon hose - pulls media from the hopper to the gun
7. Air Hose - provides air pressure to the sandblaster
8. Blasting gun - directs the stream of abrasive
9. Foot Pedal - must be pressed for blasting to occur
10. Screen Filter- filters debris as material is removed
11. Media hopper - holds the abrasive media underneath the cabinet
12. Trap Door - Easy opening door for quick-access change of abrasive
13. Gauntlet Gloves - permanently affixed heavy gloves that allow the user to manipulate items inside the cabinet with the doors closed.
14. Dust Collector - keeps (most of) the dust generated by the sandblasting process from escaping into the vicinity of the sandblaster
## Tool Safety
### COMMON HAZARDS
#### DUSTThe dust produced by the sandblaster is hazardous for your respiration
- Always ensure the access doors are properly latched before sandblasting
- Ensure your [PPE](https://docs.google.com/document/d/112TET4cJDh7Fsg_i3Sz1wWPevySFR8Ml90wAZxndKaI/edit#heading=h.gdootd55d07m) is appropriate and properly rated for respiratory protection
- Always wear a respirator when adding/removing abrasive media
- Keep others safe by vacuuming any built-up dust on or around the cabinet—especially after changing out the media
#### ABRASIVE DAMAGEAnything inside the cabinet can be damaged by the abrasive.
- Do not point the gun at the viewport
- Do not allow the abrasive blast to touch or abrade the gauntlets
### PROHIBITED MATERIALS
#### WET, OILY, OR GRIMY MATERIALSWet or oily materials should not be used in the sandblaster, as it will cause the abrasive to gum up and become useless very quickly. The pool of abrasive can also be worn down with excess debris. To avoid this, always remember to do the following before blasting:
- Ensure the material is clear of oil and moisture
- Remove dirt or any loose material from the surface by hand
#### RESILIENT MATERIALSResilient materials (e.g. items dipped in vinyl, or covered in soft paint or powder coat, etc.), while not prohibited, will not respond well to the abrasive flow, as the particles will tend to bounce off rather than remove the material.It is strongly recommended that you remove as much of such materials as possible through chemical or manual means, then use the sandblaster to finish up removal in tight crevices and similar.
## Initial Setup
### SETUP CHECKLIST
1. Check the level of abrasive supply in the hopper.
2. Ensure that part(s) to be blasted are clean, dry, and oil-free.
3. Unlock latches on the door.
4. Place and [secure part(s)](https://docs.google.com/document/d/112TET4cJDh7Fsg_i3Sz1wWPevySFR8Ml90wAZxndKaI/edit#heading=h.sy6tyhuqja19) inside.
5. Close the door and Lock the latches.
6. Ensure that the foot pedal is locked in the on position
7. Begin operation
Keep (a) abrasive level below the (b) air inlet.The level of abrasive in the hopper should be roughly ⅓ of the total depth (between 25 and 50 pounds of abrasive).If there is insufficient abrasive in the blast cabinet, or it does not appear to be abrading the material, please submit a [maintenance request](http://protohaven.org/maintenance).
## Basic Operation
### OPERATION CHECKLIST
1. Turn on the switch on top of the cabinet to turn on lights and start the vacuum.
2. Put your hands in the gauntlets.
3. Aim the gun and the part at about 45 degrees to one another, a couple inches away.
4. Squeeze the trigger to begin blasting.
5. Move the gun and part closer together or further apart to adjust the blast area.
6. Sweep the gun back and forth smoothly over the area to be blasted.
Before operation, always ensure both latches are firmly secured.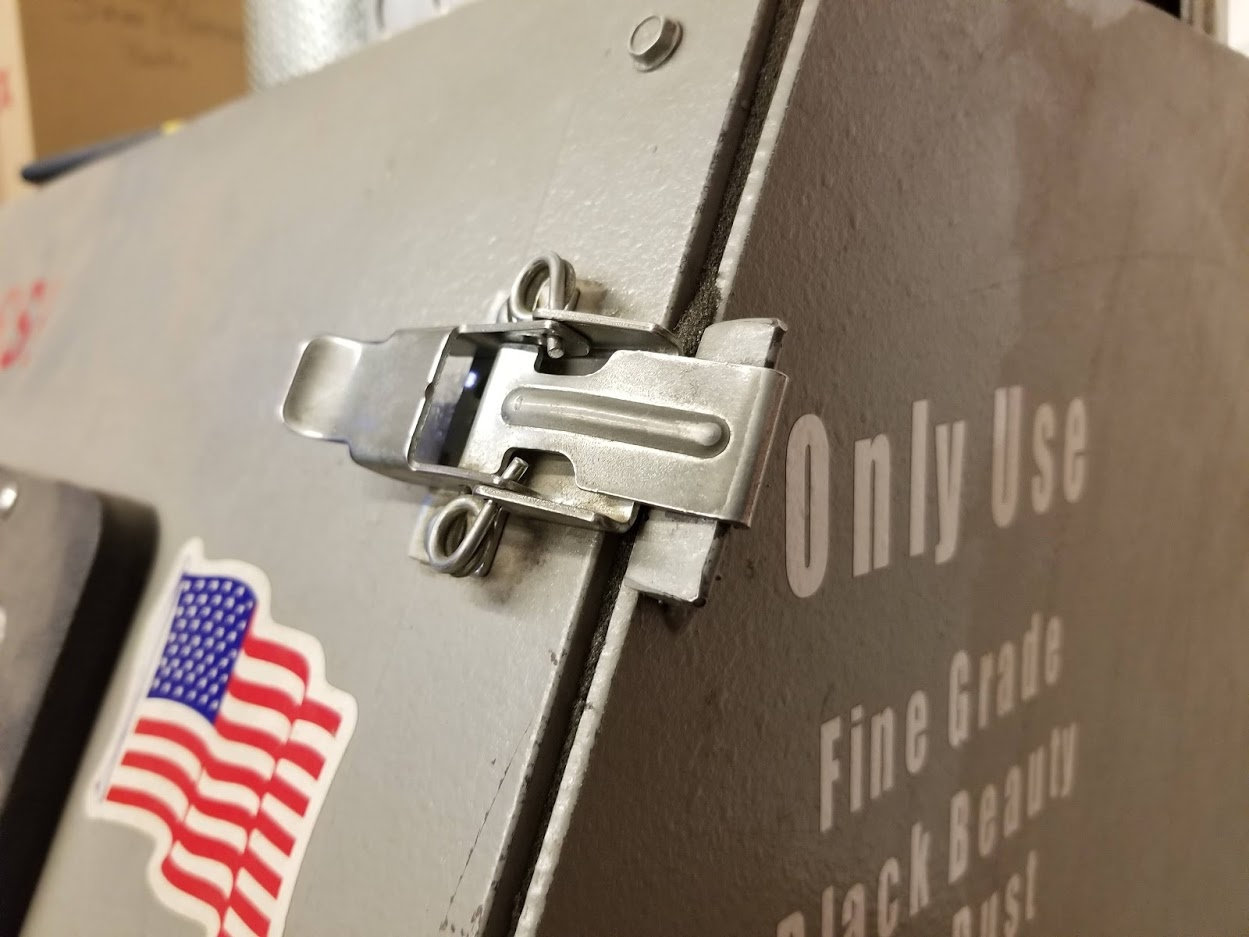
### HOW IT WORKS(1) Air from the compressor goes through (2) foot pedal control to (3) power gun. When pedal is pressed, air blows through the power gun, pulling makeup air into (4) pickup tube through (5) power zone, picking up abrasive through (6) gun venturi and out (7) nozzle.Blast hits object. Most abrasive drops to (8) bottom for recycling. Dust is pulled out (9) vac hose outlet and into (10) vacuum container. (11) Lighter particles stick to (12) internal filter cartridge and clean air exhausts through (13) vac motor and into (14) optional Final Filter.
### WORKHOLDING
L-brackets (as seen on left) can be used to support workpieces via clamps, magnets, or gravity.Small parts can be contained inside the basket (as seen on right).
Small parts must be safely secured, lest they take wing and fly about the interior. Use of scrap wood, clamps, baskets, or strong magnets may be required; just be sure to use clean, dry, and oil-free materials such as metal or wood (which you don’t mind having abraded).Larger parts can be held in the gauntlet not holding the gun (so long as there is clearance to avoid affecting the gauntlet with the abrasive), or allowed to rest in the cabinet under their own weight.
## BACK-PURGING
## A rubber ball makes an ideal stop for back-purging.Press the tip of the siphon gun directly against a piece of rubber or similar material.Then, squeeze the trigger for a few seconds.
## Cleanup
### CLEANUP CHECKLIST
1. Turn off the switch on top of the cabinet.
2. Sweep or vacuum up any extraneous dust on or around the cabinet
3. If necessary, wipe the interior of the viewport with a dry cloth to improve visibility.
4. Invert (turn inside-out) the gauntlets, so that they can more easily dry out before the next user.
5. Note any maintenance needs or concerns on the tag and at [protohaven.org/maintenance](http://protohaven.org/maintenance)
## Troubleshooting
### Common Issues
### Possible Causes
### Resolutions
No abrasive coming out of the gun
Insufficient level of abrasive
Ask a volunteer to add more abrasive, so that the hopper is no more than ⅓ full (roughly 25-50 pounds of abrasive)
Abrasive not piled in hopper
Shake the hopper gently with your knee, to encourage the abrasive to settle.
Siphon hose not in abrasive
Make sure that the siphon hose is in the abrasive hopper, and that there is enough abrasive to cover its lower end well
Siphon hose clogged
[Back-purge](https://docs.google.com/document/d/112TET4cJDh7Fsg_i3Sz1wWPevySFR8Ml90wAZxndKaI/edit#heading=h.m1bx0yfbnp6l) the gun and line, by pressing the tip directly against a piece of rubber or similar material, then squeezing the trigger for a few seconds.
Abrasive action seems poor
Bad angle or distance between gun and part
Experiment with different distances and angles between the gun and the part
Material being removed is soft or resilient
Remove as much of it as possible outside the blaster, using chemical (e.g. paint stripper) or mechanical (e.g. wire brush, scrapers) means. Softer materials take longer to be blasted away.
The abrasive may be worn down from use, or gummed up from inappropriately damp or oily material.
Please submit a [maintenance request](http://protohaven.org/maintenance), in order to have the abrasive replaced.
## Special Setups
### RESISTS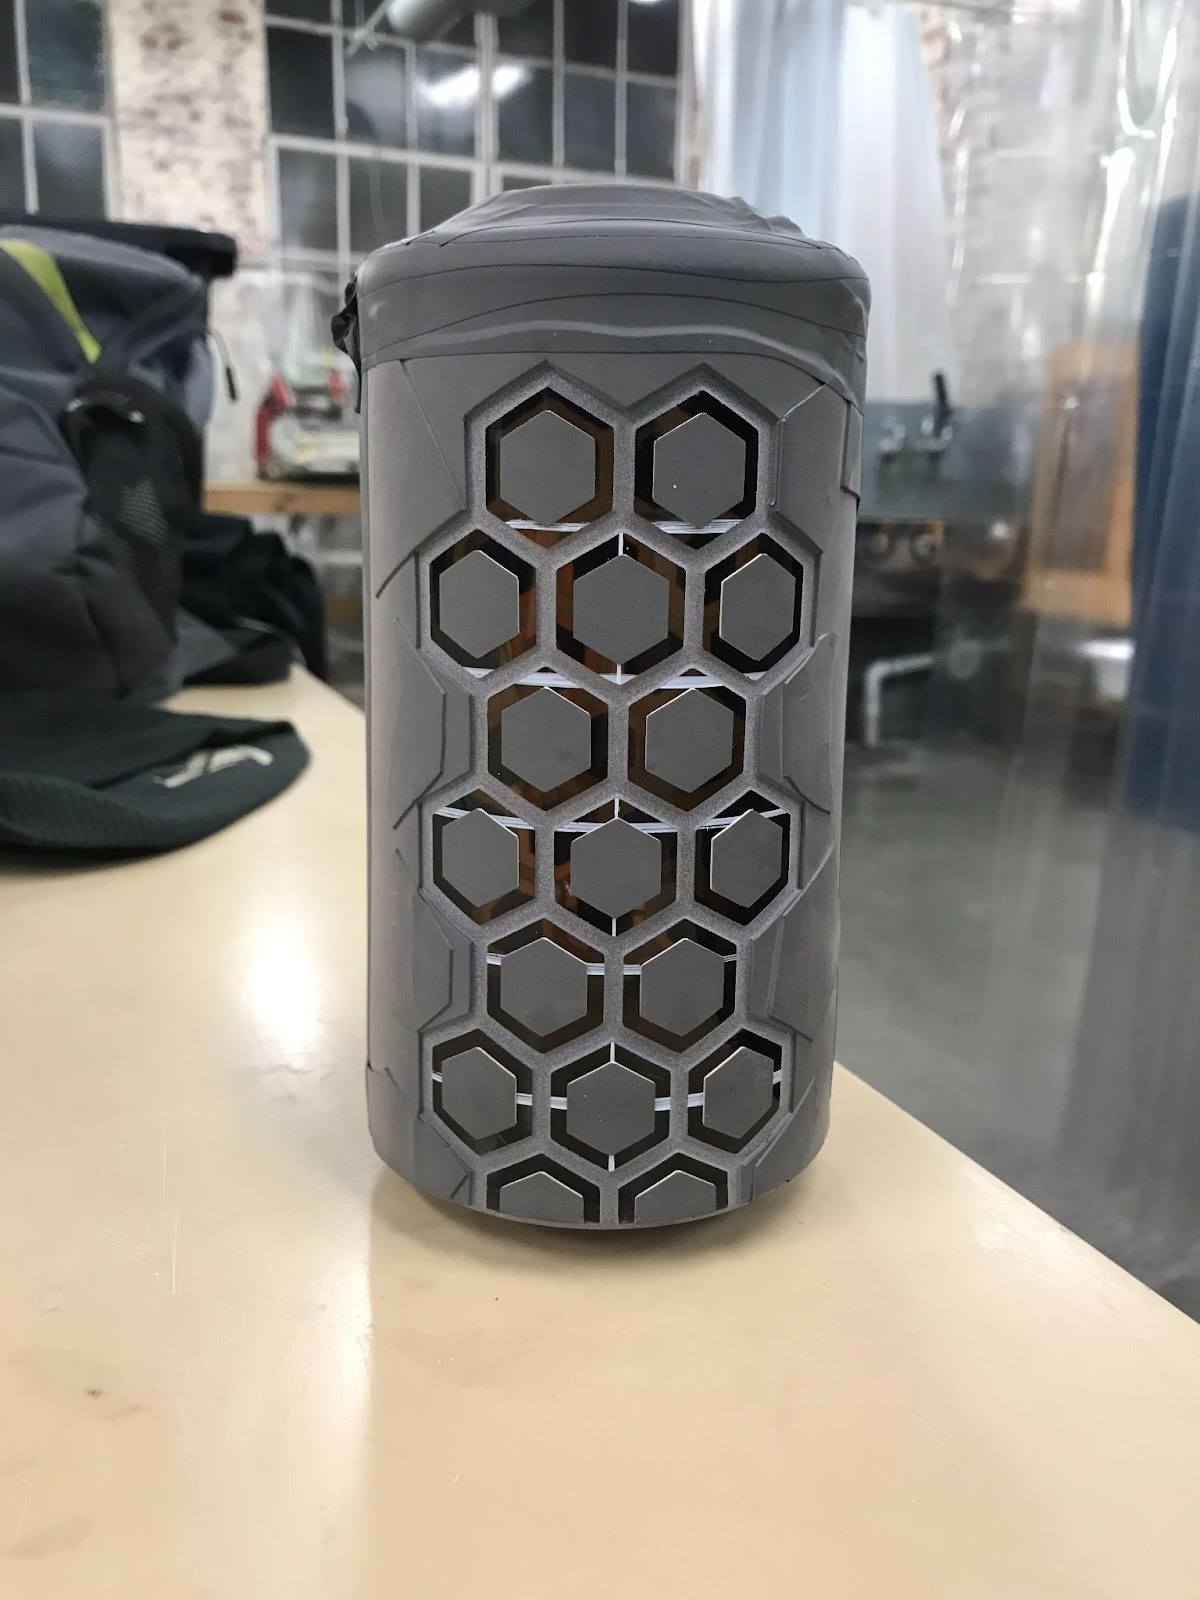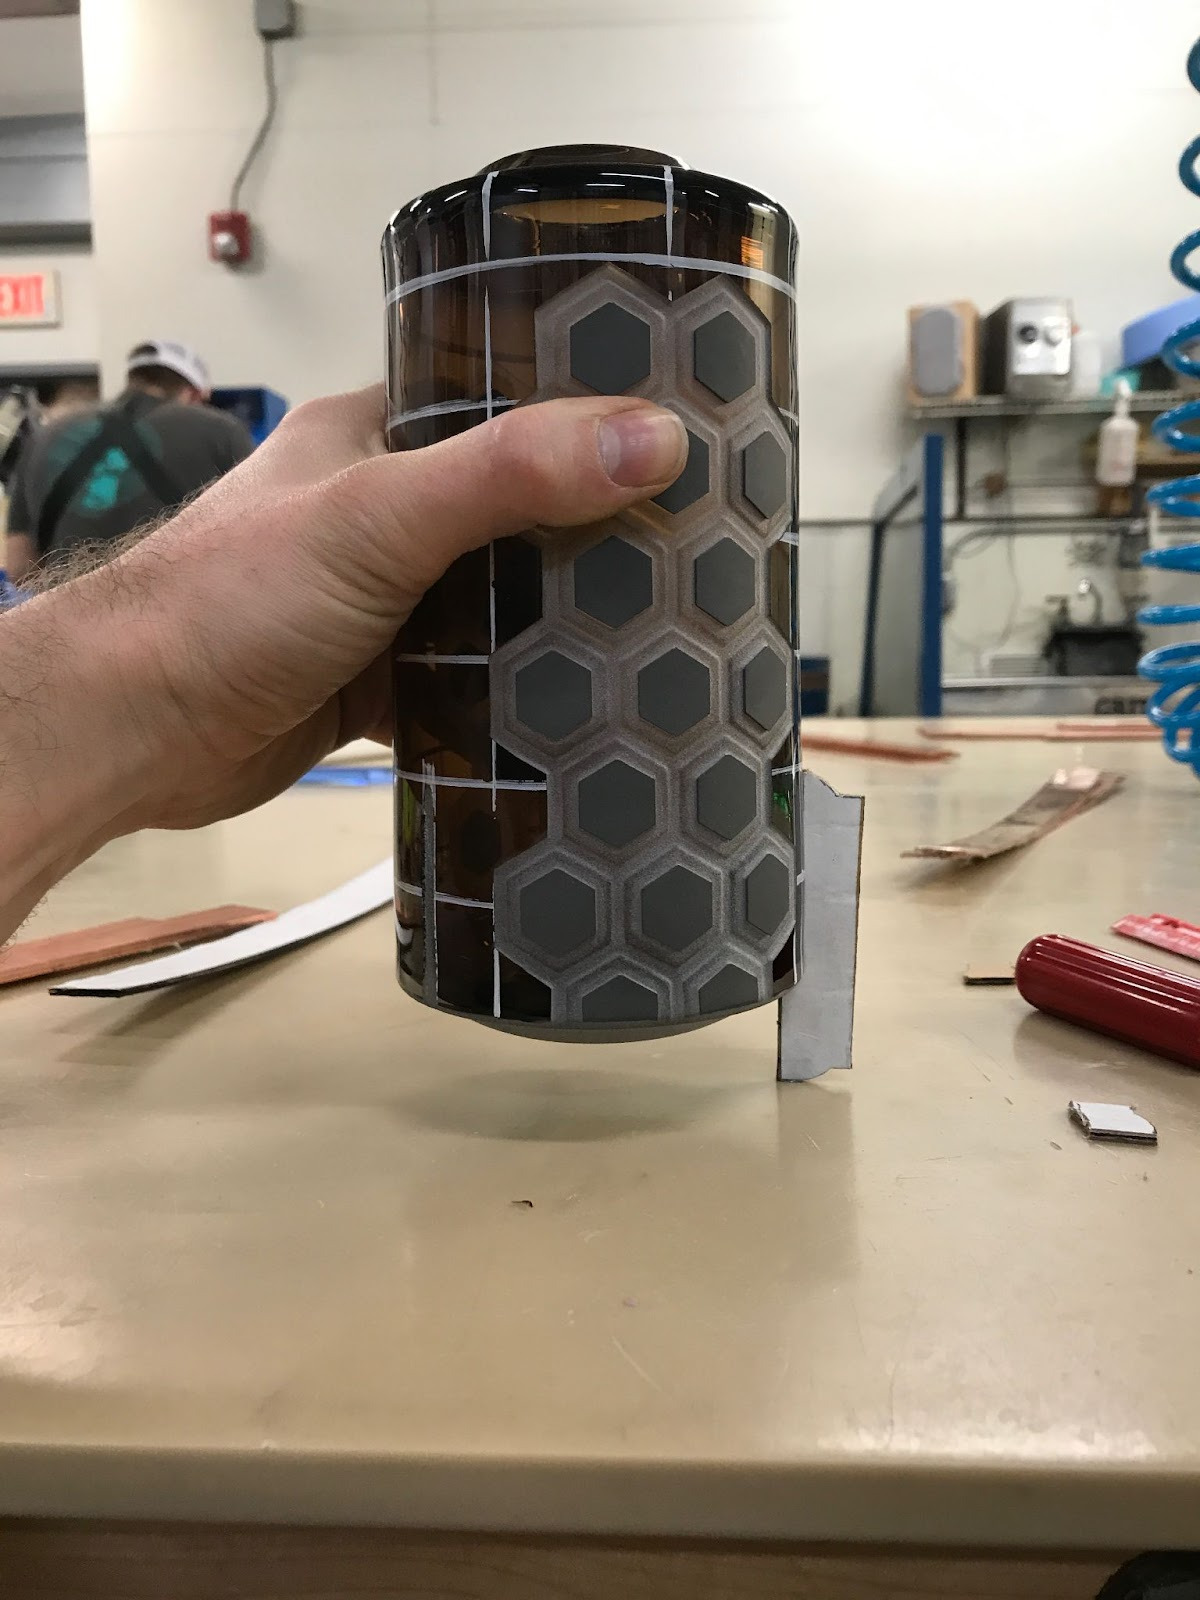For etching materials such as glass, or protecting some portions of a part from being abraded, you may wish to use some form of resist...extra material used as a type of stencil to shield those surfaces you wish to protect.Resists can be made of various materials...almost anything that is not easily abraded and can be securely fastened to the part will work.For example, you could use the [Vinyl Cutter](https://www.protohaven.org/equipment/) to produce a resist that you could adhere to a glass bottle; after blasting the glass, peel the vinyl resist away, to reveal a clear pattern in the frosted glass.
### OVERSIZED PARTSIf you wish to blast parts that are physically too long to fit into the cabinet with the doors closed, it is possible to construct a temporary extension out of materials such as duct tape and heavy cardboard, which you can fasten to the end of the cabinet with the door open. Consult with a staff member before doing so, so that they can verify the safety, dust resistance, and structural integrity of the extension.
## Additional Resources
[Manufacturer’s website](https://skatblast.com/) and [FAQ](https://skatblast.com/blast-cabinet-faq/)
[Skat Blast on Youtube](https://www.youtube.com/channel/UCcMZgQvRfwgIN2qbBEHNbmQ/videos)
### SUPPLY RESOURCES
[Grimco Pittsburgh](https://www.grimco.com/info/Locations/pittsburgh) ($)Local Vinyl Supplier
[Buttercut Resist](https://www.hisglassworks.com/bond-and-etch/acid-etching/buttercut-resist.html) ($$$)Highly resilient, rubber sandblast masking used for creating stencils that can be sandblasted. Can be cut by hand or with a [Vinyl Cutter](https://www.protohaven.org/equipment/).
[Photo Resist Film](https://ikonicsimaging.com/films/pbvinyl-sheets.html) ($$$)An advanced photo-imageable film alternative to hand-cut and plotter-cut vinyl. Allows for a finer image quality without the hassle of weeding.
### For more information:
[The Skat Blast FAQ](https://skatblast.com/blast-cabinet-faq/)
[Sand Blast Cabinet Manual](https://docs.google.com/document/d/112TET4cJDh7Fsg_i3Sz1wWPevySFR8Ml90wAZxndKaI/edit#heading=h.fd79499io83t)
[Dust Collector Manual](https://drive.google.com/file/d/1qoiXHExQLJm5moXvGKGQBYs1TsPQFypc/view?usp=sharing)
# Graphics - Cold Laminator
# Cold Laminator Tool Tutorial
Our Cold Laminator is 60" wide and can be useful for a variety of projects. The laminator is also extremely useful for applying masking to laser projects. Plywood, Acrylic, Leather, etc.
Another use for the laminator is for creating plaques/awards, where a base material such as solid wood is engraved and a sheet of glass/acrylic is laminated on top, using a clear double sided lamination film.
The laminator can be powered, but we have disabled that and use it manually - this is mainly for safety, but manual use is also slower and better for inexperienced users.
[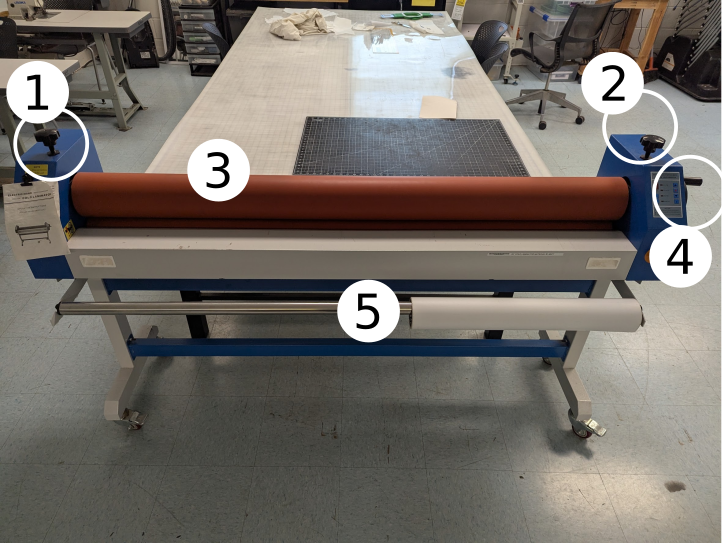](https://wiki.protohaven.org/uploads/images/gallery/2026-07/cold-laminator-anatomy.png)
1. Roller height adjustment knob (left)
2. Roller height adjustment knob (right)
3. Top and bottom rollers
4. Manual hand crank
5. Spool holder
## Safety
- The material that is being laminated should not have raised sharp edges that will cut/damage the rubber rollers (like raised edges from plasma cutting or a burr from a band saw cut). Any sharp edges should be rounded over before using the machine.
- The adhesive should not squeeze out and contaminate the rollers. Any project that will end up with adhesive squeeze out should use a different process than the cold laminator.
## Basic Operation
We have traditional plastic lamination material available in 25" and 60" widths. The 60" is kept in the class storage room because it is rarely used.
Here is a good video on how to use the laminator manually: [Cold Laminator Video](https://youtu.be/tXaWiPmnvRg?si=fZxt6XKPs7cXckkH "Cold Laminator Video")
## Cleanup
- When done using the machine: the 2 rubber rollers should not be left in contact with each other, Raise the upper roller until there is a gap between the rollers.
# Graphics - Dye Sublimation Printer
Epson SC-F570 (previously Sawgrass SG1000)
Clearance: Required
# Manual(s)
*Manuals and other reference materials from the manufacturer or other sources.*
-
# Member Notes
# Resources
*Where to obtain materials, consumables, and tooling.*
[Sawgrass s1000 Manual](https://www.sawgrassink.com/Sawgrass/media/Documents/Tech%2520Support/Guides/Sawgrass-User-Guide-English.pdf&sa=D&source=editors&ust=1676742597127515&usg=AOvVaw3q91oZcefjKIVkFF0iYCpq "https://www.sawgrassink.com/Sawgrass/media/Documents/Tech%2520Support/Guides/Sawgrass-User-Guide-English.pdf&sa=D&source=editors&ust=1676742597127515&usg=AOvVaw3q91oZcefjKIVkFF0iYCpq")
[Sawgrass "Ink Differently" Blog](https://www.sawgrassink.com/getting-started/ink-differently-blog&sa=D&source=editors&ust=1676742597128318&usg=AOvVaw32AaaF3cWuqNdg04PHABKL "https://www.sawgrassink.com/getting-started/ink-differently-blog&sa=D&source=editors&ust=1676742597128318&usg=AOvVaw32AaaF3cWuqNdg04PHABKL")
[Free, Basic Sawgrass Courses](https://academy.sawgrassink.com/collections&sa=D&source=editors&ust=1676742597128869&usg=AOvVaw0Rl95q6LfFvNbdRw3YMFqr "https://academy.sawgrassink.com/collections&sa=D&source=editors&ust=1676742597128869&usg=AOvVaw0Rl95q6LfFvNbdRw3YMFqr")
[Inkscape: The Basics](https://www.youtube.com/watch?v%3D8oGsjLSHol0&sa=D&source=editors&ust=1676742597129555&usg=AOvVaw077bdO5ijDtPuBOXtWXeBr "https://www.youtube.com/watch?v%3D8oGsjLSHol0&sa=D&source=editors&ust=1676742597129555&usg=AOvVaw077bdO5ijDtPuBOXtWXeBr")
[Inkscape: Hand Trace Images](https://www.youtube.com/watch?v%3DY_MpPc30M6A&sa=D&source=editors&ust=1676742597130080&usg=AOvVaw3tF9mFWXB3_c3hfFXsD39S "https://www.youtube.com/watch?v%3DY_MpPc30M6A&sa=D&source=editors&ust=1676742597130080&usg=AOvVaw3tF9mFWXB3_c3hfFXsD39S")
[Inkscape: Auto-trace images into vectors](https://www.youtube.com/watch?v%3DVQ97Y35qO9A&sa=D&source=editors&ust=1676742597130685&usg=AOvVaw0JzP3syGYt5Ke35L5KmGE- "https://www.youtube.com/watch?v%3DVQ97Y35qO9A&sa=D&source=editors&ust=1676742597130685&usg=AOvVaw0JzP3syGYt5Ke35L5KmGE-")
[Corel Draw: Anatomy of Vectors](https://www.youtube.com/watch?v%3D91fhkXQs9vU&sa=D&source=editors&ust=1676742597131376&usg=AOvVaw1fFM5fsgMud-EXdn2WVzJ_ "https://www.youtube.com/watch?v%3D91fhkXQs9vU&sa=D&source=editors&ust=1676742597131376&usg=AOvVaw1fFM5fsgMud-EXdn2WVzJ_")
[Corel Draw: Vector Tracing Tutorial](https://www.youtube.com/watch?v%3D31nldmLpwfc&sa=D&source=editors&ust=1676742597131994&usg=AOvVaw08kZNWnfQuoXEoLIhCM-e1 "https://www.youtube.com/watch?v%3D31nldmLpwfc&sa=D&source=editors&ust=1676742597131994&usg=AOvVaw08kZNWnfQuoXEoLIhCM-e1")
[Corel Draw: Envelope & Perspective Tool](https://www.youtube.com/watch?v%3D9d4vBfc-mQQ&sa=D&source=editors&ust=1676742597132597&usg=AOvVaw2RYnlG5-R5m_3f_3KKwjfq "https://www.youtube.com/watch?v%3D9d4vBfc-mQQ&sa=D&source=editors&ust=1676742597132597&usg=AOvVaw2RYnlG5-R5m_3f_3KKwjfq")
[Adobe Illustrator in 5 minutes](https://www.youtube.com/watch?v%3D3GzumUieDPY&sa=D&source=editors&ust=1676742597133360&usg=AOvVaw2vWD9ZTa4KBZNQiRokU9Md "https://www.youtube.com/watch?v%3D3GzumUieDPY&sa=D&source=editors&ust=1676742597133360&usg=AOvVaw2vWD9ZTa4KBZNQiRokU9Md")
[Adobe Illustrator: Turn Images into Vectors](https://www.youtube.com/watch?v%3DVPQ8i5BQaDE&sa=D&source=editors&ust=1676742597133981&usg=AOvVaw20m3g1iLET2-l2-C2yhKFC "https://www.youtube.com/watch?v%3DVPQ8i5BQaDE&sa=D&source=editors&ust=1676742597133981&usg=AOvVaw20m3g1iLET2-l2-C2yhKFC")
[Adobe Illustrator Pen Tool Tips](https://www.youtube.com/watch?v%3DF-bhWYC3EVY&sa=D&source=editors&ust=1676742597134597&usg=AOvVaw0W-8--x4I9i5Q99rMn9Aw8 "https://www.youtube.com/watch?v%3DF-bhWYC3EVY&sa=D&source=editors&ust=1676742597134597&usg=AOvVaw0W-8--x4I9i5Q99rMn9Aw8")
[Adobe Illustrator: Turn Type into Shapes](https://www.youtube.com/watch?v%3DzryY_AjHC-U&sa=D&source=editors&ust=1676742597135203&usg=AOvVaw2ldZHmCv-Zq-89829Plr7r "https://www.youtube.com/watch?v%3DzryY_AjHC-U&sa=D&source=editors&ust=1676742597135203&usg=AOvVaw2ldZHmCv-Zq-89829Plr7r")
# Dye Sublimation Printer Tool Tutorial
Dye sublimation is a digital printing technology that uses heat transfer to apply an image to the intended substrate. Also referred to as digital sublimation, the process is commonly used for decorating apparel, signs and banners as well as other items with sublimation-friendly surfaces.
[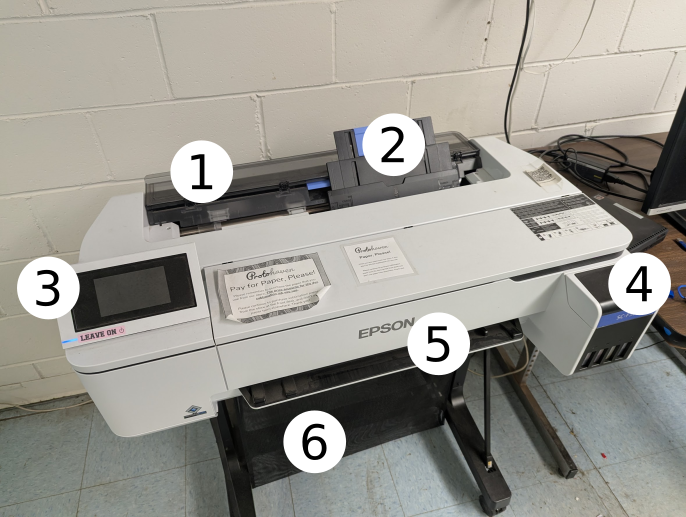](https://wiki.protohaven.org/uploads/images/gallery/2026-07/dyesub-anatomy.png)
1. Roll paper holder - only use this when printing off a dye sublimation roll
2. Sheet holder - use this when printing with dye sub sheets (purchased at the front desk)
3.
Control Panel - touchscreen interface with commands to check the printer status
4.
Ink tank level display (Cyan, Magenta, Yellow, Black)
5.
Outfeed - this is where the printed sheets come out.
6.
Catch tray - pull this out if printing many sheets at once.
## Safety
Do not remove any screws or covers.
Do not Power Off the Printer.
Verify your substrate is heat-safe before applying heat.
#### Common Hazards
Incompatible Paper can cause ink to bleed through and damage the printer head.
-
Members must use Protohaven-Supplied Sublimation Paper or make a Special Setup Arrangement with Protohaven Staff.
Blockage and/or Overheating
-
The printer must remain powered on to allow for an auto-maintenance cycle
-
The air vent must be free of obstacles at all times to prevent overheating
-
The tray cover must be properly closed
-
Any paper loaded into the tray must be free of dust and particulate
Burns & Fire - Once printing is complete, a heat press must be used to vaporize the ink and transfer the image to the final material. At this stage, burns are a significant hazard.
-
Avoid contact with any heated elements associated with sublimation process
-
Ensure the work area is clear before pre-heating
-
Do not leave a heat press unattended until it has cooled down
#### Permitted Materials
For general use, members must use Protohaven-Supplied Sublimation Paper. This can be purchased at the store front at 8 ½” x 11” and 11” x 17” dimensions. This covers ink and maintenance costs while ensuring compatibility with the printer.
To use your own paper for larger production runs, please make a Special Setup Arrangement with Protohaven Staff to ensure compatibility and arrange ink costs.
## Setup
1.
Ensure the USB cable between the Printer and PC is connected
2.
Verify the Printer is Powered On
3.
Power on the Computer
4.
Import your file to Sawgrass Print Manager
5.
Set the substrate, paper size, and color profile in Sawgrass Print Manager
#### Choosing A Substrate
Sublimation Ink must have a polymer, polyester, or polyester blended fabric in order to properly bond. There are more than 1,000 sublimation-ready “blanks” available, meaning they already have a polymer coating. This includes:
-
Acrylic & Hard Plastics
-
Ceramics
-
Glass
-
Metal
-
Slate
-
Wood
To bond to cotton fabric and natural materials, a special transfer paper or EasiSubli solution is needed.
#### Epson Edge Print
See the [official guide](https://files.support.epson.com/pdf/edgeprintpro/epson_edge_print_(eep)_video_series_guide_official_1.0.pdf) for instructions on how to print using Epson Edge Print software.
#### Color Output
Color management is an important aspect for all forms of digital printing. In terms of sublimation, there are several factors that can affect the color including the printer, the ink, the paper and the substrates.
Epson Edge Print addresses these issues and provides tools to ensure the accuracy of the color output.
## Basic Operation
1.
Ensure the printer is powered on
2.
Confirm Ink levels are usable
3.
Load Protohaven-supplied Sublimation Paper
4.
Test Print one sample if printing multiple copies to ensure quality of production
5.
Print Final production
6.
Trim to your artwork
7.
Use heat press to transfer to substrate
8.
Cleanup
## Cleanup
1.
Clear Printer and Work Area of any unused material
2.
Reset any modified computer settings to default
3.
Power off the Computer
4.
Ensure the printer remains powered on so auto-maintenance cycle can run
5.
Note dwindling ink levels, maintenance needs, or concerns on the tag and at [protohaven.org/maintenance](http://protohaven.org/maintenance "http://protohaven.org/maintenance")
#### Scrap Breakdown
There is one blue scrap bin reserved for vinyl waste and several trash bins in the studio. Maintaining these are a shared, communal responsibility.
When you notice the scrap bins are full, it’s time to take it to the dumpster out back. Feel free to enlist a helping hand.
If you notice valuable material while emptying the bins, use your judgment to selectively save a few pieces or take it home for your personal use.
### Troubleshooting
Banding is usually caused by a blockage in the print head preventing the ink from being properly dispersed to the paper. It can also be caused by low ink levels.
-
Perform a nozzle check. If blockage is found, perform a head cleaning. These functions can be accessed via the control panel on the printer or through Sawgrass Print Manager.
-
Check the ink levels on the Printer Control Panel. Update the physical maintenance cards and make a maintenance request to notify staff if ink levels will need to be replaced soon.
[Printer Not Detected During Install (Network)](https://supportdesk.sawgrassink.com/en/support/solutions/articles/65000150414-printer-not-detected-during-install-network-&sa=D&source=editors&ust=1676742597117268&usg=AOvVaw0eOXQX1s8_r_3Wb7NYbsIU "https://supportdesk.sawgrassink.com/en/support/solutions/articles/65000150414-printer-not-detected-during-install-network-&sa=D&source=editors&ust=1676742597117268&usg=AOvVaw0eOXQX1s8_r_3Wb7NYbsIU")
-
[Not Printing from CreativeStudio](https://supportdesk.sawgrassink.com/en/support/solutions/articles/65000150415-not-printing-from-creativestudio&sa=D&source=editors&ust=1676742597117956&usg=AOvVaw0EWAzQb8vTqrJOZPReTFvL "https://supportdesk.sawgrassink.com/en/support/solutions/articles/65000150415-not-printing-from-creativestudio&sa=D&source=editors&ust=1676742597117956&usg=AOvVaw0EWAzQb8vTqrJOZPReTFvL")
-
[CreativeStudio: SPM Not Installed or Printer Not Found](https://supportdesk.sawgrassink.com/en/support/solutions/articles/65000150446-creativestudio-spm-not-installed-or-printer-not-found&sa=D&source=editors&ust=1676742597118656&usg=AOvVaw1NvNtc1he01lHojGmZO4AV "https://supportdesk.sawgrassink.com/en/support/solutions/articles/65000150446-creativestudio-spm-not-installed-or-printer-not-found&sa=D&source=editors&ust=1676742597118656&usg=AOvVaw1NvNtc1he01lHojGmZO4AV")
-
[Windows: Networked Printer Not Printing](https://supportdesk.sawgrassink.com/en/support/solutions/articles/65000150454-windows-networked-printer-not-printing&sa=D&source=editors&ust=1676742597119330&usg=AOvVaw05zn9yFIHpZGOW8E_OldQ3 "https://supportdesk.sawgrassink.com/en/support/solutions/articles/65000150454-windows-networked-printer-not-printing&sa=D&source=editors&ust=1676742597119330&usg=AOvVaw05zn9yFIHpZGOW8E_OldQ3")
## Special Setups
### User-Supplied Paper
For general use, members must use Protohaven-Supplied Sublimation Paper.
To use your own paper for larger production runs, please make a Special Setup Arrangement with a Protohaven Staff Member to ensure compatibility and arrange ink costs.
### Complex Cuts
Dye Sublimation is a versatile printing process that allows you to get extremely creative with your work! Combining your use of the Printer with other tools is what will help you push the boundaries.
Printing registration marks in your artwork will allow you to make highly repeatable, complex cuts at the Vinyl Cutter, Laser Cutter, or CNC Router once your artwork is sublimated to new material.
### Printing on Dark Tones
[Neenah Ink-Jet Opaque Sublimation Transfer Paper](https://www.heattransferwarehouse.com/neenah-inkjet-opaque-ii-dark-garments-transfer-paper-8-5x11/&sa=D&source=editors&ust=1676742597124942&usg=AOvVaw0oexo9MA_oK64J3TmX-xZX "https://www.heattransferwarehouse.com/neenah-inkjet-opaque-ii-dark-garments-transfer-paper-8-5x11/&sa=D&source=editors&ust=1676742597124942&usg=AOvVaw0oexo9MA_oK64J3TmX-xZX") will allow you to print vivid colors on dark tones
### Cotton Substrates
Easy Subli & Special Sublimation Transfer Paper can be used to print onto natural materials like Cotton Fabric.
# Graphics - Heat Press and Cap Press
Hotronix Maxx Cap Press, Hotronix Swinger Heat Press
Clearance: Required
# Manual(s)
*Manuals and other reference materials from the manufacturer or other sources.*
# Member Notes
[Heat Transfer Vinyl Supplier](http://www.siserna.com/heat-transfer-vinyl/)
[Hotronix Swinger Press Tutorial](https://www.youtube.com/watch?v=Vq2gGIhWeHk)
[Tips & Tricks](https://www.youtube.com/watch?v=QwDzW-yQARI&t=44s)
[Starting Heat Printing Business](https://www.youtube.com/watch?v=UvJqh3KGu1Q)
[Materials & Temperatures](https://www.hamblyscreenprints.com/heat-press-time-temperature-guide-chart/)
[Heat Press with different fabrics](https://www.youtube.com/watch?v=QkOiffXudZI)
# Resources
*Where to obtain materials, consumables, and tooling.*
[Heat Transfer Vinyl Supplier](http://www.siserna.com/heat-transfer-vinyl/&sa=D&source=editors&ust=1676742642336998&usg=AOvVaw1AuKvjLtQOVQwyteR5FmM5 "http://www.siserna.com/heat-transfer-vinyl/&sa=D&source=editors&ust=1676742642336998&usg=AOvVaw1AuKvjLtQOVQwyteR5FmM5")
[Hotronix Swinger Press Tutorial](https://www.youtube.com/watch?v%3DVq2gGIhWeHk&sa=D&source=editors&ust=1676742642337581&usg=AOvVaw2YKoT3eBA0CSczBf3WvUlK "https://www.youtube.com/watch?v%3DVq2gGIhWeHk&sa=D&source=editors&ust=1676742642337581&usg=AOvVaw2YKoT3eBA0CSczBf3WvUlK")
[Tips & Tricks](https://www.youtube.com/watch?v%3DQwDzW-yQARI%26t%3D44s&sa=D&source=editors&ust=1676742642338066&usg=AOvVaw1u8rSpBcnbrmxAobTwqiIh "https://www.youtube.com/watch?v%3DQwDzW-yQARI%26t%3D44s&sa=D&source=editors&ust=1676742642338066&usg=AOvVaw1u8rSpBcnbrmxAobTwqiIh")
[Starting Heat Printing Business](https://www.youtube.com/watch?v%3DUvJqh3KGu1Q&sa=D&source=editors&ust=1676742642338587&usg=AOvVaw3RWfMPngumloV45tHjMZdi "https://www.youtube.com/watch?v%3DUvJqh3KGu1Q&sa=D&source=editors&ust=1676742642338587&usg=AOvVaw3RWfMPngumloV45tHjMZdi")
[Materials & Temperatures](https://www.hamblyscreenprints.com/heat-press-time-temperature-guide-chart/&sa=D&source=editors&ust=1676742642339086&usg=AOvVaw2zPEyLslwRcQC1qnBU--XH "https://www.hamblyscreenprints.com/heat-press-time-temperature-guide-chart/&sa=D&source=editors&ust=1676742642339086&usg=AOvVaw2zPEyLslwRcQC1qnBU--XH")
[Heat Press with different fabrics](https://www.youtube.com/watch?v%3DQkOiffXudZI&sa=D&source=editors&ust=1676742642339567&usg=AOvVaw0KVrmpOjOC10JSQO7tZfDS "https://www.youtube.com/watch?v%3DQkOiffXudZI&sa=D&source=editors&ust=1676742642339567&usg=AOvVaw0KVrmpOjOC10JSQO7tZfDS")
# Tool Tutorial
### Heat Press
#### CONTROL PANEL
[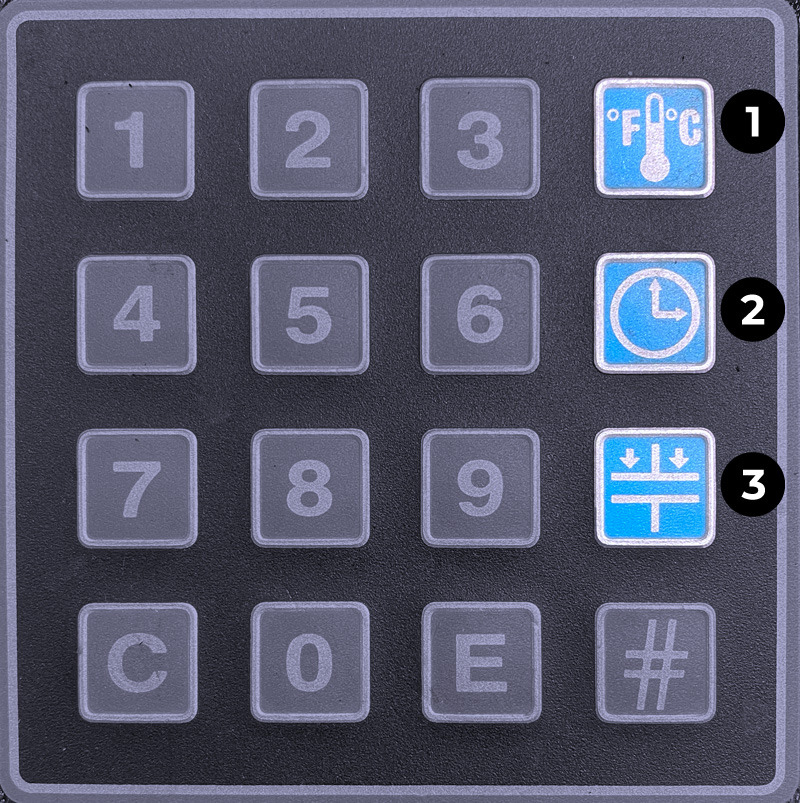](https://wiki.protohaven.org/uploads/images/gallery/2026-06/RT8image.png)
1.
Set Temperature
2.
Set Time
3.
Set Pressure
4.
Enter
### Tool Safety
-
To avoid burns, do not touch the heated platen during use.
-
Keep hands clear of the upper platen of the press during platen lock down as the pressure may cause injury.
-
Work area must be kept clean, tidy and free of obstructions.
-
Ensure temperatures are safe to use with material at hand.
### Setup
1.
Connect the power cable to the power strip
2.
Power on the power strip
3.
Position substrate between teflon sheets (use kraft paper if dye sublimating)
4.
Adjust the pressure and time
5.
Set the target temperature
6.
Wait for the target temperature to be reached
7.
Begin pressing
#### Common Settings
Substrate
Press Time
Temp
Tips
Ceramic Mugs
150-210 sec
350-400º F
Time varies. Press into silicon pad. Mugs should be cooled in warm water or using a cooling plate after transfer.
Poly Fabric
35-40 sec
400º F
Pre-press shirt for 3-5 min to eliminate moisture.
Vapor Apparel
45-55 sec
380-390º F
See [vaporapparel.com](https://vaporapparel.com/&sa=D&source=editors&ust=1676742597085566&usg=AOvVaw3075h6-qPYFBnkumwgVf60 "https://vaporapparel.com/&sa=D&source=editors&ust=1676742597085566&usg=AOvVaw3075h6-qPYFBnkumwgVf60") for tips on reducing presslines
Mousepads (neoprene)
45 sec
400º F
Look for a tight knit and high white point for more brilliant color results.
Metal (Unisub)
60 sec
400º F
Use blow-out paper. Remove plastic coating before pressing.
Metal (Other Brands)
60 sec
375-400º F
Time varies. Place absorbent sheet on the bottom of heat press. Then, place product transfer side DOWN on top of the absorbent sheet.
Outdoor Metal Panels
60-90 sec
400º F
Time varies. Place absorbent sheet on the bottom of heat press. Then, place product transfer side DOWN on top of the absorbent sheet.
Unisub Products
60 sec
400º F
Remove plastic coating. Tear transfer paper away immediately after pressing.
Fire Retardant Plastics
40-75 sec
400º F
Remove plastic coating. Tear transfer paper away immediately after pressing.
Glass/Ceramic Flat Tiles
300-720 sec
400º F
Time varies. Press tiles from back (transfer side down). Press into silicon pad.
#### Adjust the Pressure
This part of the tutorial is for an older version of heat press and needs to be remade with the new controller.
[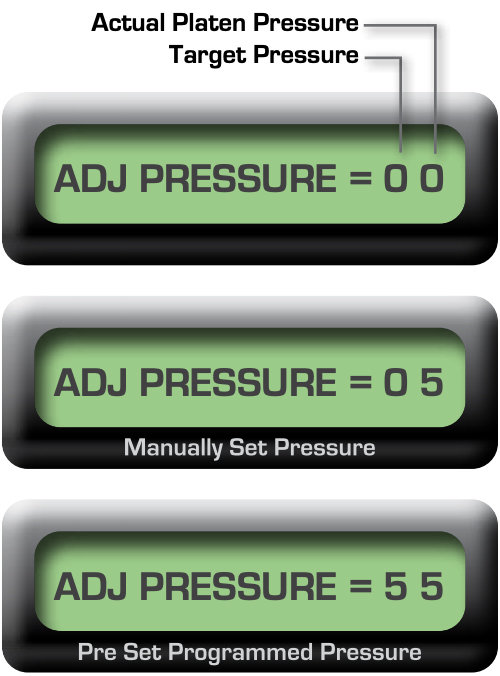](https://protohaven.org/wiki/_detail/tools/heat_press_tool_tutorial_image2.jpg?id=tools%3Aheat_press%3Astart "tools:heat_press_tool_tutorial_image2.jpg")
The Actual Platen Pressure displays the manual pressure you are applying (Numbers 1 - 9)
The Target Pressure will always display 0 when manually applying the pressure
1 - 3 = Light Pressure
4 - 7 = Medium Pressure
8 - 9 = Heavy Pressure
1.
Press the Pressure Key for 2 seconds
2.
Raise the platen to the up position, disengaged from the printing plate
3.
Position material on the press plate
4.
Turn the pressure adjustment knob to adjust the pressure
-
clockwise to increase the pressure
-
counterclockwise to decrease the pressure
1.
Lower the platen to print position
2.
Repeat until the Actual Platen Pressure displays desired setting
#### Set The Temperature
This part of the tutorial is for an older version of heat press and needs to be remade with the new controller.
[](https://protohaven.org/wiki/_detail/tools/heat_press_tool_tutorial_image4.jpg?id=tools%3Aheat_press%3Astart "tools:heat_press_tool_tutorial_image4.jpg")
Press the Temperature Key for 2 seconds
Input the desired temperature
Use 3 digits for fahrenheit
Use 4 digits for centigrade
[](https://protohaven.org/wiki/_detail/tools/heat_press_tool_tutorial_image8.png?id=tools%3Aheat_press%3Astart "tools:heat_press_tool_tutorial_image8.png")
The press accepts temperatures between
205º - 430º F
[](https://protohaven.org/wiki/_detail/tools/heat_press_tool_tutorial_image1.jpg?id=tools%3Aheat_press%3Astart "tools:heat_press_tool_tutorial_image1.jpg")
Press Enter to set the temperature
#### Set The Time
This part of the tutorial is for an older version of heat press and needs to be remade with the new controller.
[](https://protohaven.org/wiki/_detail/tools/heat_press_tool_tutorial_image3.jpg?id=tools%3Aheat_press%3Astart "tools:heat_press_tool_tutorial_image3.jpg")
Press the Time Key for 2 seconds
[](https://protohaven.org/wiki/_detail/tools/heat_press_tool_tutorial_image5.png?id=tools%3Aheat_press%3Astart "tools:heat_press_tool_tutorial_image5.png")
Input the desired range of seconds in 3 digits
The press accepts inputs of 001-999 seconds
Press Enter to set the time[](https://protohaven.org/wiki/_detail/tools/heat_press_tool_tutorial_image1.jpg?id=tools%3Aheat_press%3Astart "tools:heat_press_tool_tutorial_image1.jpg")
Your time is now set!
### Operation
1.
Preheat press to achieve the target temperature
2.
Swing platen away from the base
3.
Position substrate & your graphic between teflon sheets (use paper if dye sublimating)
4.
Swing platen into final position
5.
Lower and lock the platen into the press position
6.
Wait for countdown to complete
7.
Immediately lift up and swing the platen away
8.
Remove materials and proceed to application’s instructions
9.
Monitor the press until the entire run is complete
10.
Cleanup
### Cleanup
1.
Power off the Power Strip
2.
Unplug the Heat Press Power Cable from the Power Strip
3.
Lift up the press
4.
Monitor the area while platen remains hot
5.
Clear the work area, recycling where possible
### Scrap Breakdown
There is one blue scrap bin reserved for vinyl waste and several trash bins in the studio. Maintaining these are a shared, communal responsibility.
When you notice the scrap bins are full, it’s time to take it to the dumpster out back. Feel free to enlist a helping hand.
If you notice valuable material while emptying the bins, use your judgement to selectively save a few pieces or take it home for your personal use.
### Troubleshooting
This part of the tutorial is for an older version of heat press and needs to be remade with the new controller.
If a beep is heard at any time during programming, an error has been made.
The press will not accept temperatures below 205° F (096° C) or above 430° F (221.6° C). If you mistakenly attempt to key in a temperature beyond the allowable range, the press will beep to alert you of your error.
The press will not accept times below 001 or above 999 seconds. If you mistakenly attempt to key in a time beyond the allowable range, the press will beep to alert you of your error.
### Special Setups
The Heat Press is a versatile tool in the printing process that allows you to get extremely creative with your work! Combining your use of the Heat Press with other tools is what will help you push the boundaries.
The Heat Press is most commonly used with the Vinyl Cutter and the Dye Sublimation Printer.
Printing registration marks in your artwork will allow you to make highly repeatable, complex cuts at the Vinyl Cutter, Laser Cutter, or CNC Router once your artwork is transferred to the final substrate.
# Jewelry - Jewelry Torch
# Manual(s)
*Manuals and other reference materials from the manufacturer or other sources.*
# Member Notes
# Resources
*Where to obtain materials, consumables, and tooling.*
### Silver Solder
- Easy [https://www.riogrande.com/product/silver-sheet-solders/101200GP/?code=101200&CtoLength=6&CtoWidth=2&CtoSpoolCoiled=0&PieceUom=IN](https://www.riogrande.com/product/silver-sheet-solders/101200GP/?code=101200&CtoLength=6&CtoWidth=2&CtoSpoolCoiled=0&PieceUom=IN)
- Medium [https://www.riogrande.com/product/silver-sheet-solders/101200GP/?code=101701&CtoLength=6&CtoWidth=2&CtoSpoolCoiled=0&PieceUom=IN](https://www.riogrande.com/product/silver-sheet-solders/101200GP/?code=101701&CtoLength=6&CtoWidth=2&CtoSpoolCoiled=0&PieceUom=IN)
- Hard [https://www.riogrande.com/product/silver-sheet-solders/101200GP/?code=101702&CtoLength=6&CtoWidth=2&CtoSpoolCoiled=0&PieceUom=IN](https://www.riogrande.com/product/silver-sheet-solders/101200GP/?code=101702&CtoLength=6&CtoWidth=2&CtoSpoolCoiled=0&PieceUom=IN)
# Jewelry Torch Tool Tutorial
A natural gas/oxygen torch produces carbon-free flames, (5120°F for natural gas), which is a good all-purpose system to solder metals together.
## Tool Anatomy
[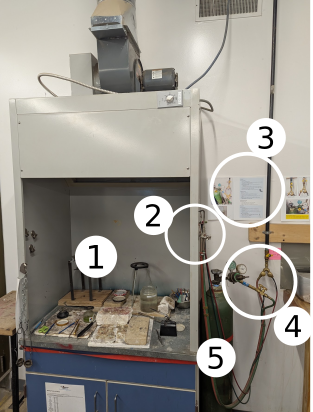](https://wiki.protohaven.org/uploads/images/gallery/2026-07/jewelry-torch-anatomy.png)
1. Flame cabinet
2. Torch & holder (outside of cabinet)
3. Gas startup/shutdown instruction guide
4. Oxygen and natural gas valves & regulator
5. Oxygen tank
For all cables: RED = GAS, GREEN = OXYGEN
A. Natural gas line opener valve - turns on the gas
B. Bronze gas valve - allows gas to flow to the torch
C. Oxygen tank valve - turns on the oxygen
D. Bronze oxygen valve - allows oxygen to flow to the torch
[](https://protohaven.org/wiki/_detail/tools/imported/striker.jpg?id=tools%3Ajewelry%3Asoldering_torch "tools:imported:striker.jpg")Striker
## Tool Safety
Clothing and closed-toed shoes (preferably boots) must be of natural materials that will burn quickly and not melt to skin (i.e. cotton, denim, leather).
There are many burn hazards - hot work, contact with the hot torch, and latent heat stored in the fire bricks, table, and items on the table. Keep extremities and clothing clear of the torch and avoid dangling clothes/accessories.
Fire and toxic fumes may come from from combustion gases and materials that are unsafe to heat (e.g. galvanized metal). Always use ventilation when the torch is lit.
Improper technique can lead to equipment damage (dropping fire bricks, torching the cabinet).
Failure to properly close oxygen and gas lines after use risks a gas leak or explosion. Carefully follow the posted instructions on the wall when closing and bleeding gas lines.
## Operation
#### Inspection & Set Up
##### **Turn on the gases**
1.
Turn on ventilation hood
2.
Turn yellow knob (A) on gas line that's mounted on the wall from perpendicular (off) to parallel (on)
3.
Open bronze valve (B)corresponding to the torch you want to use. The big torch has big hoses, the mini torch has small hoses.
4.
Turn the grey Oxygen tank valve (C) to “Open”. It's the valve on top of the oxygen tank.
5.
Open bronze valve (D) that connects to the oxygen tank.
##### **Light the torch**
1. Hold the torch in your non-dominant hand, with the hose over your arm.
2.
On the torch, turn on the GAS (RED) knob ¼ turn towards you (counterclockwise) until you hear a slight hiss.
3.
Hold the striker near the tip and make a spark (do not use a lighter).
4.
Then introduce the OXYGEN (GREEN) by opening the valve slowly.
5. Adjust the flame as desired, turning the screw toward you increases the flame, down and away from you decreases it and then turns it off, usually with a popping sound which is a safety feature that ensures that extra gas in the torch is burned off.
Note: If you open either the gas or oxygen valve too much, it will blow itself out. Go slow, start small.
##### **Turn off the torch**
1.
Close GREEN OXY valve on the torch FIRST
2.
Then close RED GAS valve on the torch
3.
Make sure both valves are closed when not in use!
##### **Turn off the gases**
1.
Turn yellow knob on gas line (A) from parallel (on) to perpendicular (off)
2.
Turn grey valve on top of the oxygen tank (C) to “Closed”
3.
Bleed out all gas and oxygen from the hoses by opening the valves on the torch.
4.
Watch the oxygen gauges. When they both read “0”, close both valves on the torch.
5.
Close all bronze valves (B & D)
6.
Turn off ventilation hood
## Annealing
- Heating metal to the prescribed temperature for that metal, you can reduce the stress within the metal that has accumulated due to overworking it.
- Work hardening occurs when the metal is hammered or bent until the point where it is no longer malleable. If it continues to be hit and compressed, it can snap, fracture or crack.
- In order to continue working/forging a piece of metal, you must anneal it whenever it shows signs that it is no longer flexible.
- Copper and Bronze are heated to a bright red, 1400F and quenched in water immediately until cooled and then placed into the pickle.
- Brass and Nu-Gold, are heated to a bright red, 1400F but must NOT be quenched, when it is cool, it is then carefully placed into the pickle pot.
- Sterling should be heated to about 1100F which is the first dull red. It is then quenched in water. Flux can be brushed on the piece as an indicator. Heat the piece with the torch and when the flux melts and turns clear, the silver should be annealed.
## Soldering
1. Prepare your metal pieces by cleaning them with a degreasing detergent and rinse thoroughly with water, dry with a clean cloth or paper towel.
2.
Make sure your piece is clean and free of debris (optional- Dip your piece in firescale protection solution (FPS) (boric acid+alcohol) This mixture is extremely flammable and has been removed from the soldering enclosure)
3.
Flux the joint to be soldered and add chips of solder
4.
Slowly warm the whole piece till the flux takes on a crusty appearance, then evenly heat, lastly focus on the area to be soldered. The hot solder will move in the direction of the flame, so positioning is key.
5.
(alternate method) Pick up a chip of solder with your flux brush to paint it onto your solder seam once the seam is hot. (more advanced) You risk moving parts out of position and just burning a bunch of brushes.
#### Soldering Tips
- Before soldering, make sure that the metal is completely clean with no grease or oxidation (tarnish) on its surface to impede the process.
- The pieces to be joined should fit tightly together without any visible gap between them. If you can see light between the two pieces, the capillary action that causes the solder to flow will be impeded by the gap.
- Metals combine with oxygen in the air, forming a scale on the surface and the process is accelerated by heat. This scale gets in the way of the solder penetrating the metal. Flux is used to coat the metal and keep the oxide layer from forming which allows the solder to flow.
- Jewelry solders are very different than what you can buy in a hardware store. The solders that are available in a hardware store are NOT for jewelry making and will most likely ruin your piece and turn it black,
- Solders are available from most jewelry suppliers and come in different types which have varying melting temperatures. The most common are Hard, Medium and Soft. The solder you choose, depends on the metal you are using, there is silver, gold, and base metal wires such as copper solder.
- Jewelry solder comes in wire, sheet, chips or strips. The thinner and smaller that you cut the pieces of solder, the easier you will get them to flow, even though you will need to use more pieces. Solder chips are a great convenience although the cost is higher.
- The number of joints that you are making affects your choice as to the melting points/hardness of the solder. If you have multiple joints to solder, you may start by using Hard solder, then move on to medium and then soft. This is a way to avoid melting your first joints while soldering subsequent ones.
- Hard silver solder melts at 1425 F, Medium at 1390 F and Easy at 1325 F.
- Hard solder tarnishes the least and has the closest color to the metal you are working with, so use hard if you just have one seam.
- When closing jump rings and bezels, keep in mind that metal expands when heating so use it to your advantage and start the flame opposite the solder joint and move the heat towards the joint alternating from both sides.
- It is necessary to heat the entire piece of metal, even when only one end is being soldered, otherwise the heat will move to the unheated areas and not build high enough to melt the solder.
## Quenching
After soldering, wait for 10-15 seconds before dropping the piece into a non-flammable bowl containing water. Do not quench if your metal is brass or Nu-Gold. If your goal is a flame patina, let the piece air cool or you will lose your patina.
Quenching in pickle is discouraged. The acid spray can harm you, the people around you and definitely ruin your clothing!
## Consumables
Silver solder in easy, medium and hard is available at the front desk for purchase. You can also buy your own (see [Resources](https://wiki.protohaven.org/books/tool-guides/page/resources-z7B))
## Cleanup
1. Follow the instructions on the wall to safely bleed and shut off the oxygen and natural gas lines:
1.
Turn on ventilation hood
1. Bleed the lines ONE GAS AT A TIME ONLY.
1. Turn off the tank valve by turning it clockwise all the way.
2. Find the knob(s) of that same gas on the torch and crack them open until both needles on the gauges fall counterclockwise back to the pin. Close the knobs.
3. Turn the adjusting screw of that regulator counterclockwise until it becomes noticeably looser and you can turn it with one finger.
4. Repeat with the other gas.
2. Put away all materials fetched from the jewelry cabinet as well as all personal supplies.
# Jewelry LIquids - Pickle, Neutralizer, Water, Ultrasonics
## Introduction
There are a few chemicals in use in the jewelry area. Liquids, even water should be clearly labeled.
### Safety
Wear safety glasses when working with acids. Never immerse your hand in the pickle or a running ultrasonic.
### Common Hazards
-
Serious eye irritation. Acids will burn through clothing and irritate skin.
- The acids are heated, this will add to the effect of the acid. Flush skin with water immediately after contact.
- Ultrasonic cleaner contains ammonia. Never mix it with other solutions. Damage to skin is minimal, but will dry and irritate.
### Uses
**Pickle -** removes firescale from soldered materials. (Sodium Bisulphate acid)
**Neutralizer -** neutralizes the acid so that the piece can be handled safely (baking Soda)
**Ultrasonic cleaning solution -** Breaks down buffing compounds (soap and ammonia)
**Magnetic pin tumbler or rotary tumbler -** uses liquid burnishing compound to break surface tension allowing the pins to slide across the surface. Unlike the ultrasonic, this process will burnish the surface to a shine. ***This should not be used to remove buffing compound or firescale.***
### Materials that can and can't be used.
**Silver, copper, brass**
**Never use steel or ferrous metals in the jewelry area, especially not in the pickles.**
**Use plastic or copper tongs, never put ferrous metals in the pickle.**
The tools
### [](https://wiki.protohaven.org/uploads/images/gallery/2026-06/liquids-area.jpeg)
### **What the solutions are, how and when to replenish**
#### **Pickle** (brand name Sparex, Sodium Bisulphate)
##### Setting Up - For 10oz warm water in the pickle pot, use up to 2 tablespoons of Sparex.
**When mixing acids, always start with the most dilute solution first (water) then add the acid.**
- **Dissolve:** Heat the pot to roughly 125° F to 150° F and stir with copper tongs until the granules are fully dissolved.
- **Usage:** Always use Copper Tongs to handle metal, as steel or iron will contaminate the bath.
##### The solution is depleted when it takes on a bright blue color and it no longer removes firescale.
Here is what you need to know about the blue color:
- **It means your pickle is working:** The color change indicates the acid is doing its job by removing surface oxidation. \[[1](https://www.youtube.com/watch?v=tuOT-U1c9XQ&t=6), [2](https://jewelrymakingjournal.com/pickling-compound-what-color-should-it-be/)\]
- **It signals when to change the batch:** Fresh Sparex pickle is clear. As the liquid gets darker and turns deep blue-green, it is loaded with copper ions and its cleaning power is becoming depleted. \[[1](https://orchid.ganoksin.com/t/pickle-and-polishing-clarification/10311), [2](http://technical-articles.hooverandstrong.com/wordpress/pickle-cleaning-up-after-soldering/), [3](https://www.reddit.com/r/jewelers/comments/xz00rb/blue_pickle_has_anyone_ever_had_their_pickle/), [4](https://www.youtube.com/watch?v=tuOT-U1c9XQ&t=6)\]
- **Watch out for "copper plating":** If you accidentally introduce a steel tool (like steel tweezers or binding wire) into a blue pickling bath, it causes a chemical reaction that forces the dissolved copper to plate right back onto your silver piece. Always use copper, plastic, or brass tongs. \[[1](https://orchid.ganoksin.com/t/getting-rid-of-sparex-copper-plate/31615), [2](https://www.tiktok.com/@kristenmoorejewelry/video/7492534249719876895), [3](https://www.youtube.com/watch?v=tuOT-U1c9XQ&t=6)\]
#### **Neutralizer (Sodium Bicarbonate)**
Warm water with just enough Baking Soda (Sodium Bicarbonate) to dissolve in the water, a couple tablespoons. You will know it is working when items from the pickle fizz a little bit when added.
#### **Ultrasonic cleaning solution**
We have a couple of proprietary solutions, one is a liquid, another granular. Mix according to package directions. It will work even when dirty, but it's nice to see the bottom of the tub. **Be sure the level is above the Minimum line.**
#### **Magnetic pin tumbler or rotary tumbler**
Contains surfacants, but doesn't foam as much as ultrasonic cleaner. Mix according to package directions when dirty or low. To remove old sediment, carefully add water, swish and dump till the remaining liquid is clear and only the pins and clean warer remain. ***This should not be used to remove buffing compound or firescale.***
***[](https://wiki.protohaven.org/uploads/images/gallery/2026-06/jewelry-solutions.jpeg)***
### **How to replenish**
**Wear safety goggles when mixing Pickle or cleaning solutions**
##### **Pickle**
1. **When it no longer removes firescale, bring the *cooled* pot to the sink along with the neutralizer bath,**
2. **Place the neutralizer in the sink, then gently pour the contents of the pickle pot in the neutralizer. It will get foamy.**
3. **Add a little more baking soda till the foaming stops.**
4. **Gently pour down the drain while running cool water along side.**
5. **Mix new solutions.**
[](https://wiki.protohaven.org/uploads/images/gallery/2026-06/depleted-pickle-disposal.jpeg)
# Jewelry - Rolling Mill
Durston Tools MINI C80
# Manual(s)
[Rolling Mill Manual.pdf](https://wiki.protohaven.org/attachments/591)
# Tool Guide
This tool guide is incomplete; these sections were taken from the manual.
#### Safety
1\. Always bolt down your rolling mill to a secure bench or secure stand for stability and safety. Also ensure that the bench or stand is securely
fixed to the floor.
2\. Ensure guards are in place at all time. The guards are the black plastic covers, covering the gears.
3\. Do not lift the mill by the hand wheel, only lift from the base. Always make sure at least 2 people carry the mill.
#### Care
1\. When the rolling mill is not in use, apply a thin coating of ruse preventative liquid. Using a clean and dry paint brush (approximately 12mm
wide) apply the rust preventative across the rolls. Turn the rolls as you do this. Make sure the rolls are nearly closed. This w ill spread the
liquid evenly over the surface. It is very important that your rolls are always protected, especially in moist/wet/hot conditions or where
temperatures are changing. Once your rolls ae marked/rusty/corroded they will be like this until you have them removed and r eground.
(However, please note that it is almost impossible that you will end up with perfect rolls. Over time and use they will get slightly marked but
will still work perfectly well). When using your mill again remove all rust preventative and ensure your rolls are clean and dry before you start
to roll material. See “removing rust preventative” at the beginning of this manual.
2\. It is also recommended that you cover your mill when not in use. This is to prevent the rust preventative from collecting dust and dirt.
3\. Keep the rolls clean. Do not touch the rolls. Oils and acids from your body can damage the rolls, leaving behind small marks and eventually
rust.
4\. Make sure all material is dry before rolling.
5\. Do not use your mill with the rolls completely closed.
6\. Do not roll ferrous metals such as iron or steel through the mill.
7\. Always release pressure on the rollers after you have completed your job.
#### Sheet Rolling
1\. Anneal the piece of sheet or ingot, pickle it, and rinse it with clean water. Now dry it.
2\. Feed the dry metal into the mill, applying snug (but not overpowering) pressure on rollers.
3\. After rolling the metal through the mill, flip the piece end to end before you roll it through again. You will get a more even roll.
4\. Before passing metal through the rollers, lower the rollers until you have a snug fit (as in step 2).
5\. If the metal becomes hard to roll, it must be annealed again. Then roll the piece through the rollers, repeating as necessar y until the desired
thickness is achieved.
6\. When rolling silver sheet, it may be necessary to anneal the sheet after rolling it from 3mm to 1mm thickness. For 14ct gold, the annealing
may be necessary after rolling from 3mm to 2mm.
#### Wire Rolling
Reduce the wire by rolling 2 or 3 times in each groove rotating the wire 90 degrees on each pass. Rolls should be nearly
closed for the last pass before moving to the next groove. Depending on the material, passes of up to 30% can be
achieved. The material should be annealed as often as necessary to avoid excessive force when rolling. Indications of
excess hardness are frayed edges, wrinkling of surface, surface cracking or excessive force needed to turn the rolls
[](https://wiki.protohaven.org/uploads/images/gallery/2026-06/40Mimage.png)
#### Special Technique - Rolling Mill Printing
The Rolling Mill
The rolling mill is a machine designed to product thinner gauges of sheet metal and wire. Most studio jewellers use a hand cranked
mill (although automated mills are used as well). Each mill consists of two smooth, highly polished hardened steel rolls, mo unted
in the housing parallel to each other. The rolling mill is used for reducing the thickness of sheet metal. The rolls for wire are cut
with ‘V’ shaped grooves arranged in decreasing sizes, allowing for gradual reduction of wire diameter and producing a square cross
section of wire. Most studio jewellers choose a ‘combination’ mill – half of the roll is smooth (for sheet metal) and half is grooved
(for wire). This limits the width of the metal to be rolled (averaging about 50-60mm).
Introduction to Printing
Metal which is passed through the rolling mill under pressure with another material will
become embossed with a pattern exactly the same as the material being used. Any small
particle trapped between the metal and roll will ‘imprint’ on the metal. If you are attempting
to roll a perfectly smooth piece of metal, this is not desirable. But the principle can be put
to use to create embossed patterns and designs on metal.
The best way to imprint metal is to create a ‘metal sandwich’ with two pieces of metal (to be
impressed) on the outside (the ‘bread’ in the ‘sandwich’) and the material being used as
pattern between them (the ‘filling’).
One-Sided vs. Two-Sided Imprinting
If you wish to imprint on one sheet of metal only, roll the metal together with the imprinting material, using the roll as the other
side of the ‘sandwich’. This technique is preferable when using expensive materials (gold and sterling) but has its drawbacks, as
there is more possibility of damaging the rolling mills if materials that are too hard are used for imprinting. It is best to make a
‘metal sandwich’ whenever possible – it produces two pieces of usable, imprinted metal with mirror image imprints (especially
useful for earrings, being symmetrical, but reversed).
#### Process
Metal to be imprinted must be annealed, dry and clean. Depending on the use
of the metal after being imprinted, you may wish an emery finish or Tripoli
rouge polish. Usually the metal that is the pattern (the ‘filling’ in the sandwich)
should not be annealed – if it is hard metal you will get a better imprint and
may be reusable.
2\. The pattern imprinted will be a reverse of the design (important to remember
if using letters and numbers in the design).
3\. An object placed between the two pieces of metal will create a recess in the
metal (intaglio; a mechanical ‘etching’ effect). As the ‘metal sandwich’ passes
between the rolls and is compress, the imprinting material is pushed into the
metal. Be careful not to roll the imprint so that the metal becomes too thin.
4\. Make one pass only! Carefully adjust the gap by attempting to roll the first ½
inch (1cm) or so. Trial and error and experience, along with written notes, are
all part of this process. Once the correct gap is calculated, roll the whole piece
in one continuous roll. Try not to stop part way through the pass.
5\. To emboss: use a plate with negative spaces so that when rolled the metal
plates push into the recessed shapes on the pattern.
[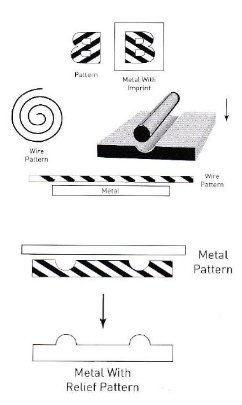](https://wiki.protohaven.org/uploads/images/gallery/2026-06/nc9image.png)
#### Troubleshooting
**Problem**
**Cause**
**Solution**
The edges of the metal are
cracking.
When the metal was poured, the ingot is not
uniform in shape or the metal was rolled too
much without annealing
Remove the part of the metal with the
crack (by sawing), anneal, and them
hammer out the metal around the
missing section until the edges are even.
Anneal again and then re-re-roll.
The surface of the metal is
flaking and/or cracking.
1. When the metal was poured, the ingot
mould was cold.
2. There may be too much old metal in the
ingot.
3. The ingot was annealed too much.
4. There may be foreign metal in the ingot.
Melt the ingot and reform in the ingot
mould. Roll it out again. If the problem
persists, it may be necessary to refine
the metal before you use it again
When wire is rolled out, it is
wavy or bent.
There was not enough tension applied to
the free end of the wire.
2. Too much pressure is being exerted by
the rollers.
1. Hold the free end of the wire
tight with one hand.
2. Remove sheet, anneal it,
planish the distorted sections
and re-roll. Apply less pressure
to the rolls.
When rolling sheet, it buckles.
Sheet was pushed through rollers after flipping
end to end without annealing.
Remove sheet, anneal and re-roll.
# Jewelry - Kiln
# Manual(s)
*Manuals and other reference materials from the manufacturer or other sources.*
-
Model: unknown/custom electric kiln
-
Controller: [SYL-2352 Ramp and Soak PID Temperature Controller](https://www.auberins.com/index.php?main_page=product_info&products_id=4 "https://www.auberins.com/index.php?main_page=product_info&products_id=4")
# Member Notes
# Resources
*Where to obtain materials, consumables, and tooling.*
# Jewelry Kiln Tool Tutorial
The kiln is a custom made electric kiln with a programmable PID temperature controller that can reach 2000 degrees Fahrenheit.
You can use this kiln for all sorts of hot work - enameling, bisque firing pottery, glass fusing and slumping, and more! However, all fume producing projects (such as wax burnout for investment casting) are prohibited until we have a solution to vent toxic gases from the kiln.
[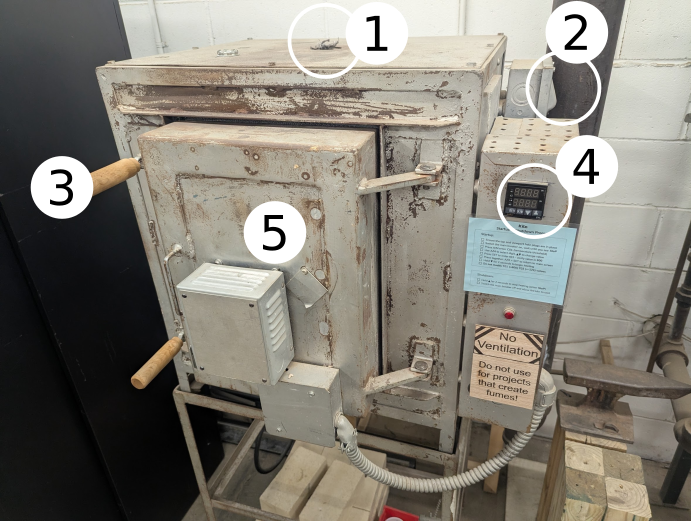](https://wiki.protohaven.org/uploads/images/gallery/2026-07/kiln-anatomy.png)
1. Top vent hole - keep this plugged up while we work on a ventilation solution
2. On/Off breaker switch - flip both sides of the switch up to turn the kiln on
3. Door handles (2X)
4. Temperature controller
5. Kiln door
#### Kiln Interior
[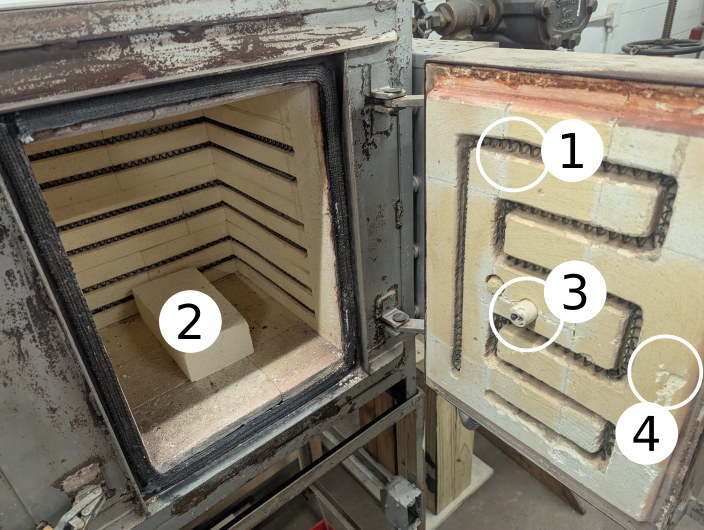](https://wiki.protohaven.org/uploads/images/gallery/2026-07/kiln-anatomy-2.png)
1. Heating coils - these get considerably hotter than the measured temperature of the kiln. Avoid contact with these when loading/unloading your project!
2. Fire brick - use these to support your workpiece and keep the base of the kiln clean.
3. Thermocouple - this device measures the internal temperature of the kiln so the controller knows how to heat it.
4. Refractory - the interior of the kiln is fragile and easily chipped. Avoid contact when loading/unloading!
### Safety
- Do not leave the building with the kiln running.
- Overnight use of the kiln is prohibited.
- With the exception of the temperature controller and the wooden door handles, always assume any part of the kiln is going to be too hot to touch.
### Common Hazards
- Burns or fire from heat exposure, touching hot parts of the oven or workpiece
- Smoke and fumes due to contaminants, inadequate ventilation
- Shrapnel from rapid temperature shocks in brittle materials (e.g. glass) or wet materials (e.g. ceramic that isn't bone-dry)
- Damage to the interior of the kiln from heating fusible workpieces without proper technique
- Damage to refractory (scraping against workpiece, thermal shock, slamming the door etc.)
- Damage to the kiln heater system from prolonged operation at the max temperature
- Pinching/crushing on the door latches
### Care
- Minimize the amount of time with heating at high temperatures to prolong life of the heating elements.
- Shut the door gently to prolong life of the door gasket and fire bricks.
### Use
#### Simple Ramp and Soak Program
This program ramps from room temperature (68 F) to 2000 F over 60 minutes, holds temperature at 2000 F for 30 minutes, then the program stops and cools to ambient. A plot of time vs temperature should look like this:
Temperature (F)
Time (minutes)
C1
68
60
C2
2000
30
C3
2000
-121
[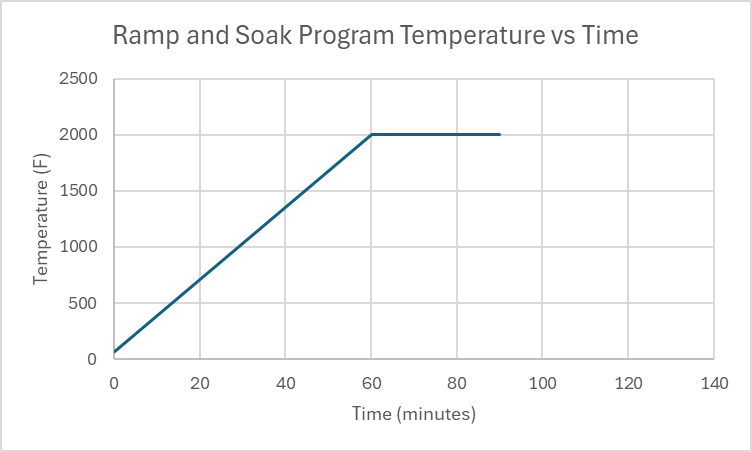](https://wiki.protohaven.org/uploads/images/gallery/2026-02/uQGimage.png)
Note: This is **IDEAL**
Note that you can program the controller to do impossible tasks. Doing this will prevent the controller from executing commands as programmed. In this example, there were two problems:
1. The programmed heatup rate was (2000-68)F / 60 min = 32.2 F/min, but the absolute maximum average heatup rate that the kiln can provide in this temperature range was only 23.38 F/min.
2. The program called for soaking at 2000 F for 30 minutes, but the kiln never reached 2000 F to start the soak, so the program ran for 150 minutes (before it was shut down manually) rather than the 90 minutes it was programmed to run.
##### Program Explanation
**Ramp:** Using the program above as an example, you can program a ramp by setting the temperature for C1 and C2 as **different** values, then at the end of the time period set for C1, the controller will change the setpoint heating to be at temperature C2 by the end of the time set for C1.
**Soak:** Just as in the ramp program, once the temperature setpoint for C2 is reached the controller looks ahead to the next temperature setpoint to figure out what needs to happen next. In this example, the temperature setpoint for C3 is the **same** as the temperature for C2, so the controller will not adjust the temperature setpoint for 30 minutes (the time C2 is programmed to run for).
**Stop:** the time "-121" stops the program and puts the controller in standby at step 1:
**Summary:**
**Command type**
**Temperature**
**Time**
Ramp
C\[a\] =/= C\[a+1\]
Duration of the ramp in minutes
Soak
C\[b\] == C\[b+1\]
Duration of the soak in minutes
Stop
Final desired temperature requiring temperature control
#### Other Example Programs
Here is a program that might be used to anneal steel (temperatures are approximate, but are used to determine timing):
Temperature (F)
Time (minutes)
Explanation
C1
68
60
Ramp up to 1450 F
C2
1450
30
Hold at 1450 F
C3
1450
630
Ramp cooldown to 1000 F
C4
1000
-121
End of program
Normalizing steel:
Temperature (F)
Time (minutes)
C1
68
70
C2
1550
30
C3
1550
-121
#### Known Heatup and Cooldown Rates:
Use these to determine program step times.
**Heatup Rates:** These are the maximum possible cooldown rates.
**Temperature**
**Time (min)**
**Time btween Points (min)**
100
0.0
0.0
200
2.6
2.6
300
4.8
2.3
400
7.0
2.2
500
9.3
2.3
600
11.9
2.5
700
14.3
2.4
800
17.2
3.0
900
20.5
3.3
1000
24.3
3.8
1100
28.6
4.3
1200
33.7
5.0
1300
39.6
6.0
1400
46.8
7.1
1500
54.6
7.9
1600
64.5
9.9
1700
75.8
11.3
**Cooldown Rates:** These are the maximum possible cooldown rates.
**Temperature**
**Time (min)**
**Time btween Points (min)**
1700
0.0
0.0
1600
1.7
1.7
1450
6.2
4.5
1400
8.2
2.0
1300
13.7
5.5
1200
21.0
7.3
1100
30.0
9.1
1000
42.5
12.5
### Tooling
- Personal temperature measurement device, if desired. A type-K thermocouple is used for control and display purposes, which has a standard accuracy of approximately +/- 4 degrees F.
### Materials
The kiln does not have active ventillation, as such, materials that produce fumes when heated are not permitted.
Prohibited materials include but are not limited to:
- Polymers / Plastics of any kind
- Oil covered metals (degrease before heat treatment)
- Zinc-bearing metal alloys - including brass, bronze, Zamak and "pot metals"
- Radioactive metal alloys
- Combustible materials
- Rubber
- Wood, paper, cardboard, MDF
- Foam
- Textiles or fibers
- Wax
- Painted, coated or varnished objects
- Adhesives
- Lead or lead containing materials
- Sealed or hollow containers
- Materials that can melt onto heating elements
## Parts of the Tool
#### Kiln Anatomy
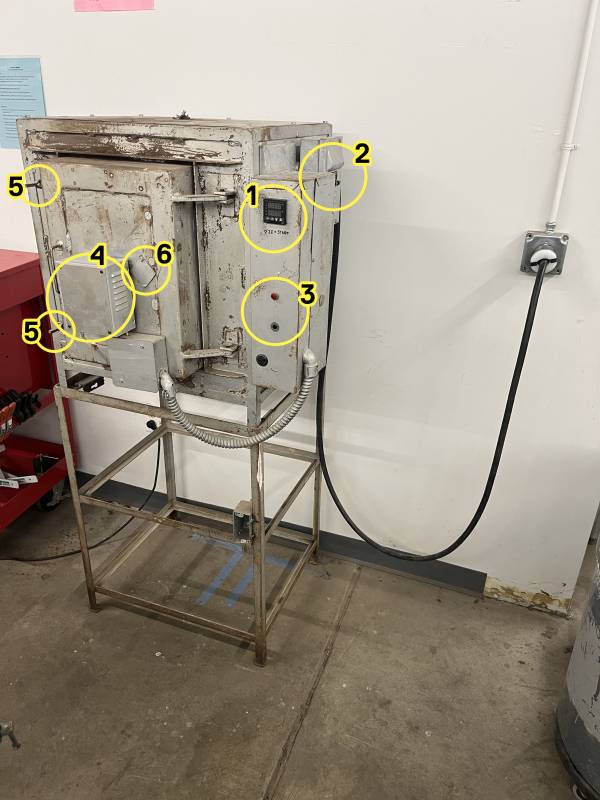
1. Controller
2. Breaker switches
3. Alarm lights (Currently not functional)
4. Temperature probe
5. Latches
6. Viewing port
#### Controller Anatomy
[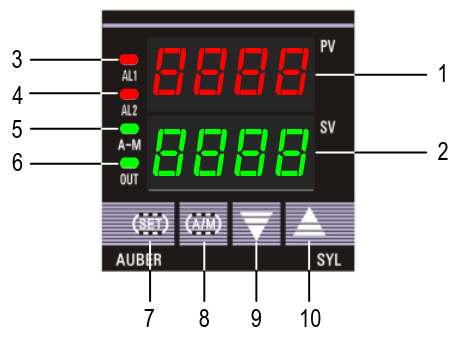](https://wiki.protohaven.org/uploads/images/gallery/2025-12/4HJimage.png)
**① PV window: Displays the Current Temperature, or process value (PV).**
**② SV window: Displays the Temperature set value (SV).**
③ AL1 indicator: It lights up when AL1 relay is on.
④ AL2 indicator: It lights up when AL2 relay is on.
⑤ A-M indicator: The light indicates the controller operating status.
- When A-M is solid on, program is running.
- When A-M is flashing, program is paused.
- When A-M is off, program is stopped.
⑥ Output indicator: Control output and the power to the heater.
- When the Output indicator is on, the heater is on.
- When the Output indicatoris off, the heater is off.
**⑦ SET key:** In normal operating mode (Display mode 1), pressing the SET key will switch the display between the temperature, step number and step timer in sequence.
**⑧ A/M key:** Programming key; digit shift key.
**⑨ DOWN key ▼:** Decreases numeric value of the setting value. Pressing and holding the DOWN key for 2 seconds will start the selected program if the controller is displaying STOP or HOLD.
**⑩ UP key ▲:** Increases numeric value of the setting value. Pressing and holding the UP key for 2 seconds will STOP the current program
#### Controller Display Modes
[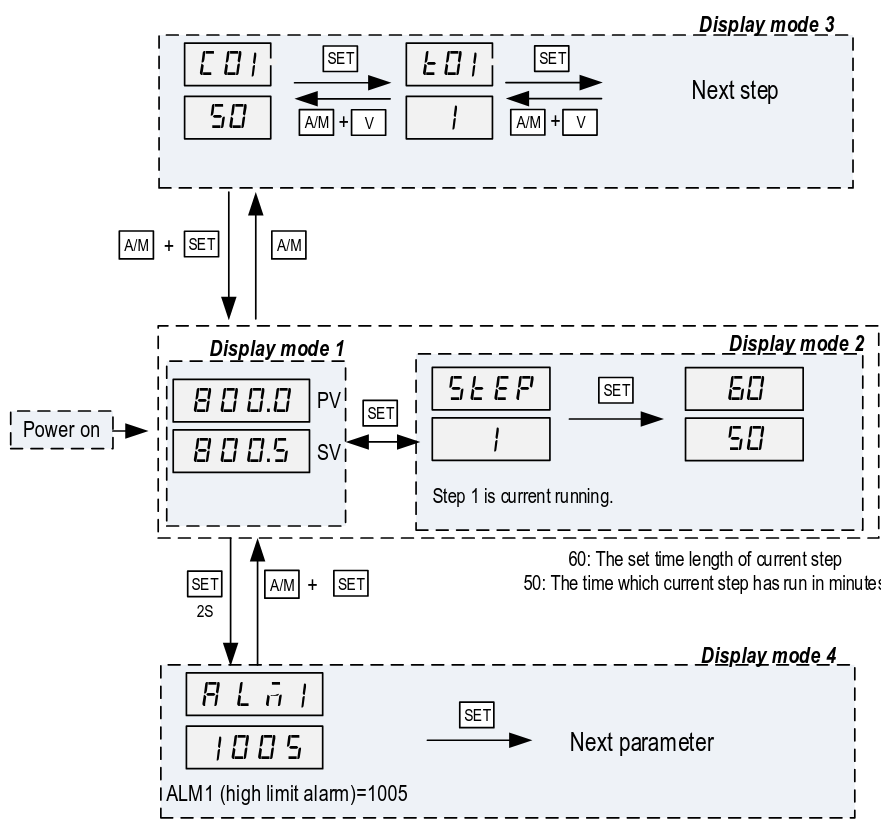](https://wiki.protohaven.org/uploads/images/gallery/2025-12/LCZimage.png)
**Display Mode 1:** Normal operating mode. Following power up, the controller will be placed in Display Mode 1. The upper display window shows the measured value (PV) and the lower window shows the four-digit set value (SV).
**Display Mode 2:** Checking the step. Press the SET key once to change the display from mode 1 to mode 2. The upper display window shows “STEP” and the lower windows shows the current step number. Press SET key again to show the timer information. PV window shows the set time for the current step. SV window shows remaining time in minutes. Press SET key again to return to the
display mode 1.
**Display Mode 3:** Programming mode. Press A/M key once to change the display from mode 1 to mode 3. As a member, you will only ever need to adjust C01/T01 values.
Do not assume that the C#/T# values are the same since the last time you ran a program.
**Display mode 4:** Parameter setting mode. Press and hold the SET key for 2 seconds to enter the display mode 4. The top window shows the name of a parameter and the bottom window shows its value. Use the UP and DOWN arrow key the change the value; use the SET key to save the change and go to the next parameter.
These settings are specific to the machine and must not be changed by members. If you suspect a parameter needs to change, please contact a shop tech and ask for help.
### Basic Operation
#### Setting Alarms
Coming soon.
- Alarms can be set, however the only indication currently is a small light on the controller.
- Alarms are informative only - they do not impact the operation of the kiln.
#### Setup
Note: If you wait too long while setting the program, it reverts back to the display mode with PV and SET (Stopped if user performs step 2)
To set a program:
1. Shut the breaker to turn the kiln and controller on.
2. Press and hold the UP arrow key to stop the last loaded program from running.
1. The display should be flashing STOP
3. Press A/M to enter programming mode (Display mode 3). The display should show C-1 for the last program that was run.
1. Note: If step 2 was not performed, the controller will display the active step from the last program run.
4. Set the temperature for the first temperature setpoint as follows:
1. Use the UP / DOWN keys to set the selected digit of the temperature setpoint (Setpoint in fahrenheit).
2. Press the A/M key to select which digit of the temperature setpoint is being modified.
3. Repeat steps 4.1 and 4.2 until the desired temperature setpoint is set.
5. Press the SET key to save the temperature setpoint and advance to the time setpoint.
1. Use the UP / DOWN keys to set the selected digit of the time setpoint (Setpoint in minutes).
2. Press the A/M key to select which digit of the time setpoint is being modified.
3. Repeat steps 5.1 and 5.2 until the desired time setpoint is set.
6. Press the SET key to save the time setpoint and advance to the next temperature setpoint.
7. Repeat steps 4 and 5 for all desired time and temperature setpoints.
Programs can be set and changed during operation of a program.
#### Run a Program
To start a program:
1. Press and hold the down arrow button for 2 seconds to start the program.
2. Observe that the PV display temperature begins increasing.
The controller display returns to Display mode 1 (displays temperature and temperature setpoint) after 10 seconds of inactivity. To view the current step being executed, press the SET key from Display mode 1. Pressing the SET key a second time will show the programmed time (top number) of the step and the elapsed time (bottom number) of the step.
#### Stop a Program
To stop a program:
1. Press and hold the UP arrow key for 2 seconds to stop the program.
2. The display will begin flashing STOP.
#### Shut Down
1. Open the circuit breaker.
2. Shut the kiln door.
3. Clean up the area.
### Cleaning Up
1. Remove any personal belongings from the area
# Jewelry - Tumbler
# Manual(s)
*Manuals and other reference materials from the manufacturer or other sources.*
-
# Member Notes
# Resources
*Where to obtain materials, consumables, and tooling.*
# Tool Tutorial
(Link to PDF Tool Tutorial)
The magnetic tumbler uses tiny metal pins driven by a powerful rotating magnet to polish and work-harden pieces.
The [Tool Safety](https://www.protohaven.org/wiki/tools/magnetic_tumbler/start?s[]=tumbler#tool-safety "tools:magnetic_tumbler:start ↵"), [Tool Care](https://www.protohaven.org/wiki/tools/magnetic_tumbler/start?s[]=tumbler#tool-care "tools:magnetic_tumbler:start ↵"), [Operation](https://www.protohaven.org/wiki/tools/magnetic_tumbler/start?s[]=tumbler#operation "tools:magnetic_tumbler:start ↵"), section of this guide are what instructors use to ensure that you can use the equipment according to community expectations.
# Requirements
Jewelry clearance is required.
# Warnings
🚫 Do not ⚠️ Warning
See the [Safety Section](https://www.protohaven.org/wiki/tools/magnetic_tumbler/start?s[]=tumbler#tool-safety "tools:magnetic_tumbler:start ↵") for more information.
# Tool Anatomy
[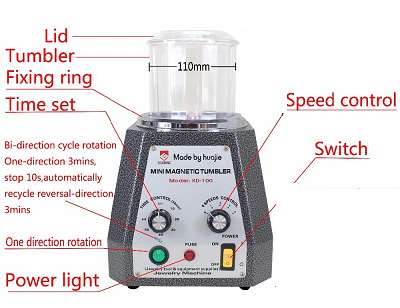](https://www.protohaven.org/wiki/_detail/tools/imported/tumbler.png?id=tools%3Amagnetic_tumbler%3Astart "tools:imported:tumbler.png")
# Tool Safety
### Personal Protective Equipment
⚠️ Safety glasses
### Common Hazards
### Prohibited Materials
# Tool Care
### Inspection
# Operation
### Set Up
**Tumbler**
-
Do not store the tumbler canister on the tumbler. This causes the steel burnishing shot to become highly magnetized and not work as well. Please store it on the table!
-
Always store the canister with the lid on and shot fully immersed, otherwise the steel shot will rust.
It rotates in one direction for about 15 minutes, and then automatically rotates to the opposite direction for 15 minutes. We suggest a two-way rotation, which is more efficient.
After selecting the direction you want, press the button in the center, then tumbler started to work.
You can choose a specific time by turning the time control button.
Tum Tumbler has self-protection function. When it works for a long time, it will stop and rest. When the motor is cooled down, it will continue to work.
**Pickle Pot**
-
Only use copper tongs in pickle solution, never steel!
-
Neutralize pickle solution in the sink by pouring it into a bowl of 1/4 baking soda and 3/4 water mixture.
-
Unplug before leaving the studio!
-
Silver work should not be used in a pickle pot where copper/bronze/brass work is pickled, otherwise it will become copper plated. Neutralize and make fresh pickle if this is the case.
**Buffs** Buffs should not be gummed up with polishing compound! Use compound sparingly so the buffs stay fluffy.
# Laser - Rabbit Laser (1 & 2)
# Manual(s)
*Manuals and other reference materials from the manufacturer or other sources.*
- Model: [Rabbit QX1290](https://rabbitlaserusa.com/laser_QX1290.html)
- Manufacturer: [ Rabbit Laser](https://rabbitlaserusa.com)
- Manual:
- Clearance Required: [Rabbit Laser Proficiency Based Clearance](https://wiki.api.protohaven.org/books/dokuwiki/page/wikitoolslaser_rabbitclearance)
# Materials
Approved and prohibited materials for the laser cutters.
## Approved Materials for Rabbit Laser Cutters
*Scroll up and down to see the list; scroll right for additional information.*
## Approved Materials for Trotec Laser Cutter
*Scroll up and down to see the list; scroll right for additional information.*
## Prohibited Materials for All Laser Cutters
**Unapproved material use is prohibited. Failure to comply will lead to revocation of privileges or membership.** Lasering unapproved material could lead to fire other equipment damage or hazardous fumes creating risk to human health.
*Scroll up and down to see the list; scroll right for additional information.*
## Notes
### Know your Poly\*
There are many plastic polymers made of different materials. Some can be lasered, others can not. Make sure you think critically about the words that come after poly.
-
Polyacrylic, Polyester, Polyethylene, Polylactic are generally the good ones. **See specifics Below**
-
Polystyrene requires vigilant observation so you don't burn down the laser.
-
Polyurethane, Polycarbonate, Polypropylene are ones are the bad ones. **See specifics Below**
### Monitor Closely
The following materials MUST BE monitored closely as they have an increased risk to cause damage to the equipment by causing fire or melting.
[Foamboard/foam core](https://www.goadams.com/foam-board "https://www.goadams.com/foam-board") (must not contain fire retardants; R.L. Adams is known good) **HIGH FIRE RISK** the entire job must be monitored closely.
-
[Coroplast brand corrugated polypropylene](https://www.coroplast.com/ "https://www.coroplast.com/") **watch for melting**; bulk polypropylene is not approved)
### Etched Only
-
Glass
-
Ceramic
-
Stone (marble, slate, quartz, etc.)
-
Plaster of Paris
-
Paints and thin spray coatings, thinner than powder coating (General blanket approval, but please use common sense and don't engrave your grandfather's old High Lead Special paint he has stockpiled.
-
Metal (painted/anodized)
-
The laser must not be used over 50% power in this scenario. Reflections can damage the optics.
-
[Cermark metal marking compound](https://www.cermarkusa.com/ "https://www.cermarkusa.com/")
## Submission of Material For Consideration
To submit a material for approval submit the request to the [\#lasers channel on Discord](https://discord.com/channels/791673872529358869/797191406048903178 "https://discord.com/channels/791673872529358869/797191406048903178"). Please provide the Safety Data Sheet (SDS).
## Laser Material Spreadsheet
The source of the above tables can be found in the following Google Sheet:
[`https://docs.google.com/spreadsheets/d/1RDp_Kf5wWVkaAUypppxwd_1NlgEtOxAvZAGb8n5b-Vc/edit?usp=sharing`](https://docs.google.com/spreadsheets/d/1RDp_Kf5wWVkaAUypppxwd_1NlgEtOxAvZAGb8n5b-Vc/edit?usp=sharing)
The Google Sheet has several pages, including:
- Notes on the spreadsheet
- Approved materials for the Rabbits, including suggested speed and power settings
- Approved materials for the Trotec, including suggested speed, power, and resolution settings
- Prohibited materials (applicable to all laser cutters)
# Member Notes
# Resources
*Where to obtain materials, consumables, and tooling.*
[Lightburn Basic Features Walk-through](https://www.youtube.com/watch?v%3DuzFsrUwONbw&sa=D&source=editors&ust=1676742576857324&usg=AOvVaw3fqAIYWnIUkK-WcwCZTQS3 "https://www.youtube.com/watch?v%3DuzFsrUwONbw&sa=D&source=editors&ust=1676742576857324&usg=AOvVaw3fqAIYWnIUkK-WcwCZTQS3")
[Lightburn Cut Settings](https://www.youtube.com/watch?\\v%3DnybhYtjElQU&sa=D&source=editors&ust=1676742576858120&usg=AOvVaw3ovUDl9YgTdBEsKfJazd2v "https://www.youtube.com/watch?\\v%3DnybhYtjElQU&sa=D&source=editors&ust=1676742576858120&usg=AOvVaw3ovUDl9YgTdBEsKfJazd2v")
[Lightburn Support Forum](https://forum.lightburnsoftware.com/&sa=D&source=editors&ust=1676742576858851&usg=AOvVaw0jkL3xpvsNb-NW-pUP9axb "https://forum.lightburnsoftware.com/&sa=D&source=editors&ust=1676742576858851&usg=AOvVaw0jkL3xpvsNb-NW-pUP9axb")
[Inkscape: The Basics](https://www.youtube.com/watch?v%3D8oGsjLSHol0&sa=D&source=editors&ust=1676742576859579&usg=AOvVaw0Mofk-UIhHuonHEgs9OY93 "https://www.youtube.com/watch?v%3D8oGsjLSHol0&sa=D&source=editors&ust=1676742576859579&usg=AOvVaw0Mofk-UIhHuonHEgs9OY93")
[Inkscape: Hand Trace Images](https://www.youtube.com/watch?v%3DY_MpPc30M6A&sa=D&source=editors&ust=1676742576860257&usg=AOvVaw3KqgR4GFQx6TIOO5K2lntj "https://www.youtube.com/watch?v%3DY_MpPc30M6A&sa=D&source=editors&ust=1676742576860257&usg=AOvVaw3KqgR4GFQx6TIOO5K2lntj")
[Inkscape: Auto-trace images into vectors](https://www.youtube.com/watch?v%3DVQ97Y35qO9A&sa=D&source=editors&ust=1676742576860853&usg=AOvVaw38lTV4jEBTzdILP2L7jKpD "https://www.youtube.com/watch?v%3DVQ97Y35qO9A&sa=D&source=editors&ust=1676742576860853&usg=AOvVaw38lTV4jEBTzdILP2L7jKpD")
[Corel Draw: Anatomy of Vectors](https://www.youtube.com/watch?v%3D91fhkXQs9vU&sa=D&source=editors&ust=1676742576861558&usg=AOvVaw2L6e4aeJ4ErUm63aQlJsVM "https://www.youtube.com/watch?v%3D91fhkXQs9vU&sa=D&source=editors&ust=1676742576861558&usg=AOvVaw2L6e4aeJ4ErUm63aQlJsVM")
[Corel Draw: Vector Tracing Tutorial](https://www.youtube.com/watch?v%3D31nldmLpwfc&sa=D&source=editors&ust=1676742576862188&usg=AOvVaw1NdbKv_ugdMXIJDXSJB2-c "https://www.youtube.com/watch?v%3D31nldmLpwfc&sa=D&source=editors&ust=1676742576862188&usg=AOvVaw1NdbKv_ugdMXIJDXSJB2-c")
[Corel Draw: Envelope & Perspective Tool](https://www.youtube.com/watch?v%3D9d4vBfc-mQQ&sa=D&source=editors&ust=1676742576862782&usg=AOvVaw2rabJd7727fbQbiGqJe5xm "https://www.youtube.com/watch?v%3D9d4vBfc-mQQ&sa=D&source=editors&ust=1676742576862782&usg=AOvVaw2rabJd7727fbQbiGqJe5xm")
[Adobe Illustrator in 5 minutes](https://www.youtube.com/watch?v%3D3GzumUieDPY&sa=D&source=editors&ust=1676742576863547&usg=AOvVaw0WG5CuyVPuNbaTaToVwYl9 "https://www.youtube.com/watch?v%3D3GzumUieDPY&sa=D&source=editors&ust=1676742576863547&usg=AOvVaw0WG5CuyVPuNbaTaToVwYl9")
[Adobe Illustrator: Turn Images into Vectors](https://www.youtube.com/watch?v%3DVPQ8i5BQaDE&sa=D&source=editors&ust=1676742576864169&usg=AOvVaw2o623Wj39F-qOnm7GgyO-Q "https://www.youtube.com/watch?v%3DVPQ8i5BQaDE&sa=D&source=editors&ust=1676742576864169&usg=AOvVaw2o623Wj39F-qOnm7GgyO-Q")
[Adobe Illustrator Pen Tool Tips](https://www.youtube.com/watch?v%3DF-bhWYC3EVY&sa=D&source=editors&ust=1676742576864801&usg=AOvVaw31i-qsXqjXNQ9YQTdVnLCk "https://www.youtube.com/watch?v%3DF-bhWYC3EVY&sa=D&source=editors&ust=1676742576864801&usg=AOvVaw31i-qsXqjXNQ9YQTdVnLCk")
[Adobe Illustrator: Turn Type into Shapes](https://www.youtube.com/watch?v%3DzryY_AjHC-U&sa=D&source=editors&ust=1676742576865378&usg=AOvVaw1uGZc1Y__IkJ1sYCi7amiY "https://www.youtube.com/watch?v%3DzryY_AjHC-U&sa=D&source=editors&ust=1676742576865378&usg=AOvVaw1uGZc1Y__IkJ1sYCi7amiY")
[Acrylic Purchasing Guide - Made by Morgan Swartz](https://docs.google.com/document/d/1jiD015owi85-m2xd0d0ig1qPqdr0u_KG1j7f7rQSW0I/edit?usp=sharing)
#### Sources for Materials
Acrylic (1/8 inch) [https://www.amazon.com/acrylic-sheet/s?k=acrylic+sheet](https://www.amazon.com/acrylic-sheet/s?k=acrylic+sheet)
Acrylic (1/4 inch) [https://www.amazon.com/acrylic-sheet/s?k=acrylic+sheet](https://www.amazon.com/acrylic-sheet/s?k=acrylic+sheet)
Cellulose Acetate Butyrate [https://www.chempoint.com/products/eastman/eastman-cellulose-esters/cellulose-](https://www.chempoint.com/products/eastman/eastman-cellulose-esters/cellulose-%20acetate-butyrate/cab-171-15)
[acetate-butyrate/cab-171-15](https://www.chempoint.com/products/eastman/eastman-cellulose-esters/cellulose-%20acetate-butyrate/cab-171-15)
Ceremark Metal Marking Compound [https://www.cermarkusa.com/](https://www.cermarkusa.com/)
Chipboard (1/16 inch) [https://www.dickblick.com/products/all-purpose-chipboard/](https://www.dickblick.com/products/all-purpose-chipboard/)
Chipboard (3-ply) [https://www.dickblick.com/products/all-purpose-chipboard/](https://www.dickblick.com/products/all-purpose-chipboard/)
CobalTex RF [https://lessemf.com/product/cobaltex-fabric/](https://lessemf.com/product/cobaltex-fabric/)
Freezer Paper [https://www.amazon.com/Reynolds-Kitchens-Freezer-Paper-Square/dp/B000BZYCNK](https://www.amazon.com/Reynolds-Kitchens-Freezer-Paper-Square/dp/B000BZYCNK)
ModPodge Gloss [https://www.michaels.com/mod-podge-gloss/M10047536.html](https://www.michaels.com/mod-podge-gloss/M10047536.html)
Painter’s Tape [https://www.amazon.com/ScotchBlueTM-Painters-Tape-Core-Yd/dp/B00004Z4DU](https://www.amazon.com/ScotchBlueTM-Painters-Tape-Core-Yd/dp/B00004Z4DU)
Plexiglass (1/4 inch) [https://www.amazon.com/Source-Thick-Inches-Acrylic-Plexiglass/dp/B004DYW31I](https://www.amazon.com/Source-Thick-Inches-Acrylic-Plexiglass/dp/B004DYW31I)
Plywood (1/16 inch) [https://ocoochhardwoods.com/plywood/baltic-birch-plywood/](https://ocoochhardwoods.com/plywood/baltic-birch-plywood/)
Plywood (1/4 inch) [https://ocoochhardwoods.com/plywood/baltic-birch-plywood/](https://ocoochhardwoods.com/plywood/baltic-birch-plywood/)
Plywood (1/8 inch) [https://ocoochhardwoods.com/plywood/baltic-birch-plywood/](https://ocoochhardwoods.com/plywood/baltic-birch-plywood/)
#### Internet Forums
- [https://forum.laseruser.com/](https://forum.laseruser.com/)
- [https://sawmillcreek.org/forumdisplay.php?8-Laser-Engraving-General-Topics](https://sawmillcreek.org/forumdisplay.php?8-Laser-Engraving-General-Topics)
# Rabbit Laser Tool Tutorial
A laser cutter is used to mark, engrave, or cut a wide variety of materials. They work a lot like printers do, where you send a graphic to print. Instead of ink, the laser uses heat to transfer the image onto the material.
Class handout for basic laser operation: [laser\_101-basic\_operation.pdf](https://wiki.protohaven.org/attachments/195)
Do not use prohibited materials in the laser (see [Material Safety](https://wiki.protohaven.org/books/tool-guides/page/materials) for allowed and prohibited materials)
Lid - Absorbs the laser radiation and must be closed when running a job
2. Lens Carriage - Houses the mirror, lens, and air assist
3.
Bed - 1200 x 900mm (~47” x 35”) Consists of a removable, magnetic honeycomb tray. Seated properly, it should feel stable & secure
4.
Emergency Stop - Reserved for emergencies. To deactivate and reset, you must twist the spring-loaded knob.
5.
On/Off Switch - Key switch turns the machine on and off
6.
Control Panel - LCD interface with commands to operate the laser
7. Spray Bottle - filled with water; use to put out any smoldering fires / flare ups
8. Magnets - use these to hold down your stock material
#### Control Panel
[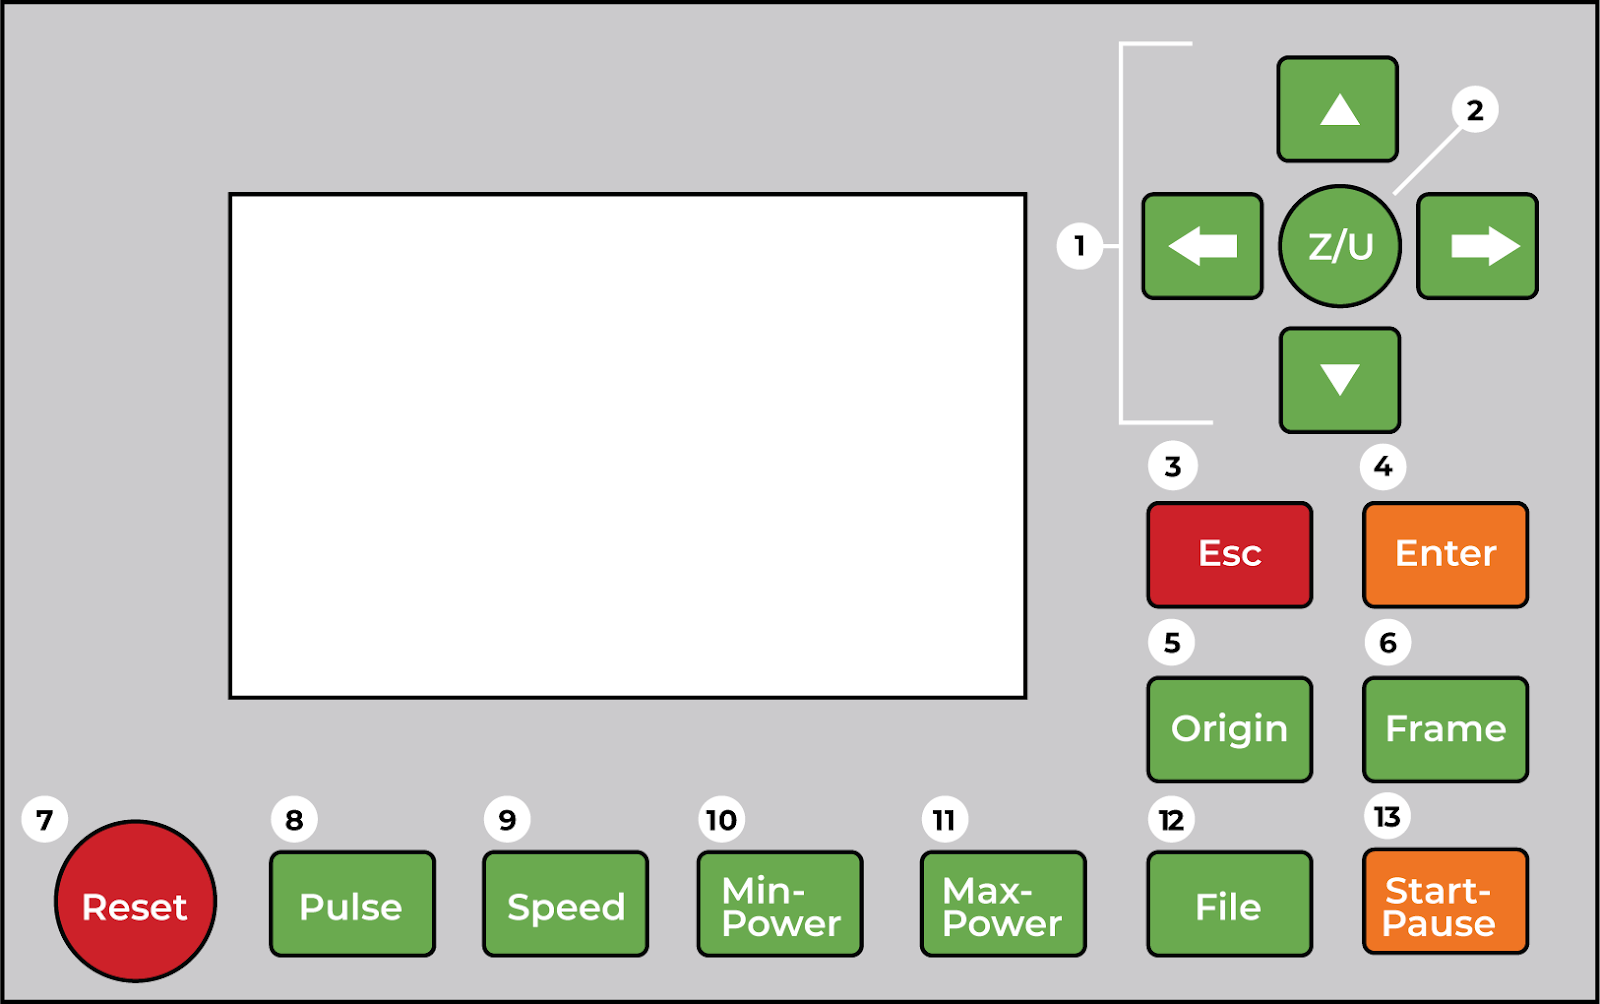](https://wiki.protohaven.org/uploads/images/gallery/2026-06/gGximage.png)
1.
Jog X-axis and Y-axis
2.
Adjust Z-Axis
3.
Exit Menu/Return to main screen
4.
Select menu item
5.
Set Job Origin
6.
Trace the footprint of a job to check its size and placement
7.
Reset machine, Abort Job
8.
Pulse the laser to mark its precise location
9.
Adjust speed (mm/sec)
10.
Adjust power (0-100%) for the areas the laser approaches a node/edge
11.
Adjust power (0-100%) for the areas where the laser is mid-cut/mid line
12.
Retrieve file sent to the machine (job queue)
13.
Start job, pause job, resume job
### Safety
**Do not leave the laser running unattended.** Lasers can cause fires. If your workpiece catches fire and the fire is not handled promptly, the fire can get out of control, and create an extreme hazard. Always keep watch over your running job, and be ready to extinguish any small fires with the nearby spray bottle, and/or hit the emergency stop if the laser goes out of control.
**Keep the laser door closed during normal operation.** The door protects those nearby from any possible eye damage or skin burns should the laser hit any reflective material.
**Make sure the fan is running before cutting or etching.** Running the laser on certain materials can produce gasses and make the studio environment unpleasant: the fans will pull the gasses outside.
#### Common Hazards
Some materials may heat up enough from the laser to catch fire. In case of a small fire, use the water spray bottles to quickly douse any small flames.
Some materials may produce toxic gas when cut or etched. Make sure the material you are cutting or etching is not listed in the Prohibited Materials subsection.
Depending on the material, laser cutting may produce sharp edges. Always handle materials carefully after they have been cut.
#### Care
Use care when opening and closing the cover; do not let the cover slam closed. The shock of letting the cover fall freely onto the chassis has damaged the laser tube in the past; members will be held liable if a slid slam causes the tube to break.
#### Prohibited Materials
See [Material Safety](https://wiki.protohaven.org/books/tool-guides/page/materials) for allowed and prohibited materials.
## Basic Operation
### Set Up the Laser
1. Turn on the large format laser.
2. Make sure chiller is powered on and working. Look for the green status light on the front of the chiller.
3. Make sure the exhaust fan is running.
4. Carefully open the lid. **The lid is heavy; letting the lid slam closed will damage the laser.**
5. Secure the workpiece to the grid. Use the provided mounting magnets to hold the workpiece in place.
6. Position the laser head over the workpiece. Use the directional buttons to move the laser head across the bed.
#### Workholding
Use magnets to secure the workpiece to the grid.
Make sure that the laser’s path won’t cause the laser to cut the magnets, or for the laser head to crash into the magnets.
#### Focus the Lens
Use a focus block on the workpiece to set the height of the lens and bring it into focus.
1. Press the Z/U button to change to bed height control.
The screen will display a menu with Z move highlighted in blue.
2. Press the ← (right arrow) and → (left arrow) buttons to align the focus gauge to the second ring of the lens carriage.
The right arrow lowers the bed, and the left arrow raises the bed.
3. Press the Esc button to return to the main screen.
[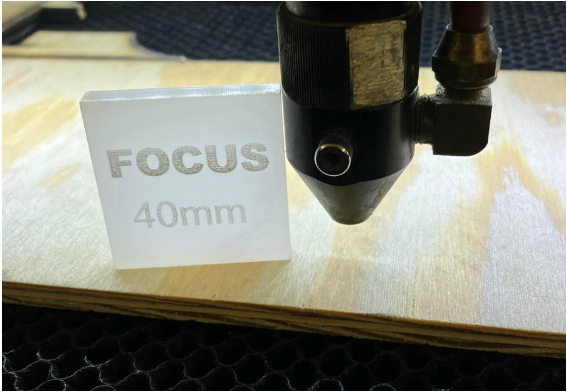](https://wiki.protohaven.org/uploads/images/gallery/2026-07/D5limage.png)
#### Set the Origin
1. Position the laser head over the workpiece at the location you want to set as a boundary for your art.
Use the directional buttons to move the laser head across the bed.
Optional: Press the Pulse button to verify the exact location.
2. Press the Origin button to set the origin point for the job.
#### Set up the Job in LightBurn
These steps detail loading a single vector art file into LightBurn, and using that file to run a job with the laser. LightBurn is capable of much more: with LightBurn, we can load, manipulate, and compose multiple images into one job. For more about LightBurn, please
see the Software section further down.
##### Import the Art
1. Open LightBurn on the computer connected to the large format laser.
2. Click File > Import.
3. Select the art file to import.
The art will be automatically placed on the LightBurn canvas. You may need to zoom and/or pan the view to see all of the art.
##### (Optional) Manipulate the Art
LightBurn is a capable image editor, and has many features that a specific to preparing artwork for the laser.
Work that is commonly done in LightBurn prior to cutting or etching:
- Duplicating the art to cut multiple copies.
- Putting portions of the art into layers, for different cuts and/or ordering the cuts.
##### Set the Reference Origin
Set the reference origin in LightBurn with the Job Origin tool:
[](https://wiki.protohaven.org/uploads/images/gallery/2026-07/KFGimage.png)
#### Set the Speed and Power
In the Cuts/Layers panel, each layer will have a listed speed and power in the Spd/Pwr column. These settings must be adjusted for the material (wood, acrylic, natural leather) and purpose (cutting or etching). To adjust the speed and power settings:
1. Click on the value in this column to bring up the Cut Settings Editor dialog box.
[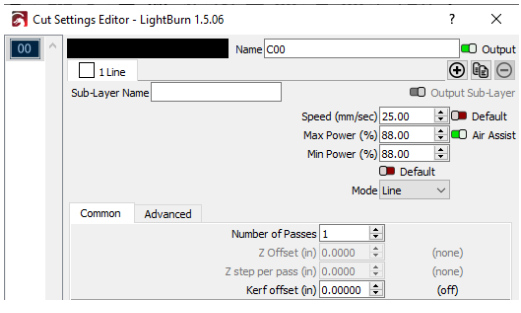](https://wiki.protohaven.org/uploads/images/gallery/2026-07/ZHMimage.png)
2. Use this dialog box to adjust the Speed and Max Power settings for the cut.
3. Click OK
See [Materials](https://wiki.protohaven.org/books/tool-guides/page/materials) for good starting speed and power values for both cutting and engraving.
### Run the Job on the Laser
1. Check the footprint of your job.
In LightBurn, press the Rectangular Frame button to command the laser to trace out the
box boundary of the job, or the Circular Frame button to trace out the exact boundary of
the job. The laser will trace out the area of the job. Make sure that the traced path does
not leave the media, or run over any of the hold-down magnets.
2. Press the start button.
3. Monitor the machine until the job is complete.
While the job is running, remain nearby the laser to make sure nothing goes wrong.
### Cleaning Up
1. Power off the Laser.
2. Reset any modified computer settings to default.
3. Vacuum the interior so material does not build up beneath the honeycomb.
4. Recycle waste in the single-stream scrap bins.
Report any maintenance needs or concerns at protohaven.org/maintenance, or by
alerting a shop tech on duty.
If the single-stream scrap bins become full, alert a shop tech
#### Scrap Breakdown
There is a black scrap bin reserved for laser waste. Maintaining this is a shared, communal responsibility.
When you notice the scrap bin is full, it’s time to take it to the dumpster out back. Feel free to enlist a helping hand.
If you notice valuable material while emptying the bin, use your judgement to selectively save a few pieces or take it home for your personal use.
### Troubleshooting
Problem
Likely Cause
Potential Solution
Cut does not go through the material
The speed is too fast or the power is too low
Use a scrap piece of the same material to make a series of tests with incremental adjustments until you find the sweet spot
The lens or mirror is fogged
Alert the staff or volunteer on duty to the issue
Slop in the frame
The origin in Lightburn is not set appropriately
Adjust the origin point in Lightburn
The artwork is too large for the cutting bed: 1200 x 900mm (~47 x 35”)
Adjust the overall artwork size
Burn marks on the back of the material
Hot debris is scorching the edges of the cut lines
Lay a sheet of paper beneath the material and the bed or line it with a laser-safe vinyl free tape
No visible cutting happening
Lid safety switches not engaged, or software issue
Confirm the lid safety switches click when the lid closes. Turning the machine off and on again may also help if that isn't the problem.
## Notes
-
Register your material on the cutting bed using magnets or tape when doing a production run.
-
Use the front pass-through door for extra long pieces.
- Use surface treatments like Cermark or paint to etch designs onto metal surfaces.
## Software
### Inkscape
Inkscape is software for creating and editing vector graphics: [https://inkscape.org/](https://inkscape.org/)
Inkscape is a valuable tool that’s useful in many parts of the shop.
A common use of Inkscape is to prepare art for import into the software that drives
various tools around the shop. Protohaven members use Inkscape to create and edit
designs for use with:
- Large Format Laser (LightBurn)
- CNC Embroidery (Artistic Designer)
- Vinyl Cutter (Sure Cuts A-Lot)
- CNC Router (Vcarve)
Inkscape can be used to prepare art for the Large Format Printer.
Inkscape is also a good general purpose tool for creating visuals: drawings, infographics, logos, title blocks, icons.
#### Download
Inkscape is freely available to download and use for Linux, Windows, and MacOS: [https://inkscape.org/release/](https://inkscape.org/release/)
#### Help and Tutorials
##### Manual
The Inkscape project maintains a comprehensive manual: https://inkscape-manuals.readthedocs.io/en/latest/index.html
The manual is updated regularly, and available for both online (HTML) and offline (PDF, ePub) reading.
##### Video
A short tutorial to get started with Inkscape:
- Inkscape Tutorial: Complete Starter Guide for New Users (with chapters) [https://www.youtube.com/watch?v=fzk-suGcqrc](https://www.youtube.com/watch?v=fzk-suGcqrc)
A comprehensive tutorial series for Inkscape is available from TJ Free:
[https://www.youtube.com/playlist?list=PLqazFFzUAPc5lOQwDoZ4Dw2YSXtO7lWNv](https://www.youtube.com/playlist?list=PLqazFFzUAPc5lOQwDoZ4Dw2YSXtO7lWNv)
Some videos from the series that are good places to start:
- Inkscape Lesson 1 - Interface and Basic Drawing [https://www.youtube.com/watch?v=8f011wdiW7g](https://www.youtube.com/watch?v=8f011wdiW7g)
- Inkscape Lesson 10 - Trace Images with Bezier Tool [https://www.youtube.com/watch?v=sagrkdmC\_BI](https://www.youtube.com/watch?v=sagrkdmC_BI)
- Inkscape Lesson 11 - Trace Bitmap Tool (Convert Raster to SVG) [https://www.youtube.com/watch?v=E7HwLTQu2FI](https://www.youtube.com/watch?v=E7HwLTQu2FI)
### LightBurn
LightBurn is layout, editing, and control software for the large format lasers: [https://lightburnsoftware.com/](https://lightburnsoftware.com/)
LightBurn is only available on the desktops dedicated for use with the lasers.
LightBurn is capable of handling all stages of a laser project, from art design through to running the job on the laser.
LightBurn can also import vector and raster art from other sources: you can work on your project in other software and then import it into LightBurn when you’re ready to run the job.
#### Help and Tutorials
LightBurn software has a YouTube page ([https://www.youtube.com/@lightburnsoftware](https://www.youtube.com/@lightburnsoftware%207189/)
[7189/](https://www.youtube.com/@lightburnsoftware%207189/)) with lots of content to help with projects. For those new to laser cutting and etching, these videos are a good place to start:
- Getting Started With LightBurn: Set up & First Project [https://www.youtube.com/watch?v=v3RDzOrlCTM](https://www.youtube.com/watch?v=v3RDzOrlCTM)
- LightBurn UI Walkthrough [https://www.youtube.com/watch?v=uzFsrUwONbw](https://www.youtube.com/watch?v=uzFsrUwONbw)
- LightBurn Cut Settings [https://www.youtube.com/watch?v=nybhYtjElQU](https://www.youtube.com/watch?v=nybhYtjElQU)
## Concepts
### Image Types
For computers to work with image data, the image data needs to be encoded in some way so that the computer can understand it. There are many approaches to encoding visual data, but most of them fall into two categories:
- raster images, where the image is encoded as a grid of dots
- vector images, where the image is encoded as a collection of objects
#### Raster Images
Raster images are composed of lots of dots: a rectangular grid of points, each point encoded with color information. If we zoom way in on a raster image, we’ll see that it’s made up of this grid of dots. In the following image, we can see from the zoomed in portion of the image that it’s made up of lots of tiny dots of color:
[](https://wiki.protohaven.org/uploads/images/gallery/2026-07/AQ1image.png)
These dots are often referred to as pixels.
The number of pixels we have in an image partially determines its quality. The more dots in the image, the better the image will look (to a degree) and the more we’ll be able to adapt it for a variety of uses: we can, for example, scale up an image with lots of pixels and still have it look reasonable for most applications.
Raster images are useful for rich graphics: photographs, non-technical line art, etc. Raster images are particularly good for photographic material. Raster images are a poor choice for transmitting text (particularly if scaled), or vector art like line drawings, schematics, etc.
Common file formats like .jpeg, .gif, and .png are all image raster data.
#### Vector Images
Vector images are built from logical instructions. In a raster image, a line might be encoded as a string of dots on the grid. In a vector image, a line is encoded as a logical connection between two points. A nice property of vector images is that they scale very well: they can be re-rendered with precision at any size. In the following image, we can see in the zoomed in portion of the image that there is no loss in precision or quality of the image:
[](https://wiki.protohaven.org/uploads/images/gallery/2026-07/yhIimage.png)
Vector graphics are made of objects.
The objects in a vector graphics file logically describe the visual contents of the file. For example, the file my specify that at a particular coordinate on the canvas there is a square, filled in with a particular color. The information is not encoded in dots, like a raster image: the image contents are described instead by a collection of objects that describe an image.
Vector graphics are useful for any image that requires precision: vector formats are good choices for infographics, technical line drawings, schematics, and similar art. Vector graphics are also useful for any art that has a text component: labels, legends,
titles, etc. With a vector graphic, the text is also stored as vectors (the glyphs of the font, or objects derived from it), and the image can be scaled without any loss of quality for the text or the art.
Common file formats like .ai, .dxf, and .svg are all image vector data.
Most vector file formats can also contain raster images, but raster formats cannot contain vectors.
# Laser - Trotec (3)
Trotec Speedy 300 C80
# Community Laser Files
- "T" shaped hold down laser cutter file: [t\_holddown\_trotec.svg](https://wiki.protohaven.org/attachments/236)
- Wide base hold down: [Tees 2024.ai](https://wiki.protohaven.org/attachments/360)
- Ai Template and color palette: [Template with trotec colors.ait](https://wiki.protohaven.org/attachments/362). [trotec colors.ase](https://wiki.protohaven.org/attachments/361)
# Trotec manuals
[8011 Speedy 300 Service Manual.pdf](https://wiki.protohaven.org/attachments/354)
[operating-manual-Speedy-300-8066-en-us.pdf](https://wiki.protohaven.org/attachments/353)
[SP300\_Beam\_alignment.pdf](https://wiki.protohaven.org/attachments/349)
[SP300\_Table\_leveling.pdf](https://wiki.protohaven.org/attachments/348)
[Trotec info for maintenance.pages](https://wiki.protohaven.org/attachments/351)
[operating-manual-Speedy-300-8066-en-us.pdf](https://wiki.protohaven.org/attachments/353)
[SP300\_8011\_Beam\_alignment.pdf](https://wiki.protohaven.org/attachments/363)
[SP300\_Laser\_tube\_replacement\_Iradion.pdf](https://wiki.protohaven.org/attachments/364)
[JobControl-Manual-EN.pdf](https://wiki.protohaven.org/attachments/355)
[Handbook-for-engravers.pdf](https://wiki.protohaven.org/attachments/356)
# Trotec Rotary Tool Guide
#### Manuals:
[Rotary-guide-formatted-electronic-5-18.pdf](https://wiki.protohaven.org/attachments/357)
[operating-manual-Speedy-300-8066-en-us.pdf](https://wiki.protohaven.org/attachments/359)
Lots to come, after full development of flat cutting/engraving document. Working on it.
# Trotec Tool Guide - Flat Cutting and Engraving
The Trotec Laser can cut and engrave a variety of materials from a digital file in fine detail. Projects up to 21"x17" will fit in this laser.
#### SAFETY
#### CARE
#### CLEANUP
1\. Always keep the lid closed, do not tamper with the safety switches on the lid.
1\. Do not force the lid open higher than the shocks allow.
1\. Vacuum up small parts, clean catch tray when numerous small parts have fallen between the honeycomb.
2\. Cut and engrave approved materials only.
2\. Handle the honeycomb table carefully, bent surfaces cause cuts in the underside of the materials.
2\. Place the rotary tool back in the storage cabinet.
3\. Be sure both fans are operating.
3\. Submit a [maintenance request](http://protohaven.org/maintenance) when needed.
3\.
## Tool Anatomy
[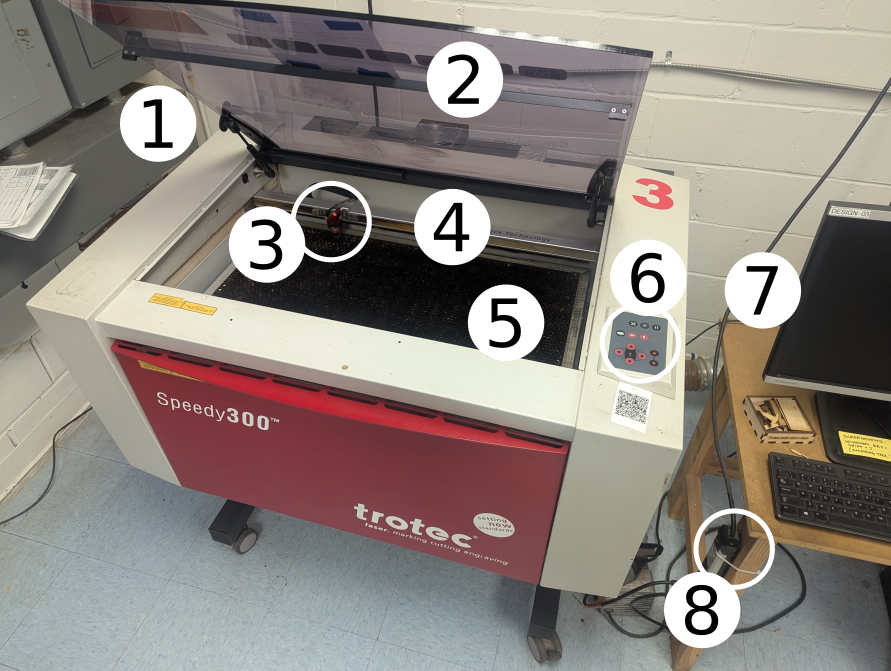](https://wiki.protohaven.org/uploads/images/gallery/2026-07/trotec-diagram.png)
1. Power Switch - on/off switch, located on the back left of the machine
2. Lid
3. Lens carriage
4. Gantry
5. Bed
6. Control panel
7. Desktop computer
8. Exhaust switch - activate the power strip to pull smoke from the bed to outside
#### CONTROL PANEL
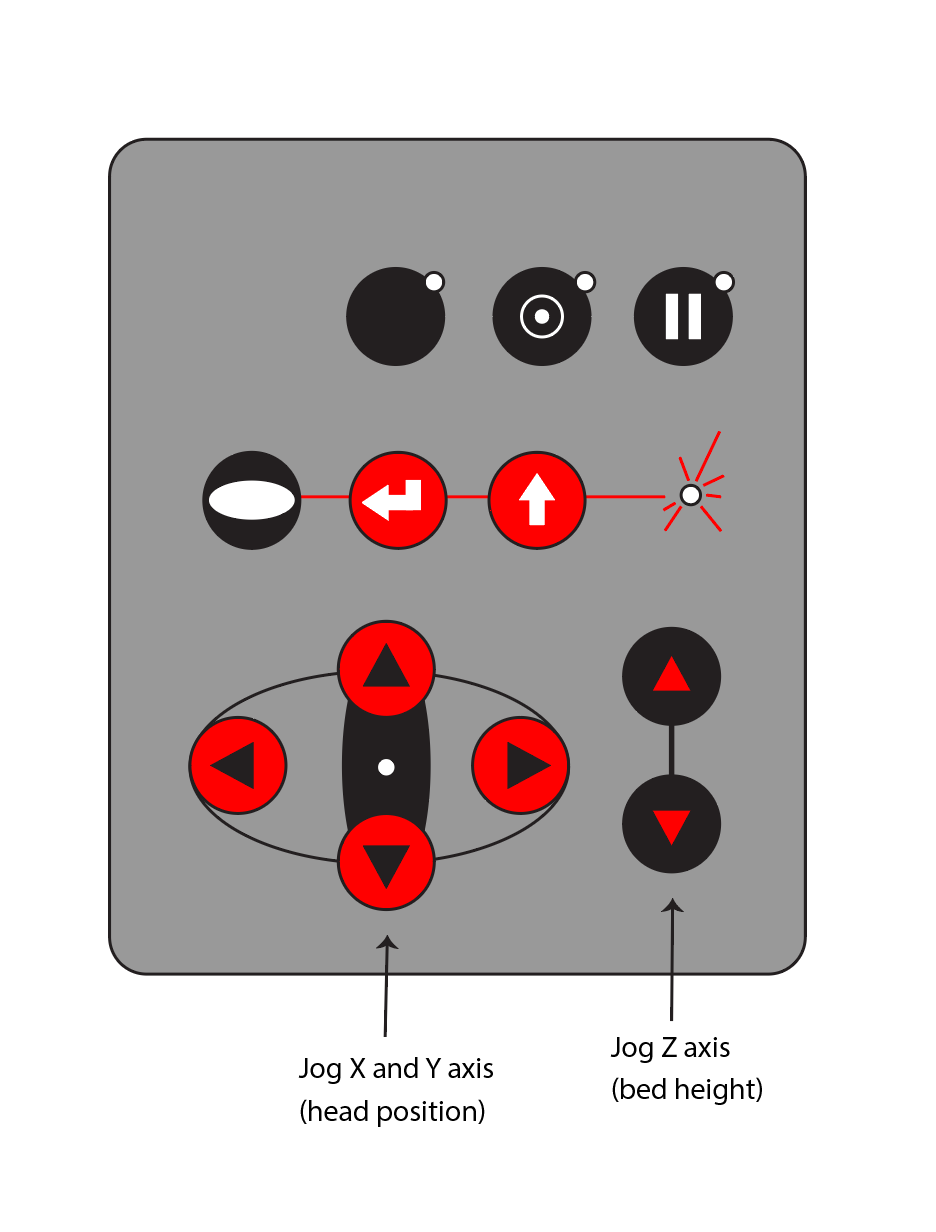
## Safety
### Common Hazards
- The lid of the machine protects against stray emissions and eye damage. The lid should always be shut when in use, there are switches to automatically turn the laser off when the lid is opened. Immediately report any problems with the lid.
- **Ventilation:** Make sure the fan is on before cutting.
- **Flames:** Watch for flames and pause the laser and use spray bottle with water if a flame develops.
- **Cuts:** Bodily hazard of being cut by your own sharp material.
- **Toxicity:** Only use approved materials on the machine to avoid creating toxic gas.
- **Noise:** The combined sound of the Trotec motors and the Rabbits is **LOUD**! Noise cancelling headphones recommended.
### Materials
**Many materials can emit melt, catch fire, or emit toxic fumes when cut with a CO2 laser.**
**Consult the [allowed and prohibited materials list](https://wiki.protohaven.org/books/tool-guides/page/materials) before cutting or engraving new materials,** and use the speed and power settings on that page as a starting point for your project.
## File Setup
#### Using ADOBE Illustrator
1. You can use any vector based software to design your artwork as long as it can export files using file types .svg or .ai. Save your file to a USB thumb drive and bring that to the computer.
2. Open Adobe Illustrator on the desktop computer.
3. New from template> Desktop > Template Trotec\*. This template contains the palette below as well as the Graphic Styles palette where red and black are already set up.
4. Copy and paste your artwork into this document.
5. The software that this machine is picky about the line types it can use. Make sure your cutting lines are 0.001 stroke width and the colors are as listed as in the chart below for them to be read.
6. Print - Job Control will start
#### Using Corel Draw
1. 1. Save files as svg
2. Open Corel Draw
3. Check line weights for cutting are 0.001 and any other colors are the same as the chart below.
4. Print - Job Control will start.
#### Document color setup
The TROTEC JobControl allows the selection of 16 different colors in the material templates to specify 16 different power levels during cutting or engraving. When using this function, the colors in the graphics program must match exactly the colors listed in the TROTEC JobControl (on using Corel draw make sure that color management is OFF). In some graphics programs these Basic colors are already predefined, with other programs, you must define each color separately with its RGB components first. If the 16 driver colors are not automatically available in the software, use the values in the following list:
***\* This set of colors can be found in the Trotec template on the desktop. Corel Draw RGB defaults to these. (double check)***
[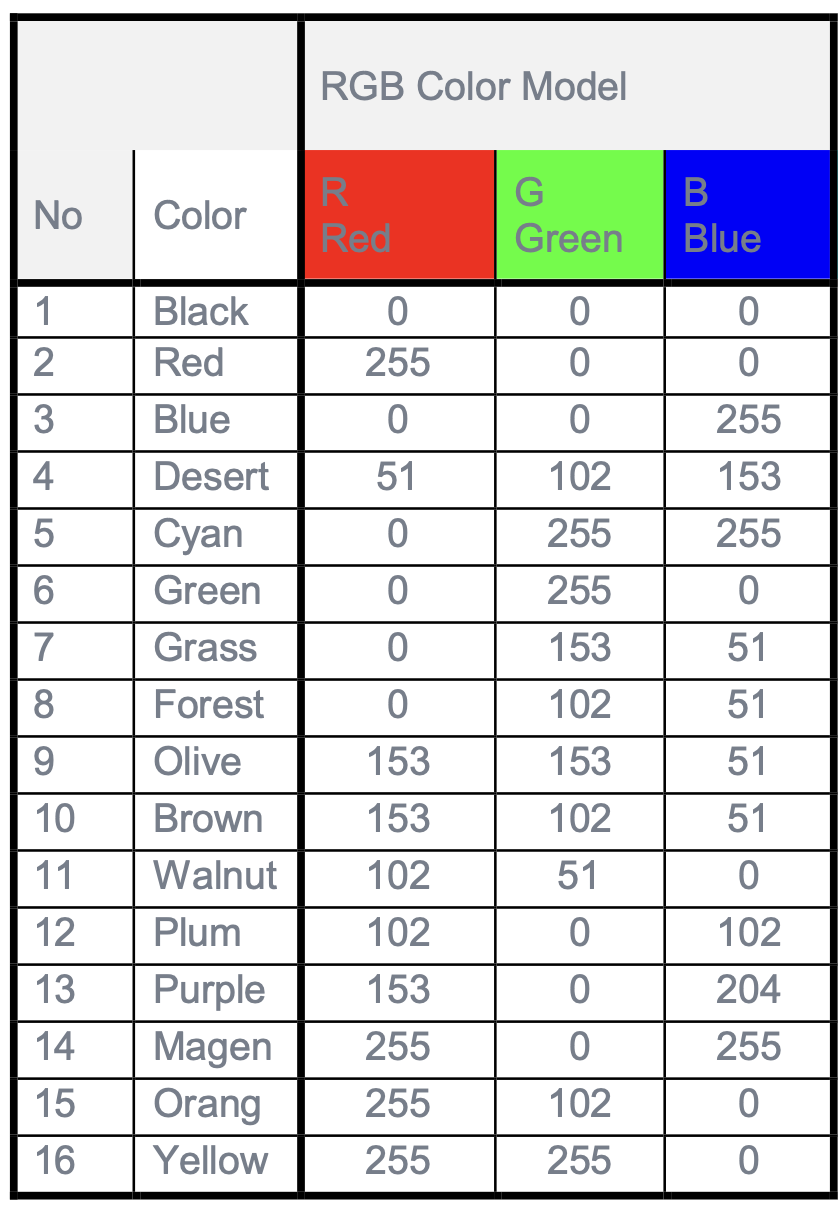](https://wiki.protohaven.org/uploads/images/gallery/2025-11/screenshot-2025-11-10-at-3-20-42-pm.png)
## Machine Setup
#### **SETUP CHECKLIST**
1. Be sure the bed is clean and level (as much as possible for a warpy old bed)
2. Open your file in a vector draw program and check for duplicate layers, correct size for your material, and the correct colors. Remove any clipping paths, bounding boxes, stray paths.
3. Ensure your material is not on the list of **Prohibited Materials** posted on the top of the lid.
4. Turn on the switch at the back of the machine.
5. Switch on the exhaust fan at the side of the computer table.
### Job Control
**The Job Control software functions more like a driver for a desktop printer, in other words, you can't open files directly in Job Control, they need to run through a vector draw program "*Print File*" dialog boxes. There are three levels to this:**
1. Print, click on the "Preferences" button.
2. You will see Printing Preferences, size will be "User Defined" or Bed Size"
3. (Optional) Material Setup (also available in Job Control, the two will talk to each other)
[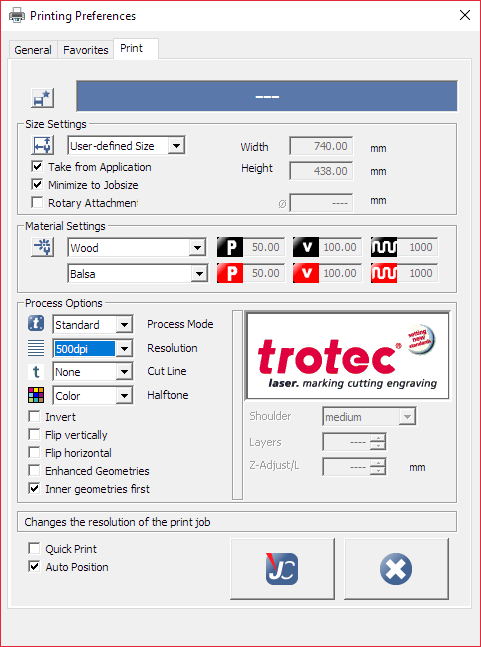](https://wiki.protohaven.org/uploads/images/gallery/2025-11/advanced-driver.png)
Materials Settings: Use a thickness and material that best matches.
[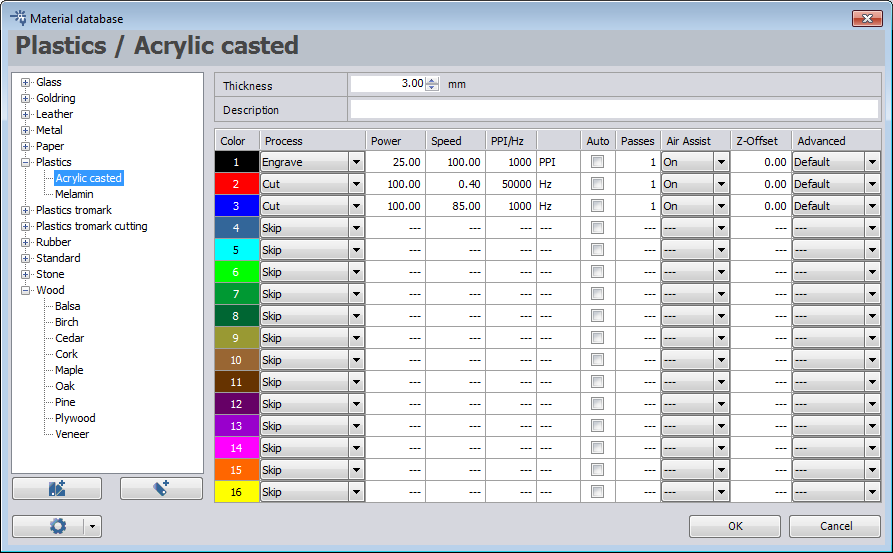](https://wiki.protohaven.org/uploads/images/gallery/2025-11/materials-list.png)
Click OK, then the JC Button, Then JC on the original screen. Job Control will start.
1. To see an actual preview of your job on the bed, click the WYSIWYG button  (Ctrl + I)
2. Set the speed/power settings for the material & line colours in the Material Templates window 
3.
1. Your artwork will appear on a panel on the right hand side in the “Jobs” panel. Click and drag to add it to the bed. The art can be placed on any of the intersections of the crosshairs or directly on center.If the
2.
Add more here!
### Common Settings
Settings for this machine are stored in an internal database that is editable by members.
It's recommended to look up the desired material and thickness in the [allowed and prohibited materials list](https://wiki.protohaven.org/books/tool-guides/page/materials) to make sure power, speed, and other settings are correctly set.
## Basic Operation
1. Power on the machine. The switch is on the back of the machine on the left side, near the circuit breakers.
2. Power on the exhaust fan by turning on the power strip on the front left leg of the desktop computer table.
3. Connect the machine and Job Control by clicking the USB port button in the bottom right corner.
4. Add your material. Open the lid and place your material on the bed. You can secure the material using wood clips. This bed is made of aluminum and therefore is both delicate and not magnetic.
5. Move the head over the material. Hang one of the focus measuring pieces on the laser head and raise the bed slowly until the piece falls off.
6. Move the head to your origin
7. Close the lid
8. Cut using Job Control
9. Watch your job to make sure it goes smoothly. If you notice a problem, you can:
**A.** pause the job with the pause button on the control panel.
**B.** Pause using the Job Control Software. (the pause button on the machine panel will not allow a restart of the job, using pause in the software will let you finish where you left off.
**If your material catches on fire, pause the job and use the water spray bottle to extinguish it.**
## Cleanup
1. Power off the Laser
2. Reset any modified computer settings to default
3. Vacuum the interior so material does not build up beneath the honeycomb
4. Note any maintenance needs or concerns on the tag and at [protohaven.org/maintenance](http://protohaven.org/maintenance)
5. Recycle or dispose of waste in the single-stream scrap bins or trash can
6. Return the rotary tool to the cabinet.
### Scrap Breakdown
There are two black scrap bins reserved for laser waste. Maintaining these is a shared, communal responsibility.
When you notice the scrap bins are full, it’s time to take it to the dumpster out back. Feel free to enlist a helping hand.
If you notice valuable material while emptying the bins, use your judgment to selectively save a few pieces or take it home for your personal use.
## Troubleshooting
### Common Issues
### Possible Causes
### Resolutions
Job control WSIWYG doesn't show all lines in a cut or engraving
Not using the correct line weight or colors.
Use the Illustrator template "Trotec Template"
The honeycomb bed doesn't show up in JC, I see the rotary tool
The last setup was for the rotary tool.
Go to Settings/Options/accessories and uncheck rotary tool, check honeycomb bed.\*\*Valerie check!
My parts don't fit in the JC engraving area
The last setup was for the rotary tool
Print setup + + +\*\*Valerie check!
Set to "Bed Size"
## Special Setups
#### Rotary tool
The Trotec can engrave on cylindrical materials - tumblers, glasses, pipes, etc.
Read the [Trotec Rotary Tool Guide](https://wiki.protohaven.org/books/tool-guides/page/trotec-rotary-tool-guide "Trotec Rotary Tool Guide") for details on how to set up and use the rotary tool attachment..
# Measuring - Hardness Tester
# Manual(s)
*Manuals and other reference materials from the manufacturer or other sources.*
# Member Notes
# Resources
*Where to obtain materials, consumables, and tooling.*
# Tool Tutorial
## Introduction
The Rockwell hardness tester is primarily for testing the hardness of steels.
The hardness tester has two functions in the shop:
- Test if materials are soft enough to be cut/machined on shop tools.
- Test if a hardening process was successful.
### How the Hardness Tester Works
The hardness tester presses a diamond into the metal to take the reading, and the tester measures the amount of resistance offered by the material under test.
The diamond tip is fragile, and must be treated with upmost care when loading/unloading the part to be tested.
The process of testing hardness will leave a small indentation in the part. It is best to test hardness in an inconspicuous area.
### Rockwell B and C Scales
By swapping out the indenter tip, the hardness tester can test for two different scales: Rockwell B (100kg, suitable for softer material) and Rockwell C (150kg, suitable for steels).
The shop hardness tester is set up with a diamond tip. The diamond tip is calibrated for testing the Rockwell C scale.
If you need to test the hardness of a material with the Rockwell B scale, pleasee contact a member of the maintenance crew.
These instructions are for the Rockwell C scale.
### Hardness Values and Shop Safety
An important function of the hardness tester is to test unknown materials to make sure they won't damage shop tools.
If the material doesn't register on the C scale (a value of zero or below), we can safely machine the material on any of our tools.
If the material registers above 10 on the C scale, we need to be careful how we machine the material with our tooling - our tools might not be able to machine the material without excess care.
## Notes
### Safety
- Use eye protection.
### Common Hazards
If there is a weakness in the material being tested, the material may chip under pressure, and the debris may be ejected from the part at great speed. Always wear eye protection when using the hardness tester.
### Care
**Be careful of the C (diamond) indenter.** This is a precision part, and bumping or crushing the indenter can reduce the accuracy of the machine.
**Be careful of the granite block.** The granite block is a precision surface, and should be protected by the cover at all times while using the hardness tester.
### Tooling
Anvils and test plates are located on the shelf below the hardness tester. indenters are located in the draw cabinet next to the hardness tester.
### Materials
Use the hardness tester with hard metals like steel.
Do not use this tool with soft metals, plastics, or wood.
Do not use this tool with any ceramics.
## Parts of the Tool
### Full View, Annotated
[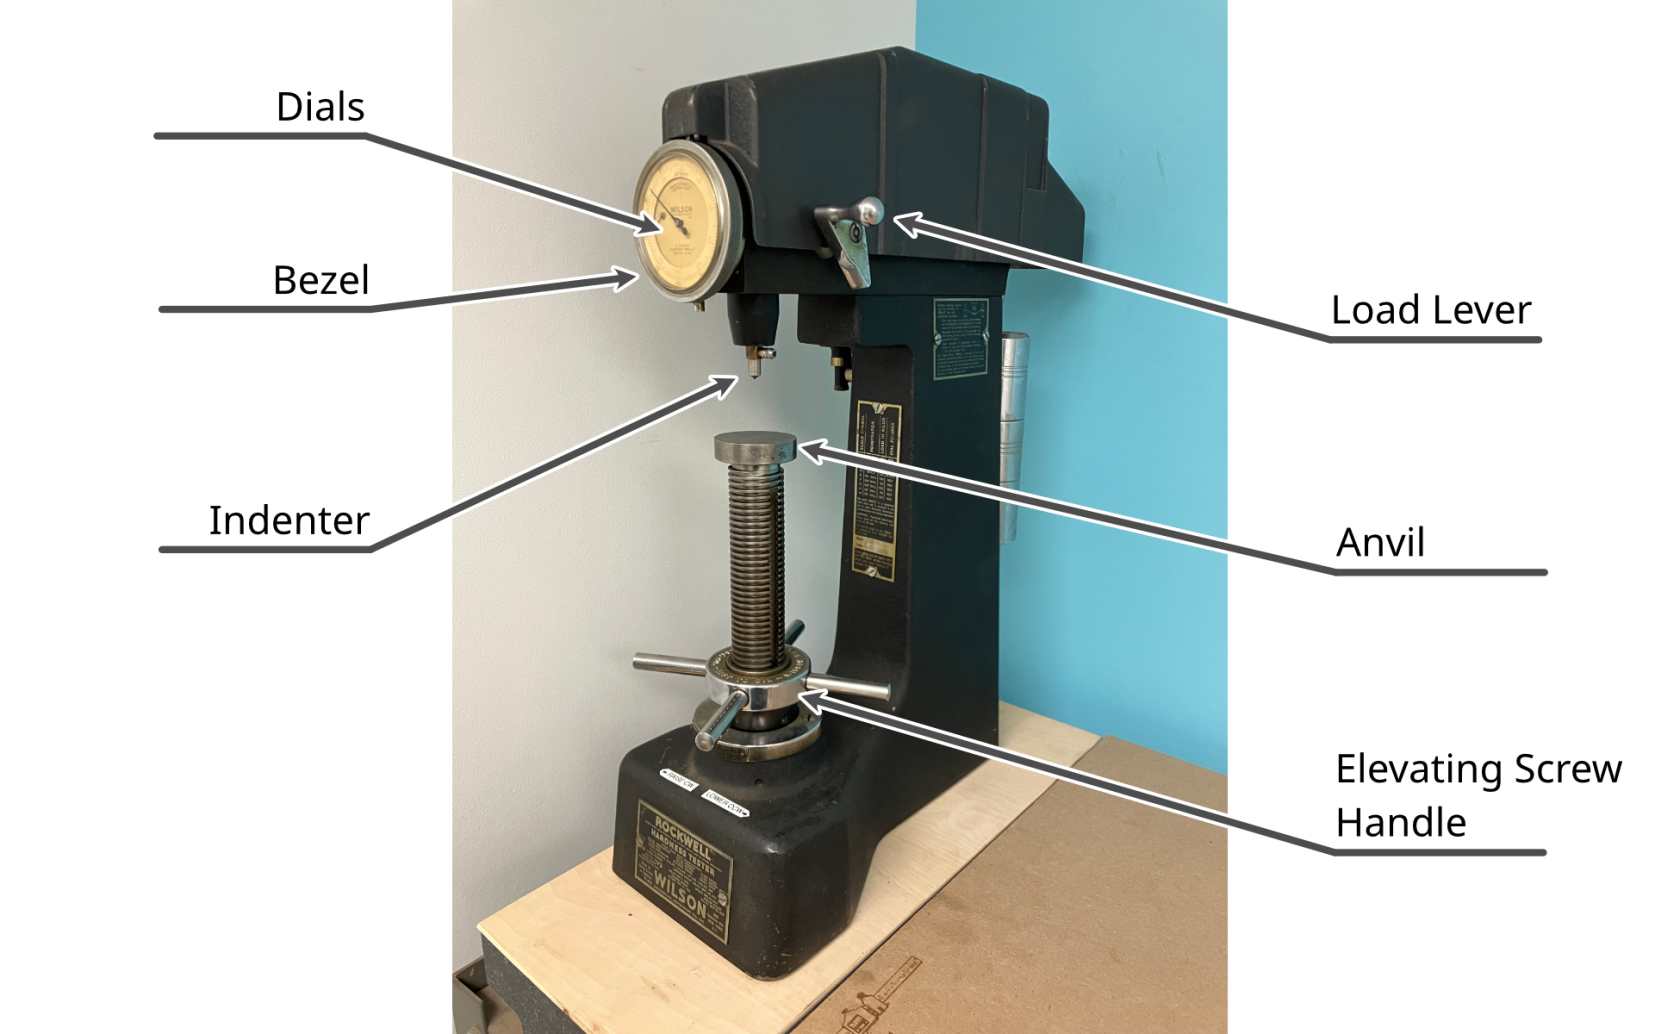](https://wiki.protohaven.org/uploads/images/gallery/2025-08/full-view-annotated.png)
### Indenter
The precision part that makes contact with the workpiece under load.
### Anvil
The surface that holds the workpiece for testing. Flat anvils are used for square workpieces, v-anvils are used for round workpieces.
### Elevating Screw Handle
Used to raise or lower the anvil. Follow the stickers on the base of the tester for raising and lowering the anvil.
### Dials
Both dials are used to calibrate the minor load, using the large and small dial hands. Under major load, the large dial hand reports the hardness rating.
[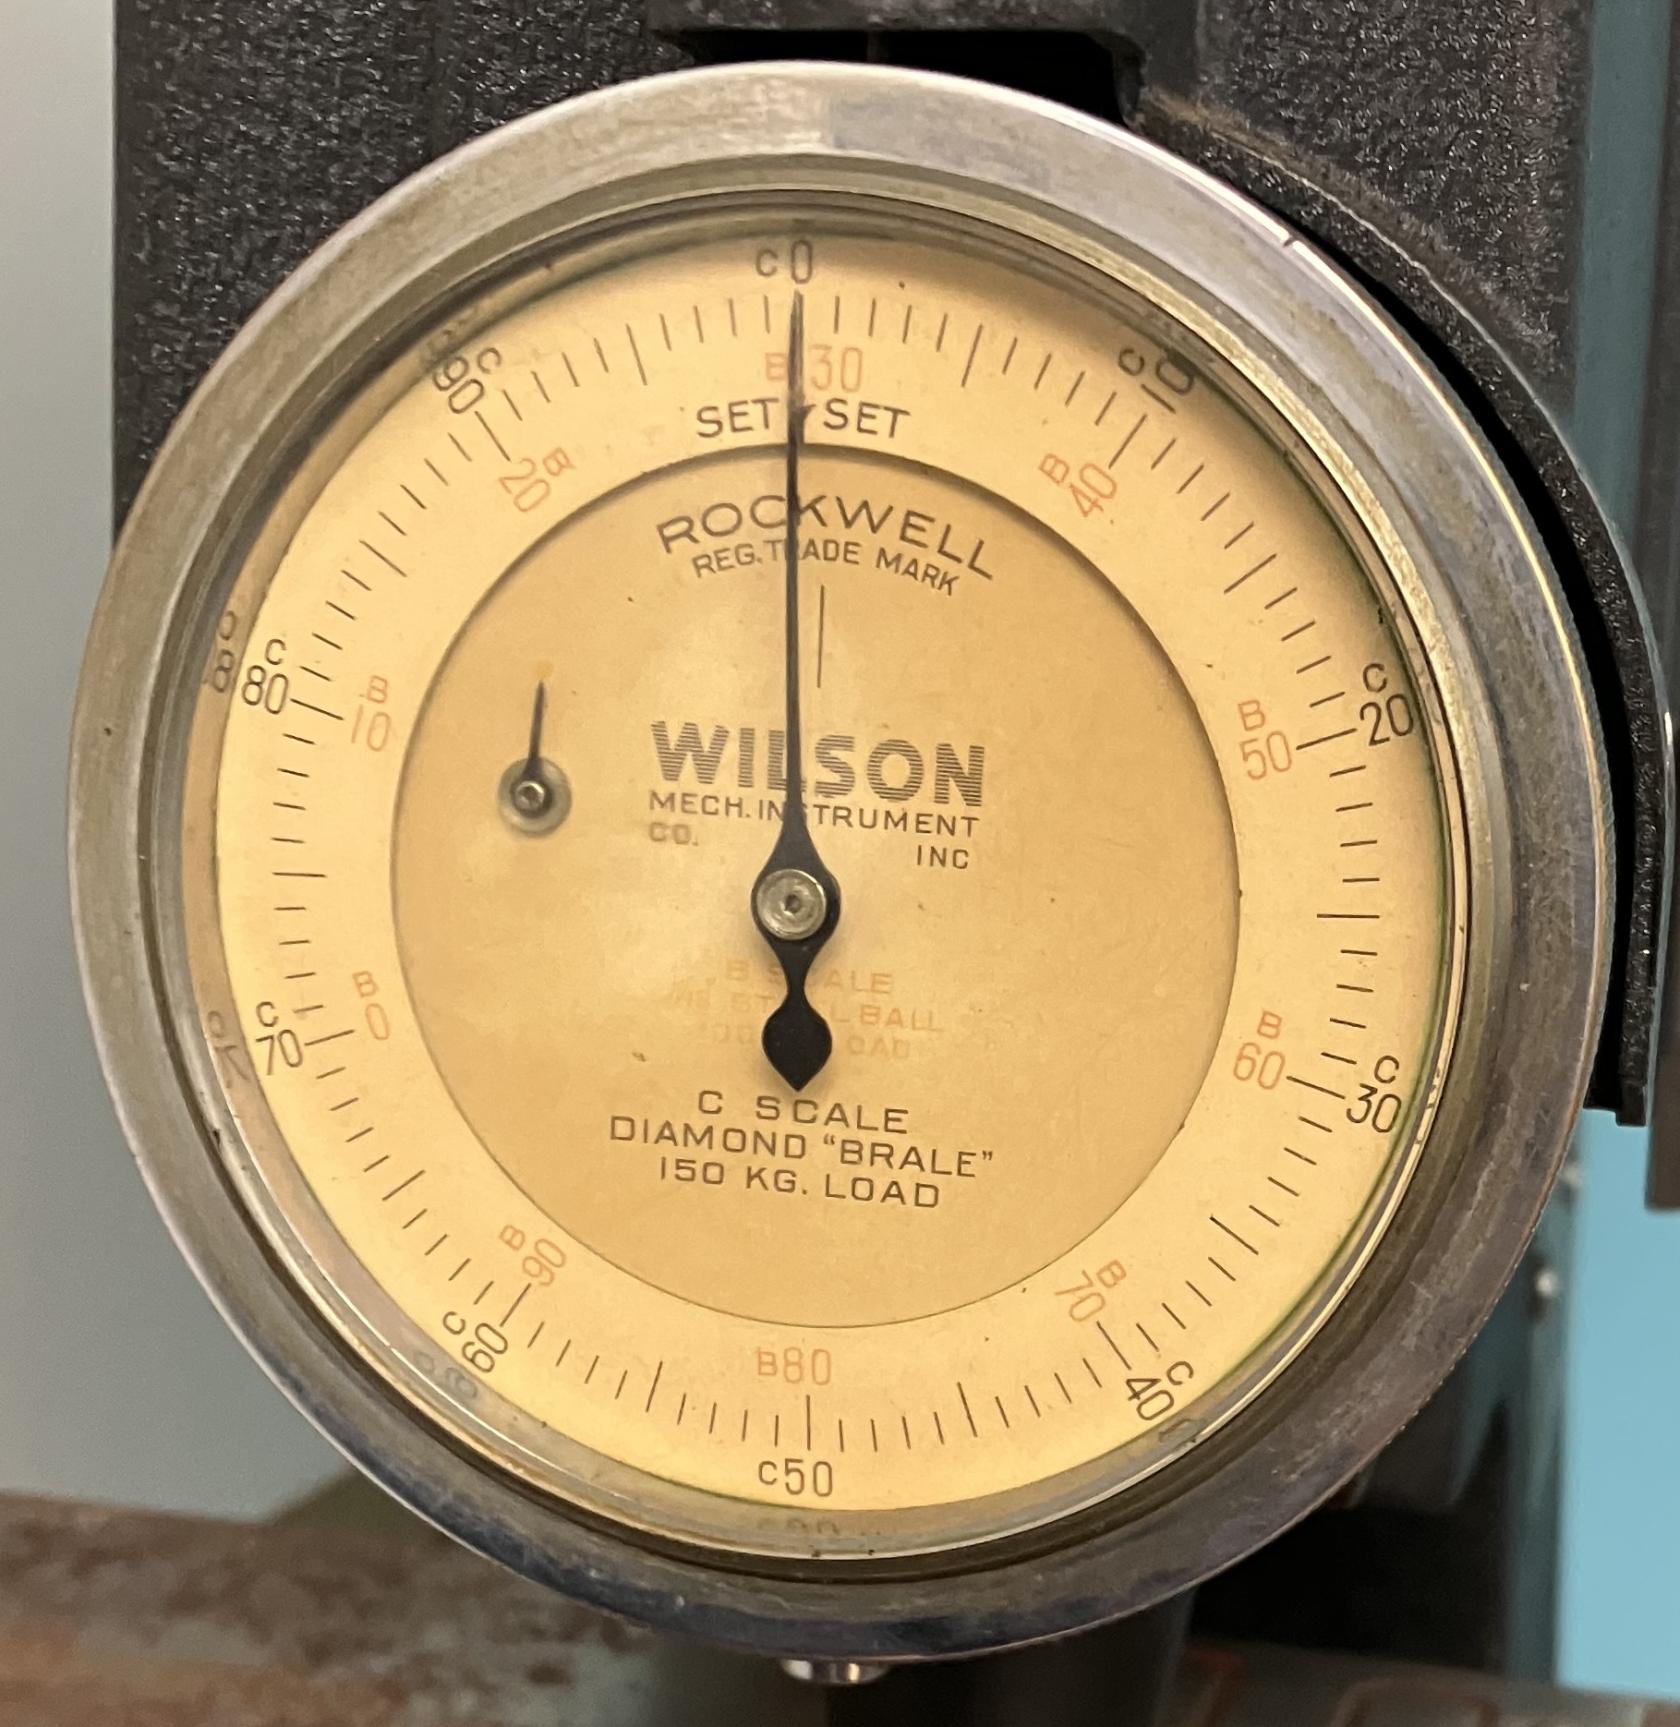](https://wiki.protohaven.org/uploads/images/gallery/2025-08/hardness-tester-dials.jpeg)
### Bezel
Sets a zero with the minor load, and reports hardness under the major load.
### Load Lever
Applies and releases the major load.
## Basic Operation
### Setting Up
Remove the cover form the tester.
Make sure the tester is clean, level, and securely mounted.
Use safety glasses—small fragments can break off harder materials.
### Prepare the Workpiece
The surface of the workpiece must me:
- **Clean** (free from oil, paint, rust).
- **Flat and smooth** (no mill scale or burrs).
The workpiece material must:
- **Be thicker than 3 mm (1/8")**.
- **Be wide enough** to avoid testing too close to edges. All testing must be done more than 2.5 mm from any edge.
- **Have a flat testing area paced 3+ mm from other indentations**. Testing to close to an existing indentation may give incorrect results.
### Workholding
Install an appropriate anvil.
When installing or removing any anvil, be very careful to not contact the tip of the indenter.
For most applications, select the appropriate flat anvil:
- Large flat anvil
- Small flat anvil
[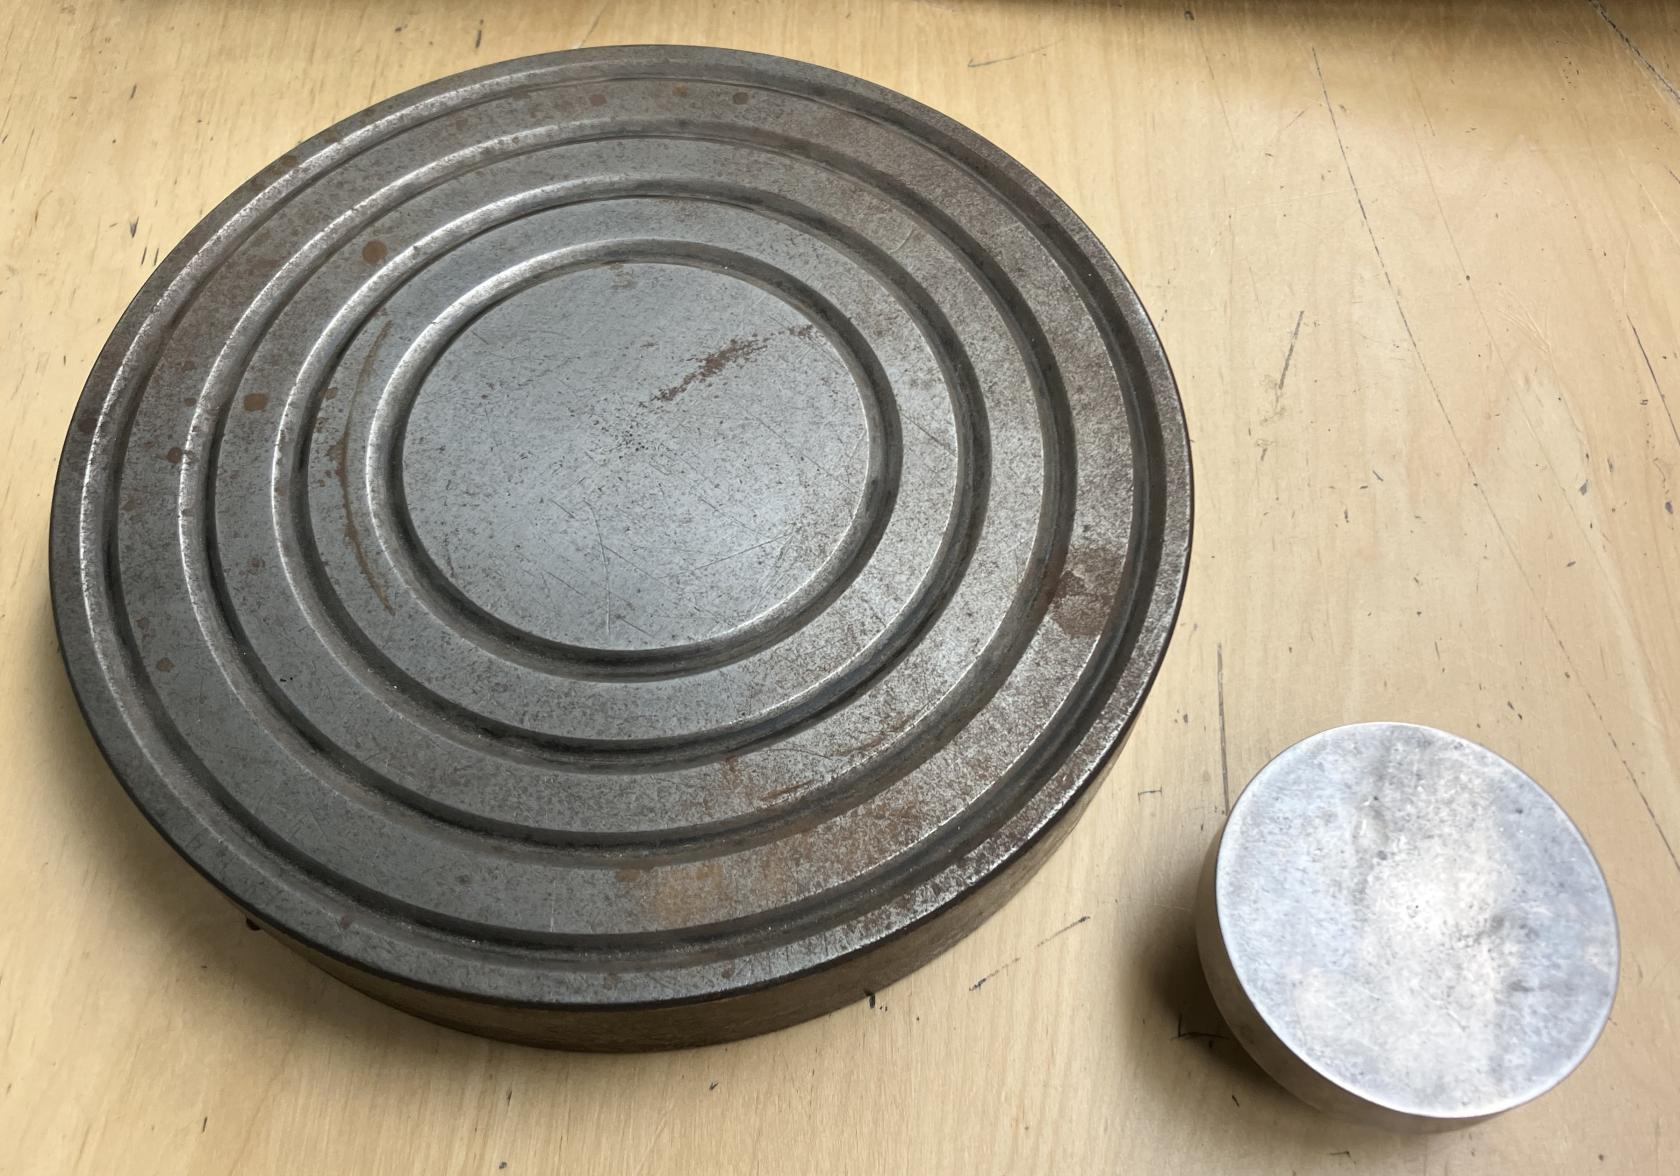](https://wiki.protohaven.org/uploads/images/gallery/2025-08/GQmhardness-tester-flat-anvils.jpeg)
Choose an anvil that best supports the workpiece. At Protohaven, the small flat anvil is usually installed in the tester.
For round stock, select the appropriate v-anvil:
- Tiny v-anvil
- large v-anvil
[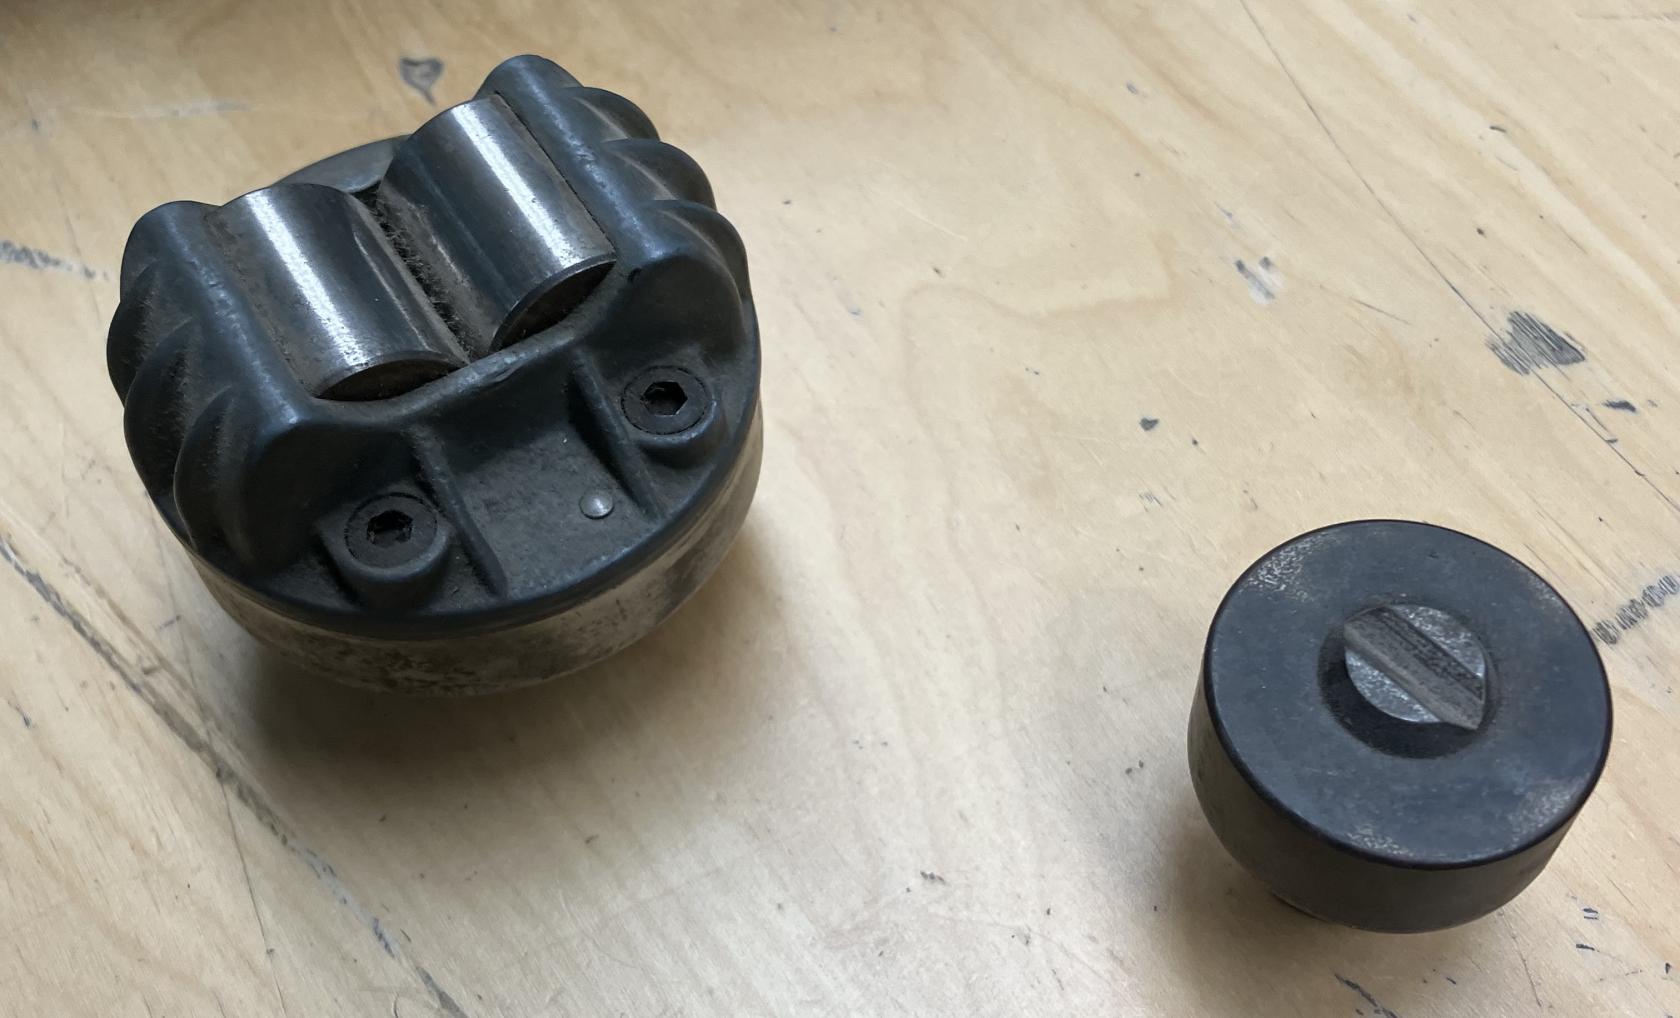](https://wiki.protohaven.org/uploads/images/gallery/2025-08/DZkhardness-tester-v-anvils.jpeg)
Choose an anvil that best supports the workpiece.
Do not clamp a workpiece to an anvil; the workpiece should rest solidly on the anvil by weight alone.
If material is longer or imbalanced, you may have to build a support structure to keep the material equally balanced on the anvil. This can be a stack of wood with a machinist jack, or anything else that helps achieve the height. Do not use dirty/crumbly objects, such as bricks or cinder blocks. Be very careful with the granite surface.
**Do not use testing anvils to support workpieces.** The testing anvils are special materials that are used in calibrating the tool. They should not be used as general purpose anvils.
### Using the Tool
#### Load the Sample
1. Place your part flat on the anvil.
2. Turn the elevating screw handle slowly to raise the anvil and part until it just contacts the indenter.
#### Apply the Minor Load
1. Continue slowly turning the elevating screw until:
- The **small needle** reaches the preload mark. This is straight up.
- The **long pointer** settles near vertical (±5 divisions).
2. Wait **2–3 seconds** for the load to stabilize.
#### Zero the Dial
Rotate the outer dial bezel so the long pointer aligns exactly with 0 (zero) on the outer (black) scale.
*This is your reference for the HRC reading.*
#### Apply the Major Load
1. Slowly push the load lever back to apply the major load.
2. Wait for the needle to stop moving.
3. Dwell for 5 seconds to allow the indentation to form fully.
#### Remove the Major Load
1. Gently pull the load lever forward to return to the minor load (10 kg remains).
2. Do not touch the elevating screw.
#### Read the Hardness Value
Read the number indicated by the long pointer on the outer black scale.
This is your HRC value for the material under test.
There are charts in the vicinity of the hardness tester to help interpret the result.
#### Multiple Tests on the Same Workpiece
If you want to perform multiple tests on the same workpiece, reposition the part so that the indenter contacts a different part of the testing surface, and repeat the testing procedure. Choose a new spot that is at least 3mm away from any previous test. Testing too close to a previous indent may invalidate the test.
#### Remove the Part
Turn the **elevating screw** to lower the anvil and remove your part
Be careful not to crush the indenter by raising the anvil.
### Cleaning Up
1. Lower and remove the anvil.
Be careful not to crush the indenter by raising the anvil.
2. Put away all other anvils, if necessary.
3. Reset the machine to test HRC, if needed.
4. Cover the tester.
5. Make sure the area is clean.
# Measuring - Surface Plate
# Tool Tutorial
### Granite Surface Plate
The granite surface plate is used for precision measuring and comparison of parts. The accuracy and longevity of the plate depends on users taking care of the surface. A plywood cover is provided to protect from accidental damage. All parts that are measured on the plate should be clean, free of machining chips and grease/grime.
When first uncovering the plate, carefully wipe the plate of dust and other contaminates.
Make sure the surfaces of the tools and parts that will touch the plate are free of burrs or other defects that may damage the plate.
When finished using the plate, carefully wipe it down and place the plywood cover back on the plate.
# Forge - Belt Grinder
# Manual(s)
*Manuals and other reference materials from the manufacturer or other sources.*
# Member Notes
# Resources
*Where to obtain materials, consumables, and tooling.*
# Tool Tutorial
A belt grinder or "linisher" allows sanding, grinding, and polishing materials using a belt of abrasive material under tension. Our belt grinder is often used by our blacksmithing members to bevel corners, flatten or smooth rough marks, and point edges for knife blades.
A supply of sanding belts are provided by Protohaven for light use. Please note that excessive wear on belts falls under our [equipment damage policy](https://wiki.protohaven.org/books/policies/page/equipment-damage-policy "Equipment Damage Policy") and may incur extra fees.
##
### Safety
### Common Hazards
### Care
### Use
### Consumables
### Tooling
(recommendations for bringing own tooling/parts: blades, bits, cutters, etc.)
### Materials
(what can and cannot be worked with the tool)
## Parts of the Tool
### Annotated Image(s)
### Part Description
### Part Description
### Part Description
## Basic Operation
### (Special topics)
### Setting Up
### Workholding
### Using the Tool
### Cleaning Up
###
# Forge - Forge
# History
## July 2025
### Propane Regulators
*Q: What’s up with the “do not touch” on the forge’s propane regulator? Curious what the correct setting is on that, I thought it was just fully open.*
We keep the propane flow regulated to around 10 psi, which is not fully open (though that's really an educated guess, it's set by observing the flame cause that regulator doesn't have a gauge).
The flow rate is **not** meant to be member adjustable, which is said explicitly in the clearance class.
The "do not touch" is due to members fully opening the valve (presumably remembering the instructions for other regulators like the mig gas, or they though the tank was running low, or they thought that it was supposed to be fully open).
For reference that 10 psi figure pre-dates historical notes. It likely comes from a few places:
- diminishing returns on forge heat beyond the point (for vastly increased gas consumption),,
- the mr volcano can't really hold much more flame than that at a neutral fuel air mix and we don't want a lot of dragons breath coming out the doors (hazardous for folks who aren't expecting it),,
- and lastly we don't want it at forge welding temp as we don't allow forge welding in that forge (the regulator on the forge welding forge is set quite a bit higher, though still not quite fully open, and it gets hot and belches quite a bit of flame and requires quite a bit more caution to use safely),
To add a little more to the story, the instructions from Mr. Volcano originally said to back the valve off, just like the welding regulators, in order to stop the flow between uses, and to readjust the flame to neutral each time you turned it back on. The regulator is *really* low quality and isn't engineered to be opened and closed regularly without wearing out the threads, so that was always just a bad suggestion on the part of the "manufacturer".
# Manual(s)
*Manuals and other reference materials from the manufacturer or other sources.*
Model: Mr. Volcano Hero 1 v6.6
Manual: [forge-mr\_volcano-hero\_1-H1\_v6.6.pdf](https://wiki.protohaven.org/attachments/164)
# Member Notes
Forge 1 and Forge 2 have original kaowool, and should not be used when the insulation is exposed.
Forge 3 has the markings for the new superwool extra, which is less dangerous.
# Resources
*Where to obtain materials, consumables, and tooling.*
# Tool Tutorial
The blacksmithing area is a collection of very simple tools. The work of learning forging is practice:
- trying things
- figuring things out
- refining technique
### Safety
When forging, always wear appropriate safety gear:
- Leather apron
- Eye protection
- Hearing protection
Always wear well-fitted clothing made of natural fibers (cotton, denim, wool) in the blacksmithing area. Do not wear clothing made of plastic: if the clothing gets too hot, it will melt into your skin, causing severe burns.
Always wear closed-toed shoes in the blacksmithing area. Boots are recommended. Wear shoes or boots made of natural materials (leather or canvas).
Assume all objects on the large forge table are hot.\]) Always use tongs to pick up or manipulate objects on the large forge table.
Never leave a forge unattended while lit.
### Common Hazards
Do not use tongs that fit loosely to your workpiece; this may cause a heated workpiece to move unexpectedly in the tongs or fall out, possibly resulting in injury.
### Tooling
Protohaven has a good range of common smithing tools available for use in the tool crib. You are welcome to bring (or make!) your own tools for use in the blacksmithing area.
### Materials
Materials approved for use in the forge:
- carbon steel (unpainted, uncoated, ungalvanized)
Materials prohibited for use in the forge:
- painted metal
- coated metal
- galvanized metal
- brass
- bronze
- chromium steel
- stainless steel
A small selection of steel rod suitable for blacksmithing is available at the Protohaven shop.
## Parts of the Blacksmithing Area
### Propane Tank
The **tank isolation valve** controls the flow of propane from the tank into the hose line.
[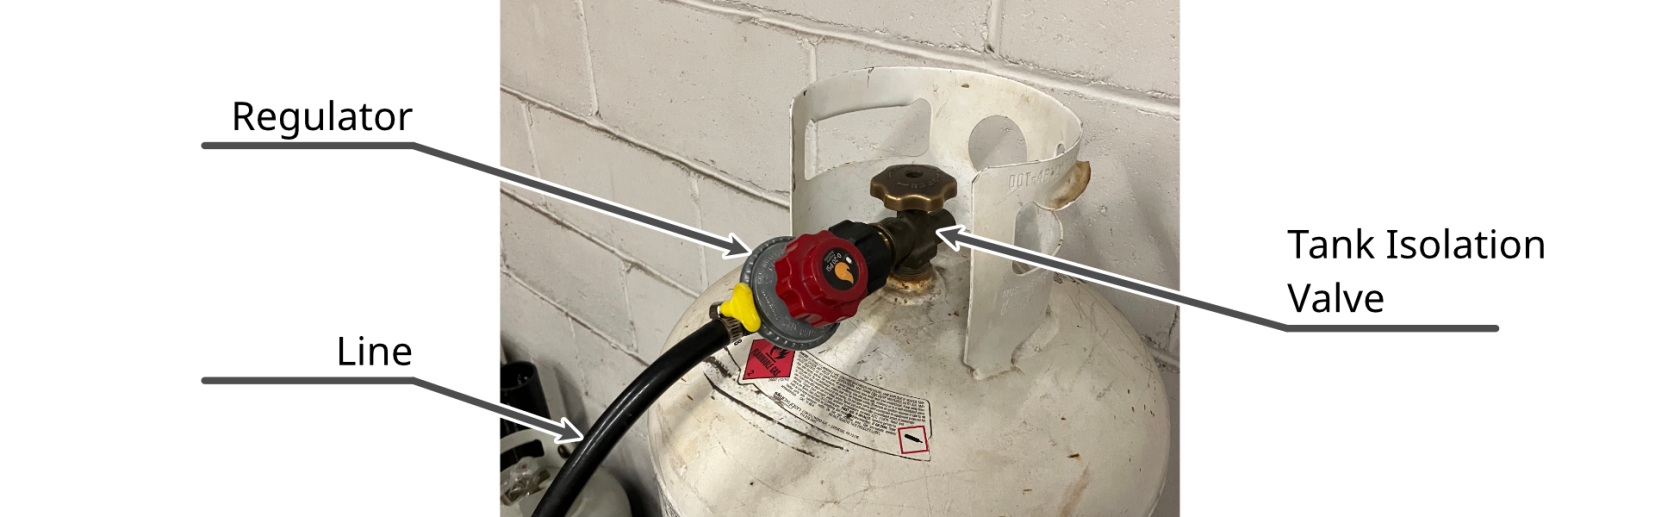](https://wiki.protohaven.org/uploads/images/gallery/2025-05/smithy-propane-tank-annotated.png)
**Do not adjust the propane regulator**. If you think the flow rate is low, tell a tech on duty.
### Forge
The **forge isolation valve** controls the flow of propane from the hose line into the forge.
Press the **ignition switch** to ignite the forge.
[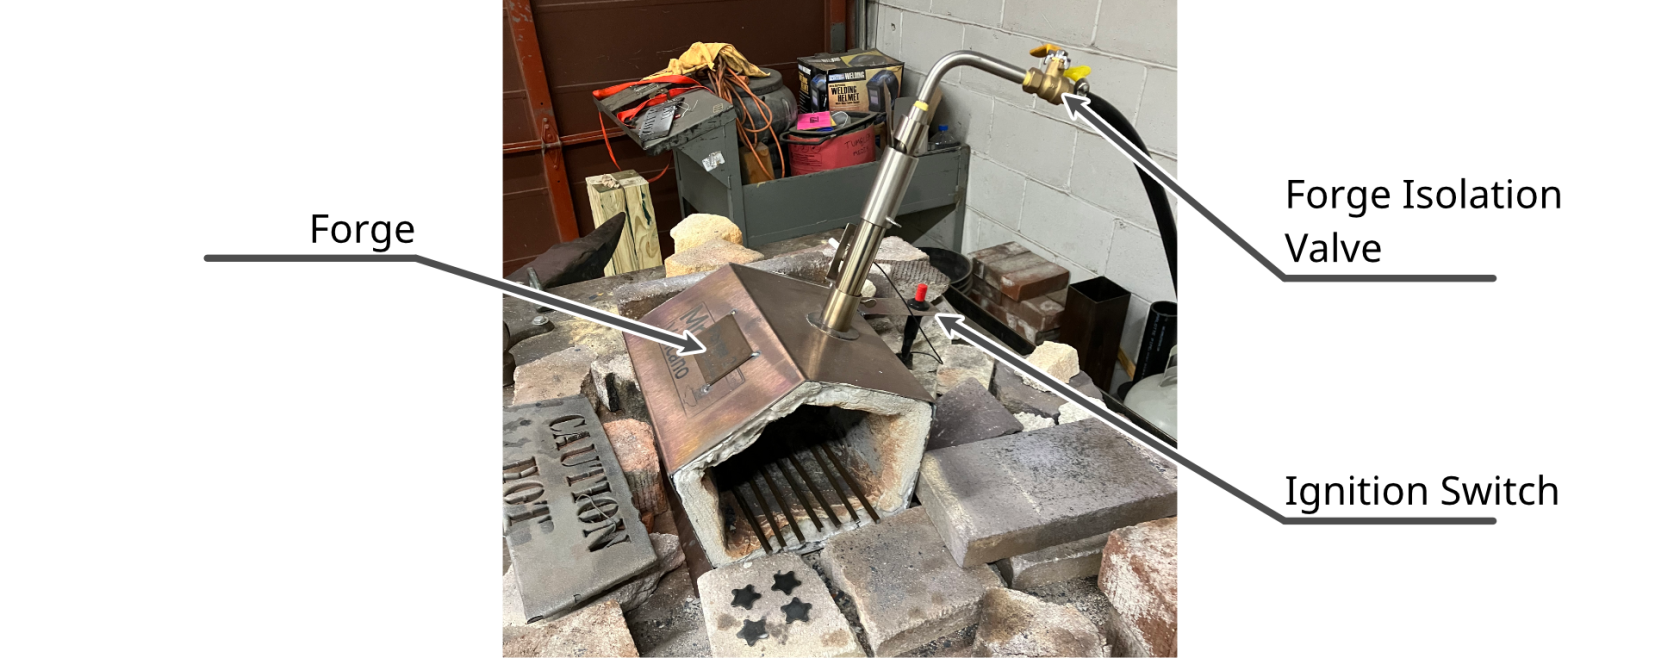](https://wiki.protohaven.org/uploads/images/gallery/2025-05/smithy-forge-annotated.png)
The firebrick inside the forge protects the refractory material from damage.
### Anvil
The anvil is a work surface for many forging tasks.
[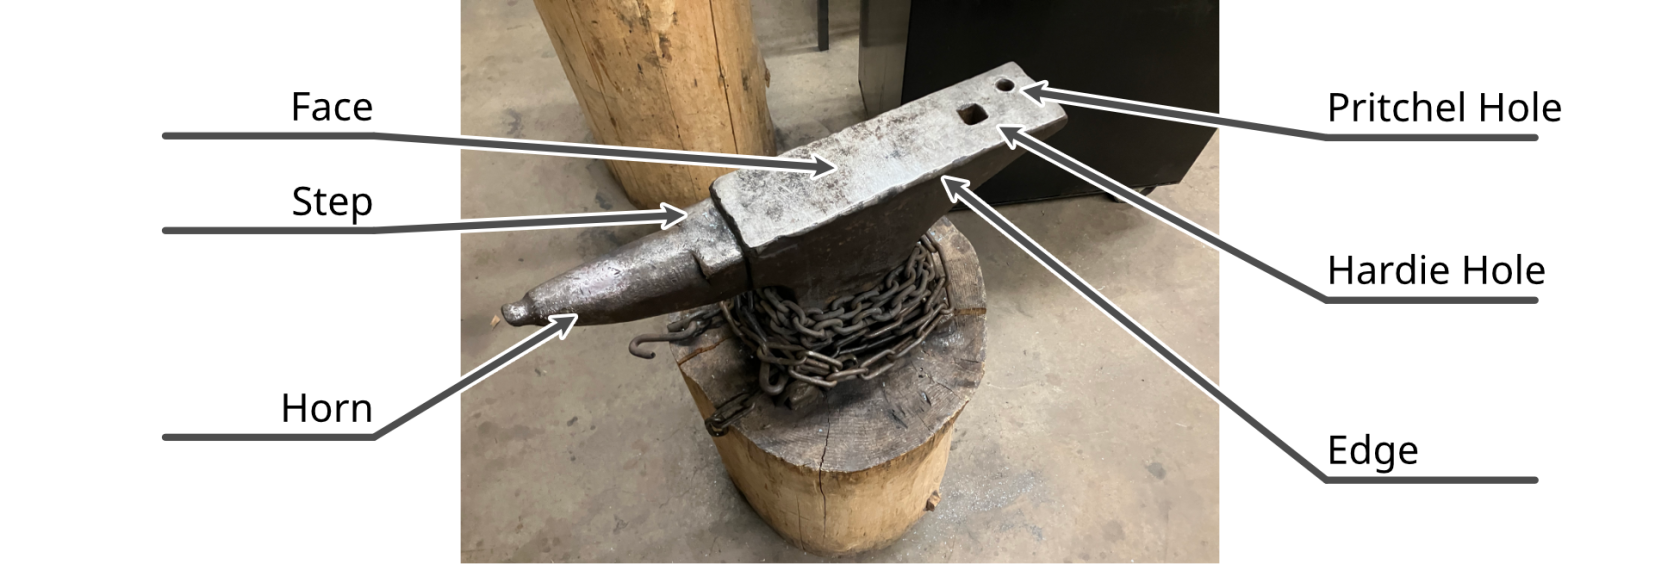](https://wiki.protohaven.org/uploads/images/gallery/2025-05/smithy-anvil-annotated.png)
**Face**. The face is the flat area at the top of the anvil. The top of the face is used to flatten and shape material. The edge of the face can be used to bend material. Face edges can be sharp or rounded to achieve different kinds of bends.
**Step**. The step (also known as the cutting table) is a small area between the face and the horn. The step is slightly lower than the face. The metal of the step is softer than the face for better absorbing chisel blows during cutting operations.
**Horn**. The horn is the rounded, tapered end of the anvil. The horn is used to bend material into curves. Different parts of the horn can be used to shape the material into various curves.
**Hardie hole**. The hardie hole is a square hole at the rear if the face, extending clear through the body of the anvil. The hardie hole accepts hardie tools, which rest in the hole without rotating.
**Pritchel hole**. The pritchel hole is a round hole at the rear if the face, extending clear through the body of the anvil. The pritchel hole provides clearance for punching tools. It can also be used to hold tools that have round shanks, such as the hold fasts.
### Quench Tub
The quench tub filled with water is on the floor of the forge.
[](https://wiki.protohaven.org/uploads/images/gallery/2025-05/smithy-quench-tub.jpeg)
The quench tub is used to quickly cool tools and forged workpieces.
The quench tub can be a tripping hazard. Be very careful moving around the shop, especially so when manipulating a hot piece of metal.
### Large Forge Table
the large forge table is by the the gas bottles, and holds the primary working forge in the blacksmithing area.
[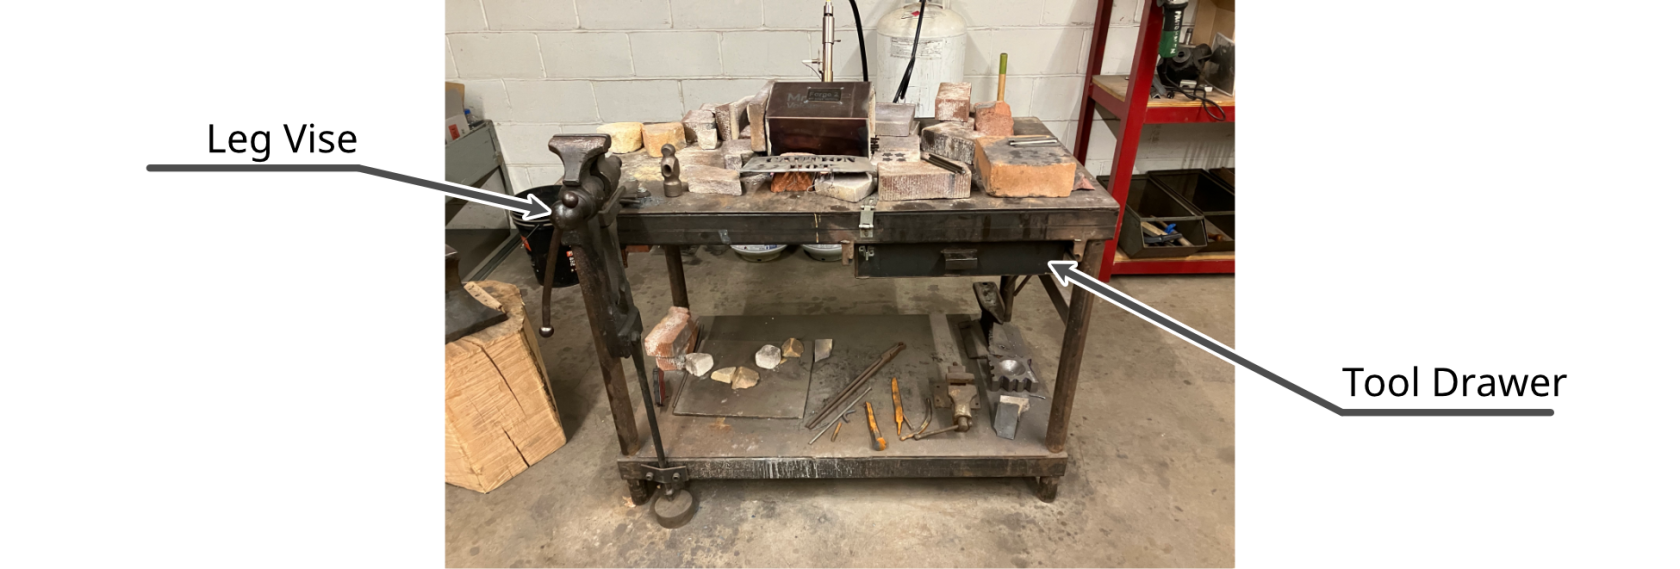](https://wiki.protohaven.org/uploads/images/gallery/2025-05/smithy-large-forge-table-annotated.png)
The large forge table can be used to rest heated workpieces and tools.
The large forge table as an attached leg vise, and a drawer for hand tools.
### Leg Vise
The leg vise is attached to the forge table.
The leg vise can be used to hold workpieces for hand bending and twisting. Workpieces should not be forged in the vise.
### Garage Door
The garage door must be opened for ventilation while a forge is lit.
### Tool Crib
The blacksmithing area tool crib holds various hand tools.
[](https://wiki.protohaven.org/uploads/images/gallery/2025-05/smithy-tool-crib.jpeg)
## Hand Tools
### Hammers
The blacksmithing area tool crib holds forging hammers of various sizes.
[](https://wiki.protohaven.org/uploads/images/gallery/2025-05/smithy-hammers.jpeg)
### Tongs
The blacksmithing area tool crib holds tongs of various shapes and sizes.
[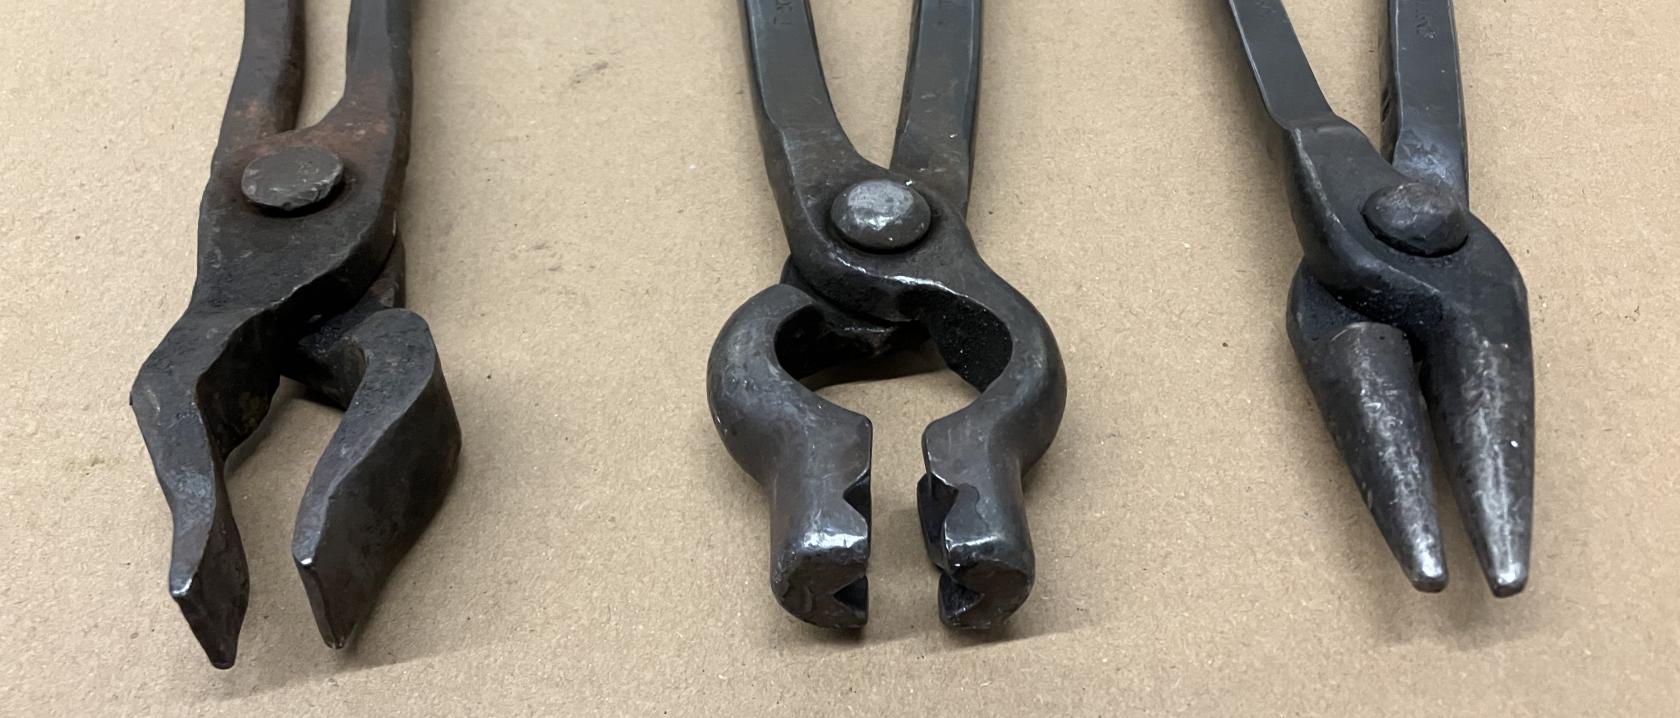](https://wiki.protohaven.org/uploads/images/gallery/2025-05/smithy-tongs-detail.jpeg)
Always choose tongs that will have strong, positive contact with the workpiece.
### Brushes
The blacksmithing area tool crib holds various wire brushes.
[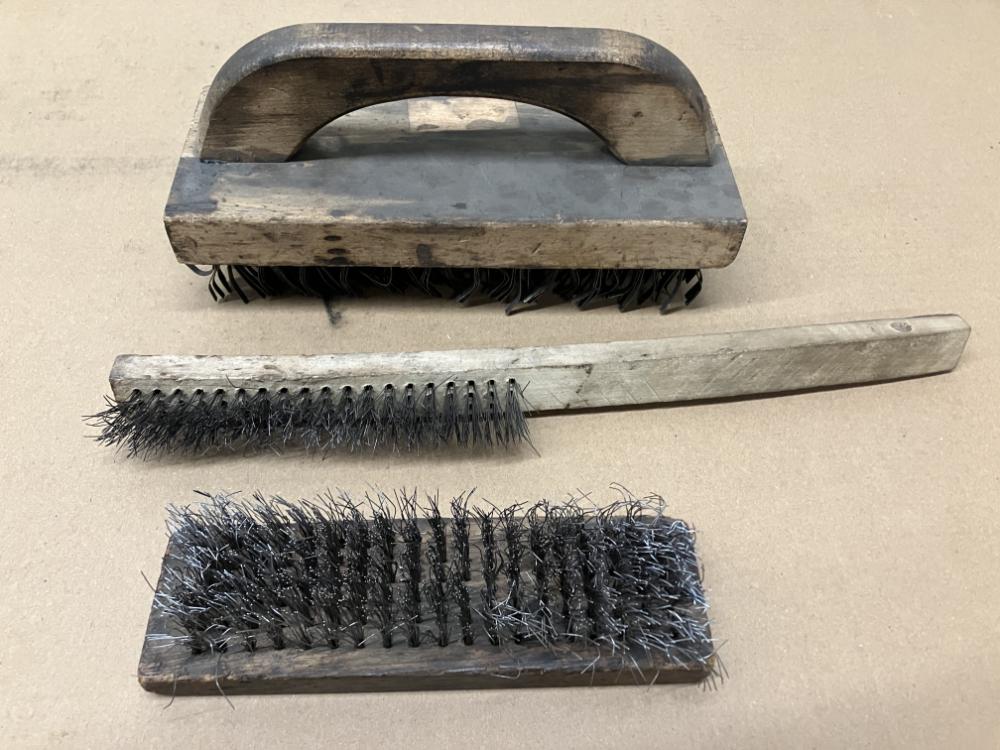](https://wiki.protohaven.org/uploads/images/gallery/2025-05/KdJsmithy-brushes.jpeg)
Brushes are used to clean the scale off of forged material.
### Punches
The blacksmithing area tool crib holds various punches for cutting material, making holes, and manipulating surfaces.
[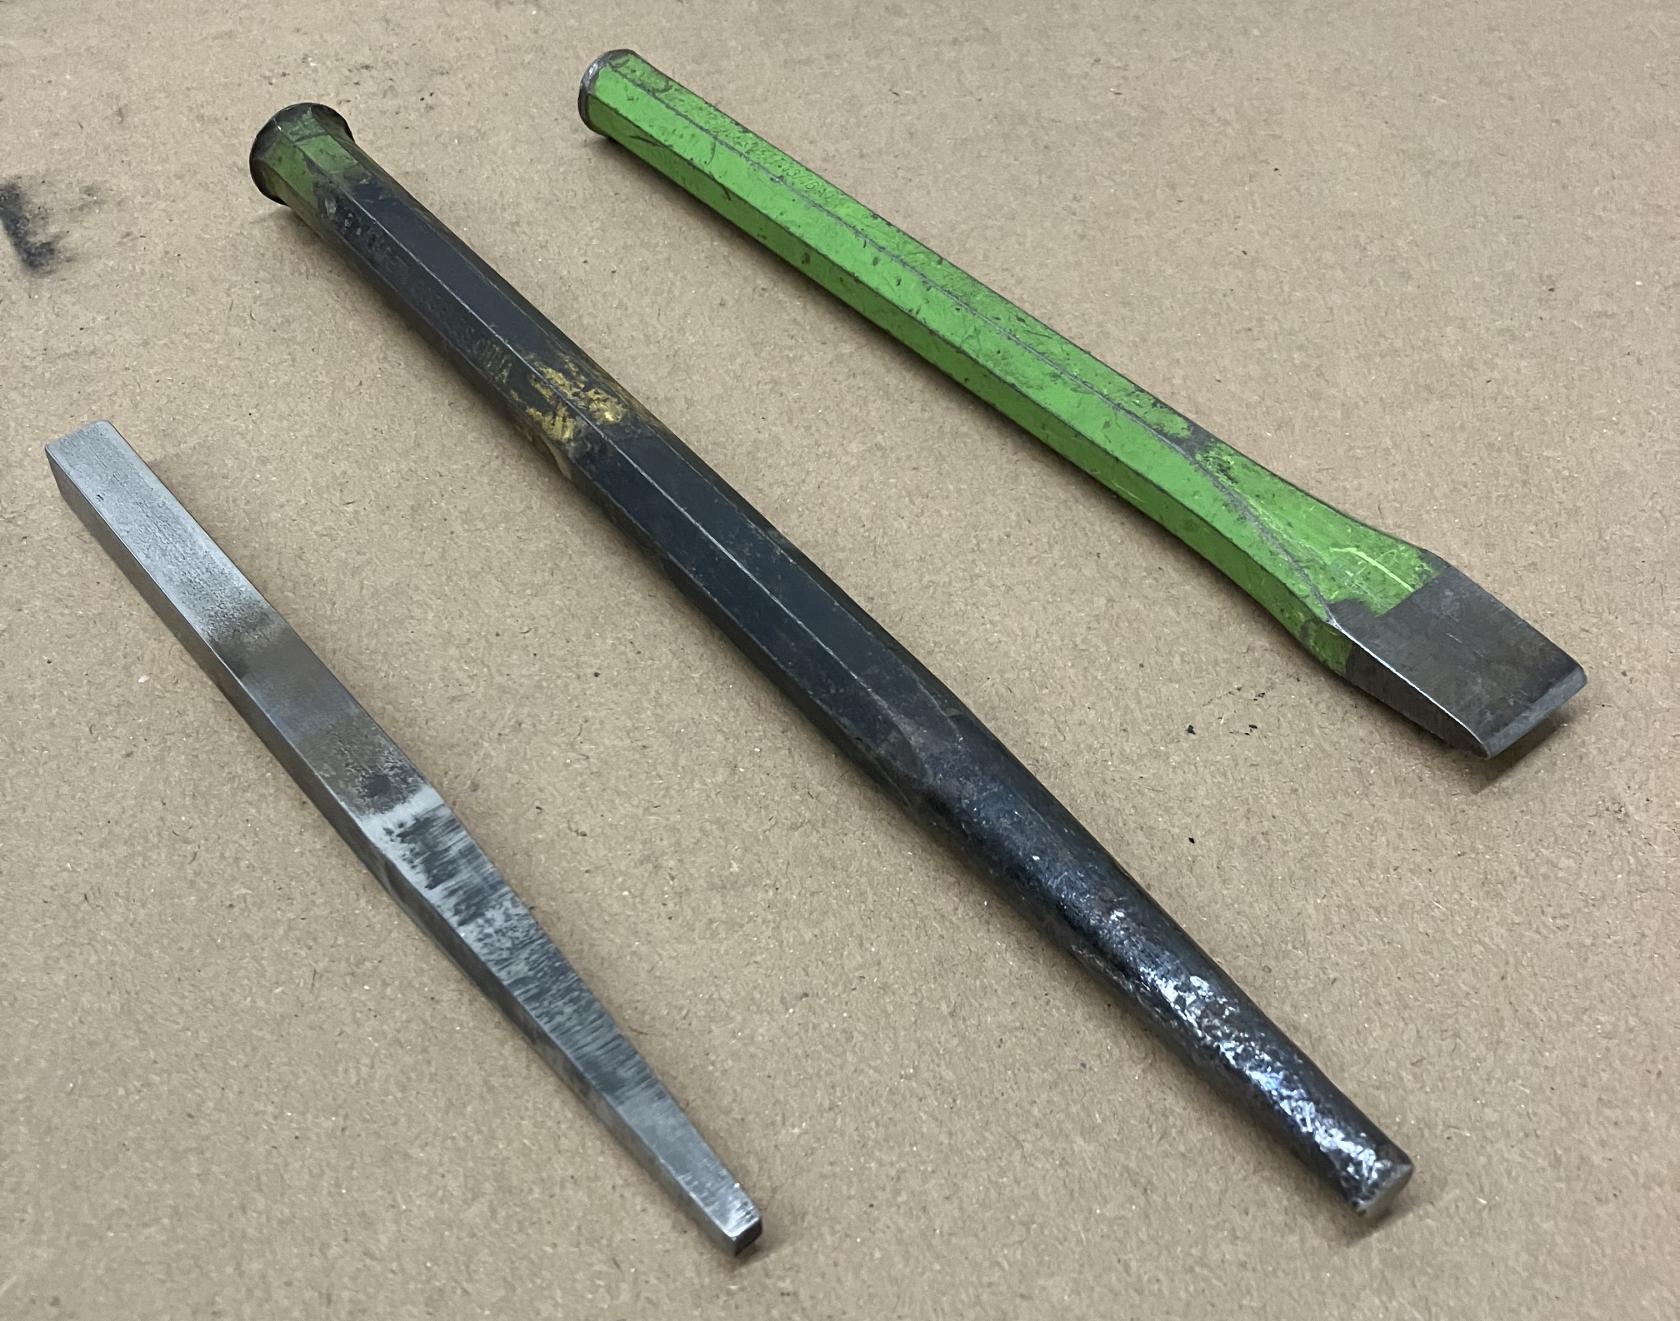](https://wiki.protohaven.org/uploads/images/gallery/2025-05/smithy-punches.jpeg)
**Cutting**. Various chisels can be used to cut material.
**Making holes**. Various punches and drifts can be used to make square or round holes in material. For through holes, use the pritchel hole for clearance underneath the workpiece.
**Manipulating surfaces**. Chisels can be used to mark material prior to forging. The shop also has several sets of letter and number punches, for embossing the surface of a workpiece with text.
### Hardie Tools
The drawer in the metal forge table holds hardie tools. These tools are meant to be used with the hardie hole on an anvil.
[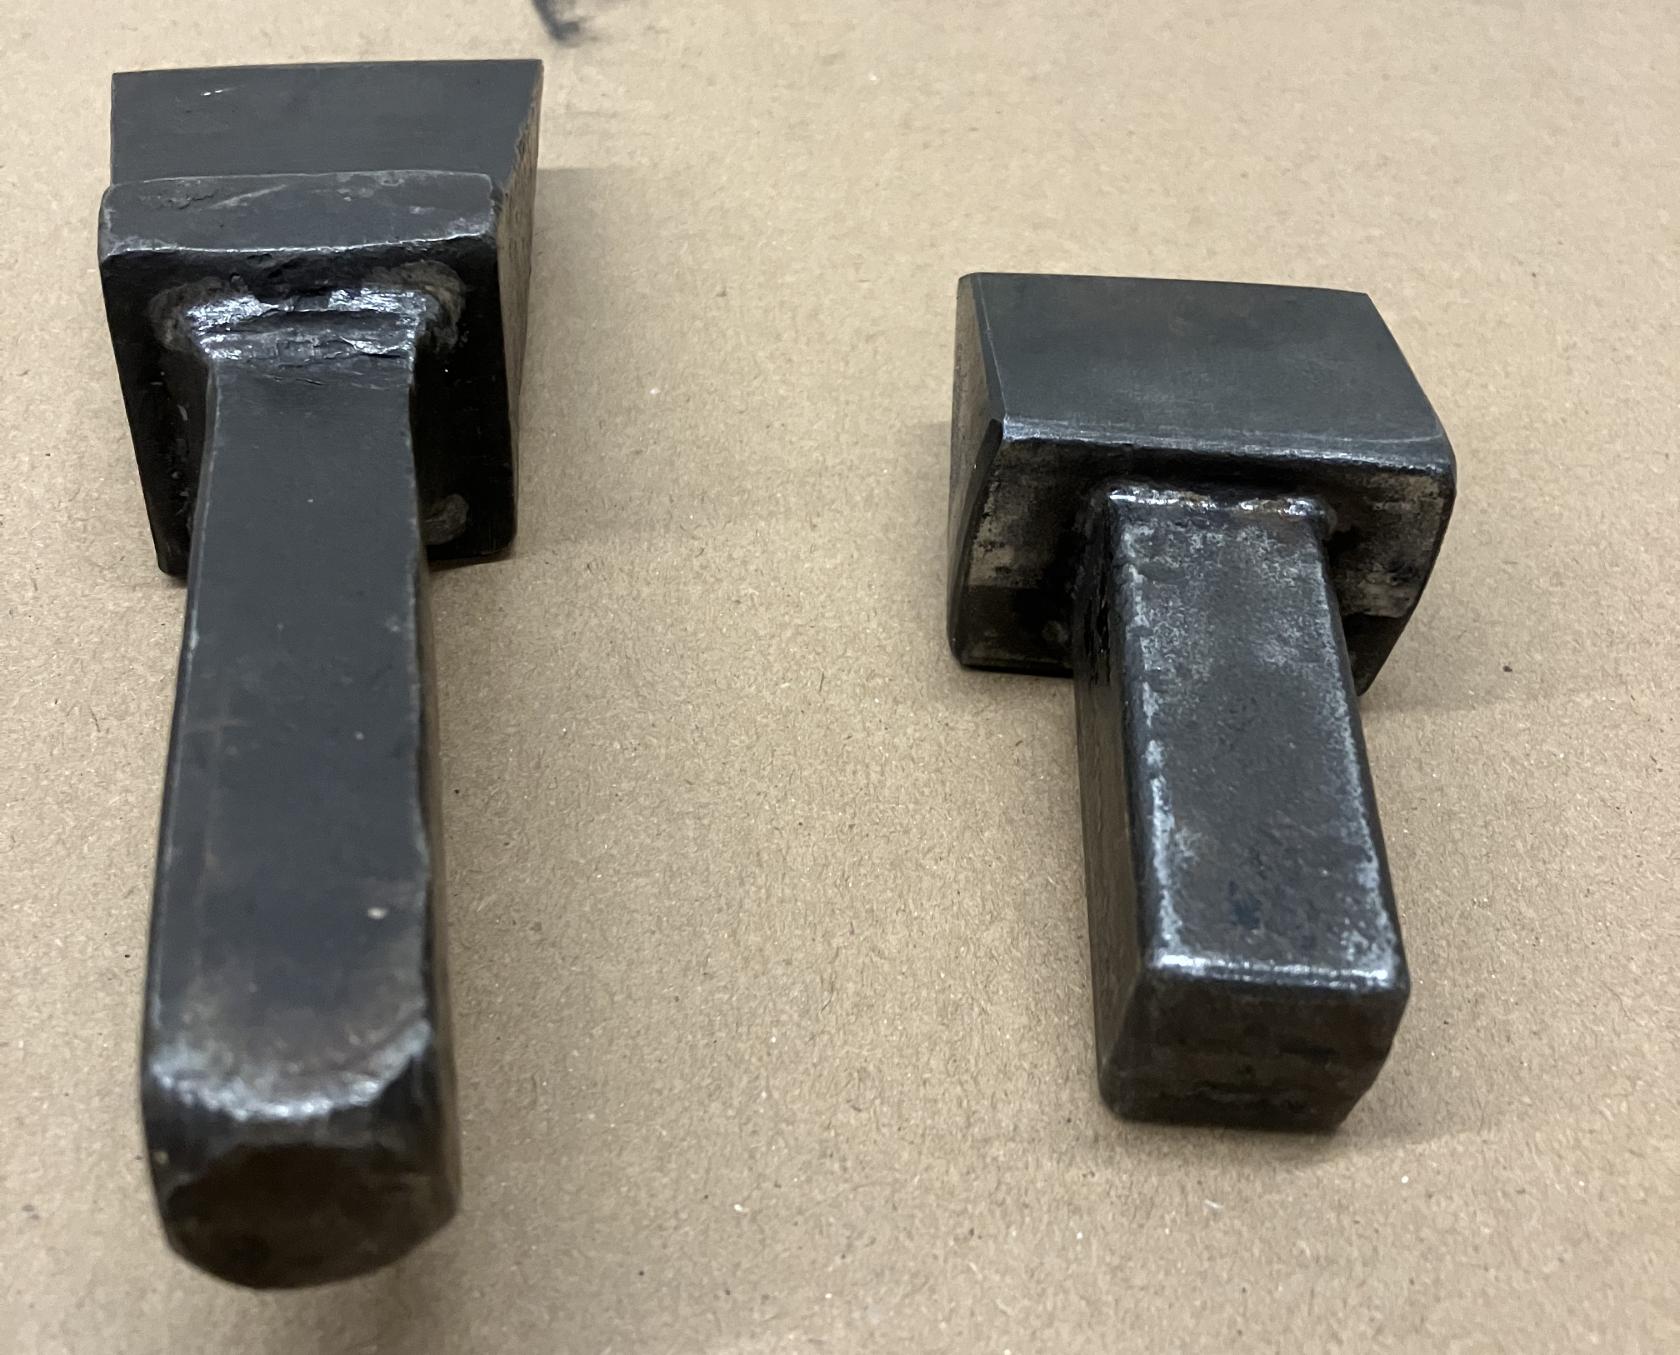](https://wiki.protohaven.org/uploads/images/gallery/2025-05/smithy-square-tools.jpeg)
Only use a hardie tool if it fits *loosely* in the hardie hole of an anvil. You may need to use a different anvil for a particular tool.
Do not leave hardie tools in the anvil when the hardie tools are no longer in use. This has led to amputation in other shops from a smith not noticing the tool is installed and then proceeding to hammer down on it.
**Cut-off hardie**. The cut-off hardie is an edged tool that presents a cutting edge. Fixing the cutting edge lets you use your hands to manipulate the material and the hammer while cutting, for an easier cut.
### Pritchel Tools
The metal forge table also holds tools for use with the pritchel hole on an anvil.
[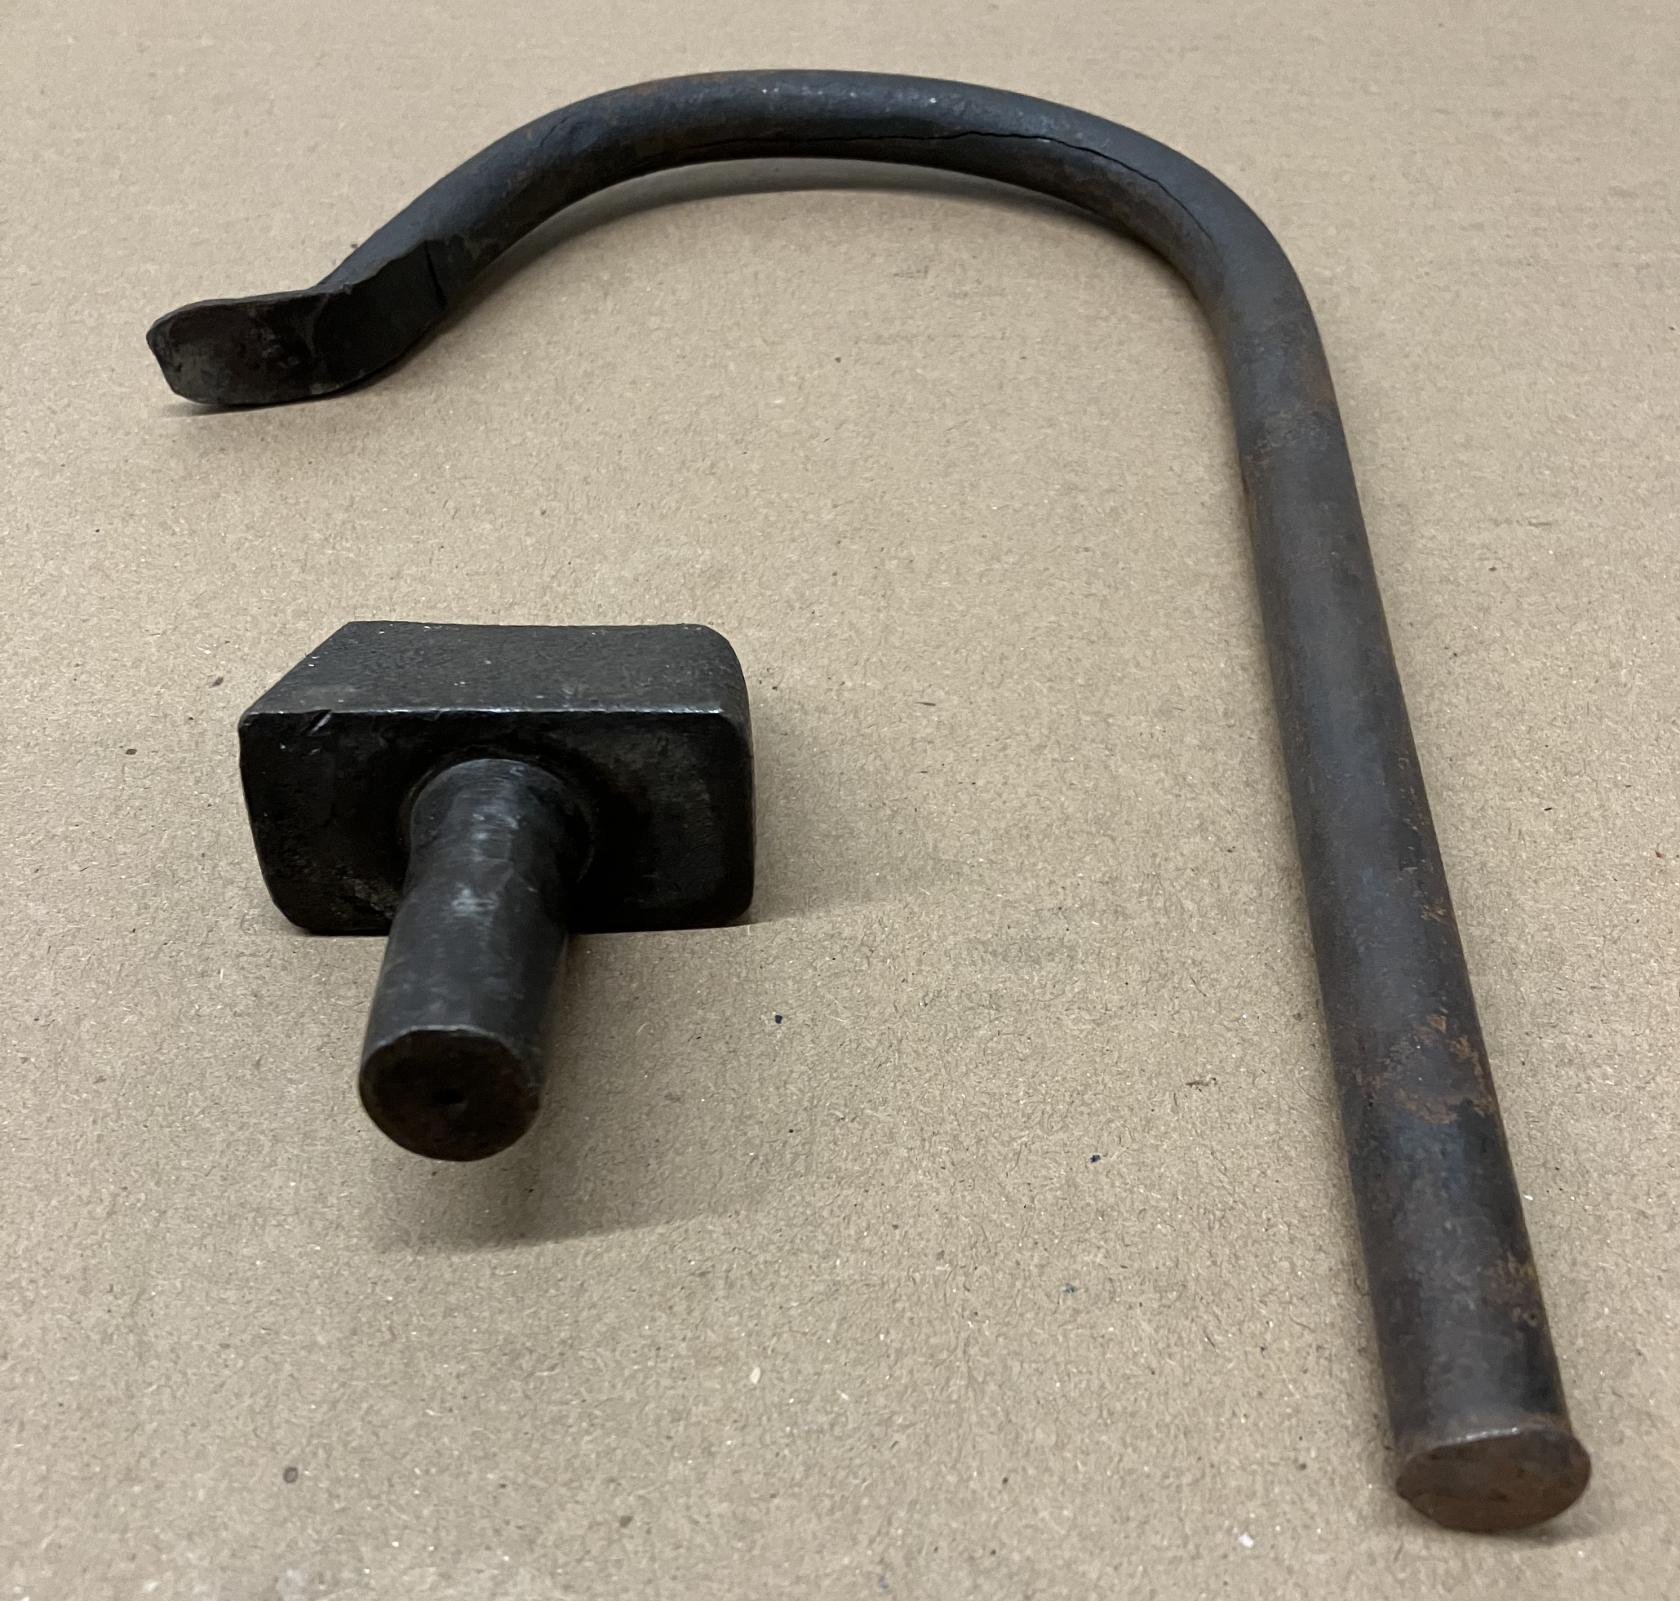](https://wiki.protohaven.org/uploads/images/gallery/2025-05/smithy-round-tools.jpeg)
Holdfasts are hung from the large forge table. Holdfasts can be used in pritchel holes to hold a workpiece to the anvil.
## Basic Operation
### Setting Up
1. Make sure that all of the materials and tools you will need for forging your workpieces are available and within easy reach.
*If you need to get something from outside the blacksmithing area and the forge is lit, turn off the forge. **Never leave a lit forge unattended.***
2. Check both the tank isolation valve and the forge isolation valve to make sure they are closed.
*When checking valve positions, always turn the valve towards the closed position (clockwise).*
3. Open the vent.
4. Turn on the vent fan.
5. Open the garage door.
### Workholding
Always use tongs that have a snug and secure fit to your workpiece.
Use the leg vise to hold pieces for bending or twisting.
Use holdfasts to clamp a workpiece to the anvil.
### Lighting the Forge with the Igniter
1. Open both ends of the forge for good airflow.
*If one end of the forge is sealed with bricks, flame may sputter during ignition. Once the forge is at temperature, one side may be closed.*
2. Open the tank isolation valve to allow gas to flow from the tank.
*Do not wear hearing protection for this step: immediately close the tank isolation valve if you hear gas escaping.*
3. Open the forge isolation valve and immediately press the ignition switch. Press the button repeatedly until the gas ignites, as needed.
**If the gas does not ignite within three seconds, shut off the forge isolation valve immediately**. Let the blacksmithing area ventilate for a minute before next attempting to start the forge.
**Do not adjust the regulator.** If you believe the regulator is faulty, alert the tech on duty.
### Lighting the Forge with the Blowtorch
\+ Open both ends of the forge for good airflow.\\
\_If one end of the forge is sealed with bricks, flame may sputter during ignition. Once the forge is at temperature, one side may be closed.\_
\+ Open the tank isolation valve to allow gas to flow from the tank.\\
\_Do not wear hearing protection for this step: immediately close the tank isolation valve if you hear gas escaping.\_
\+ Stand between the tank and the forge.\\
\_Do not stand in front of the open ends of the forge.\_
\+ Light the blowtorch, and send the flame across one open end of the forge.\\
#image("images/smithy-blowtorch\_lighting.jpeg", width: 60%)
\+ Open the forge isolation valve, and angle the flame slightly into the forge.\\
\_The forge should ignite.\_
**If the gas does not ignite within three seconds, shut off the forge isolation valve immediately.** Let the blacksmithing area ventilate for a minute before next attempting to start the forge.
**Do not adjust the regulator.** If you believe the regulator is faulty, alert the tech on duty.
### Forging
1. Heat your material by placing it in the lit forge on the firebrick.
2. Let the material soak until the area you want to forge is glowing yellow.
3. Use tongs to transfer the material to the anvil or leg vise for working.
4. Work the material as needed.
If the material cools too much to continue working, repeat the above steps. Material will be too cool to work when it reaches a dull red, sometimes noted as "medium cherry red" (1400°F).
Clean the anvil off between heats. If scale is left on the anvil, forging a workpiece on top of the scale will pound the scale into the anvil, damaging the face.
### Quenching
The quench tub has multiple uses in the blacksmithing area.
Use the quench tub to cool areas of your workpiece that you do not want to bend while you are working the heated areas.
If the material no longer needs to be worked, cool it in the quench tub until it can be safely handled.
When you pull material out of the water, note how quickly it dries. If the material dries immediately, it is still too hot to handle with bare hands. If the material stays wet, it \_might\_ be safe to touch: proceed with caution.
### Cleaning Up
1. Close the tank isolation valve.
2. Close the forge isolation valve.
3. Turn off the vent fan.
4. Close the garage door.
5. Return all tools to their places in the tool crib or the large forge table.
6. Sweep the blacksmithing area floor for any slag and debris and discard.
7. Recycle any waste by placing it in the scrap metal bins.
# Forge - Power Hammer
# Manual(s)
- [KA75\_Manual\_DIGITAL.pdf](https://wiki.protohaven.org/attachments/583)
# Member Notes
# Resources
# Power Hammer Tool Tutorial
A power hammer is a pneumatic device that simulates the blow of a blacksmith's hammer to manipulate the shape of hot metal.
Our hammer uses a compressed air ram activated via foot pedal to provide up to 75lb hammer blows. One press of the pedal delivers one strike, and repeated taps deliver repeated blows.
The top section of this machine moves suddenly when turning on/off and during operation.
**Exercise extreme caution when placing hands and extremities near this machine.**
### Safety
- Always maintain full use of vision and hearing PPE (close fitting natural fiber or flame retardant clothing and close toed shoes are also strongly encouraged any time you are near forges or furnaces)
- Ram pops up when air is turned on - stand clear
- Keep foot off pedal between operations and when placing small pieces on die
- Turn air off when not in use to prevent others from cycling ram unintentionally
- Don’t set tools on top of the ram
- Don’t lean on the ram
- Watch out for cut off Ends. They can fly off and hit someone or land in a corner and start a fire.
### Operation
#### Checking the machine and Starting Up
1. Always check to make sure die wedges are tight, and re-check wedges regularly when operating.
2. Open the shut-off valve slowly. Always stand clear when the ram comes up!
3. Lubricate the guides before each session using light hydraulic oil or auto transmission fluid - a squirt can is provided at the machine for this purpose. The cylinder guides should be kept just wet with oil.
#### Shutting down
1. Place the wooden block between the jaws of the hammer
2. Close the shut-off valve
3. Step gently on the foot pedal to lower the ram onto the block - avoid slamming it down.
#### Notes
- In most cases, the operator needs to anticipate the blow and let off the treadle just before the hammer strikes so that the hammer can bounce off the work.
- If a more holding blow is used, a lot of heat is sucked from the work and another heat may be required.
- When striking repeated blows, it is not necessary (or even desirable) to let the hammer return all the way to the top of its stroke. Come down on the treadle soon enough so the hammer only raises about six or eight inches off the work.
### Changing Dies
As of July 2026, **members are prohibited from changing dies.** Please ask the shop tech on duty if you have a project that requires changing dies. Instructions are provided below for clarity.
#### Removing Dies
1. Open shut-off valve slowly.
2. Place a block of wood (2 x 4) about 12 inches long between ram and anvil cap.
3. Close shut-off valve to lower ram.
4. Bleed valve should remain open until ready to run the hammer!
5. Make sure ram resting securely on block!
6. Shut-off valve with operators secure key padlock!
7. Drive wedge loose from the operator side.
8. When removing top die it must be held up by hand or prop as the wedge is withdrawn.
9. Remove wedge and die should be free to come out.
#### Installing Dies
1. With hammer blocked as described above, put die in place with center pin (locating pin) and insert proper wedge.
2. Tighten wedge just snug (from side opposite operator).
3. Close bleed valve and open shutoff valve slowly.
4. When ram raises remove block, close shut-off valve and open bleed valve to lower ram.
5. Sock wedges tight with two-pound hammer.
6. Re-check wedges after one or two strikes of the ram.
7. Re-check position of the dies often after changing dies.
# General Metals - Bench Grinders (Steel & Aluminum)
# Manual(s)
*Manuals and other reference materials from the manufacturer or other sources.*
- *[Bench Grinder- jet-jbg-10a-user-manual.pdf](https://wiki.protohaven.org/attachments/165)*
# Member Notes
# Resources
*Where to obtain materials, consumables, and tooling.*
# Tool Tutorial
### Pedestal Grinders
The grinder is an abrasive wheel that uses a rough stone to wear away harder metals. It can shape the metal, remove burrs and clean up rough cut edges.
**Because of the soft nature of aluminum, you MUST only grind it on the "Aluminum" machine.**
Using aluminum on the "Steel" grinder with standard wheels will cause it to [embed into the wheel](https://www.youtube.com/watch?v=ZIn9q8MEMn8). This inhibits material removal, causes rapid friction heating and eventual explosion of the wheel if further grinding is attempted.
[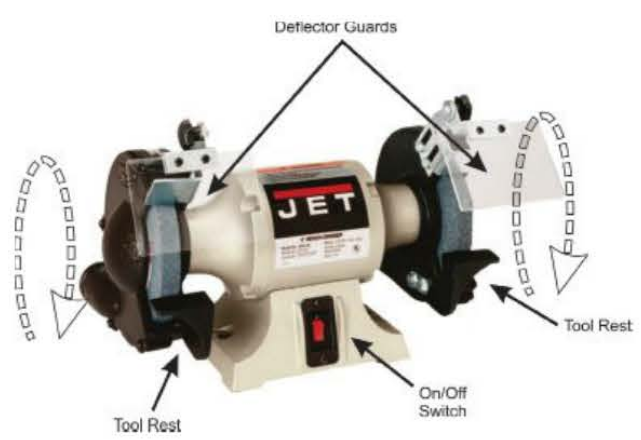](https://wiki.protohaven.org/uploads/images/gallery/2025-01/Iq5image.png)
#### Safety Precautions and Features
The rapidly spinning disks on the grinder are capable of causing serious injury. They are also more fragile than one initially thinks because of the vibration associated with the high speeds. Keep these safety precautions in mind at all times.
- ONLY GRIND MATERIAL ON THE WHEEL FOR WHICH IT IS INDICATED. See the warning callout above.
- Always keep material seated against the tool rest. If you hold it free hand you, can lose control of your material due to the strong downward forces. Hold material with vise grips if necessary.
- Ensure that the gap between the tool rest and the wheel is 1/8” or less. The downward motion of the wheel can pull your part in and shatter the wheel or launch the part causing serious injury if this gap is too big
- Hold the material firmly, and take light, steady passes against the wheel
- Do not feed part into wheel aggressively. Initial contact with the wheel should be slow and constant
- Keep spark shield down at all time
- Visually inspect wheels before starting the motor for uneven surfaces, chips or knicks, and any residual material stuck in the surface of the wheel
- Stand aside as the motor comes up to speed
- Do not wear gloves when using this machine. They could pull your hand into the wheel
- Do not grind on the side of the wheel. Always use the front face of the wheel
### Adjustments
#### Adjusting Tool Rest Distance and Angle
It is important that the distance between the table and the grinding wheel is no greater than 1/8” because the force of the spinning wheel will pull your material into the gap. This could cause the wheel to jam and possibly shatter at a high speed.
[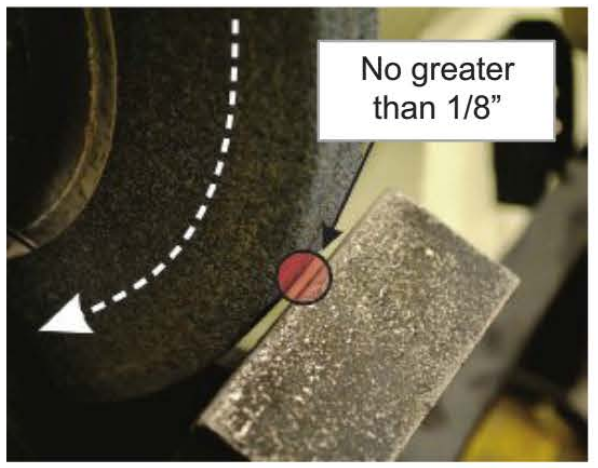](https://wiki.protohaven.org/uploads/images/gallery/2025-01/Zcuimage.png)
Seek a shop tech for adjustment of the tool rest if you find the gap is larger than 1/8”, or if you need to change the angle at which you are grinding.
#### Adjusting Deflector Guard Angle Angle Adjustment
The deflector guard shields you from sparks and particles thrown during the grinding process.
- To adjust the distance of the guard from the wheel loosen the bolts on the interior side of the wheel housing.
- To adjust the angle of the deflector guard loosen the friction lock at the top of the guard assembly. Retighten after adjusting.
[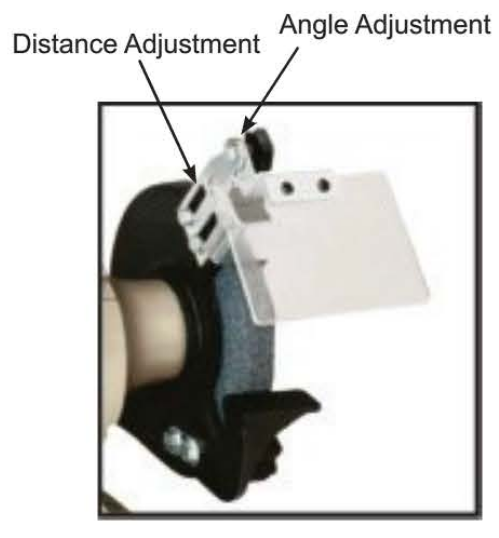](https://wiki.protohaven.org/uploads/images/gallery/2025-01/a8yimage.png)
### Basic Operation
1. Turn the motor on, and allow the wheel to spin up to its maximum velocity while standing clear to the side of the machine.
2. Firmly hold your workpiece — use vise grips if needed — on or just above the rest.
3. Push the work slowly into the wheel.
4. Keep the work moving so as not to wear out one spot on the wheel.
5. Grind with a light hand and frequently cool material in water.
6. When finished grinding move material away from wheel surface.
7. Turn motor off and allow to it to spin to a stop.
8. Clean up work and surrounding floor area.
9. Remove all scraps from your cut, and clean chips from table and surrounding floor area.
#### Notes
- Your workpiece will get hot enough to change the temper and heat treat the metal if you do not take light passes and frequently pull the metal away from the wheel to cool. You can use a cup of water to douse your part to quickly cool it.
- If the wheels do have excess material in them or have an irregular surface ask a shop tech to dress them for you.
- When grinding stainless, do NOT allow it to get red hot. This will make it too hard for further work and presents a risk of off-gassing of the compounds from non-ferrous additives in the alloy (esp. hexavalent chromium).
# General Metals - Chop Saw
Evolution S355 MCS
# Manual(s)
- [https://store.evolutionpowertools.com/products/evolution-s355mcs-mitre-chop-saw-heavy-duty-metal-cutting](https://store.evolutionpowertools.com/products/evolution-s355mcs-mitre-chop-saw-heavy-duty-metal-cutting)
- [S355MCS\_Instruction\_Manual.pdf](https://wiki.protohaven.org/attachments/245)
# Member Notes
# Resources
# Tool Tutorial
## Introduction
The Evolution S355MCS Mitre Saw is a powerful tool designed for cutting various materials, including mild steel, and aluminum.
## Notes
### Safety
**Read and understand the instructions.** Before operating the saw, thoroughly read the [instruction manual](https://manuals.plus/evolution/s355mcs-mitre-saw-manual) to familiarize yourself with its features and safety measures.
**Remove all adjusting keys and wrenches.** Always check that all adjusting keys and wrenches are removed from the tool before turning it on.
**Maintain a clean work area.** Keep your work to reduce the risk of accidents. Cluttered areas invite accidents.
### PPE**Always wear safety glasses and ear protection:** the machine may cause flying debris, and the motor is very loud. Dust masks may be worn to protect against dust.
### Common Hazards
Proper use of the clamps and good workholding technique should keep materials from flying out of the machine. Feeding the saw too quickly can cause parts to go airborne. Always wear safety goggles in case of flying debris.
### Care
Do not force the blade into the workpiece; let the cutting teeth do the work. Putting too much pressure on the blade can break teeth, reducing the life of the blade and introducing a safety hazard.
### Materials
Permitted materials:
- Mild steel
- Aluminum
- Brass
- Bronze
## Parts of the Tool
### Annotated Image(s)
### Part Description
### Part Description
### Part Description
## Basic Operation
### (Special topics)
### Setting Up
1. **Inspect the blade** to make sure there are no missing teeth and the saw is in good condition.
2. **Ensure the workpiece is firmly secured** using both the front and top clamps. Not all cuts can support both sides of the work, use extreme caution when one side is not clamped.
3. **Check the blade position.** Make sure the blade is positioned correctly front to back.
*If needed, adjust the slide at the back of the saw. See the diagrams below for proper positioning.* It is preferable to have the centerline of the blade directly above the part or slightly behind. If the blade is in front of the part, the blade can lift the part up.
4. **Check Blade Path Clearance.** Before making a cut, ensure all clamps are fully clear of the blade path and that the cutting head has full range of motion.
When making a mitre cut, it is possible to cut through a clamp. Pins have been added to try and prevent this from happening; always be carful not to damage the clamps.
5. **Perform a Test Run:** Without the blade spinning, perform a test rotation of the cutting head to ensure there are no obstructions.
### Workholding
[](https://wiki.protohaven.org/uploads/images/gallery/2025-04/chop-saw-metal-workholding.png)
### Using the Tool
1. **Start the Motor.** Slide the safety lock on the left side of the trigger switch to the left, then depress the main trigger switch.
Never start the saw with the cutting edge of the blade in contact with the workpiece.
2. **Make the Cut.** Gently lower the cutting head to the material, applying light pressure to prevent the blade from grabbing.
*Do not force the machine; let the saw blade do the work.** It helps to have the right hand pulling down on the handle and left providing some upward support to the handle, to prevent too fast of a feed.*
3. **Complete the Cut.** Release the trigger to turn off the motor.
### Cleaning Up
###
# Tool Tutorial - Notes
**Safety-Oriented User Guide for the Evolution S355MCS Mitre Saw**
The Evolution S355MCS Mitre Saw is a powerful tool designed for cutting various materials, including mild steel, and aluminum. To ensure safe and effective operation, please adhere to the following safety guidelines:[Owners Manual](https://manuals.plus/evolution/s355mcs-mitre-saw-manual?utm_source=chatgpt.com)
**1. General Safety Precautions:**
- **Read and Understand Instructions:** Before operating the saw, thoroughly read the instruction manual to familiarize yourself with its features and safety measures.
- **Remove Adjusting Keys and Wrenches:** Always check that all adjusting keys and wrenches are removed from the tool before turning it on.
- **Maintain a Clean Work Area:** Keep your work to reduce the risk of accidents. Cluttered areas invite accidents.
**3. Personal Protective Equipment (PPE):**
- Always wear appropriate PPE, such as safety glasses, ear protection, and dust masks, to protect against flying debris, noise, and dust.
**4. Preparing to Make a Cut:**
- **Inspect the blade:** Make sure there are no missing teeth and the saw is in good condition.
- **Secure the Workpiece:** Ensure the workpiece is firmly secured using both the front and top clamps.
- **Check the blade position:** Make sure the blade is positioned correctly front to back. If needed, adjust the slide at the back of the saw. See the diagrams below for proper positioning.
- **Check Blade Path Clearance:** Before making a cut, ensure all clamps are fully clear of the blade path and that the cutting head has full range of motion. **During a mitre cut, it is possible to cut through a clamp, pins have been added to try and prevent this from happening.**
- **Perform a Test Run:** Without the blade spinning, perform a test rotation of the cutting head to ensure there are no obstructions.
**5. Operating the Saw:**
- **Starting the Motor:** Slide the safety lock on the left side of the trigger switch to the left, then depress the main trigger switch. Never start the saw with the cutting edge of the blade in contact with the workpiece.
- **Making the Cut:** Gently lower the cutting head to the material, applying light pressure to prevent the blade from grabbing. Do not force the machine; let the saw blade do the work. It helps to have the right hand pulling down on the handle and left providing some upward support to the handle, to prevent too fast of a feed.
- **Completing the Cut:** Release the trigger to turn off the motor.
By following these safety guidelines, you can ensure a safe and efficient cutting experience with your Evolution S355MCS Mitre Saw. For more detailed information, refer to the full instruction manual.
### **Proper clamping and cutting techniques:**
[](https://wiki.protohaven.org/uploads/images/gallery/2025-03/ba2image.png)
# General Metals - Disc Grinder
# Manual(s)
*Manuals and other reference materials from the manufacturer or other sources.*
- [Model: ](https://www.woodcraft.com/products/laguna-20-disc-sander-2-hp)[MSAN20DISC1PH2HP-020](https://www.woodcraft.com/products/laguna-20-disc-sander-2-hp)
- Manufacturer: [Laguna](https://lagunatools.com/)
- Manual:
# Member Notes
# Resources
*Where to obtain materials, consumables, and tooling.*
# Tool Tutorial
(Link to PDF Tool Tutorial)
# Requirements
[General Metal Working](https://www.protohaven.org) clearance or class equivalent is required before use.
# Warnings
🚫 Do not stand on the machine. Serious injury could occur if the machine tips over. Do not wet grind or polish.
🚫 Never use a steady stream of water on the workpiece. Only quench the workpiece in water to cool it.
🚫 Do not grind or polish magnesium as it may catch on fire.
âš ï¸ Replace sanding discs when they become loaded and glazed or frayed.
See the [Safety Section](https://wiki.api.protohaven.org/books/dokuwiki/page/#tool-safety) for more information.
# Tool Anatomy
[](https://wiki.api.protohaven.org/books/dokuwiki/page/wiki_detailtoolsdiscgrinder.png?id=tools%3Ametals_disc_grinder%3Astart)
- Guard
- Disc with abrasive
- Miter gauge
- Work Table
- Trunion Scale
- Brake
- Rack
- Lock Handle
- Hand wheel
- Power/Speed Switch
For more visit the manufacturers website and user manual both linked at the top of this document.
# Tool Safety
## Safety
#### Personal Protective Equipment
âš ï¸ Safety glasses, hearing protection, and nonskid closed-toed shoes are required.
âš ï¸ Remove tie, rings, watches and other jewelry, and roll sleeves up past the elbows.
âš ï¸ All hair, clothing and accessories should be secured close to the body.
🚫 Do not wear gloves.
#### Common Hazards
**Pull/Abrasion Risk**
- Keep safety guards in place at all times when the machine is in use. If removed for maintenance purposes, use extreme caution and replace the guards immediately.
- Maintain a balanced stance at all times so that you do not fall or lean against moving parts. Do not over-reach or use excessive force to perform any machine operation.
- Never leave the machine running unattended. Turn the power off and do not leave the machine until it comes to a complete stop.
- Make all machine adjustments or maintenance with the machine unplugged from the power source.
**Flying Debris**
- Support the workpiece with the miter gauge; maintain control of the workpiece at all times.
- After turning switch to “ON,†always allow the disc to come up to full speed before sanding or grinding. Keep hands clear of the disc.
# Tool Care
#### Cleaning
1. Turn off the machine and disconnect from power before cleaning.
2. Use a brush or compressed air to remove chips or debris — do not use your hands.
## Inspection
Before you start using the sander you are expected to do an initial inspection and assess its readiness for use.
- Make certain the switch is in the OFF position before connecting the machine to the power supply.
- Make all machine adjustments or maintenance with the machine unplugged from the power source.
- Remove adjusting keys and wrenches. Form a habit of checking to see that keys and adjusting wrenches are removed from the machine before turning it on.
- Check damaged parts. Before further use of the machine, a guard or other part that is damaged should be carefully checked to determine that it will operate properly and perform its intended function. Check for alignment of moving parts, binding of moving parts, breakage of parts, mounting and any other conditions that may affect its operation. A guard or other part that is damaged should be properly repaired or replaced.
## Operation
Raise the table into position. After turning on the sander, allow the disc to come up to full speed before beginning to sand.
**Forward-Reverse Switch**
When changing direction with the Forward-Reverse switch, turn the lever to the OFF position and allow the disc to come to a complete stop. (Use the brake for immediate stop). Then turn the lever to the opposite direction, and allow the disc to come up to speed.
**Brake**
âš ï¸ Apply the brake only when the switch is OFF. Damage to the machine can occur if the brake is applied while the switch is ON.
- Pull the brake handle until the pad contacts the rotating disc.
### Maintenance Requests
If you encounter any of the issues listed in the Inspection area or have any other issues with the printer not working properly
- Update the physical Maintenance Tag at the machine
- 🟢Green can be used without issue
- 🟡Yellow can be used withcaution
- â›”Red cannot be used without hazard to either the user or the equipment
- Record issues at [protohaven.org/maintenance](https://protohaven.org/maintenance). This notifies our staff and volunteer maintenance crew of any issues.
## Troubleshooting
Trouble
Probable Cause
Remedy
Machine will not start/restart or repeatedly trips circuit breakers or blows fuses.
Machine not connected to power source.
Verify machine is connected to power.
Fuse blown, or circuit breaker tripped.
Replace fuse, or reset circuit breaker.
Cord damaged.
Replace cord.
Extension cord too light or too long.
Use adequate size extension cord.
Building circuit breaker trips or fuse blows.
Verify that sander is on a circuit of correct size. If circuit size is correct, there is probably a loose electrical lead.
Loose electrical connections.
Go through all the electrical connections on the edge sander including motor connections, verifying the tightness of each. Look for any signs of electrical arcing which is a sure indicator of loose connection or circuit overload.
Switch or motor failure (how to distinguish).
If you have access to a voltmeter, you can separate a switch failure from a motor failure by first, verifying incoming voltage at 220+/-10% and second, checking the voltage between switch and motor at 220+/-10%. If incoming voltage is incorrect, you have a power supply problem. If voltage between switch and motor is incorrect, you have a switch problem. If voltage between switch and motor is correct, you have a motor problem.
Motor failure.
If electric motor is suspect, you have two options: Have a qualified electrician test the motor for function or remove the motor and take it to a qualified electric motor repair shop and have it tested.
On/Off switch failure. (or Forward/Reverse switch on 3 phase model).
If the switch is suspect, you have two options: Have a qualified electrician test the switch for function, or purchase a new switch and establish if that was the problem on changeout.
Disc won’t come up to speed.
Extension cord too light or too long.
Use adequate size extension cord.
Low (incoming) voltage.
Contact qualified electrician.
Excessive bite, or feed pressure too great.
Allow sanding disc to cut freely, do not force.
Excessive replacement of sanding paper.
Too much pressure being used during cuts.
Reduce pressure.
Not using full width of belt.
Stroke across the belt using full width.
Machine vibrates excessively.
Sander base not level with floor.
Shim if necessary.
Not secured to the floor.
Use lag screws through holes in base to secure machine to the floor.
Improper motor mounting.
Check and adjust mounting.
Sanding marks on workpiece.
Sanding paper too coarse for required finish.
Use proper grit. Coarser grits for stock removal, and finer grits for finish work.
Workpiece sanded across grain.
When surface sanding, use fine sanding disc paper then finish by hand, working in direction of grain.
Sanding grains quickly rub off paper.
Sanding paper has lost its original properties.
Do not store sanding paper in extremely dry or high temperature areas. Do not fold sanding disc papers, store them flat.
Sanding paper becomes glazed.
Sanding painted surface.
Use open-end grain/flint sanding paper.
Wood is wet or gummy.
No cure. Use different stock.
Burn marks on workpiece.
Wrong sanding paper surface.
Use coarser grit for stock removal.
Feed pressure too great.
Do not force workpiece into disc. Use just enough pressure, and let the sanding disc do the work.
Sanding paper burns, or clogs quickly.
Too much pressure, sanding disc biting too deeply into workpiece.
Adjust for slight sanding action and make several passes.
Workpiece pulled from hand.
No support for workpiece.
Use miter gauge. Keep workpiece firmly down against table.
Sanded edge is not square.
Result of freehand sanding.
Keep workpiece flat on table at all times when a square edge is desired. Use miter gauge to ensure workpiece is square with sanding disc.
Table scale inaccurate.
Check table alignment to disc with a machinist’s square. It should be 90 degrees. Adjust pointer and table angle if necessary.
# General Metals - Shop Press
# Manual(s)
*Manuals and other reference materials from the manufacturer or other sources.*
# Member Notes
# Resources
*Where to obtain materials, consumables, and tooling.*
# Tool Tutorial
(Link to PDF Tool Tutorial)
# General Metals - Vertical Bandsaw
# Manual(s)
[Manual](https://docs.travers.com/assets/pdf/87-115-320_manual.pdf)
# Materials
## Approved Materials and Speeds
The following table lists appropriate speeds for using the bimetal saw blades in the vertical metal bandsaw.
These speeds must be adjusted depending on the cutting fluid used; see the **Notes** tab for more information.
*Scroll right for additional speeds.*
The Google Sheet for this table can be accessed directly at the following URL:
[`https://docs.google.com/spreadsheets/d/1mbvCgrGWhvr8H5-HGaHIzhEWQRvGiGg8j-m4hpl9JTM/edit?usp=sharing`](https://docs.google.com/spreadsheets/d/1mbvCgrGWhvr8H5-HGaHIzhEWQRvGiGg8j-m4hpl9JTM/edit?usp=sharing)
This link permits anyone to comment.
# Member Notes
# Resources
*Where to obtain materials, consumables, and tooling.*
# Tool Tutorial
### **Jet 1610 Vertical Metal Bandsaw**
## Introduction
The Jet 1610 Vertical Metal Bandsaw is a manually fed cutting tool for cutting metals such as aluminum and mild steel. Unlike horizontal bandsaws, this machine allows users to guide the workpiece by hand, making it well-suited for contours and non-linear cuts.
This saw operates at relatively low blade speeds, which makes it effective for softer metals but unsuitable for hardened materials and stainless steels. Proper cutting technique, especially feed rate, blade speed, and use of cutting fluid is critical to prevent blade damage and ensure safe operation.
Because the cut is controlled manually, users must rely on feedback such as sound, chip formation, and temperature to maintain proper cutting conditions.
## Notes
- Always use cutting fluid. Bottles for aluminum and steel are labeled nearby the machine.
- Do not adjust the high/low speed lever
- The speeds marked on the machine for steel and aluminum are starting points; you may need to adjust the speed depending on your workpiece.
### Safety
- Wear safety glasses or a face shield, ear protection, and non-slip footwear.
- Remove gloves, loose clothing, or jewelry that could catch in the moving blade.
- Always adjust the blade speed with the machine running.
### Common Hazards
- Contact with the blade due to improper technique or sudden movement of the workpiece during cutting
- Catastrophic failure of the blade during operation
- Burns from hot metal due to improper feed rate and/or blade speed
- Cuts from sharp edges
- Fumes from contaminants
- Embedding of metal chips
- Pinching/crushing of fingers/hands in between parts of the machine, or the machine and the workpiece
- Entanglement due to catching of fabric or worn gloves/accessories
### Materials
The 18 TPI blade is best for cutting materials between 5/32" to 1/2" (4mm to 13mm). Using thinner material than recommended can result in stripping teeth from the blade.
Bi-metal band saw blades are sufficient for cutting a wide range of materials. However, the Vertical Metal Band Saw has a minimum blade speed of approximately 150 feet per minute (45 meters per minute), which limits what materials can be used for blade longevity.
#### Prohibited Materials
The following materials are prohibited to prolong life of the machine and blades:
- Hardened metals
- This includes plasma cut edges on any material.
- Stainless steel
- Non-metals
## Parts of the Tool
[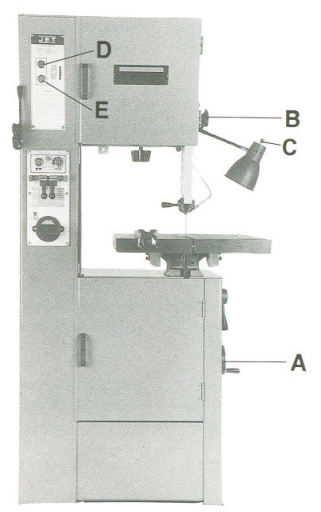](https://wiki.protohaven.org/uploads/images/gallery/2026-04/evkimage.png)
Figure 1: Vertical Metal Bandsaw Basic Anatomy
Figure 1-A: **Blade Speed Adjust Hand Wheel** - located below work table on right side of machine base. Turn clockwise to increase speed and counterclockwise to decrease speed. Caution: Do not turn handle while machine is stopped. Adjust speed only when machine is running.
Figure 1-B: **Upper Blade Guide Lock Knob** - located on right side of upper arm. Turn counter-clockwise to loosen and clockwise to tighten. Lossening allows adjustment of the blade gaurd height for cutting thicker or thinner stock.
Figure 1-C: **Work Lamp Switch** - on top of lamp shade; turns lamp on and off.
Figure 1-D: **Start Switch** - located on upper front column. Press to start the bandsaw.
Figure 1-E**:** **Stop Switch** - located on upper front column. Depress to stop bandsaw.
## Basic Operation
1. Determine the appropriate blade speed for the material and stock size to be cut using the chart posted on the inside of the upper pulley housing door (Also in: Setup Up).
2. Adjust the blade guard to minimize exposed teeth for the stock to be cut.
3. Turn on the lamp.
4. Adjust fence as required for the cut.
5. Press the Start Switch to start the bandsaw.
6. Set the previously determined blade speed using the Blade Speed Adjust Hand Wheel.
7. Apply the appropriate cutting fluid depending on the material using the labeled bottles nearby.
8. Perform the cut (See: Using The Tool section below).
9. Press the Stop Switch to stop the bandsaw.
### Setting Up
Before cutting the material, the appropriate blade speed should be determined considering both the material and the thickness of the material. The blade speed chart is shown below:
If the material is not listed in this chart, see the section titled "Prohibited Materials".
[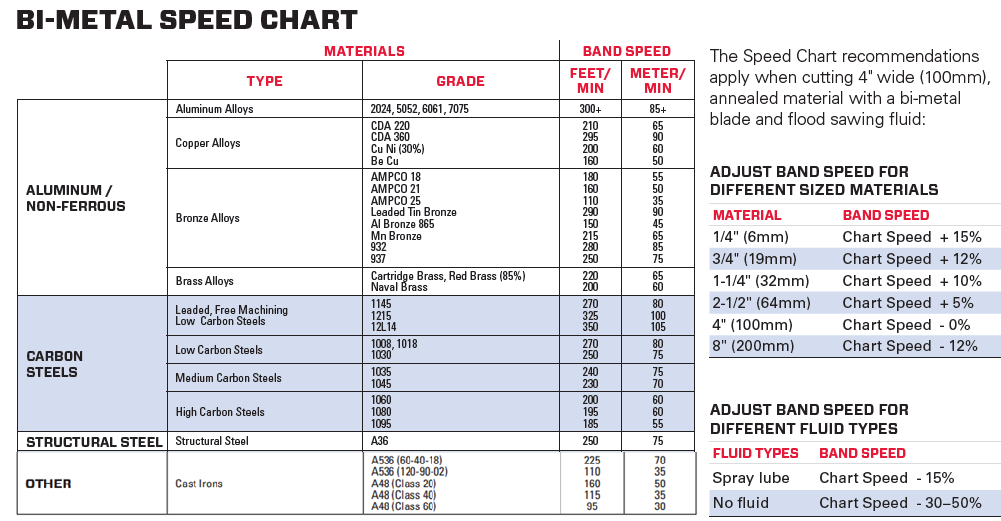](https://wiki.protohaven.org/uploads/images/gallery/2026-04/screenshot-2026-04-18-135029.png)
Note that these speeds should be increased for thinner materials, as shown on the right.
### Using the Tool
Because the stock is fed by hand, feedback is critically important to ensure life of the tool and blade. Here are some things to look out for while making cuts:
**1. Noise:**
- The cut should be fairly quiet with a consistent "shhh"-ing noise, and should not feel like the blade is trying to grab the piece.
- Rubbing or squealing of the blade usually means you are feeding too slow.
- Blade chattering usually means you are feeding too fast.
**2. Chips:**
- **For thinner workpieces**, chips can be misleading because the chips are small.
- Ideal chips are thin and curled without color change.
- Dust-like / small gritty chips usually mean you are feeding to slow
- Thick chips usually mean you are feeding too fast. For steels, these chips will usually be straw (yellow) or blue colored.
- A quick reference chip guide is posted at the machine and is visible during operation.
**3. Temperature:**
- It is expected that the workpiece heats up during a cut, but it should never get too hot to touch.
- Heat indicates that proper chips are not forming during the cut.
- The workpiece getting excessively hot means that you are feeding **either** too fast or too slow.
### Cleaning Up
1. Clean all metal chips and cutting fluid from the table, blade guides (above and below table), and dispose in a trash can.
2. Turn off the lamp.
---
# Industrial Metals - Cold Saw
Jet J-FK350-2K
Clearance: Required
# Manual(s)
*Manuals and other reference materials from the manufacturer or other sources.*
- *[Jet Manual Ferrous Cold Saw- 414214\_man\_EN.pdf](https://wiki.protohaven.org/attachments/161)*
# Member Notes
# Resources
*Where to obtain materials, consumables, and tooling.*
# Tool Tutorial
### Cold Saw
The cold saw makes accurate, square and angled cuts in steel and aluminum. The saw is heavy and stable and the dual vise clamping system makes for more accurate cuts than an abrasive chop saw with minimal burring, almost like a machined edge. It uses a solid HSS (high speed steel) circular saw blade to cut the material with the force of the user. It's a “cold saw” because it transfers the heat generated by cutting to the chips created by the saw blade. This is the opposite of an abrasive saw which abrades the metal and stores a great deal of heat in the material and the blade.
[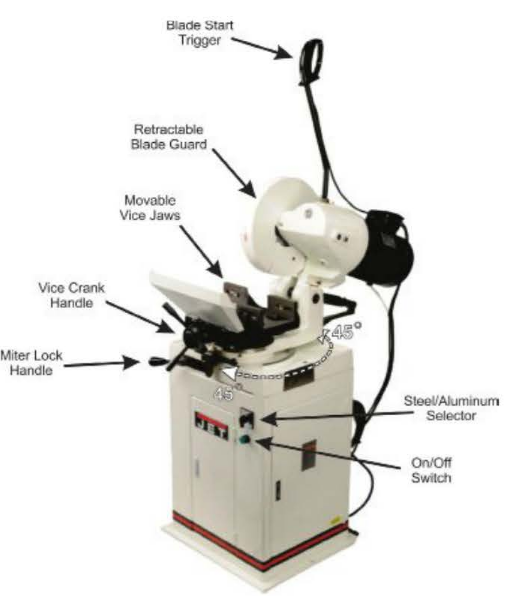](https://wiki.protohaven.org/uploads/images/gallery/2025-01/Go4image.png)
### Safety Precautions and Features
- The cold saw can handle a range of materials from aluminum to steel. However, hardened steel and stainless steel are too hard and must be cut with an abrasive chop saw. If you want to cut these materials, consult a shop tech.
- Because of the high cutting forces involved with the thick blade, the material being cut must be held correctly and tightly in the vise. If you are uncertain about your workholding, please ask a shop tech member for assistance.
- When cutting keep both hands on the trigger handle. This ensures that your hands are not near the cutting plane and allows you to provide appropriate, constant downward pressure (feed).
### Adjustments
#### Work holding
Work holding is one of the most important adjustments you can make to the cold saw because of the high cutting forces involved. The four jaws of the vise are locked together and work like a normal vise except that there is support on both sides of the blade for your material which greatly increases rigidity.
- Clamp work very tightly in the vise using the vise handle
- The jaws of the vise can be loosened with the Allen wrench on the side of the machine and moved left and right along your
material to accommodate the saw blade [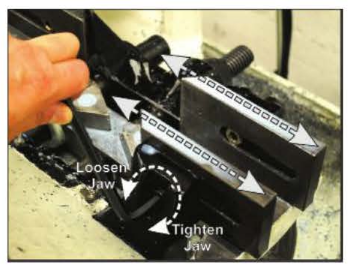](https://wiki.protohaven.org/uploads/images/gallery/2025-01/4FNimage.png)
- IN NORMAL STRAIGHT CUTS the vise jaws should have a 1/8” clearance on either side of the blade to allow safe blade passage and also to have better grip on your part.
- Always make sure to re-tighten your vise jaws after adjusting.
#### Miter (Angle) Cuts
The cold saw upper assembly is capable of being rotated to make angled cuts up to 45° degrees in your material in both directions. It is important to always test whether or not the blade will hit the vise jaws and adjust the jaws according to your angle.
#### Changing Angle of Cut
1. Loosen the locking lever by moving it to the left
2. Push in lock mechanism to release it from pin
3. Pull the back of the saw to set desired angle for your cut.
4. There is a fixed stop pin at 45°. If you are cutting a 45° angle, release the lock mechanism near 45° and allow it to lock.
5. If you are cutting angles aside from 45°, stop at your desired position and re-tighten the locking lever by moving it to the right.
[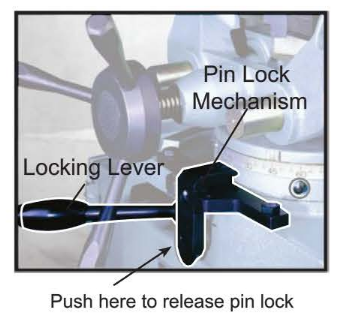](https://wiki.protohaven.org/uploads/images/gallery/2025-01/QnFimage.png)
#### Adjust the Vice Jaws
1. Remove the allen wrench from left side of the machine and loosen the bolts on appropriate jaws.
2. Move jaws out of blade path.
3. With the saw turned OFF, bring the blade down with jaws in new position to check for clearance.
4. If blade is clear of jaws, re-tighten jaws and replace allen wrench in the slot on left side of machine.
[](https://wiki.protohaven.org/uploads/images/gallery/2025-01/z92image.png)
#### Work Stop Adjustment
The work stop is a mechanical stop that can be locked at a specific distance from the vise to allow you to quickly cut many parts of the same length without having to measure every time you cut.
1. Hold part loosely in the vise and slowly drop blade to 1/2” above material.
2. Measure and move material until correct cut length is achieved.
3. Tighten work holding vise.
4. Loosen the work stop lock.
5. Slide work stop towards protruding end of your material until it is 1/8” from material.
6. Lock work stop down.
#### Set Speed Appropriately for Material
You will have to adjust the blade speed appropriately for the material you are cutting. This saw has two speeds: steel and aluminum. Make sure this is set appropriately
[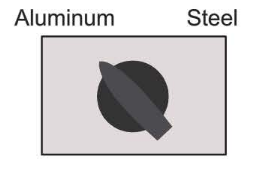](https://wiki.protohaven.org/uploads/images/gallery/2025-01/Psvimage.png)
### Basic Operation
1. If making a straight cut, check that the locking pin is engaged and the saw is locked correctly.
2. If making an angle cut, unlock the miter locking lever, release the locking mechanism and move to desired position and then relock the miter locking lever.
3. Slowly drop the saw without turning on the blade to check vise jaw clearance.
4. Adjust the vise jaws appropriately to allow clearance.
5. Clamp material tightly in the vise. Use appropriate workholding for geometry of your material.
6. Turn on the machine using the switch on the front.
7. Switch between aluminum or steel. Do not do this when the blade is running.
8. Depress the trigger to turn the blade on.
9. Allow blade to spin up to maximum velocity. Ensure that coolant is flowing and fully covering the cutting surface of the blade.
DRY CUTTING will break the blade. This is considered to be tool abuse and you could be held responsible for replacing the blade.
10. With BOTH hands on trigger. Evenly apply downward pressure and begin cutting material.
11. Continue applying steady, downward force and FOLLOW THROUGH until saw reaches end of travel. The blade travel stops before the saw reaches the bed of the vise so do not attempt to stop cut prematurely.
12. Once cut is complete, release trigger and return saw to upper position.
13. Unclamp material and remove scraps.
14. If you made any angle adjustments return the saw to 0° and RE-ADJUST THE Vise JAWS. Also ensure that the locking pin is in place and the miter locking lever is locked.
### Notes
- The saw will make a loud grinding noise. This is the nature of this machine. If you do not feel like you are removing material at a rapid rate you are probably cutting the wrong material
- Keep both hands on the handle and slightly lean into the saw. The weight of your body alone with a little force is enough to cut.
**Do NOT attempt to force the cut.** If you see the blade skipping, you are applying too much force.
DRY CUTTING will break the blade. This is considered to be “abuse of tools” and you could be held responsible for replacing the blade.
# Industrial Metals - Horizontal Bandsaw
Jet J-7040M, 10" x 16" Horizontal Mitering Bandsaw
Clearance: Required
# Manual(s)
*Manuals and other reference materials from the manufacturer or other sources.*
- *[Horizantal Bandsaw- j7040m.pdf](https://wiki.protohaven.org/attachments/181)*
# Member Notes
# Resources
*Where to obtain materials, consumables, and tooling.*
# Tool Tutorial
### Horizontal Band Saw
The horizontal Band Saw is a liquid cooled, fairly accurate saw capable of cutting mild steel, aluminum and other non-ferrous metals. The horizontal Band Saw is different from a vertical band saw in that your material stays stationary while the arm that holds the blade steadily drops down and automatically cuts your metal. At Protohaven, the saw is hydraulically controlled so you do not need to touch the saw once it is running and coolant is flowing. The saw will automatically finish the cut and turn itself off. Since your work is clamped into a vise, and the blade is steadily dropped, a horizontal band saw is capable of making more precise cuts than a vertical band saw. However, unlike a vertical band saw, you are limited to making straight cuts.
[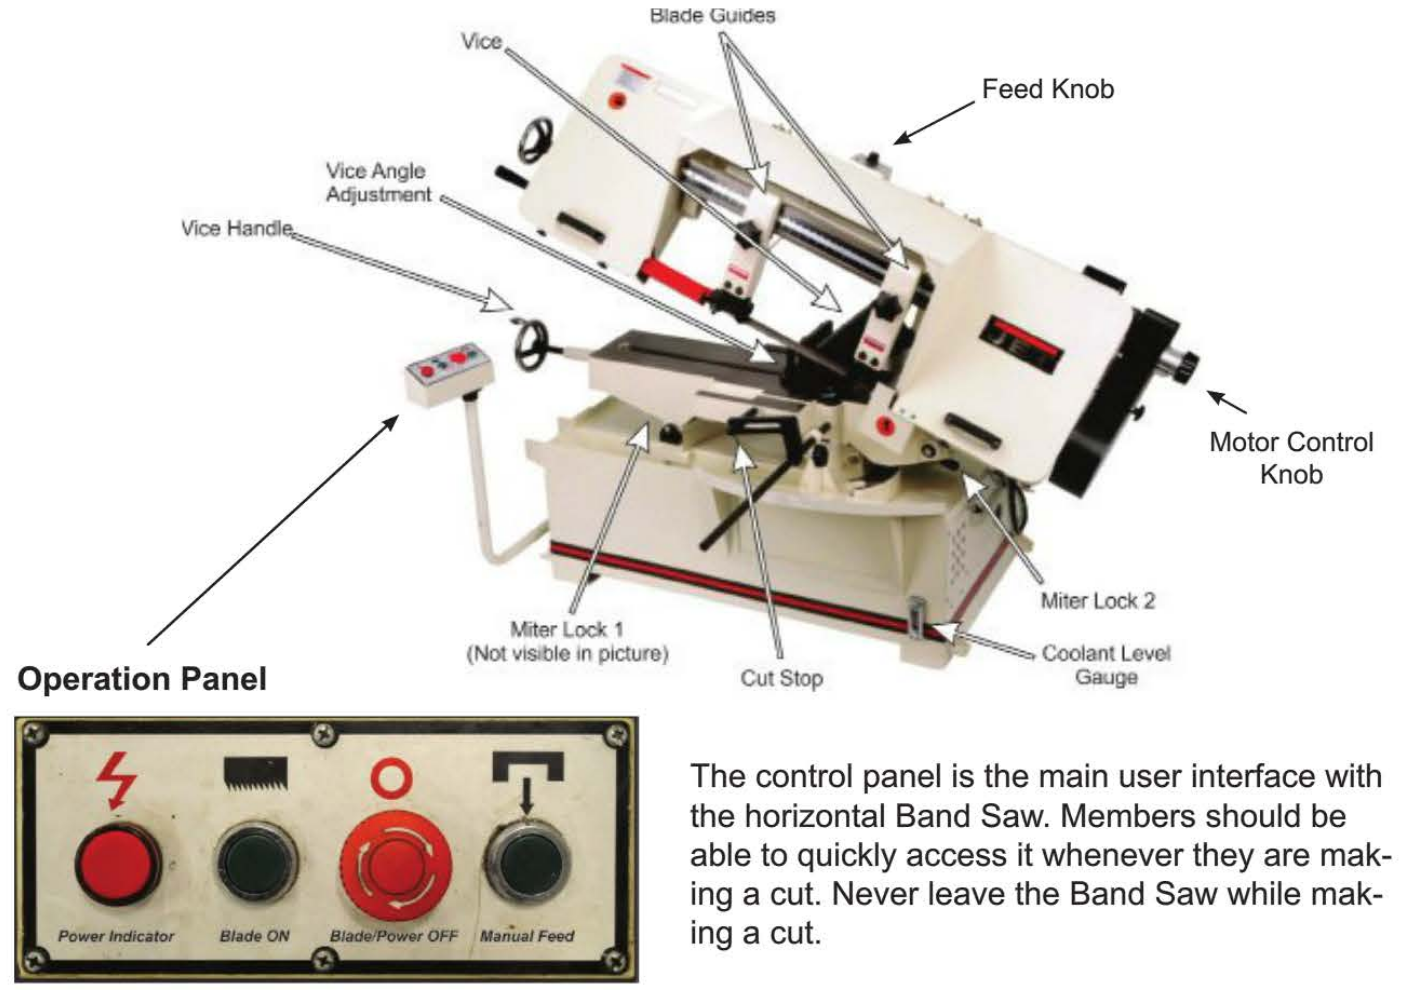](https://wiki.protohaven.org/uploads/images/gallery/2025-01/esVimage.png)
- Power Indicator: This red light turns on when the machine is powered and ready to cut.
- Blade ON: Press this green button to start the cutting process. It starts both the motor spinning the blade and the pneumatic arm dropping.
- Blade/Power OFF: This large red switch stops any cutting processes. When it is pressed, the machine will not engage and the power indicator will turn off. To run the machine twist the button clockwise until it pops out. This will turn on the power indicator signaling the machine is live and ready to cut.
- Manual Feed: This button causes the arm of the saw to drop at the speed set on the feed knob WITHOUT running the blade. It is used for positioning the blade above your materials before you cut as well as for lowering the arm into a resting position after you have finished using the machine.
### Adjustments
#### Adjusting feed and speed
The most important adjustments members make to the horizontal band saw is the motor speed at which the blade cuts and the feed speed (drop rate) of the arm. Safe cutting of a material is an appropriate combination of these two movements of the blade. Incorrect settings for your material will crash the machine, break the blade, damage your part, potentially injuring you as well.
[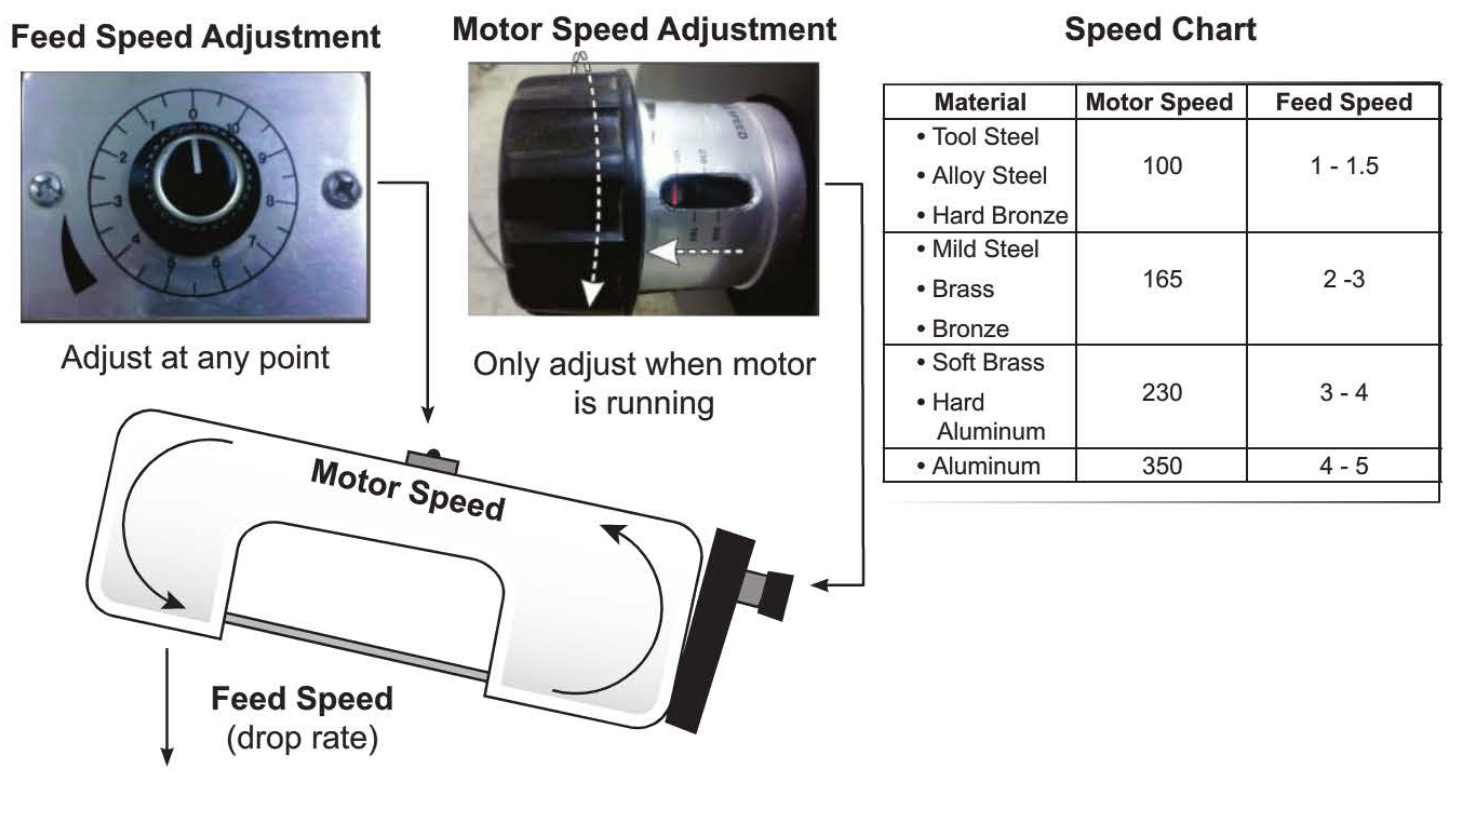](https://wiki.protohaven.org/uploads/images/gallery/2025-01/wXJimage.png)
##### Feed Speed Adjustment
This knob controls how quickly the arm drops. It can be adjusted at any time during the operation. When it is set to zero, the blade will not drop. Use this knob in conjunction with the manual feed button to completely drop the saw when finished using.
##### Motor Speed Adjustment
This controls how fast the motor rotates the blade. This adjustment can only be made when the motor is running. When changing speeds make sure the red indicator line is pointing towards one of the predefined speed numbers.
##### Proper Adjustment Sequence
- Raise arm by handle only
- Turn feed speed knob to 0
- Push the green blade on button to start the saw
- Turn the Motor Speed Adjustment knob to the appropriate speed.
#### Blade Guide Adjustment
The blade guides should generally not be adjusted. Their purpose is to keep the blade rigid despite the
force of the cut. The only time a member would adjust the guides is when the width of the material exceeds the current cutting area between the guides or during a miter cut. If adjustment is needed, only move the frontal (left) guard arm.
[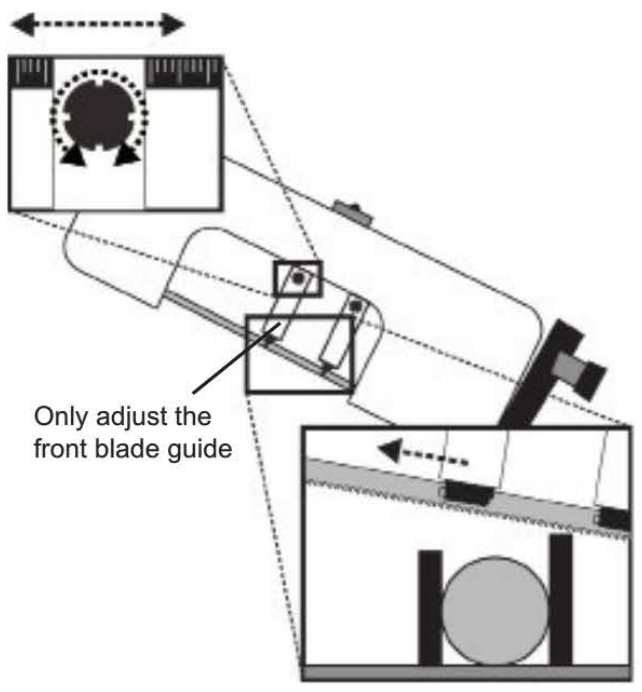](https://wiki.protohaven.org/uploads/images/gallery/2025-01/vebimage.png)
Never move the back blade guide! Improper guide adjustment risks damaging the machine.
Ideally, you should have 1” of clearance between your material and the frontal blade guide. It is possible for a member to have adjusted this before you and left it, so always check the tolerances at slow feed without the blade running.
#### Angled Cut Adjustment
##### Changing the Blade Angle
1. Loosen both front and back miter locks. When facing each lock pull towards the left to unlock.
2. Move entire carriage by pulling the handle to the left to desired angle. Check angle against gauge.
3. Relock both miter locks.
[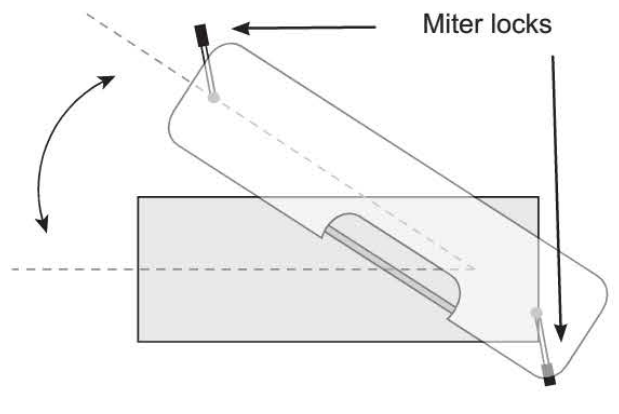](https://wiki.protohaven.org/uploads/images/gallery/2025-01/ECsimage.png)
##### Changing the Front Vise Angle
1. Loosen the vise angle lock bolt.
2. Turn vise crank handle and clamp onto your part. As the front vise jaw moves towards your material it will automatically align its angle to seat parallel against your part.
3. Tighten the vise angle lock bolt.
[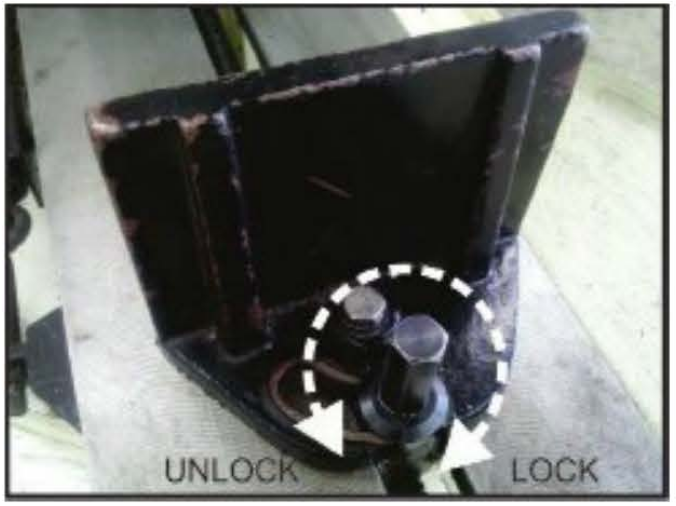](https://wiki.protohaven.org/uploads/images/gallery/2025-01/vszimage.png)
#### Coolant Flow Adjustment
To protect both the blade and your material from the effects of heating due to the friction of the cut, the horizontal Band Saw has an automatic coolant system. Because of this system, only metals can be cut on this machine. Wood or plastic will ruin the coolant system and make the machine inoperable. To cut wood or plastic, use the vertical band saw located in the general woodshop area.
1. At all times coolant must flow during a cut. The entire cutting surface of the blade needs to be covered in coolant.
2. Before making a cut, allow the blade to run for a few seconds with the feed knob set to 0 so the arm does not descend.
3. If there is not a steady flow of coolant, check the red coolant flow lever on top of the arm near the feed speed control knob. Ask a facilities staff member for assistance.
#### Setting the Work Stop
The work stop is a mechanical stop that can be locked at a specific distance from the vise to allow you to quickly cut many parts of the same length without having to measure every time you cut.
Caution: Do not use work stop with angle cuts.
1. Hold part loosely in vise and slowly drop blade to 1/2"above material.
2. Measure and move material until the correct cut length is achieved. Allow for the blade kerf (the thickness of the blade).
3. Tighten the vise.
4. Loosen the work stop lock.
5. Slide towards the protruding end of your material until it is 1/8” from material.
6. Lock work stop down.
[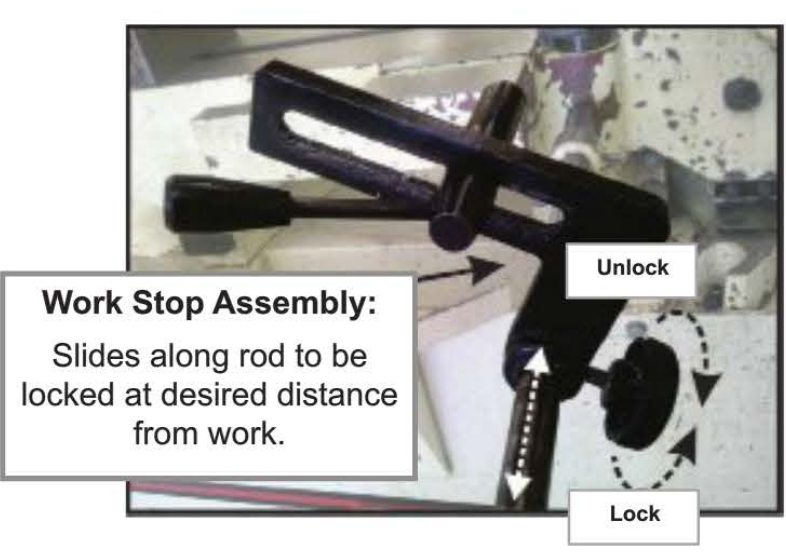](https://wiki.protohaven.org/uploads/images/gallery/2025-01/cUuimage.png)
### Basic Operation
#### Making a Slow Test Drop
Use the feed adjustment knob and manual feed button to do a slow test drop. Check to make sure:
1. Blade guards do not hit vise or part
2. Blade does not cut vise
3. Cut is in correct place on material
4. There is nothing obstructing the downward motion of the arm.
#### Basic Cut:
1. Grab upper handle and raise the cut arm.
2. If you are going to cut at an angle, change the miter angle of the arm.
3. Insert part into the vise and clamp loosely.
4. Perform a slow drop to check measurement and clearances.
5. Clamp vise tight on material.
6. Lift blade 2 to 3 inches above material.
7. Set feed speed knob to 0.
8. Push the green button to turn blade on.
9. Wait until coolant starts flowing and completely covers cutting surface of the blade.
10. Check the chart (posted on the arm of the saw) for appropriate motor speed for your material and adjust the motor speed while the blade is running.
11. Check the chart (posted on the arm of the saw) for appropriate feed (drop) speed and turn knob slightly below chart setting to initiate cut.
12. As the blade enters the material, increase feed to appropriate chart number.
13. Keep your hand near emergency stop button and watch entire cut.
14. Wait for the blade to stop itself as it finishes cutting through your part.
15. Pull handle up and remove your material from the vise.
16. Discard large scraps, vacuum chips and coolant from machine and surrounding floor area.
17. When you finish using the band saw, use the feed knob and manual feed button to drop the saw to resting position.
### Notes
- Lightly hold your part with your hand to prevent it from falling when cut finishes. Only do this if the length protruding from the vise exceeds six inches.
- For clamping round stock use V blocks. If cutting a large tube, you can clamp the inside of the tube to back jaw in addition to mild clamping.
- If you are cutting too fast (speed too high) you will get tightly curled DISCOLORED chips. If you are feeding too slowly, you will get powdery chips.
- Always re-lock both miter locks after you have changed the cut angle. This ensures your angle does not shift during cutting.
# Industrial Metals - Ironworker
* Edwards 55-ton Hydraulic Ironworker with PowerLink
Clearance: Required
# Manual(s)
*Manuals and other reference materials from the manufacturer or other sources.*
- [IronWorker- IW5502\_Ironworker 55T\_COMBINED.pdf](https://wiki.protohaven.org/attachments/160)
# Member Notes
# Resources
*Where to obtain materials, consumables, and tooling.*
### Useful Links
- [Machine manufacturers website](http://www.edwardsironworkers.com/)
- [Hole punching tips and tricks](http://www.americanpunchco.com/punch_die_setup_tips.htm)
- [Ironworker tips and tricks](http://coloradok5.com/forums/archive/index.php/t-266090.html)
# Ironworker Tool Tutorial
The ironworker’s main strength is its versatility. It can shear, punch, and notch a variety of different materials. The ironworker consists of three primary sections: The shear, the notcher and the punch.
## Tool Anatomy
[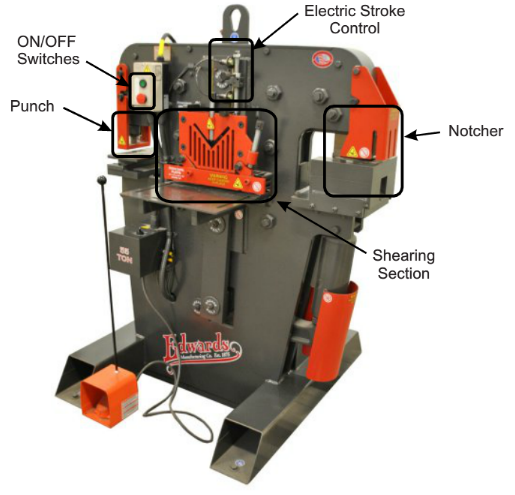](https://wiki.protohaven.org/uploads/images/gallery/2025-01/2tGimage.png)
### Shear
This section of the machine can shear angle, round stock, and flat stock of varying thicknesses. The shear section of the ironworker consists of a dedicated angle shear and a dedicated flat and round stock shear.
#### Angle Iron Shear
The angle iron section of the machine consists of an angled slot through which material is fed to be sheared. A “V” shaped blade shears the material when the pedal is depressed. The shear can cut thick angle iron which is very inefficient and harder to hold safely on the cold saw and horizontal bandsaw. When cutting very large pieces be sure to have someone behind the machine catching the cut pieces. This will help prevent damage to the machine and others.
#### Flat and Round Stock Shear
The flat stock section of the shear allows the user to shear thick plate and round stock metals very quickly. Pieces that cannot be appropriately held on the bandsaw and can fit within the size requirements should be sheared on the ironworker.
[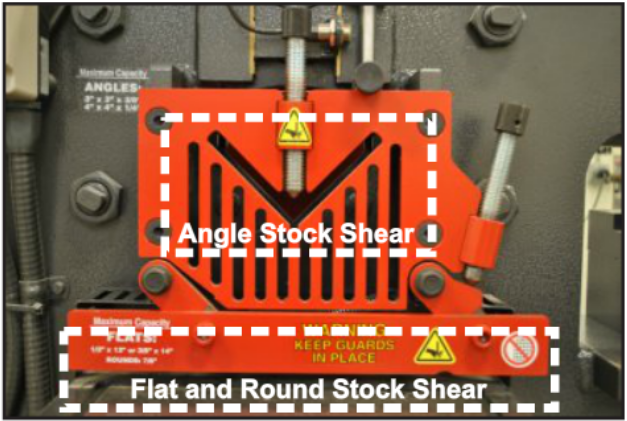](https://wiki.protohaven.org/uploads/images/gallery/2025-01/z9Iimage.png)
### Punch
The punch will punch holes in very heavy gauge material. This tool works very well with all types of plate materials. It will punch through thick plate steel in a couple of seconds where the drill press would take minutes. The hole sizes are limited to the punch and die sets that are available. Punch and die sets are available in different shapes such as round, square, rectangle, hex, oblong. Protohaven has common sizes in square and round. If a specific die is needed, it can be purchased from the manufacturer. If a hole is needed that is in between available hole sizes, a hole can be punched slightly smaller than the desired hole size. This hole can then quickly be enlarged on the drill press. Ask a shop tech for assistance if you need help changing dies.
[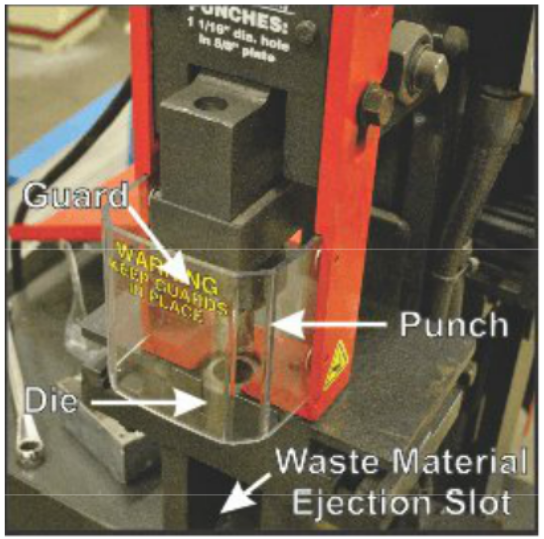](https://wiki.protohaven.org/uploads/images/gallery/2025-01/c1cimage.png)
### Notcher
The notcher is used to cut notches out of material for a variety of purposes. When a piece needs to fit within a slot, a tongue can be created by removing a square chunk of material from both sides. Any angle can be cut on the notcher by moving the material to the desired angle. One of the most useful applications for the notcher is for removing sections of one leg of angle stock for assembly purposes. This operation would require multiple steps on other machines but can be done in one quick step on the ironworker.
[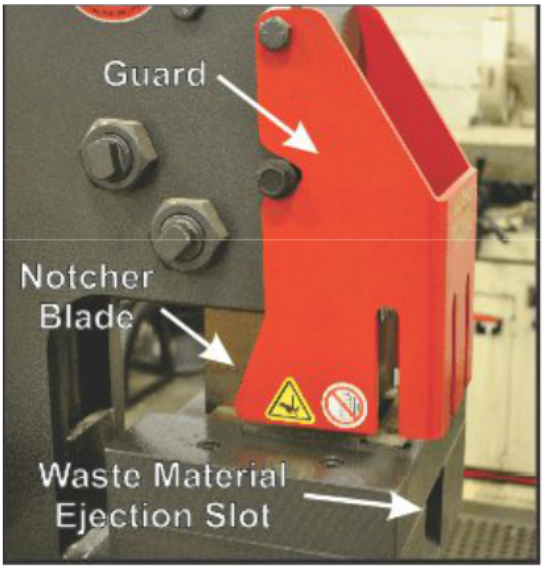](https://wiki.protohaven.org/uploads/images/gallery/2025-01/nrFimage.png)
### Safety Features & Precautions
#### Machine Guards
Each section of the ironworker has a guard to prevent injury to the user during operation. It is imperative that guards remain seated slightly above the material you are working with. This prevents injury and damage to the machine and your work.
#### Shear
There are two shear guards. There is one guard for securing angle stock and another for securing flat and round stock. When working on this machine make sure the guard is lowered to the height of your material. It needs to be almost touching your material. The guard should be no further away from your material than 1/32” - 1/16” for flat and round stock and should make contact with angle stock.
The guards on the shear are raised and lowered by turning a screw. The angle stock guard consists of a screw with a tapered end to secure the material. Secure angle stock tightly with this screw. The flat and round stock guard consists of a bar that is lowered by a screw. It is not spring loaded so it will need to be moved up by hand when it needs to be raised. Simply turning the screw counter clockwise will not raise the flat and round stock guard.
The material ejection ports on the back of the shear are covered to prevent access to the blades while the machine is in operation. When cutting large or heavy material make sure you have someone catching the material as it is cut. This will prevent damage to the machine and others.
[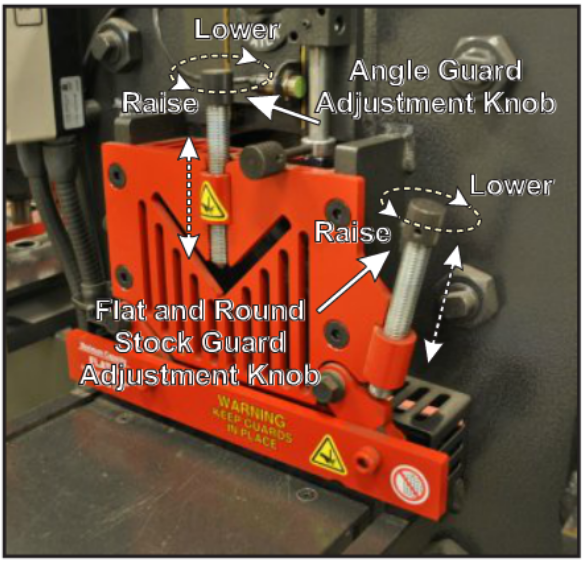](https://wiki.protohaven.org/uploads/images/gallery/2026-02/image.png)
#### Punch
The guard on the punch should always be seated very close to the material while the machine is in operation. The guard should be located 1/32"-1/16” above the material being punched. Extra space should be made for the material as it will slightly deform after being punched and will then be impossible to remove from the machine without moving the guard. The guard is moved by loosen-
ing the bolts on either side, then lifting it up or down as needed and then re-tightening the bolts.
Align the punch and die before using them to punch holes. Carefully lower the punch into the die and, if needed, align them The table can be adjusted by loosening the 3/4" bolts on the underside.
[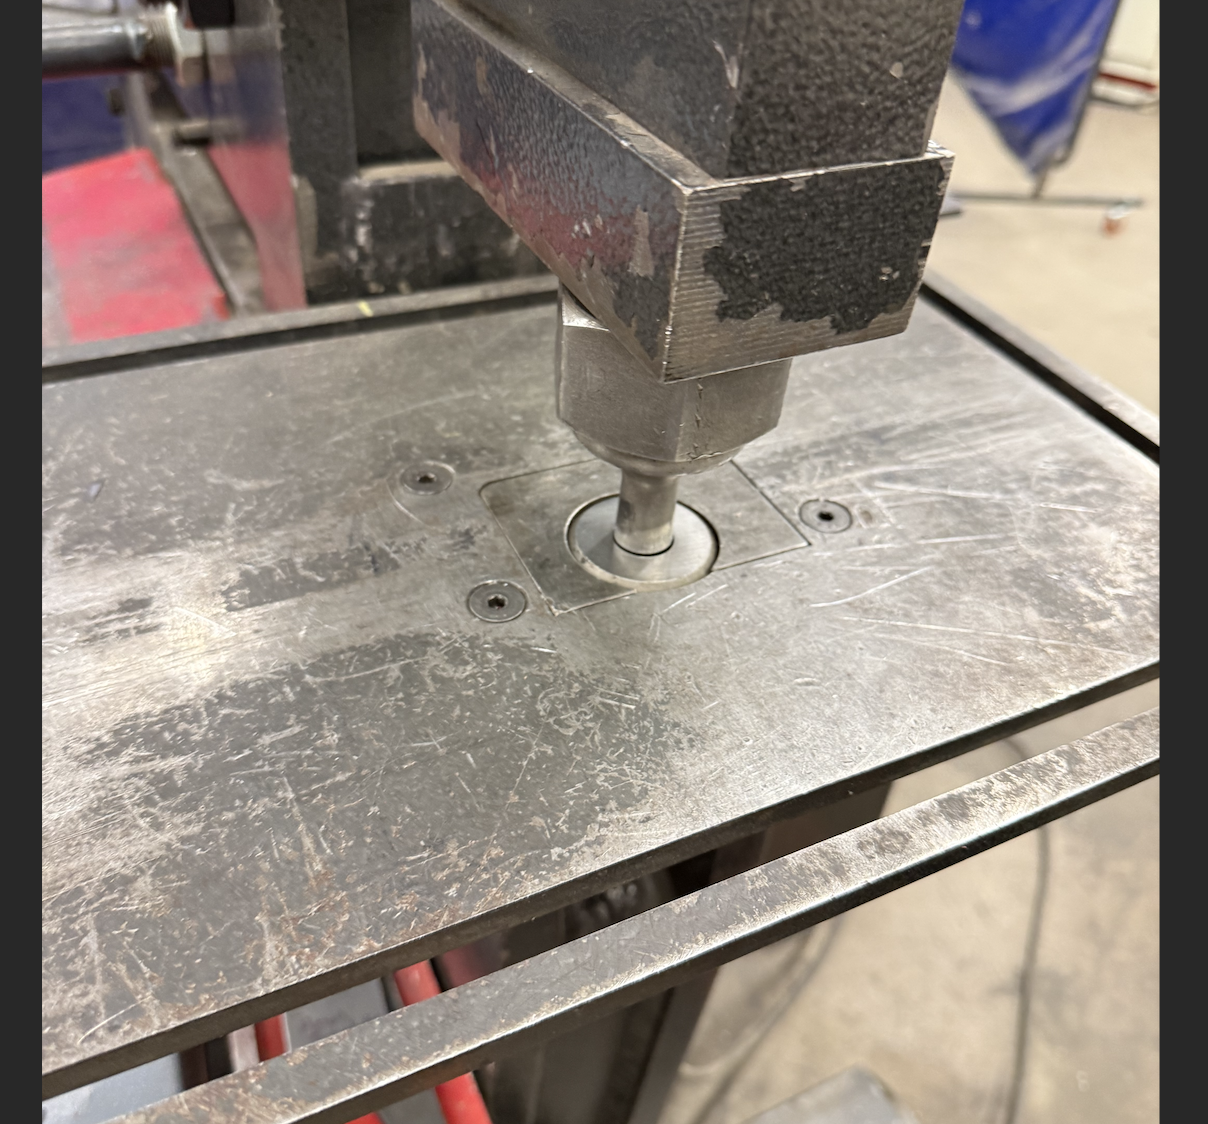](https://wiki.protohaven.org/uploads/images/gallery/2026-02/screenshot-2026-02-02-at-12-36-20-pm.png)
[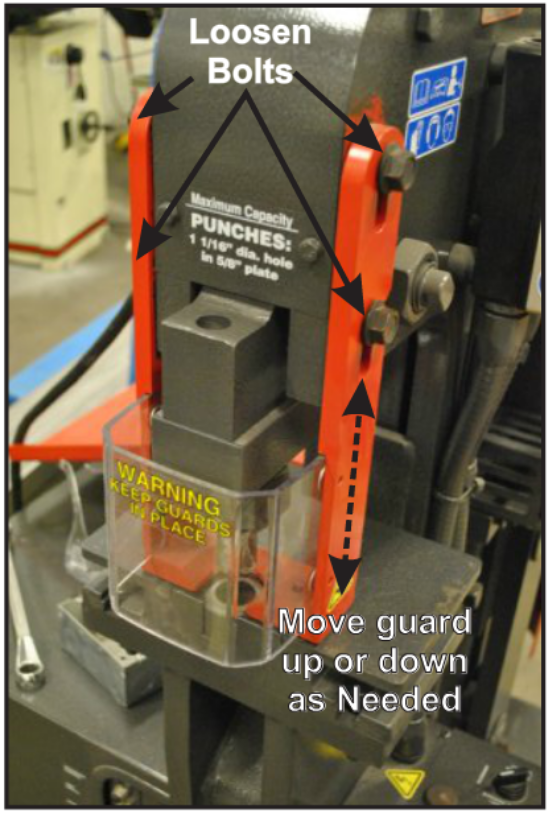](https://wiki.protohaven.org/uploads/images/gallery/2025-01/C1Uimage.png)
#### Notcher
The notcher guard helps prevent injury from the tool. The notcher should always be operated with the guard down and lowered
to 1/32” - 1/16” above the material. The guard swings out towards the operator and is tightened in place with two bolts. Make sure the bolts are tightened before operating the machine. The notcher guard is set to a fixed height for the maximum material thickness. The guard placement should not need to be adjusted. The slots in the guard are designed for usage with angle stock and allow clearance for the vertical leg of the material.
[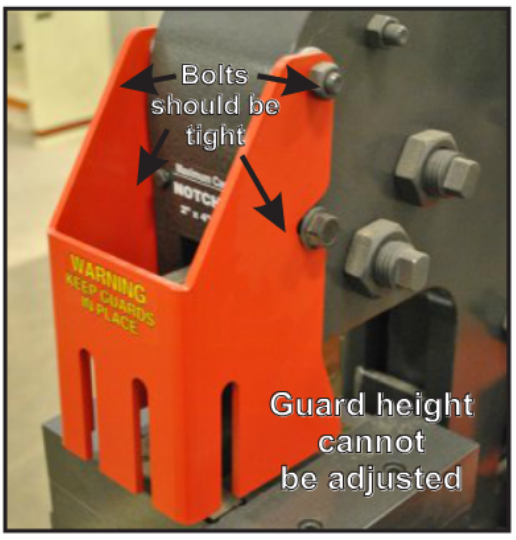](https://wiki.protohaven.org/uploads/images/gallery/2025-01/nsVimage.png)
### Maximum Material Capacity
The ironworker is capable of shearing, punching and notching very thick plate metals but it is very important that the maximum capacities of the machine are followed. Damage to the machine will be minimized by following these capacities. The capacity of each section of the machine are clearly labeled. Please refer to the labels on the machine or in the following chart for the maximum material capacities of the ironworker. Tool steels are not to be used on this machine. Stainless steel can be used but not at the maximum thickness capacities of the machine. Always check with a shop tech anytime you want to use the machine for materials harder than mild steel.
[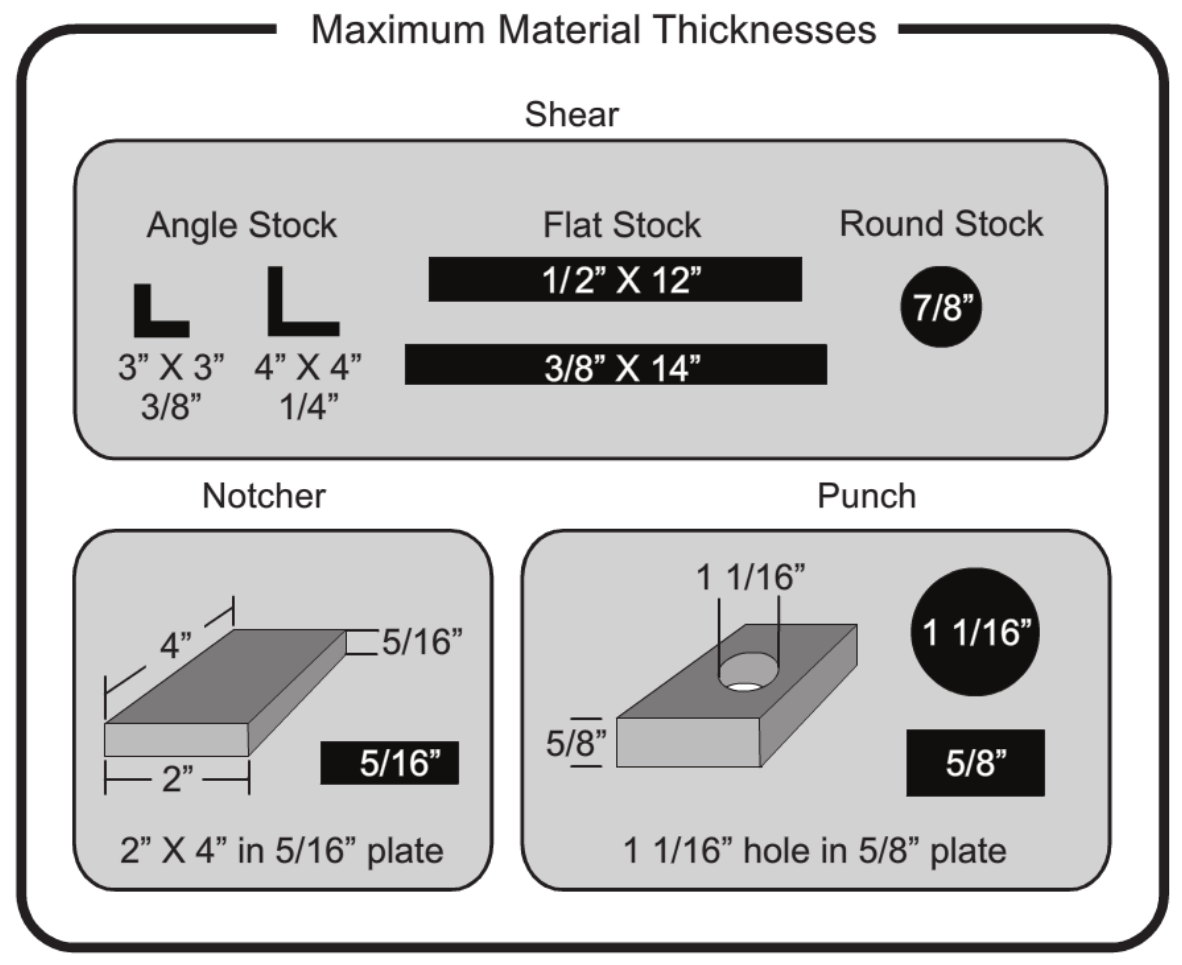](https://wiki.protohaven.org/uploads/images/gallery/2025-01/rQOimage.png)
### Controls
The ironworker controls are very basic. There is a start and stop button that turns the machine on and off. A footswitch actuates the movement of the machine. When the footswitch is depressed and held, the shear, punch and notcher run through one full cycle of movement. All three tools move simultaneously. Three different modes are available that can be selected when the machine is not running. The available modes are ironworker, accessory, and autocut.
#### Ironworker Mode
When the ironworker mode is selected the shear, punch, and notcher are available for use. This is the primary mode for the ironworker.
#### Accessory Mode
This mode is selected when the ironworker’s hydraulic tube and pipe bender attachment is used. The ironworker’s power is fed to the hydraulic bender and none of the ironworker’s tools (shear, punch, notcher) will move when the bender is in use.
#### Auto Cut Mode
The auto cut mode is used when an attachable auto cut device is used. The auto cut device plugs into the back of the machine and is used for shearing operations. It consists of a movable stop with a trigger. When the trigger is hit the ironworker will engage and cut the material at the desired length. This device is not currently available.
[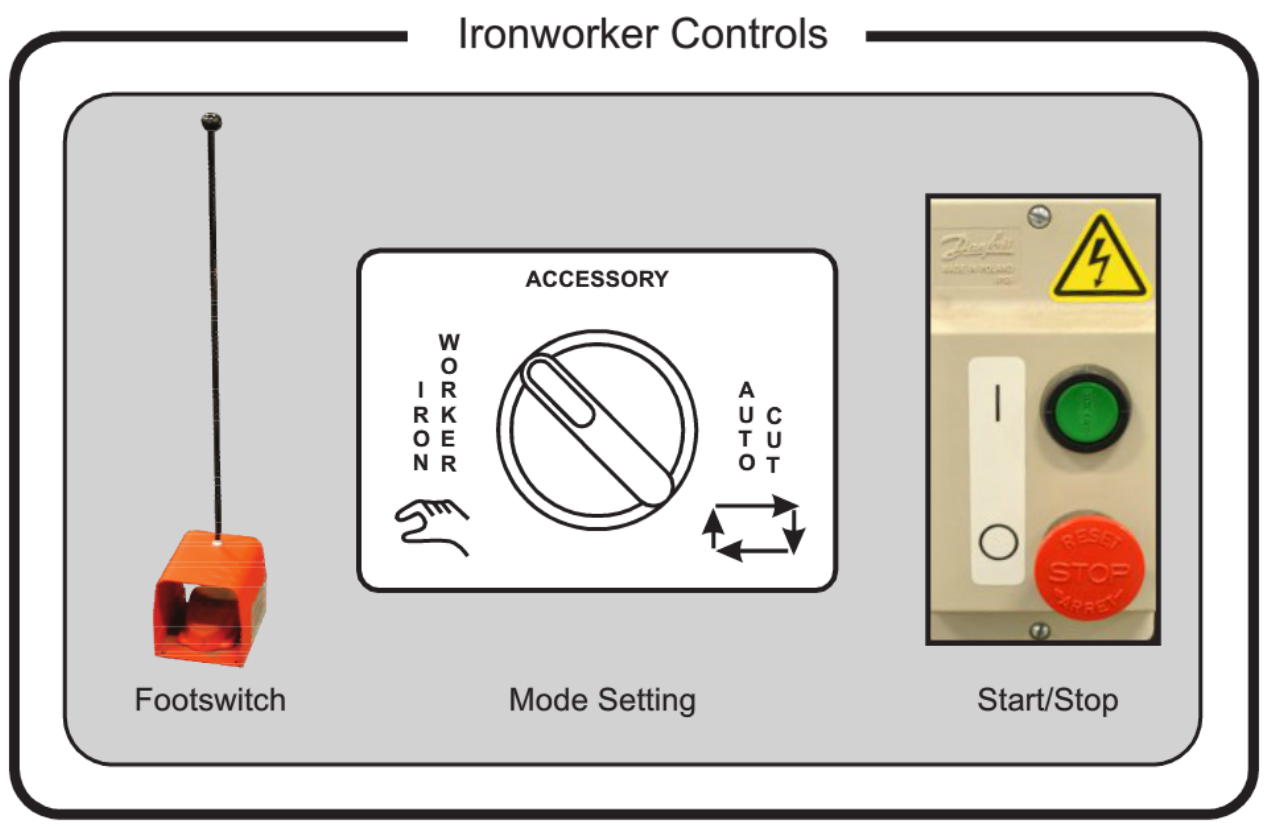](https://wiki.protohaven.org/uploads/images/gallery/2025-01/J6Mimage.png)
## Basic Operation
### Shear
The distance from the angle stock guard front face to the blade is 4 13/16” and the distance from the flat and round stock guard front face to the blade is 5 7/16”. Make sure to account for this distance when cutting your material by adding it to the length you desire to cut and then align your mark to the front face of the guard.
#### Cutting Flat or Round Stock
1. Mark material with sharpie or scribe at desired cut length.
2. Place material on bed.
3. Move material to desired location for cut.
4. Set guard to 1/32"-1/16” above material by turning the adjustment knob.
5. Turn machine ON by pressing the green button.
6. When hands are free of any pinch points and NOT located under your material depress the footswitch.
7. Release the foot pedal when the machine has completed one full cycle and the blades have returned to their starting position.
8. Turn the machine OFF by pressing the red button when all cutting is complete.
9. Dispose of any scrap material in the metal scrap bin.
#### Cutting Angle Stock
1. Mark material with sharpie or scribe at desired cut length.
2. Place material into angle stock slot.
3. Move material to desired location for cut.
4. Turning the adjustment knob until the tapered screw has made contact with the material.
5. Turn machine ON by pressing the green button.
6. When hands are free of any pinch points and NOT located under your material depress the footswitch.
7. Release the foot pedal when the machine has completed one full cycle and the blades have returned to their starting position.
8. Turn the machine OFF by pressing the red button when all cutting is complete.
9. Dispose of any scrap material in the metal scrap bin
### Punch
1. Use center punch to mark desired location of hole.
2. Place material on bed.
3. Move material to desired location for cut.
4. Set guard to 1/32°-1/16” above material by loosening the guard bolts, moving the guard and then re-tightening the guard bolts.
5. Turn machine ON by pressing the green button.
6. When hands are free of any pinch points and NOT located under your material depress the footswitch.
7. Release the foot pedal when the machine has completed one full cycle and the blades have returned to their starting position.
8. Turn the machine OFF by pressing the red button when all cutting is complete.
9. Dispose of any scrap material in the metal scrap bin.
**The punch can be very loud and startling to other members when in operation. Verbally notify other members when performing punching operations with large diameters.**
### Notcher
1. Draw desired cut on material with sharpie or scribe.
2. Place material onto the bed.
3. Set guard to 1/32”-1/16” above material by loosening the guard bolts, pivoting the guard to correct location and then re-tightening the guard bolts.
4. Turn machine ON by pressing the green button.
5. When hands are free of any pinch points and NOT located under your material depress the footswitch.
6. Release the foot pedal when the machine has completed one full cycle and the blades have returned to their starting position.
7. Turn the machine OFF by pressing the red button when all cutting is complete.
8. Dispose of any scrap material in the metal scrap bin.
# Pipe Bender Tool Tutorial
The tube and pipe bender is a quick-connect hydraulic tool that expands the capabilities of the Ironworker. It is designed for medium to heavy duty material, bends up to 2” (1.D.) Schedule 40 pipe, 2.5” (O.D.) tube and 2” square tube quickly and accurately.
[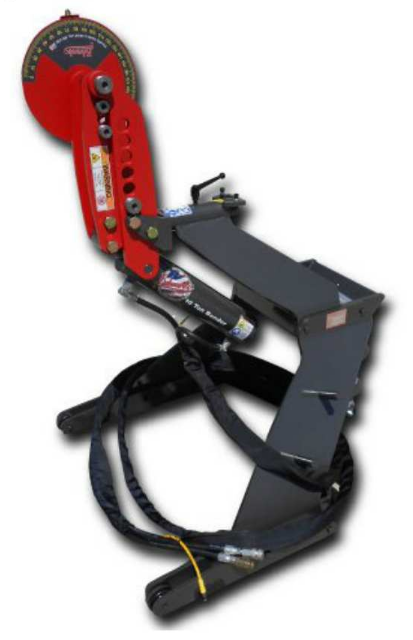](https://wiki.protohaven.org/uploads/images/gallery/2025-01/z8Himage.png)
### Pipe Bending
To bend pipe on the pipe bender you need to have the proper dies for the size pipe you want to bend. We currently have pipe dies for you to choose from.
[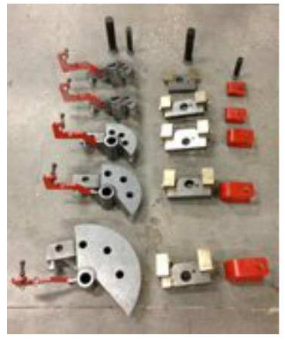](https://wiki.protohaven.org/uploads/images/gallery/2025-01/2gnimage.png)
### Connecting the Pipe Bender
Once you have rolled the pipe bender near the Ironworker you have to connect it to the Ironworker. There are three cables bundled together and then the remote. The male and female hydraulic connections go to their opposites and the remote cable goes in the top plug labeled accessory control. The yellow cable operates the limit switch you can set where you want your bend to stop, it plugs into the plug labeled limit switch.
[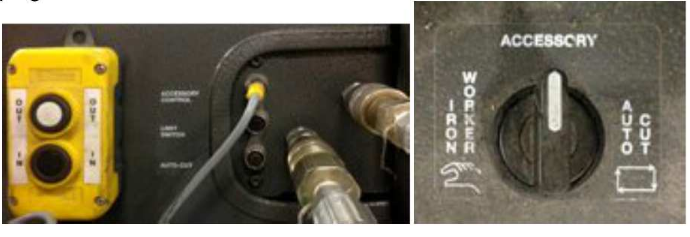](https://wiki.protohaven.org/uploads/images/gallery/2025-01/UVsimage.png)
### Setting up the Pipe Bender
After connecting the pipe bender to the Ironworker, it’s time to set up your bend. First, you need to find the right size die for your pipe.
[](https://wiki.protohaven.org/uploads/images/gallery/2025-01/bumimage.png)
Second, you need to decide if you are bending horizontally or vertically. There needs to be enough clearance around the bender for your material to move during the bend without hitting anything.
**NOTE:** If you have a long pipe you are bending there is more room for the end of the pipe if you bend it vertically towards the sky. Smaller length pipe that will not contact with the things sitting around the bender can be done horizontally.
Once you have chosen the correct size die for your pipe, start by putting the die on the bender with the large pin going through the arms of the bender and the center of your die.
[](https://wiki.protohaven.org/uploads/images/gallery/2025-01/Y0Eimage.png)
Next, take your backstop that matches the die and install it on the non-moving arm of the bender with another pin. Make sure that the screw is towards the bottom of the bender.
[](https://wiki.protohaven.org/uploads/images/gallery/2025-01/tGAimage.png)
Now you can slide your pipe into the bender between the die and backstop. The collar that holds the pipe goes on next using the short pin.
[](https://wiki.protohaven.org/uploads/images/gallery/2025-01/ydBimage.png)
**NOTE:** If you are making a bend at the end of a piece of pipe you want to make sure that it is even with the end
of the die.
Once the pipe is where you want it in the die, tighten down the set bolt with a 3/4” wrench. Do not over tighten the bolt.
[](https://wiki.protohaven.org/uploads/images/gallery/2025-01/PmRimage.png)
#### Making a Bend
The pipe bender has an angle finder to locate the degree bend you want to make. To make a 90-degree bend you are going to have to make two 45-degree bends using the step pin on the pipe die.
For your first bend line up the die on the angle finder to 0-degree.
[](https://wiki.protohaven.org/uploads/images/gallery/2025-01/ZpBimage.png)
Now press the remote OUT button to start the bend. When you reach the end of the first step, jog the bender back with the IN button to make it easier to remove the step pin. Now adjust the step pin to the next hole in the die to finish the 90-degree bend.
[](https://wiki.protohaven.org/uploads/images/gallery/2025-01/rWvimage.png)
To safely remove your pipe, jog the bender back using the IN button to relieve the pressure on the pipe. Remove the collar, step pin and backstop to remove your pipe.
The dies at Protohaven are for 90-degree bends. To make a 180-degree bend with these dies you must move the pipe forward after the first 90-degrees to ensure that you will not pinch the pipe on the die, which will make it almost impossible to remove the pipe from the bender.
**NOTE:** The minimum length of pipe to use on the bender is 15”.
# Industrial Metals - Surface Grinder
# Manual(s)
*Manuals and other reference materials from the manufacturer or other sources.*
# Member Notes
# Resources
*Where to obtain materials, consumables, and tooling.*
# Tool Tutorial
(Link to PDF Tool Tutorial)
# Machining - Manual Metal Lathe
Jet GH-1440W-3, Geared Head Lathe
Clearance: Required
# Manual(s)
*Manuals and other reference materials from the manufacturer or other sources.*
- [Manual Lathe Manual GH-1440W-3.pdf](https://wiki.protohaven.org/attachments/173)
##### Regular Maintenance
- Lubrication, manual p. 10
- Coolant Prep, manual p. 12
- Parts List & Exploded Views, manual p. 22-64
Technical Support: 1-800-274-6846
Replacement Parts: [https://store.jettools.com/metalworking.html](https://store.jettools.com/metalworking.html "https://store.jettools.com/metalworking.html")
# Member Notes
# Resources
*Where to obtain materials, consumables, and tooling.*
#### Where to buy consumables
McMaster-Carr is an easy (and incredibly fast) resource for lathe tools and raw materials. [https://www.mcmaster.com/](https://www.mcmaster.com/ "https://www.mcmaster.com/") (Part numbers are listed in the table in the consumables section)
#### Helpful Tutorials
How to use a live center: [https://www.youtube.com/watch?v=8x6maER5qr0](https://www.youtube.com/watch?v=8x6maER5qr0 "https://www.youtube.com/watch?v=8x6maER5qr0")
#### Speed Calculator
Spindle speeds can be calculated here. Look up the feet-per-minute speed for your material and then enter the diameter of your part to calculate how many rotations per minute it needs to spin. Remember to divide by 2 as these speeds will be ideal speeds for machinists under ideal conditions : [https://littlemachineshop.com/reference/cuttingspeeds.php](https://littlemachineshop.com/reference/cuttingspeeds.php "https://littlemachineshop.com/reference/cuttingspeeds.php") (More info in the Set Speed and Common Settings Sections)
# Supporting Long Stock
If you are using a long piece of stock on the metal lathe that extends through the headstock and then out into the walkway, make sure that the setup is secure and safe.
## Safety
If the workpiece is only supported at the chuck and extends far out behind the headstock, the unsupported part of the workpiece will drop off axis behind the headstock.
[](https://wiki.protohaven.org/uploads/images/gallery/2025-10/rZ6metal-lathe-off-axis-workpiece.jpeg)
[](https://wiki.protohaven.org/uploads/images/gallery/2025-10/metal-lathe-unsupported.jpeg)
Under rotation, the unsupported part of the workpiece will rotate off axis, and will develop a kink where it leaves the back of the head stock. The piece will bend out from the axis of rotation.
A bent workpiece will spin like a helicopter blade behind the headstock of the metal lathe. This is a massive hazard to anyone and anything in the vicinity of the metal lathe.
**Always secure long work pieces behind the headstock when using the metal lathe.** We want to support the workpiece so it stays centered on the lathe axis.
## Securing the Workpiece
To secure a long workpiece when using the metal lathe, you will need:
- a roller stand
- a large c-clamp
- optional: a rag
Secure the workpiece:
1. Use a roller stand to support the workpiece so that the workpiece is centered in the headstock, and parallel to the floor.
[](https://wiki.protohaven.org/uploads/images/gallery/2025-10/metal-lathe-supported.jpeg)
2. Lock the roller stand height.
3. Set up the roller stand so that the roller is skew from the workpiece.
[](https://wiki.protohaven.org/uploads/images/gallery/2025-10/Ozzmetal-lathe-workpiece-skew-on-roller.jpeg)
4. Use a c-clamp to keep the work piece from lifting off the roller stand, with light but positive contact on the top of the workpiece.
*Do not preload excessive force on the top of the workpiece.*
[](https://wiki.protohaven.org/uploads/images/gallery/2025-10/metal-lathe-c-clamp-on-roller.jpeg)
5. Rotate the stand so that the c-clamp keeps the work piece from drifting left or right across the roller, with light but positive contact on both sides of the workpiece.
*Do not preload excessive force on the sides of the workpiece.*
[](https://wiki.protohaven.org/uploads/images/gallery/2025-10/metal-lathe-c-clamp-snugged.jpeg)
6. *Optional:* lightly place a rag in the back of the headstock around the part to further dampen vibrations.
[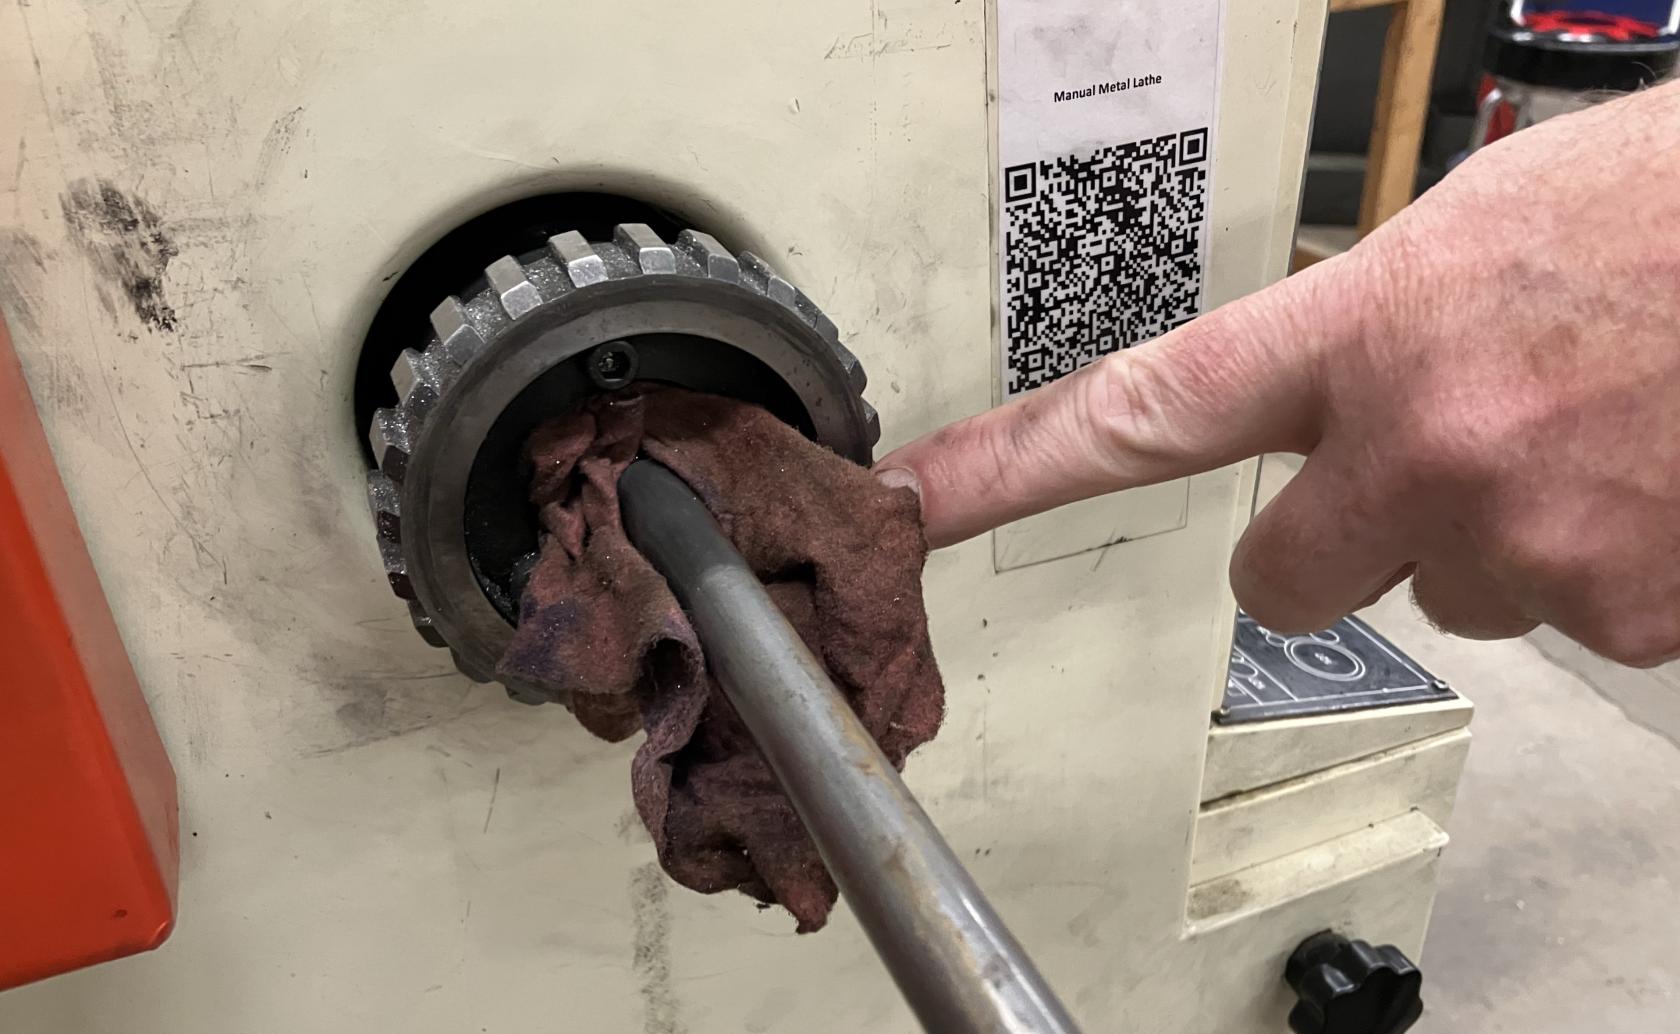](https://wiki.protohaven.org/uploads/images/gallery/2025-10/metal-lathe-additional-stabilization-with-rag.jpeg)
7. **Important Last Step:** Build a fort: place rolling carts around the area to keep other members from accidentally walking into the workpiece while the metal lathe is in use.
While workpiece is turning, monitor the roller stand to make sure that the workpiece does not walk too far off axis, or there is a danger of the workpiece working out of the c-clamp.
# Tool Tutorial
### Manual Metal Lathe
The lathe is used to make parts with radial symmetry and can be used to make incredibly precise cuts in most metals and plastics (accurate to the .001 inch!). It is a joy to operate, but it must command your full attention.
Never leave the key in the chuck. The key in the chuck without a hand touching it is not ok.
Never set the speed while the machine is running.
Wear appropriate PPE
Avoid crashing the tool holder into the chuck.
Ensure all tooling and fixtures are secure before powering on.
Clean the ways and the mating surfaces before and after chuck changes.
### Tool Anatomy
[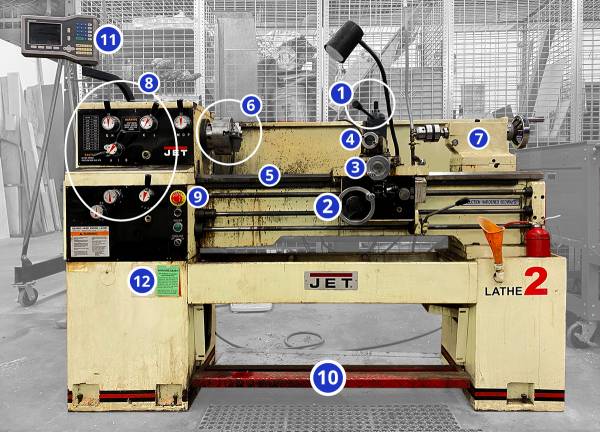](https://protohaven.org/wiki/_detail/tools/metal_lathe_1.jpg?id=tools%3Ametal_lathe%3Astart "tools:metal_lathe_1.jpg")
1.
Tool Post - Securely holds cutting tools and allows their angle to be adjusted
2.
Carriage - Moves tools toward/away from the workpiece on the z axis
3.
Cross slide - Moves tools toward/ away from the workpiece on the x axis
4.
Compound slide - Additional axis that can be set an an angle to move the tool in an additional direction (usually for cutting tapers)
5.
Ways - the rails on which the carriage, cross slide and compound slide move
6.
Three jaw chuck - Holds the workpiece and spins with the spindle.
7.
Tailstock - Holds drills and live center
8.
Control Panel - Adjust speeds, feeds, and e-stop
9.
E-Stop Button - Cuts power to the machine in an emergency (also important to press if working with hands on/in the jaws or spindle)
10.
Emergency Foot Brake - Cuts power to the machine in an emergency
11.
Digital Readout - Provides precise position of the carriage and the cross slide
12.
Maintenance Tag - Manually tracks the usability status with color-coded cards
#### Control Panel
[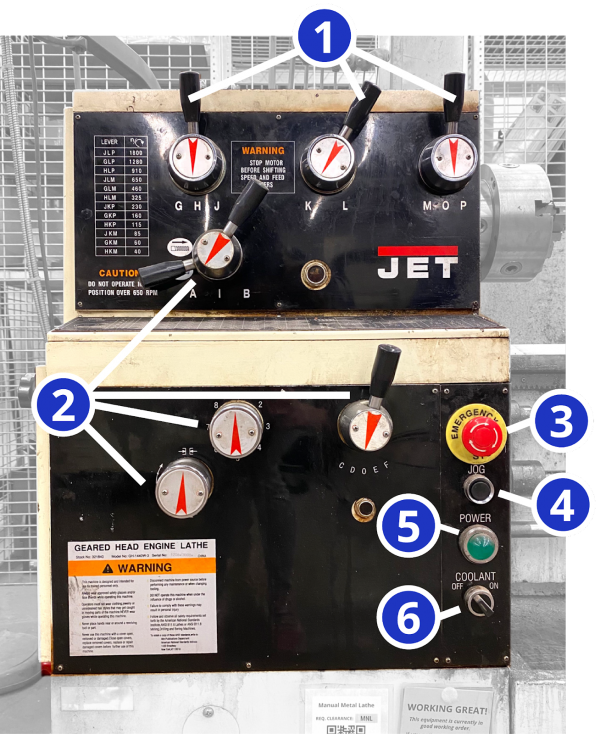](https://protohaven.org/wiki/_detail/tools/metal_lathe_2.png?id=tools%3Ametal_lathe%3Astart "tools:metal_lathe_2.png")
1.
Speed Adjustment Levers - Set the speed at which the chuck spins
2.
Feed Adjustment Levers - Set the speed at which the autospeed moves the carriage or cross slide.
3.
E-Stop Button - Cuts power to the machine in an emergency (also important to press if working with hands on/in the jaws or spindle)
4.
Jog Switch - Press and release to advance spindle momentarily (Currently does not function)
5.
Power Indicator Light - illuminated whenever lathe has power
6.
Coolant On-Off Switch - turns coolant pump on and off (Currently does not function)
### Tool Checklist
-
On the lathe top
-
Chuck Key
-
1/2“ wrench
-
3/4” wrench
-
1-1/8“ wrench
-
Chip brush
-
Oil
-
Cutting Fluid
-
In the tool cabinet
-
Carbide facing / turning tool
-
Parting off tool
-
Drill chuck
-
Center drills / drills
-
Boring bar
-
Live Center
### Tool Safety
The lathe is a joy to operate, but it must command your full attention. Keep in mind that it can shred steel (which is much harder to shred than humans). It is powerful and can result in serious injury if used improperly.
At the manual lathe safety glasses and closed-toed shoes are also required.
All hair, clothing and accessories should be secured close to the body. Necklaces, hoodie drawstrings, hair, etc. can all be pulled into the machine resulting in injury or death. Roll up sleeves and tie back long hair.
Do not wear gloves or rings when working on the lathe. Much like loose clothing, these can get pulled into the lathe, resulting in serious injury or death.
#### Common Hazards
1.
**The lathe can drag the user in by getting hair, clothing and accessories wrapped around the work piece or chuck.**
-
Always secure dangling clothing, hair and accessories.
-
Remember to roll sleeves securely to elbows
-
Never wear gloves while operating
2.
**Pieces of the workpiece are cut away in spiraling chips. These chips can be sharp and hot. They can also wrap around the chuck and workpiece creating a swirling tornado of sharp metal if not cleared away often enough. That tornado can cut you or worse, catch on your clothing or hair and pull you into the lathe.**
-
Always wear safety goggles and [appropriate PPE](https://protohaven.org/wiki/tools/start#personal_protective_equipment "tools:start")
-
Practice good chip management!
-
Break chips frequently by briefly pausing the cut.
-
Clear chips away from the chuck and push down to the chip tray.
3.
**The lathe operates using high torque. Unsecure objects (like if the chuck key is left in the chuck!) can be flung out of the machine at high speed or dragged into the rotation, possibly resulting in injury or death.**
-
**NEVER LEAVE THE CHUCK KEY IN THE CHUCK**
-
Never reach over the chuck or lean on the machine
-
Never turn the lathe without something gripped in the chuck
-
Wait for the spindle to stop before releasing your focus
#### General Safety Precautions
1.
Note that the lathe has two emergency stops: [the button and the foot pedal](https://protohaven.org/wiki/tools/start#tool_anatomy "tools:start"). Activating these stops will cut power to the machine, but ***will not stop it immediately***. The lathe has considerable momentum and it will continue to spin for several seconds after the stop has been activated.
2.
Keep the E-STOP engaged when you are installing your workpiece or tools. You don’t want the machine to start if your hands are in it.
3.
Never turn the lathe without something gripped in the chuck. Make sure all three jaws of the chuck are closed on the workpiece. ***Keep as little material as possible exposed***. It will reduce bending and vibration. If you must have a large amount of material exposed, consider using the [live center](https://protohaven.org/wiki/tools/metal_lathe/start#live_center "tools:metal_lathe:start ↵") to help support your workpiece.
4.
Wait for the spindle to stop before speaking to the operator.
5.
Look and listen. If something seems weird, it is weird. Stop and reassess if you hear screeching, thumping or vibrating, or smell something smoky or burning.
### Materials
#### Allowed Materials
General Use Materials that are permitted for use on the equipment. Use of tool-safe materials outside of that scope would require a Special Setup arrangement with staff in advance of your visit.
-
Non-hardened metals
-
Mild Steel
-
Aluminum
-
Stainless Steel (with lots of cutting fluid - can easily work-harden)
-
Brass
-
Delrin
-
Machinable Wax
#### Prohibited Materials
-
Hardened Steel - Do not cut hardened steel on the lathe (it is harder than your cutting tool)
-
Wood - Do not cut wood on the metal lathe as there is a more appropriate lathe available in the woodshop.
### Tool Care
#### Initial Setup
1.
**Secure** clothing and hair / remove accessories / put on safety goggles
2.
**Check** that all tools are present
3.
**Clean** the ways and mating surfaces
4.
**Oil** the ways
5.
**Ensure** the chuck is tightly attached to the spindle
6.
**Unlock** the E-stops
7.
**Set** speed
8.
**Load** the workpiece keeping as little material as possible exposed, use a live center if a large amount of exposure is necessary.
9.
**Remove the chuck key**
10.
**Power on** the machine and begin operation
#### Consumables
Cutting tools are considered consumables. You may find cutting tools already installed on the tool block, but they may become dull and need replacing. You may want to purchase your own set of the following:
-
Carbide insert for facing / turning [1691N59](https://www.mcmaster.com/1691N59 "https://www.mcmaster.com/1691N59")
#### Clean Ways & Mating Surfaces
Dirty ways can get scratched which will prevent the lathe from moving smoothly/accurately. Always brush off any chips that are on the ways (the rails that the tool carriage, cross slide and compound slide ride on).
When installing a chuck, make sure to clean all visible mating surfaces. If it is a shiny surface (not painted or black), it needs to be cleaned before starting.
Hit the e-stop to prevent the machine from turning on with your hands in it. Use the chip brush or your fingers to gently remove any chips that are in the spindle or on any of the mating surfaces.
#### Oil the Ways
Oiling the ways keeps the machine moving smoothly and accurately. The ways should be oiled each time you set up the machine, and any time during operation that you notice that the ways do not have a coating of oil.
There should be a can of oil at the lathe labeled “Ways Oil”. This oil is quite viscous and sticky, and is designed not to drip off of surfaces to which it is applied. Please leave this oil at the machine, and do not use other oils on the ways.
There are small brass inserts with a spring-loaded ball bearing on the carriage(2) and cross slide(3). Push the tip of the oil can against the ball bearing until the tip rests firmly inside the depression. Pump the oil can’s handle until two squirts of oil have been put in. This fills an internal reservoir that will continually lubricate the ways as you move the carriage and cross-slide during your turning operations.
If chips build up on the ways, please wipe them off to prevent scratching and premature wear to the ways.
#### Secure the Chuck
The three jaw chuck is the fastest and easiest way to hold onto parts. If the workpiece is very small or requires high precision, the collet chuck may be preferable.
The chuck is secured using three retained bolts (they cannot be removed).
1.
Ensure the hatch line on each bolt is between the two Vs etched on the chuck as shown below. If it is not between the Vs it is not tight.
2.
It is good practice to loosen and tighten each of the three bolts before beginning use even if they look tight at first glance. Trust, but verify!
Never turn the lathe without something gripped in the chuck.
Always ensure that all three jaws of the chuck are closed on the workpiece. Keep as little material as possible exposed. It will reduce bending and vibration.
If you must have a large amount of material exposed, use the live center to help support your workpiece.
#### Set The Speed
The speed of the lathe should be set according to the material you are cutting, the size of the material, and what type of cutting tool you have (carbide or HSS).
Never change the speed while the machine is running.
The recommended settings should be considered upper limits. There is nothing wrong with cutting at lower speeds as you get the feel for it.
Select your speed (see common settings) and finding the closest match on the table located on the upper left portion of the lathe:
[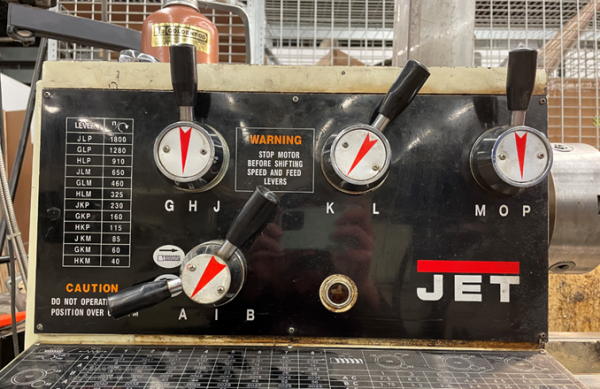](https://protohaven.org/wiki/_detail/tools/metal_lathe_4.png?id=tools%3Ametal_lathe%3Astart "tools:metal_lathe_4.png")
Turn the top three knobs to match the letters indicated by the table. The lathe is set to 115 Rotations Per Minute (RPM) with the knobs set to HKP. (Note O indicates neutral and the lathe won’t spin if the third knob is set to O).
### Common Settings
The turning speed of the lathe depends on the material you are cutting and the diameter of the workpiece. Large workpieces need slower speeds because their surfaces move faster relative to the cutting tool. Soft materials can be cut quickly, but hard materials should be cut slower.
A few example speeds for common materials and diameters are listed below: (all assuming a High Speed Steel (HSS) cutting tool)
Diameter
Ideal Speed for aluminum (RPM)
Recommended speed (RPM)
Ideal Speed for Steel (RPM)
Recommended
¾ inch
2546
1273
407
204
1 inch
1910
955
306
153
2 inch
955
477
153
76
3 inch
700
350
102
51
Note the recommended speed is ½ of the ideal speed. The ideal speed is what would be used by a machinist if they had a coolant flow, sharp cutting tools, etc. For most hobbyists the ideal speed is much higher than needed. You can always run the tool slower if you feel intimidated at higher speeds.
See additional resources to find a [speed calculator](https://littlemachineshop.com/reference/cuttingspeeds.php "https://littlemachineshop.com/reference/cuttingspeeds.php") for different materials or diameters.
Remember: You can always turn slower than the calculated speed!
### Basic Operation
#### Operation Checklist
1.
**Setup**
2.
**Power on** the machine, leaving the **E-Stop engaged**
3.
**Set** the direction of rotation
4.
**Load** and align tooling
5.
**Set** the origin
6.
**Twist** E-Stop button to enable the lathe (lifting the emergency stop pedal with toe if it still does not start)
7.
**Begin** cutting
8.
**Cleanup**
#### Set Rotation Direction
[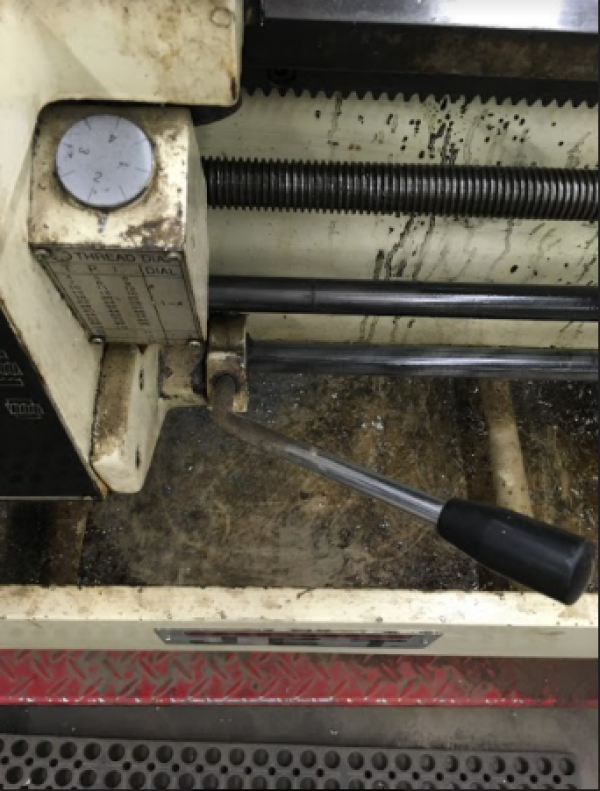](https://protohaven.org/wiki/_detail/tools/metal_lathe_5.png?id=tools%3Ametal_lathe%3Astart "tools:metal_lathe_5.png")
This lever on the lower right of the carriage acts as the power switch for the spindle. To turn the machine on, push the handle slightly towards the tail stock to unlock it from its off position, then move it up or down to turn the spindle on in the desired direction. Release the handle when you have moved it to its full extent and the machine has turned on. If the machine does not turn on, return it to its off position and check the e-stop and foot pedal switch.
To make the jaws spin **toward you**, lift up on the spindle control handle.
To make the jaws spin **away from you**, push down on the spindle control handle. For the vast majority of operations you will lift up. You want the material you are cutting to come down onto the cutting tool where the cutting surface is sharp.
To stop the spindle, move the handle to its off position without pushing the handle in towards the tail stock. It will naturally fall into its locked off position.
**Never** move the lever from one direction to the other without first moving the lever to its off position and waiting for the spindle to come to a complete stop.
This lever should be used to stop the lathe during normal, non-emergency usage instead of the e-stop.
#### Load Tooling
Select your tool and tool holder. There are tool holders with tools already installed in the black drawers. Be sure to check that the tool is securely attached by the screws in the tool holder. Don’t assume the person before you installed them correctly.
Once the tool is inserted into the tool holder, load the tool holder onto the tool post shown below:
[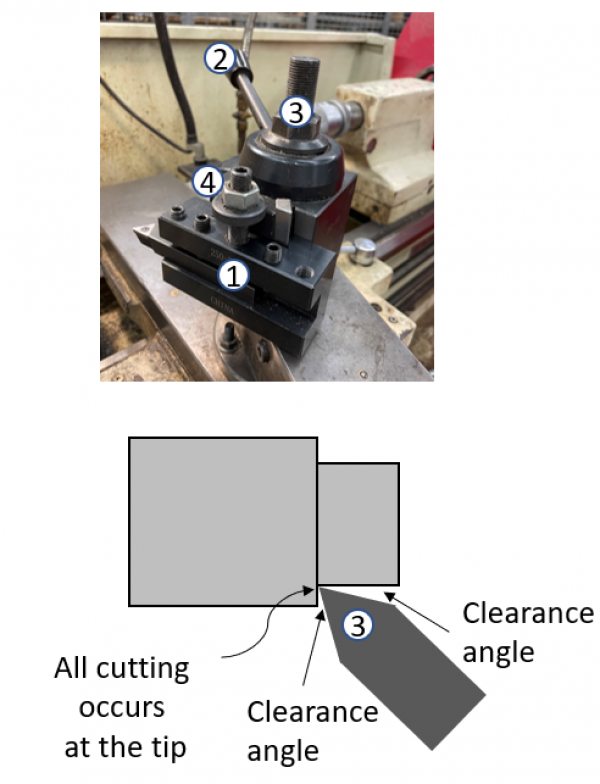](https://protohaven.org/wiki/_detail/tools/metal_lathe_6.png?id=tools%3Ametal_lathe%3Astart "tools:metal_lathe_6.png")
#### Tool Post Setup
1.
Place the tool holder onto the dove tail of the tool post.
2.
The locking handle tightens the dove tail to hold the tool holder in place. Leave it loose when starting setup.
3.
Set the angle of the tool tip by loosening the top bolt, moving the tool block and retightening. Be sure there is clearance at the front and back of the cutting tool for chips to evacuate. All cutting should occur at the tip, not on the sides of the cutting tool.
4.
Set the height of the cutting tool by adjusting the thumb screw and locking it in place with the top nut.
5.
Lock the tool holder into position using the lock handle.
#### Checking Tool Height
1.
Move the carriage up to your workpiece and set the height as close to the center of your part as you can.
2.
Lock it down using the lock nut and the dovetail lock handle.
3.
Start the machine at a low speed and face a tiny bit of material off the front of the workpiece. If you are high or low you will see a “belly button”.
4.
Adjust your tool up or down depending on the location of the belly button relative to the cutting tool.
5.
Keep adjusting until the tool is centered and no detectable belly button appears. (Remember that the height of your tool will change slightly after you lock down the dove tail, so you may need to adjust a couple of times.)
#### Set the Origin
The digital readout can be used to provide an accurate measurement of the position of the carriage and the cross slide. It has lots of functions, but setting the tool position to zero is the most important. To set the zero position of the carriage and cross-slide, follow the following steps:
[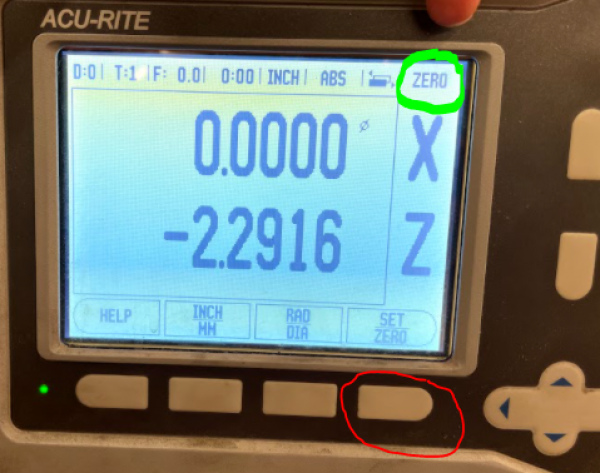](https://protohaven.org/wiki/_detail/tools/metal_lathe_7.png?id=tools%3Ametal_lathe%3Astart "tools:metal_lathe_7.png")
1.
Make sure the readout is in *zero mode*. The top right of the screen should say “zero.” If it says “set” instead, hit the mode button (circled in red) until the top right reads “zero.”
2.
Move the carriage and cross slide to your desired zero point and hit the set buttons (circled in blue) to set their positions to zero. (Carriage is Z and the cross slide is X.
3.
If the screen looks as it does below, hit “no ref”.
[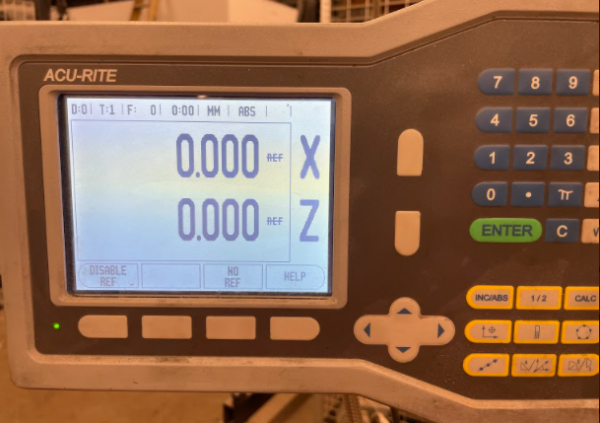](https://protohaven.org/wiki/_detail/tools/metal_lathe_8.png?id=tools%3Ametal_lathe%3Astart "tools:metal_lathe_8.png")
### Types of Operations
#### Facing
Facing is the act of creating a flat surface on the front of the workpiece or a shoulder along its length.
[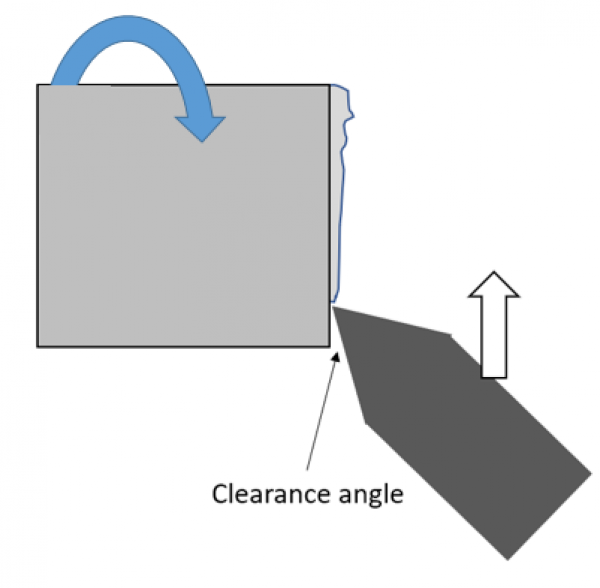](https://protohaven.org/wiki/_detail/tools/metal_lathe_9.png?id=tools%3Ametal_lathe%3Astart "tools:metal_lathe_9.png")
1.
Touch off on the front of your part
2.
Back off using the cross slide
3.
Move in .020” or so on the carriage
4.
Set Z0 on the digital readout
5.
Slowly move the cutting tool across the face until you reach the center
6.
Back off using the carriage so you don’t ruin your surface finish by tracing back over the part (only on the finishing pass)
7.
If facing to check for centering:
-
Check the front of your workpiece for an “outie belly button.”
-
If there, move your tool up to the belly button to see if it is high or low.
-
Adjust the nut accordingly and repeat.
#### Turning
Turning is performed to change the diameter of the workpiece with high precision.
[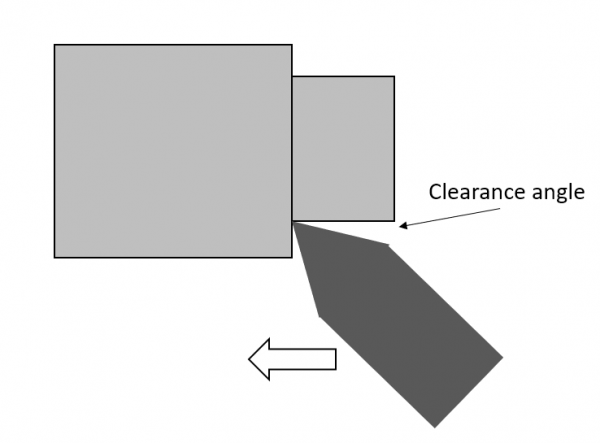](https://protohaven.org/wiki/_detail/tools/metal_lathe_10.png?id=tools%3Ametal_lathe%3Astart "tools:metal_lathe_10.png")
1.
Touch off on the side of your part
2.
Back off using the carriage
3.
Move in .020” or so on the cross slide
4.
Set X0 on the digital readout
5.
Slowly move the cutting tool across the outer diameter until you reach the end of your shoulder.
6.
Back off using the cross slide so you don’t ruin your surface finish by tracking back over the part. (This will also face the front edge of the shoulder)
#### Chamfering
[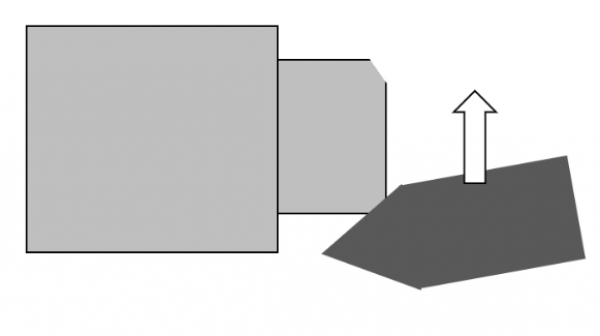](https://protohaven.org/wiki/_detail/tools/metal_lathe_11.png?id=tools%3Ametal_lathe%3Astart "tools:metal_lathe_11.png") Chamfering creates a slanted edge on the face of your part. It is useful for breaking sharp edges and for making parts that insert into holes more easily without jamming.
Chamfering differs from facing and turning because it uses the side of the cutting tool rather than the tip. Adjust the angle of your tool block and drive the cutting tool across your workpiece using the cross slide.
#### Drilling
[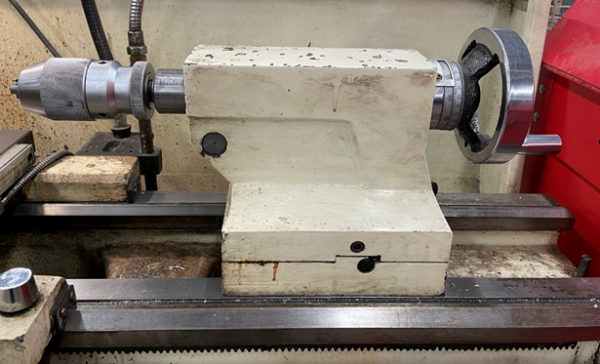](https://protohaven.org/wiki/_detail/tools/metal_lathe_12.png?id=tools%3Ametal_lathe%3Astart "tools:metal_lathe_12.png")
1.
To insert drill chuck: extend the tailstock out past the 10 mark
2.
Push the drill chuck in a make sure it is secure (rotate it if it doesn’t slide all the way in)
3.
Do not retract past the 10 mark or it will eject the chuck
4.
Slide the tailstock up close to your part and lock it into position using the handle on the back side. If you don’t lock it down, the tail stock may slide backwards as you drill.
5.
Always drill with a center drill first. This will keep your drill in the center of your part. If you don’t use a center drill, your drill may walk and damage the part or break the drill.
6.
Drill with a **pecking motion** to clear chips and allow the workpiece and drill to cool. (keep an eye out for little pieces of chips welded to the drill. Stop and chip them off if you see them) Be sure to bring the drill all the way out of the workpiece when you peck to clear chips and allow the bit to cool. Cutting fluid is highly
recommended for any metal, but absolutely essential for steels.
#### Tapering
[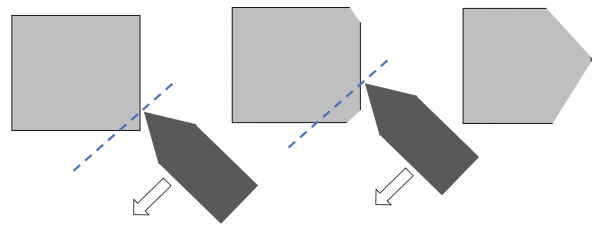](https://protohaven.org/wiki/_detail/tools/metal_lathe_13.png?id=tools%3Ametal_lathe%3Astart "tools:metal_lathe_13.png")
Tapering allows you to create an angled cut on your part. It is similar to turning and facing in that the cut is performed with the tip of the cutting tool. The main difference is that the cut is performed using the compound slide.
1.
Set the angle of the compound slide
2.
Move the tool in just past the outer diameter
3.
Use the compound slide to make a cut
4.
Retract the compound and move in with the cross axis.
5.
Repeat until your final cut at which point you will retract with the man carriage away from your part to protect the finish.
#### Parting Off
[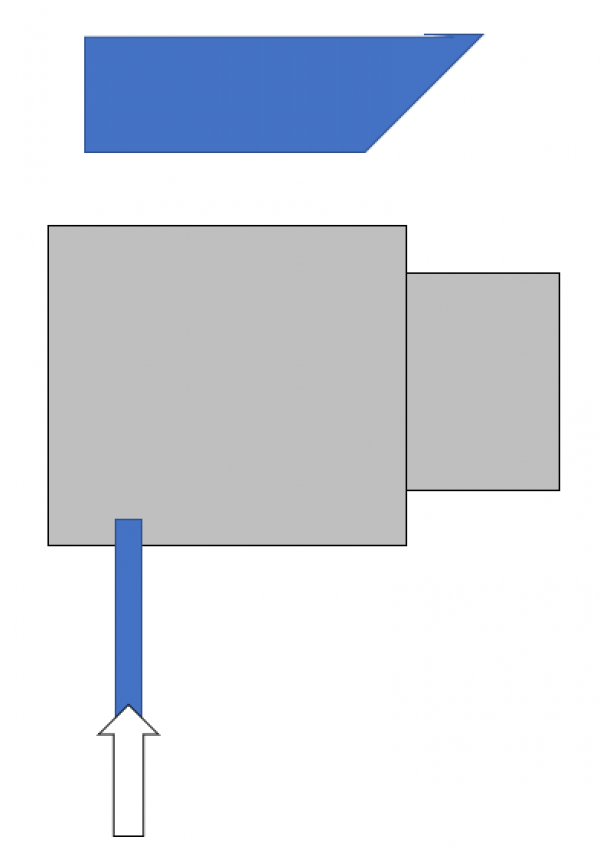](https://protohaven.org/wiki/_detail/tools/metal_lathe_14.png?id=tools%3Ametal_lathe%3Astart "tools:metal_lathe_14.png")
Parting off requires a specific tool and allows you to cut parts to a very accurate length.
1.
Load the cut-off tool into the tool post
2.
Loosen the tool post and use the flat front of the 3 jaw chuck to square the cut-off tool to the spindle.
3.
Tighten down the tool post when there is no gap between the front of the jaws and the tool
4.
Touch off on the front side of your part and set the zero position on the digital readout.
5.
Move the cutting tool to your cutting position. Remember the cut-off tool is 0.125” wide, so move the axis an extra 1/8” to make your part the right length
6. **Set the speed appropriately for the parting tool** - a good rule of thumb is 30-40% of the "nominal" turning RPM you'd use for a turning operation.
7.
Slowly drive the tool into your part using the cross slide (1/4 the speed you would use to face or turn)
8.
Remember to back off occasionally to clear chips and cool the tool. Cutting fluid is strongly recommended.
### Cleanup
#### Cleanup Checklist
1.
Power off the lathe
2.
Return all tools
3.
Brush chips from top to bottom
4.
Empty the chip tray by removing and dumping and/or vacuum it out
5.
Wipe all chips and debris from mating surfaces (includes ways and inside the chuck attachment if you used the collet attachment)
6.
Oil the ways
7.
Ensure 3 jaw chuck is secured
8.
Ensure all axes are unlocked
9.
Unlock the Estop
10.
Note any maintenance needs or concerns on the tag and at [protohaven.org/maintenance](https://wiki.protohaven.org/protohaven.org/maintenance)
### Troubleshooting
#### The machine doesn’t turn on
##### The e-stop is engaged
1.
Twist the E-stop button until it pops
2.
Lift the E-stop foot pedal with your toe and try to turn the machine on again
##### The power button on the back is off
1.
Turn on the power switch on the back of the machine.
#### The cut has a poor finish (wavy)
##### The speed of the jaws is too low compared to your tool’s travel speed
1.
Move the carriage or cross slide slower
2.
Speed up the spindle
##### The work piece is deflecting
1.
Too much material is out of the chuck—shorten up. If not possible, use a live center to support the part.
2.
Make smaller cuts to reduce the force on the workpiece
#### The spindle won’t move when you lift the spindle control handle
##### The spindle is not in gear
1.
Move the speed selection knobs and make sure you hear/feel them click into place. If they don’t click, rotate the jaw while turning the knobs. (never change speed while running the spindle)
##### The E-STOP is on
1.
If no electrical activity is heard the handle is lifted, the e-stop is on.
2.
Twist the E-STOP button and release the emergency stop pedal
##### The power button on the back is off
1.
Press the power button on the back of the machine
### Special Setups
#### Collet Chuck
When cutting very small diameter material, or when extreme precision is needed, it may be beneficial to use the collet chuck as opposed to the three jaw chuck.
#### Live Center
When cutting long material, the end of the workpiece will need to be supported to prevent bending. This will require drilling a small hole in the end of the workpiece, installing a live center into the tailstock, and inserting the live center into the hole. [Check out a video on the subject](https://www.youtube.com/watch?v=8x6maER5qr0 "https://www.youtube.com/watch?v=8x6maER5qr0").
# Machining - Manual Mill
# Manual(s)
*Manuals and other reference materials from the manufacturer or other sources.*
- *[Manual Mill-M\_690182\_JTM\_4VS\_Turret\_Mill\_\_\_Rev\_J1\_2e0a.pdf](https://wiki.protohaven.org/attachments/172)*
*Wizard 411 DRO Manual*
- *[Wizard\_411\_Manual\_ATA.pdf](https://wiki.protohaven.org/attachments/345)*
# Member Notes
# Resources
*Where to obtain materials, consumables, and tooling.*
- *[http://www.mcmaster.com/](http://www.mcmaster.com/) McMaster-Carr. Metals, plastics, tools, industrialsupplies, much more*
- *[http://www.grainger.com/](http://www.grainger.com/) Grainger Industrial Supply. Tools, industrial supplies and more*
- *[http://www.onlinemetals.com](http://www.onlinemetals.com) Online Metals.com. Metals and plastics*
- *[http://www.use-enco.com/](http://www.use-enco.com/) Enco. Metals, plastics, tools, industrial supplies, much more*
- *[http://www.whitney-tool.com/html/calculatorSpeedFeed.html](http://www.whitney-tool.com/html/calculatorSpeedFeed.html) Whitney Tool Company. Speed and feed calculator*
- *[http://www.custompartnet.com/calculator/milling-speed-and-feed](http://www.custompartnet.com/calculator/milling-speed-and-feed) Custom Part Net Milling. Speed and feed calculator*
- *[http://www.essortment.com/home/powertoolsuse\_slzc.htm](http://www.essortment.com/home/powertoolsuse_slzc.htm)*
- *[http://www.nmri.go.jp/eng/khirata/metalwork/index\_e.html](http://www.nmri.go.jp/eng/khirata/metalwork/index_e.html)*
# Tool Tutorial
### JET Vertical Mill
Loose clothing should not be worn around the mill. ABSOLUTELY NO GLOVES may be worn while operating the mill: this includes latex, nitrile, vinyl, and similar gloves. Any jewelry on the hands or wrists must taken off while using the mill. Long sleeves should be rolled up and secured past the elbows. Long hair must be pulled back and secured. Watch out for loose clothing or loose jewelry
Never leave the wrench on the draw bar for any length of time - this becomes a projectile hazard.
Never lean on the machine. Always keep your weight back.
Watch out for chips. The mill may produce long ribbon-like metal shavings that can cut you or pull you into the machine. Consult a shop tech if you are continuously getting long hazardous chips.
The mill, as well as the metal lathe, can be thought of as one of the two basic machines of a machine shop. From these two machines nearly infinite number of parts can be made. While the mill is used primarily for making parts with flat sides and angles, it can be used for much more. Mills can come with a variety of attachments and tooling to do many things, from boring large holes to making
gears.
A milling machine is used to machine surfaces so they are flat and have precise dimensions, to cut slots and voids, and to even drill holes to precise depths. When using a milling machine for general operations, you clamp your work piece securely to the table with the machinist’s vise or special clamps and as your work piece is moved by the table relative to the end mill which is being spun by the milling machine’s spindle motor.
[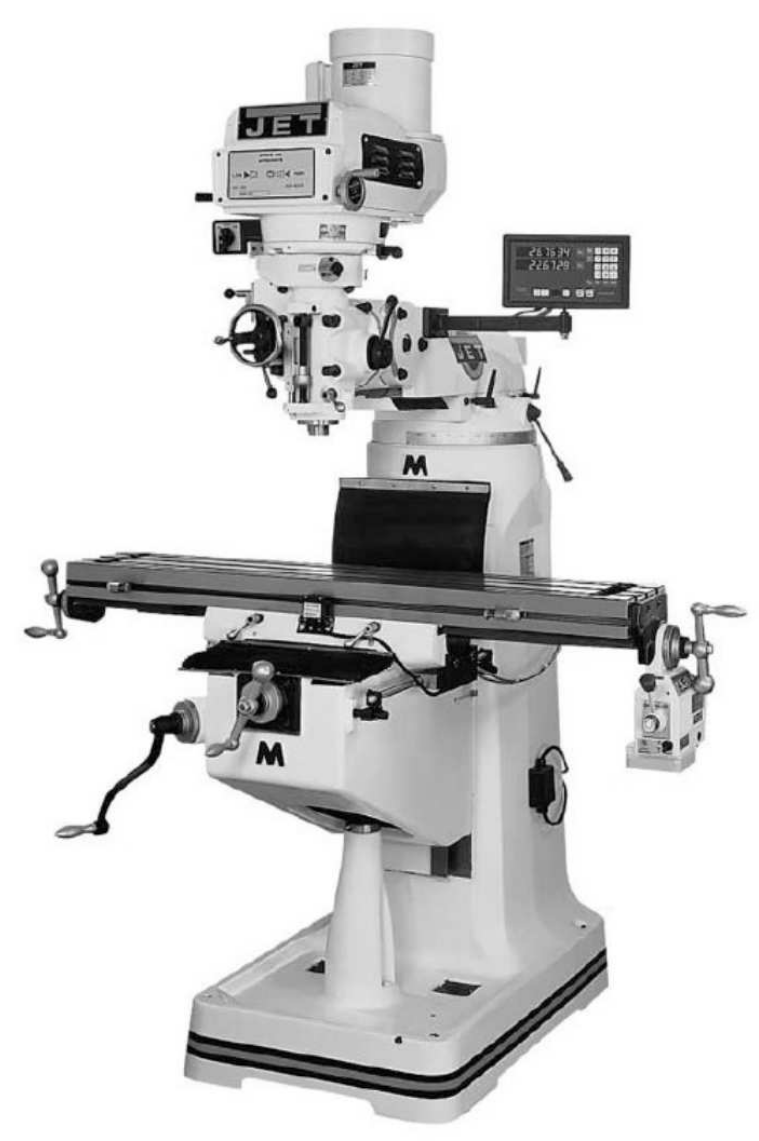](https://wiki.protohaven.org/uploads/images/gallery/2025-01/P3zimage.png)
### Equipment Controls
The primary controls you will use on the mill:
- Speed adjustment mechanism
- Table X axis wheel (left to right)
- Table Y axis wheel (backward and forward)
- Table Z axis crank or knee crank (up and down)
- Power control (turns the mill on and off)
- Spindle (quill) lever (lowers the spindle and quill like a drill press)
- DRO (digital read-out) zeroing buttons
#### Specifications
- Table size: 9" x 49"
- Longitudinal table travel, maximum: 34"
- Number of T-slots: 3
- T-slot size (W x D): 5/8" x 3/4"
- T-slot centers: 2-1/2"
[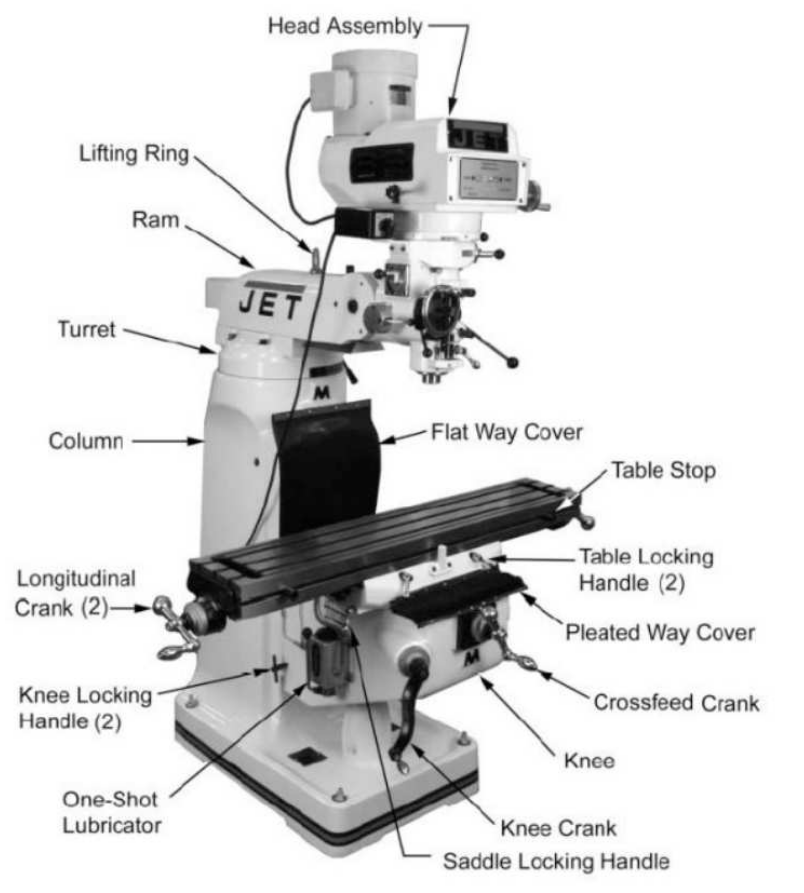](https://wiki.protohaven.org/uploads/images/gallery/2025-01/iPlimage.png)
#### Head Assembly
The head assembly of the mill contains several controls; most important to know are the speed adjustment and the hand quill feed. Many mills adjust their RPM using stepped pulleys and a high and low gear. Some may also have a high and low motor speed. Some mill heads do not have stepped pulleys but instead have a variable speed adjustment. Stepped pulleys are changed when the machine is off; variable speed heads have their speed adjusted while the machine is on. All mills have a high and low gear. Gearing is
changed only when the machine is off and are done per machine instruction.
When you switch gears, the spindle of the mill will turn in the opposite direction it did before. For this and several other reasons, the motors in mills can be run in both directions. Some mills say Forward and Reverse while others say nothing. Always make sure the cutter is turning the right way when you turn on the machine.
Further down the head is a lever that resembles the lever of a drill press. This is the quill hand feed, or coarse feed handle, and it serves the same purpose on the drill press. This allows you to bring the quill up and down. Notice that a metal ring moves up and down when this is done. This is the quill stop and can be used to set the height of the quill. A little further down is a small lever, the
quill lock, which locks the quill in whatever position you have it. The quill should always be lock engaged (locked) when you are milling.
[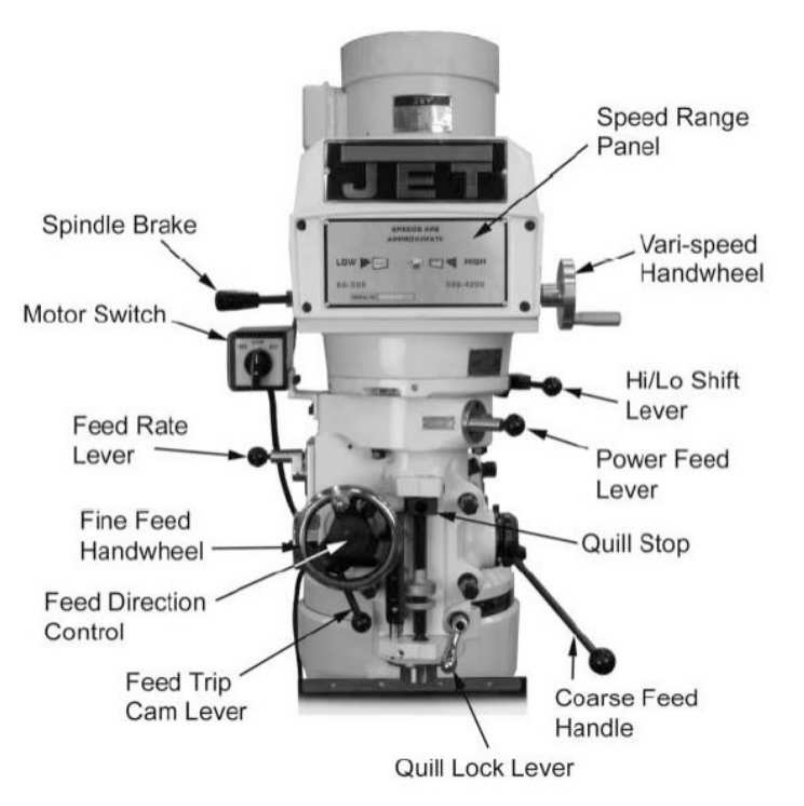](https://wiki.protohaven.org/uploads/images/gallery/2025-01/l4Bimage.png)
#### Table
The mill has a large T-slot table upon which all work is attached. It is common to hold small work to a precision vise mounted on top of the table. Pieces clamped to the table are done using T-nuts and hold-down clamps available in the machine shop. A sacrificial piece should always be placed under the work piece to protect the table.
#### Hand Wheels
The mill table has freedom to move in two axes, the X and the Y, by turning different hand wheels. On each hand wheel is a dial that allows you to accurately measure the distance the table has moved; keep in mind, however, that there is backlash that you must account for. For each axis there is a lock that locks the table.
Always lock all of the axes you are not using for milling.
#### Knee
The knee is the large mass of cast iron that supports the table. It is moved up and down (move the Z axis) with the knee crank. The lock for the knee is usually located right beside the knee crank but may be located around the side of the column. For accuracy and stability, always lock the knee as well as crank up to your final position.
### Basic Operation
#### Check Mill
Before getting started, check the mill to notice any differences since the last time you used it, and to see whether there is anything you might be unfamiliar with. Ensure the power quill feed is disengaged by unlocking the quill and testing to make sure it moves freely. Also be sure the vise is clamped and that the table and knee move smoothly and freely.
#### Determine RPM
Before performing any operation, you should determine the correct RPM (revolutions per minute) to use for the operation. The RPM is determined by three variables: the work material, tooling material, and diameter of the tool. For every work-material/tool-material combination, there is a different cutting speed in feet/minute. Cutting speeds for some material can be found on charts in the shop, and more extensive charts are in Machinery's Handbook. From this linear speed, the RPM is determined by the following formula:
`RPM= (CS * 4) / D`
where
- CS = cut speed
- D = diameter of stock (lathe) or diameter of cutting tool (mill), in inches
- RPM = speed of the rotating part or tool, in revolutions per minute
The cutting speed is given as a set of constants that are available from the material manufacturer or supplier. The most common materials are available in reference books or charts but will always be subject to adjustment depending on the cutting conditions.
[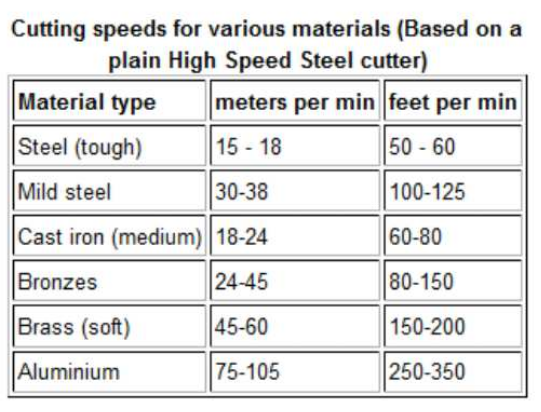](https://wiki.protohaven.org/uploads/images/gallery/2025-01/ykFimage.png)
#### Feed Rate
Feed rate is the speed the tool moves relative to a fixed, stationary part. It is the autofeed rate when autofeed is used and is usually measured in inches per minute on a mill, or inches per revolution on a lathe. When just learning the mill, you should try to feed by hand and so will be using your senses to determine the correct speed. In order not to overtax the machine, you will feed the tool through the work so that you do not feel any undue resistance to your movement but so that you also cut efficiently.
#### Load the End Mill
End mills are held in the mill by an R8 collet. An end mill has two diameters: the shank diameter and the cutting edge diameter. Often these can be the same. To load the end mill, select a collet that matches the shank diameter of your end mill. Insert the end mill so that the flutes are as close to the end of the collet as possible without being inside. Load the end mill and collet into the spindle by
matching the key way. While holding the collet up in the spindle, turn the draw bar and tighten until finger tight. Next, tighten the draw bar with the wrench while holding the spindle brake. Make sure to put the wrench back. It is important to tighten the draw bar so that it is more than snug -- but be careful not to over tighten. Aim for tight and secure, rather than as tight as possible (monkey tight, not gorilla tight).
#### Put Work in Vise
When securing the work in the vise, take care that at least some to the work is held by the center of the vise. Also be sure there is sufficient clearance between the top of the vise and the work. You may need to use parallels to achieve this height. Tighten the vise more than snug -- the same way you would tighten the drawbar.
#### Turn Mill On
Check the mill to ensure nothing is in the way or could get caught in the spinning mill. Double-check which way the end mill must spin in order to cut. Turn the end mill on and make sure that it is spinning the correct way. You may have to turn the machine off and let it spin down to check.
#### Zero Your Part
There are many different ways to zero your part. A quick and easy way is to slowly bring the end mill in contact with the work until it scrapes off just a tiny bit of material. Zero the dial or the DRO and back off slightly.
#### Mill the Surface
Milling removes material from the surface of your workpiece with the rotary cutting tool. First choose the depth of cut. To determine this, start with a very light cut and take progressively more until you find a balance between depth and feed speed. Do not cut deeper than half the diameter of the cutter in a single pass nor more than twice the diameter of the cutter overall on any slot or step.
Once you've chosen the depth of cut, you will start off the piece with the end mill engaged less than or equal to 50% of the diameter. Start at a side that ensures that when you feed the cutter through the work you will not be climb cutting. After you are set up, lock the axis that you are not feeding in, and then begin slowly and evenly to feed the cutter through the work till it is out. It is usually most efficient to make a spiral cut or to cut coming back on the other side of the piece.
#### Mill a Channel
Milling a channel is very similar to milling a surface, in that you will be using the rotary cutter to remove material from your workpiece, but instead of removing material only on the surface, the cutter is engaged 100% of its diameter and creates a channel.
### Cleanup
1. Remove all tooling and return it to the appropriate location.
2. Put the rolling cart out of the way.
3. If you have broken or damaged any tooling, please do not return it to the tooling storage. Instead, speak to a shop tech or take it to the front desk so it can be evaluated and replaced, if necessary.
4. Clean up all of your chips and any other chips in the general area. Use a broom or vacuum cleaner, as needed.
5. Wipe up any coolant or lubricant and leave the machine clean and dry.
6. If you have used a special setup or have changed something so that it is no longer in its expected position, please reset it or find a shop tech to show you how to reset it (e.g., let us know if the machine is now out of tram).
# Machining - Pantograph
# Drive Belt
The drive belt is a 4mm polyurethane cut at 60". The ends are joined by heating with a heat knife and melting slightly. Then push the ends together. Finish by grinding the bulging material off to make a smooth transition from one end to the other.
# Manuals
Operating Instructions: [Phanograph Operating Instructions.pdf](https://wiki.protohaven.org/attachments/347)
Spare Parts: [Phanograph Spare Parts Catalog.pdf](https://wiki.protohaven.org/attachments/346)
# Resources For Pantograph
60 degree engraving bits are a great place to start.
These are the ones used in the class: [Amazon Engraving Bits](https://www.amazon.com/dp/B07DFG3LTV?ref=fed_asin_title&th=1)
15 degree bits can be very fragile and 45 degree bits can cut a wide path. Feel free to experiment.
Chronova Engineering has great pantograph content: [Chronova Engineering](https://youtu.be/bv9IQTOYl8Q?si=3R2aruYvhOOaP7vj)
Inheritance Engineering has pantograph content: [Pantograph Video](https://youtu.be/7am-ysvGD3s?si=KBNOUPPY1hesOUDK)
# Tool Tutorial
The pantograph is a tool that's especially useful for engraving - maker's marks etc. It uses a template and a 1.5x-10x reduction linkage to achieve very precise motion over a very small space without the aid of a CNC machine.
### Basic Info
- This machine has two tables: Pattern table (which holds the pattern) and work table (which holds the piece being engraved).
- All user adjustments require the 3/4" wrench, or the two small collet wrenches for changing end mill bits, located in the drawer of the adjacent desk.
- 3/8" collet is holding a reducer collet that usually contains a collet for 1/8" end mills and engraving bits. A 1/4" collet is in the drawer, if needed. 1/8" bits with a 60º grind are recommended.
### Approved Materials
- Aluminum
- Copper
- Brass
- Bronze
- Steel
- Plastic/Delrin
- Please seek advice on any other materials
### Safety
- There are spinning elements on this machine and entanglement is a risk
- Glasses are mandatory when operating
- Short sleeve shirt or long sleeves that can be securely rolled up
- No dangling hoodie ties, necklaces, wrist watches, etc.
- Long hair needs to be tied back and secure
### 2D Mode
Warning: 2D mode only works on FLAT surfaces - make sure your stock material is flat where you are about to engrave.
1. Decide on the reduction ratio - how small the result is. All three segments of the arm should be set to the same value indicated on the top of the segment. All 5's for 5:1, all 3's for 3:1 etc.
- - To change reductions, make sure the stylus is **NOT** loaded; changing while the stylus is loaded risks breaking the stylus
- Use the 3/4" wrench to loosen the nuts on the back of each of the arm segments, then slide the gauge to the correct number and re-tighten - only a little tightness is needed, don't crank these down.
- Crank the pattern table hand wheel out so that the end of the arm is appropriately located over the top of the pattern table - the two tables must be farther apart for a larger reduction, and closer together for a smaller reduction.
[ 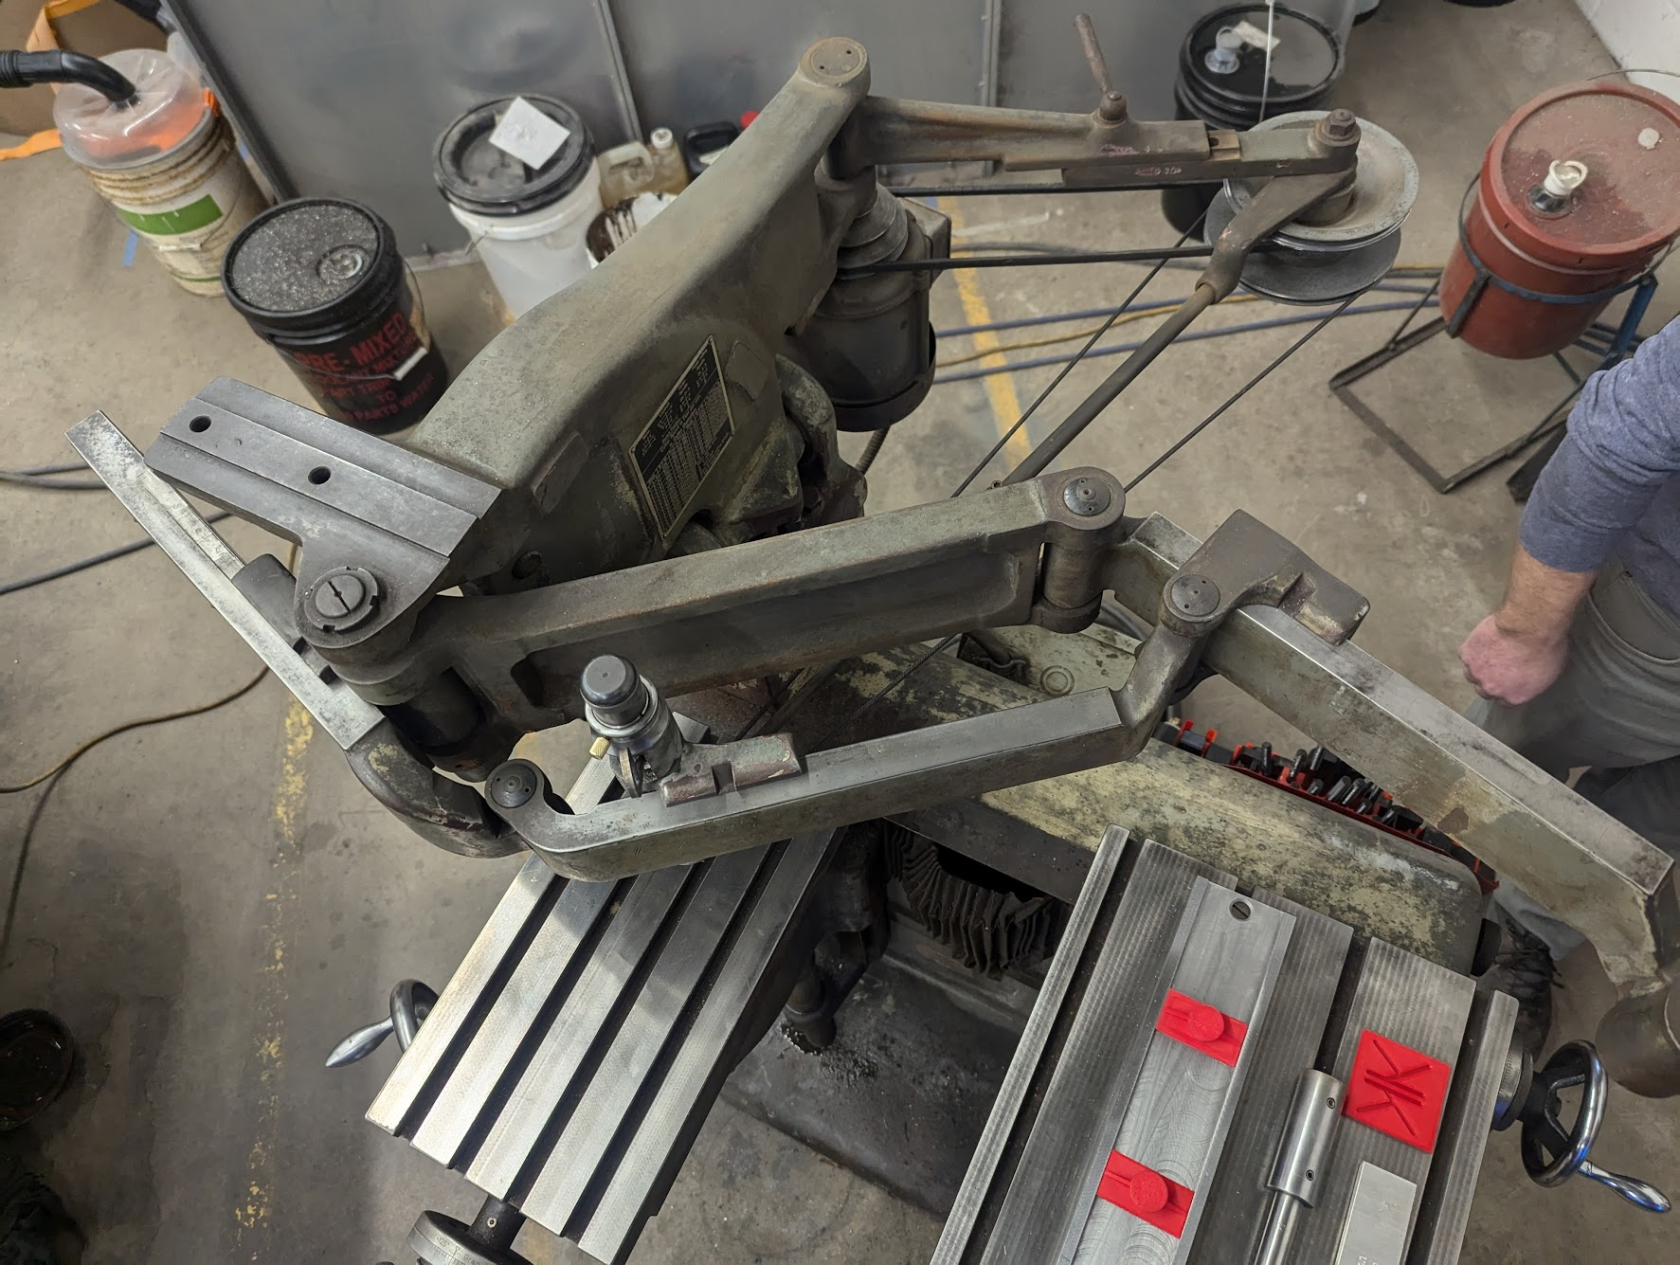](https://wiki.protohaven.org/uploads/images/gallery/2025-02/o27image.png)
1. Ensure it's at the highest speed if engraving (20k RPM); for larger bits consult the table on the plaque on the side of the machine [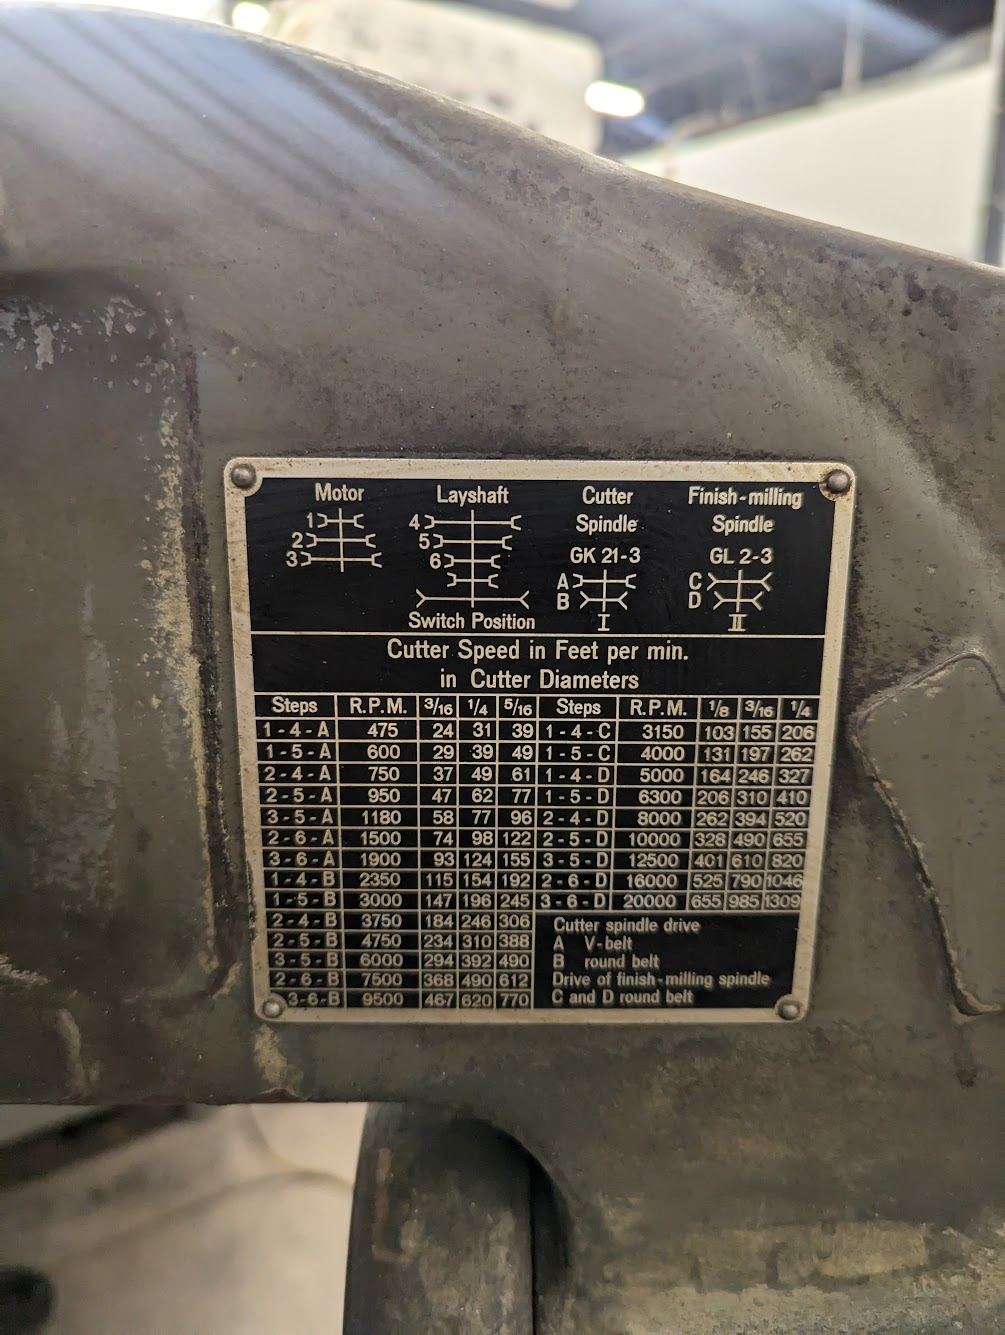](https://wiki.protohaven.org/uploads/images/gallery/2025-02/vBYimage.png)
2. Ensure all the axes are unlocked as you typically won't need to use them when engraving - X lock is underside of the machine below the knee, Knee lock is to the left of the knee wheel, Y is on the left side of the worktable.[ ](https://wiki.protohaven.org/uploads/images/gallery/2025-02/ErLimage.png)
3. If needed, zero the gauges on the hand wheels by loosening the large knurled nut and hand placing the gauge at 0", before tightening it again. In basic usage, you probably won't need to do this.
4. Firmly attach your engraving pattern to the pattern table. If using the pattern jig, add the end stops and ensure the knurled knobs are snugged so the pattern stays in place. Letter stencils and operator's manual are also located in the right side desk drawer. [](https://wiki.protohaven.org/uploads/images/gallery/2025-02/zPRimage.png)
5. Insert stylus; note: the locking screw holding it in place is intentionally loose so it can be raised and lowered out of the design when doing 2D engraving. [](https://wiki.protohaven.org/uploads/images/gallery/2025-02/YFEimage.png)
6. Load the desired engraving bit using the two collet wrenches located in the desk drawer. Use only one hand when loosening/tightening collets - snug is good, heavily cranked down is no good.
7. Clamp down your stock material - you may use the stylus and the pattern jig to better align the stock to be engraved, and the toe clamp kit mounted to the side of the machine for holding it down. As with other aspects of this machine, the clamps do not need to be overly tight. Snug is good. [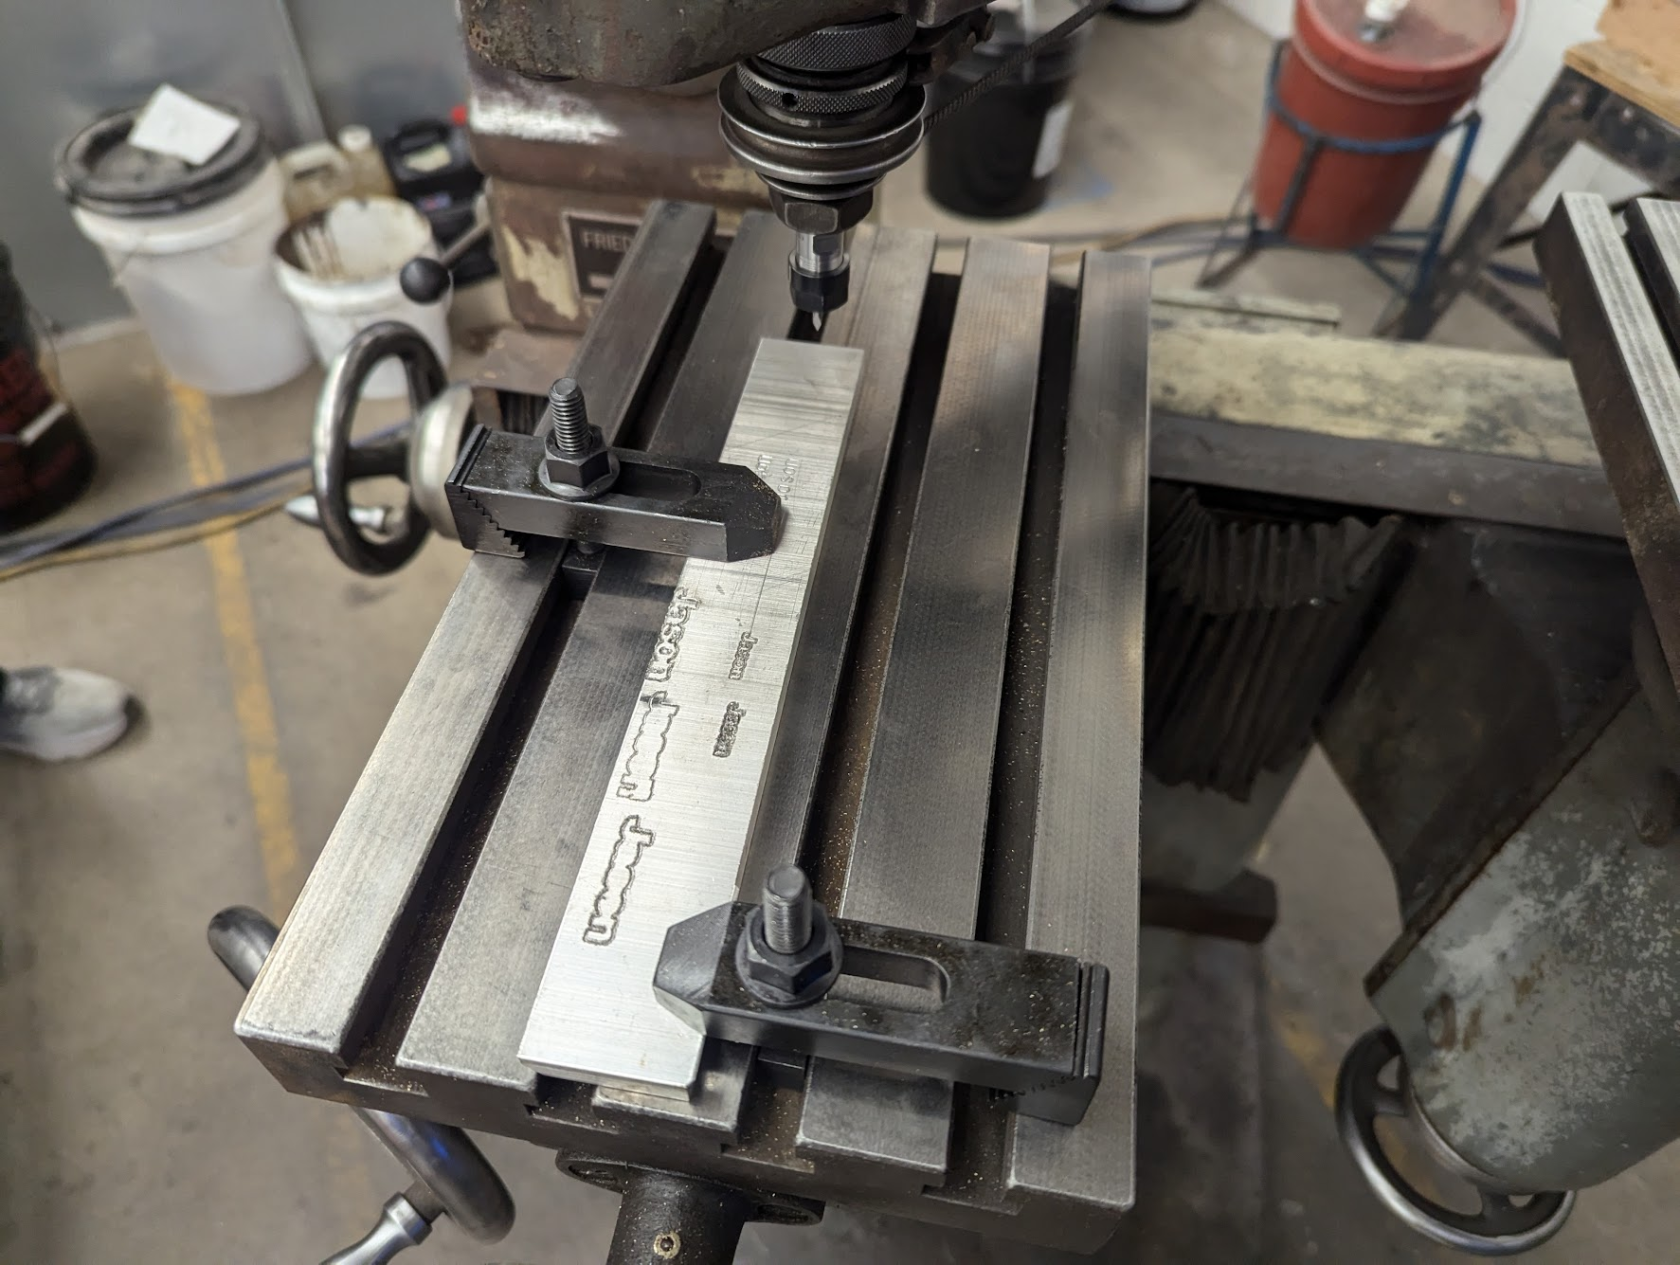](https://wiki.protohaven.org/uploads/images/gallery/2025-02/W7simage.png)
8. Near the toe clamp set, there is a large off/on switch, move the switch to 'on'.
9. Throw the red switch at the back of hte machine to turn on power, then the power switch is on the left side by the engraving table to start the spindle. NOTE: Low speed (i.e. "I") does not work, just use high speed ("II"). [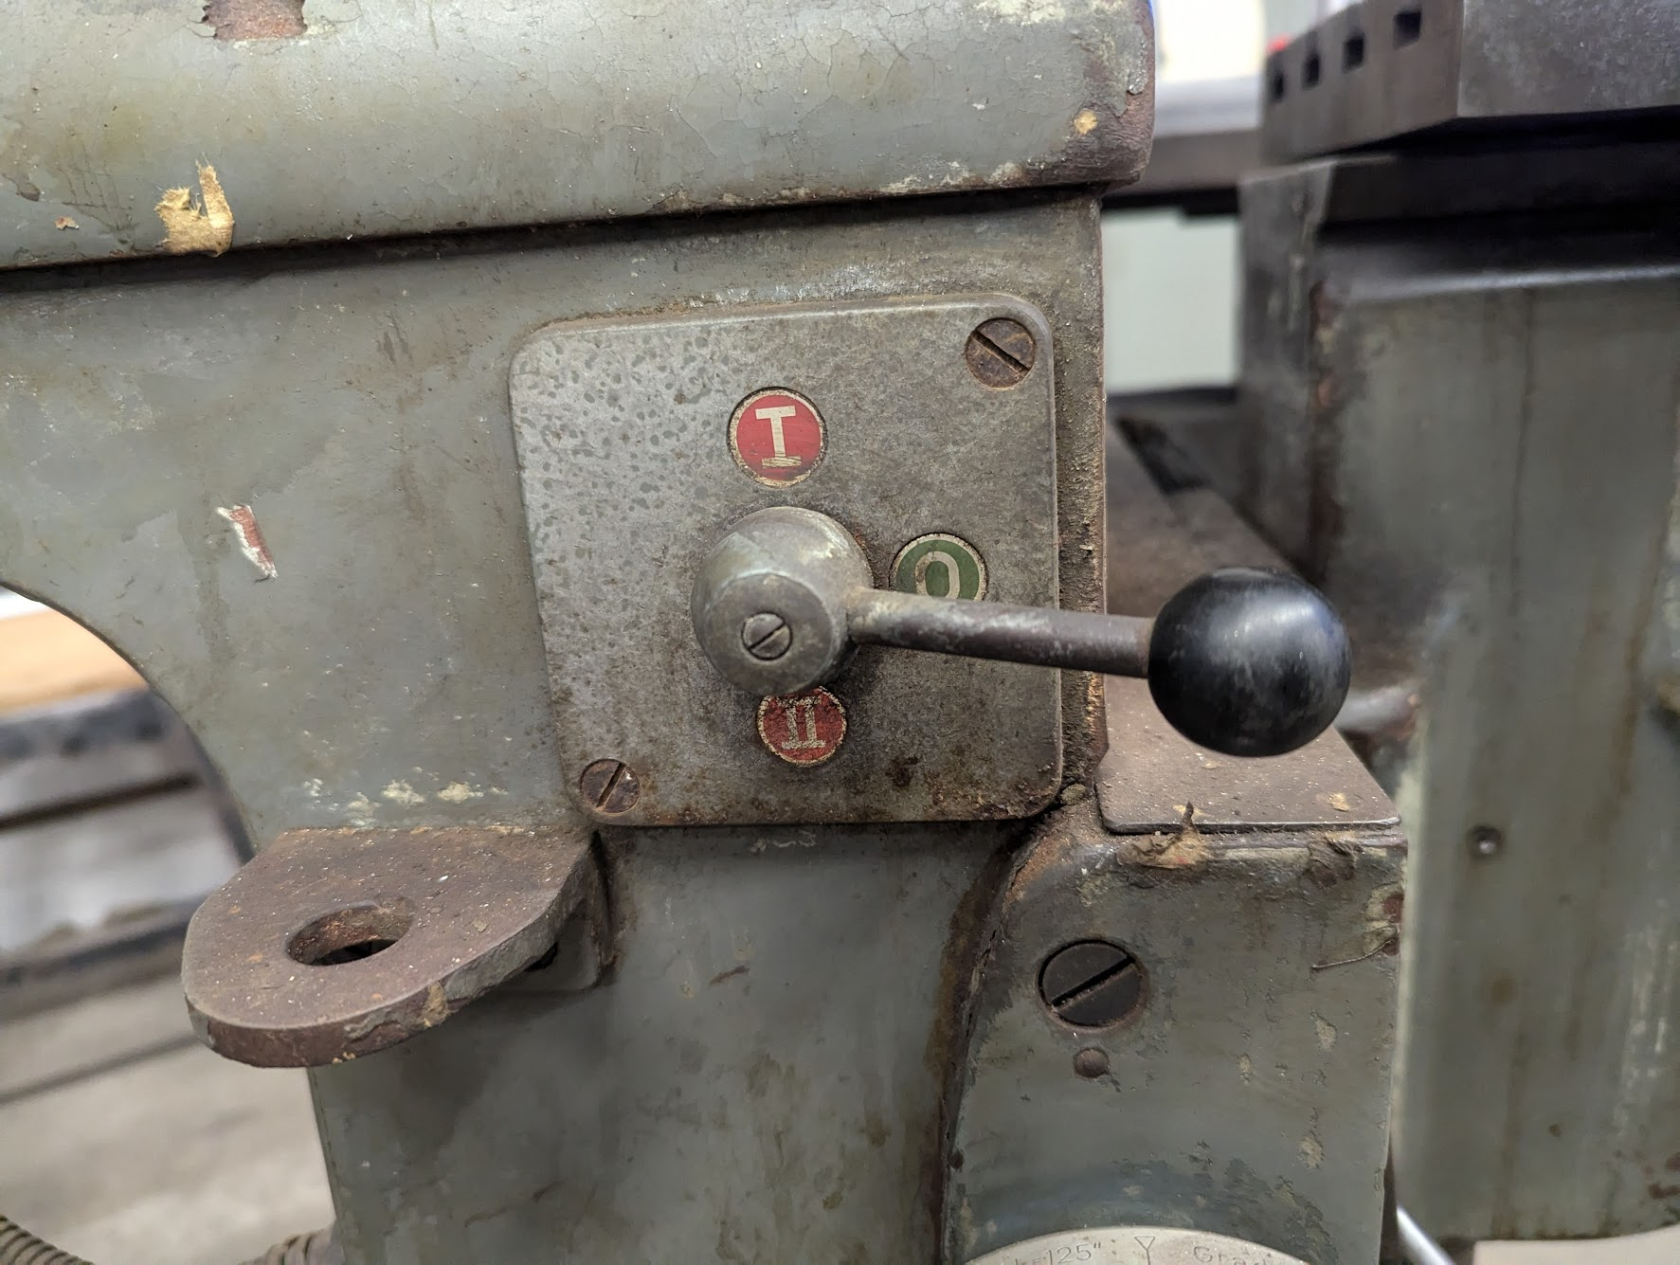](https://wiki.protohaven.org/uploads/images/gallery/2025-02/YPgimage.png)
10. Wait for the motor to come up to speed - it takes a couple seconds.
11. Use cutting fluid while engaving (WD-40 for aluminum, trim-sol for mild steel)
12. For fine depth adjustment, lower the loop on the front of the spindle and slide it left/right to fine adjust depth, also loosen the knurled lock ring on top of the spindle (above the brass knob) to adjust the maximum depth of cut.[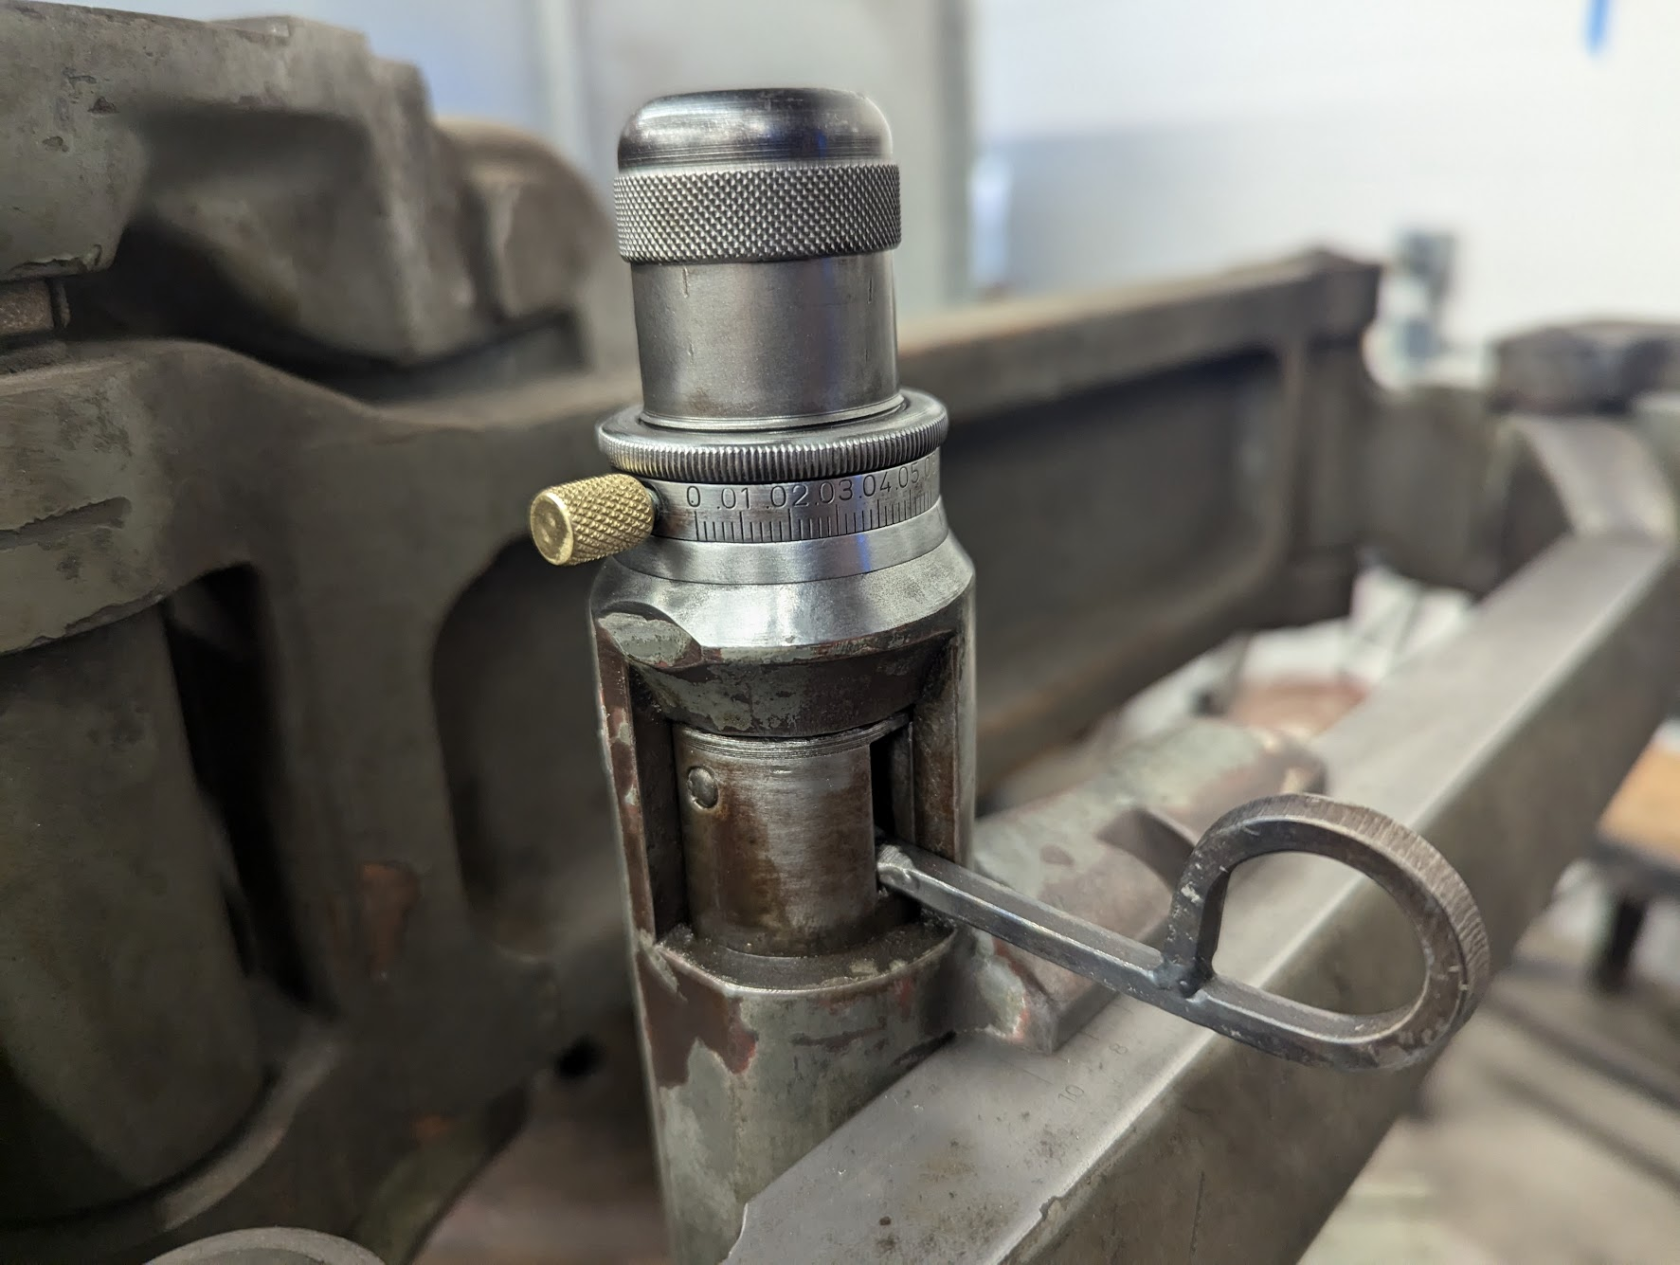](https://wiki.protohaven.org/uploads/images/gallery/2025-02/9ktimage.png)
13. Raise the knee to the engraving depth.
14. When switching to a different part/letter of the engrave, always raise the spindle before raising the stylus (otherwise it will cut through the part)
15. Hold the stylus like a pencil, DON'T use the handle of the pantograph when engraving.
16. Engrave the part using slow, deliberate movements of the stylus.
Recommend ~60º cutting bits; lower (such as 15º) are easily broken.
### Cleanup
1. Turn off power to the machine via the red large power switch that is near the toe clamp rack
2. Remove stylus and put it in the drawer, along with any patterns that were used
3. remove and return toe clamps to the holder attached to the machine
4. Wipe down the work table with a shop rag/towel
5. Remove engraving bit from the collet and ensure all wrenches are returned to the drawer
### Special Setups
#### 3D Mode
3D needs some special alignment between the main Z pivot, the milling spindle end, and the stylus, which is easy to get wrong. Also requires the stylus diameter to be the same ratio larger than the end mill (e.g. 5x larger for 5:1) and to match the topology (ball for ball nose etc.).
If trying this:
1. remove the bolt and spacer/cylinder from the left side of the machine, place in the "storage" flange with hole below it.\\
2. Also loosen the travel limiter bolt on the right side of the main body. The arm will now travel freely in the Z axis
3. Adjust the Loading/unloading dial to adjust the counter spring which supports the arm. "Loading" makes the arm lighter and want to lift, "Unloading" makes the arm heavier and want to drop.
4. Use the 3D alignment bar to align the cutter and the stylus. Tighten the stylus into position with a 6mm Allen wrench.
5. Proceed with 3D engraving, taking light cuts and progressively deeper cuts.
6. Make sure that you've converted the machine back into 2D mode when done.
#### Size increases
Could swap the spindle and the stylus to do larger things, but it adds error and isn't the strong point of the machine. Requires moving the spindle and the whole tension bar etc. Never been attempted.
#### Custom 3D printed patterns for the pattern jig/bar
2.454" wide, **0.150" thick**, with 0.040" clipped off the end, with a 60deg dovetail. You may need to file it down to size for it to fit smoothly. [Blank Pantograph Template STEP File](https://wiki.protohaven.org/attachments/267)[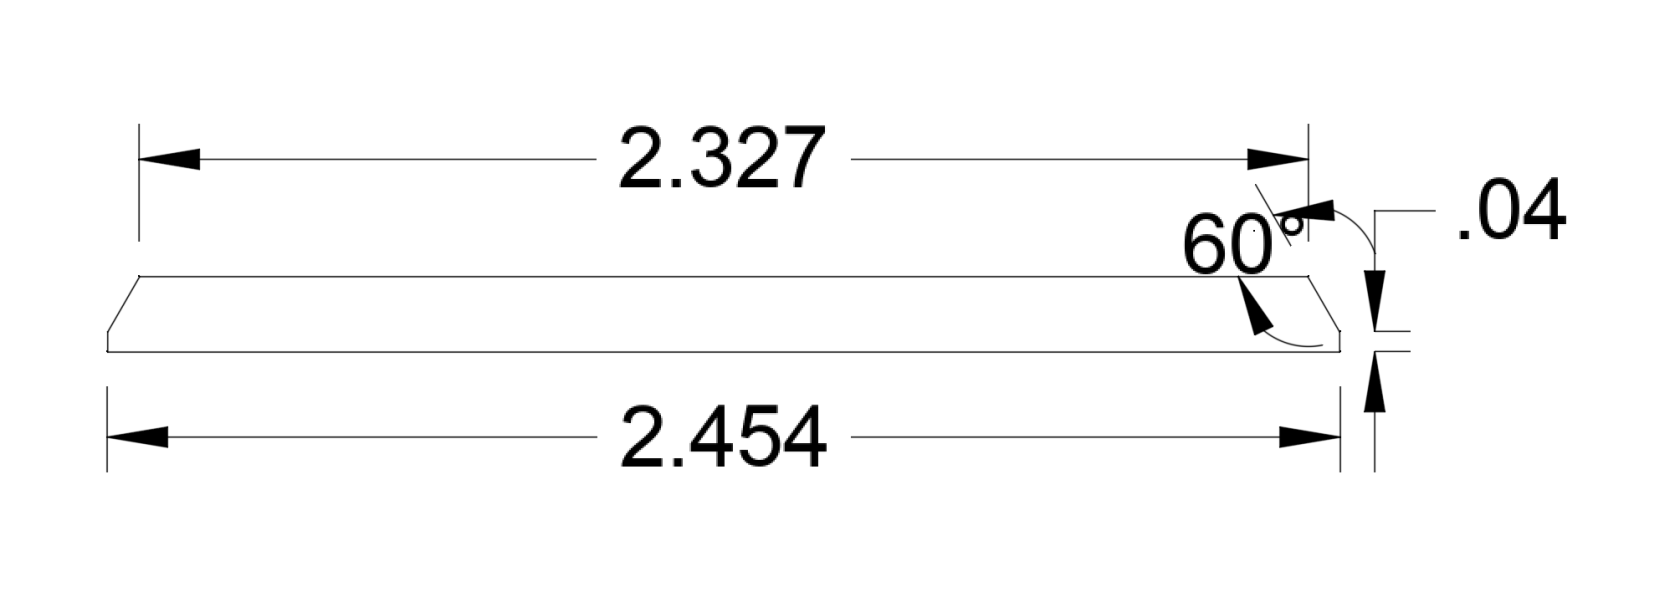](https://wiki.protohaven.org/uploads/images/gallery/2025-02/screenshot-2025-02-15-at-11-46-51-am.png)
Larger patterns can be made and held down with toe clamps. Larger patterns could be 3d printed, carved from wood, wax or any other material that can be traced from. Custom patterns that do not contain 1/8" groves to trace from will require a custom stylus to be made. Depending on the desired results, the stylus would ideally be a larger than the engraving bit/end mill by the scaling factor that is set on the bar. Ex: if a 1:5 scale is selected and a 1/8" end mill is being used, the stylus should be 5/8" in diameter.
### Spare Template Files
These STEP files can be used to 3d print new letter templates.
[Letter Templates.step](https://wiki.protohaven.org/attachments/268)
The Letter lock is the threaded hold down at each end of the letters.
[Letter lock.step](https://wiki.protohaven.org/attachments/269)
### Maintenance (for techs)
Missing / potential machining projects
- There is an optional addition that mounts onto the top slide of hte machine to provide a profile to push the engraver up/down to handle circular engraving and such.
- Styluses are machined in-house out of delrin. The large end is 3/8" and the tip is a rounded 1/8" to engage with the 1/8" wide letter templates.
Every ~2 months, pump a squirt of oil into the ball oilers on each of the 5 handwheels on the machine.
# Machining - Tormach
Tormach PCNC 770 Aluminum Mill
Clearance: Required
# Manual(s)
*Manuals and other reference materials from the manufacturer or other sources.*
- *[pcnc\_770\_product\_datasheet.pdf](https://wiki.protohaven.org/attachments/166)*
- *[pcnc\_770\_user\_manual.pdf](https://wiki.protohaven.org/attachments/167)*
# Member Notes
# Resources
*Where to obtain materials, consumables, and tooling.*
[CNC Concepts](http://www.cncci.com "http://www.cncci.com") - Has lots of good training materials for beginner and advanced users
-
[Modern Machine Shop Online](http://www.mmsonline.com "http://www.mmsonline.com") - Has lots of news about the machining industry
- [Proven Cut ](https://provencut.com/login?destination=/recipes)Is a fee based site that has a lot of really useful speeds and feeds that are specific to the Tormach machines.
- [NYCNC on YouTube](https://www.youtube.com/@nyccnc) Has a lot of really great videos on programming Fusion 360 for use on a Tormach.
- [NYCNC on Speeds and feeds](https://youtu.be/uw8uL2jjEBs?si=_ZqqN0pM76_RKlsD)
# Tool Tutorial
### CNC Metal Mill (Tormach 770)
The Tormach can cut a diverse range of materials from aluminum, brass, copper and Delrin. Steels can be cut but are tricky because of machine flex.
A mill is used to machine surfaces, cut slots and pockets, and drill holes to precise dimensions. In the case of the Tormach mill, the spindle holds the tool and moves in the Z axis, while a clamp on the table holds your work and moves the X and Y axes.
A CNC mill is controlled by a program created by CAM software such as Fusion 360. The recommended Fusion post processor is Mach3Mill. The CNC Router Parts Mach 3 post will work too.
When programming speeds and feeds for this machine, keep in mind that this is a hobbyist grade machine and the speeds and feeds that end mill manufacturer's specify are for much more robust machines. The speeds and feeds need to be much lower on this machine.
This tool can deliver enough force to break brittle tools, crush bones, and tear flesh.
Electronic devices within the electrical cabinet may retain dangerous levels of electrical charge even after power has been turned off.
# Tool Anatomy
Power Switch - Key switch turns the machine on and off
Emergency Stop - Reserved for emergencies. To deactivate and reset, you must twist the spring-loaded knob.
Maintenance Tag - Manually tracks the usability status with Green/Yellow/Red cards
#### Equipment Controls
[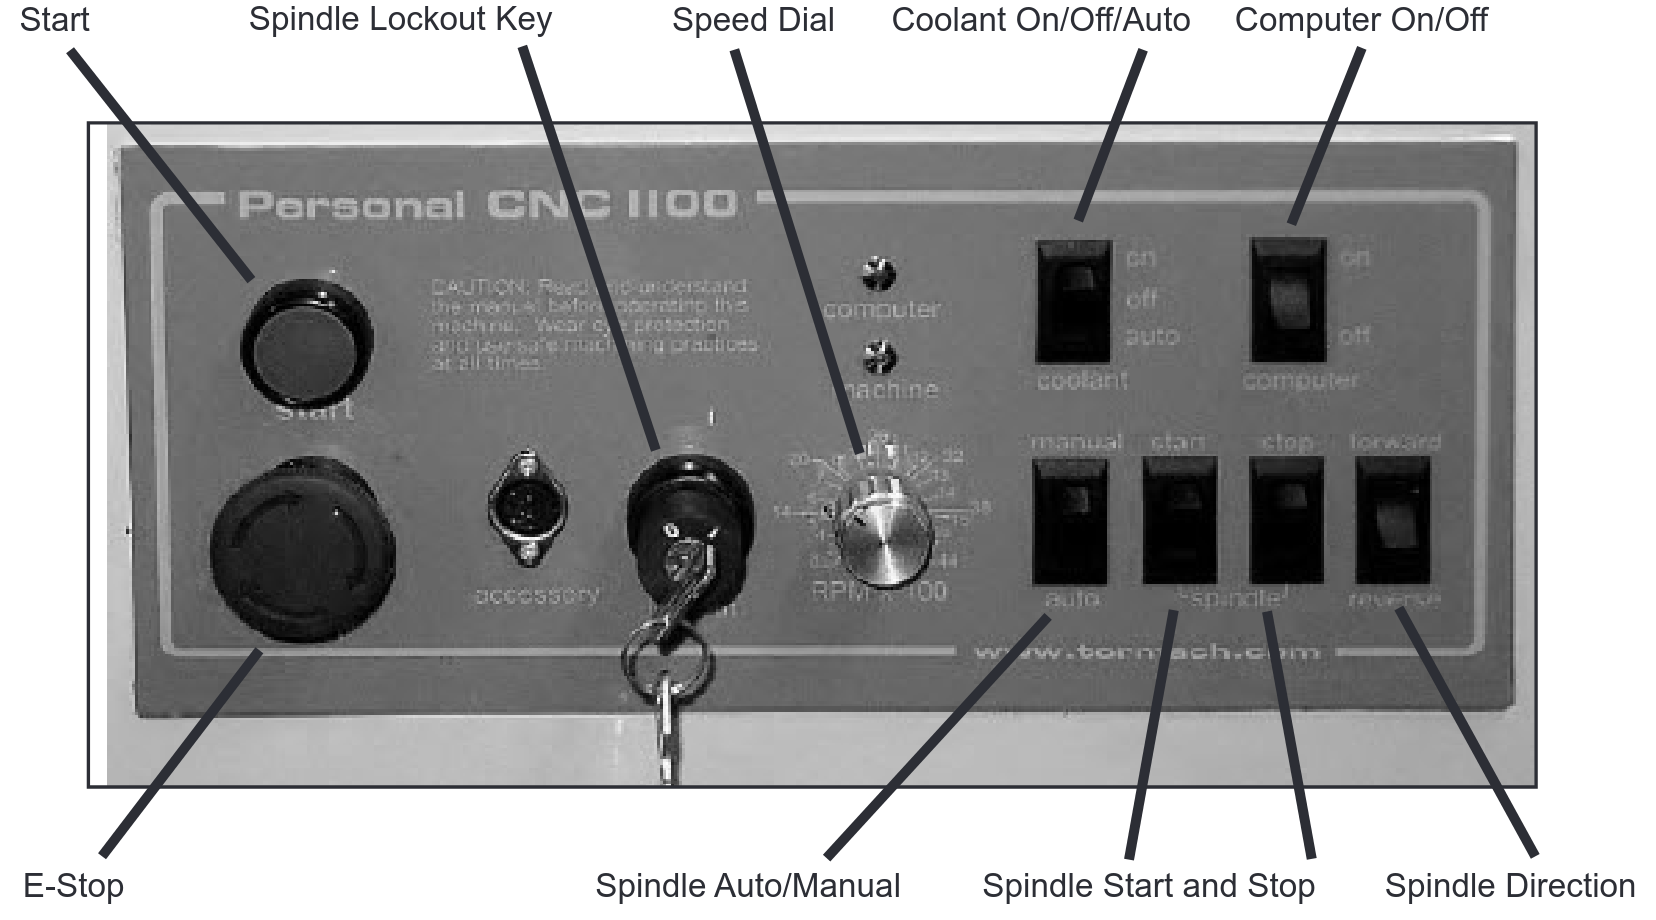](https://wiki.protohaven.org/uploads/images/gallery/2025-01/ueZimage.png)
- **Start**: The Start button turns on the circuits for the axis drives and the spindle motor.
- **E-Stop:** The Emergency Stop button stops all motion and is locked when pressed. To release, turn the button head a quarter-turn clockwise.
- Spindle Lockout Key **(Not normally used)** Power to the spindle motor can be disabled using the Spindle Key switch, while still allowing the Z axis to move.
- Speed Dial **(Not normally used)**: Controls the speed of the spindle when the spindle is under manual control.
- ****Coolant On/Off/Auto**Coolant On/Off/Auto**: Setting this switch to Auto gives control of the coolant over to the computer, Off turns the coolant OFF altogether, and On turns the coolant on. It is preferred to leave this switched to Auto.
- Computer On/Off **(Not normally used)**: This is a rocker switch that controls the power to the two outlets for the computer and monitor.
- Spindle Auto/Manual **(Not normally used)**: In the Auto position, the computer controls the spindle speed, while in the Manual position, the user controls the spindle speed.
- Spindle Start and Stop **(Not normally used)**: These switches allow you to start and stop the spindle when the spindle is under manual control.
- Spindle Direction **(Not normally used)**: This sets the rotation direction of the spindle. Forward spins the spindle clockwise, while Reverse spins it counterclockwise.
### Tool Safety
#### Safety Checklist
1.
Never leave the machine unattended while it is running
2.
Power off the spindle before changing tooling. Once the spindle has stopped spinning, the upper door has safety switches to prevent it from turning on.
3.
Ensure that your clothing and PPE is safe for operation
4. Making Z errors or not accounting for how deep a part will be cut away can damage the vice or the table. Soft Jaws are highly recommended.
### Personal Protective Equipment
At the Tormach, Well-fitted Clothes, Closed-toed Shoes, and Safety Goggles are required. Hearing protection is recommended.
Loose sleeves must be rolled up and long hair and scarves must be tied back. Avoid any dangling drawstrings or other articles of clothing that may come in contact with the mill.
### Tool Care
1.
Take small cuts at slow speeds.
2.
Be prepared to stop the machine at any time using the e-stop.
3.
Submit a maintenance request when needed.
### Tool Operation
#### Inspection
Before you start using the mill you are expected to do an initial inspection of the mill and access its readiness for use. Notify a shop tech if you notice anything amiss.
#### Startup
1. Turn the large red and yellow rotating power switch on the side of the cabinet to the On position (clockwise). This doesn’t actually turn anything on; it’s more like switching on the power strip that everything else is plugged into.
2. The computer needs to boot up before activating the drive motors. Open the side cabinet underneath the machine and press the computer's power button.
3. When the computer has booted up, double-click the Mach3 icon to launch Mach3, the program that runs the Tormach.
4. Install a tool holder with a tool or edge finder installed (set screws or collet nuts that not tight can come loose)
5. Run the spindle at 1000rpm to warm up the spindle. 10-15 min is good for a warm up. Other steps can be completed while the machine is warming up.
6. Copy your part program to the Tormach desktop to avoid any errors that may occur in the USB interface.
7. Load your G-code program into Mach3.
8. Release the E-stop on the cabinet by turning it clockwise and press the green Start button to power up the motors.
#### Jog Wheel
The jog wheel buttons select which axis to move, while the rotating the wheel in the middle will move the axis on the machine. A yellow square in the Digital Readout portion of the computer screen indicates which axis is selected for jogging. You can also move the axis using the arrow keys (X and Y) and page up/down keys (Z) on the keyboard.
Use the Step button on the jog wheel to cycle through the standard jog lengths or use the keyboard to enter a jog step value. There are two wheels to turn in the center of the jog wheel. The outer wheel springs back to center and will jog the selected axis faster, the further from center it is turned. The inner wheel is operated with your fingertip and has detents that will jog the selected axis the specified jog length for each click.
Jogging the machine the direction you intend takes some practice, so be careful around any parts, stock or fixtures.
[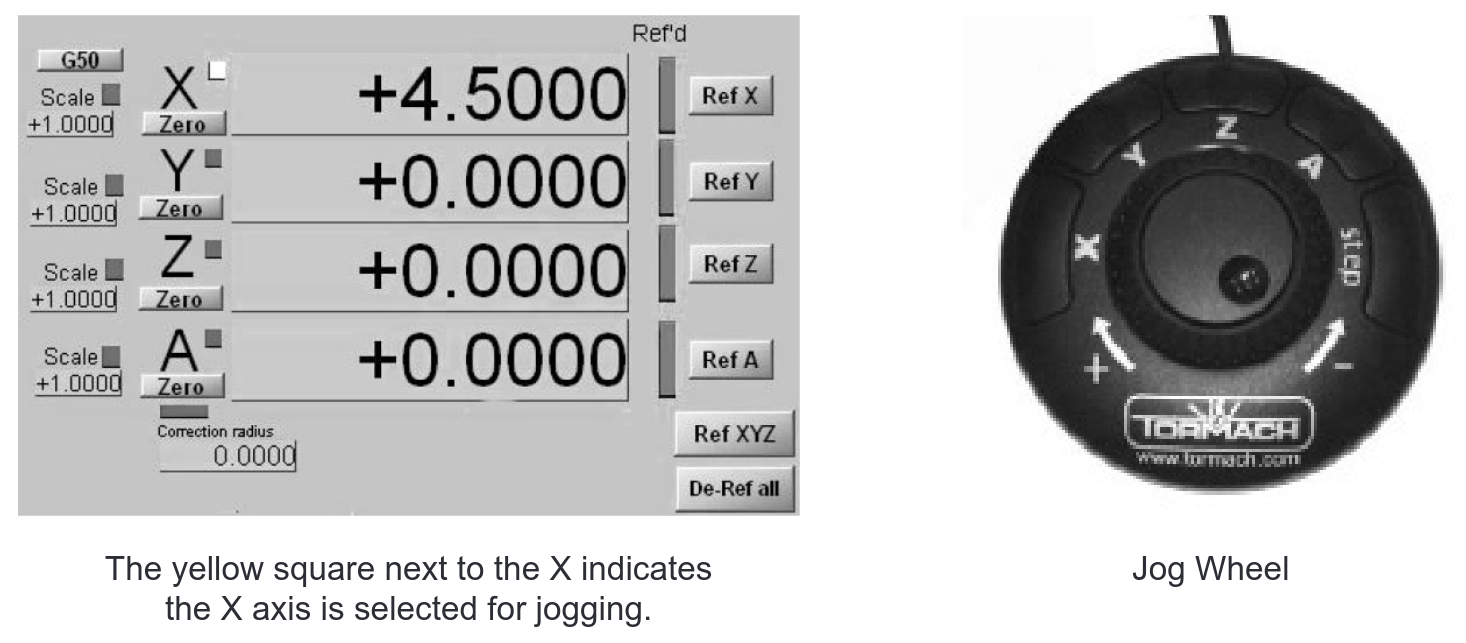](https://wiki.protohaven.org/uploads/images/gallery/2025-01/f65image.png)
#### Tooling
The Tormach mill uses a standard R8 spindle and collet that do not fit any other machines at Protohaven. The Tormach Tooling System allows you to set up a series of tools in different holders that can be easily changed as needed. The holders and other Tormach tools can be found on the nearby cart.
#### Operation
1. Check the coolant level in the machine and alert a shop tech if it’s low. It must not be below 2/3 full and ideally be near the top.
2. Check that the motor belts are in the speed setting that you expect, and that the belt position matches on the Mach 3 screen.
3. Mount your work piece securely in the machine. A vice is a common work holding method, while fixtures or the work itself may clamped to the bed of the machine using step blocks, clamps and T-nuts.
4. Making or buying your own Aluminum Soft jaws to put in the vice is highly recommended.
[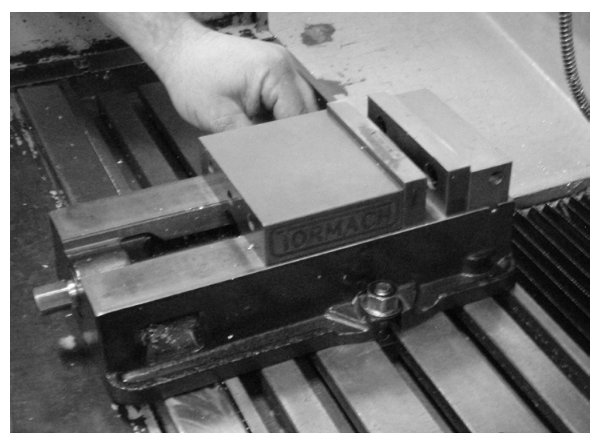](https://wiki.protohaven.org/uploads/images/gallery/2025-01/i51image.png)
5. Locate the X and Y axis zeros for your part. Depending on the accuracy desired, this can be done by eye or by using an edge finder. If using an edge finder, follow these steps:
1. Open the front door of the spindle and move the spindle lock arm down to hold the draw bar tight. Our lock bar is different than what is pictured.
[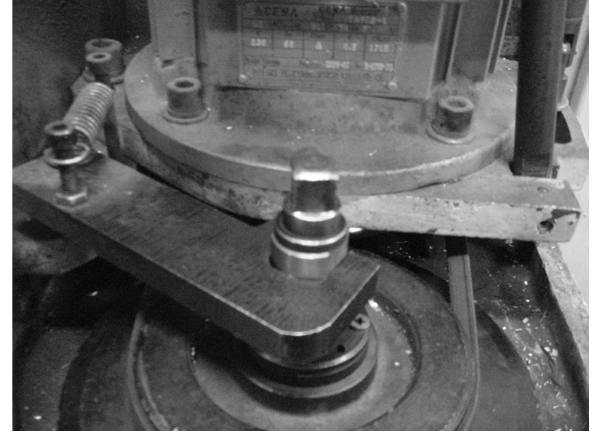](https://wiki.protohaven.org/uploads/images/gallery/2025-01/WFLimage.png)
2. Use a 13mm wrench to loosen the draw bar nut, insert the edge finder into the end of the spindle, and tighten the drawbar nut. Keep a hold of the tool to make sure it doesn’t fall out of the machine.
[](https://wiki.protohaven.org/uploads/images/gallery/2025-01/d19image.png)
3. Move the spindle lock arm back and close the door.
4. Set the spindle speed to 1,000 RPM, set spindle control to Manual, and start the spindle.
5. Jog the machine so that the tip of the edge finder is outside and below the top of your work. Move the edge finder towards your work, slowly. Use a .001” step and the inner wheel on the jog wheel for precise control. When the two parts of the edge finder come together, it means you’re close to the edge of your part. When the two halves pop apart, that means you’re at the edge of your material.
[](https://wiki.protohaven.org/uploads/images/gallery/2025-01/WbJimage.png)
6. Set the zero for the axis you’re locating by clicking the Zero button in the Digital Readout.
7. Repeat for the other axis.
8. Move the edge finder above the top of your work, enter G0 X0 Y0 in the MDI (manual data input) field, and press Enter. Adjust the values to read half the diameter of the edge finder by double-clicking in the X and Y fields and manually entering a number. Remember to use negative numbers, where appropriate.
9. Recheck your zeros by entering G0 X0 Y0 in the MDI field.
6. Locate the top of your part.
1. Following the same procedure as the edge finder, above, insert the cutting tool you’ll be using into the collet. When removing tools from the collet, keep your hand under the tool to catch it and avoid damaging it.
2. Once the tool is inserted, jog the tool down to the top of the part. A common way to set the zero to the top of your part is to insert a piece of paper between the tool and the part. Use a .001” step and the inner wheel on the jog wheel for precise control. When the paper does not slide under the tool, the tip of the tool is about .003” above the part.
3. Zero the Z axis by clicking the Zero button in the DRO, then remove the paper, double-click in the Z field, and enter .003”.
4. The same steps can be taken by using the .020 feeler gauge that is at the computer keyboard.
7. Place the shield on the front of the machine to protect yourself from coolant, chips or other things that may fly out of the machine.
8. If you’re using a manually-controlled spindle speed, use the speed dial to set the correct spindle speed, flip the spindle auto/manual switch to Manual, and use the spindle Start switch to start the spindle.
9. Place one hand over the E-Stop button, then click the Cycle Start button on the computer screen twice to start the program. Use the space bar to pause your program, if necessary. The space bar pauses the program but does not stop the spindle. Do not hesitate to push the E-Stop button if things aren’t going along as planned. It’s much easier to restart a program than explain how you broke the machine.
10. Once you’re confident that the machine is set up properly and will not crash into anything like a vice or the table, you can remove your hand from the E-Stop button.
11. Turn the coolant on by setting the coolant button to Auto to keep the tool and workpiece cool and lubed for a quality finish and longer tool life.
Make sure you never leave the machine unattended while it is running.
### Troubleshooting
Extensive troubleshooting information is available in section 9.6 of the [manual](https://protohaven.org/wiki/_media/tools/pcnc770-3-um-b1-4_2_.pdf "https://protohaven.org/wiki/_media/tools/pcnc770-3-um-b1-4_2_.pdf"), on page 156 of the PDF.
### Shutdown & Cleanup
1.
Deactivate the drive motors by pushing the e-stop
2.
Exit Mach3
3.
Delete any files copied to the computer
4.
Remove your usb/flash drives, and shut down the computer
5.
When the computer has shut down, turn off the power to the whole Tormach by turning the red and yellow power switch on the side of the cabinet to the OFF position (counter-clockwise).
6.
Vacuum and sweep any chips and debris (sometimes it can be help to do this first, being able to use the computer to move the table around is helpful in cleaning) Pay attention to the way covers behind the table.
7. Sweep chips off of the windows and out of the sliding door tracks.
8. Vacuum chips from the screen on top of the coolant tank.
9.
Wipe any excess coolant with a rag
10.
Return any vice, hold-downs, or cutting tools to their home
11.
Note any maintenance needs or concerns on the tag and at protohaven.org/maintenance
12.
Recycle waste in the scrap bins
### Scrap Breakdown
We try to save scrap and recycle it. There are bins for Aluminum and Steel. Place scrap in the appreciate bin and avoid mixing metals. Avoid mixing steel chips into the aluminum chips.
### Special Setups
#### The Internet...
Is full of unique operations done on machine shop tools. Use caution and consult other users of the machine to see if these operations are valid or if there is a better way to get a job done.
#### Advanced Workholding
Making soft jaws is needed to hold oddly shaped parts.
# Sheet Metals - Shrinker/Stretcher
# Manual(s)
*Manuals and other reference materials from the manufacturer or other sources.*
# Member Notes
# Resources
*Where to obtain materials, consumables, and tooling.*
# Shrinker/Stretcher Tool Tutorial
The shrinker and stretcher are used for projects requiring a combination of curves, angles, edges, and flanges. These tools can shrink or stretch up metal up to 16 gauge thickness.
By stretching or shrinking the edge of a piece of metal, you can create a wide variety of custom organic shapes with tight bends.
[](https://wiki.protohaven.org/uploads/images/gallery/2026-07/cOdimage.png)
## Safety and Procedures
- Keep hands away from pinch points
- Do use metal thicker than 16 gauge on these machines
- Ensure that the tool is solidly mounted to the bench or in a vice before using it
- Keep proper footing and balance at all times
- Use caution when handling sheet metal to avoid cutting yourself on the sharp edges
## Basic Operation
1. Place metal to be shrunk or stretched in the mouth of the tool.
2. Pull the handle towards yourself to deform the material slightly. It doesn’t take a lot of force to shrink or stretch the metal.
3. Move your material and continue to make a series of small deformations to achieve your desired result. The shrinker and stretcher are designed to produce results through a series of very small increments.
4. When all operations are complete, remove your material from the mouth of the tool.
# Welding & Plasma Cutting - CNC Plasma Cutter
Hypertherm Powermax65 with CNC Router Parts PRO CNC Plasma Kit
Clearance: Required
# Filling and Draining the Plasma Table
### Filling and Draining the Plasma Table
The plasma table is made from aluminum and has steel slats that the material to be cut material rests on. Primarily, steel is the most common material that is cut. When steel and aluminum are in contact, a galvanic reaction occurs and aluminum is usually the loser in that reaction. We have begun running an additive in the table that will slow this reaction but in the name of belt and suspenders, we are draining the water from the table. This will not stop the reaction completely but should considerably slow it.
The additive we are running is Green Cut Plasma Fluid at a 20:1 ratio. This may leave a film on plasma cut parts.
[](https://wiki.protohaven.org/uploads/images/gallery/2025-07/zhLimg-0198.jpeg)
When you first approach the table, it will be drained into the lower holding tank and the drain valve will be open (vertical position). Move the valve to the horizontal position to close it. The valve can be found by looking under the table, at the front.
[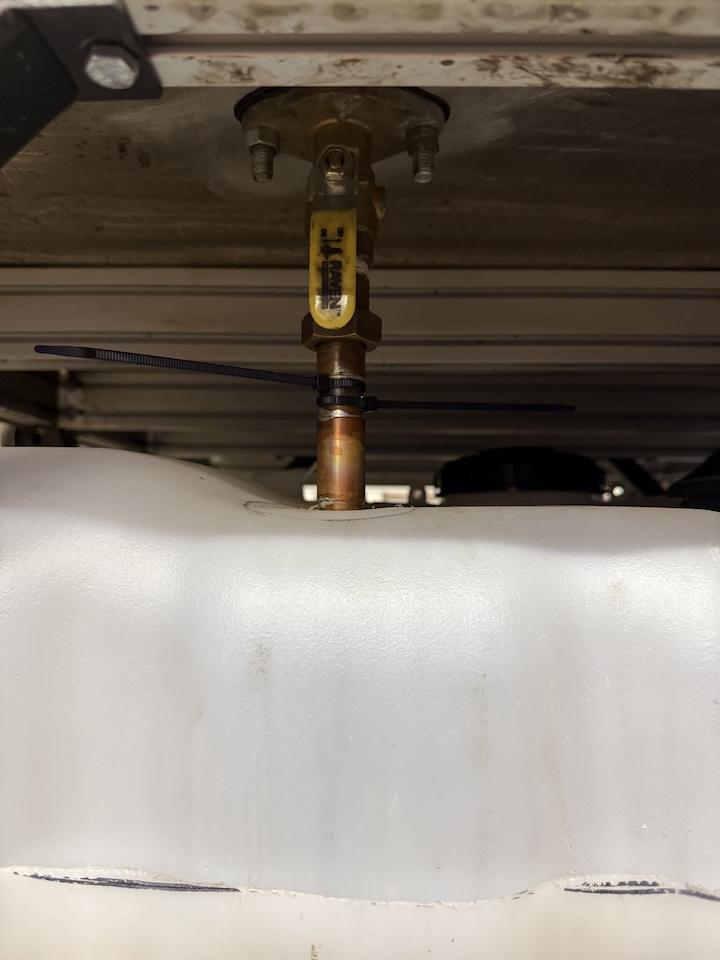 ](https://wiki.protohaven.org/uploads/images/gallery/2025-07/S6Jimg-0193.jpeg)[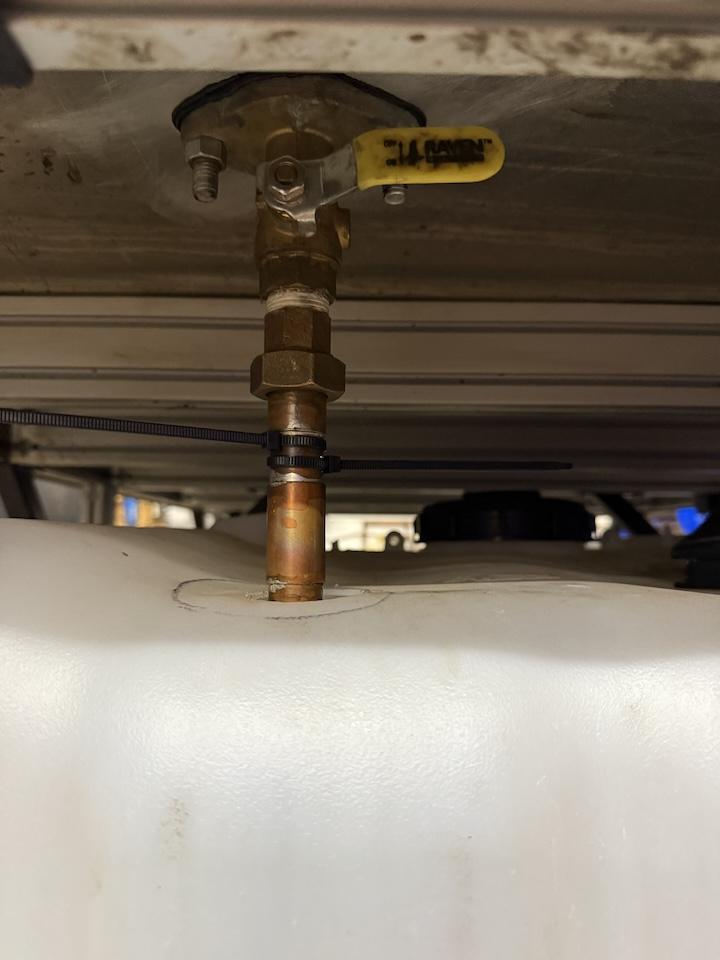](https://wiki.protohaven.org/uploads/images/gallery/2025-07/qkgimg-0194.jpeg)
Next, locate the foot switch for the pump. It should be stored on top of the tank. At the front, on the right. Plug the foot switch onto the an outlet under the computer. Depressing the pedal once and releasing will activate the pump. Pressing and releasing a second time will turn the pump off.
[](https://wiki.protohaven.org/uploads/images/gallery/2025-07/6XRimg-0195.jpeg)
The fluid will come out of the rear outlet and fill the table in about 6 minutes. Use this time to prepare your files for plasma cutting.
[](https://wiki.protohaven.org/uploads/images/gallery/2025-07/Fo1img-0196.jpeg)
Allow the table to fill till the slats at the front are about 1/8" from being submerged. Then switch the pump off, unplug the switch and put it away. There is an overflow fitting at the rear of the table, it should be impossible to overfill the table but please refrain from testing this too much.
[](https://wiki.protohaven.org/uploads/images/gallery/2025-07/OTnimg-0197.jpeg)
When done plasma cutting, move the drain valve to the vertical positionopen to drain the table, allowing the water back into the tank. Please clean up any large debris that is left from your use of the machine.
#### **Maintenance notes:**
#####
The orange fittings are 3d printed and the 3d print files are here:
The Water supply is best printed on its side. It also needs to rest on the couple pieces of metal, because it will wick fluid up behind it and onto the floor. If a replacement needs to be made, feel free to experiment with redesigning to prevent wicking. I suggest opening up the tolerances where it slips over the table.
[https://wiki.protohaven.org/attachments/303](https://wiki.protohaven.org/attachments/304)
The bulkhead fitting is printed with reverse threads to counteract the rotation of the earth and moon..... (joking). Just be aware when trying to assemble and disassemble. The washer is printed from TPU, a sealant should be used to get a better seal of these parts.
[https://wiki.protohaven.org/attachments/304](https://wiki.protohaven.org/attachments/304)
The white fitting on the bulkhead fitting is a 1.5" sink tail piece extension that is cut to length, this was done as a consumable that is inexpensive and easy to replace in the event of damage.
#### **Green Cut Plasma Fluid:**
This is mixed at a 20:1 ratio and is checked via PH. The reoccurring CNC Plasma 14 Maintenance covers the check. Typically the water is consumed and needs to be replenished.
A refractometer may be a good future purchase to check the exact concentration levels.
A filter system is suggested by the Green Cut Plasma Fluid company. We are currently not filtering out fluid beyond letting it settle out in the tank.
# Manual(s)
*Manuals and other reference materials from the manufacturer or other sources.*
# Member Notes
Fusion Plasma Post Processer [protohaven mach3 plasma.cps](https://wiki.protohaven.org/attachments/571)
Speeds and Feeds as of 3/3/2026
[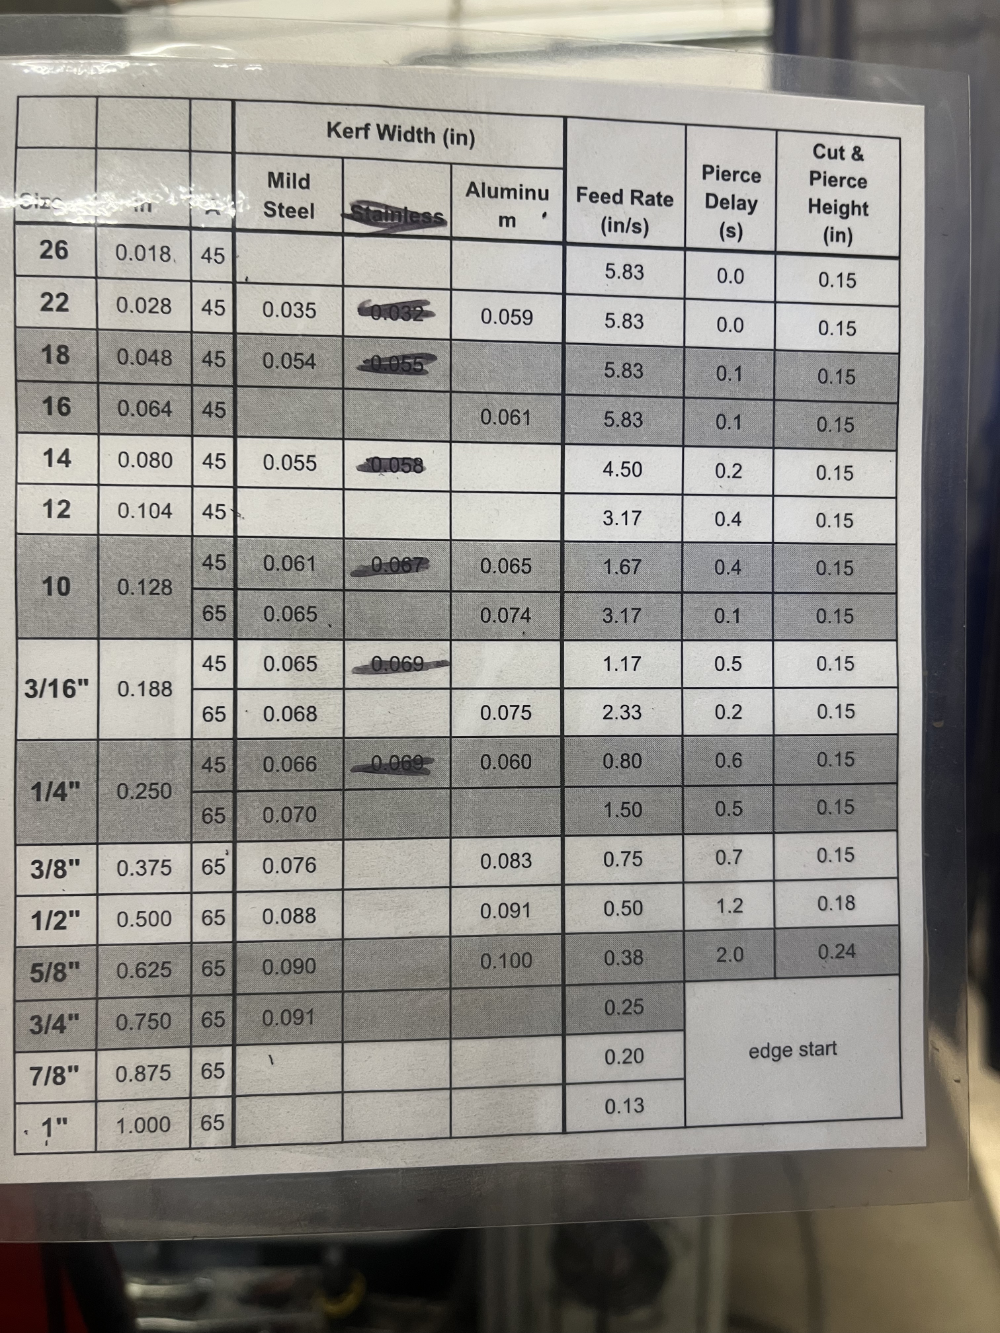](https://wiki.protohaven.org/uploads/images/gallery/2026-03/img-3957.png)
# Resources
*Where to obtain materials, consumables, and tooling.*
#### **Consumables**
**Always buy name brand : Hypertherm**
- ##### **Shields**
- \#220817 | [https://stvcnc.com/product/220817-hypertherm-shield/](https://stvcnc.com/product/220817-hypertherm-shield/)
- ##### **Nozzles**
- 45A #220941 | [https://stvcnc.com/product/220941-hypertherm-nozzle-45a/](https://stvcnc.com/product/220941-hypertherm-nozzle-45a/)
- 45A FineCut #220930 | [https://stvcnc.com/product/220930-hypertherm-nozzle-finecut/](https://stvcnc.com/product/220930-hypertherm-nozzle-finecut/)
- not used very often - not significantly different from 45A.
- 65A #220819 | [https://stvcnc.com/product/220819-hypertherm-nozzle-65a/](https://stvcnc.com/product/220819-hypertherm-nozzle-65a/)
# Tool Tutorial
### CNC Plasma Cutter (Avid Pro)
The [Avid Pro Plasma 4x8](https://www.avidcnc.com/plasma-components-c-62_67.html "https://www.avidcnc.com/plasma-components-c-62_67.html") CNC system plus [Hypertherm PowerMax 65](https://www.hypertherm.com/en-US/hypertherm/powermax/powermax65?region=NAR "https://www.hypertherm.com/en-US/hypertherm/powermax/powermax65?region=NAR") plasma cutter can run cutting operations on sheet metal including mild steel, and aluminum.
### Quick Facts
- Max cut size 1“ (at 65A)
-
Members need to supply their own plasma consumables - these are available for purchase at the front desk.
-
**Do NOT cut stainless steel on this machine** - hot metal operations on stainless steel can produce hexavalent chromium, which is highly carcinogenic.
### Initial Setup: Powering On
It's strongly recommended to [reserve a timeslot](https://www.protohaven.org/product/equipment-area-reservations/ "https://www.protohaven.org/product/equipment-area-reservations/") so you know the machine is available.
-
Top up the water in the water table if there's >5mm of open space to the top of the slats
-
Roll the trash bin by the plasma over to the sink, fill it, return to CNC plasma, and slowly pour water in the center of the water table using the included bucket.
-
Ensure a good nozzle and electrode are loaded in the torch head
-
Disconnect the THC wire and unscrew the head
-
Verify the amperage rating of the nozzle (45A or 65A printed on the side)
-
Replace electrode and/or nozzle if the wear pattern is not symmetric
-
Screw down the head until it gently stops, then reattach THC wire
-
Turn on the Hypertherm and ensure its amperage setting matches the nozzle rating
-
Turn on the control box and use Mach3 to move the head free of your work area
-
Load your material and attach the ground clamp nearby
-
Draw the curtain behind you to protect other members from arc flash
### Preparing G-Code: SheetCam
-
Create/edit an existing tool for Material Type & Thickness by referencing the [Hypertherm Torch Operator Manual](https://www.google.com/url?q=https://drive.google.com/file/d/1cVR8hSIFpbJe9-G18MAgyezId-ENfhoz/view?usp%3Dsharing&sa=D&source=editors&ust=1676742581134637&usg=AOvVaw1IO5f0tY43Aa8oXN4MrMF7 "https://www.google.com/url?q=https://drive.google.com/file/d/1cVR8hSIFpbJe9-G18MAgyezId-ENfhoz/view?usp%3Dsharing&sa=D&source=editors&ust=1676742581134637&usg=AOvVaw1IO5f0tY43Aa8oXN4MrMF7")l to your Material Type & Thickness:
-
Feed Rate
-
Pierce Delay
-
Pierce Height
-
Cut Height
-
Import your plasma .DXF file as “new part”
-
Select your part
-
Create new “Plasma Cut” Operation (Operation>Plasma Cut)
-
Select the layer that contains the vectors you want to cut
-
Choose Contour Method
-
Outside Offset is typical for jobs with a mix of closed/open profiles
-
Enter the feed rate based on your material type and thickness
-
Configure lead-in and lead-out settings and press OK
-
Verify that the cutting preview shows the appropriate direction & leads
-
To prevent the cutter from crashing into parts that flip up during operation, go to Options → Job Options and ensure the Rapid Clearance field is set to 3” or larger (a higher value takes longer to touch off when starting a cut, but is less likely to crash on already cut pieces)
-
Run the Post Processor to create your .TAP g-code file
#### Import Scaling Issues
Occasionally, importing .svg parts from Inkscape creates non 1:1 scaling. If this occurs, the following usually works:
1. Set inkscape part dimensions in inches with hariline line width
2. Save the document as a DXF R12 \*.dxf file to the document
3. In SheetCAM, click file in the upper left-hand corner and select "Import Drawing"
4. Select custom scaling and set 1:1 scaling
### Operation: Mach 3
-
Hit flashing red “Reset” button to clear Emergency Stop condition
-
If the button does not reset when clicked, check that E-Stops & Proximity Limit Switches are unlocked
-
Select “Reference All Home” (wait until all three axis lights are green)
-
Zero X, Y, and Z axis
-
Load your file (File>Load G-Code)
-
Jog the machine head to the left/front corner of the desired origin (arrow keys)
-
Before zeroing, make note of the coordinates so that, if you need to restart mid-cut, you’ll have the exact location to return to
-
If prefered, select ”MDI Alt 2” to manually jog to the nearest whole number for your desired origin
-
Zero X and Y on the left/front corner of the desired origin
-
Zero Z with torch approximately ¼” above the material surface (page up/down)
-
Trace the job location using jog/arrow keys to ensure your file fits where desired
-
Safety Check:
-
Identify nearest fire extinguisher
-
Ensure E-Stop is easily accessible
-
Put on appropriate eye protection
-
Select “Cycle Start” to begin cutting
### Cleanup
-
Turn off the control box
-
Turn off the plasma cutter (Hypertherm)
-
Remove any remaining material from the table
-
Detach the ground clamp and store it clear of the water table
-
If using your own consumables, remove them from the nozzle and replace them with a spare from the workstation table.
-
If using one, **remember to take your flash drive with you!**
### Additional Resources
-
[Mach 3 basics, no THC control](https://www.google.com/url?q=https://www.youtube.com/watch?v%3DjwaOBPTVOvs&sa=D&source=editors&ust=1676742581141873&usg=AOvVaw03JSEUSzVn-iEBswOHqPd7 "https://www.google.com/url?q=https://www.youtube.com/watch?v%3DjwaOBPTVOvs&sa=D&source=editors&ust=1676742581141873&usg=AOvVaw03JSEUSzVn-iEBswOHqPd7")
# Welding & Plasma Cutting - Manual Plasma Cutter
A plasma cutter is a tool that cuts conductive metals like steel, aluminum, and copper. It uses a high-speed jet of ionized gas to melt and blow away the metal. It is used in fabrication to create custom cuts on sheet metals.
# Manual(s)
- [hf-manual-plasma.pdf](https://wiki.protohaven.org/attachments/568)
# Member Notes
# Resources
Consumables:
- [45A plasma cutting tips](https://www.harborfreight.com/45-amp-plasma-cutting-tips-5-pack-56811.html)
- [plasma electrodes](https://www.harborfreight.com/65-amp-copper-plasma-electrodes-5-pack-59182.html) (Note: title is for 65A electrodes, but these are compatible with the 45A cutter)
Warranty:
[https://www.harborfreight.com/extended-service-protection](https://www.harborfreight.com/extended-service-protection "https://www.harborfreight.com/extended-service-protection") - 2 years, order #129523914 placed on Feb 3 2026
# Tool Tutorial
[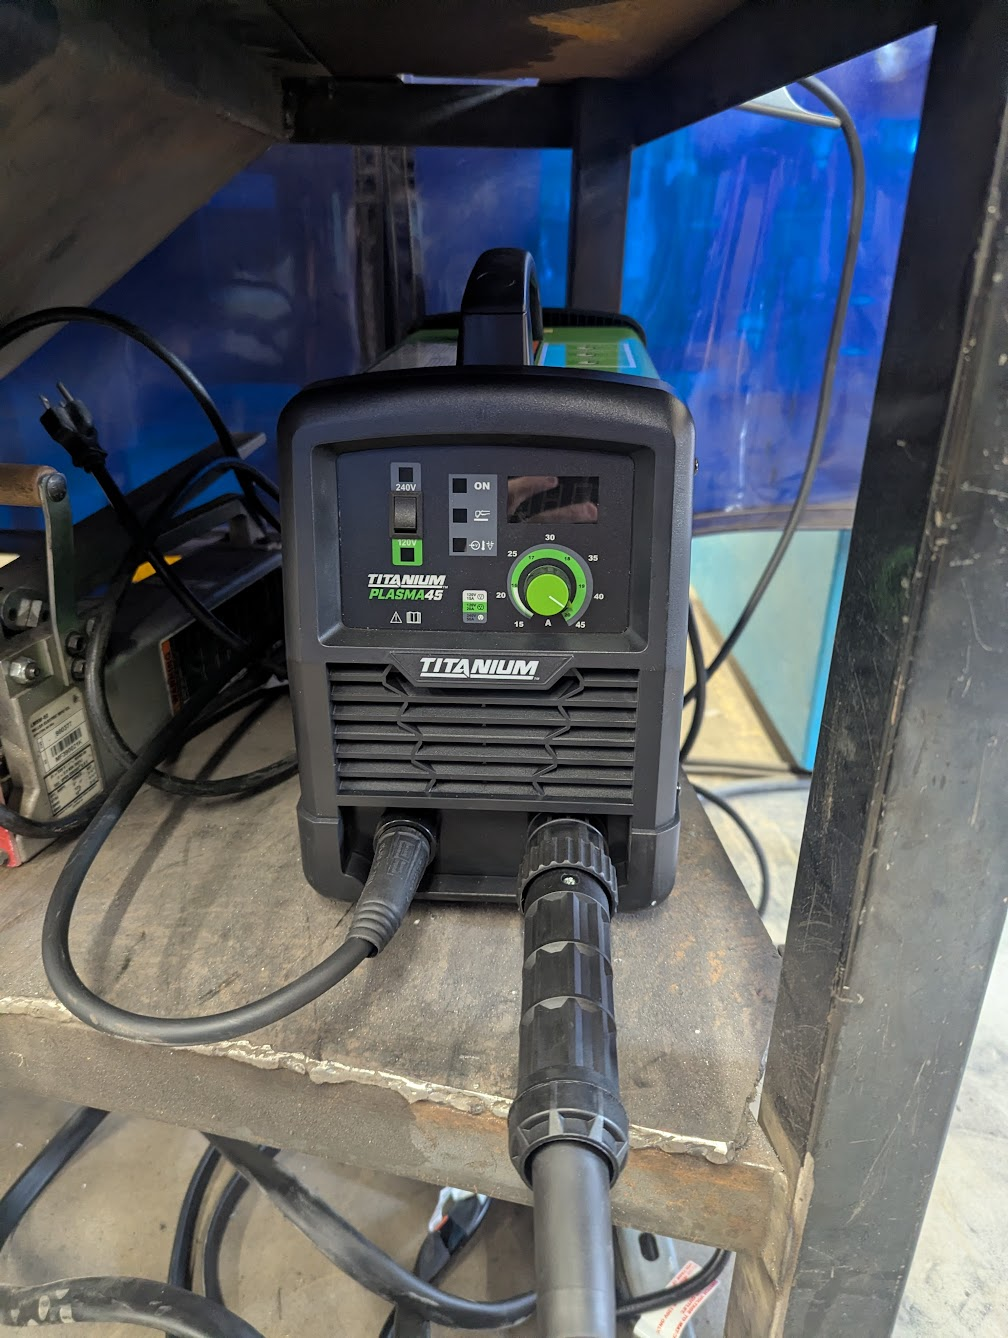](https://wiki.protohaven.org/uploads/images/gallery/2026-02/Uioimage.png)
[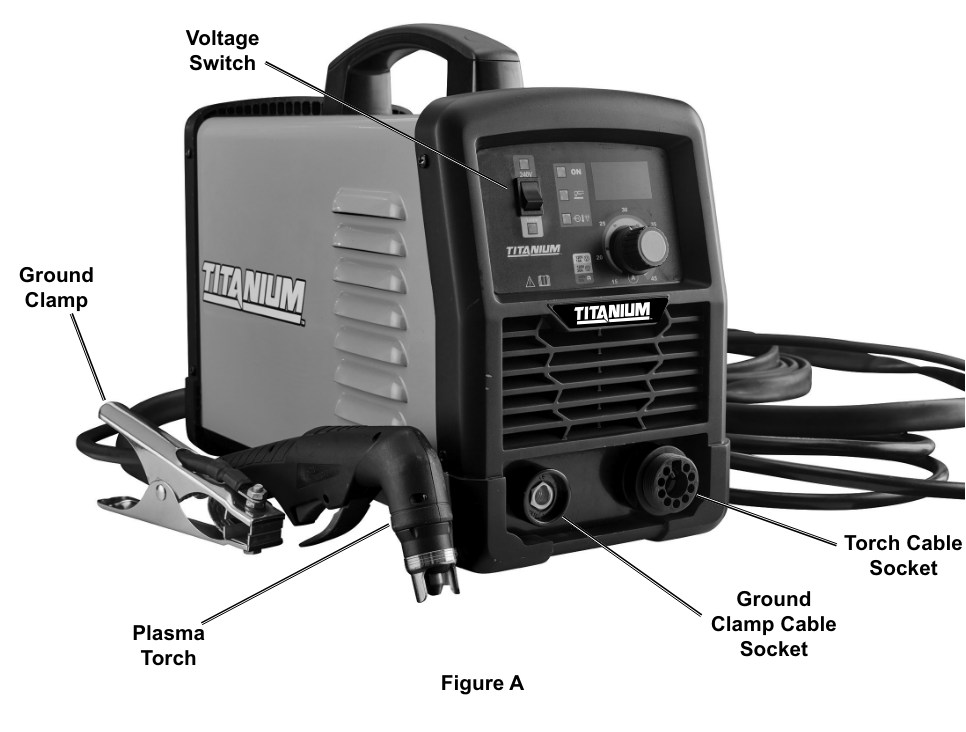](https://wiki.protohaven.org/uploads/images/gallery/2026-02/E0Aimage.png)
[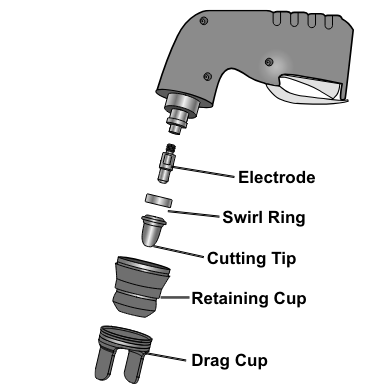](https://wiki.protohaven.org/uploads/images/gallery/2026-02/Amcimage.png)
[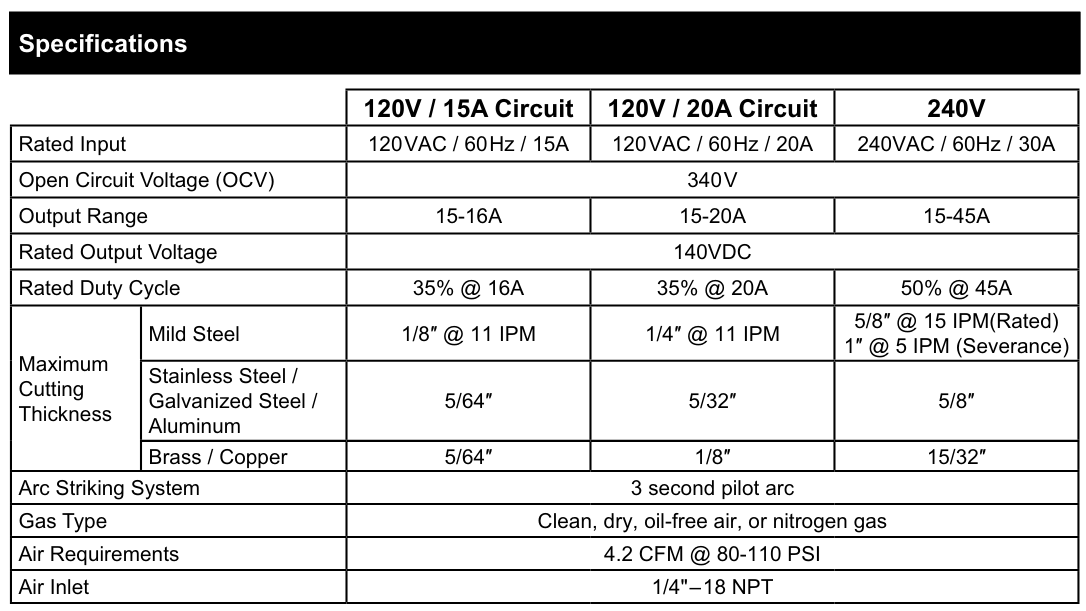](https://wiki.protohaven.org/uploads/images/gallery/2026-02/QBvimage.png)
[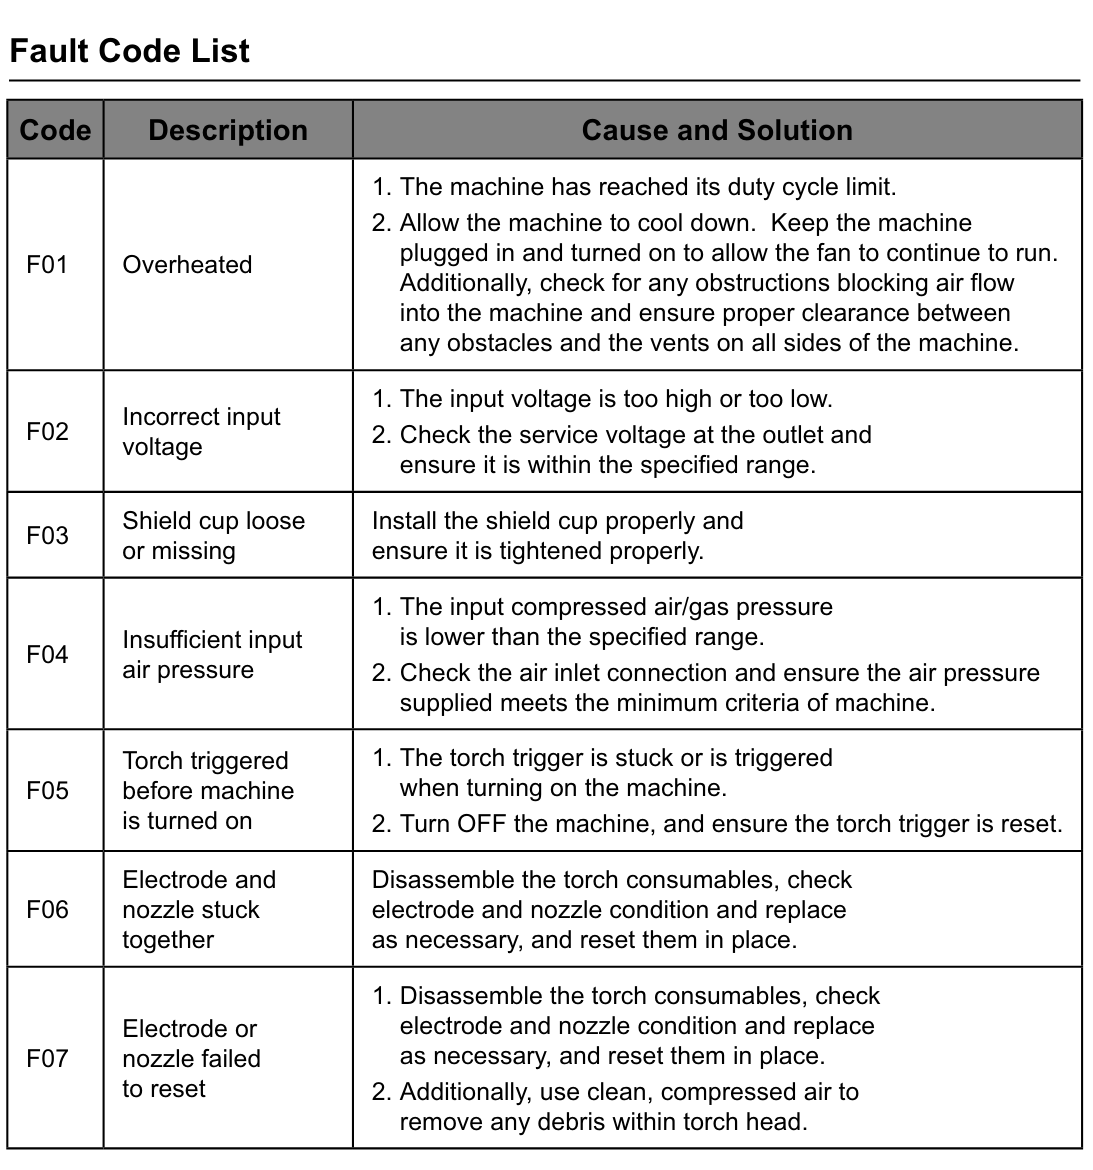](https://wiki.protohaven.org/uploads/images/gallery/2026-02/Ngiimage.png)
# Welding & Plasma Cutting - MIG Welder
Lincoln Electric PowerMIG 256
# Manual(s)
### [MIG Manual](https://ch-delivery.lincolnelectric.com/api/public/content/cd48a32f8fb640e7bbcea640af2b6ac8?v=7d4fd46b)
# Member Notes
# Resources
# MIG Welder Tool Tutorial
The [Setup](https://docs.google.com/document/d/1gx2Gm-SzsWHNR1Wdn59GmXmQOOjW6eH6fycFt-P6-Ns/edit#heading=h.ex7lrkf7dm2k), [Operation](https://docs.google.com/document/d/1gx2Gm-SzsWHNR1Wdn59GmXmQOOjW6eH6fycFt-P6-Ns/edit#heading=h.w363ck6j8o52), and [Cleanup](https://docs.google.com/document/d/1gx2Gm-SzsWHNR1Wdn59GmXmQOOjW6eH6fycFt-P6-Ns/edit#heading=h.4s5ijlcmnku) Checklists of this guide are what instructors use to ensure that you can use the equipment according to community expectations.MIG welding is an efficient, relatively easy way to weld mild steel. The machine continuously feeds steel wire from a spool inside the machine, through the middle of one of the welding leads, to the tip of the gun, where the filler wire itself is used as the welding electrode as it is fed into the weld.
## Usage Highlights
[MIG Clearance](https://www.protohaven.org/equipment/) or [Class Equivalent](https://www.protohaven.org/product-category/classes-events/) Required Before Use
### SAFETY
### CARE
### CLEANUP
1. Wear proper PPE.
1. Protect the welding table from arcing and spatter.
1. Close the argon tank valve.
2. Isolate the welding area with curtains.
2. Use anti-spatter and keep the nozzle clear of build-up.
2. Purge the pressure from the regulator.
3. Do not touch electrically live components.
3. Submit a [maintenance request](http://protohaven.org/maintenance) when needed.
3. Return hoses, clamps, and fixtures to their homes.
## Personal Protective EquipmentWelding Helmet – Shields the eyes from extreme light levels and harmful UV rays. Failure to protect your eyes will cause “welder’s flash” which at it’s mildest can cause inflammation or temporary blindness, and in severe cases, permanent blindness. Auto-darkening helmets can be set to ‘grind’ mode, which causes them to not activate, or to activate at a very low shade. Double-check your shade settings each time you begin an operation. Shade 11 is a common setting for arc welding. 10 should be the minimum shade used.Safety Glasses – Should be worn beneath the welding helmet.A long-sleeved welding jacket is made of leather or flame-retardant cloth which will help protect your skin from UV light and hot sparks. They should be worn any time you are welding.Gloves will protect your hands from UV light and hot sparks. They provide minimal protection when handling hot metal, and you can easily get burned through the gloves when handling freshly welded metal. Handling hot metal with leather gloves will also destroy the gloves. Use pliers to manipulate hot workpieces.Close-toed shoes made of leather or natural fibers should be worn. Open shoes or shoes made of synthetic fibers (which will melt) will allow hot sparks to be trapped against your feet.
## Tool Anatomy
### MACHINE ANATOMY
1. Power Switch - on/off switch
2. Wire feed speed - This controls how fast the wire is fed through the MIG gun. The faster the wire is fed, the more material will be deposited into the weld puddle, and the more current/amperage will be pushed through the circuit. The higher the amperage, the more heat will be put into the weld puddle.
3. Volts Knob - The voltage is set by the operator, and then during welding, the power supply adjusts the current being fed through the arc in order to maintain the desired voltage. Generally, a higher voltage will produce a wider puddle, and a lower voltage will produce a narrower puddle.
4. Trigger Mode - Leave this at ‘2-step’, as it can cause a dangerous situation for the next user if they are not notice the setting. To reduce fatigue in high-production situations it is possible to set the welder to ‘4-step’ and the welder will continue feeding energized wire after releasing the trigger. To stop the welder, the trigger must be depressed and released a second time.
5. Spot time - Provides a timed power pulse in order to create uniform tacks. Power will be cut off after a specified time while keeping the trigger depressed. Generally this is left ‘off’.
6. Run-in - Allows a slower wire feed to be used until the arc is initiated, which can help when starting a weld using difficult materials like stainless steel. Generally this is left ‘off’.
7. Burnback - Controls how long power will be applied after the trigger is released and the wire feed is stopped. This will cause the electrode wire to burn back towards the mig gun, effectively retracting it from the weld puddle before it cools. Too much burnback will cause the wire to fuse itself to the contact tip.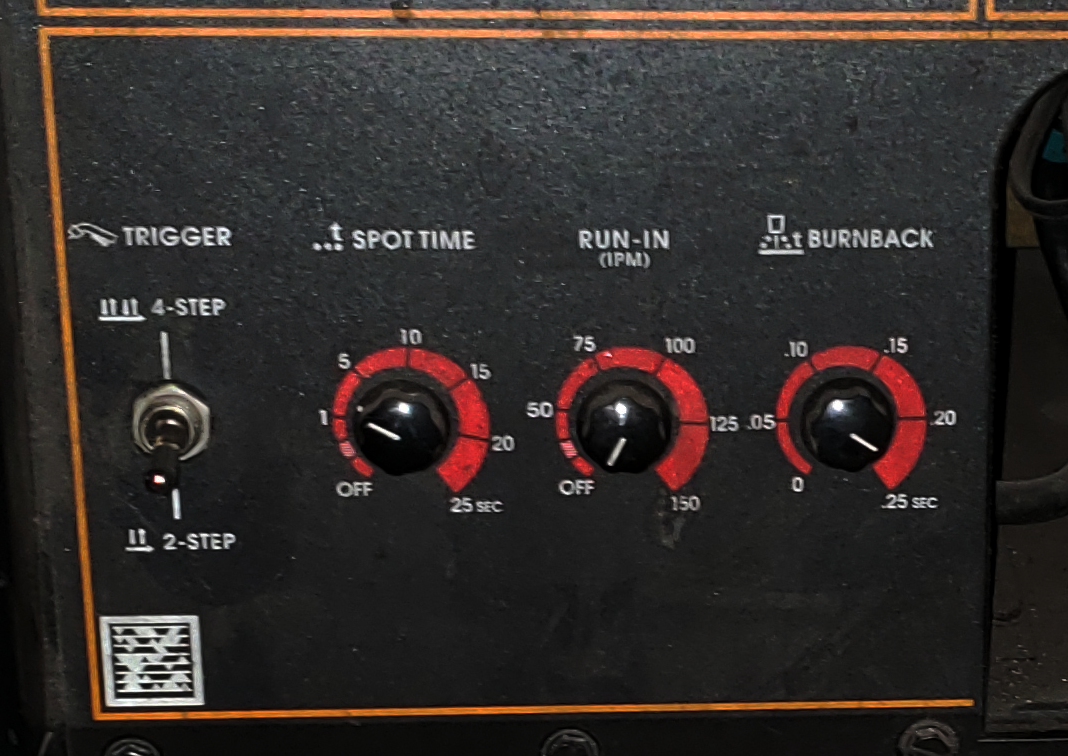
8. Cover - Everything inside the cover should be considered energized when the welder is turned on, so the cover should always be closed unless the machine is unplugged.
9. Wire Spool - The wire pushed out of the gun is stored on a spool inside the welder. You should verify that there is sufficient wire remaining for your project before starting.
10. Feed Rollers - The feed rollers push the wire through the lead to the welding gun. They must match the size of the wire being used.
11. Feed Roller Tensioner - This spring-loaded knob applies the proper amount of pressure to the feed rollers to allow them to push the filler wire without crushing it. It can be pulled to the left to unlock the arm holding the top feed roller.
12. MIG Pliers - These specialized pliers have specialized features that allow you to perform frequently needed maintenance on the mig gun, like clip the filler wire to length, clean out spatter from the nozzle, and unscrew the contact tip. They are also quite useful when moving hot metal pieces around the bench.
13. Ground Clamp - Sometimes referred to as the Work Clamp, this clamp is attached to the workpiece in order to complete the circuit from the electrode back to the welder. This must have good electrical contact with the workpiece in order to achieve a solid arc. Clamp directly to a bare metal part of the workpiece, since clamping this to the table will force the electrical current to jump from the workpiece to the table, and the workpiece will tend to weld itself to the table. Paint and rust will block the current from flowing.
14. MIG Gun - Acts as the second electrode in the welding circuit, and ejects filler wire into the weld.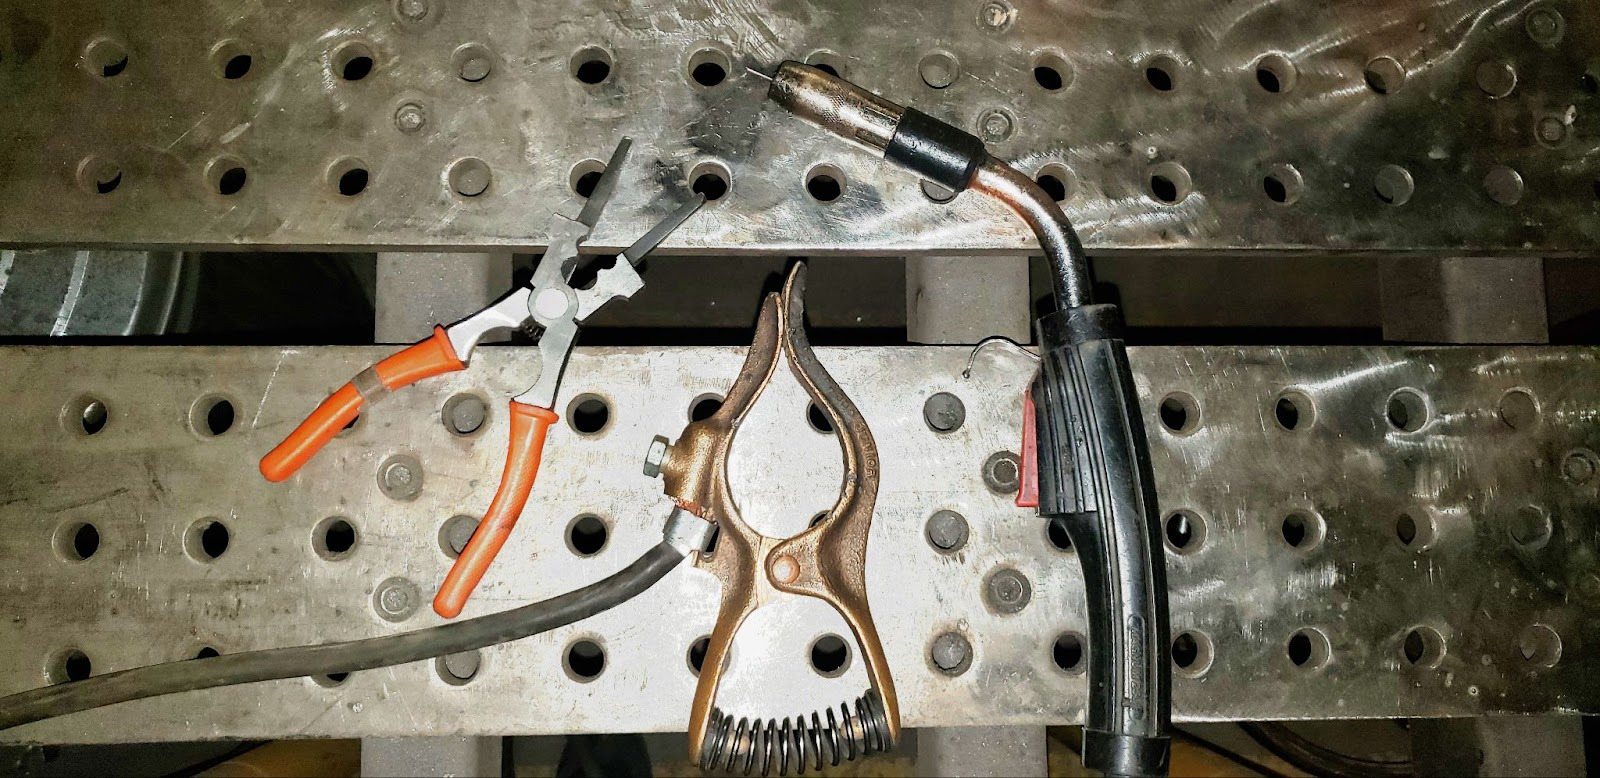
15. Gun Trigger - When depressed, the shielding gas will begin to flow, wire will begin to feed at the set speed, and power will be supplied to the contact tip at the configured voltage.
16. Gas Diffuser - The heart of the MIG gun, the diffuser holds together the gun, contact tip, and nozzle. It also distributes the shielding gas evenly around the nozzle to provide an even flow from the tip of the gun.
17. Contact Tip - The tip at the end of the gun must have an electrode tip that matches the size of the wire. This electrode will wear out over time and should be replaced when damaged. The wire will sometimes weld itself to the tip when there is extreme burnback or spatter. Often the wire can be freed from the tip using pliers.
18. Gas Nozzle - This helps direct the shielding gas over the contact tip and flood the weld area. Weld spatter can build up on and inside the nozzle causing flow issues. Clean the nozzle periodically to ensure good gas flow.
19. Insulator Sleeve - Provides an insulating barrier between the wire electrode and the rest of the welding gun so the user does not get shocked.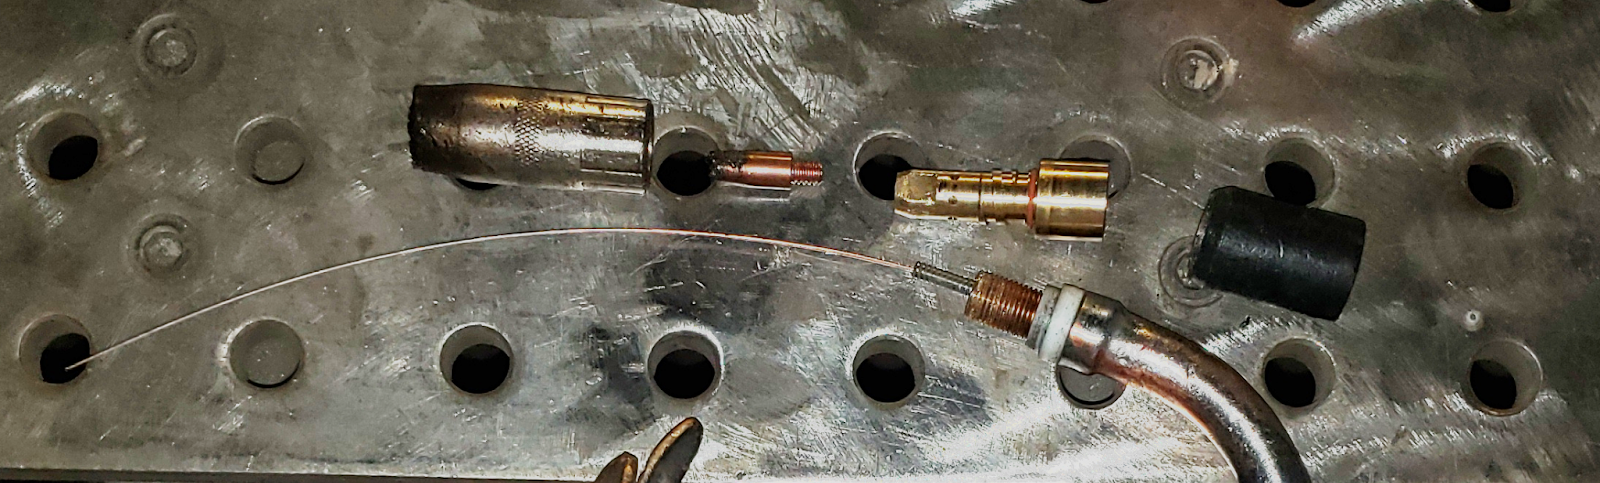
20. Maintenance Tag - Manually tracks the usability status with Green/Yellow/Red cards
## Tool Safety
### COMMON HAZARDSCommon hazards include electrocution, hot surfaces, sparks, UV light exposure, and toxic gasses.To avoid electrocution, never open the side case without unplugging the machine. When operating the welder, make sure that the workpiece is properly grounded with the ground clamp, and that no part of your body is introduced into the circuit between the gun electrode and the workpiece. I.e. do not hold the wire against your hand and pull the trigger. Take care to maintain control over any filler wire that is ejected from the gun while purging the gas lines to prevent incidental contact with any person or nearby objects.When working in the welding area, assume that any metal objects or surfaces are hot. A previous worker may have set down a hot piece of metal and walked away. Hover your hand over any piece to see if it is radiating heat before touching it. Use gloves and pliers as appropriate to move hot pieces.Wear thick, natural-fiber clothing to keep sparks from contacting your skin.UV light is especially harmful to your eyes, but can also cause damage to any exposed skin. Always wear a welding helmet with a shade of at least 10, and cover all skin surfaces.Make sure your workpiece is completely cleaned of any paints or coatings. Heat will travel quite a distance through the workpiece, so you must strip far more than just where you will be welding. Always position the fume hood where it can capture the welding fumes.
### PROHIBITED MATERIALSWorkpieces that are painted, powdercoated, galvanized, or otherwise similarly coated should not be welded. Many solvents, especially those containing chlorine, are prohibited. If at all in doubt, use acetone and allow it to completely evaporate before welding. Toxic fumes can kill you and others nearby.
## Initial Setup
### SETUP CHECKLIST
1. Prepare your weld fitment
2. Put on your PPE
3. Position the workspace protection
4. Secure your workpieces
5. Open the gas tank
6. Turn on the welder and adjust the settings
### Prepare your weld fitmentThis is one of the most critical and time-consuming parts of the welding process. The parts to be welded must be ground down to bare, shiny metal, and be free of oils and debris.A flap disc, grinder, or wire wheel is often used for this purpose. A flat, undamaged work-surface is necessary for precision fitups, so do not grind on the welding table without taking steps to protect the table from incidental grinder contact if you must grind in the welding area. The pieces should fit together snugly; it is possible to fill in gaps with weld, but it is less-than-ideal. When joining material thicker than ¼”, the edges will likely need to be beveled in order to achieve a deep, strong weld.Grinding wheels and wire brushes dedicated to aluminum should not be used to clean steel. Small bits of the steel will become embedded in the wheel or brush, and will contaminate any aluminum it is used on in the future.
### Secure your workpiecesImmobilize your work using clamps, magnets, or other fixturing devices. Give enough room between your weld area and the fixtures to prevent damaging them while welding.
### Put on your PPEFind a welding helmet and adjust the head band so it fits securely on your head. Double-check to make sure the shade level is 10 or higher, and grind mode is not activated. Wear safety glasses under your hood. Make sure you cover all skin surfaces by wearing MIG gloves, a welding jacket, long pants, and shoes made of natural fibers (leather boots preferred).
### Position the workspace protectionMake sure the welding curtains block all possible line-of-sight from the arc to other parts of the shop. Other users of the shop may not be aware that the welding arc may damage their vision.Position the fume extractor above or next to where you will be welding. You should move this frequently for maximum effectiveness as your welding position changes.
### Open the gas tankMake sure the regulator knob is backed off so there is no tension on the spring. Do not unscrew it so far that the knob comes out of the regulator.Very slowly open the tank valve. In rare instances the valve itself has been blown off of the top of the tank while being opened. Do not place your hand on top of the valve handle to avoid serious injury if this were to occur. Opening the tank valve too quickly can shock the regulator, rupturing the diaphram and throwing debris at the operator. Stand to the side of the regulator so as to be out of the most likely path of debris if the regulator were to rupture. Once the tank pressure needle begins to move, stop opening the valve and allow the regulator to pressurize. The right gauge should read somewhere between 100 and 2000 psi. If the gas is low, please submit a maintenance request to swap the tanks. Once the regulator has pressurized, open the valve at least two turns to allow proper gas flow.Once the tank valve has been opened, slowly screw in the regulator knob until the desired working pressure on the left gauge has been achieved. Note that the pressure may drop slightly while shielding gas is actively being dispensed by the welder. Adjust the regulator so that the proper shielding gas coverage will be achieved while actually welding. A common setting for MIG welding is 18cfh. Please be conservative with your setting, and only use as much flow as is needed to get adequate coverage.
### Turn on the welder and adjust the settingsTurn the power switch to “ON”. Using the chart of established settings found on the welder’s case, determine the proper wire feed and voltage and adjust the machine appropriately.Check that the trigger mode is in “2-step”.Turn off the spot time and run-in unless needed.Set your burnback to .15 seconds.
### COMMON SETTINGSVoltage/Feed/Wire diameter chart for 75% Ar / 25% CO2 mix
Wire Size
Setting
⅜”
5/16”
¼”
3/16”
12ga
14ga
16ga
18ga
20ga
22ga
.023”
Voltage
-
-
-
19
18
18
17.5
16.5
16
16
Wire Speed
-
-
-
320
250
230
220
17.5
160
145
.030”
Voltage
20
19.5
19
18
18
17.5
17
16.5
16
16
Wire Speed
390
335
280
240
200
180
155
140
110
100
.035”
Voltage
21
20.5
20
19
18.5
17.5
17
17
16
16
Wire Speed
310
285
260
225
180
170
150
125
100
80
.045”
Voltage
21
20.5
20
18
18
17
17
16
-
-
Wire Speed
240
220
180
155
140
120
110
75
-
-
### CONSUMABLESThe shop is responsible for providing all consumables for the MIG welder, but you will need to know when they need to be replaced.The contact tip should not have any looseness between the orifice and the filler wire. If the wire can be wiggled back and forth in the contact tip, the tip should be replaced.The nozzle should be free of spatter and debris. Coating it with anti-spatter will help keep it clean. If it is partially clogged, use the MIG pliers to clean it out. If the spatter is too well fused to the nozzle to clean out, it must be replaced.The spool of filler wire will need to be replaced when it has been exhausted.
## Basic Operation
### OPERATION CHECKLIST
1. Trim the wire
2. Check your position is clear through the length of the weld
3. Lower your hood
4. Announce “Welding”
5. Tack your pieces together
6. Weld the length of the joint
7. Terminate the arc
8. Allow to cool
9. Clean the weld and inspect
### Trim the wireBefore you weld, you should trim off any excess wire at the end of the gun, establishing your stickout at about ¼”.Check your positionBefore welding, you should check to make sure that you have free and smooth access to the weld joint along it’s entire length. Making a dry run will often bring interference and entanglement issues to your attention.When you are ready to weld, place the tip of the nozzle about ¼” away from the joint. The gun should be pointed directly away from the weld (i.e. straight up in the air if welding on a flat surface) and tilted 10 degrees in the direction of travel. The tip of the wire should not be touching the workpiece when you pull the trigger, but should instead be power-fed into the workpiece.Lower your hoodWith a quick nod of your head, drop the hood over your face.Announce “Welding”Ensure that anyone in the area knows that you are about to initiate an arc by announcing that you are “Welding”. This gives them time to avert their eyes if they are unprepared.TackMake a small tack weld at the start and end of the weld joint you are about to make. This prevents the pieces from shifting or drifting apart during the weld due to heat movement. You should inspect these welds and clean off any soot before continuing.WeldOnce the parts are tacked in place, initiate the arc at one end of the joint and, keeping your perpendicular position with a 10 degree angle towards the direction of travel, keep the filler wire feeding into the weld puddle at the leading edge of the molten pool.The speed with which you move will determine how much ‘build up’ the weld profile will have. The faster you go the lower the bead will be, and the slower you go, the more metal will be deposited along the length of the weld.In many operations, you will find that some amount of ‘weaving’ back and forth across the joint will be needed to tie the weld securely into the material on both sides of the weld. This is often described as drawing a series of “U” shapes, or lowercase cursive “e”s.TerminateWhen you reach the end of the weld joint, pause briefly to add a bit of additional fill at the end of the weld. Without adding this additional fill, the end of your weld will develop a slight crater in it as the molten puddle cools and shrinks. That crater will be a weak spot in the weld, and may lead to cracking and failure of the joint.WaitAfter extinguishing the arc, pause for a moment and let the puddle cool before continuing. Our MIG machine has no post-flow. Cooling the weld artificially by dunking it in water, etc. will thermally shock the weld and will likely lead to cracking and failure.Clean the weld and inspectLook the weld over for signs of porosity, proper fusion at both sides of the weld, and an appropriate bead profile. Use a wire brush to clean off any soot and silicon deposits.
## Cleanup
### CLEANUP CHECKLIST
1. Close tank and purge regulator
2. Turn off welder
3. Store the leads
4. Clean up clamps
5. Sweep the floor
6. Note any maintenance needs or concerns on the tag and at [protohaven.org/maintenance](http://protohaven.org/maintenance)
### Close tank and purge regulatorTurn the tank valve handle clockwise until it is firmly seated in the closed position.The residual pressure must be purged from the regulator to prevent damage to the springs and diaphragm. To release the remaining gas in the lines, the gas solenoid must be activated using the gun trigger, which has the unwanted side-effect of feeding wire. In order to minimize the amount of wire ejected from the gun during purging, turn the wire feed down to its lowest setting.Point the gun in a direction where the extending wire won’t contact any person or objects and pull the trigger. After a few seconds the gas pressure gauges should both drop to zero.Once the gauges are at zero, turn the pressure regulation knob counter-clockwise until there is no tension being put on the diaphragm by the knob. The knob should not be unscrewed completely from the regulator.
### Turn off welderFlip the power switch to ‘OFF’.
### Store the leadsCoil the ground and gun leads loosely and drape them over the handle of the welder.Making sure the welder is off, either clip off the excess wire from the gun tip, or open the cover, unclamp the feed roller tension handle, and slowly turn the wire spool clockwise to re-spool the few inches of excess wire until it is just barely sticking out at tip of the gun.
### Clean up clampsGather any clamps, magnets, and fixtures on the welding tables and return them to the tool cart.
### Sweep the floorUse a broom to sweep the entire welding area, collecting any grinding dust, filler wire, and cut-offs that may be on the floor.
### ScrapThere is a small scrap bin under the cutting table into which recyclable steel may be placed.
## Troubleshooting
### Common Issues
### Possible Causes
### Resolutions
Excessive soot and porosity.
Inadequate or excessive gas flow.Excessive stickout.
Check that the gas cylinder valve is open and there is pressure.Check that the gas flow is set to between 15 and 20 cfh.Listen for gas flow when the trigger is pulled.Hold the gun closer to the work.
Arc will not initiate.Wire stubs out on bottom of weld, pushing the gun away from the work.
Inadequate ground.Worn or dirty contact tip.Improper voltage.Improper wire feed.
Position the ground closer to the weld.Attach the ground clamp to bright, clean metal on the workpiece.Increase voltage.Decrease wire feed.
Cold bead with poor fusion
Excessive stickout.Voltage too low.Wire feed too slow.
Hold the gun closer to the weld.Increase voltage.Increase wire feed.
Additional ResourcesEastwood’s Intro to Mig Welding -[https://www.youtube.com/watch?v=W4-eYXsUr3g](https://www.youtube.com/watch?v=W4-eYXsUr3g)
How to change the MIG wire: [https://www.youtube.com/watch?v=ySdGVEg6Epk](https://www.youtube.com/watch?v=ySdGVEg6Epk) - Skip 3:10-5:17 (for Shop Techs only)
# Welding & Plasma Cutting - TIG Welder
# Manual(s)
*Manuals and other reference materials from the manufacturer or other sources.*
- Model: Lincoln Electric Precision TIG 225
- Manufacturer: [Link](https://www.lincolnelectric.com/en/)
- Manual: [https://drive.google.com/file/d/1hsCRIXgpst2UtDMhiFR07auMWp3RN9Tf/view?usp=drive\_link](https://drive.google.com/file/d/1hsCRIXgpst2UtDMhiFR07auMWp3RN9Tf/view?usp=drive_link)
# Member Notes
# Resources
*Where to obtain materials, consumables, and tooling.*
## Videos
# TIG Welder Tool Tutorial
The [Setup](https://docs.google.com/document/d/1hlOoq0Rw9FORYjTqfFTD48tlur-mqFuLlqNN3Nf0zsg/edit#heading=h.ex7lrkf7dm2k), [Operation](https://docs.google.com/document/d/1hlOoq0Rw9FORYjTqfFTD48tlur-mqFuLlqNN3Nf0zsg/edit#heading=h.w363ck6j8o52), and [Cleanup](https://docs.google.com/document/d/1hlOoq0Rw9FORYjTqfFTD48tlur-mqFuLlqNN3Nf0zsg/edit#heading=h.4s5ijlcmnku) Checklists of this guide are what instructors use to ensure that you can use the equipment according to community expectations.TIG welding is a versatile method of welding that is considered one of the best ways to weld aluminum and thin steels. Though extremely precise welds are possible, TIG is often slower than other welding methods, and can be difficult to learn due to the coordination required. The welding torch held in one hand is used to melt the base metal, and then the tip of a filler rod held in the other hand is dabbed into the molten puddle to build up the weld. A foot pedal is used to initiate and extinguish the arc, and is also used to vary the amperage as needed to control the size of the weld puddle as it is pushed along the weld joint.
## Usage Highlights
[TIG Clearance](https://www.protohaven.org/equipment/) or [Class Equivalent](https://www.protohaven.org/product-category/classes-events/) Required Before Use
### SAFETY
### CARE
### CLEANUP
1. Wear proper PPE.
1. Protect the welding table from arcing and spatter.
1. Close the argon tank valve.
2. Isolate the welding area with curtains.
2. Secure the TIG torch when setting it down to prevent it from falling off the table and breaking the cup.
2. Purge the pressure from the regulator.
3. Do not touch electrically live components.
3. Do not grind troughs into the grinding wheel.
3. Return hoses, clamps, and fixtures to their homes.
4. Submit a [maintenance request](http://protohaven.org/maintenance) when needed.
## Personal Protective EquipmentWelding Helmet – Shields the eyes from extreme light levels and harmful UV rays. Failure to protect your eyes will cause “welder’s flash” which at it’s mildest can cause inflammation or temporary blindness, and in severe cases, permanent blindness. Auto-darkening helmets can be set to ‘grind’ mode, which causes them to not activate, or to activate at a very low shade. Double-check your shade settings each time you begin an operation. Shade 11 is a common setting for arc welding. 10 should be the minimum shade used.Safety Glasses – Should be worn beneath the welding helmet.A long-sleeved welding jacket is made of leather or flame-retardant cloth which will help protect your skin from UV light and hot sparks. They should be worn any time you are welding.Gloves will protect your hands from UV light and hot sparks. TIG gloves are thinner than other welding gloves in order to provide more dexterity, but they provide less protection when handling hot metal, and you can easily get burned through the gloves when handling freshly welded metal. Handling hot metal with leather gloves will also destroy the gloves. Use pliers to manipulate hot workpieces.Close-toed shoes made of leather or natural fibers should be worn. Open shoes or shoes made of synthetic fibers (which will melt) will allow hot sparks to be trapped against your feet.
## Tool Anatomy
### MACHINE ANATOMY
1. Power Switch - on/off switch
2. Polarity Selector - This selector allows the user to define whether the torch electrode is always negative (DCEN), always positive (DCEP), or alternates between positive and negative (AC). Most steel wil be welded in DCEN, and most aluminum will be welded in AC.
3. Output Knob - The amperage is set by the user, and dictates how much electrical current will pass through the arc.
4. Mode Selector - Put the machine in “STICK” or “TIG” mode. This should always be set to “TIG” when TIG welding.
5. AC BALANCE - When in AC mode (mostly for aluminum), determines the amount of time spent in DCEN (welding) vs DCEP (cleaning). The more time spent in DCEP the hotter the tungsten will become, but the more cleaning action will be apparent on the work piece. The cleaning action should be kept to a minimum, where it will adequately clear the aluminum oxide away from the weld puddle, but does not extend much further.
6. Pulse Frequency - The machine can automatically raise and lower the amperage in a repeating cycle. This can be useful when doing delicate work to help control heat.
7. Postflow - Amount of time to flow gas after the arc is terminated. Provides covering gas as the weld cools.
8. Ground Clamp - Sometimes referred to as the Work Clamp, this clamp is attached to the workpiece in order to complete the circuit from the electrode back to the welder. This must have good electrical contact with the workpiece in order to achieve a solid arc. Clamp directly to a bare metal part of the workpiece, since clamping this to the table will force the electrical current to jump from the workpiece to the table, and the workpiece will tend to weld itself to the table. Paint and rust will block the current from flowing.
9. TIG Torch - Acts as the second electrode in the welding circuit. The torch assembly is made of the torch body, a collet, a collet body, a back cap, a cup, and the tungsten electrode.
10.
11. Tungsten Electrode - The TIG torch uses a tungsten as an electrode, which is fairly heat resistant, especially compared to the other common welding techniques like MIG or stick welding. Tungsten electrodes come in different alloys and sizes. Mild steel and aluminum both weld well with lanthanated tungsten (purple) or ceriated tungsten (gray). Do not use thoriated tungsten (red) in the shop, as it is radioactive, and the grinding dust poses a health hazard to you and other members. Pure tungsten (green) is also available, but does not hold an arc as well as blended types. Using too small a diameter tungsten for a given amperage will cause it to melt, and using too large a diameter tungsten for a given amperage will leave it too cold to properly emit electrons, leading to unstable arc properties. AC and DCEP processes heat the tungsten more than DCEN, and may need a larger diameter to prevent melting the electrode.
12. Collet Holder - The collet holder screws into the head of the torch and encapsulates the collet when the torch is assembled.
13. Cup - The cup directs the shielding gas around the tungsten and towards the weld joint. It is screwed on to the collet holder after the collet holder is installed in the torch head.
14. Collet - The collet slides into the back of the collet holder, and when it is compressed against the inside of the collet holder it pinches the electrode and holds it firmly in place at its current length.
15. Back Cap - Screws into the back of the torch as the last part of assembly, and pushes the collet into the collet holder.
16. Maintenance Tag - Manually tracks the usability status with Green/Yellow/Red cards
## Tool Safety
### COMMON HAZARDSCommon hazards include electrocution, hot surfaces, sparks, UV light exposure, and toxic gasses.To avoid electrocution, never open the side case without unplugging the machine. When operating the welder, make sure that the workpiece is properly grounded with the ground clamp, and that no part of your body is introduced into the circuit between the gun electrode and the workpiece. I.e. do not hold the wire against your hand and pull the trigger. Take care to maintain control over any filler wire that is ejected from the gun while purging the gas lines to prevent incidental contact with any person or nearby objects.When working in the welding area, assume that any metal objects or surfaces are hot. A previous worker may have set down a hot piece of metal and walked away. Hover your hand over any piece to see if it is radiating heat before touching it. Use gloves and pliers as appropriate to move hot pieces.Wear thick, natural-fiber clothing to keep sparks from contacting your skin.UV light is especially harmful to your eyes, but can also cause damage to any exposed skin. Always wear a welding helmet with a shade of at least 10, and cover all skin surfaces.Make sure your workpiece is completely cleaned of any paints or coatings. Heat will travel quite a distance through the workpiece, so you must strip far more than just where you will be welding. Always position the fume hood where it can capture the welding fumes.PROHIBITED MATERIALSWorkpieces that are painted, powdercoated, galvanized, or otherwise similarly coated should not be welded. Many solvents, especially those containing chlorine, are prohibited. If at all in doubt, use acetone and allow it to completely evaporate before welding. Toxic fumes can kill you and others nearby.Thoriated tungsten electrodes are radioactive, and not permitted.
## Initial Setup
### SETUP CHECKLIST
1. Prepare your weld fitment
2. Prepare your tungsten
3. Assemble the torch
4. Put on your PPE
5. Position the workspace protection
6. Secure your workpieces
7. Open the gas tank
8. Turn on the welder and adjust the settings
### Prepare your weld fitmentThis is one of the most critical and time-consuming parts of the welding process. The parts to be welded must be ground down to bare, shiny metal, and be free of oils and debris.A flap disc, grinder, or wire wheel is often used for this purpose. A flat, undamaged work-surface is necessary for precision fitups, so do not grind on the welding table without taking steps to protect the table from incidental grinder contact if you must grind in the welding area. The pieces should fit together snugly; it is possible to fill in gaps with weld, but it is less-than-ideal. When joining material thicker than ¼”, the edges will likely need to be beveled in order to achieve a deep, strong weld.Grinding wheels and wire brushes dedicated to aluminum should not be used to clean steel. Small bits of the steel will become embedded in the wheel or brush, and will contaminate any aluminum it is used on in the future. Contamination of this type can lead to rust spots and weld failure.
### Prepare Your TungstenThe tungsten will need to be periodically sharpened as it will become contaminated if it touches the weld puddle or if it overheats and loses its shape. Even a perfectly cared tungsten will eventually need to be resharpened due to natural erosion or “burnoff” that occurs over time during welding. The exact angle of the grind is not critical for hobby level work, but does have an effect on arc stability and tungsten longevity. Generally, a pencil-tip is adequate. The very tip may be ground flat to increase longevity, or left sharp to increase arc starting and stability. Always wear safety glasses when grinding. Hold the tungsten so the grind marks are along the length of the tungsten, not across it. Do not create deep grooves in the grinding wheel, even though it makes for an easy surface, as it weakens the wheel and it may shatter explosively. Stand to the side of the wheel to avoid debris. If a tungsten has been contaminated by being dipped into the weld puddle, snap off the end to avoid contaminating the grinding wheel with non-tungsten materials. Do not try to cut the tungsten with wire cutters, as it will damage the cutters. It is safer to ‘drag’ the point as you grind, so the point does not catch on the wheel and drive it towards the operator. If grinding against the tip, DO NOT hold the tail end against your palm, or the tungsten can be driven through your hand.
### Assemble the torch
1. Screw the collet holder onto the front of the torch (the side with the white ring). This should be firmly finger-tight.
2. Screw the cup onto the collet holder. This should be tightened enough to close the gap between the cup and the white plastic ring, but gently, as overtighening can cause the white ring to shear off of the torch.
3. Insert the collet into the back of the torch. It should drop completely into the collet holder.
4. Insert the tungsten into the collet from the back of the torch. The sharpened end should go through the torch and come out the front of the cup. The fine adjustments to how far the tungsten sticks out from the torch will be adjusted later.
5. Screw on the back cap until it just starts to provide resistance. If you are using a new tungsten, you must use a long back cap to encapsulate the entire length of the rod. If you are using a mostly used-up rod, a shorter back cap can be used to reduce the profile of the torch.
6. While the back cap is only partially tightened, there should be enough resistance between the collet and the tungsten that you can adjust the length of the tungsten by grabbing the point with your fingers and moving it in and out of the torch. Move it so that the tungsten protrudes roughly two times the diameter of the tungsten rod.
7. Tighten down the back cap firmly to lock the tungsten in place.
### Secure your workpiecesImmobilize your work using clamps, magnets, or other fixturing devices. Give enough room between your weld area and the fixtures to prevent damaging them while welding.
### Put on your PPEFind a welding helmet and adjust the head band so it fits securely on your head. Double-check to make sure the shade level is 10 or higher, and that grind mode is not activated. Wear safety glasses under your hood. Make sure you cover all skin surfaces by wearing MIG gloves, a welding jacket, long pants, and shoes made of natural fibers (leather boots preferred).
### Position the workspace protectionMake sure the welding curtains block all possible line-of-sight from the arc to other parts of the shop. Other users of the shop may not be aware that the welding arc may damage their vision.Position the fume extractor above or next to where you will be welding. You should move this frequently for maximum effectiveness as your welding position changes.
### Open the gas tankMake sure the regulator knob is backed off so there is no tension on the spring. Do not unscrew it so far that the knob comes out of the regulator.Very slowly open the tank valve. In rare instances the valve itself has been blown off of the top of the tank while being opened. Do not place your hand on top of the valve handle to avoid serious injury if this were to occur. Opening the tank valve too quickly can shock the regulator, rupturing the diaphram and throwing debris at the operator. Stand to the side of the regulator so as to be out of the most likely path of debris if the regulator were to rupture. Once the tank pressure needle begins to move, stop opening the valve and allow the regulator to pressurize. The right gauge should read somewhere between 100 and 2000 psi. If the gas is low, please submit a maintenance request to swap the tanks. Once the regulator has pressurized, open the valve at least two turns to allow proper gas flow.Once the tank valve has been opened, slowly screw in the regulator knob until the desired working pressure on the left gauge has been achieved. Note that the pressure may drop slightly while shielding gas is actively being dispensed by the welder. Adjust the regulator so that the proper shielding gas coverage will be achieved while actually welding. A common setting for TIG welding is 15cfh. Please be conservative with your setting, and only use as much flow as is needed to get adequate coverage. Too much gas flow can actually draw atmospheric air with it, contaminating the weld. Imagine the gas creating a small pillow of air surrounding the weld, rather than a rush of air blowing over it.
### Turn on the welder and adjust the settingsTurn the power switch to “ON”. Using the chart of established settings found on the welder’s case, determine the proper amperage and adjust the machine appropriately.
### COMMON SETTINGSFor a ballpark amperage setting, use one amp for every .001”. E.g. a ⅛” thick plate would be .125” thick, so an amperage of 125 would be about right.Filler rods should be thinner than the material being welded, but the smaller the diameter, the faster you will have to feed.Tungsten diameter needs to be large enough that the electrode does not melt, but using too large an electrode will degrade the arc quality.
### CONSUMABLESMembers are responsible for purchasing and maintaining their own tungsten electrodes. The shop will make every effort to have available standard collets, collet holders, and cups, but serious welders may wish to bring their own.A small selection of steel and aluminum filler rods are available to purchase from the store, but serious welders may wish to bring their own supply.
## Basic Operation
### OPERATION CHECKLIST
1. Check ground clamp.
2. Position torch.
3. Position filler rod.
4. Check your position.
5. Lower your hood.
6. Announce that you are “WELDING”.
7. Initiate an arc.
8. Establish a weld puddle.
9. Add filler rod.
10. Move and repeat.
11. Terminate the weld.
### Check ground clampEnsure that your ground clamp has good electrical contact with your workpiece. It should be attached to bright, clean metal.
### Position torchHold the torch so the tip of the tungsten electrode is 1/8” from and perpendicular to the workpiece. Angle the tip of the torch 10 degrees towards the direction of travel.
### Position filler rodHold the filler rod in our other hand at a low angle over the intended weld path, pointed towards the torch’s electrode. This will let you access the weld puddle under the leading edge of the torch cup. You should aim to maintain about three inches of filler rod between your feeding hand and the weld puddle.
### Check your positionBefore welding, you should check to make sure that you have free and smooth access to the weld joint along it’s entire length. Making a dry run will often bring interference and entanglement issues to your attention.
### Lower your hoodWith a quick nod of your head, drop the hood over your face.
### Announce “Welding”Ensure that anyone in the area knows that you are about to initiate an arc by announcing that you are “Welding”. This gives them time to avert their eyes if they are unprepared, and lets people who may be about to enter the area that it is unsafe to do so.
### Tack the ends of the jointMake a small tack weld at the start and end of the weld joint you are about to make. This prevents the pieces from shifting or drifting apart during the weld due to heat movement. You should inspect these welds and clean off any soot before continuing.
### Initiate an arcDepress the foot pedal all the way to initiate an arc. The electrode should stay at a consistent height and should not move.
### Establish a weld puddleOnce the arc is initiated, holding it in one place over the workpiece will add heat where the arc contacts the metal. When the metal melts, it will become smooth and shiny, forming a small pool of molten metal.
### Add filler rodOnce a weld pool has formed, lightly dip the tip of the filler rod into the leading edge of the pool. You do not want to melt the rod with the arc, but rather let the pool absorb the filler rod directly. Be careful not to let the tungsten electrode touch the puddle, as the fluid level will rise as material is added. Pull the filler rod back away slightly from the pool, but keep it close enough that it stays within the envelope of shielding gas from the torch.
### Move and repeatAfter adding a dab of filler rod, move the torch slightly forward along the weld joint in order to melt the next bit of metal in the direction you are welding. Pause and wait for the molten puddle to follow the path of the torch and establish itself under the arc. Add another dab of filler rod as before.
### Terminate the weldWhen you reach the end of the weld joint, the build-up of heat in the workpiece may be significant, and you will likely need to taper off on the foot pedal in order to decrease the heat of the arc as you come to the end of your weld. As you reach the termination point, pause briefly with the arc still active and add a bit of additional filler rod at the end of the weld. Without adding this additional fill, the end of your weld will develop a slight crater in it as the molten puddle cools and shrinks. That crater will be a weak spot in the weld, and may lead to cracking and failure of the joint.
### WaitAfter extinguishing the arc, pause for a moment and let the puddle cool before continuing. The TIG machine is equipped with post-flow, which keeps the shielding gas flowing for a short time after the arc has been extinguished. Keeping the hot weld shielded until it is no longer glowing is critical to keeping the weld uncontaminated.
### Clean the weld and inspectLook the weld over for signs of porosity, proper fusion at both sides of the weld, and an appropriate bead profile. Use a wire brush to clean off any soot and silicon deposits.
## Cleanup
### CLEANUP CHECKLIST
1. Close tank and purge regulator
2. Turn off welder
3. Store the leads
4. Clean up clamps
5. Sweep the floor
6. Note any maintenance needs or concerns on the tag and at [protohaven.org/maintenance](http://protohaven.org/maintenance)
### Close tank and purge regulatorTurn the tank valve handle clockwise until it is firmly seated in the closed position.The residual pressure must be purged from the regulator to prevent damage to the springs and diaphragm. Point the torch in a safe direction where it won’t contact any person or objects and depress the foot pedal. After a few seconds the gas pressure gauges should both drop to zero.Once the gauges are at zero, turn the pressure regulation knob counterclockwise until there is no tension being put on the diaphragm by the knob. The knob should not be unscrewed completely from the regulator.
### Turn off welderFlip the power switch to ‘OFF’.
### Store the leadsCoil the ground and torch leads loosely and drape them over the handle of the welder. Remove your tungsten from the torch once it has cooled. The rest of the torch may be left assembled, but care should be taken not to drop or damage the delicate ceramic cup.
### Clean up clampsGather any clamps, magnets, and fixtures on the welding tables and return them to the tool cart.
### Sweep the floorUse a broom to sweep the entire welding area, collecting any grinding dust, filler wire, and cut-offs that may be on the floor.
### ScrapThere is a small scrap bin under the cutting table into which recyclable steel may be placed.
## Troubleshooting
### Common Issues
### Possible Causes
### Resolutions
Excessive soot and porosity.
Inadequate or excessive gas flow.Excessive stickout.
Check that the gas cylinder valve is open and there is pressure.Check that the gas flow is set to between 13 and 18 cfh.Listen for gas flow when the pedal is depressed.Hold the electrode closer to the work.
Arc is crackling, spitting, and wandering.Tungsten is no longer pencil-shaped.
Tungsten is contaminated.
Remove electrode from torch and resharpen.
Arc will not initiate.
Inadequate ground.Insufficient pedal.Improper amperage.Torch too high.
Position the ground closer to the weld.Attach the ground clamp to bright, clean metal on the workpiece.Push pedal all the way to the floor.Increase amperage.Hold torch closer to work.
The workpiece is getting too hot
The arc length is too long.
Hold the electrode closer to the puddle.
## Additional ResourcesWeld.com’s introduction to TIG welding - https://www.youtube.com/watch?v=gCCdiksvXMU&list=PLcWz87a3qt23IU0NVBdTTuAYNCmHQoG5A&index=1
# Plastics - Injection Molder
Morgan Press G-100T Injection Molder
Clearance: Required
# Custom (3D Printed) Molds
- [MoldHolder\_Small\_BlankVolume.step](https://wiki.protohaven.org/attachments/582)
# Manual(s)
*Manuals and other reference materials from the manufacturer or other sources.*
- *[Injection Molder Manual 2- press-MP\_Manual.pdf](https://wiki.protohaven.org/attachments/182)*
# Member Notes
# Resources
*Where to obtain materials, consumables, and tooling.*
*[www.Protomold.com](https://www.Protomold.com) Online mold design guidelines plus a design tips e-mail newsletter.*
*Plastic Part Design for Injection Molding, Robert A. Malloy
(Hanser/Gardner Publications — ISBN 1-56990-129-5. Around $80 used.)
Good coverage of the broad range of mold design issues.*
# Tool Tutorial
### Morgan Industries G-100T Injection Molding Machine
The injection-molding machine forms plastic parts by melting plastic and forcing the plastic into a multi-plate mold that is held in a powerful clamp. After the plastic solidifies, the clamp is released, allowing the finished part to be removed from the mold. The basic cycle is clamp, melt, inject, pack, solidify, unclamp, eject.
- **Clamp**: The two (or more) parts of the mold are brought together and held under pressure by a strong clamp.
- **Melt**: Feed stock material is brought up to melting temperature and becomes a viscous liquid. This is often called “the melt.”
- **Inject**: The melt is forced into the mold cavity, filling it completely.
- **Pack**: The melt is held at pressure inside the mold until the gate solidifies. (The “gate” is the final orifice that material flows through into the cavity.)
- **Solidify**: The material is allowed to harden in the mold. As it solidifies, it will shrink. The amount of shrink depends on the material and your process.
- **Unclamp**: The parts of the mold are pulled apart to allow the work piece to be removed.
- **Eject**: The work piece is removed from the mold and allowed to continue to cool. It may shrink further as it cools.
On the G-100T, all of these processes are manually controlled. This provides great flexibility and allows you to use complex molds without having to do any complicated controller programming. In injection molding, the key to quality is a consistent process. Since with our machine you are the controller, you will get the best results by developing a rhythm and keeping up a comfortable and consistent pace as you make parts.
[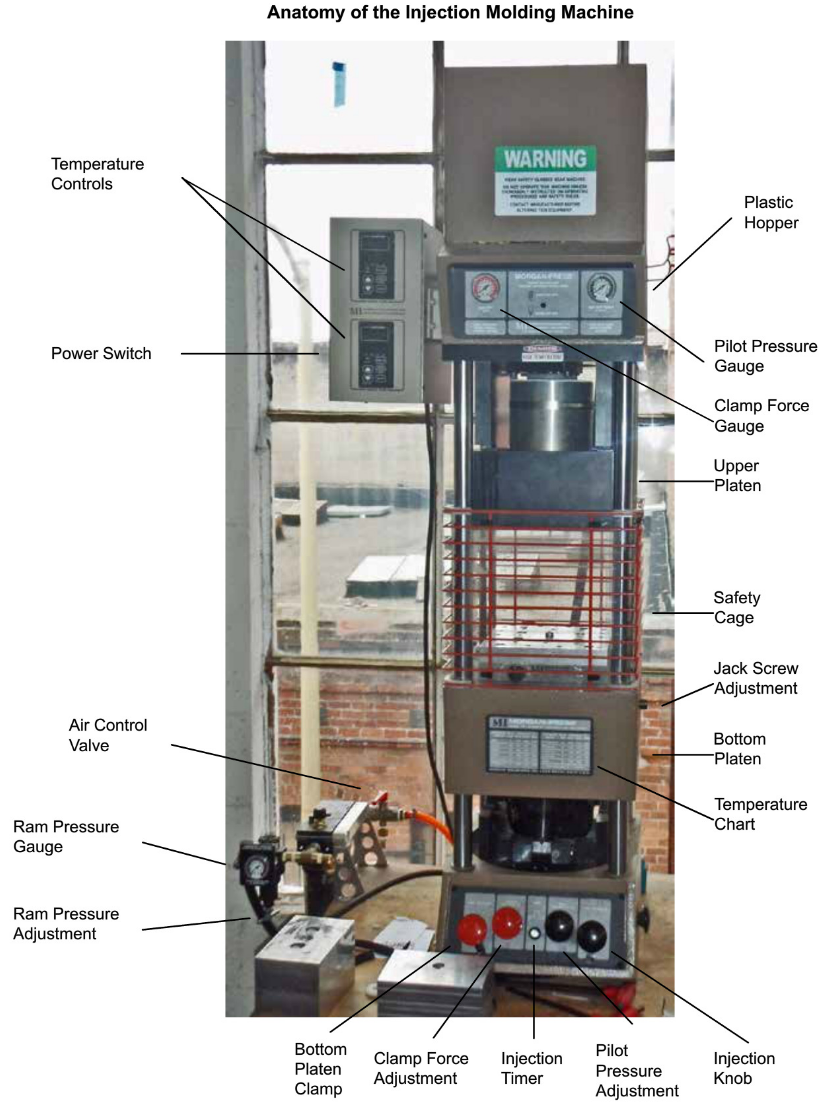](https://wiki.protohaven.org/uploads/images/gallery/2025-01/av6image.png)
### Safety and Procedures
- Some parts of the machine are hot and can cause severe burns
- Hot plastic is sticky and can cause severe burns
- Wear leather or heat-resistant gloves to protect your hands from hot molds and plastic
- The machine has a powerful clamp that can cause crushing injuries. Do not defeat the safety interlock, and watch for fingers around the lower platen when clamping and unclamping
- The machine has a powerful ram that can cause crushing injuries. Do not defeat the safety interlock. Do not open the feed chute door before the ram has completed its return stroke
- Know what, if anything, your chosen material out-gasses during the melt phase and ensure adequate ventilation
- Know the correct process temperatures for your material. Avoid excessive process temperatures. Some resins give off noxious fumes when overheated, and all will quickly degrade. Excessive temperatures don’t help — imagine melting ice cubes — water at 80°F isn’t any more liquid than water at 40°F — so, too, with plastic
- Do not process “mystery material.” It may out-gas unacceptable fumes, or may be corrosive.
- Know the properties of your material and obtain a data sheet from the manufacturer, if possible.
- DO NOT RUN SHAPELOCK - it is a very low-temperature plastic not suitable for injection
molding
### Basic Anatomy of a Mold
Making parts with an injection-molding machine requires that you bring a mold to use with the machine. There are many subtleties in mold design; this tool tutorial only covers the basic parts and nomenclature of a mold.
Figure 1 shows the cross-section of a simple two-part manual mold for a cup:
[](https://wiki.protohaven.org/uploads/images/gallery/2025-01/5Smimage.png)
##### Bottom Plate
The bottom plate has a locating socket that centers the mold over the locating pin on the mold heater.
The core that forms the interior profile of the work piece is, in this case, part of the bottom plate. Where the top and bottom plates meet is called the parting line. The top and bottom plates of a mold need to meet with correct alignment. In this mold, a simple step is turned in the bottom plate that mates with a ring turned in the top plate.
#### Top Plate
The top plate molds the exterior profile of the part. The locating ring turned in the top plate is milled through on each side to provide places to insert tools to pry apart the two parts of the mold. The injector nozzle on the G-100T is a 1” diameter ball with a 3/16” orifice. This mold is designed to use a sprue bushing (not shown) between the nozzle and the mold. The sprue carries the melt from the nozzle to the gate.
Molds should be vented to allow air to escape when material is injected. Vents are typically 0.002” deep channels milled along the parting line from an edge or corner where air would be trapped. For the class mold, the vents were machined from the edge of the part to the pry gaps for simplicity.
#### Other Features
More sophisticated molds have additional features. Runners distribute material from the sprue to the gates in multi-gate or multi-cavity molds. Core pulls are additional parts of a mold inserted from the side to create more complex features than a two-piece mold will allow. Ejector pins are used to pop the part from the mold when the machine unclamps. Inserts are components placed in the mold to become part of the finished work piece.
### Using the Injection Molder
The injection molder requires many steps to set it up. It may seem a little overwhelming at first, but it will get easier each time you use the machine.
#### Remove Leftover Plastic and Fill Hopper
Start by checking the hopper for plastic left over from the previous user. If there is plastic in the hopper, you'll have to heat up the machine up and purge the hopper before adding your own plastic, which is covered a little later on. If there is no leftover plastic in the hopper, fill the hopper with the plastic you'll be using.
[](https://wiki.protohaven.org/uploads/images/gallery/2025-01/DSTimage.png)
#### Preheat Injection Molder
1. Turn ON the injection molder by flipping the switch on the side of the temperature control housing.[](https://wiki.protohaven.org/uploads/images/gallery/2025-01/7Syimage.png)
2. Adjust the temperatures to match the material you will be injecting based on the chart on the front of the machine.[](https://wiki.protohaven.org/uploads/images/gallery/2025-01/GQAimage.png)
3. Begin heating the heater block to the correct temperature for your plastic. The mold, injector nozzle and heater take about 20 minutes to heat up, so be careful not to burn yourself on anything while setting up the rest of the machine.
[](https://wiki.protohaven.org/uploads/images/gallery/2025-01/xC9image.png)
4. Connect the machine to a shop air supply, and turn the air on to the machine using the valve in back.[](https://wiki.protohaven.org/uploads/images/gallery/2025-01/lncimage.png)
5. Open the material hopper cage. There is a safety device that will not let the machine activate the plastic injection stroke when the hopper cage is open, which makes the machine much safer while your hands are inside it and in range of the injection nozzle.
#### Set Up Mold
1. Insert the locating bolt into the heater block on the bottom platen. The locating bolt keeps your mold centered under the injection nozzle.
[](https://wiki.protohaven.org/uploads/images/gallery/2025-01/eyiimage.png)
2. Place the riser block onto the locating bolt and spin it to make sure the locating bolt in the riser stays centered. Depending on the height of your mold, you may not need a riser block. Make sure there isn’t any foreign material on the riser or heater block surfaces. The riser block should spin freely about the locating bolt and should not rock when applying pressure to one side or the other.
[](https://wiki.protohaven.org/uploads/images/gallery/2025-01/lSQimage.png)
3. Carefully put the two halves of the mold together. Any scratches inside the mold will leave marks on your molded parts. Place the sprue bushing on the top of the mold and place the mold on the riser block. Check for any gaps or uneven parts resulting from misalignment or foreign material on the mold.
[](https://wiki.protohaven.org/uploads/images/gallery/2025-01/41Limage.png)
4. Adjust the clamp force to 10 tons by turning the clamp force knob. Ten tons is the maximum clamping force that may be placed on the injection nozzle. Depending on the design and size of your mold, you may need to use more or less pressure.
[](https://wiki.protohaven.org/uploads/images/gallery/2025-01/L5Bimage.png)
5. Adjust the Pilot Pressure to 6.
[](https://wiki.protohaven.org/uploads/images/gallery/2025-01/KUMimage.png)
6. Check to make sure the upper platen is fully raised. If it is not, loosen the four bolts holding it in position. Be sure to support the upper platen when loosening the last bolt, since it is very heavy. Let the platen fall as far as it can, then slide the safety cage down to reveal the backing bolts at each corner and thread them all the way up into the machine.[](https://wiki.protohaven.org/uploads/images/gallery/2025-01/EX6image.png)
7. Raise the safety cage (it may take quite a bit of force to engage the catch), then raise the upper platen as far as it will go and clamp it in place by tightening one bolt.
[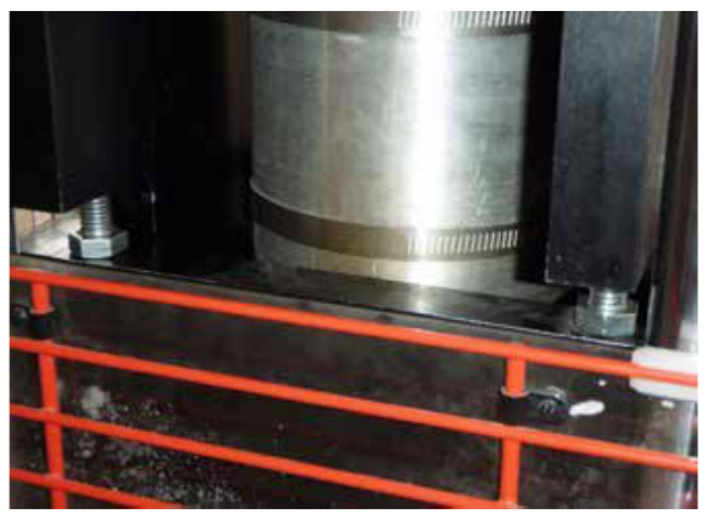](https://wiki.protohaven.org/uploads/images/gallery/2025-01/UNGimage.png)
8. Remove the mold from the machine (use gloves; it will be warm), lower the safety cage, release the safety on the clamp knob, and push it in to raise the bottom platen.
[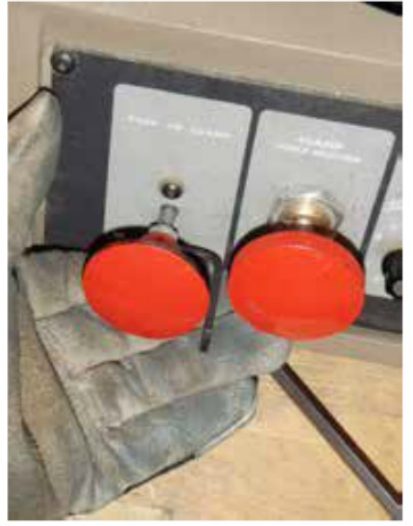](https://wiki.protohaven.org/uploads/images/gallery/2025-01/mkSimage.png)
9. Raise the safety cage, place the mold and sprue bushing on the riser block to check clearances. There should be about 1/4” between the top of the assembly and the injection nozzle. If there is not enough clearance, lower the bottom platen by turning the adjustment screw on the side of the machine.
[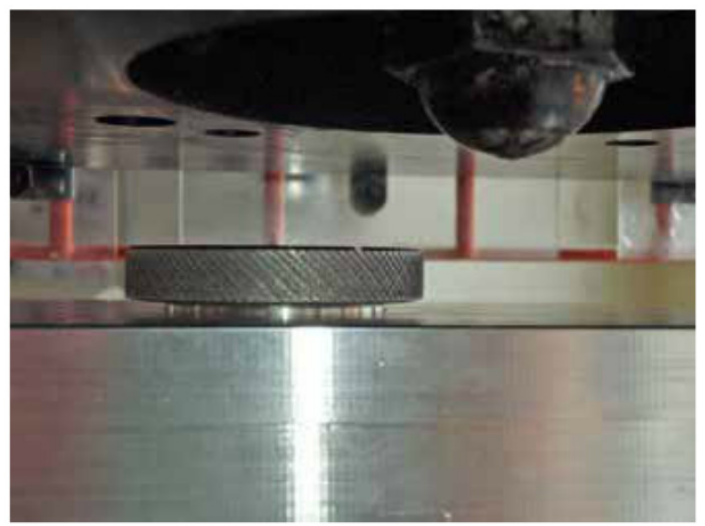](https://wiki.protohaven.org/uploads/images/gallery/2025-01/XCIimage.png)[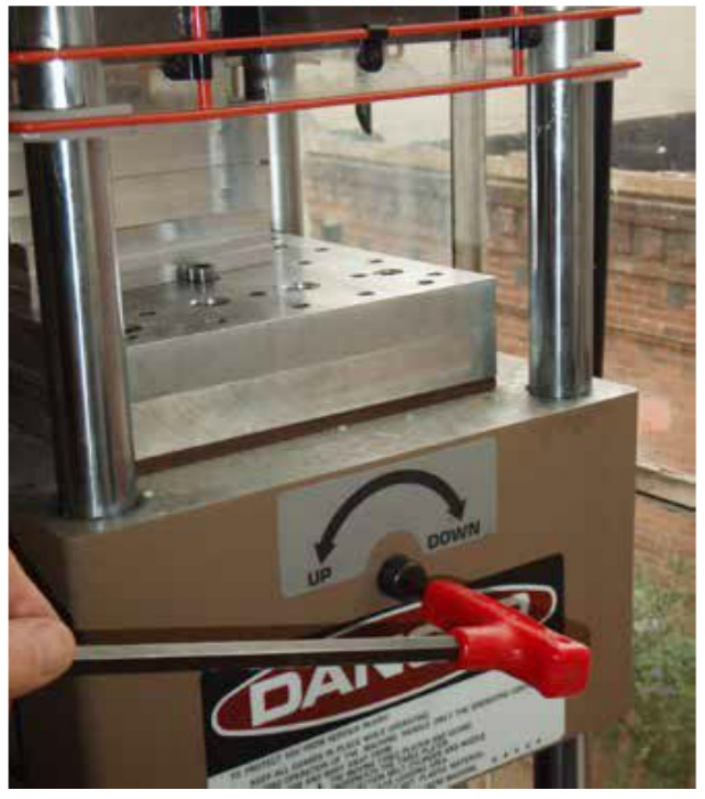](https://wiki.protohaven.org/uploads/images/gallery/2025-01/ZkXimage.png)
10. Lower the safety cage and pull the clamp knob out to lower the bottom platen. Place the mold over the locating bolt on the riser block. Spin the mold to make sure it's centered in the machine. Remove any plastic dripping from the injection nozzle with needle-nose pliers. Close the safety cage, release the safety, and push the clamp knob in to raise the bottom platen.
[](https://wiki.protohaven.org/uploads/images/gallery/2025-01/jfWimage.png)
11. Raise the safety cage and raise the bottom platen using the adjustment screw on the side of the machine until the mold contacts the injection nozzle. Tighten the adjustment screw further until the mold does not spin on the riser block.[](https://wiki.protohaven.org/uploads/images/gallery/2025-01/q9yimage.png)
12. Support the upper platen and loosen the side slide bolt. Do not let the platen fall on the mold. Place the upper platen on top of the mold and jiggle it to seat it fully on the mold. Tighten the four side slide bolts to hold the upper platen in place.[](https://wiki.protohaven.org/uploads/images/gallery/2025-01/bT3image.png)
13. Lower the safety cage and then lower the four corner bolts until they are seated on top of the platen finger tight. (Using a wrench on the bolts may cause the platen to become crooked, possibly damaging the machine or your mold.)[](https://wiki.protohaven.org/uploads/images/gallery/2025-01/IcXimage.png)
14. Now that the upper platen is in place, it's time to adjust the clamping force. Lower the safety cage and pull the clamp knob out to lower the bottom platen. Adjust your clamping force to what you’ll be using while creating parts. Raise the bottom platen using the adjustment screw on the side by a 1/4 turn and push the clamp knob. There will be an audible thump when the jack screw locks in place at the correct clamping force.
15. If you do not hear a thump while adjusting, check to make sure the jack screw has gone over center. If it has not, lower the platen adjustment until the jack screw goes over center, and raise it a 1/4 turn at a time until you hear the thump. Clamp and unclamp the mold a few times to make sure the thump is consistent.[](https://wiki.protohaven.org/uploads/images/gallery/2025-01/2yBimage.png)
Left: The jackscrew is over center, contacting the pneumatic cylinder. Right: The jack screw is not quite touching and not capable of holding the clamping force specified.
#### Set Up Plastic Injection
Now that the mold is set up, you can set up the plastic injection.
1. Start by adjusting the ram pressure. Ram pressure controls how fast the ram moves as well as how much pressure the plastic being injected puts on the mold. Figuring out how much pressure to use is a combination of science, art and experience. A good starting point is 3000 PSI. Adjust the pressure using the knob under the ram pressure gauge.[](https://wiki.protohaven.org/uploads/images/gallery/2025-01/ziLimage.png)
2. Remove the mold and riser plate from the heater block and lower the safety cage. Close the hopper cage to enable the plastic injection stroke. Release the safety and push the inject knob in. Hot plastic should come out of the injection nozzle similar to a hot glue gun. This will help purge any plastic left over from previous users as well as any burnt material.[](https://wiki.protohaven.org/uploads/images/gallery/2025-01/FXVimage.png)
3. Lift the safety cage and clear out the plastic using a tool (e.g., pliers) instead of your hands. The plastic will be very hot and gooey, and may cause severe burns even if you’re wearing gloves.
[](https://wiki.protohaven.org/uploads/images/gallery/2025-01/itkimage.png)
4. Place the riser block, mold and sprue bushing in place over the heater block. Make sure there Step 6 aren’t any gaps between any of the pieces and that everything is centered on the locating bolts.
5. Lower the safety cage and press the clamp knob to clamp the mold. Double-check the ram speed gauge, clamping force gauge and pilot pressure gauge.
6. Turn the small timer knob all the way clockwise until it stops. Do not apply too much force since it is easy to break the timer attached to the other side. The timer comes in handy when making larger quantities of parts and you know how long the injection cycle should last.
[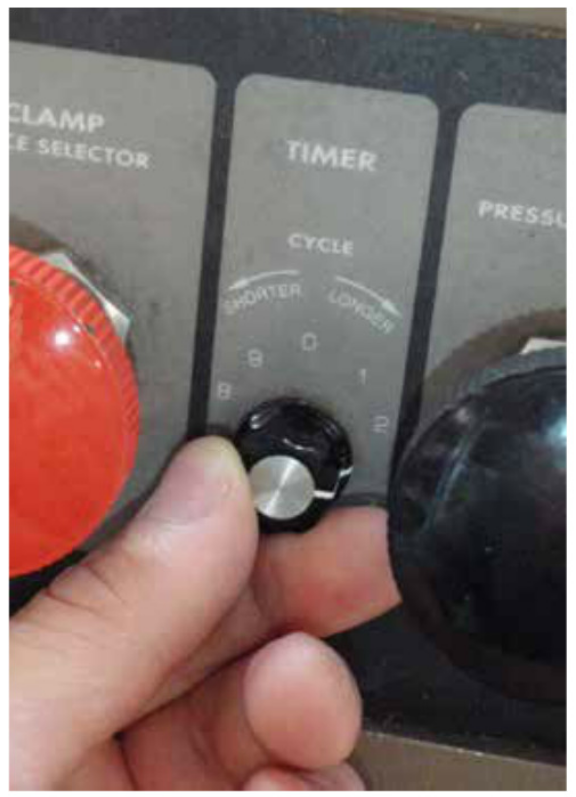](https://wiki.protohaven.org/uploads/images/gallery/2025-01/Dheimage.png)
#### Make Some Parts
1. Release the safety on the inject knob and push it in for about five seconds. It should take the mold about this long to fill and begin to solidify.
2. Release the knob and wait another five seconds. This keeps pressure on the plastic in the mold and allows the plastic to fully solidify.
3. Pull the clamp knob out to release the bottom platen and raise the safety cage. Carefully remove the mold using gloved hands. Twist the sprue bushing several times to sever the plastic holding it to the mold and place it back on the heater block to help keep it warm for the next part.[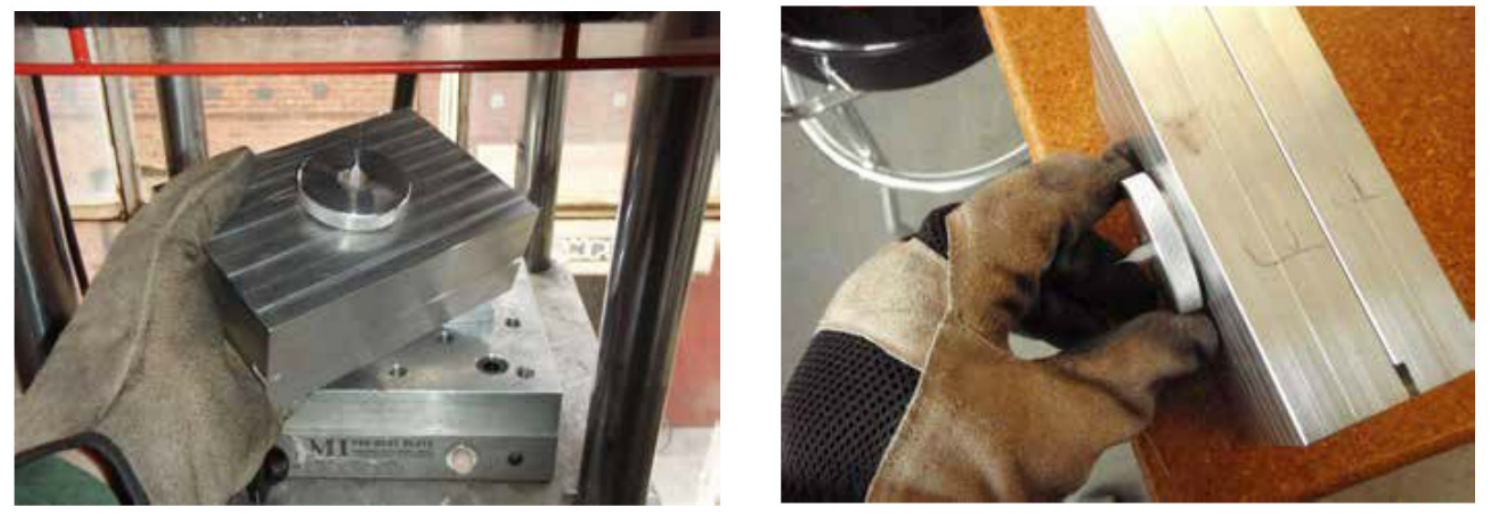](https://wiki.protohaven.org/uploads/images/gallery/2025-01/CSPimage.png)
4. Carefully split the mold halves apart and pop the molded part out. You may need to use a screwdriver or other prying implement, but be careful to not damage the mold. You can use blasts of air or gentle persuasion with a screwdriver to pop the molded piece off the mold. Do not use too much air since it will cool down the mold.
5. Chances are, the first part will not come out right. It may take a few tries to get everything up to temperature and to find the right injection time, speed and clamping force. Consult the troubleshooting guide (further in this document) and adjust accordingly.
[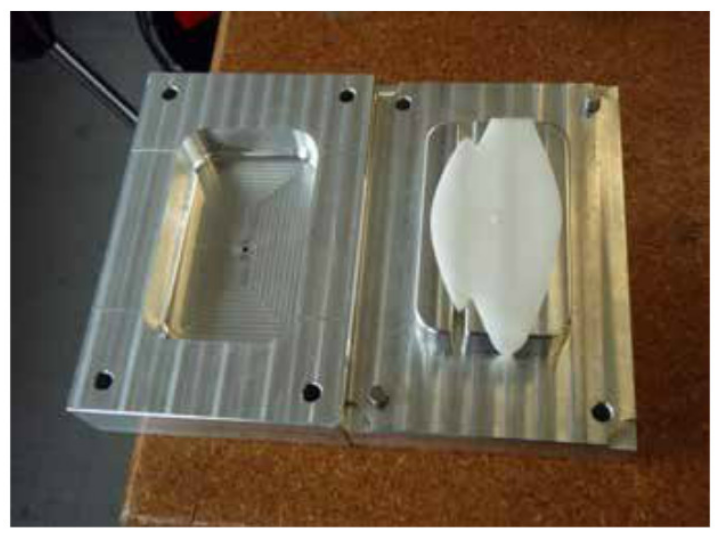](https://wiki.protohaven.org/uploads/images/gallery/2025-01/QF1image.png)
6. Keep the hopper full while using the injection molder. If smoke begins to come out of the hopper opening, the plastic level has fallen too far. Depending on the size of your parts, you may need to add plastic as frequently as every two or three parts.
### Cleanup and Shutdown
1. Scoop out any unused plastic from the hopper. Remove your mold and riser block, lower the safety cage, and run a few injection cycles to purge any plastic left over in the hopper.
[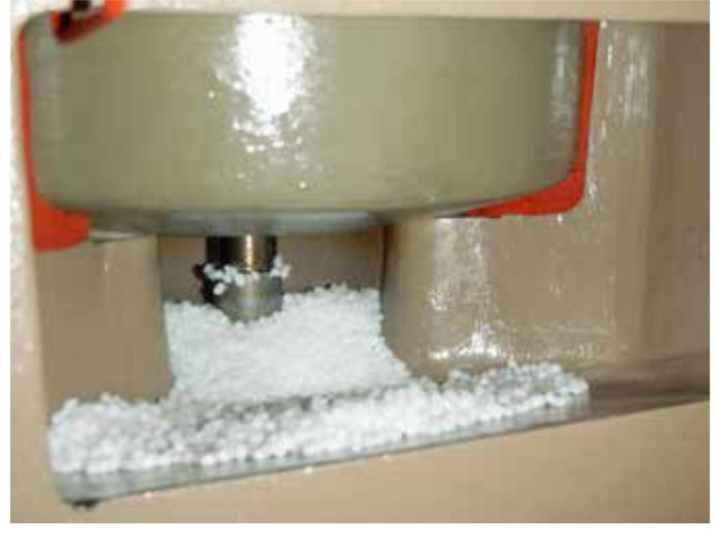](https://wiki.protohaven.org/uploads/images/gallery/2025-01/oYKimage.png)
2. Loosen the four side slide screws to lower the upper platen, spin the four corner bolts all the way in, and lift and secure the upper platen in its fully raised position.
3. Lower the bottom platen, turn off the heater block and lower the safety cage.
4. Turn OFF the air to the machine. Turn OFF the machine power, and disconnect the air supply at the source.
### Troubleshooting
##### Bottom platen doesn’t move when the clamp knob is pushed in.
**Is the safety cage all the way down**, engaging the safety interlock?
##### Ram doesn’t operate when you engage the injection valve.
**Is the door to the feed chute closed,** engaging the safety interlock? Is the pilot pressure high enough?
##### Lower platen stalls coming down when disengaged.
**The safety cage should slide smoothly** on the stanchions, but sometimes it sticks. When it sticks, it causes the safety interlock to trip, cutting off the clamp piston’s air supply. Helping the cage down by hand is a quick fix. The most likely cause is contamination of the stanchions by over-sprayed mold release or other foreign material. Wipe down the stanchions with WD-40 to remove the contamination and lubricate the stanchions.
##### Short shots (a short shot is an insufficiently filled mold).
**Resin is too cold, doesn’t flow well because of insufficient time between shots** to fully melt the material, or not gradually
adding material to the barrel on a consistent basis. This is the most likely cause of short shots in a well-warmed mold. Wait
longer between shots and feed material at a constant rate.
**Resin is too cold, doesn’t flow well because cold drool was injected.** Solution: Drool freezes in the air as it comes out of the nozzle. Don't try to inject it. Use needle nose pliers to pinch off and discard it. Molds with runner systems can be designed to divert the leading edge of the flow into a “blind alley” so that the cold leading edge is parked out of the way.
**Resin is too cold, doesn’t flow well because barrel and/or nozzle temperatures may be too low.** Adjust temperatures
judiciously. It is easy to set the temperature too high.
**Mold is cold, shot solidifies too quickly.** If these are your first shots, the problem may solve itself after a few shots. Alternatively, increase temperature of heater block. Note that using a riser block will reduce the overall efficiency of mold heating, so you may need to compensate.
**Shot time is too short.** Use a longer shot.
**Shot is too slow. I**ncrease injection speed. Increase injection pressure. Enlarge gates. Enlarge vents. Enlarge runners and sprue.
**Trapped air.** Add and/or enlarge vents.
##### Excessive flash (flash is material that squeezes out of the mold along the parting line).
**Insufficient clamping pressure.** Increase clamp pressure. Reduce injection pressure. Change to a material with lower viscosity, allowing reduced injection pressure. Increase size of gates and vents, allowing reduced injection pressure. Redesign mold to have a smaller area at the parting line. Redesign mold to include clamping bolts.
**Poor platen adjustment.** Make sure the top platen is correctly adjusted square to the mold. Flash only along one side of the part is an indication of a skewed platen. Make sure the platen is adjusted to hold the mold securely, and that the adjusting and suspension screws are tight. If you are using a mold that is too small to contact the upper platen, redesign the mold to 4"x4” or larger.
**Poor mating at parting line.** Re-machine the interface between the mold plates for a smoother finish.
##### Part won't eject.
**Use a squirt of aerosol mold release every few shots.** Eliminate undercuts. Increase taper. Polish mold. Add ejection mechanism. Remember, plastic shrinks as it cools. It will pull away from the outside of your mold, and shrink on to the core.
##### Plastic doesn’t inject and escapes from nozzle seat.
**The upper platen is poorly adjusted**, creating a gap between the nozzle and the nozzle seat. Repeat the upper platen adjustment procedure.
**Cold drool fouled the seat and/or blocked the sprue.** Remember to discard cold drool immediately before clamping. Clean dripping material off the nozzle.
##### Ram won’t return.
**Occasionally, high viscosity or cold material will cause the ram to get stuck in the barrel.** Use short shots on the ram return assist valve until it breaks free. Each shot should be one second. If it is not free after 5 or 6 shots, get assistance from a shop tech.
# Plastics - Plastic Dryer
# Image and Data Dump For Plastic Dryer
[-standard-hopper-dryer-shd.pdf](https://wiki.protohaven.org/attachments/276)
[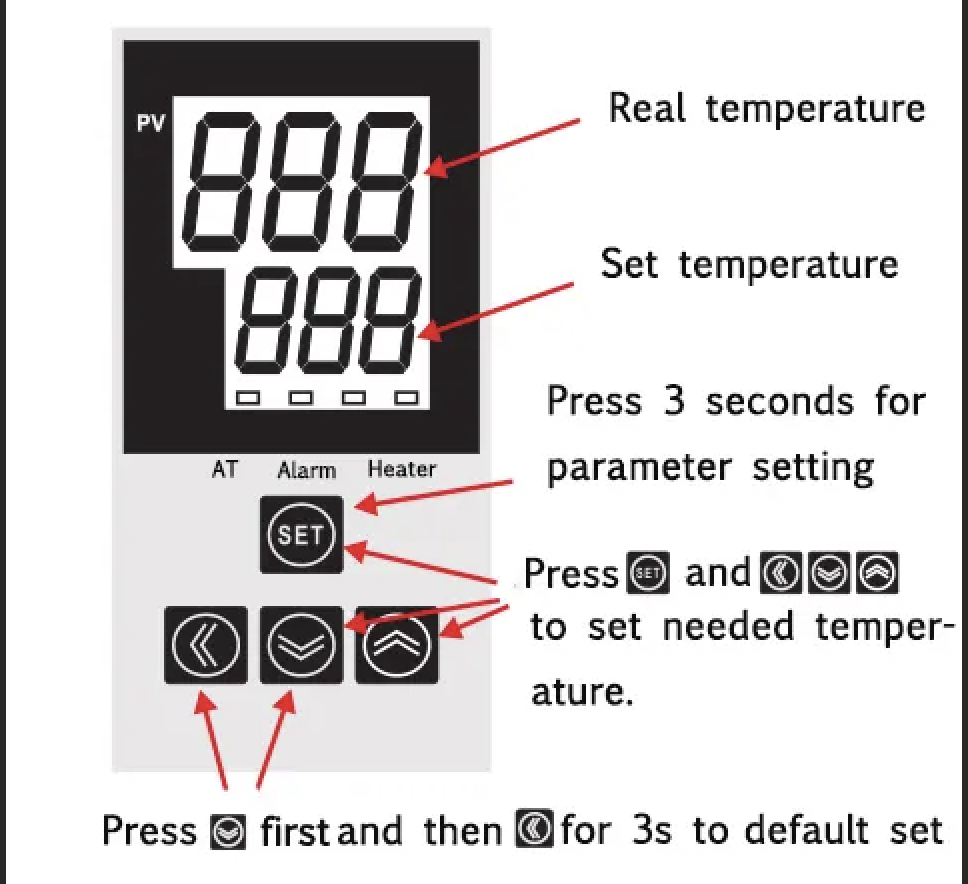](https://wiki.protohaven.org/uploads/images/gallery/2025-05/screenshot-2025-05-02-at-3-55-50-pm.png)
[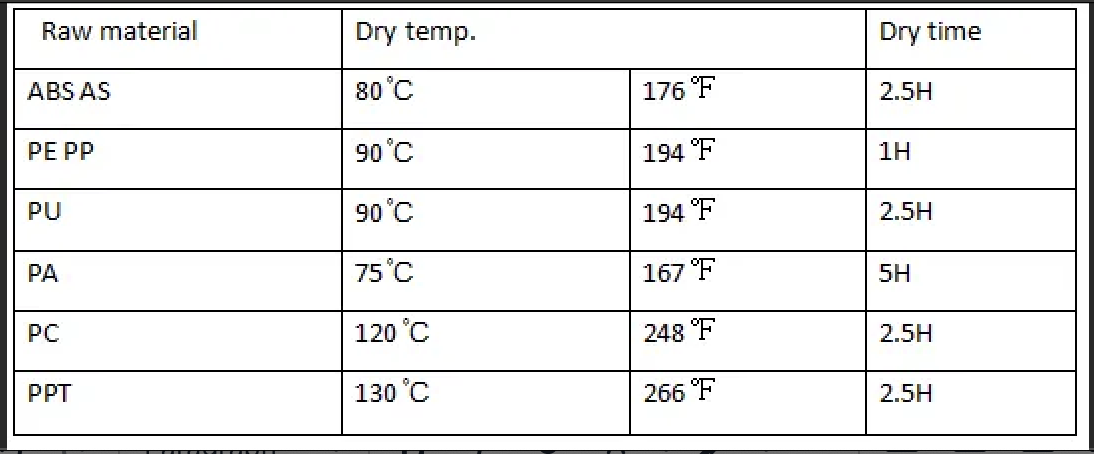](https://wiki.protohaven.org/uploads/images/gallery/2025-05/screenshot-2025-05-02-at-3-59-08-pm.png)
[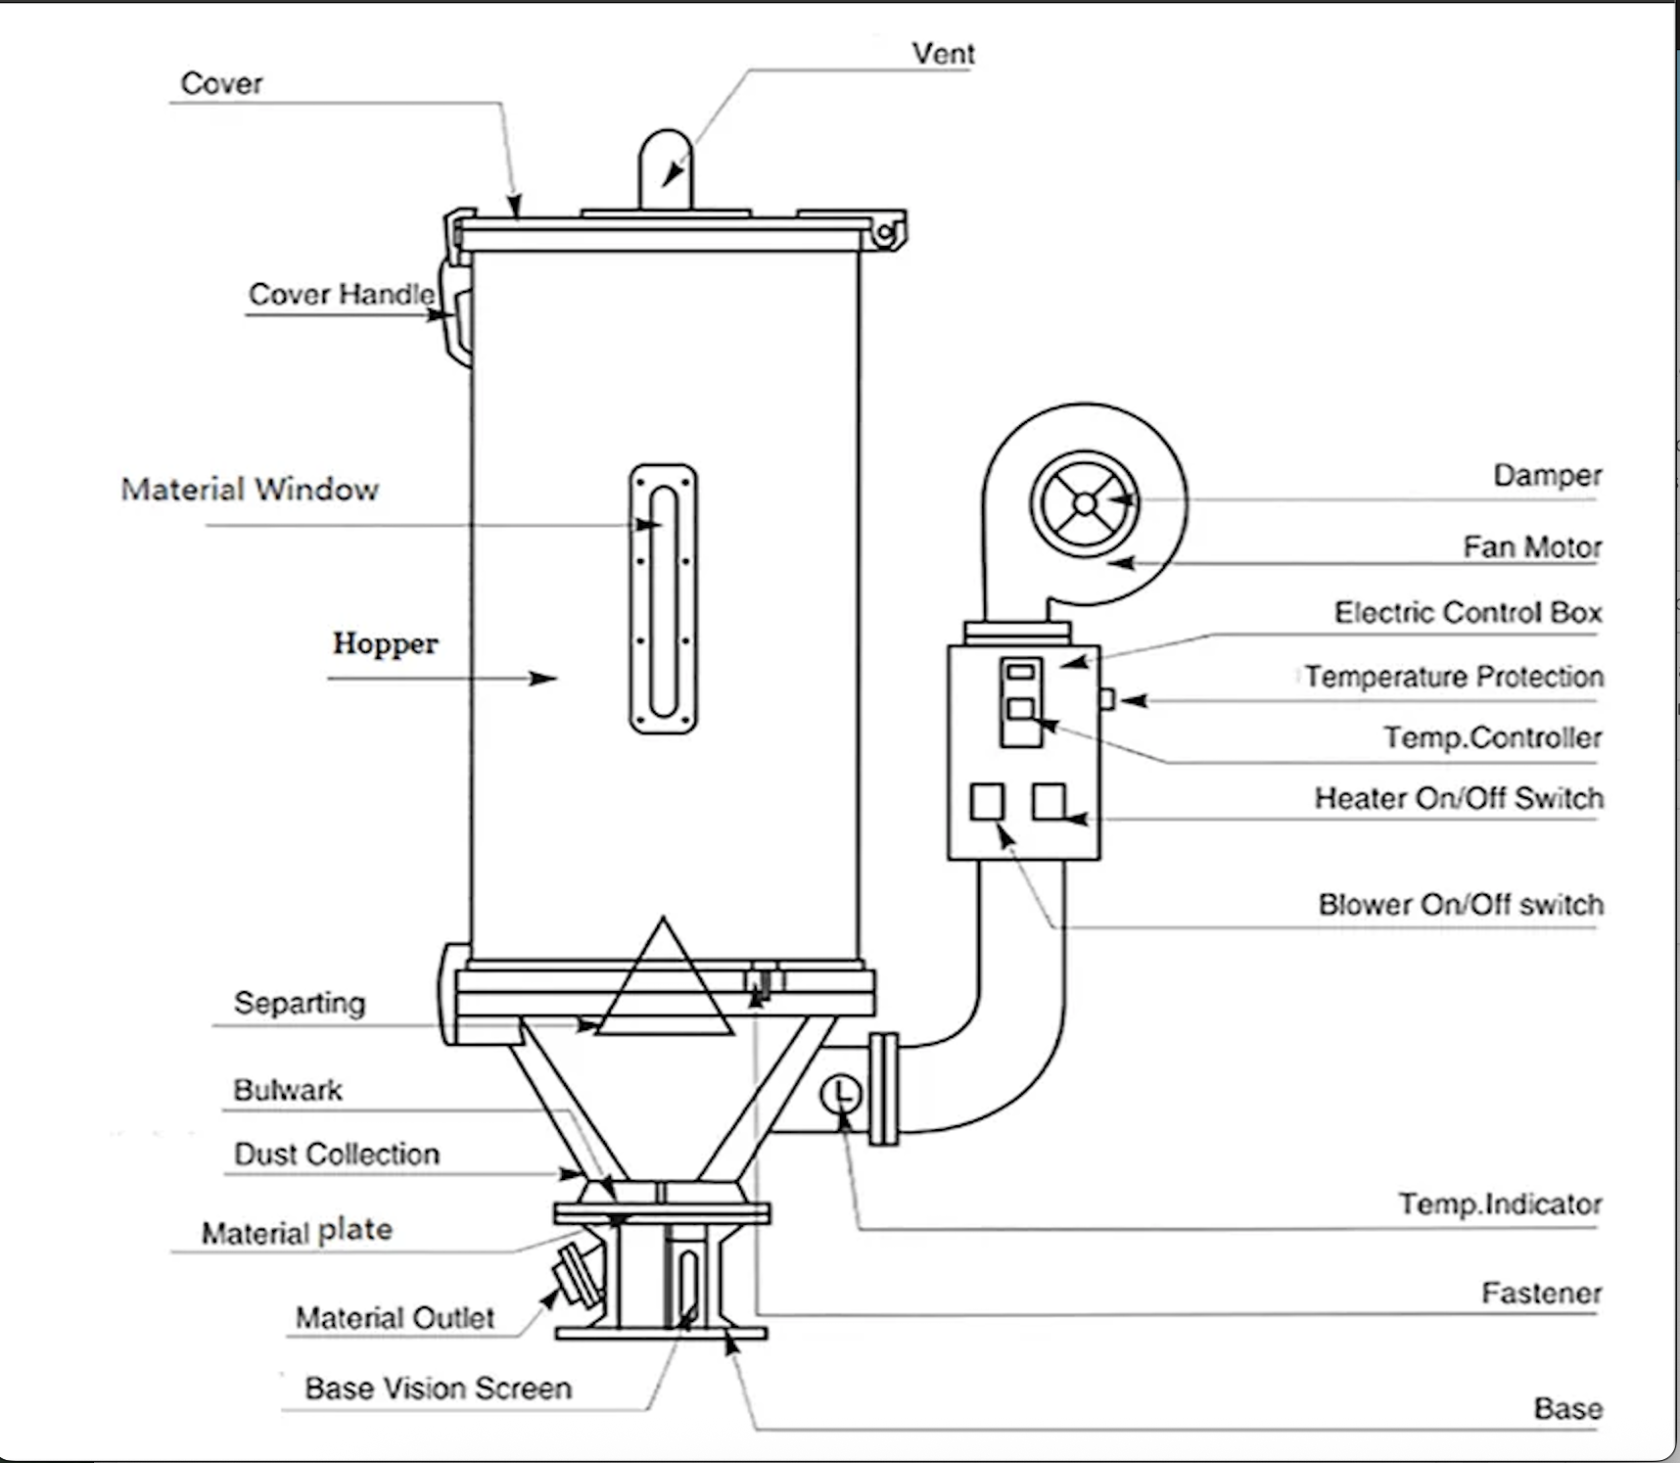](https://wiki.protohaven.org/uploads/images/gallery/2025-05/screenshot-2025-05-02-at-3-50-39-pm.png)
[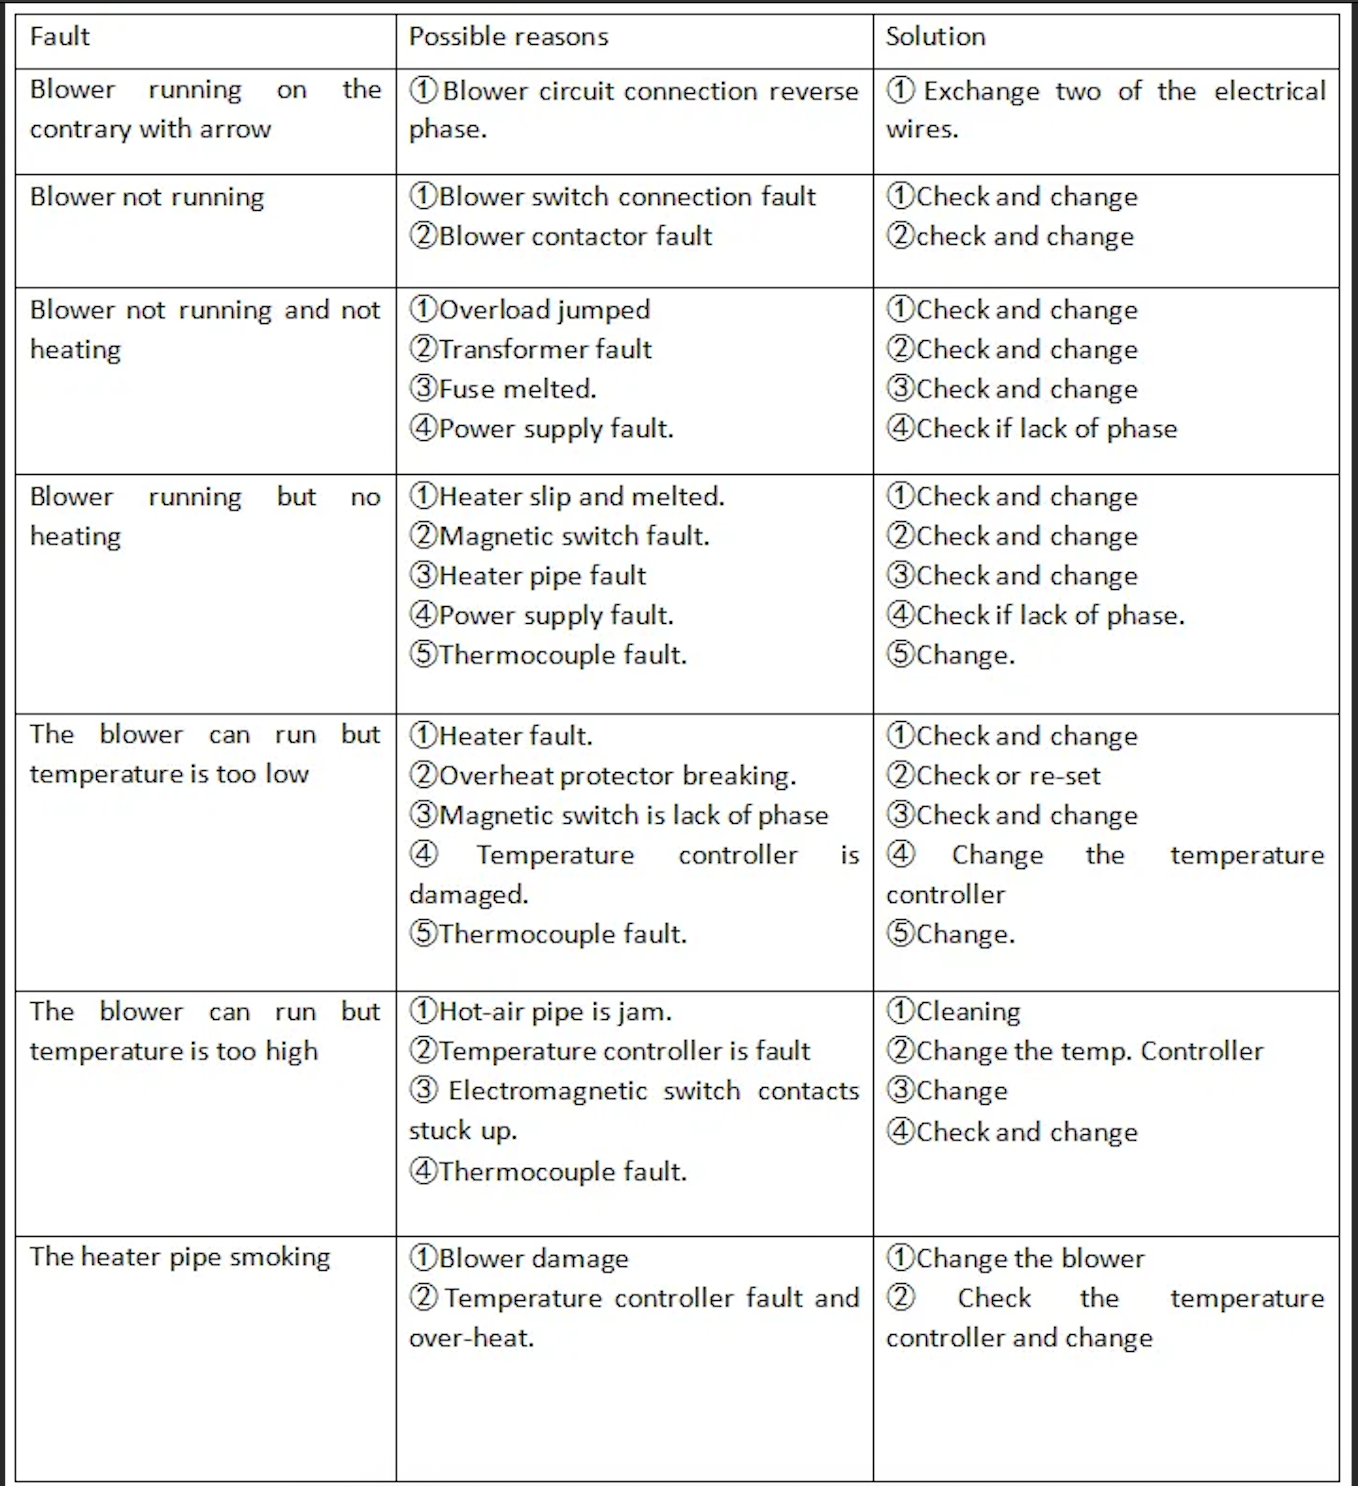](https://wiki.protohaven.org/uploads/images/gallery/2025-05/screenshot-2025-05-02-at-3-59-21-pm.png)
# Plastics - Plastic Shredder
# Manual(s)
*Manuals and other reference materials from the manufacturer or other sources.*
-
# Member Notes
# Resources
*Where to obtain materials, consumables, and tooling.*
The reason we love the global Precious Plastic community is because they provide a wealth of open source community resources! Here are some resources you may find helpful:
[Safety and plastic fumes](https://cutt.ly/yfsZknr&sa=D&source=editors&ust=1676742628382677&usg=AOvVaw34aPGW7Dj7TWPQBjZ5M6ER "https://cutt.ly/yfsZknr&sa=D&source=editors&ust=1676742628382677&usg=AOvVaw34aPGW7Dj7TWPQBjZ5M6ER")
[Oshcut: An Online Metal Laser Cutting Service](https://www.oshcut.com/?gclid%3DCj0KCQjw3duCBhCAARIsAJeFyPWMT5nDYKEJck_0VnYyHOxB0H-mTxRPNjsNuqTmHij6hQ1JTQ_anaEaAoQHEALw_wcB&sa=D&source=editors&ust=1676742628383507&usg=AOvVaw2CgQzYEOfN2skgoEQd3OcK "https://www.oshcut.com/?gclid%3DCj0KCQjw3duCBhCAARIsAJeFyPWMT5nDYKEJck_0VnYyHOxB0H-mTxRPNjsNuqTmHij6hQ1JTQ_anaEaAoQHEALw_wcB&sa=D&source=editors&ust=1676742628383507&usg=AOvVaw2CgQzYEOfN2skgoEQd3OcK")
[Going nerdy on plastic](https://cutt.ly/efsZkPm&sa=D&source=editors&ust=1676742628383992&usg=AOvVaw3jvXmrpjGy3p18Ns0GgKBp "https://cutt.ly/efsZkPm&sa=D&source=editors&ust=1676742628383992&usg=AOvVaw3jvXmrpjGy3p18Ns0GgKBp")
[Good design with recycled plastic](https://cutt.ly/gfsZckW&sa=D&source=editors&ust=1676742628384379&usg=AOvVaw0SsuaUBRHBFGjFh1MQc1Q8 "https://cutt.ly/gfsZckW&sa=D&source=editors&ust=1676742628384379&usg=AOvVaw0SsuaUBRHBFGjFh1MQc1Q8")
# Tool Tutorial
This machine allows you to shred plastic into small flakes.
Always use the plunger to guide plastic into the blades—no hands!
Power off the machine before clearing a jam.
Always wear safety goggles while operating the grinder.
See the Safety section for more information.
## Tool Anatomy
1.
E-Stop Switch - This button cuts power to the machine.
2.
Power Switch - The lever turns the machine on and off. It can move the blades forward or in reverse to help clear build up.
3.
Hopper - Funnels new material into the blades to be shredded
4.
Plunger - Used to gently and safely guide material into blades
5.
Blades - Grind the material
6.
Receptacle - Removable bin that captures the freshly shredded material
7.
Maintenance Tag - Manually tracks the usability status with Green/Yellow/Red cards
## Tool Safety
- Always cut power the the Plastic Grinder when servicing or putting you hands inside of the hopper.
- Always use the plunger when grinding plastic to prevent plastic from shooting out of the hopper.
- Only grind known plastics and never grind parts thicker than 1/8“.
## Personal Protective Equipment
When using the Plastic Grinder, Hearing Protection, Closed-toed Shoes, and Safety Goggles are required. A face mask is recommended to prevent the inhalation of small plastic particles and irritants.
Long sleeves must be rolled up and long hair and scarves must be tied back. Avoid any dangling drawstrings or other articles of clothing that may come in contact with the motor and blades.
### Common Hazards
The most common hazard is flying debris that causes injury to the eye
-
Always ensure safety goggles are on before use
-
Be aware of others in your space at all times
-
Use the plunger to block escaping plastic particles
The most significant hazard is getting caught in the rotation of the motor or blades and being drawn into the grinder.
-
Always use the Plunger as a guide while the grinder is operating—never hands!
-
Power off the machine before clearing out a jam
-
Ensure clothes are well-fitted, long sleeves are rolled up to the elbows
-
Verify hair, scarves, drawstrings or hanging articles are tied back and secure
## Setup
1.
Gather the sorted plastic you want to shred
2.
Ensure all plastic is thoroughly clean
3.
Separate by plastic number and color
4.
Check that the mesh is clear
## Operation
1.
Plug in the machine and power on the grinder
2.
Load the plastic just a few pieces at a time and guide them using the plunger
3.
Occasionally, run the blades backwards to clear any clogged plastic
4.
If running the machine with the mesh filter installed, be sure to clear the plastic from the filter if it starts to build-up inside the grinder. This build-up can heat-up and melt if left circulating in the grinder for too long.
5.
Check the blades periodically
## Cleanup
1.
Power off and unplug the grinder
2.
Use pressurized air to blast extra plastic out of the grinder blades. Use the provided wooden filter to prevent plastic from aerating
3.
Remove the mesh filter (if using), clean, and replace
4.
Sweep debris from surrounding area
## Troubleshooting
Common Issues
Possible Causes
Resolutions
The motor makes a gnarly sound when powering on
There is melted plastic trapped between blades
Power off immediately. Allow blades to cool, and clear out any trapped plastic
The blades are not grabbing the plastic
Sometimes weight or shape lends itself to needing a helping guide.
Use the push tool to move the plastic towards the blade. Never attempt to do this with your hands.
The blades may be operating in reverse
Flip the ignition switch in the opposite direction.
Machine stops mid shred
There is likely too much plastic. The resistance exceeds the maximum torque of the motor, causing it to stall out
## Special Setups
When using plastics other than #5 (Polypropylene), please be extra careful to properly clean up and avoid cross contamination.
We generally recommend first grinding your plastic with the mesh filter removed, then replacing the mesh filter for a second, finer, grind. The Pelletizer can also be used for this second step.
We’ve set up our machines to focus on diverting Plastic #5 (Polypropylene) from the landfill, which doesn’t currently have an easy municipal solution! Of course, you are welcome to bring in different Plastic materials to use on our machines.
# Plastics - Vacuum Former
# Manual(s)
- [Formech\_686\_mHUB\_User\_Guide\_.pdf](https://wiki.protohaven.org/attachments/286)
- [Formech\_686\_owners\_service\_and\_opertation.pdf](https://wiki.protohaven.org/attachments/287)
- [Vacuum-Forming-Guide-for-the-Classroom-Aug-24-v1.pdf](https://wiki.protohaven.org/attachments/329)
# Member Notes
A temperature probe on the heat shield under the heater when it's pushed back would help a lot with knowing when it's ready to use
Blinds for the window, please! Very bright, hard to see the HMI
Premade MDF baseplates would be pretty nice.
# Resources
*Where to obtain materials, consumables, and tooling.*
# Tool Tutorial
## Introduction
## Notes
### Safety
Hot parts, Compressed air hazard, pinch points (electric assisted lift)
### Common Hazards
Hot parts
### Care
Be Careful
Remove any protective film from plastic before putting it under the heater
TAKE CARE WHEN REACHING TO THE BACK OF THE MACHINE. THERE MAY BE VERY HOT SUR-
FACES IN THIS AREA. COUNTERWEIGHTS ARE HEAVY ITEMS AND HENCE CARE MUST BE TAKEN TO PREVENT TRAPPING OF FINGERS. TAKE CARE WHEN ASSEMBLING, LOADING AND UNLOADING COUNTERWEIGHT. HEAVY ITEMS CAN CAUSE CRUSHING IF MISHANDLED, MISUSED OR IF DROPPED. WHEN LOADING AND UNLOADING COUNTERWEIGHTS ENSURE THE LOCKING SPLIT PIN AND WASHER ARE REPLACED AT THE END OF THE COUNTERWEIGHT ARM.
Do not touch the heated plastic material with your hand or any other object during the heating cycle. This may cause harm or damage the material itself. Rely on the visible slight sag as the indicator for the optimum temperature to perform the vacuum form, or use a temperature gun to aid you.
Do not attempt to raise the table of the vacuum forming machine when the heaters are in the forward position. This may damage the lever mechanism, or the heating elements. Most vacuum forming machines have a safety mechanism that will not allow the table to be raised unless the heaters are in their fully back position, or for the heaters to be pulled forwards if the table is raised.
When lowering the table, be sure to make this a smooth and steady motion rather than dropping it. This will prevent any damage or movement of the mold tool within the forming area, and reduce stress on the machine.
Always remember, this machine produces heat that reaches very high temperatures. Do not touch or put
anything on top of the heating draw of the machine, or put your hand under the heating drawer itself.
Repairs to the vacuum circuit can be costly. The use of talc as a release agent is not recommended. It may clog the vacuum pump, valves and hoses.
Note: the heater timer on the HMI display runs fast - the actual elapsed time may be less than indicated.
Do not leave auto-level on while the bed is close to the top of the machine - this will leave auto-level running, which could blow softened plastic into the heater.
There is no guarantee any saved settings will be persisted - do not assume that a setting you saved is still correct. If you wish to record settings, use the [Member Notes page](https://wiki.protohaven.org/books/tool-guides/page/member-notes-wVH/) on this wiki.
### Use
### Consumables
None
### Tooling
All tools should be mounted on a baseboard. They should not have undercuts and must be produced with slightly angular sides (‘draft angle’) to aid release. Vent holes are needed to allow the air to be evacuated from pockets and sharp angles on the tool. Providing these holes are kept small (1mm diameter or less) they will not leave marks on the surface of the finished molding.
Porous mold materials such as wood and plaster should be properly sealed to prevent the vacuum pump from sucking out any moisture or sawdust, loose plaster etc. The vacuum circuit may quickly become blocked with dust or slurry if moulds are not properly sealed.
As the plastic cools after forming it will contract, gripping the tool tightly. If the tool has been made with sloping sides and has a good surface finish it will release more easily. Where the draft angle must be kept to a minimum a release agent may be used to assist release.
Sealed molds will usually release more easily. Silicon based release agents may be used on more difficult molds. Silicon based release agents are rapidly absorbed by porous (unsealed) molds, rendering them ineffective. The use of talc as a release agent is not recommended. It may clog the vacuum circuit.
The baseboard can be made from either MDF or aluminum and needs to be 12.00mm (1/2”) thick. The vacuum hole can be 30.00mm diameter and needs to be positioned 94mm forward of the center of the
table.
30mm
94mm
The baseboard has to be 4mm shorter in both directions than the forming aperture of the machine e.g. Forming aperture
280mm x 430mm = baseboard size
276mm x 426mm.
[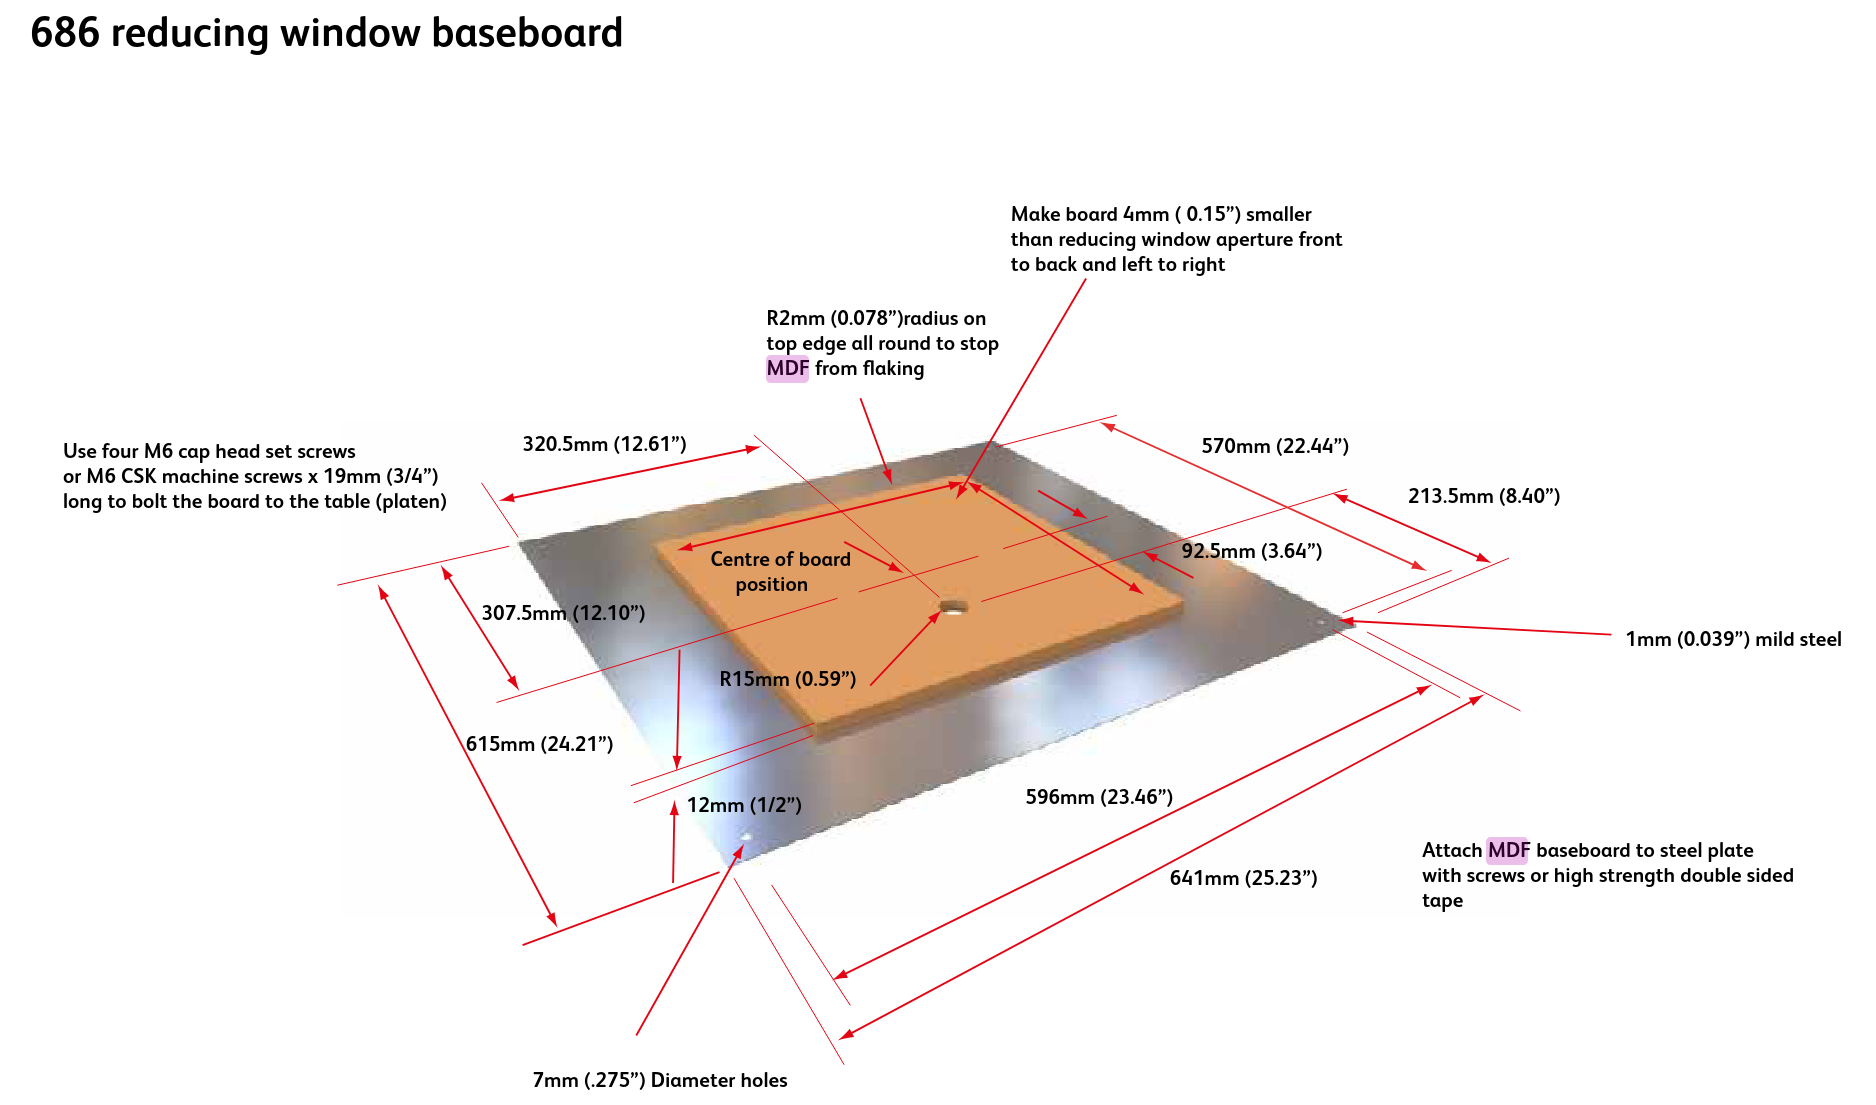](https://wiki.protohaven.org/uploads/images/gallery/2025-09/ojPimage.png)
[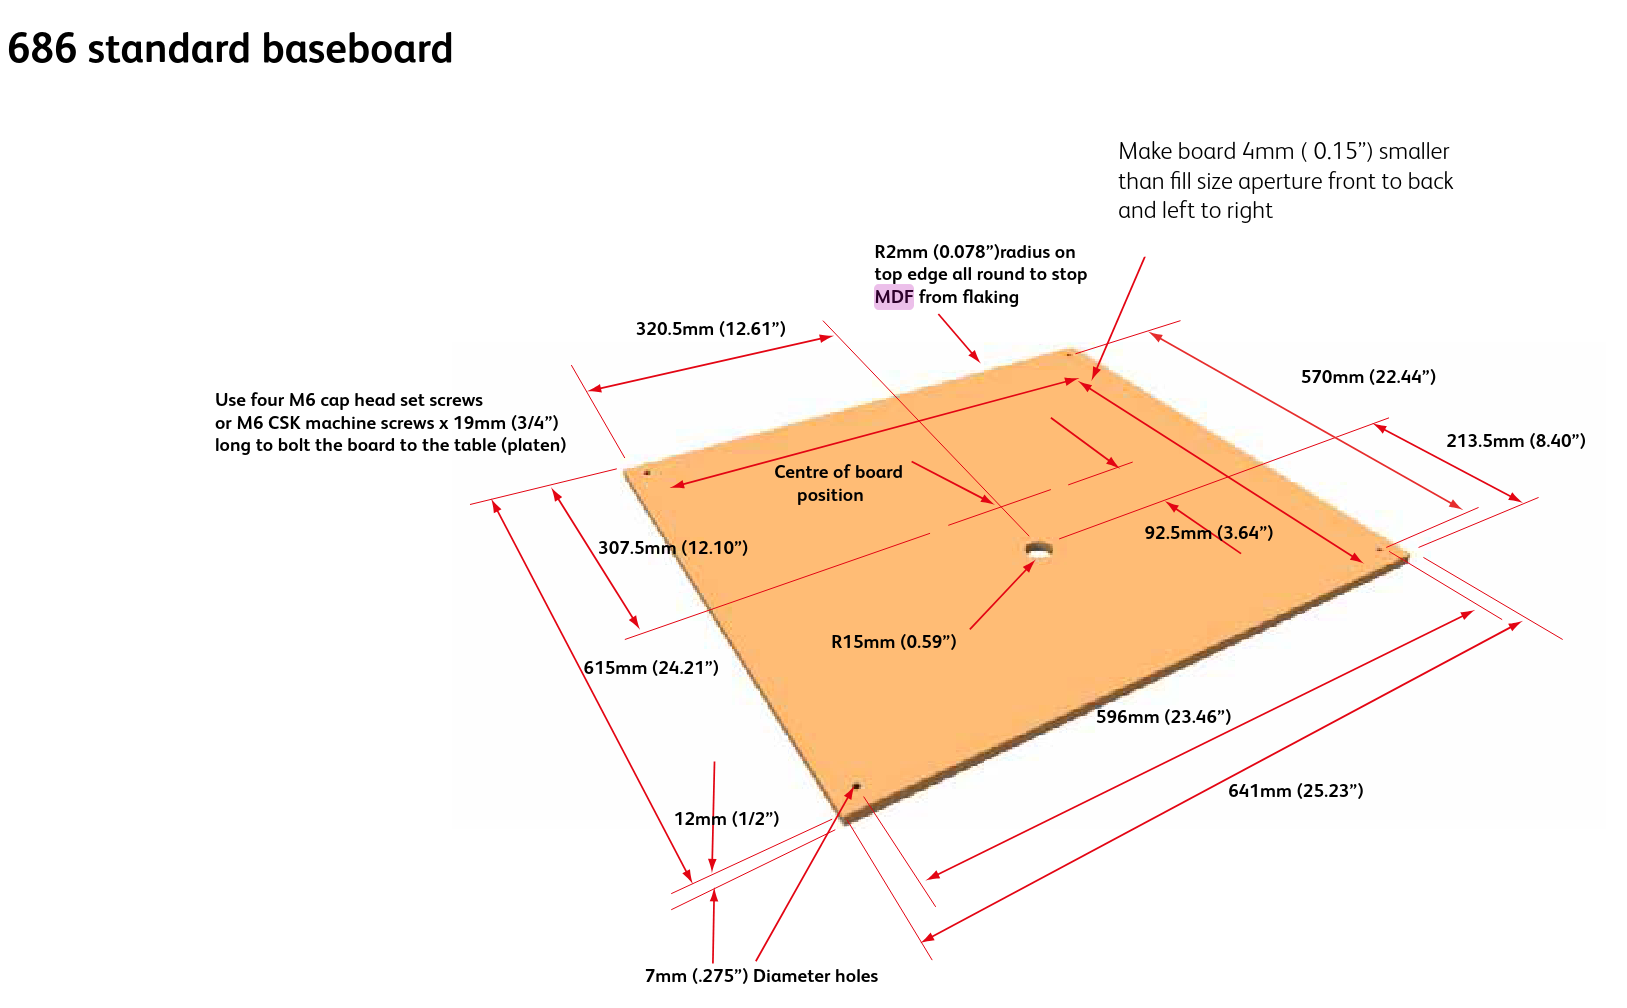](https://wiki.protohaven.org/uploads/images/gallery/2025-09/image.png)
### Materials
Any thermoform plastic, thickness per manual recommendation, max size 24x24
Plastic sheet is commercially available in a wide variety of grades, thickness and colours. Materials such as styrene and PVC are most suited to vacuum forming. Other materials such as acrylic, polypropylene and polycarbonate will mould but difficulties may be encountered.
## Parts of the Tool
### Annotated Image(s)
### Part Description
### Part Description
### Part Description
The 686PT is fitted with an automatic sheet levelling system. An optical sensor directs a beam of infrared light across the machine. The system comprises of a transmitter and receiver. When the beam is broken air is pumped into the machine cabinet under the plastic lifting it until beam transmission is re-established. The optical sensors are located under the top-frame at the sides.
## Basic Operation
### Setting Up
Confirm air line is hooked up
Plug in and rotate the red switch at the back to turn on
Roll the sheet holders at the back so that the counterweights do not come in contact
Undo the clamps and lift the top plate
Insert desired frame from the cart at the back - make sure the gaskets are unobstructed and the alignment bolts at the back go through the hole on the frame
Hit **heater on** to start preheating - needs 15 mins to come to temp
START >
- LOAD DEFAULT SETTINGS -> uses system default (doesn't auto start)
- LOAD CURRENT SETTINGS
- LOAD NEW JOB
Run Menu:
- Heater timer -> goes to heat zone select. Set all zones not in use to 0%
### Workholding
Table down - use button on HMI
Table up - press both buttons on front of machine
### Settings & Timing
It is important to heat the plastic material appropriately to gain the perfect vacuum form. This comes with the experience of just a few forming cycles, although a good general rule is to apply 20 seconds of heat for every 0.5mm of thickness of the plastic material.
For example, 1.5mm thick plastic requires approximately 60 seconds of heat.
Standby settings add considerable time to the actual vacuum forming - recommend setting to the same as heating time.
For 12x12 mold, recommend starting with 100% in very center heat zone, 100% in the middle ring, 0% on outside.
### Using the Tool
Remove any protective film from plastic before putting it under the heater. Put the plastic in smooth side down, so it seals effectively
Make sure clamps are tight
Pull the heater forwards over the clamped plastic. The heater icon will start counting up.
Activate the auto-level if required by touching the button so it shows green . If the plastic is sagging and not being heated evenly then the auto-level feature is used to keep the plastic level while the heater is forward and until ready to form a mould.
As the plastic heats up it may begin to rise slightly. It will then soften and begin to drop back.
When performing an initial forming it will be necessary to check the progress of heating as this will vary with plastic type, thickness and color. Push the heater back slightly to test the softness of the plastic manually or to observe its state. Continue with heating until it is soft enough to form. When the plastic softness is correct push back the heater fully back.
Press the **PRE-STRETCH** button to inflate the plastic before molding if required. This feature is particularly useful if the mold is high because it keeps the plastic at a more even thickness throughout the molding. If the molding is quite high it may be necessary to pre-stretch the plastic before molding takes place.
Press the two **TABLE UP** buttons simultaneously and hold until the table is fully raised. Then press the VACUUM icon to latch on the vacuum. The molding will form around the tooling.
The **AUTO-VACUUM** feature may be enabled before bring the table up. This feature will start the vacuum automatically when the table rises. The trigger point of the auto-vacuum sensor may be adjusted if required.
At the appropriate time when the plastic has formed around the mold tool the fans may be turned on to start the plastic cooling process – press the **FAN** icon . When the molding is adequately cooled, press the fan icon again to turn it off.
NOTE: WE DO NOT HAVE A FAN; THIS BUTTON DOES NOTHING
Once the plastic has cooled sufficiently the RELEASE icon may be pressed to blow the molding off the mold. Too long or too soon a release may distort the molding.
Once released the molding is now complete and the table may be lowered. Press the TABLE DOWN icon and ensure the molding has released from the mold tool. Ensure the table has reached its lower position. Release the clamp frame to remove the molding for inspection.
Review the results and determine the parameters required to produce the forming. Use the settings mode to set and record the values for later recall.
### Cleaning Up
Remove all of your plastic and mold supplies from the machine.
Turn the machine off via the red switch at the back.
Tidy around the machine, put away any frames not already in the rack.
# Textiles - Consumer Sewing Machine
1-8: Singer Heavy Duty 4423
Clearance: Not required, but we offer skills & safety classes if you do better with guidance
# Manual(s)
*Manuals and other reference materials from the manufacturer or other sources.*
- [Singer Heavy Duty 4423 Instruction Manual](https://wiki.protohaven.org/attachments/595)
# Member Notes
# Resources
*Where to obtain materials, consumables, and tooling.*
### Consumables
Appropriate needles and bobbins are available in the consumables section of our store front. Both are sold individually for ease and convenience.
Members are reasonable for bringing their own thread and fabric.
-
Needles: Singer 2020 70/9 or 110/18 9(70) 18(110)
Standard sharp needles. Sizes range thin to large.
-
Bobbins: Singer Class 15
Transparent for ease of monitoring the amount of thread available during use.
-
Thread & Fabric:
-
Always use the same thread in the upper tension and in the bobbin.
-
Light-medium weight fabrics are approved for use on this machine.
-
For heavy weight fabrics, please refer to our [Industrial Sewing Machines](https://wiki.protohaven.org/search?term=%5Btextiles_group%3Dindustrial%5D "https://protohaven.org/wiki/tools/imported/industrial_straight_stitch_tool_tutorial").
## Tutorials & Guides
[Singer Tutorial: Threading the Bobbin](https://youtu.be/IN0NzPlcrtY&sa=D&source=editors&ust=1676742615704806&usg=AOvVaw3FxpMKkKOcHqNJKJbCeDoM "https://youtu.be/IN0NzPlcrtY&sa=D&source=editors&ust=1676742615704806&usg=AOvVaw3FxpMKkKOcHqNJKJbCeDoM")
[Singer Tutorial: Automatic Needle Threader](https://www.youtube.com/watch?v%3Dq8aiE0NlLfU%26feature%3Dyoutu.be&sa=D&source=editors&ust=1676742615705198&usg=AOvVaw1wTQyvK7tN5xulc5bX0br9 "https://www.youtube.com/watch?v%3Dq8aiE0NlLfU%26feature%3Dyoutu.be&sa=D&source=editors&ust=1676742615705198&usg=AOvVaw1wTQyvK7tN5xulc5bX0br9")
[Sewing Master: Threading & Winding the Bobbin](https://www.youtube.com/watch?v%3DQ8xr-iW54Ls&sa=D&source=editors&ust=1676742615705582&usg=AOvVaw1NzNOcUvUVlTe3Hd0wvMUZ "https://www.youtube.com/watch?v%3DQ8xr-iW54Ls&sa=D&source=editors&ust=1676742615705582&usg=AOvVaw1NzNOcUvUVlTe3Hd0wvMUZ")
[Sewing Master: Tension Test](https://youtu.be/ChaRW3koO9E&sa=D&source=editors&ust=1676742615705907&usg=AOvVaw22VbWvvPsksxan8iW0ZZpp "https://youtu.be/ChaRW3koO9E&sa=D&source=editors&ust=1676742615705907&usg=AOvVaw22VbWvvPsksxan8iW0ZZpp")
[Sewing Master: Denim Seam](https://youtu.be/0QSpgisogfU&sa=D&source=editors&ust=1676742615706209&usg=AOvVaw1nZ0HR458dmFQPPiMrSwWC "https://youtu.be/0QSpgisogfU&sa=D&source=editors&ust=1676742615706209&usg=AOvVaw1nZ0HR458dmFQPPiMrSwWC")
[Sewing Master: Selecting Thread](https://youtu.be/vhG7qsL3ru8&sa=D&source=editors&ust=1676742615706496&usg=AOvVaw3psQh38s_bytRxeAFUCFqo "https://youtu.be/vhG7qsL3ru8&sa=D&source=editors&ust=1676742615706496&usg=AOvVaw3psQh38s_bytRxeAFUCFqo")
[Everything Eboni: Troubleshooting Tension Issues](https://youtu.be/dDClSCtmPgA&sa=D&source=editors&ust=1676742615706845&usg=AOvVaw26s72r0NkdPE02BjSlXgss "https://youtu.be/dDClSCtmPgA&sa=D&source=editors&ust=1676742615706845&usg=AOvVaw26s72r0NkdPE02BjSlXgss")
# Tool Tutorial
# Safety
- The needle is capable of going through your finger. Keep your fingers away from the needle when the machine is running. This can and does happen, even with experienced operators
- Always manually check to make sure your material is sewable. Lower the presser foot and spin the handwheel manually to see if the needle will pass through the material easily If the machine makes any loud grinding or thumping noises, or any other unusual sounds or smells, STOP the machine and alert a shop tech.
- Ensure the machine is threaded correctly by examining the first few stitches after starting. If the stitch does not form correctly, it is possible for the thread to knot up and break the machine
- Use an appropriately sized needle for your fabric
- Let the machine do the work of feeding your material. Use your hands to guide the fabric through the machine but do not push or pull the fabric while sewing. This is the primary reason fingers get caught in needles and can also bend needles or pucker your fabric
- Do not push or pull material while stitching.
- Power off the machine before threading, inserting the bobbin, or handling the needle.
## Tool Anatomy
[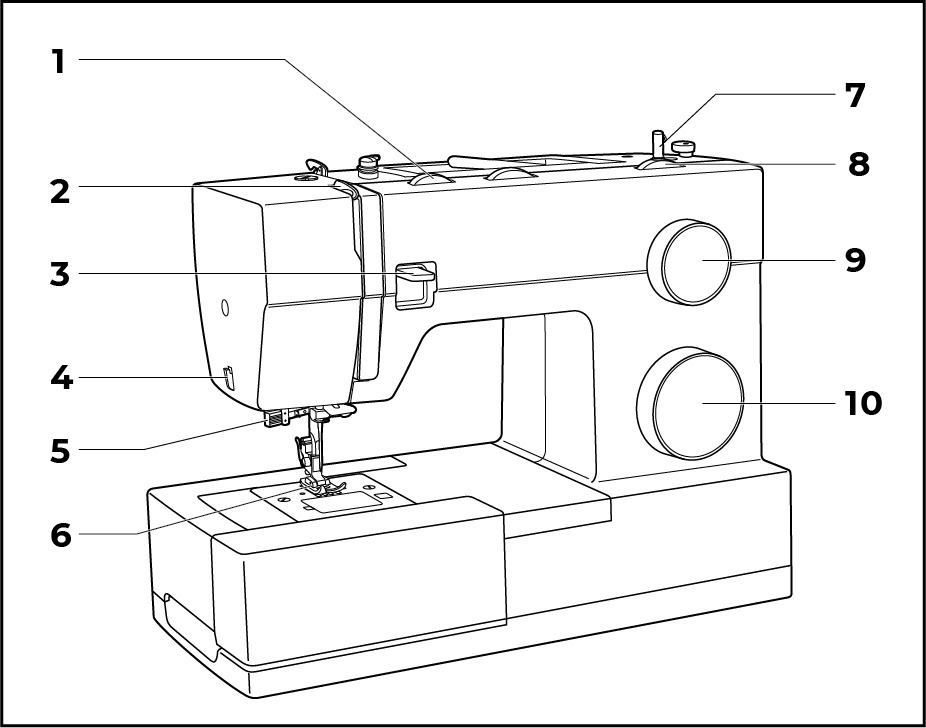](https://wiki.protohaven.org/uploads/images/gallery/2026-06/X8Fimage.png)
1.
Thread tension dial - regulates the tension of thread from the spool
2.
Thread take-up lever - part of the thread feeding mechanism that pulls thread off the spool
3.
Reverse sewing lever - engages the machine to sew in reverse
4.
Thread cutter - an attached tool to cut threads after stitch has been completed
5.
Presser foot - holds materials to be stitched to the bed
6.
Bobbin winding spindle - pin that holds the bobbin during bobbin winding
7.
Stitch width dial - adjusts the width of a stitch
8.
Stitch length dial - adjusts the length of the stitch
9.
Pattern selector dial - adjusts the type of stitch
Horizontal spool pin - holds the spool for the top thread
2.
Bobbin winding spindle - pin that holds the bobbin during bobbin winding
3.
Handwheel - manually advances the machine (turn counter clockwise only!)
4.
Power and light switch - on/off switch
5.
Presser foot lifter - lever that raises and lowers presser foot
6.
Foot pedal - controls the speed
## Tool Safety
### Common Hazards
The most common hazards are thread jams and broken needles.
-
Watch for top thread and/or bobbin thread to bind up, jam, and birds nest.
-
Avoid pulling/pushing fabric, which may misalign needles and cause breakage.
The most significant hazard is injury
-
Always power off the machine before threading, clipping out jams, or replacing broken needles.
-
Keep fingers away from all moving parts.
-
Special care is required around the sewing machine needle.
### Prohibited Materials
Thread Jams and needle breakage are critical concerns. Material that is too thick or rigid will lead to needle breakage. Material that is too slick (plasticized or otherwise “finished”) will slide against the presser foot and cause thread jams and/or needle breakage.
For those reasons, it is important to avoid:
-
Abrasives
-
Leather
-
Heavy Weight Canvas
-
Plastics
-
Rigid Material (non-fabric)
-
Rubber
-
Vinyl
If you’d like to work with material beyond what the Singer Heavy-Duty is rated for, please refer to our [Industrial Sewing Machines.](https://wiki.protohaven.org/search?term=%5Btextiles_group%3Dindustrial%5D)
## Initial Setup
1.
Wind the bobbin
2.
Ensure the needle is usable, replace if needed
3.
Thread the needle (aka top thread assembly)
4.
Insert the bobbin
5.
Select the stitch type
6.
Set the stitch width
7.
Align test fabric
8.
Lower presser foot and begin operation
### Winding the Bobbin
Appropriate bobbins (singer class 15) are available in the consumables section of our store front.
[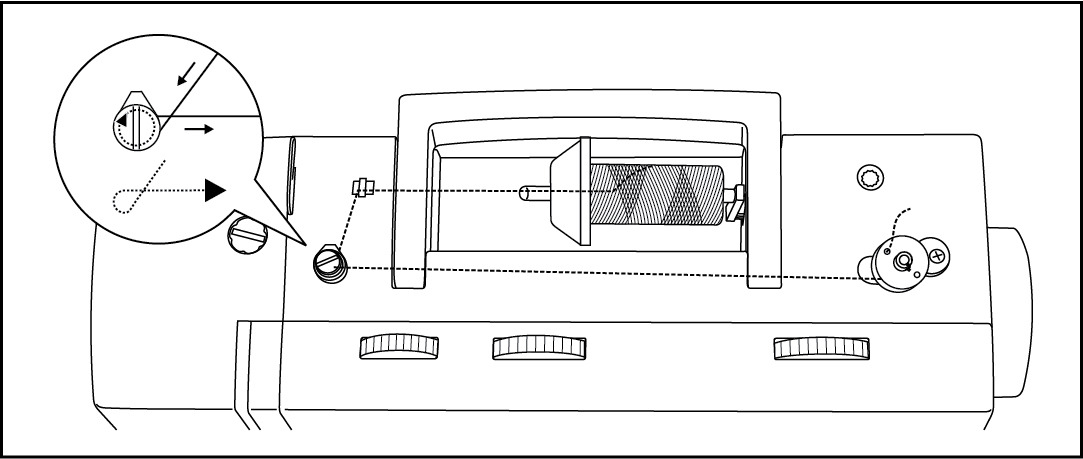](https://wiki.protohaven.org/uploads/images/gallery/2026-06/RUnimage.png)
Load thread and corresponding spool holder onto the spool pin (1/2).
[](https://wiki.protohaven.org/uploads/images/gallery/2026-06/QE7image.png)Gently snap the thread into the thread guide (3).
Then, wind the thread clockwise around the tension discs (4).
[](https://wiki.protohaven.org/uploads/images/gallery/2026-06/SFiimage.png)
Thread the bobbin as illustrated (5) and place the bobbin onto the spindle.
Then, engage “bobbin winding mode” by gently pushing the bobbin to the right (6).
[](https://wiki.protohaven.org/uploads/images/gallery/2026-07/oBMimage.png) [](https://wiki.protohaven.org/uploads/images/gallery/2026-07/HVmimage.png)
Hold the end of the thread (7) and step on the foot pedal (8) to begin winding.
[](https://wiki.protohaven.org/uploads/images/gallery/2026-07/a0Uimage.png)
Cut the thread (9), disengage “bobbin winding mode” by pushing to the bobbin to the left (10), and remove the bobbin.
### Inserting the Bobbin
[](https://wiki.protohaven.org/uploads/images/gallery/2026-07/Zgpimage.png)[](https://wiki.protohaven.org/uploads/images/gallery/2026-07/Sc8image.png)
Ensure the power is off.
Turn the handwheel counterclockwise (1) until the needle is fully raised.
Insert the bobbin into the bobbin case (2) with the thread running counterclockwise.
[](https://wiki.protohaven.org/uploads/images/gallery/2026-07/5n8image.png)
Then, pull the thread through slit “A” (3).
Draw the thread clockwise (4) until it slips into notch “B”.
Pull about 6 inches of thread and re-attach the bobbin cover plate.
Hold the upper thread with the left hand while turning the handwheel counterclockwise (1). This will lower and then raise the needle.
Note: If it is difficult to raise the bobbin thread, check to make sure the thread is not trapped by the hinged cover or the Removable Extension Table.
Gently pull on the upper thread to bring the bobbin thread up through the needle plate hole.
Then, lay both threads to the back under the presser foot.
If the thread is looping or birdnesting on the top of the fabric, this is an indication that the bobbin thread has not been threaded correctly.
### Replacing the Needle
Appropriate needles (singer 2020 9(70) or 18(110)) are available in the consumables section of our store front.
[](https://wiki.protohaven.org/uploads/images/gallery/2026-07/p7kimage.png)
1.
Power off the machine.
2.
Loosen the needle clamp screw (A) and re-tighten after replacing the needle.
3.
Ensure that the flat side of the needle shaft (B) is towards the back.
4.
Insert the needle as far up as it will go (C/D).
### Worn or Damaged Needles
[](https://wiki.protohaven.org/uploads/images/gallery/2026-07/gAximage.png)
It is important to replace needles regularly. Problems can occur with:
A. Damaged points
B. Bent Needles
C. Blunt needles
### Threading the Needle
[](https://wiki.protohaven.org/uploads/images/gallery/2026-07/HPtimage.png)[](https://wiki.protohaven.org/uploads/images/gallery/2026-07/94dimage.png)
Ensure the power is off.
Turn the handwheel counterclockwise (1) until the needle just barely begins to descend.
Raise the presser foot to release the tension discs.
[](https://wiki.protohaven.org/uploads/images/gallery/2026-07/alnimage.png)
Lift the spool pin and place the spool of thread onto the holder (2).
Note: for small thread spools, invert the spool holder so that the small side is touching the spool of thread.
Pass the thread through the upper thread guide (3).
[](https://wiki.protohaven.org/uploads/images/gallery/2026-07/ywAimage.png)[](https://wiki.protohaven.org/uploads/images/gallery/2026-07/xcsimage.png)
Then, pull the thread through the pre-tension spring (4).
Draw the thread down the right channel and, then, up the left channel (5) to wrap the thread into the tension module.
Pass the thread from right to left through the slotted eye of the take-up lever and then downwards again (6).
[](https://wiki.protohaven.org/uploads/images/gallery/2026-07/E2mimage.png)
Pass the thread behind the thread guide and behind the wire clamp guide (7).
Then, pass the thread down and through the eye of the needle from front to back (7).
Pull about 6-8 inches of thread through the needle eye and trim (8).
## Basic Operation
Once the machine is threaded and your fabric is prepped, you're ready to run a test stitch and then create a seam. Test stitches are performed by hand on your first seam to make sure the needle and thread are able to pass through the multiple layers of fabric easily and not damage the machine.
#### Running a Test Stitch
1. Place your fabric under the presser foot and lower the presser foot to hold the fabric in place.
2. Turn the top of the handwheel towards you to move the needle up and down twice and create a stitch. If it takes a tremendous amount of effort to move the needle through the fabric, you should use a more robust machine, such as the Juki walking foot sewing machine (clearance required).
3. Raise the thread take-up lever to its highest position, lift the presser foot, remove your fabric, and cut the threads.
4. Inspect the stitch to make sure it is tight and looks good before sewing the rest of the seam.
#### Sewing a Seam
1. To sew a seam, place your fabric under the presser foot and lower the foot.
2. Turn the sewing machine on and position your foot on the control pedal. The control pedal works like a gas pedal in a car: The more you press it down, the faster the machine will go. The maximum speed of the machine can be set using the speed control slider on the front of the machine.
3. Press the foot pedal down gently to begin sewing, sew a few stitches, and then release the control pedal to stop the machine. The machine automatically feeds the fabric through, so you'll only need to guide the fabric into the machine.
4. Press the reverse stitch button and press the foot pedal down gently to sew a few stitches in the opposite direction. This helps to lock the beginning of the seam.
5. Release the reverse stitch button and sew the length of the seam.
6. When you reach the end of your seam, press the reverse stitch button and run a few stitches in reverse to help lock the end of the seam.
7. Raise the thread take-up lever to its highest position, lift the presser foot, remove your fabric, and cut the threads.
#### Adjusting the Tension
Proper tension is critical for strong seams. The basic thread tension setting is “4”. 90% of all sewing will be between “3” and “5”, but each stitch type, thread, and fabric requires individual testing and adjustment.
To increase the tension, turn the dial to the next number up. To reduce the tension, turn the dial to the next number down.
[](https://wiki.protohaven.org/uploads/images/gallery/2026-07/iZgimage.png)
Normal tension for straight stitch sewing.
Too loose for straight stitch sewing.
Turn the dial clockwise to increase tension.
[](https://wiki.protohaven.org/uploads/images/gallery/2026-07/PSgimage.png)
Too tight for straight stitch sewing.
Turn the dial counter clockwise to reduce the tension.
[](https://wiki.protohaven.org/uploads/images/gallery/2026-07/5Lnimage.png)
Normal tension for zig zag and decorative sewing.
Correct tension is when a small amount of the upper thread appears on the bottom side of fabric.
## Cleanup
1.
Power off the machine and ensure all controls are set to the off (“O”) position.
2.
Un-thread top needle and spool
3.
Remove bobbin
4.
Wipe down, vacuum, and blow out lint and stray thread clippings
5.
Sweep up threads, lint and debris and deposit in waste bins
## Troubleshooting
Please note any maintenance needs or concerns on both the physical maintenance tag and [protohaven.org/maintenance](http://protohaven.org/maintenance "http://protohaven.org/maintenance")
**Common Issues**
**Possible Causes**
**Resolutions**
Thread is looping or birdnesting on the top of the fabric
Error in threading the bobbin.
Remove all fabric and thread.
Then, rethread the machine and start again.
Thread Jams
Error in threading top or bobbin thread
Remove all fabric and thread.
Then, rethread the machine and start again.
Inappropriate tension
Remove all fabric and thread.
Then, rethread the machine and adjust tension +/- (test on scrap material)
Decorative stitch is puckering fabric
Tension is too tight
Remove all fabric and thread.
Then, rethread the machine and reduce tension
Broken Needle
Material is too thick
Remove all fabric and thread.
Replace needle, rethread the machine, and reduce the amount of layers being sewn and/or use thinner materials.
Dull/Bent/Improper Needle selection
Remove all fabric and thread.
Replace needle and rethread the machine. Then, start again.
## Special Setups
### Button Holes & Buttons
Buttonhole sewing requires the use of the buttonhole foot. The buttonhole foot is stored in the sewing checkout kit at the front desk.
### Stretch Stitch
The stretch stitch patterns are indicated in blue on the pattern selector dial. To select these, turn the pattern selector dial to the desired pattern. Then, turn the stitch length dial to “S1”.
# Textiles - Embroidery Machine
Stabber: Brother PR-620
Clearance: Required
# Manual(s)
*Manuals and other reference materials from the manufacturer or other sources.*
- [Operation Manual, Brother PR-620](https://download.brother.com/welcome/doch000126/pr620ug01en.pdf)
- [Quick Reference Guide, Brother PR-620](https://download.brother.com/welcome/doch000127/pr620qg01ennlfrdeites.pdf)
- [User's Guide, Cap Frame for Brother PR-620](https://download.brother.com/welcome/doch000120/pr620600_2upg_capugenfres.pdf)
# Member Notes
# Resources
### Thread
For best results, use [\#40 Madeira polyester embroidery thread](https://www.madeirausa.com/polyneon/).
Note that using rayon thread in particular can be prohibitively slippery for the tension we've calibrated the machine at.
#### *Repair files*
*Spool Holder 3d print file: [CNC Embroidery Spool Holder.step](https://wiki.protohaven.org/attachments/344) (print laying on its side for most strength)*
# Tool Tutorial
##
[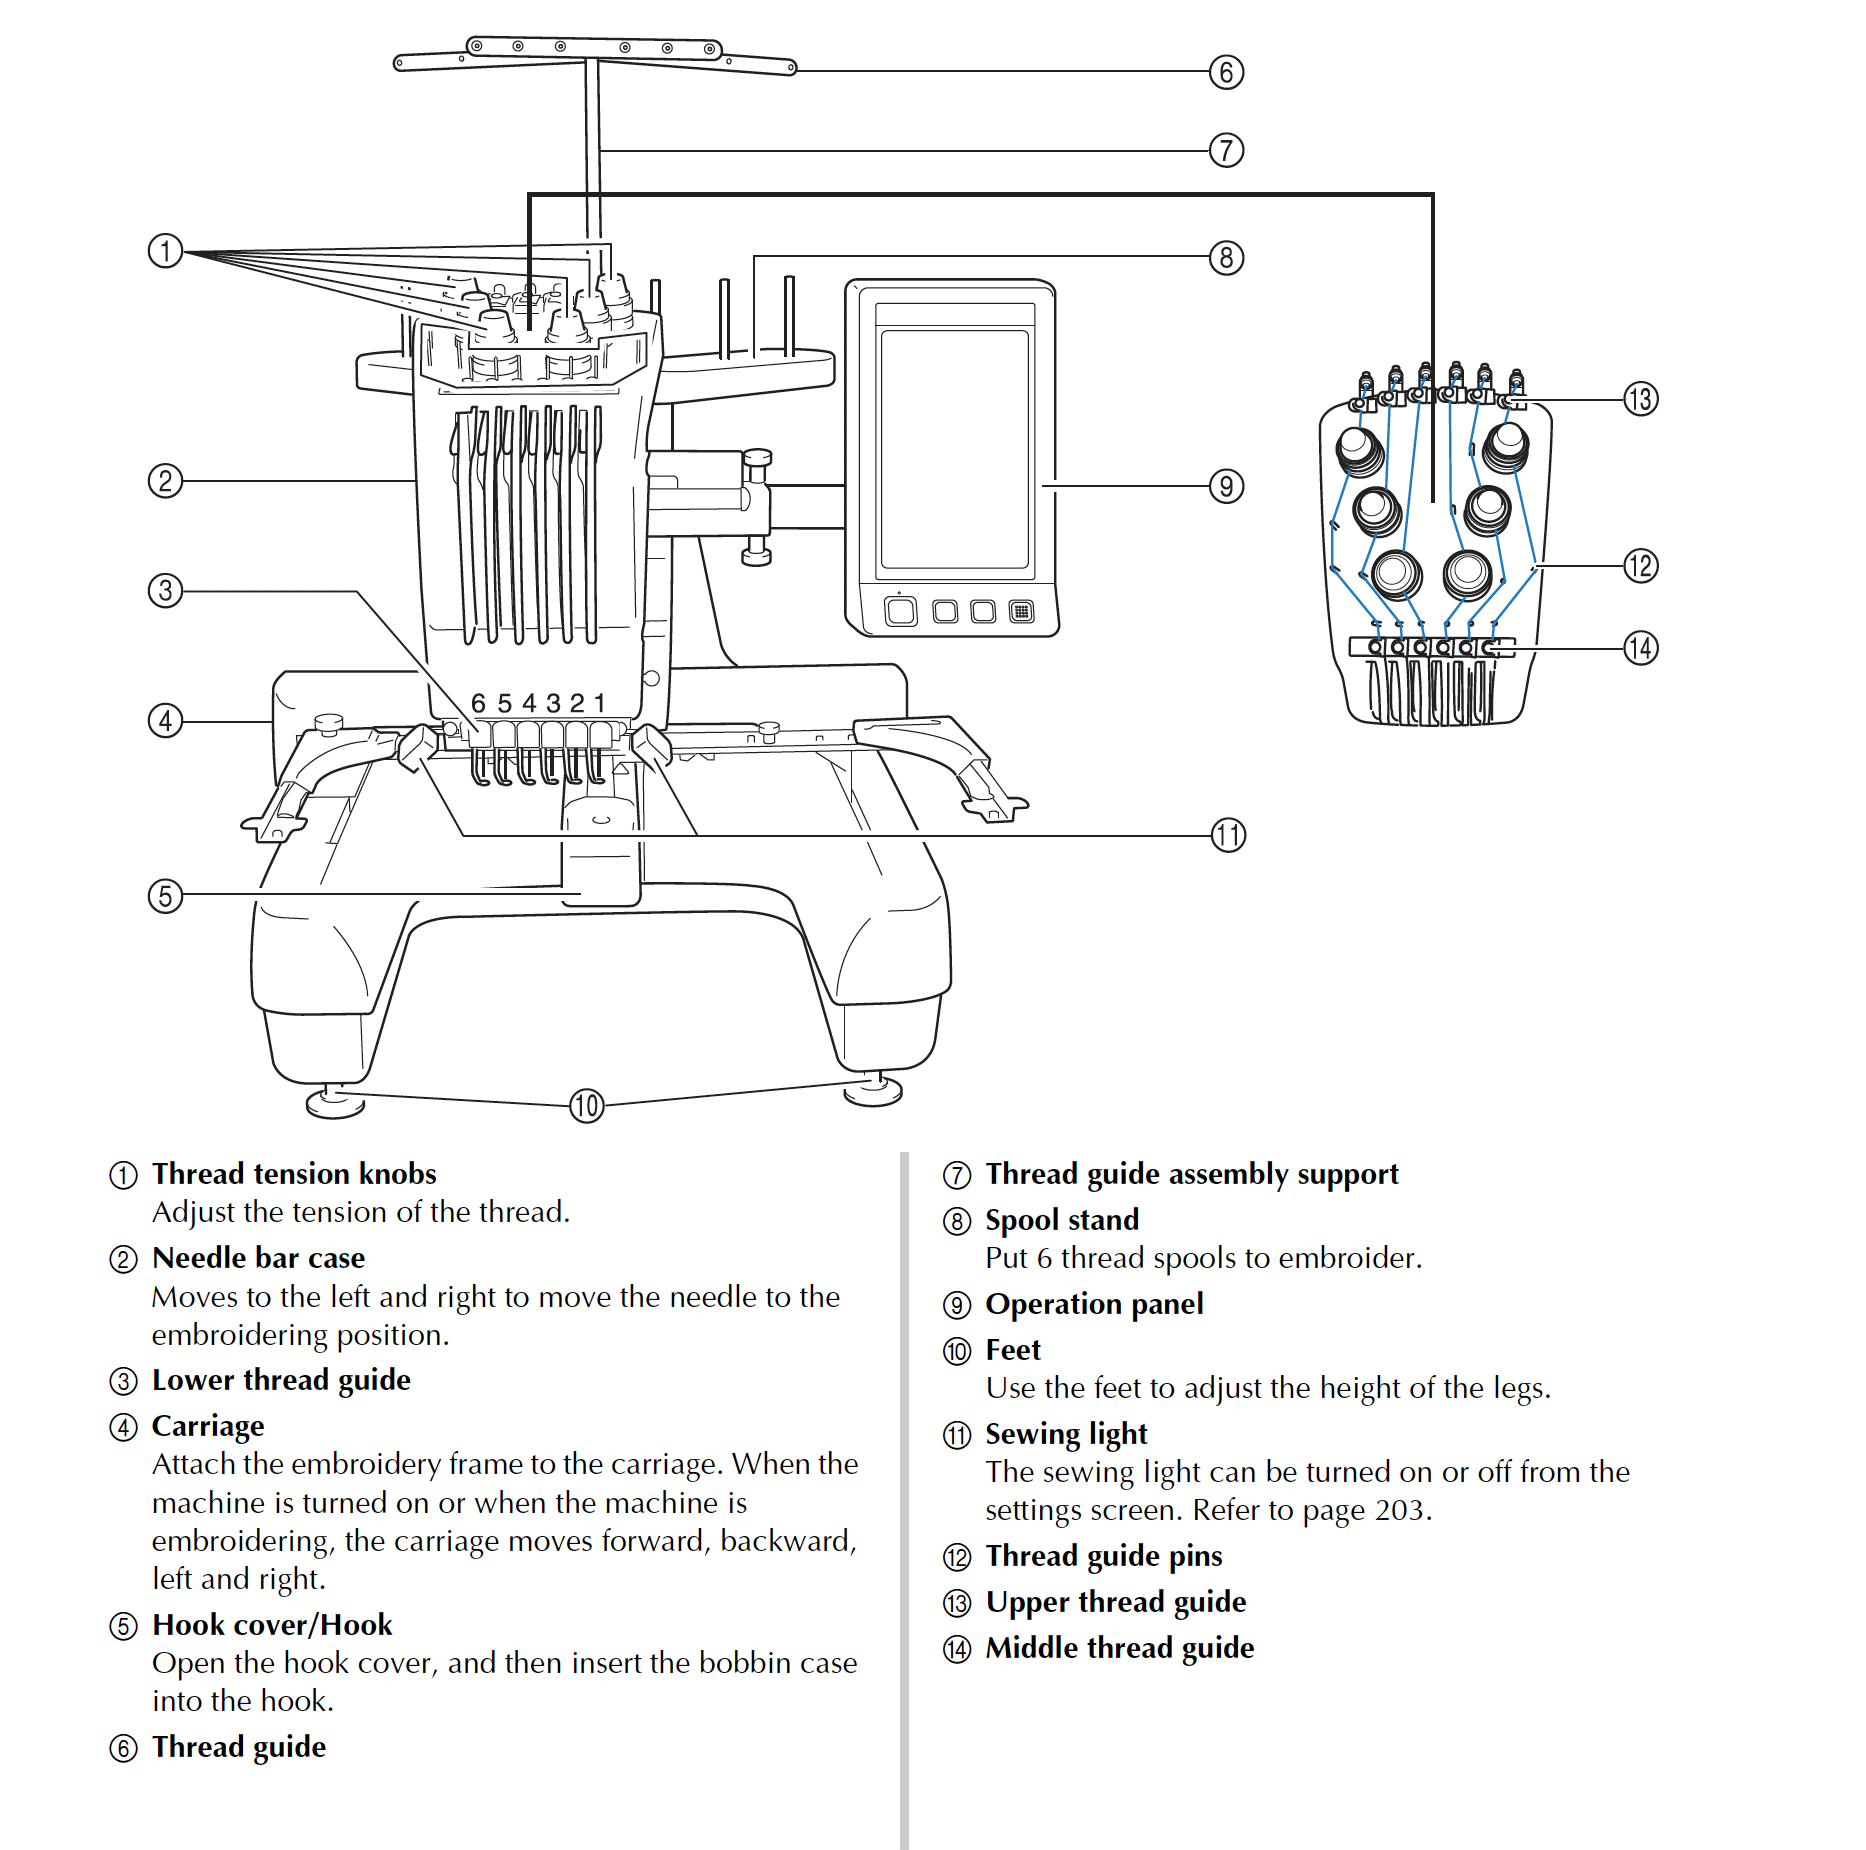](https://protohaven.org/wiki/_detail/tools/cnc_embroidery_image3.png?id=tools%3Acnc_embroidery%3Astart "tools:cnc_embroidery_image3.png")
[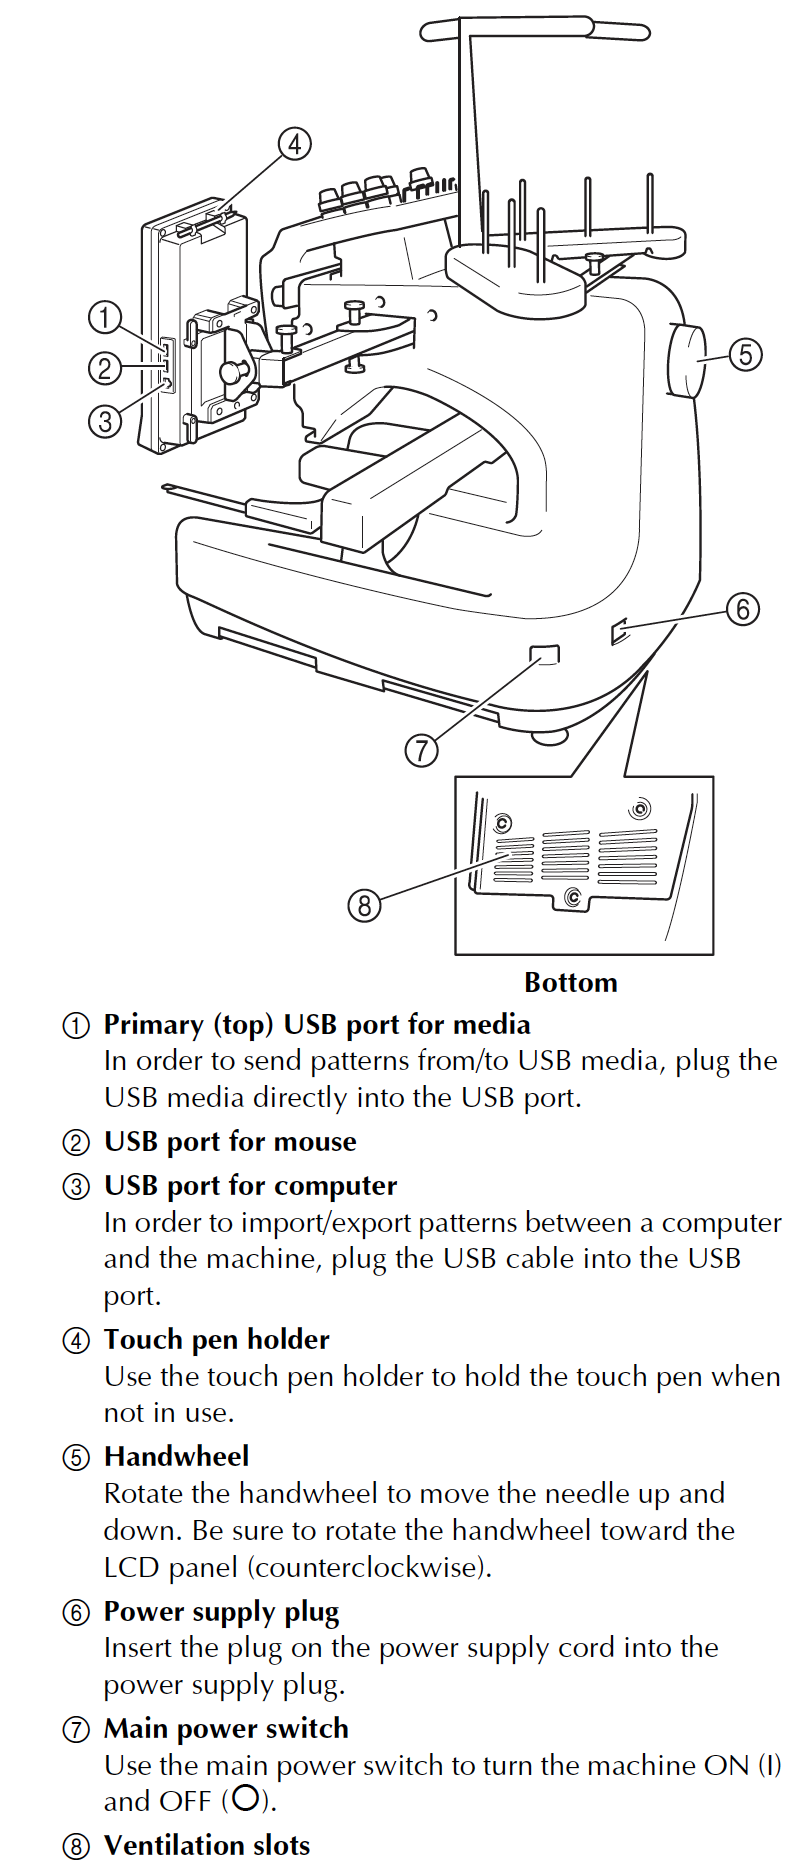](https://protohaven.org/wiki/_detail/tools/cnc_embroidery_image1.png?id=tools%3Acnc_embroidery%3Astart "tools:cnc_embroidery_image1.png")
---
[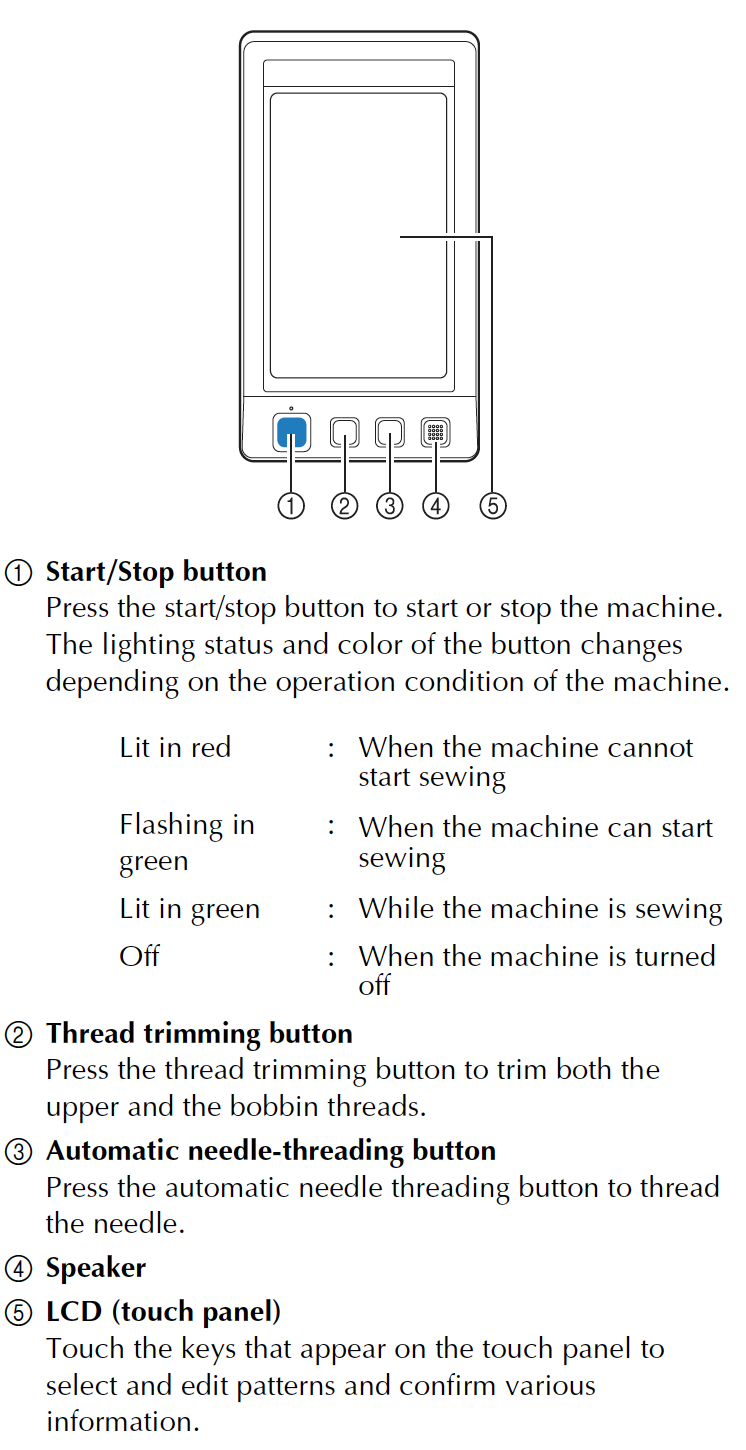](https://protohaven.org/wiki/_detail/tools/cnc_embroidery_image2.png?id=tools%3Acnc_embroidery%3Astart "tools:cnc_embroidery_image2.png")
## Making Adjustments
Members are ONLY permitted to adjust the following screws and knobs on the device:
- Embroidery frame holder knobs (grey thumbscrews)
- Operation panel arm knobs (grey thumbscrews)
Adjustment of the following by members without the guidance of a shop tech are specifically prohibited:
- All knobs on the top of the machine (including the thread tension knobs and the black guides behind them)
- The bobbin case screw (for bobbin tension)
Thread tension adjustment knobs in particular have been expensive for us to repair. In the past, members have damaged the machine both by over-tightening (cracking internal parts of the assembly) and under-tightening (releasing internal springs and washers). Please respect our rules and do not adjust these knobs (see "Troubleshooting" below for ways to solve tension problems)
## Using correct thread
40 embroidery thread must be used in the embroidery machine - **non-embroidery thread (e.g. standard sewing machine thread) is expressly forbidden**, as use over time will damage parts of the machine it comes in contact with. See the [Resources](https://wiki.protohaven.org/books/tool-guides/page/resources-lea) page for recommended thread brands to give best results.
**Only our bobbins (available in the store) are permitted for use on the embroidery machine.** We use specific pre-wound bobbins with high-grade thread to prevent tangling, breakage, and damage to the machine. Please trust us on this - you **will** have a bad time if you try to wind your own or buy off-brand.
## Troubleshooting
When in doubt, troubleshoot the following in order BEFORE reporting problems with the machine:
1. Your fabric and hooping technique (e.g. using stretchy/poor fabric, some gaps in stabilizer when hooping)
2. Your thread and bobbin (are you using the recommended thread above?)
3. Your design (have you tried a basic I-test using your fabric and thread, before attempting something more complex?)
If you think the machine is out of calibration or not working properly in some way, **ask a tech to run an "I-test" using our maintenance kit.** This kit contains known good thread and fabric and can rule out machine problems as part of your project.
## Needle breakage
Occasionally, a problem will occur which breaks one of the needles on the machine. **Please report this to the shop tech on duty when it happens.**
**Do NOT attempt to change a needle by yourself** as incorrectly loaded needles have broken the auto-threading system and caused internal damage to the machine in the past.
## Operation sequence
-
Install Bobbin
-
Turn on machine
-
Select embroidery pattern
-
Edit embroidery pattern
-
Specify embroidery settings
-
Check previewed image
-
Hoop the fabric in embroidery frame
-
Attache embroidery frame to the machine
-
Check the embroidery area
-
Thread the upper threads
-
Unlock the machine, then press the start/stop button to begin embroidering. (Machine automatically stops at pattern completion)
-
Check thread tension
-
Remove the embroidery frame, then remove fabric from frame
-
Turn off the machine
# Textiles - Juki Straight Stitch
Juki DDL 8700
Clearance: Required
# Manual(s)
*Manuals and other reference materials from the manufacturer or other sources.*
- [Juki DDL 8700 Instruction Manual](https://juki.com/pub/media/wysiwyg/products/DDL-8700_manual.pdf)
# Member Notes
# Resources
*Where to obtain materials, consumables, and tooling.*
Appropriate needles and bobbins are available in the consumables section of our store front. Both are sold individually for ease and convenience.
Members are responsible for bringing their own thread, specialty needles/feet, and fabric.
-
**Bobbin:** Juki #229-32909 metal bobbin
-
**Thread:**
-
Must be in a Cone or Vicone to accommodate the high speed
-
Always use the same thread in the upper tension and in the bobbin
-
**Fabric** Light to medium weight
-
**Needle**:
-
[Size Range for machine:](https://www.thethreadexchange.com/miva/merchant.mvc?Screen=CTGY&Category_Code=needle-information "https://www.thethreadexchange.com/miva/merchant.mvc?Screen=CTGY&Category_Code=needle-information")
-
DBx1 #9 to #18 (Organ)
-
134 #65 to #110 (Groz-Beckert)
-
Point Type: [appropriate to fabric](https://sewtootpatterns.com/wp-content/uploads/2016/02/Needle_Types.jpg "https://sewtootpatterns.com/wp-content/uploads/2016/02/Needle_Types.jpg")
-
Weight: [appropriate to the thread and fabric](https://sewtootpatterns.com/wp-content/uploads/2016/02/Needle_Types.jpg "https://sewtootpatterns.com/wp-content/uploads/2016/02/Needle_Types.jpg")
-
Eye: must be 40% larger than the thickness of the thread
### Vendors
- [Wawak](https://www.wawak.com/&sa=D&source=editors&ust=1676742700829073&usg=AOvVaw0Wbizk4Rt_RA_6rTqfU1Yz "https://www.wawak.com/&sa=D&source=editors&ust=1676742700829073&usg=AOvVaw0Wbizk4Rt_RA_6rTqfU1Yz") — Place to buy Needles and thread of every type, including heavy duty and embroidery
- [The Thread Exchange](https://www.thethreadexchange.com/miva/merchant.mvc?Screen%3DCTGY%26Category_Code%3DNDL-135x17&sa=D&source=editors&ust=1676742700829607&usg=AOvVaw1NJYXAnTLKLF6x3clQRm-e "https://www.thethreadexchange.com/miva/merchant.mvc?Screen%3DCTGY%26Category_Code%3DNDL-135x17&sa=D&source=editors&ust=1676742700829607&usg=AOvVaw1NJYXAnTLKLF6x3clQRm-e") - thread and needles
- [Needle buying Guide](https://www.thethreadexchange.com/miva/merchant.mvc?Store_Code%3DTTE%26Screen%3DCTGY%26Category_Code%3Dneedle-information&sa=D&source=editors&ust=1676742700830475&usg=AOvVaw2ol_2TNOsxxeNjsPj78DbT "https://www.thethreadexchange.com/miva/merchant.mvc?Store_Code%3DTTE%26Screen%3DCTGY%26Category_Code%3Dneedle-information&sa=D&source=editors&ust=1676742700830475&usg=AOvVaw2ol_2TNOsxxeNjsPj78DbT")
- [Needle and thread Guide](https://www.servicethread.com/blog/industrial-sewing-thread-needle-sizes&sa=D&source=editors&ust=1676742700831159&usg=AOvVaw09QuL5MFPN91oV-4xO7zUQ "https://www.servicethread.com/blog/industrial-sewing-thread-needle-sizes&sa=D&source=editors&ust=1676742700831159&usg=AOvVaw09QuL5MFPN91oV-4xO7zUQ")
- [Bobbin Guide](https://www.thethreadexchange.com/miva/merchant.mvc?Screen%3DCTGY%26Store_Code%3DTTE%26Category_Code%3Dprewound-bobbin-information&sa=D&source=editors&ust=1676742700831661&usg=AOvVaw3faMV7GkKnMUpG0idGiCqJ "https://www.thethreadexchange.com/miva/merchant.mvc?Screen%3DCTGY%26Store_Code%3DTTE%26Category_Code%3Dprewound-bobbin-information&sa=D&source=editors&ust=1676742700831661&usg=AOvVaw3faMV7GkKnMUpG0idGiCqJ")
### Checking Needle Size
{{@577#bkmrk-grab-a-needle-and-ab}}
{{@577#bkmrk-if-the-needle-does-n}}
## Learning Resources
[Threading and overview](https://www.youtube.com/watch?v=QI-8pLZGqvU "https://www.youtube.com/watch?v=QI-8pLZGqvU")
[Machine capabilities](https://www.youtube.com/watch?v=AZsHSBN2Q6c "https://www.youtube.com/watch?v=AZsHSBN2Q6c")
[Sewing Gold Channel](https://www.youtube.com/channel/UC9DPdV59J32ftSwG2boGYlQ "https://www.youtube.com/channel/UC9DPdV59J32ftSwG2boGYlQ") : (multiple industrial machine videos)
# Juki Straight Stitch Tool Tutorial
This machine is great for working with long straight items like draperies and bedding using fabric ranging from light to medium weight. Maximum sewing speed is 5500 stitches per minute!
Link to PDF Tool Tutorial: [Letter size straight stitch 2025.pdf](https://wiki.protohaven.org/attachments/252)
Link to 2025 rev. poster: [24 x 24 straight stitch poster 2025.pdf](https://wiki.protohaven.org/attachments/253)
## Tool Anatomy
[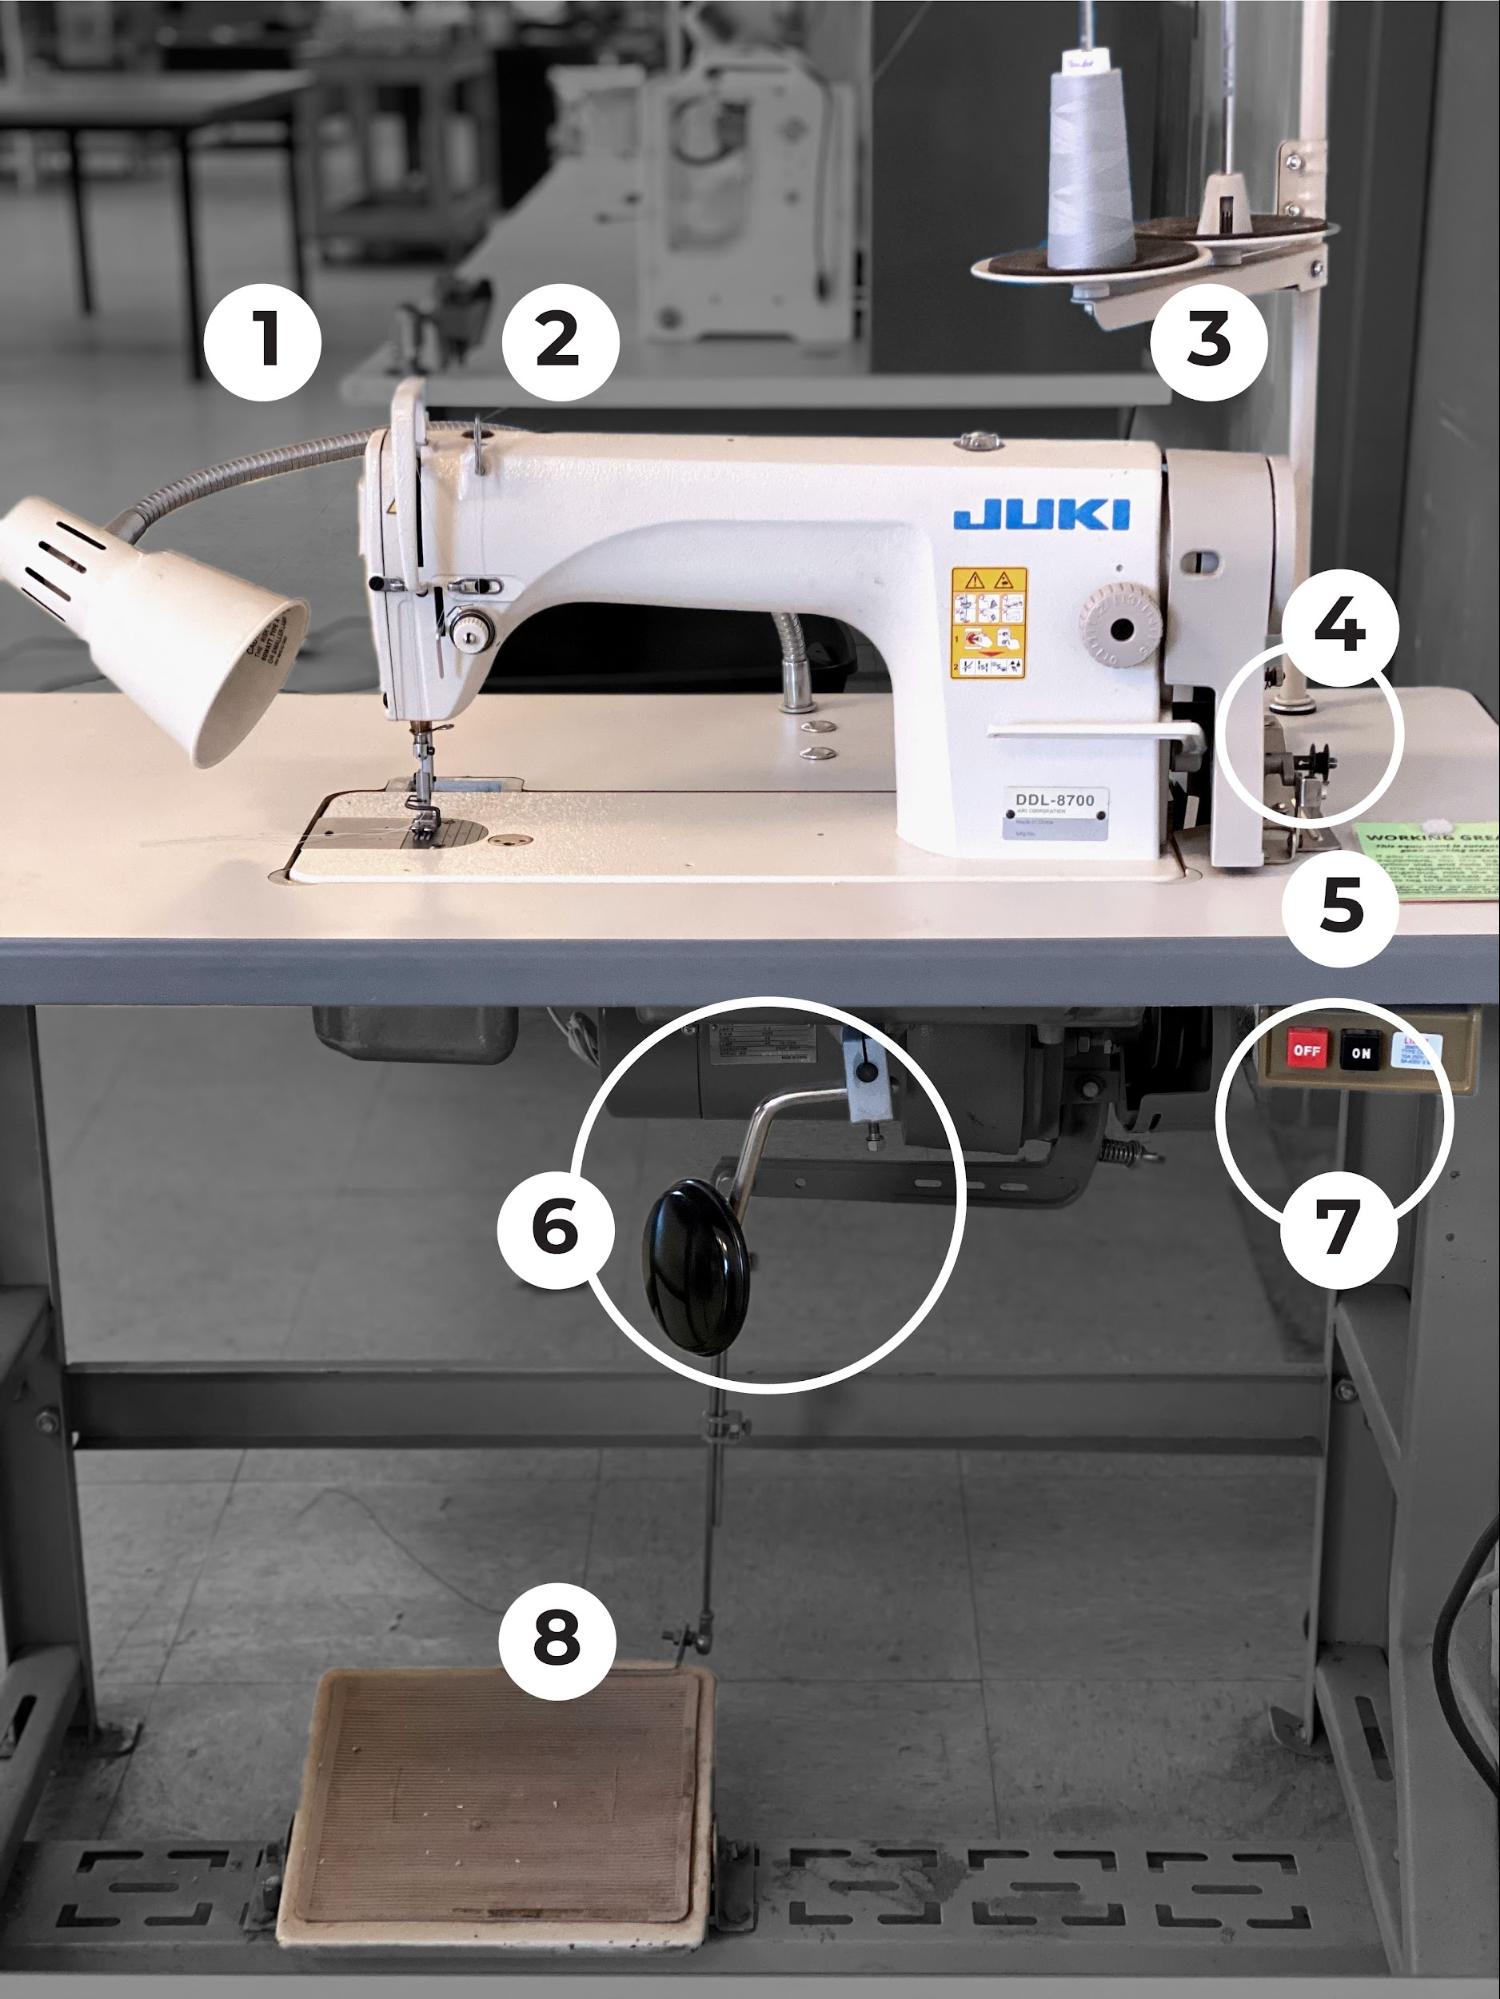](https://wiki.protohaven.org/uploads/images/gallery/2026-07/industrial-straight-stitch-tool-tutorial-image11.jpg)
1.
Light - For easy viewing
2.
Straight Stitch - The Machine
3.
Thread Holders - Please Note: The secondary holder is for continual bobbin winding
4.
Bobbin Winder
5.
Maintenance Tag - Manually tracks the usability status with Green/Yellow/Red cards
6.
Knee Presser Foot Lifter - Knee operated lever that lifts the presser foot while sewing
Manual Presser Foot Lifter (not seen, around back)
2.
Presser Foot Height Adjustment
3.
Thread Guide
4.
Oil Level Indicator
5.
Hand Wheel
6.
Thread Tension and Guides
7.
Stitch Length Knob
8.
Bobbin Winder Tensioner
9.
Needle
10.
Reverse Lever
11.
Bobbin Winder Spindle
## Safety
- Do not push or pull material while stitching.
- Power off the machine before threading, inserting the bobbin, or handling the needle.
- Keep hair, loose clothing, and fingers away from all moving parts!
- Safety glasses are recommended.
- Check the needle condition prior to sewing, be sure it is the correct size for the material being sewn, and it is not bent or chipped.
- Never sew over pins, staples or other metal materials, as this may cause the needle to shatter, resulting in bodily harm and severe machine damage.
- Always turn the hand wheel towards you, (down) never away.
### Common Hazards
The most common hazards are thread jams and broken needles. Watch for binds, jams, and bird nests—stop immediately if they occur.
-
Ensure the needle and thread are removed before winding a bobbin
-
Avoid pulling/pushing fabric, which may misalign and break the needle
The most significant hazard is injury. Always power off and run the machine until the motor drains before handling, adjusting, or threading.
-
Keep fingers 3” away from the needle
-
Power off and drain the motor before:
-
Threading
-
Replacing needles
-
Removing jams
-
Tie back hair and scarves
-
Tuck sleeves behind elbows
## Materials
Thread Jams and needle breakage are critical concerns. Material that is too thick or rigid will lead to needle breakage. Material that is too slick (plasticized or otherwise “finished”) will slide against the presser foot and cause thread jams and/or needle breakage.
Industrial machines will not “step over” pins in the fabric. Hitting one may break the needle and send broken parts into the hook below.
For those reasons, it is important to avoid:
-
Abrasives
-
Paper and cardboard products
-
Pins in the fabric
-
Plastics
-
Rigid Material (non-fabric)
## Setup
1.
Wipe down the machine and bed to clean up any oil or dust.
2.
Check the oil level, see Maintenance.
3.
Power on the machine.
4.
Wind the bobbin.
5.
Power off the machine to insert the bobbin and thread the machine.
6.
Thread the machine.
7.
Ensure the needle is usable and appropriate for the material and thread.
8.
Lower the presser foot and begin operation.
### Checking Needle Size
1.
Grab a needle and about 12 inches of the intended thread
2.
Thread the needle
3.
Hold both ends of the thread, creating a 60 degree slope with one end to see if the needle is able to slide along the slope
4.
Reverse the process to see if the needle slides back
If the needle does not freely slide down the thread, the size may be too small. As a general rule, you’ll want the smallest size needle that will slide freely down the thread.
### Winding the Bobbin
**This machine does not disengage while winding like a consumer machine!**
Rotate the case 2-3 times to manually wind the thread for traction.
6.
Place the bobbin on the spindle, holding onto the tail of loose thread.
7.
Gently press the foot pedal to wind the bobbin. It will stop when full.
Please watch [this video,](https://www.youtube.com/watch?v=22AeAlLLEgM "https://www.youtube.com/watch?v=22AeAlLLEgM") which includes details of winding and placing the bobbin in the case.
### Attach the Bobbin Case
[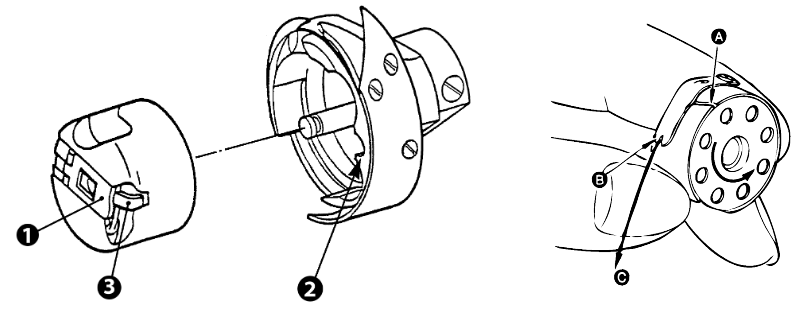](https://wiki.protohaven.org/uploads/images/gallery/2026-07/4eEimage.png)
1. Set the bobbin into the bobbin case, the thread running clockwise. (looks like a “q”)
2. Pass the thread around the thread slit (1), and pass it under the tension spring (2)
3. The bobbin rotates in direction B when thread is pulled in direction A
4. Orient the lower knob (1) of the bobbin case to the indented part (2) of the bobbin housing’s inner hook.
5. Push the bobbin into the case until it clicks.
### Insert the Needle
[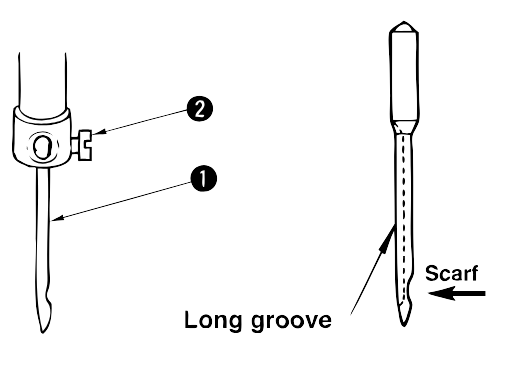](https://wiki.protohaven.org/uploads/images/gallery/2026-07/d3dimage.png)
1. Turn the handwheel forward until the needle bar is at the highest position
2. Loosen the needle clamp screw and hold the needle so that the scarf is to the right and the long groove in the needle is exactly to the left.
3. Insert the needle (1) into the clamp hole until it will go no further.
4. Tighten the needle clamp screw firmly (monkey tight—not gorrilla!)
### Thread the Machine
[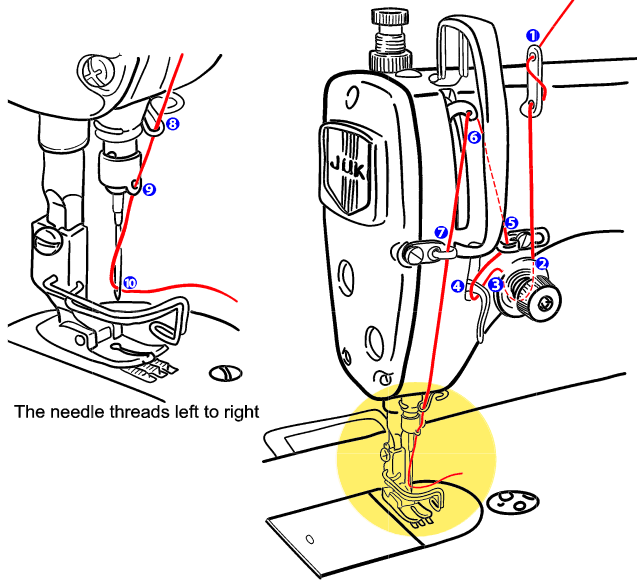](https://wiki.protohaven.org/uploads/images/gallery/2026-07/0Cpimage.png)
[Example Video](https://www.youtube.com/watch/v=QI-8pLZGqvU "https://www.youtube.com/watch/v=QI-8pLZGqvU")
Thread the machine following the order of (1) through (11) as shown above.
Move the handwheel towards you to get the top thread to take up the bobbin thread - never move it away from you.
## Basic Operation
1.
Setup the machine
2.
Raise the presser foot with the knee pedal to load fabric
3.
Test by sewing on scrap similar to what you will be sewing
4.
Adjust the tension and stitch length
5.
Remove test and trim threads
6.
Load and align project fabric
7.
Back stitch/reverse to keep your stitch from unraveling
8.
Sew
9.
Cleanup
### Adjust the needle thread tension
[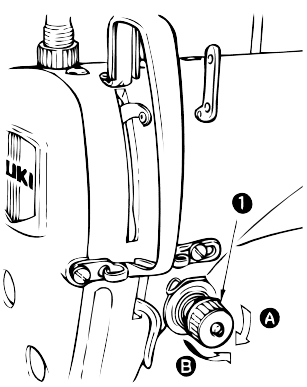](https://wiki.protohaven.org/uploads/images/gallery/2026-07/nRLimage.png)
1.
Direction A clockwise - to increase needle thread tension.
2.
Direction B counterclockwise - to decrease needle thread tension.
[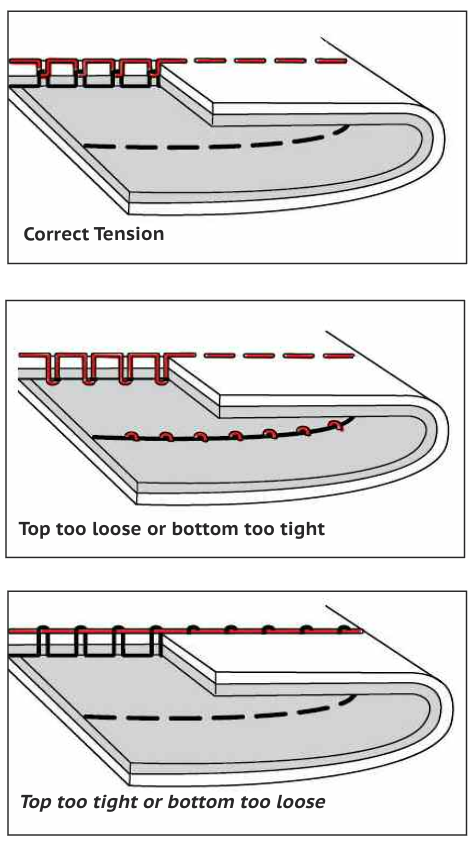](https://wiki.protohaven.org/uploads/images/gallery/2026-07/smYimage.png)
### Adjust the bobbin thread tension
**Adjusting the bobbin is rarely needed or advisable. Look elsewhere for the problem!**
Too tight. Turn the tension nut counter clockwise to reduce the tension.
### Backstitch and Stitch Size
[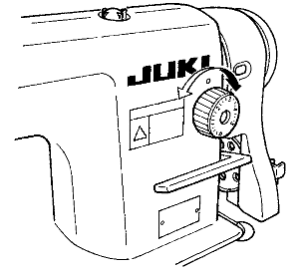](https://wiki.protohaven.org/uploads/images/gallery/2026-07/cvwimage.png)
Turn the dial to change stitch size
Press the lever to reverse at the end of the seam
## Cleanup
1. Power off and drain the machine
2. Unthread machine head and spool
3. Remove bobbin
4. Wipe down, vacuum, and blow out lint and stray clippings
5. Sweep up threads, lint, and debris and deposit in waste bins
6. Return stray items to drawer under table
## Troubleshooting
**Common Issues**
**Possible Causes**
**Resolutions**
Thread comes out of the needle on the first few stitches
The threads need a longer tail, and needs to be held back, or
The take up lever is not at its highest position
Pull threads to the back when beginning the seam, with the take-up lever in it’s highest position
Thread clumps up and fabric won’t feed through
Bent needle, needle inserted incorrectly, machine threaded incorrectly
Be sure it is threaded left to right.
Be sure the needle is right for the fabric.
Skipped stitches
Bent needle, needle inserted incorrectly, machine threaded incorrectly
Turn off the machine be sure there is no jam near the hook and bobbin casing, then re-thread the machine and bobbin
Bobbin thread won’t pull
through, or is very tight
The bobbin housing may be damaged.
Pull it out and check for any dents or an oval shape that could be pinching the bobbin. A new housing will
need to be installed
## Special Setups
For all of the following, please make a Special Setup Arrangement with a Protohaven Staff Member to gain clearance in advance of use. Consider whether you need specialty adjustments as part of an extended project, or if the adjustments or accessories are temporary.
### Winding the Bobbin while Sewing
For large projects, a second bobbin can be wound while sewing.
1.
A second spool of thread is required.
2.
The needle and presser foot remain in place, and sewing can continue.
3.
Follow all other instructions in “Bobbin Winding” above
### Adjusting the Thread Take Up Stroke
The amount of thread pulled from the spool can be adjusted to allow thicker or thinner materials to sew more precisely. All adjustments must be reverted to the average settings when finished.
See Section 16 of the [Manual](https://wiki.protohaven.org/books/tool-guides/page/manuals-4gE)
### Specialized Presser Foot
Cording foot, Left/Right piping, Zipper foot, Hemmer - User is responsible for purchasing
### Specialized Feed Dogs
The machine is set for average types of fabric, but can be adjusted for very fine fabric or very thick. The feed dogs can be changed out for various weights, but the user is responsible for purchasing these and re-setting the machine completely after use.
# Textiles - Juki Walking Foot
Juki Walking Foot DNU 1541s
Clearance: Required
# Manual(s)
*Manuals and other reference materials from the manufacturer or other sources.*
- [Juki Walking Foot DNU 1541s Instruction Manual](https://drive.google.com/file/d/116O_0pvLrTCr9say9q8DxgVoa7hr-6hc "https://drive.google.com/file/d/116O_0pvLrTCr9say9q8DxgVoa7hr-6hc")
# Member Notes
# Resources
*Where to obtain materials, consumables, and tooling.*
### CONSUMABLES
Appropriate needles and bobbins are available in the consumables section of our store front. Both are sold individually for ease and convenience.
Members are responsible for bringing their own thread and fabric.
-
**Bobbins:** Size “M”, standardized metal bobbin
-
**Thread**
-
Must be in a Cone or Vicone to accommodate high speed
-
Always use the same thread in the upper tension and in the bobbin
-
**Fabric:** light to heavy weight fabrics
-
**Needle** (see chart below):
-
Size Range for machine:[ 135 x 17, 135 x 16 (Nm160) Nm125~Nm180](https://www.thethreadexchange.com/miva/merchant.mvc?Screen%3DCTGY%26Category_Code%3DNDL-135x17&sa=D&source=editors&ust=1676742692798267&usg=AOvVaw2h9NabKWNK9g7TEJHMT8nL "https://www.thethreadexchange.com/miva/merchant.mvc?Screen%3DCTGY%26Category_Code%3DNDL-135x17&sa=D&source=editors&ust=1676742692798267&usg=AOvVaw2h9NabKWNK9g7TEJHMT8nL")
-
Point Type: [appropriate to fabric](https://sewtootpatterns.com/wp-content/uploads/2016/02/Needle_Types.jpg&sa=D&source=editors&ust=1676742692798833&usg=AOvVaw3uYTKRPSH2paSVMPig6odA "https://sewtootpatterns.com/wp-content/uploads/2016/02/Needle_Types.jpg&sa=D&source=editors&ust=1676742692798833&usg=AOvVaw3uYTKRPSH2paSVMPig6odA")
-
Weight: [appropriate to the thread and fabric](https://sewtootpatterns.com/wp-content/uploads/2016/02/Needle_Types.jpg&sa=D&source=editors&ust=1676742692799244&usg=AOvVaw1m31zIAXEdhw-FuzRt2NGo "https://sewtootpatterns.com/wp-content/uploads/2016/02/Needle_Types.jpg&sa=D&source=editors&ust=1676742692799244&usg=AOvVaw1m31zIAXEdhw-FuzRt2NGo")
-
Eye: must be 40% larger than the thickness of the thread
**Needle Type**
(shape of the point)
**Needle Size**
(Fine to heavy)
**Fabric Type**
**Thread Size**
(Measured in Tex, Denier, mm and weight)
Universal R or DP
70 up to 230
Light to heavy woven
Light to medium
Ballpoint RG, FFG, G
100 to 125
Light to medium knits, jerseys, stretch, bulky knit
Light to medium
Jeans R
100 - 110
Medium to Heavy
Medium to Heavy
Leather/Vinyl LR, LL, P, PCL, S, D, GH
Range of sizes
Heavy/Layers
Heavy
### Vendors
- [Wawak](https://www.google.com/url?q=https://www.wawak.com/&sa=D&source=editors&ust=1676742692848846&usg=AOvVaw1LHOQ1_qvqOQWkxmEZ4Lmi "https://www.google.com/url?q=https://www.wawak.com/&sa=D&source=editors&ust=1676742692848846&usg=AOvVaw1LHOQ1_qvqOQWkxmEZ4Lmi") —Place to buy Needles and thread of every type, including heavy duty and embroidery
- [The Thread Exchange](https://www.google.com/url?q=https://www.thethreadexchange.com/miva/merchant.mvc?Screen%3DCTGY%26Category_Code%3DNDL-135x17&sa=D&source=editors&ust=1676742692849299&usg=AOvVaw318_uto__4KL8yrHzNGHJh "https://www.google.com/url?q=https://www.thethreadexchange.com/miva/merchant.mvc?Screen%3DCTGY%26Category_Code%3DNDL-135x17&sa=D&source=editors&ust=1676742692849299&usg=AOvVaw318_uto__4KL8yrHzNGHJh") - thread and needles
- [Needle buying Guide](https://www.google.com/url?q=https://www.thethreadexchange.com/miva/merchant.mvc?Store_Code%3DTTE%26Screen%3DCTGY%26Category_Code%3Dneedle-information&sa=D&source=editors&ust=1676742692849775&usg=AOvVaw301qf5RFQo8u_F4D4Qd0xu "https://www.google.com/url?q=https://www.thethreadexchange.com/miva/merchant.mvc?Store_Code%3DTTE%26Screen%3DCTGY%26Category_Code%3Dneedle-information&sa=D&source=editors&ust=1676742692849775&usg=AOvVaw301qf5RFQo8u_F4D4Qd0xu")
- [Needle and thread Guide](https://www.google.com/url?q=https://www.servicethread.com/blog/industrial-sewing-thread-needle-sizes&sa=D&source=editors&ust=1676742692850221&usg=AOvVaw1ahsolS41MnVxymXKvd0yK "https://www.google.com/url?q=https://www.servicethread.com/blog/industrial-sewing-thread-needle-sizes&sa=D&source=editors&ust=1676742692850221&usg=AOvVaw1ahsolS41MnVxymXKvd0yK")
- [Bobbin Guide](https://www.google.com/url?q=https://www.thethreadexchange.com/miva/merchant.mvc?Screen%3DCTGY%26Store_Code%3DTTE%26Category_Code%3Dprewound-bobbin-information&sa=D&source=editors&ust=1676742692850649&usg=AOvVaw1lx7CtWQEpxy1smnU_oPNj "https://www.google.com/url?q=https://www.thethreadexchange.com/miva/merchant.mvc?Screen%3DCTGY%26Store_Code%3DTTE%26Category_Code%3Dprewound-bobbin-information&sa=D&source=editors&ust=1676742692850649&usg=AOvVaw1lx7CtWQEpxy1smnU_oPNj")
- [Bobbins: pack of 20 for $12 on Amazon](https://www.google.com/url?q=https://www.amazon.com/Bobbins-Industrial-Sewing-Consew-Cutex/dp/B018MRGR7C&sa=D&source=editors&ust=1676742692851178&usg=AOvVaw3s8z73WbUVpL9X9fKiIm77 "https://www.google.com/url?q=https://www.amazon.com/Bobbins-Industrial-Sewing-Consew-Cutex/dp/B018MRGR7C&sa=D&source=editors&ust=1676742692851178&usg=AOvVaw3s8z73WbUVpL9X9fKiIm77")
# Tool Tutorial
Link to PDF Tool Tutorial: [letter size walking foot 2025.pdf](https://wiki.protohaven.org/attachments/254)
Link to PDF Tool Poster: [24 x 24 walking foot poster 2025.pdf](https://wiki.protohaven.org/attachments/255)
This machine is intended for use on heavy materials like vinyl, leather and heavy layers of upholstery. The stepping feeding motion promises the consistent feeding of multiple layers or heavy duty materials without stitch gathering or layer unevenness.
Maximum sewing speed is 3,000 stitches per minute!
# Warnings
🚫 Do not push or pull material while stitching.
⚠️ Power off the machine before threading, inserting the bobbin, or handling the needle.
⚠️ This machine retains some power in the motor after powering off. Drain it by pressing the foot pedal while keeping hands away from the machine.
⚠️ Keep hair, loose clothing, and fingers away from all moving parts!
See the Common Hazards section for more information.
### MACHINE ANATOMY
1\. **Bobbin Winding parts -** pre-tension bar, tension, and winder
2\. **Hand Wheel -** Manually advances the machine (turns downwards only)
3\. **Reverse Lever -** to allow back-stitching at the end of seams
4\. **Stitch Length Selector -** Adjusts size of stitch
5\. **Safety Clutch -** Release button for safety lock out mechanism
6\. **Tensioner -** keeps stitches even
7\. **Check Spring -** Keeps the thread taught as the take-up lever moves.(Do Not Adjust!)
8\. **Walking Presser Foot -** Holds material down to the bed while sewing
9\. **Feed Dog Mechanism -** Moves with presser foot to feed material
10.**Bobbin Hatch Cover**
11.**Needle**
12.**Manual Presser Foot Lifter** (back of machine head)
13.**Thread Take-up lever -** part of the thread feeding mechanism that pulls thread off the spool
14.**Flat 4-hole Thread Guide and 2-hole Thread Guide**
## Tool Safety
### COMMON HAZARDS
The most common hazards are thread jams and broken needles. Watch for binds and jams —stop immediately if they occur.
-
This machine has a safety mechanism to avoid jamming. It must be reset after a jam before continuing. (See Safety Reset)
-
Ensure the needle and thread are removed before winding a bobbin
-
Avoid pulling/pushing fabric, which may misalign and break the needle
The most **significant hazard** is injury. Always power off and run the machine until the motor drains before handling, adjusting, or threading.
-
Keep fingers 3” away from the needle
-
Power off and drain the motor before:
-
Threading
-
Replacing needles
-
Removing jams
-
Tie back hair and scarves
-
Tuck sleeves behind elbows
### PROHIBITED MATERIALS
Thread Jams and needle breakage are critical concerns. Material that is too thick or rigid will lead to needle breakage.
##### Industrial machines **will not “step over” pins** in the fabric. Hitting one will break the needle and send broken parts into the hook below.
For those reasons, it is important to avoid:
-
Pins in the fabric
-
Abrasives
-
Paper and cardboard products
-
Plastics
-
Rigid Material (non-fabric)
### Initial Setup
Wipe down the machine and bed to clean up any oil or dust. Power on the machine. Ensure safety is not engaged, if the machine seems to be jammed, see [Troubleshooting](https://protohaven.org/wiki/tools/sewing_walking_foot/start#troubleshooting "tools:sewing_walking_foot:start ↵"). Wind the bobbin. Power off the machine to insert the bobbin and thread the machine. Ensure the needle is usable and appropriate for the material and thread. Set the needle position. Begin operation.
### NEEDLE ANATOMY
[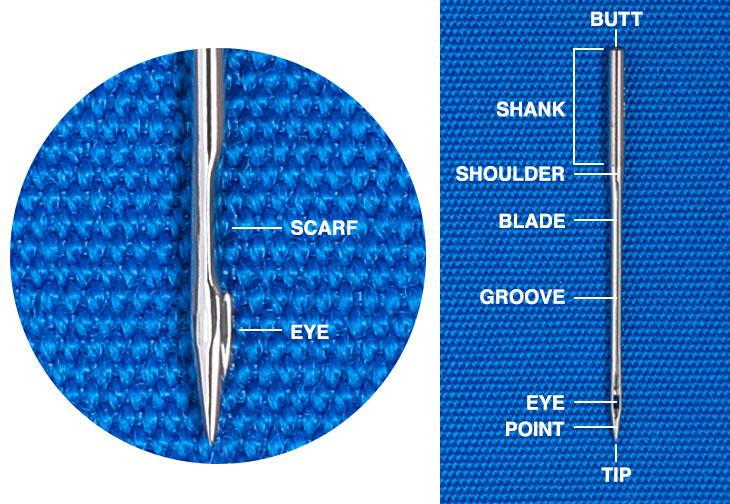](https://wiki.protohaven.org/uploads/images/gallery/2026-09/anatomy-of-a-sewing-machine-needle-2.jpg)
#### CHECKING NEEDLE SIZE
1.
Grab a needle and about 12 inches of the intended thread
2.
Thread the needle
3.
Hold both ends of the thread, creating a 60 degree slope with one end to see if the needle is able to slide along the slope
4.
Reverse the process to see if the needle slides back
If the needle does not freely slide down the thread, the size may be too small. As a general rule, you’ll want the smallest size needle that will slide freely down the thread.
### WIND THE BOBBIN (Size M available in the Protohaven store and online, see resources below)
[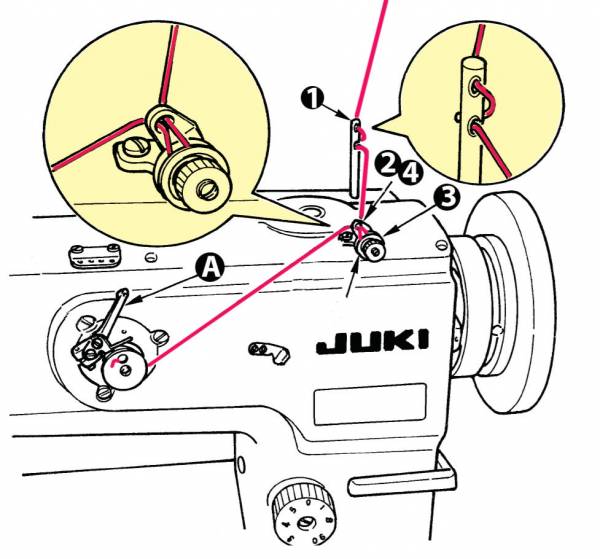](https://protohaven.org/wiki/_detail/tools/imported/bobbin_winding.jpg?id=tools%3Asewing_walking_foot%3Astart "tools:imported:bobbin_winding.jpg")
**Caution :** Be sure all object are off the table! The needle does not disengage like a consumer machine. It is preferable to remove the needle to avoid injury.
1.
Check the bobbin housing for lint, brush it out if necessary.
2.
Pass the thread in order of (1) through (4)
3.
Lift the manual presser foot lever to raise the presser foot.
4.
Gently push the foot pedal until the bobbin is full—it shuts off automatically.
Please Note: If the bobbin is lop-sided, it can be used with caution, although it can affect tension.
### WINDING THE BOBBIN WHILE SEWING
For large projects, a second bobbin can be wound while sewing.
1.
A second spool of thread is required.
2.
The needle and presser foot remain in place
3.
Follow all other instructions in “[Bobbin Winding](https://protohaven.org/wiki/tools/sewing_walking_foot/start#bobbin_winding "tools:sewing_walking_foot:start ↵")” above
Set the bobbin into the bobbin case.
Pass the thread around the thread slit (1), and pass it under the tension spring (2)
Adjust so that the bobbin rotates in direction B when thread is pulled in direction A
Turn the handwheel forward until the needle bar is at the highest position
- Loosen the needle clamp screw and hold the needle so that scarf is to the right and the long groove in the needle is exactly to the left.
- Insert the needle (1) into the clamp hole until it will go no further.
- Tighten the needle clamp screw firmly (monkey tight—not gorrilla!)
### THREAD THE MACHINE
[](https://wiki.protohaven.org/uploads/images/gallery/2026-09/threading-wf.jpg)
Thread the machine following the order of (1) through (13) as shown above.
Move the handwheel towards you, never away to get the top thread to take up the bobbin thread.
### CRITICAL THREADING DETAILS
[](https://wiki.protohaven.org/uploads/images/gallery/2025-04/tension-and-check-spring.jpg)
[](https://wiki.protohaven.org/uploads/images/gallery/2026-09/check-spring-click.jpg)
**Ensure the presser foot is UP.**
While holding the thread taught on either side, pass the thread between the tension discs, between the spring guide, and above the spring.
You will hear a light click as the thread crosses over a small hook on the inside of the disc. (just visible through the hole next to the spring)
Please Note: Do not adjust the check spring knob (#6)!
Its function is to keep the thread taught while the take up arm moves to the highest position. Loosening the nut will disable the spring, causing the machine to come unthreaded or tangle while sewing.
This spring should always have enough tension to pull the thread down.
[](https://wiki.protohaven.org/uploads/images/gallery/2025-04/three-last-parts-f.jpg)
Down through and under the next two guides and the bottom slot, then through the hole above the needle.
Thread the needle left to right:
## Basic Operation
### CONTROL PANEL
[](https://protohaven.org/wiki/_detail/tools/industrial_walking_foot_image16a.png?id=tools%3Asewing_walking_foot%3Astart "tools:industrial_walking_foot_image16a.png")[](https://wiki.protohaven.org/uploads/images/gallery/2026-09/needle-and-speed.jpg)
1. On/Off Switch: Main power to the machine
2. Increase Speed: Increase r.p.m.
3. Decrease Speed: Decrease r.p.m.
4. Needle Position Mode: Set the needle to up / down position
5. Rotation: FOR AUTHORIZED MAINTENANCE ONLY
### SETTING THE NEEDLE POSITION
Setting the needle position allows you to control whether the needle will finish a stitch engaged in your fabric or not. A light press and release of the foot pedal will move the needle exactly one stitch forward, ending the needle in the desired position setting.
[](https://wiki.protohaven.org/uploads/images/gallery/2026-09/needle-up-down.jpg)
### ADJUSTING THE TENSION
[](https://protohaven.org/wiki/_detail/tools/industrial_walking_foot_image6.png?id=tools%3Asewing_walking_foot%3Astart "tools:industrial_walking_foot_image6.png")
To increase the tension, turn the tension nut (1) clockwise (A). To reduce the tension, turn the tension nut (1) to the counterclockwise (B).
### BACK STITCH/REVERSE SEWING
Stitch Size Selection
[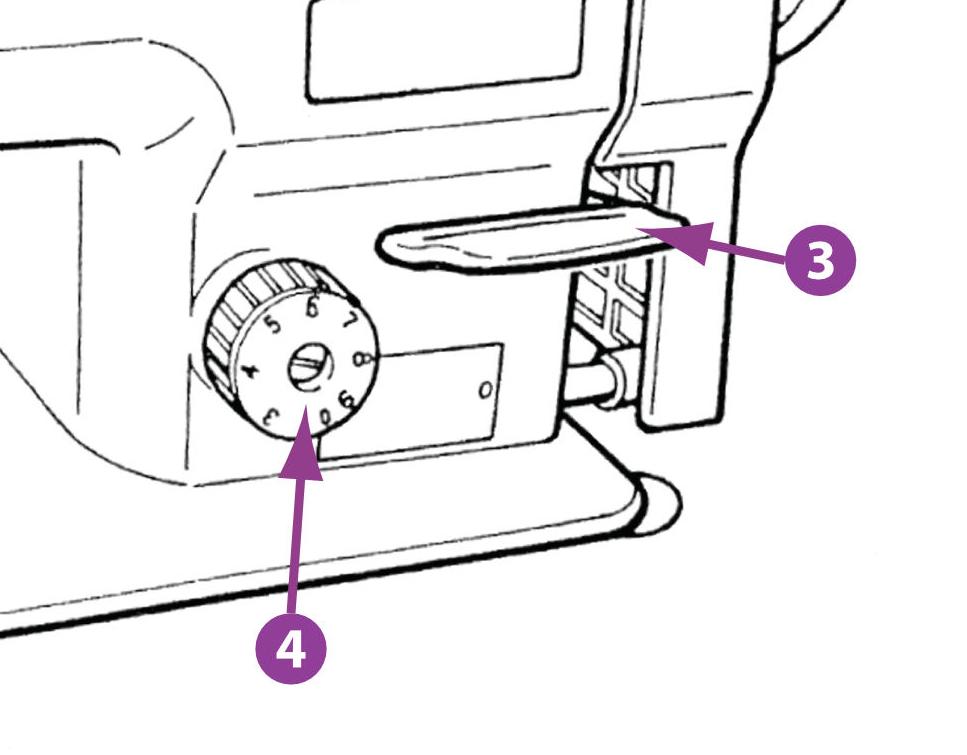](https://wiki.protohaven.org/uploads/images/gallery/2026-09/reverse-and-stitch-length.jpg)
Press down the reverse feed control lever (3). Release the lever and the machine will run in the normal feed direction.
To change the size of the stitch, turn the wheel (4) to the desired size.
### SAFETY RESET
##### This machine has a safety to protect the mechanism from damage during a jam. The handwheel will be frozen, and the hook will not rotate around the bobbin. ***The machine is not broken!***
***Do not attempt tto***
1. Cut away the knot near the needle, remove the fabric.
2. Open the bobbin housing and remove any stray thread, be sure the bobbin is not stuck.
3. Press in the safety button (5) and turn the hand wheel away from you till it clicks, and the button pops up.
4. Turn the wheel towards you. You may hear another click. Continue turning till the take-up lever is at its highest position.
5. Re-thread and continue sewing.
## Cleanup
1.
Power off and drain the machine
2.
Unthread machine head and spool
3.
Remove bobbin
4.
Wipe down, vacuum, and brush out lint and stray clippings
5.
Sweep up threads, lint, and debris and deposit in waste bins
6.
Return checkout kit
### Maintenance Requests
- Notify a tech and record issues at [http://protohaven.org/maintenance](https://airtable.com/appbIlORlmbIxNU1L/pagv0lR39A4ALn4zd/form "http://protohaven.org/maintenance"). This informs our staff and volunteer maintenance crew of any issues.
## Troubleshooting
**Common Issues**
**Possible Causes**
**Resolutions**
Machine stops working after a jam—the hand wheel will not turn, or the hook does not rotate around the bobbin.
The safety mechanism has locked the hook.
Power off and drain the machine. (see Safety Reset above)
Remove the jam near the needle and below, inside the bobbin housing.
[Reset the safety](https://www.google.com/url?q=https://www.youtube.com/watch?v%3DMKlGOzQdMXM&sa=D&source=editors&ust=1676742692834008&usg=AOvVaw2faDfrwedVI1Eup6lq0sKc "https://www.google.com/url?q=https://www.youtube.com/watch?v%3DMKlGOzQdMXM&sa=D&source=editors&ust=1676742692834008&usg=AOvVaw2faDfrwedVI1Eup6lq0sKc").
Thread comes out of the tensioners
The thread around the check spring disk isn’t pulled up until it clicks.
Re-thread the machine with the presser foot raised to take tension off during threading. See [Critical Threading](https://protohaven.org/wiki/tools/sewing_walking_foot/start#criticalthreading "tools:sewing_walking_foot:start ↵")
The check spring disk may be loose.
Make a maintenance request at [http://protohaven.org/maintenance](http://protohaven.org/maintenance "http://protohaven.org/maintenance") and notify the tech on duty.
Missed stitches
The needle is inserted improperly.
Be sure that the scarf is to the right
The needle is threaded right to left
Re-thread left to right
The needle is bent or broken
Replace the needle
Loud noise while winding the bobbin
The presser foot is down.
Use the manual lever to pick it up. Unthread the needle, (preferable take it out) be sure nothing can roll towards the drive shaft.
Thread seems stuck—can’t pull stitched fabric away from the presser foot after sewing the seam.
The tensioners are not dis-engaged
Push the knee pedal HARD to the right to dis-engage the tension.
## Special Setups
### CHECK SPRING
The Check Spring is used to alter the amount of thread being pulled away from the thread spool above, used for very small or very large stitches or very thick material..
To adjust the stroke of the check spring, please make a Special Setup Arrangement with a Protohaven Staff Member to gain clearance in advance of use.
## Additional Resources
### HOW-TO GUIDES
[Juki-1541-Manual .pdf](https://wiki.protohaven.org/attachments/602)
[Visual chart of needle types](https://www.google.com/url?q=https://sewtootpatterns.com/wp-content/uploads/2016/02/Needle_Types.jpg&sa=D&source=editors&ust=1676742692844734&usg=AOvVaw1vA5UnFt2Un_WhspnOVVrv "https://www.google.com/url?q=https://sewtootpatterns.com/wp-content/uploads/2016/02/Needle_Types.jpg&sa=D&source=editors&ust=1676742692844734&usg=AOvVaw1vA5UnFt2Un_WhspnOVVrv")
[Threading the machine](https://www.google.com/url?q=https://www.youtube.com/watch?v%3DnxqTk4umcNs&sa=D&source=editors&ust=1676742692845128&usg=AOvVaw2RJkgIjvBNSgnMub3py937 "https://www.google.com/url?q=https://www.youtube.com/watch?v%3DnxqTk4umcNs&sa=D&source=editors&ust=1676742692845128&usg=AOvVaw2RJkgIjvBNSgnMub3py937")
Juki Walking foot overview:
[www.youtube.com/watch?v=qfXDo4xr-FU](https://www.youtube.com/watch?v%3DqfXDo4xr-FU&sa=D&source=editors&ust=1676742692845621&usg=AOvVaw3Nl_mDfKBc0VXfGmtQrfJQ "https://www.youtube.com/watch?v%3DqfXDo4xr-FU&sa=D&source=editors&ust=1676742692845621&usg=AOvVaw3Nl_mDfKBc0VXfGmtQrfJQ")
[www.youtube.com/watch?v=cr2VmyJDZFk](https://www.youtube.com/watch?v%3Dcr2VmyJDZFk&sa=D&source=editors&ust=1676742692845930&usg=AOvVaw0juor-XkFSjLZViWonv1ZV "https://www.youtube.com/watch?v%3Dcr2VmyJDZFk&sa=D&source=editors&ust=1676742692845930&usg=AOvVaw0juor-XkFSjLZViWonv1ZV")
[Common errors](https://www.youtube.com/watch?v%3DBCSwO_OxZNg&sa=D&source=editors&ust=1676742692846317&usg=AOvVaw3Vyi-m9jqvJaJv6TPuTV09 "https://www.youtube.com/watch?v%3DBCSwO_OxZNg&sa=D&source=editors&ust=1676742692846317&usg=AOvVaw3Vyi-m9jqvJaJv6TPuTV09")
How to thread and oil the Juki walking foot:
[www.youtube.com/watch?v=aaNsmgHQzTo&t=31s](https://www.youtube.com/watch?v%3DaaNsmgHQzTo%26t%3D31s&sa=D&source=editors&ust=1676742692846832&usg=AOvVaw1tu-hR2NShDLdDCUizJ__- "https://www.youtube.com/watch?v%3DaaNsmgHQzTo%26t%3D31s&sa=D&source=editors&ust=1676742692846832&usg=AOvVaw1tu-hR2NShDLdDCUizJ__-")
[www.youtube.com/watch?v=Y1ZYwIwYRC0&t=2s](https://www.youtube.com/watch?v%3DY1ZYwIwYRC0%26t%3D2s&sa=D&source=editors&ust=1676742692847150&usg=AOvVaw3STcXlyYgNiNDom-iKxKne "https://www.youtube.com/watch?v%3DY1ZYwIwYRC0%26t%3D2s&sa=D&source=editors&ust=1676742692847150&usg=AOvVaw3STcXlyYgNiNDom-iKxKne")
[Sewing Gold Channel](https://www.youtube.com/channel/UC9DPdV59J32ftSwG2boGYlQ&sa=D&source=editors&ust=1676742692847907&usg=AOvVaw0MjZcF0o08Kjb36Fcrk8-u "https://www.youtube.com/channel/UC9DPdV59J32ftSwG2boGYlQ&sa=D&source=editors&ust=1676742692847907&usg=AOvVaw0MjZcF0o08Kjb36Fcrk8-u"): Operating videos on many machine models, and how-to’s on sewing a range of fabrics
[Ageberry - How to choose thread](https://www.ageberry.com/sewing-thread-sizes-how-to-choose/&sa=D&source=editors&ust=1676742692848333&usg=AOvVaw1DiBrfmCHcZdyVrAL5itVs "https://www.ageberry.com/sewing-thread-sizes-how-to-choose/&sa=D&source=editors&ust=1676742692848333&usg=AOvVaw1DiBrfmCHcZdyVrAL5itVs")
## Regular Maintenance
TODO: Sort into maintenance books
#### Lubrication
-
Faceplate, [manual p. 15](https://drive.google.com/file/d/116O_0pvLrTCr9say9q8DxgVoa7hr-6hc "https://drive.google.com/file/d/116O_0pvLrTCr9say9q8DxgVoa7hr-6hc")
-
Top plate, [manual p. 16](https://drive.google.com/file/d/116O_0pvLrTCr9say9q8DxgVoa7hr-6hc/view?usp%3Dsharing&sa=D&source=editors&ust=1676742692854982&usg=AOvVaw0UTRcXxb0FHpr7aED__a1T "https://drive.google.com/file/d/116O_0pvLrTCr9say9q8DxgVoa7hr-6hc/view?usp%3Dsharing&sa=D&source=editors&ust=1676742692854982&usg=AOvVaw0UTRcXxb0FHpr7aED__a1T")
-
Hook, [manual p. 17](https://drive.google.com/file/d/116O_0pvLrTCr9say9q8DxgVoa7hr-6hc/view?usp%3Dsharing&sa=D&source=editors&ust=1676742692855359&usg=AOvVaw0BJbpURjy009W9LqIZ--ip "https://drive.google.com/file/d/116O_0pvLrTCr9say9q8DxgVoa7hr-6hc/view?usp%3Dsharing&sa=D&source=editors&ust=1676742692855359&usg=AOvVaw0BJbpURjy009W9LqIZ--ip")
-
[Video Part 1](https://www.youtube.com/watch?v=cRUNec9Qrgs "https://www.youtube.com/watch?v=cRUNec9Qrgs")
Resetting the Safety Clutch, [manual p. 43](https://drive.google.com/file/d/116O_0pvLrTCr9say9q8DxgVoa7hr-6hc/view?usp%3Dsharing&sa=D&source=editors&ust=1676742692857253&usg=AOvVaw0xBBt7ZvOQkCMrDLjj258k "https://drive.google.com/file/d/116O_0pvLrTCr9say9q8DxgVoa7hr-6hc/view?usp%3Dsharing&sa=D&source=editors&ust=1676742692857253&usg=AOvVaw0xBBt7ZvOQkCMrDLjj258k")
-
[Releasing the safety clutch video](https://www.youtube.com/watch?v%3DMKlGOzQdMXM&sa=D&source=editors&ust=1676742692857602&usg=AOvVaw0_N4o-8Ec7t4ESAAZFhbQ6 "https://www.youtube.com/watch?v%3DMKlGOzQdMXM&sa=D&source=editors&ust=1676742692857602&usg=AOvVaw0_N4o-8Ec7t4ESAAZFhbQ6")
-
[Hook disassembly for jams or broken needle video](https://www.youtube.com/watch?v%3D6PGPtkjsqus&sa=D&source=editors&ust=1676742692857932&usg=AOvVaw3qEtTTwFXVe6kL2UnBdcfg "https://www.youtube.com/watch?v%3D6PGPtkjsqus&sa=D&source=editors&ust=1676742692857932&usg=AOvVaw3qEtTTwFXVe6kL2UnBdcfg")
#### https://www.youtube.com/watch?v=uJJNzfiYZIw&t=393s
#### Adjusting the Check Spring
The check spring must always be taut so that it naturally bounces back. If the nut has been loosened, and the spring is not pulling back down, it must be reset.
-
Adjusting the thread take-up spring, [manual p. 28](https://drive.google.com/file/d/116O_0pvLrTCr9say9q8DxgVoa7hr-6hc/view?usp%3Dsharing&sa=D&source=editors&ust=1676742692858723&usg=AOvVaw0XFNNRQUEMNPAg7ycZFSCz "https://drive.google.com/file/d/116O_0pvLrTCr9say9q8DxgVoa7hr-6hc/view?usp%3Dsharing&sa=D&source=editors&ust=1676742692858723&usg=AOvVaw0XFNNRQUEMNPAg7ycZFSCz")
-
[Check spring adjustments, video](https://youtu.be/uAwl_Nr2tas?si=hA09_GDNQ2Dx-yLz "https://www.youtube.com/watch?v%3DXicwSGPaYiA&sa=D&source=editors&ust=1676742692859060&usg=AOvVaw2Jzv4RzFRuD87r4KOdvtGl")
# Textiles - Serger
Juki Serger MO 6714S
Clearance: Required
# Manual(s)
*Manuals and other reference materials from the manufacturer or other sources.*
- [Juki Serger MO 6700S Instruction Manual](https://www.juki.co.jp/industrial_j/download_j/manual_j/mo6700da/menu/mo6700s/pdf/instruction_7k.pdf)
- [Juki Serger MO 6000 Engineer's Manual](https://semsi.com.mx/Manuales/JUKI/MO6000S,%20MO6900G%20Engineer%20Manual%20%20.pdf)
- [Serger\_JUKI\_MO-6714s Manual.pdf](https://wiki.protohaven.org/attachments/436)
Note: the S series is (s)tandard and is a discontinued model. The D series, while still in production and listed on the Juki site, is (d)ry and includes improvements to reduce oil-splashing, which is great, but not the machine we have.
# Member Notes
# Resources
*Where to obtain materials, consumables, and tooling.*
Needle: DC x 27 (standard) DC x 1 may be used Organ B27 / DC X 27
Thread for a serger is generally finer than for a normal sewing machine, and the spools are larger because of the interwoven pattern of the serger. A normal thread spool may not be enough for serging, however some sewists use it for the left needle thread to closely match the color of the fabric.
Online sources for supplies
Wawak.com
Place to buy Needles and thread of every type, including heavy duty and embroidery
The Thread Exchange
thread and needles
# Tool Tutorial
Link to PDF Tool Tutorial: [Letter size serger.pdf](https://wiki.protohaven.org/attachments/251)
Link to PDF Tool Poster: [Serger poster 2025.pdf](https://wiki.protohaven.org/attachments/250)
A serger can bind the edge of fabric while sewing the seam. This machine can be used with three threads, resulting in a “Merrow” which works well on knits and finishing raw edges, or with the second needle, which adds a chain-stitched seam as a durable seam next to the bound edges. Several widths of stitches are possible.
## Warnings
⚠️ 1. Power off the machine before threading or handling the needles.
⚠️ 2. Do not force material while stitching.
⚠️ 3. Keep hair, loose clothing, and fingers away from all moving parts!
See the Tool Safety section for more information.
## Machine Overview
OVERVIEW
1.
Power On/Off
2.
Presser Foot Lift pedal
3.
Operation Pedal
4.
Thread holders
5.
Table latch (below)
6.
Tensioners
7.
Finger shield
8.
Needle(s)
9.
Oil level indicator
10.
Maintenance Tag - Manually tracks the usability status with Green/Yellow/Red cards
### ALL DOORS OPEN - OVERVIEW OF INSIDE
[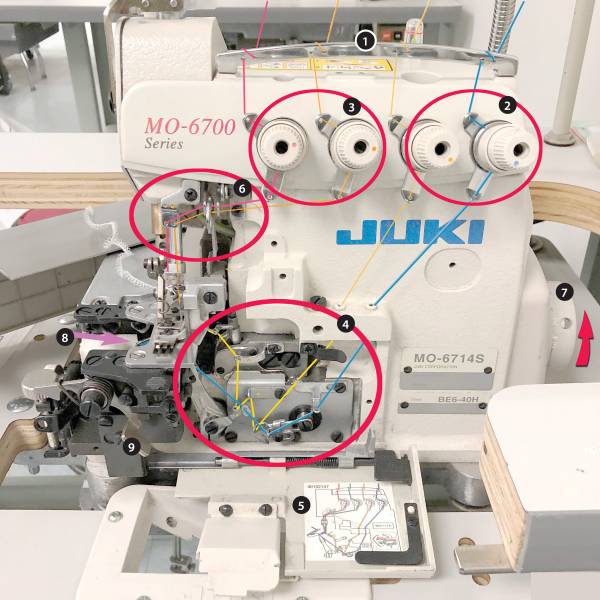](https://protohaven.org/wiki/_detail/tools/serg_parts_breakdown.jpg?id=tools%3Aserger%3Astart "tools:serg_parts_breakdown.jpg")
1.
Thread guide bar - all threads
2.
Tensions for looper threads
3.
Tensions for needle threads
4.
Looper thread guides
5.
Threading door with diagram
6.
Needle thread guides
7.
Stitch size selector
8.
Access to looper threads
9.
Door latch
## Tool Safety
### COMMON HAZARDS
The most common hazards are thread jams and broken needles. Watch for binds and jams, stop immediately if they occur. Avoid pulling/pushing fabric, which may misalign and break the needle.
**The most significant hazard is injury.** Always power off and run the machine until the motor drains before handling, adjusting, or threading.
```
⚠️ Keep fingers 3” away from the needle
⚠️ Tie back hair and scarves
⚠️ Roll sleeves behind elbows
⚠️ Power off and drain the motor before:
* Threading
* Replacing needles
* Removing jams
```
### Pin Safety
The Serger will not “step over” pins in the fabric. Hitting one will damage the knife that cuts the fabric while sewing.
-
Baste using a consumer machine with a large stitch, or by hand, so that pins aren’t needed on the serger.
-
Use mini-clips, removing them as they get closer to the needle. You may need to stop the machine occasionally or sew slowly.
-
Instead of typical pin placement perpendicular to the seam, pins can be placed outside of the seam allowance parallel to the seam. Be sure to bury the points on the reverse side of the fabric to avoid pricked fingers!
### PROHIBITED MATERIALS
Thread Jams and needle breakage are critical concerns. Material that is too thick or rigid will lead to needle breakage. Material that is too heavy may not be cut through by the knife. Leather will not need serging, and may dull the knife.
For those reasons, it is important to avoid:
-
Abrasives
-
Paper and cardboard products
-
Pins in the fabric (see “pin safety”)
-
Plastics
-
Rigid Material (non-fabric)
## SETUP CHECKLIST
```
✔ Wipe down the machine and bed to clean up any oil or dust.
✔ Open the underside of the machine and brush away accumulated lint.
✔ Add or take out the left needle, depending on desired seam type.
✔ Thread the machine with your thread.
✔ Power on the machine.
✔ Ensure the needle is usable and appropriate for the material and thread.
✔ Secure the presser foot in position and begin operation.
✔ Test sew on a scrap.
```
## Inserting the Needles
[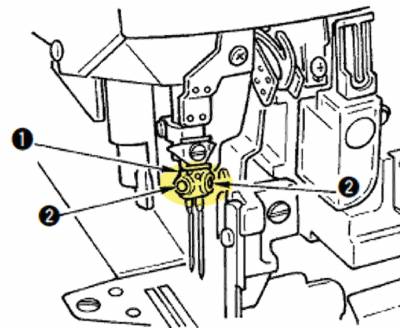](https://protohaven.org/wiki/_detail/tools/serg_needle_installation_highlight.jpg?id=tools%3Aserger%3Astart "tools:serg_needle_installation_highlight.jpg")
1.
Bring the needle clamp(1)to its highest position using the handwheel.
2.
Loosen needle clamp screws (2) and fully insert the needle into the clamp hole with the needle recess (scarf) facing backwards as viewed from the operator’s side.
3.
Tighten the needle clamp screw.
4.
The left needle will sit higher than the right.
## Threading the Machine
[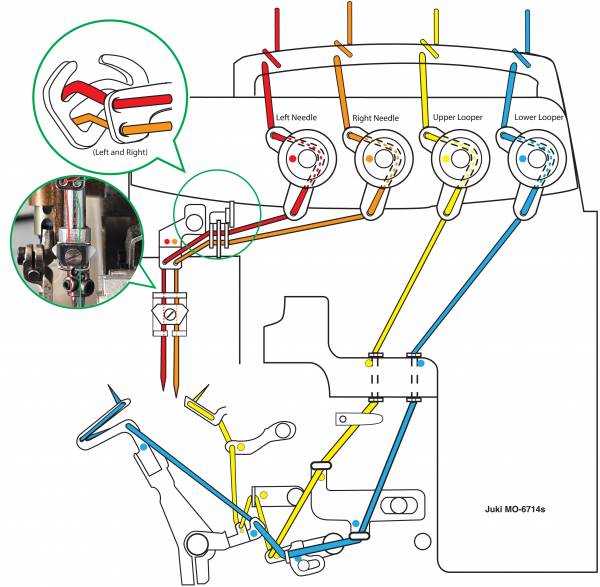](https://protohaven.org/wiki/_detail/tools/serg_serger_threading_color.jpg?id=tools%3Aserger%3Astart "tools:serg_serger_threading_color.jpg")
1.
From the thread holders,the thread goes up through the holes in the gray bars, down through and around the tree-like chrome bars (not shown) In and around the bar at the top of the machine, through the top hole on the tensioner, between the tension disc, out the bottom hole.
2.
The blue and yellow lines go through the tunnels in the front of the machine, use a floss threader to pull through the holes.
3.
Follow the yellow and blue line as marked by the dots, using tweezers.
*ProTip:Thread the yellow line first! (The blue line overlaps it)*
4.
Follow the color coding until the loopers pass under the presser foot.
Open the presser Foot (right) You will need to turn the hand-wheel to expose the parts as you thread them.
**VERY IMPORTANT!!** The hand-wheel on this machine goes **CLOCKWISE** -If your hand is at the top of the wheel, you will be pushing it **AWAY** from you.
**Blue line:**
Open the left side compartment.
Pass the thread underneath the presser foot and into the hole in the back of the hook.
Pass the thread back under, turn the handwheel (away from you) till you see the hole in the hook,this is the last hole.
[](https://protohaven.org/wiki/_detail/tools/yserg_yellow_tiny_tunnel.jpg?id=tools%3Aserger%3Astart "tools:yserg_yellow_tiny_tunnel.jpg")
The Yellow line has a critical component, a tiny diagonal tunnel and a small needle-like hole.
### The red and orange (green) go to the needles.
[](https://protohaven.org/wiki/_detail/tools/serg_needle_detail_copy.jpg?id=tools%3Aserger%3Astart "tools:serg_needle_detail_copy.jpg")[](https://protohaven.org/wiki/_detail/tools/serg_rocking.jpg?id=tools%3Aserger%3Astart "tools:serg_rocking.jpg")
Thread the Needles, following the Orange and Red lines as in the diagram (above) with special attention to the inset, there is a set of stationary holes on either side of the rocking hook.
Down through two sets of holes and under the keystone, last set of holes, and into the needles.
### CLEANUP CHECKLIST
1.
Power off the Machine.
2.
Reset any modified stitch sizes to default. (average)
3.
Use a brush, tweezers and compressed air to remove fuzz around loopers and inside the bottom door. You should be able to see the thread guides inside.
4.
Note any maintenance needs or concerns on the tag and at [http://protohaven.org/maintenance](http://protohaven.org/maintenance "http://protohaven.org/maintenance").
5.
Discard sliced edges, and all scrap fabric.
6.
Sweep the floor around the table and machine.
## Maintenance Requests
If you encounter any of the issues listed in the Inspection area or have any other issues with the machine not working properly, notify a tech and record issues at [http://protohaven.org/maintenance](http://protohaven.org/maintenance "http://protohaven.org/maintenance"). This notifies our staff and volunteer maintenance crew of any issues.
## Troubleshooting
Common Issues
Possible Causes
Resolutions
Thread breaks
Needle inserted incorrectly, Machine not threaded correctly, bent needle, wrong thread and needle size for the fabric.
Check that the scarf of the needle is facing the back of the machine, revisit threading instructions, paying close attention to the last steps of the looper threading
Seam curls or threads are loose
Incorrect tension for the weight of the fabric and size of the needle
Be sure you are using needle and thread appropriate for your fabric. Adjustments should be done in quarter turn increments!!
Difficult to pass thread through the yellow and blue “tunnels”
Lint is built up inside
Use a floss threader to pull a heavy thread through the tunnels and use heavy thread to clean the tunnels.
[\[\[Doitbetteryourself.club\]\]](https://doitbetteryourself.club/blogs/sewing-tools/serger-tension-made-easy "https://doitbetteryourself.club/blogs/sewing-tools/serger-tension-made-easy") - Photos of every combination of tension errors and how to fix them.
# General Woodshop - Bandsaw
JET 14" Woodworking Bandsaw JWBS-14
# Resources
\* Default blade: [93.5"L x 0.25"W x 0.025"T 6TPI skip tooth blade from Olson](https://www.amazon.com/Olson-FB14593DB-6-TPI-Blade-2-Inch/dp/B0031JUM50)
# Woodshop Band Saw Tool Tutorial
The [Setup](https://docs.google.com/document/d/1zDirtI52wd2XRqig19EBWFDtXXALgw_XcbVzKQPVpg4/edit#heading=h.ex7lrkf7dm2k), [Operation](https://docs.google.com/document/d/1zDirtI52wd2XRqig19EBWFDtXXALgw_XcbVzKQPVpg4/edit#heading=h.w363ck6j8o52), and [Cleanup](https://docs.google.com/document/d/1zDirtI52wd2XRqig19EBWFDtXXALgw_XcbVzKQPVpg4/edit#heading=h.4s5ijlcmnku) Checklists of this guide are what instructors use to ensure that you can use the equipment according to community expectations.The bandsaw is used to cut curved and other odd and intricate shapes that are not possible to make on the table saw. It is useful for cutting materials that are thicker than can be cut on the table saw, though its cuts are not as precise.
## Usage HighlightsBasic Woodshop[ Clearance](https://www.protohaven.org/equipment/) or [Class Equivalent](https://www.protohaven.org/product-category/classes-events/) Required Before Use
### SAFETY
### CARE
### CLEANUP
1. Position hands so they will not contact the blade, even if they slip, or the workpiece feeds faster than expected.
1. Ensure the guide blocks are adjusted properly and locked in place.
1. Dust off all surfaces.
2. Ensure the workpiece has one flat surface to place against the table.
2. Only cut wood and plastics
2. Clean out dust and debris from the bottom guides.
3. Position the blade guide at an appropriate height to support and guide the blade during the cut.
3. Feed slowly enough to let the blade do the work. Do not force the material through the saw.
3. Vacuum the dust from the bottom housing.
4. Have a push block at hand before beginning a cut, and use when appropriate.
4. Submit a [maintenance request](http://protohaven.org/maintenance) when needed.
4. Sweep the dust from the floor surrounding the saw.
## Personal Protective EquipmentSafety glasses must always be worn. Hearing protection is highly recommended in the workshop, especially when the dust collection fan is active.
## Tool Anatomy
### MACHINE ANATOMY
1. Power Switch - on/off switch.
2. Maintenance Tag - Manually tracks the usability status with Green/Yellow/Red cards
3. Guard Doors - The upper and lower doors must be closed when operating the machine. They prevent accidental contact with the blade as well as contain the majority of the blade when the blade brakes or comes off the drive wheels. Simply pull them open, do not try to unscrew the knobs.
4. Table - Precision ground to be flat, your workpiece should always have one flat surface against the table at all times.
5. Throat Plate - Provides a means for replaceable, small-clearance inserts to support the material near the blade.
6. Blade Guard - The blade guard should cover the portion of the blade between the upper drive wheel and the the workpiece. This prevents accidental contact with the blade and also provides an adjustable mounting point for the upper blade guides. The Blade Guard should be adjusted so it sits approximately ⅛” above the top of the workpiece.
7. Blade Guard Lock Knob - Found on the back of the upper housing. Before moving the blade guard this lock knob must be loosened to allow the Blade Guard to move vertically. Loosen it significantly to allow free movement of the Blade Guard along it’s entire travel. The knob must be locked back in place before cutting or the saw’s vibrations will cause the Blade Guard to work it’s way downward over time, and may pinch against the workpiece in the middle of a cut.
8. Guide Blocks - The blocks on each side of the blade are designed to help prevent the blade from wandering over the length of a cut. They should be positioned as close to the blade as possible without touching the blade when the saw is idling. The front edge of the guide blocks should overlap as much of the blade as possible without contacting any part of the tooth profile. Be sure the teeth do not touch the guide blocks even when the blade is pushed backwards against the thrust bearing.
9. Thrust Bearing - The roller behind the blade helps the blade not get pushed off the back of the wheels during a cut. It is not designed to provide a lot of resistance, and care should be taken not to excessively push the blade against the bearing. It should sit approximately 1/32” behind the blade when the saw is idling.
10. Lower Guide Block - Just below the throat plate sit the lower blade guides, consisting of two Guide Blocks and one Thrust Bearing.
11. Tension Knob - Found on top of the top housing, this knob adds or removes tension from the blade. This should not be adjusted unless advanced training has been acquired.
12. Blade Tracking Knob - Found on the back of the saw, this knob tilts the top wheel forward and backward in order to adjust where on the wheel the blade rides. The blade should ride in the middle of the wheel. Only small adjustments should be made to the tracking, and should be made only when spinning the top wheel by hand, not powered by the motor. The guide blocks and thrust bearing will need to be readjusted after changing the tracking.
## Tool Safety
### COMMON HAZARDSThe most immediate hazard of the bandsaw are contact with the blade. Care should be taken to keep your hands out of the path of the blade. Plan for the end of the cut and how you will maneuver the trailing end of the workpiece past the blade as you finish the cut. Use a push stick when your fingers would have to get within 6” of the blade.Every blade has the potential to fail catastrophically. If the blade does break during operation, you will hear a loud POP. The blade may stop moving but remain embedded in the workpiece, or the blade may be pulled into the housing. In the worst scenario the broken blade will get caught on the lower drive wheel and start thrashing around inside the lower housing. In any of these scenarios, immediately hit the off button and step away from the machine until everything has stopped. If it is unsafe to access the stop button, just step away from the machine. Unplug it if you can access the plug, or find the appropriate breaker to disconnect power to the machine. Alert a staff member and report a maintenance report.
### PROHIBITED MATERIALSReclaimed wood often has embedded nails or screws which can damage the blade, cause the workpiece to kick, and can scratch the table. All reclaimed wood should be checked with the hand-held metal detector before being resawn.Reclaimed materials may be painted with lead paints. Lead paints are prohibited in the shop as the dust created is toxic.No metals shall be cut on the resaw bandsaw.Material that is not thick enough to engage with two full blade teeth should not be used. Thin wood can slip deeply into the gullet of a tooth, creating a rigid floor that the next tooth will slam down onto, causing tooth breakage. Once one tooth of the saw is broken, it creates a larger gap that wood can slip into, and the rest of the teeth will break off in short order.
## Initial Setup
### SETUP CHECKLIST
1. Make sure the blade tension is properly set, and the tension handle is locked into the 11 o’clock position.
2. Spin the top wheel by hand and check that the blade is tracking in the middle of the wheel.
3. Adjust the height of the blade guard. Be sure to unlock and relock it.
4. Adjust the guide bearings and thrust bearings.
5. Make sure you have appropriate roller stands set up if needed.
6. Make sure you have a push stick if needed.
### SETUP BREAKDOWN
1. Open the top blade guard door. Spin the top wheel by hand, being careful not to touch the blade or get your fingers caught between the blade and the wheel. Watch where the blade rides on the wheel. If it does not ride in the middle of the wheel, the blade tracking knob will need to be used to realign the tracking of the blade. Do do so, loosen the lock nut on the knob and SLOWLY turn the knob while continuing to spin the top drive wheel. After making a small adjustment, continue to spin the wheel until the blade settles into it’s new position. Repeat this process until the blade is tracking properly. It may be necessary to move the thrust bearings backwards if they are preventing the blade from moving backwards while adjusting the tracking. Lock the tracking knob’s nut back in place and close the top guard door.
2. Loosen the blade guard knob to allow the blade guard to move freely. Use the blade guard crank to raise or lower the blade guard. It should be positioned so that it sits approximately ¼” above the highest part of the workpiece as it passes below the guide. The goal is to prevent your fingers from getting between the blade guard and the top of the workpiece while still allowing the workpiece to pass freely below the blade guard. Once the blade guard is positioned correctly, lock it back in place.
3. Adjust the guide bearings so that there is only a paper’s thickness of space between the blade and the bearings when the blade is idling. The bearings should not spin when not making a cut, but should be positioned closely so that when sideways pressure is put on the blade the guides will be there to prevent bowing of the blade. Similarly the thrust bearing should be a small distance away from the back of the blade, allowing the natural tension between the wheels to provide most of the forward cutting pressure. The thrust bearing should be close enough to prevent the blade from being pushed backwards on the drive wheels, but ideally should not be forcing the blade through the cut.
4. If making a long cut (one where more than half the workpiece will hang off the back of the table when finishing the cut), an outfeed roller stand should be positioned to help support the weight of the workpiece as it exits the saw. Positioning the roller stand at exactly the same height as the table is ideal, but slightly lower is better than slightly higher, allowing for a smooth exit without any hang-ups.
5. Have a push-stick at hand so that as you approach the end of the cut you can quickly pick it up and push the workpiece past the blade without stopping the operation or fumbling around at a critical moment.
### CONSUMABLESThe blade is the shop’s responsibility, but should be inspected each time you use the machine. Check to make sure there is not excessive pitch build-up, broken teeth, or cracks in the blade. Report any problems via a maintenance request.Users may wish to bring in their own saw blades, but should receive additional training in how to safely remove and install saw blades.
## Basic Operation
### OPERATION CHECKLIST
1. Open dust gate
2. Power on Dust Collection
3. Adjust the fence to the appropriate cut thickness if needed.
4. Position the workpiece on the table.
5. Turn on the machine.
6. Begin the cut.
7. Feed the workpiece through the cut.
8. Finish the cut.
9. Turn off the machine.
### OPERATION BREAKDOWN
### Open dust gate
### Power on Dust Collection
### Adjust the fence If using a fence to help create a uniform cut thickness, set it’s position now.
### Position the workpiecePlace the workpiece flat against the table a few inches in front of the blade, and firmly against the fence if needed.
### Turn on the machine.
### Start the cut.Gently bring the workpiece into contact with the blade.
### Feed through the cutWith firm, constant pressure, feed the workpiece past the blade, allowing the blade to cut away the material without excessive forward pressure. Let the machine do the work.
### Finish the cutAs you approach the end of the cut, use a push-stick to feed the workpiece completely past the blade without endangering your fingers. Maintain sideways pressure against the fence for as long as possible, but do not pinch the blade between the two sides of the cut. Push the pieces completely past the blade, making sure not to leave any part of the workpiece trapped between the blade and the fence if using.
### Turn off the machinePush the off button and allow the blade to come to a complete stop. The workpiece may be removed from the table with care while the blade is coming to a stop, but care should be taken to avoid contact with the blade. Small pieces should not be fished out with your hand from near the blade.If the blade needs to be stopped quickly, a sacrificial piece of wood can be fed into the blade in order to provide stopping friction by cutting.
## Cleanup
### CLEANUP CHECKLIST
1. Brush the sawdust off of the machine surfaces
2. Vacuum dust out of the fence guide rail, bottom guide structure, and bottom housing.
3. Sweep the floor surrounding the bandsaw.
4. Check the dust collection drum and recruit help in emptying it in the dumpster if it has reached the seam in the middle. Make sure to retain the rubber gasket.
5. Note any maintenance needs or concerns on the tag and at [protohaven.org/maintenance](http://protohaven.org/maintenance)
6. Dispose of small cutoffs in the trash, and place any large, project-usable scrap in the scrap bin.
### SCRAP BREAKDOWNThere is a large black scrap bin at the back of the shop. Maintaining this is a shared, communal responsibility.When you notice the scrap bins are full, sort through the items and clean out the least usable items. We generate more scrap than we use, so please throw away anything that is questionable, or requires processing (removal of nails, disassembly, etc).
## Troubleshooting
### Common Issues
### Possible Causes
### Resolutions
Blade pulls to one side or the other during a cut
Blade tracking is bad.Fence is not aligned to the bladeBlade is dull
Adjusting the blade tracking forward or backward on the wheel can slightly change the tilt of the blade with relation to the table.The fence may have been knocked out of true with the table. Using an appropriate allen wrench the fence can be adjusted a few degrees to the left and right to help correct for blade drift.Bolting a resaw bar to the fence allows the user to feed at virtually any angle.A blade that pulls badly to one side or the other may need to be replaced.
The saw ‘chirps’ when running.
A guide or thrust bearing that is worn out will make rattling and chirping sounds
This is mostly benign, but is an indication that the bearings should be replaced. Check the maintenance logs to see if the noise has been reported yet.
There is a grinding sound when the blade is moving
The blade is scraping against part of the saw housing.The top wheel is scraping against part of the saw housing.
Check the blade tracking to see if it has crept backwards past the back edge of the wheel.Check the top and bottom edges of the wheel to see if it is scraping against the housing.
The saw blade vibrates back and forth when idling
Insufficient blade tension
Adding some blade tension can reduce blade flutter. Be cautious and do not adjust blade tension without proper training.
## Special SetupsIt will be necessary to use a sled or v-block of some sort in order to safely feed round stock lengthwise through the bandsaw.
## Additional ResourcesWood Magazine - How to resaw lumber (resaw technique) [https://www.youtube.com/watch?v=hgTpsGDRRRo](https://www.youtube.com/watch?v=hgTpsGDRRRo)
Band Saw Clinic with Alex Snodgrass - (blade setup) [https://www.youtube.com/watch?v=wGbZqWac0jU](https://www.youtube.com/watch?v=wGbZqWac0jU)
AmericanWoodworker - The Flutter Test (blade tensioning) [https://www.youtube.com/watch?v=z8zZuDosSy0](https://www.youtube.com/watch?v=z8zZuDosSy0)
Matt Estlea’s Guide to Setting up a bandsaw (comprehensive setup) [https://www.youtube.com/watch?v=ugc85kJmos8](https://www.youtube.com/watch?v=ugc85kJmos8)
# General Woodshop - Belt and Disc Sander
The belt sander is great for knocking the corners and edges off of projects, and other convex contour shaping. The disc sander, while not as aggressive as the belt sander, is able to reach into interior corners and provides a more precisely flat surface.
Jet JSG-6DC
Clearance: Required
# Manual(s)
*Manuals and other reference materials from the manufacturer or other sources.*
-
# Belt and Disc Sander Tool Tutorial
The [Setup](https://docs.google.com/document/d/1pl_0RTa6orQ2X0jMLWBofdC9Jg3iteyt5jXFpW8Eq90/edit#heading=h.ex7lrkf7dm2k), [Operation](https://docs.google.com/document/d/1pl_0RTa6orQ2X0jMLWBofdC9Jg3iteyt5jXFpW8Eq90/edit#heading=h.w363ck6j8o52), and [Cleanup](https://docs.google.com/document/d/1pl_0RTa6orQ2X0jMLWBofdC9Jg3iteyt5jXFpW8Eq90/edit#heading=h.4s5ijlcmnku) Checklists of this guide are what instructors use to ensure that you can use the equipment according to community expectations.The belt sander is great for knocking the corners and edges off of projects, and other convex contour shaping. The disc sander, while not as aggressive as the belt sander, is able to reach into interior corners and provides a more precisely flat surface.
## Usage Highlights
[Belt and Disc Sander Clearance](https://www.protohaven.org/equipment/) or [Class Equivalent](https://wiki.protohaven.org/protohaven.org/classes) Required Before Use
### SAFETY
### CARE
### CLEANUP
1. Keep materials flat to the table
1. Use the entire width of the abrasive belt
1. Brush the dust from the machine surfaces
2. Do not angle materials upward into the abrasive
2. Regularly clean out the sawdust from the abrasive using the eraser
2. Sweep the floor surrounding the machine
3. Do not use the other table as a storage surface
3. Make sure the abrasive belt is tracking in the middle of it’s wheels
4. Submit a [maintenance request](http://protohaven.org/maintenance) when needed.
## Personal Protective EquipmentSafety glasses must always be worn. Hearing protection is highly recommended in the workshop, especially when the dust collection fan is active.
## Tool Anatomy
### MACHINE ANATOMY
1. Power Switch - on/off switch
2. Maintenance Tag - Manually tracks the usability status with Green/Yellow/Red cards
3. Belt Abrasive - Moves constantly downward past the table. These belts are 6” wide and 48” long. There is a graphite platen behind the belt to help support it horizontally without building up excessive heat from friction.
4. Belt Table - provides a stable platform on which to hold your work. Can be tilted between 90 and 135 degrees to the abrasive.
5. Belt tracking knobs - Used to center the belt’s tracking with regards to the drive wheels and platen. The lock knobs can be released, then the tracking screws adjusted slowly to move the belt left and right while the machine is powered on. Both screws should be touching the housing when properly adjusted. Lock the knobs back into place once they are situated properly.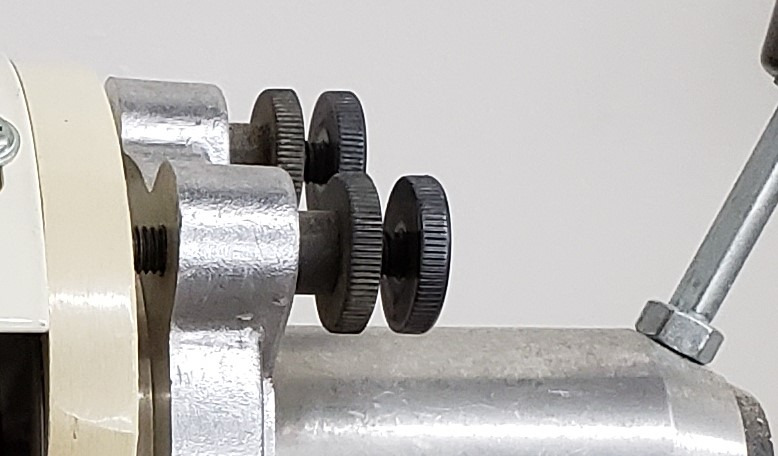
6. Belt tension release - The machine must be off and unplugged before using this lever. Pulling it towards you will release all tension on the belt, allowing it to be removed from the left side door of the housing.Lower Guide Block - Just below the throat plate sit the lower blade guides, consisting of two Guide Blocks and one Thrust Bearing.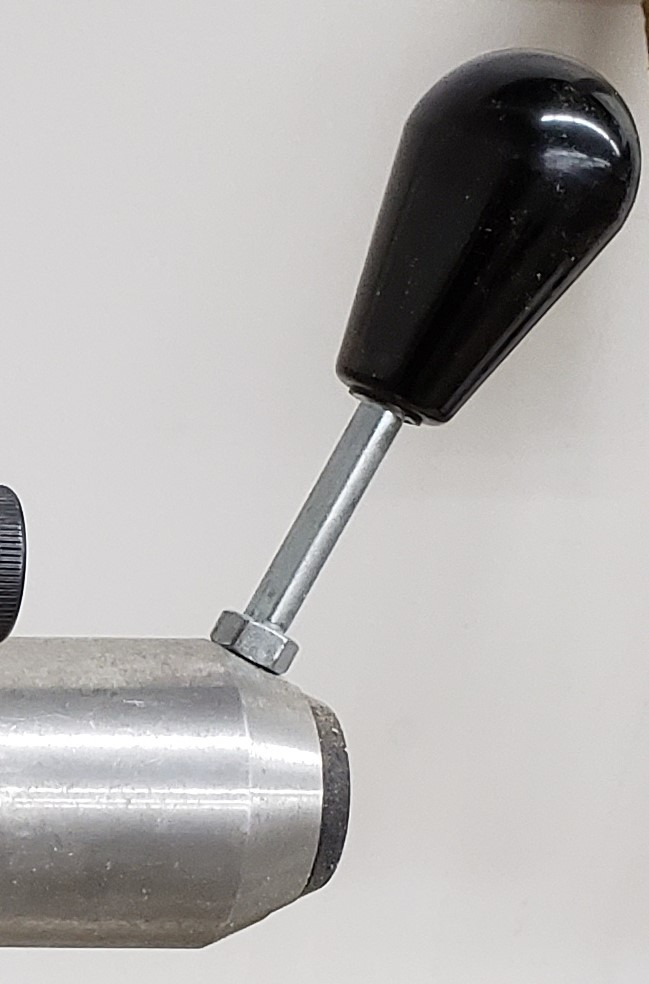
7. Disc Abrasive - Provides a very flat surface as a reference, and has an exposed edge that allows it to reach into the corners that the belt abrasive cannot. Rotates counterclockwise. 12” disc attached with pressure activated adhesive.
8. Disc Table - Provides a stable platform on which to hold your work when using the disc abrasive. Can be tilted between 90 and 135 degrees to the abrasive.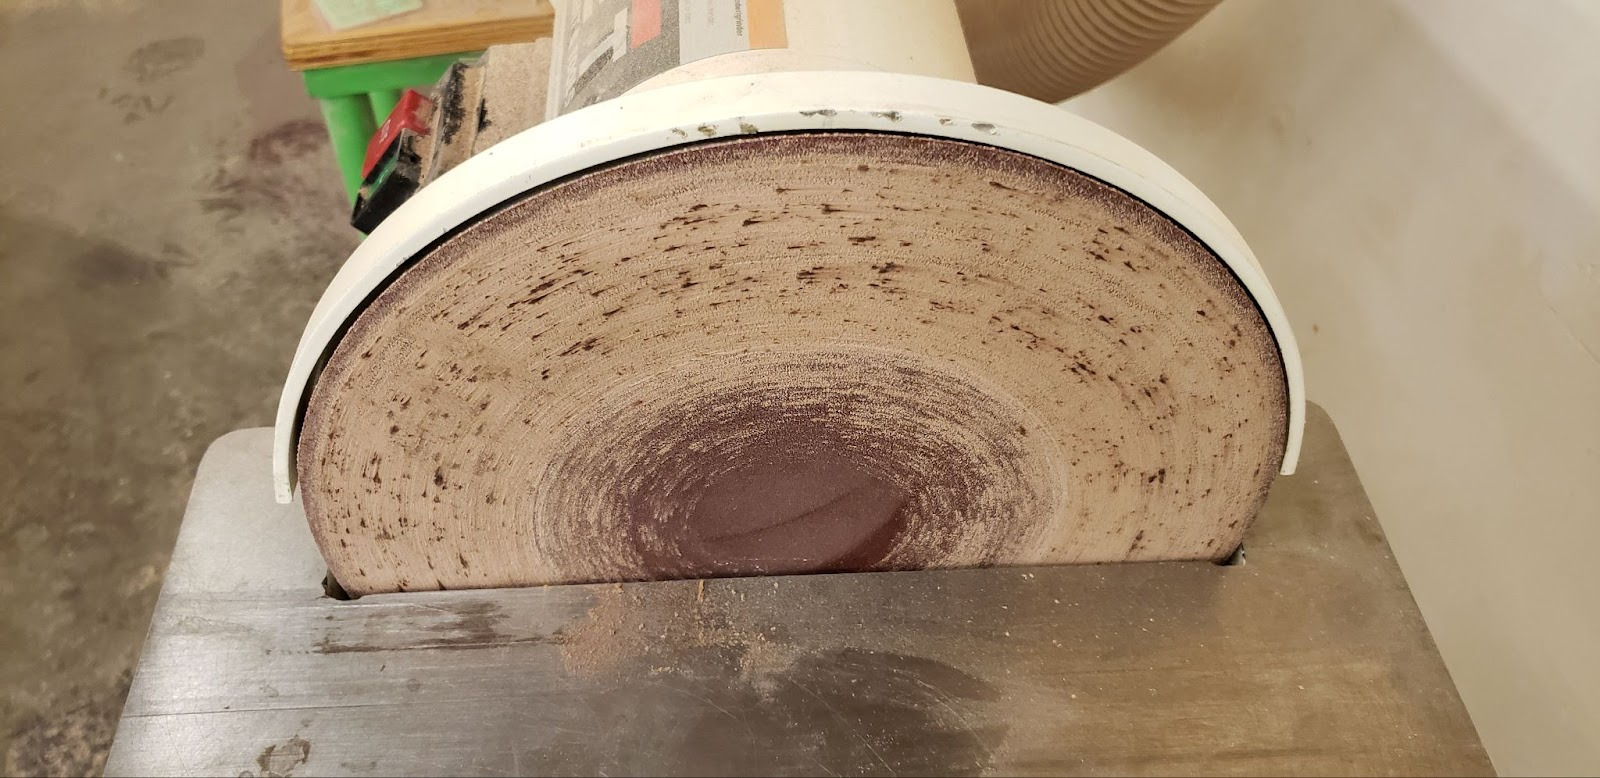
## Tool Safety
### COMMON HAZARDSThe abrasive belt and disc will be constantly trying to pull your workpiece downward into the gap between the abrasive and the table. If your workpiece is pulled into the gap, it may draw your fingers in with it, leading to debraiding and potentially amputation. Maintain a firm grip on the workpiece, and keep it held flat to the table to prevent it from being pulled in by the machine.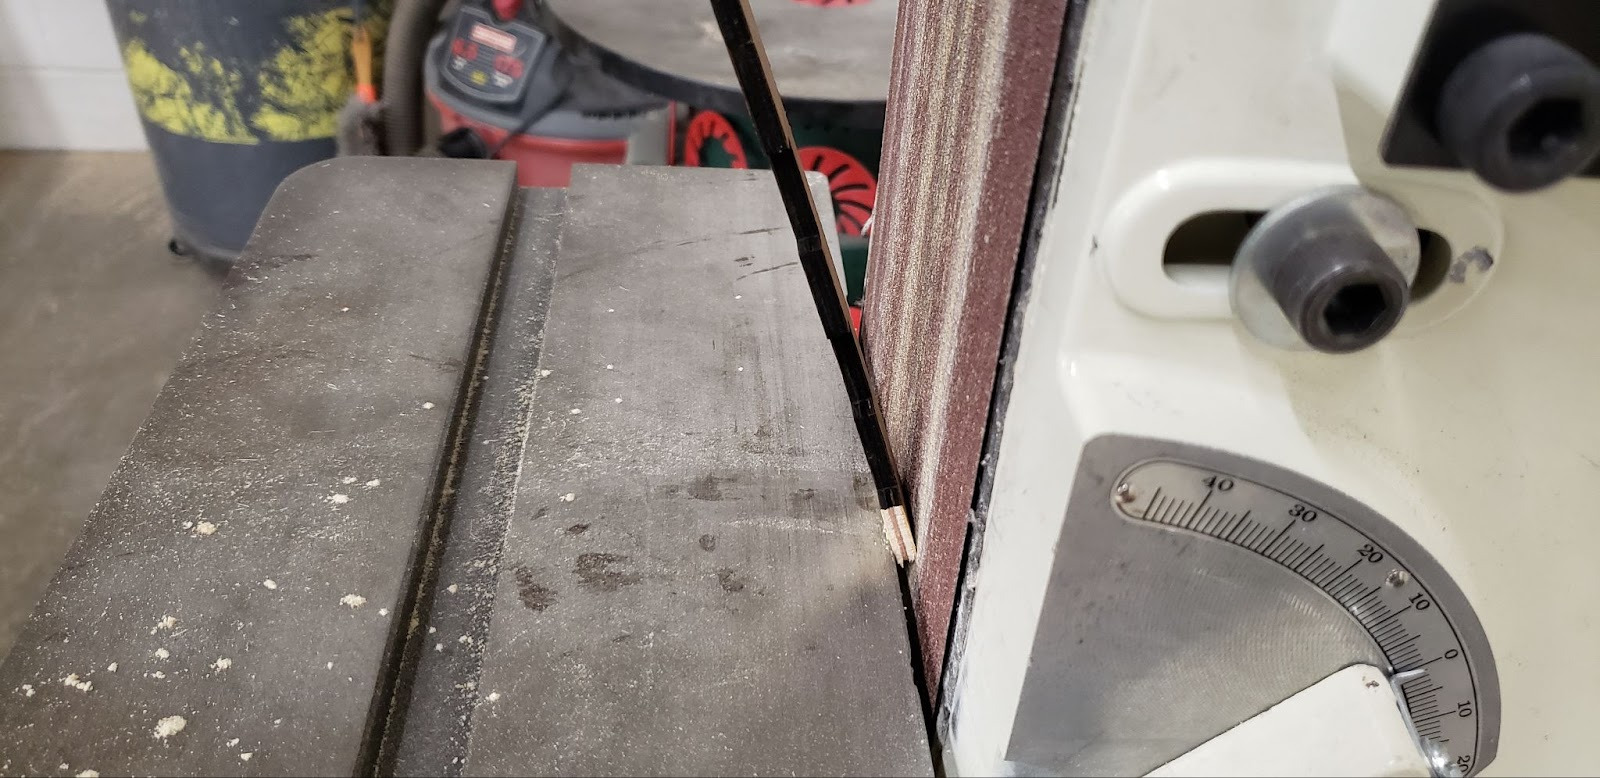Thin, flexible materials may still get pulled down into the crack between the abrasive and the table even when held tightly, so use particular caution with those materials. If needed, use a thicker sacrificial piece below a thin workpiece to provide support.If a workpiece is presented to the abrasive in an upward-facing angle, it can be forcibly pushed down and out away from the machine, posing an impaling hazard. Keep the workpiece flat against the table. Angled sanding can be done by flipping the workpiece on edge and presenting it at a 45 degree angle, or by angling the entire table.
### PROHIBITED MATERIALSMaterials that are reclaimed may be painted with lead paint. Do not sand any materials that might possibly contain lead.Metals are not permitted on the wood shop sanding equipment. Sparks generated pose a fire hazard due to the sawdust around the machine and in the dust collection system. Metals will also quickly wear out the abrasives and the graphite platen found behind the belt sander.
## Initial Setup
### SETUP CHECKLIST
1. Check for foreign objects
2. Verify that the belt tracking
3. Clean the abrasive surfaces
### SETUP BREAKDOWN
### Check for foreign objectsBefore turning on the machine, verify that nothing has been left on the tables. It is easy to overlook something left on the table surface that you are not actively using. An object left on one of the tables can easily get jammed in the machine or be thrown across the shop.
### Verify the belt trackingLook at where the belt is sitting with regard to the top roller and the platen. It should be tracking centrally, and not touching any part of the frame of the machine.Turn on the machine and verify that the tracking does not change when the belt is moving.If the belt tracking is not centered, unlock the tracking adjustment knobs and SLOWLY make SMALL adjustments to the knobs. Allow the belt to settle into it’s new position before making more adjustments. Once the belt is running in the center of the rollers and platen, verify that both adjustment knobs are touching the housing. It is common for one knob to be in contact with the housing and the other to be floating a bit away from the housing. Once both knobs are touching the housing, lock the knobs securely.
### Clean the abrasive surfacesLook at the abrasives and see if they are clogged with sawdust. If sawdust is beginning to build up in the abrasive, touch the eraser lightly to the abrasive to pull out the sawdust and expose fresh grit.Sawdust that has been overly compacted will form solid chunks that stick out from the surface of the abrasive and cause heat build-up due to friction between the sawdust and the workpiece. Once these have formed the abrasive usually needs to be replaced. If the abrasive is used after these build-ups have formed, they will scorch and turn black as they burn, and will leave a poor finish on the workpiece.Submit a maintenance request if the abrasive needs to be replaced.
### CONSUMABLESThe shop is responsible for replacing the belt and disc abrasive.
## Basic Operation
### OPERATION CHECKLIST
1. Open dust gate
2. Power on Dust Collection
3. Place the workpiece on the table
4. Touch the workpiece to the abrasive
5. Clean the abrasive as needed
### OPERATION BREAKDOWN
### Open dust gate
### Power on Dust Collection
### Place the workpiece on the tableSet the piece flat on the table and make sure you have free range of motion to complete your task.
### Touch the workpiece to the abrasiveIf using the belt, use a gentle sweeping motion across the entire width of the abrasive while sanding. This will ensure that the belt will wear and stretch at the same rate, preventing premature tearing and buckling of the belt.If using the disc, stay toward the front/left edge of the disc, where it is moving downward with relation to the table. Using the back/right edge of the disc will cause the workpiece to be lifted from the table. Avoid the middle of the disc, as it will tend to draw the piece toward the back of the disc, again causing it to lift from the table.
### Clean the abrasive as neededKeep an eye on the abrasive as you sand, and use the eraser to pull the sawdust out of the abrasive if it begins to get clogged.
## Cleanup
### CLEANUP CHECKLIST
1. Brush the dust off of the machine surfaces
2. Sweep the dust from around the machine
## Troubleshooting
### Common Issues
### Possible Causes
### Resolutions
The abrasive does not sand as fast as it should
Clogged abrasive
Use the eraser to unclog the abrasiveSubmit a maintenance request for new abrasive
Abrasive belt is rubbing against machine housing
Tracking is off
Adjust tracking, or submit a maintenance request if help is needed.
# Member Notes
# Resources
*Where to obtain materials, consumables, and tooling.*
# General Woodshop - Miter Saw
Jet 12" Sliding Dual Bevel Compound Miter Saw
# Manual(s)
*Manuals and other reference materials from the manufacturer or other sources.*
Part number: DWS779
Manual: [dws779.pdf](https://wiki.protohaven.org/attachments/163)
# Member Notes
# Miter Saw Tool Tutorial
The [Setup](https://docs.google.com/document/d/1QwOp4K8n1dWvcrW3VeU6JPTS811tnb1JM-IKGNlsSPU/edit#heading=h.ex7lrkf7dm2k), [Operation](https://docs.google.com/document/d/1QwOp4K8n1dWvcrW3VeU6JPTS811tnb1JM-IKGNlsSPU/edit#heading=h.w363ck6j8o52), and [Cleanup](https://docs.google.com/document/d/1QwOp4K8n1dWvcrW3VeU6JPTS811tnb1JM-IKGNlsSPU/edit#heading=h.4s5ijlcmnku) Checklists of this guide are what instructors use to ensure that you can use the equipment according to community expectations.Allows quick cuts when chopping lumber to length, as well as mitered cuts and beveled cuts. Can crosscut 4” thick lumber up to 12” wide.
## Usage Highlights
[Woodshop Drill Press Clearance](https://www.protohaven.org/equipment/) or [Class Equivalent](https://www.protohaven.org/product-category/classes-events/) Required Before Use
### SAFETY
### CARE
### CLEANUP
1. Keep hands at least 10” away from path of blade
1. Allow the saw to work at it’s own pace. Do not bog the motor.
1. Brush chips off of the surfaces
2. Clamp workpieces firmly to the table when too small to hold securely by hand
2. When making beveled cuts, ensure that the fence extensions are out of the path of the blade.
2. Sweep chips from the floor
3. Use the table saw for any pieces that are too small to clamp
3. Submit a [maintenance request](http://protohaven.org/maintenance) when needed.
## Personal Protective EquipmentSafety glasses must always be worn. Hearing protection is highly recommended in the workshop, especially when the dust collection fan is active.
## Tool Anatomy
### MACHINE ANATOMY
1. Power Switch - on/off switch is a trigger on the handle designed to be activated with the index finger of the right hand.
2. Maintenance Tag - Manually tracks the usability status with Green/Yellow/Red cards
3. Table - Your workpiece should have one flat surface held firmly against the table
4. Fence - Your workpiece should have one flat surface held firmly against the fence
5. Miter detent release - Pulling this trigger releases a locking pin from detents found at commonly used miter positions. This trigger should be pulled any time you are moving the miter angle. Release the trigger when you are approaching your desired angle and allow the locking pin to drop into place in the appropriate detent.
6. Miter cam lock - If positioning the miter to an angle that does not correspond to one of the detent lock positions, push this cam lock lever down to lock the miter position. This is not a very firm lock, so do not use the saw roughly to avoid losing your angle.
7. Bevel lock - Lift this locking lever to a vertical position to release the bevel lock. Be aware that the saw housing will flop heavily to the side if it is not supported at all times when the bevel lock is disengaged. Support the saw with your left hand, then release the bevel lock. Push the lever firmly downward to re-engage the bevel lock.
8. Bevel stop - If this knob is pushed in, the bevel angle will stop at 90 degrees. If this is pulled out, the bevel angle can be rotated to the right of 90 degrees.
9. Slide lock - This knob locks the sliding mechanism in place. When unlocked, the head must be pulled forward, chopped into the work, then pushed back to the fence. When locked, the head can be pulled down into the work like a normal, non-sliding miter saw.
## Tool Safety
### COMMON HAZARDSKickbackWhen a piece is not held firmly against the table or the fence, the blade can turn the workpiece inward towards the throat of the fence and cause kickback. Always make sure the work is firmly held to both the table and the fence, using the clamp when needed. If a workpiece is too small to use the clamp, use the table saw with a sled to make the cut.A warped piece of wood can also kick back when it collapses mid-cut, pinching the blade. Make sure the wood is supported evenly along its length, and contacts the fence without any gaps.Blade contactKeep your hands clear of the cutting path.
### PROHIBITED MATERIALSMaterials containing nails, screws, or lead paint should not be cut in the shop.
## Initial Setup
### SETUP CHECKLIST
1. Open the dust gate
2. Check the status of the slide lock
### SETUP BREAKDOWN
### Open the dust gateThere is a dust port embedded in the table behind the saw. Opening the dust port to the left of the saw will help contain the amount of dust in the shop.
### Check the status of the slide lockThe operation of the saw is very different depending on whether the slide is locked or not. Always verify that the slide mechanism is set to the desired operation when approaching the machine.
### CONSUMABLESThe shop is responsible for maintaining the 12” blade in the saw.
## Basic Operation
### OPERATION CHECKLIST
1. Position the workpiece
2. Secure the workpiece
3. Make the cut
4. Stop the blade
5. Reset
### OPERATION BREAKDOWN
### Position the workpieceLay the workpiece flat against the table and flat against the fence. The most stable position will be for the largest surface to be against the table instead of “standing up” against the fence. When making miter cuts it may be necessary to position the piece upright in order to achieve the desired angle, but extra care should be made to ensure that the piece remains firmly against the table and fence during the cut.Pull the blade down towards the top of the workpiece and slide the workpiece left or right in order to match the blade to the cut line on the workpiece. Be aware of which side is the ‘waste’ side and which side is the ‘keep’ side to avoid cutting your piece too short.
### Secure the workpieceThe smaller the workpiece is, the more likely the blade will pull the work into the throat of the fence. If your hand is able to hold the piece and stay outside the hand warning lines cast in the table, it is safe to simply hold it, as the weight of the workpiece and the leverage applied by your hand is sufficient to overcome the torque applied by the blade while cutting.For pieces smaller than the hand warning lines, the table clamp must be utilized to hold the piece in place. Be aware that the clamp may interfere with bevel cuts, so some small cuts simply may not be possible.If the piece is too small to be held securely by the table clamp, it is unsafe to complete this operation on the miter saw. Use a sled on the table saw to make your cut.When using the sliding feature of this saw, the back of the blade applies a lifting force to the workpiece as it cuts, potentially lifting it from the table and creating a dangerous situation where the saw may buck unexpectedly, or the workpiece may be thrown from the saw causing injury. Always supply adequate downward force on the workpiece when making a sliding cut and use the table clamp to ensure stability.
### Make the cutWhen the sliding feature is locked, start with the saw in its highest position and pull the trigger. Pull the blade down to just above the workpiece. Slowly introduce the blade to the workpiece, checking to make sure the cut is properly positioned.When the sliding feature is unlocked, pull the entire head as far forward as it will go, then pull the trigger and pull the blade down until it has bottomed out. If the blade will contact the workpiece as you plunge, adjust your speed as needed during the cut. After reaching the full depth of cut, slowly push the blade backwards through the workpiece towards the fence until the cut is complete.Pay close attention to the sound of the motor as you cut through the workpiece. The motor should maintain its speed through the cut. If it starts to slow down, decrease the speed at which you are cutting.The saw will have to work harder in the middle of the cut than it will at the start and end of the cut, as it is cutting a longer path through the material, so be prepared to slow down as you progress.If the blade has a dramatic decrease in speed, release the trigger immediately. The blade is most likely being pinched, and you are at risk of kickback. Retract the blade from the cut and try to determine what might have shifted in order to cause pinching on the blade.
### Stop the bladeWhen you have completed the cut, keep the blade at its lowest point and release the trigger. Let the blade come to a complete stop before lifting it from the cut. This prevents the spinning teeth of the blade from catching the cutoff and throwing it from the saw as the blade is lifted. It also helps prevent tearout from the teeth spinning as they pass over the newly cut faces of the workpiece.
### Return the blade to its highest positionLift the blade back to its original position, leaving room to remove your workpiece and any cutoffs, and position the next piece for processing.
## Cleanup
### CLEANUP CHECKLIST
1. Brush any chips from the surfaces of the machine
2. Sweep any chips from the floor around the machine
3. Note any maintenance needs or concerns on the tag and at [protohaven.org/maintenance](http://protohaven.org/maintenance)
## Troubleshooting
### Common Issues
### Possible Causes
### Resolutions
The blade won’t cut all the way through the work
The depth stop mechanism on the right side of the head is engaged
Flip the depth stop lever out of the way of the depth stop screw
The table will not swing left or right
The saw is locked into a detentThe miter cam-lock is engaged
Pull the trigger at the miter table handle to release the detentLift the cam-lock lever to disengage the cam lock
The rotation of the miter table is rough
Sawdust has gotten into the slides between the table and the base
Immediately report the problem in a maintenance request. This will quickly wear out the mating surfaces of the table.
# Resources
*Where to obtain materials, consumables, and tooling.*
# General Woodshop - Panel Saw
# Manuals
[PM9\_1510007\_UM\_EN\_ED\_6\_06\_2023\_PDF\_cda7.pdf](https://wiki.protohaven.org/attachments/200)
# Panel Saw Dust Hose Attachment
> The old 3D-printed duct pointed the hose directly at the user, making it difficult to see the line used to align vertical cuts. Further, this duct was printed from an inflexible plastic, ABS, and had cracked.
>
> To correct these problems, I designed a right-angle duct and printed it out of PETG. I used Onshape as the design tool, and Scott approved the design before I printed it. I included an internal plane to promote laminar airflow and increase strength. Following Scott's advice, I kept this plane far enough inside the duct to allow the vacuum hose to be fully inserted. I did several fit tests to make sure my duct fit both the saw output and the tapered vacuum hose correctly.
>
> I cut my design at a 45-degree angle and printed it in two pieces so the layer lines for both the machine mounting ring and the vacuum ring are perpendicular to their attachments. With a 40% gyroid infill, the print time on my Prusa 3 was nearly 19 hours. After 3D printing, I sanded the mating surfaces and used a plastic epoxy to join them into a single duct.
>
> I purchased a 4-inch hose clamp and used it to install my duct on the machine. I also used flexible silicone to fill the strain relief holes so they wouldn't leak air.
>
> I left the old, cracked duct at the front desk.
>
> Finally, I'd like to provide the shop with the STL of my duct so that it can be reprinted if needed. Please tell me where to send it so it can be attached to this tool's instruction page.
>
> I tested it, and it works as intended. My donation of time and materials to the shop. Enjoy!
>
> Best, Phil
### [Panel Saw duct Final.zip](https://wiki.protohaven.org/attachments/592)
[ ](https://wiki.protohaven.org/uploads/images/gallery/2026-06/navimage.png)[](https://wiki.protohaven.org/uploads/images/gallery/2026-06/g6limage.png)
# General Woodshop - Router Table
# Manual(s)
*Manuals and other reference materials from the manufacturer or other sources.*
# Member Notes
# Resources
*Where to obtain materials, consumables, and tooling.*
# Router Table Tool Tutorial (TODO merge)
(Link to PDF Tool Tutorial)
# Router Table
- Clearance Required: [Woodshop Basics](https://protohaven.org/wiki/clearances/woodshop_basics)
- Model: [Porter Cable 690LR Router](https://www.portercable.com/product/690lr/1-34-hp-fixed-based-router?tid=576206) mounted on router table
- Manufacturer: [Link](https://www.portercable.com/)
- Manual: [Download](https://www.portercable.com/GLOBALBOM/QU/690LR/8/Instruction_Manual/EN/N384509_690.pdf)
A router table is a handy woodworking tool that helps you shape and cut wood with precision and ease. It consists of a flat surface with a hole where a handheld router is mounted upside down. This setup allows you to guide the wood over the router bit, creating intricate edges, grooves, and patterns. Through this page you will learn the router table's anatomy, learn the essential care routines, and explore workspace requirements.
The [Tool Safety](https://wiki.api.protohaven.org/books/dokuwiki/page/#tool-safety), [Tool Care](https://wiki.api.protohaven.org/books/dokuwiki/page/#tool-care), [Operation](https://wiki.api.protohaven.org/books/dokuwiki/page/#operation), section of this guide are what instructors use to ensure that you can use the equipment according to community expectations.
# Requirements
- [Woodshop Basics](https://protohaven.org/wiki/clearances/woodshop_basics) clearance or class equivalent is required before use.
- See front desk for **Table Top Router Kit** and **Router Bits.**
# Warnings
- âš ï¸ Always wear safety goggles and hearing protection when operating the router table.
- âš ï¸ Keep loose clothing, jewelry, and long hair away from the router bit and moving parts.
- âš ï¸ Ensure that the router bit is securely fastened before starting the machine.
- âš ï¸ Keep the workspace well-lit to enhance visibility and reduce the risk of accidents.
- âš ï¸ Disconnect the router table from power before changing router bits or performing maintenance.
- âš ï¸ Maintain a firm grip on the workpiece and use push blocks or sticks to keep your hands safe from the router bit.
- 🚫 Avoid distractions while using the router table to maintain focus on the task.
- 🚫 Do not remove debris or adjust the router table while it is in motion.
- 🚫 Do not overload the router with excessive feed pressure; let the tool work at its own pace.
- âš ï¸ Use a router table fence or guide to ensure consistent and controlled cuts.
- 🚫 Avoid freehand routing without proper guides or jigs, as it increases the risk of slips and injuries.
- âš ï¸ Double-check the depth settings before making a cut to prevent the router bit from cutting too deep.
- âš ï¸ Work in a clutter-free environment to avoid tripping hazards and ensure freedom of movement.
- 🚫 Never reach over or behind the router table while it's running; turn off the power and wait for all moving parts to stop.
- âš ï¸ Read and understand the router table's manual and safety guidelines before operation.
- âš ï¸ In case of any unfamiliar noises, vibrations, or irregularities, turn off the router table and inspect the issue before continuing.
- 🚫 Do not rush tasks; take your time to ensure accurate cuts and reduce the risk of accidents.
See the [Safety Section](https://wiki.api.protohaven.org/books/dokuwiki/page/#tool-safety) for more information.
# Tool Anatomy
[](https://wiki.api.protohaven.org/books/dokuwiki/page/wiki_detailtoolsrouter_table.jpg?id=tools%3Arouter_table%3Astart)
1. \*\* Router Opening **: This opening is designed to accommodate the router and its base, allowing the router bit to extend through the surface of the table for woodworking operations. Use wrenches from Table Top Router Kit to swap \*\* Router Bits** for specific tasks. **Remember** to include faceplate once router bit is added.
2. \*\* Fence \*\*: A fence on a router table is a vital component that serves as a guide and support for the workpiece during routing operations. As an adjustable barrier, it is positioned vertically on the router table's surface and runs parallel to the direction of the router bit's movement. The fence ensures consistent and controlled cuts by helping to maintain the workpiece's position and alignment as it is guided past the rotating router bit. It's a crucial safety feature as well, as it helps to keep the operator's hands at a safe distance from the spinning bit. Fences often have additional features like dust collection ports and micro-adjustment mechanisms to fine-tune the position for precise routing.
3. \*\* Key Hole \*\*: Use the key from the **Table Top Router Kit** to lock the router height in place. While locked, minor adjustments can still be made.
4. \*\* Height Adjustment Control \*\*: Controls height of the router bit. Each revolution corresponds to 1/32 of an inch.
5. \*\* ON / OFF Switch \*\*: Push for OFF and Pull for On
6. \*\* Power Cord \*\*: ensure this is off while performing maintenance or adjustments.
For more visit the manufacturers website and user manual both linked at the top of this document.
# Tool Safety
- Always wear safety goggles and hearing protection.
- Keep loose clothing, jewelry, and hair away from moving parts.
- Ensure the router bit is securely fastened before starting the machine.
- Use push blocks or sticks to keep hands away from the router bit.
- Never adjust the router table or remove debris while it's in motion.
- Use a router table fence or guide for controlled cuts.
- Double-check depth settings before making cuts.
- Disconnect power when changing router bits or performing maintenance.
- Do not reach over the router table while it's running.
- Read and understand the router table's manual and safety guidelines.
- In case of unfamiliar noises or vibrations, turn off the machine and inspect the issue.
- Never rush tasks; prioritize accuracy and safety.
- Keep the router table surface clean and clutter-free.
- Avoid freehand routing without proper guides or jigs.
- Turn off power and wait for all moving parts to stop before servicing.
- Keep hands and body positioned to the side of the router bit's path.
- Use appropriate push blocks, featherboards, and other accessories for added safety and control.
# Tool Care
- Ensure that router bit is pushed all the way down in the collet before operating.
- Regularly inspect the router table for any signs of wear, damage, or loose components.
- Keep the router table surface clean and free from debris after each use.
- Clean surrounding area of debris after each use
- Check and tighten all fasteners, screws, and bolts to ensure stability.
- Clean and replace the router table insert as needed to prevent build-up that could affect the accuracy of cuts.
- Regularly clean the router bit and collet to prevent build-up that could affect cutting performance.
- Periodically check and adjust the router fence for squareness and alignment.
- If the router table has adjustable legs or leveling feet, ensure that the table is stable and level for safe operation.
# Router Table Tool Tutorial
The [Setup](https://docs.google.com/document/d/1Sc5D-U9j6qoNJKfSMTvEvjQE8diNYSNDPQWtSDho64o/edit#heading=h.ex7lrkf7dm2k), [Operation](https://docs.google.com/document/d/1Sc5D-U9j6qoNJKfSMTvEvjQE8diNYSNDPQWtSDho64o/edit#heading=h.w363ck6j8o52), and [Cleanup](https://docs.google.com/document/d/1Sc5D-U9j6qoNJKfSMTvEvjQE8diNYSNDPQWtSDho64o/edit#heading=h.4s5ijlcmnku) Checklists of this guide are what instructors use to ensure that you can use the equipment according to community expectations.Routers are used to cut curved profiles, pockets, slots, and add decorative trim profiles to the edges of wooden projects. Table routers provide superior support and control compared to handheld routers when routing small workpieces, and eliminate the need for clamping individual workpieces to a workbench when routing long pieces like trim molding.
## Usage Highlights
[Router Table Clearance](https://www.protohaven.org/equipment/) or [Class Equivalent](https://www.protohaven.org/product-category/classes-events/) Required Before Use
### SAFETY
### CARE
### CLEANUP
1. Keep fingers away from the bit.
1. Unlock the fine adjustment knob before making fine adjustments
1. Brush off all machine surfaces.
2. Always make ‘conventional cuts’ not ‘climb cuts’
2. Make a maintenance request when the coarse adjustment becomes difficult to move.
2. Sweep the floor around the table.
3. Submit a [maintenance request](http://protohaven.org/maintenance) when needed.
3. Empty the shop-vac and knock out the filter.
## Personal Protective EquipmentSafety glasses must always be worn. Hearing protection is highly recommended in the workshop, especially when the dust collection fan is active.
## Tool Anatomy
### MACHINE ANATOMY
1. Power Switch - on/off switch. Found under the table on the back left of the body of the router.
2. Maintenance Tag - Manually tracks the usability status with Green/Yellow/Red cards
3. Router - The motor that drives the tool.
4. Coarse Adjustment Tool - Rod & handle that gives the user control over the coarse height adjustment of the router.
5. Coarse adjustment hole - The hole in the router table into which the Coarse Adjustment Tool is inserted.
6. Fine adjustment knob - After setting a coarse height, this knob can be used to finely adjust the height of the router.
7. Fine adjustment dial - Shows the user how far the fine adjustment is moving the router.
8. Fine adjustment lockscrew - Locks the fine adjustment in place. Takes a ⅛” hex wrench.
9. Collets - Holds the shank of the router bit.
10. Collet nut - Holds the collet and locks it to the router.
11. Collet wrenches - Used to tighten and loosen the collet nut. Some router models have a lock pin to hold the shaft in place while a single wrench loosens the collet.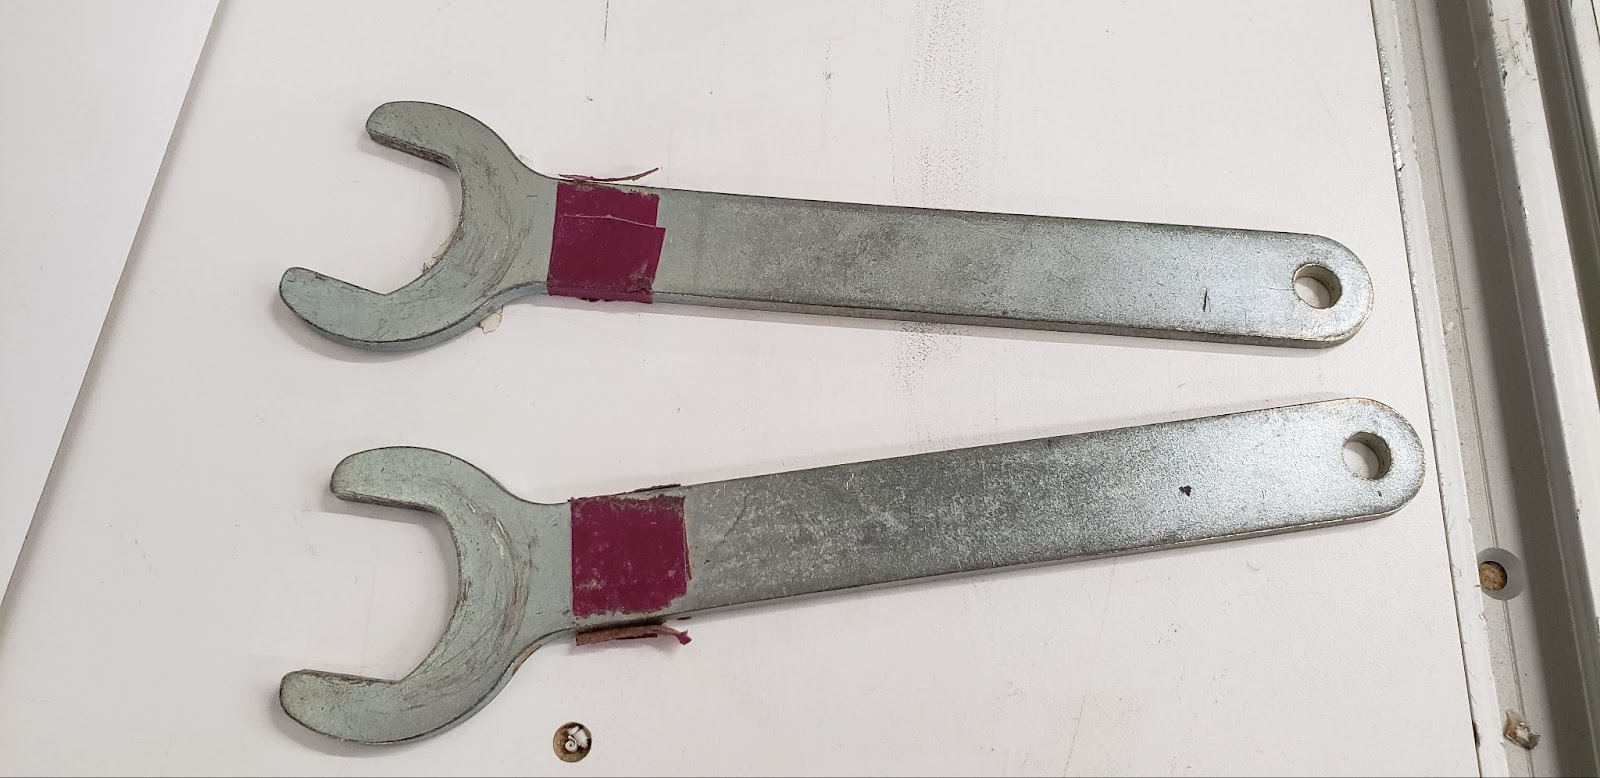
12. Fence - Helps the user cut at a consistent depth in straight stock.
13. Throat Plates - Multiple throat plates with different sized holes provide support below the workpiece while allowing various sizes of bits to pass through the table. If the hole in the throat plate is smaller than the collet nut, the router will need to be lowered below the table before the throat plate can be installed.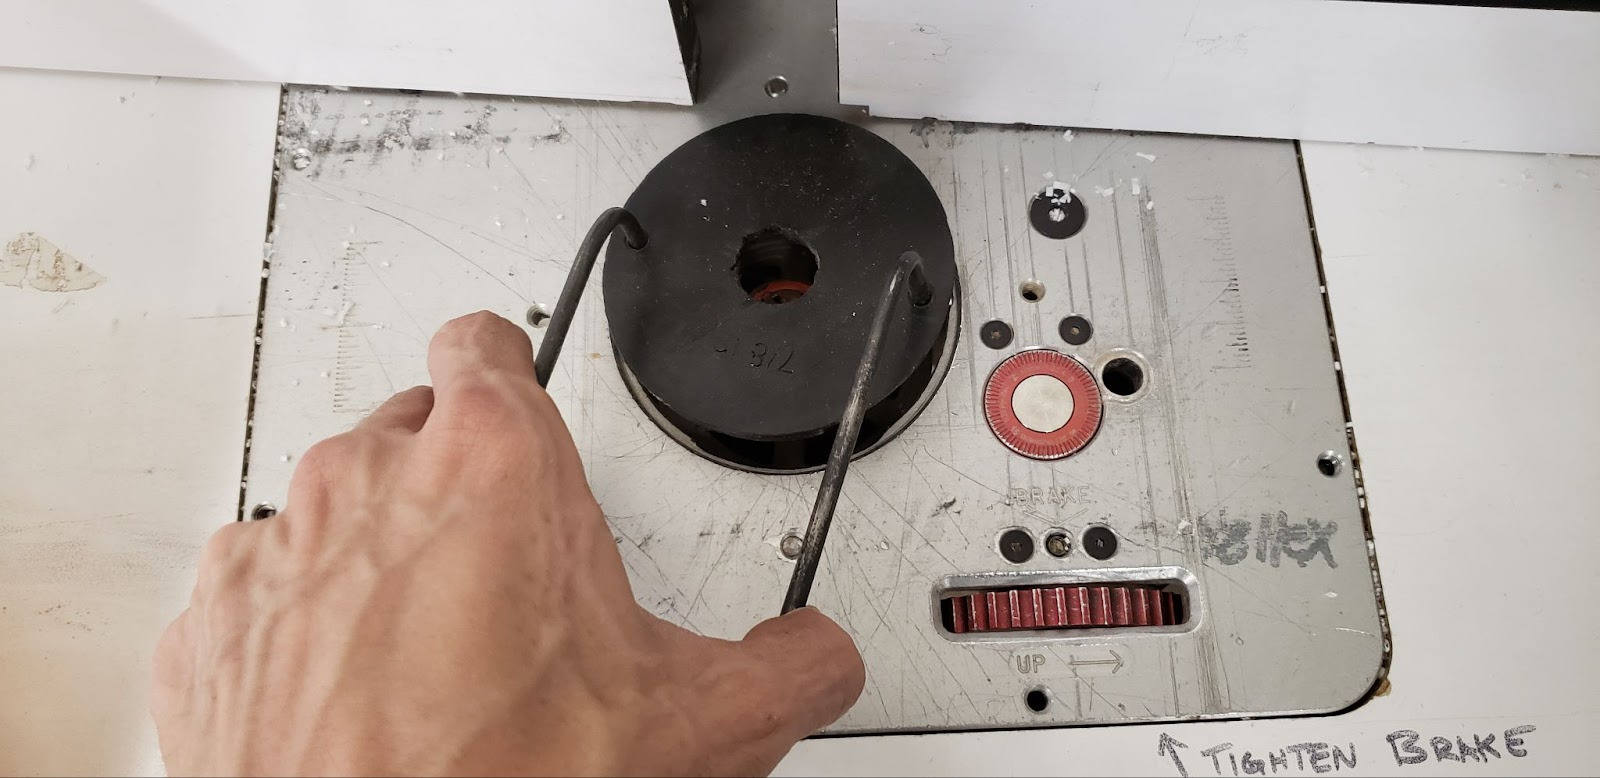
14. Throat Plate Spanner - Tool for unlocking and removing throat plates.
## Tool Safety
### COMMON HAZARDSKickbackSpecial consideration must be made with regards to what direction a workpiece is being fed past the router bit. When installed in a table, the router bits will spin counterclockwise when viewed from above. This rotation will naturally want to pull anything that contacts the bit in that same direction, so anything pushed straight into the bit will be deflected towards the right side of the table. As the workpiece is forced to the right by the bit, that exposes new material to the bit, which is then also pushed to the right. This is called kickback, and can easily rip the workpiece from the user’s grasp.In order to prevent this, you should always feed against the direction of the cutting action. For normal edge routing, this means pushing the work from right-to-left as the cutting edge tries to push the piece to the right. The bit will cut away a portion of the work, and will leave a void in it’s path. If the work were to momentarily get caught by the bit, the void will be pulled rightward around the bit, leaving nothing more to pull against.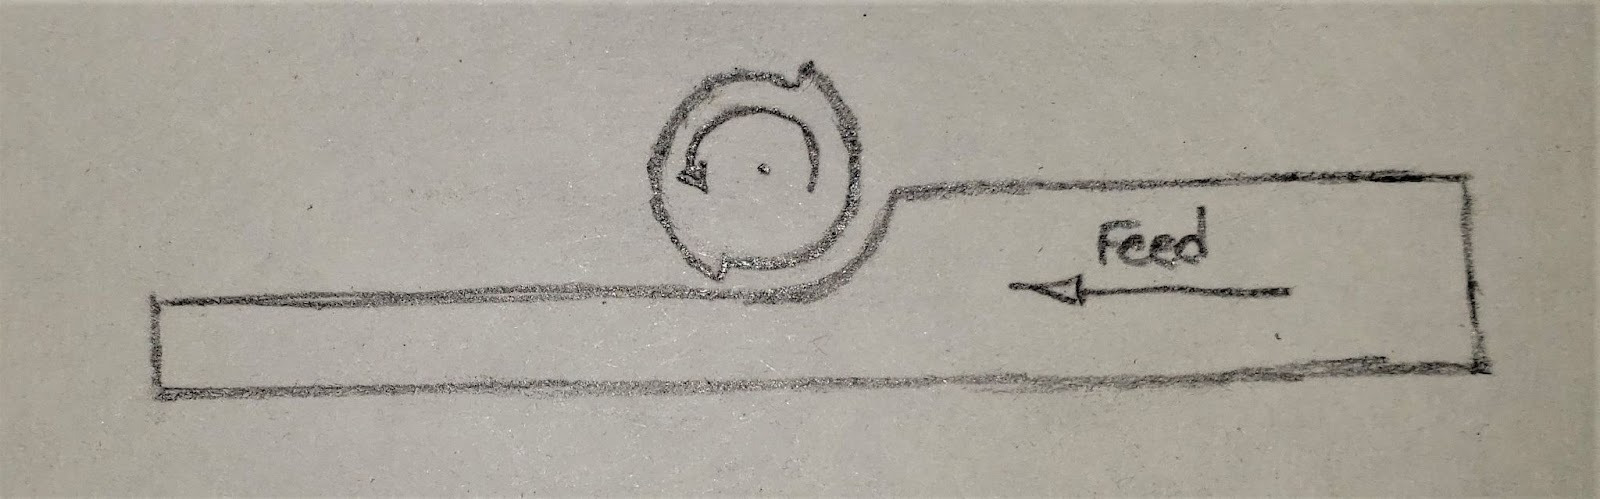Finger contact with bitMany of the operations performed with the router table involve the router bit being completely buried in the workpiece and invisible to the user most of the time. Be especially aware of where the bit will exit from the workpiece as you approach the end of a cut, and make sure your fingers are nowhere close. Use a push stick or push block when appropriate.Flying debrisDue to the high rotary speed of the bit, any splinters that may break off of a piece, or even the whole workpiece itself, may be thrown forcefully from the machine. Always wear eye protection, and stay away from the path of any potential kickback.PROHIBITED MATERIALSNo lead-painted materials are allowed due to toxic dust.
## Initial Setup
### SETUP CHECKLIST
1. Move the table to accommodate long work
2. Attach dust collection
3. Disconnect power
4. Select a router bit
5. Install the router bit
6. Install a throat plate
7. Connect power
### SETUP BREAKDOWN
### Move the tableIf milling a profile on the edge of a long or bulky workpiece it may be necessary to move the table away from the dust collector in order to feed the whole piece past the router bit without interference. Make sure you have sufficient space both on the infeed and outfeed to accommodate your work.Find a shop vac in the wood shop and attach it’s hose to the dust port in the fence. Even if you do not intend to use the fence to guide your work, keep the fence as close as you can to provide air flow and collect whatever amount of particulate you can.
### Disconnect powerIf the router is plugged in, unplug it to prevent accidental powering of the motor while installing the bit.
### Select a router bitWhile there may sometimes be router bits available at the shop for emergency use, it is expected that members will bring their own bits so they can be assured to have a sharp, undamaged bit that is the right size and style for their project.There are many types of router and can be used in many different ways.Bits with bearing guides are designed to ride along the profile of an edge, while bits with no bearing are used with the fence to cut trim profiles, grooves, and slots, or can be used for free-hand shaping.Straight bits are often used for free-hand shaping, but can also be used in conjunction with a bearing following a template to create accurately repeatable parts without relying on CNC.Many styles of profile bits exist, and can range from purely decorative like the ogee, to providing complex joinery solutions like tong-and-groove and raised panel sets.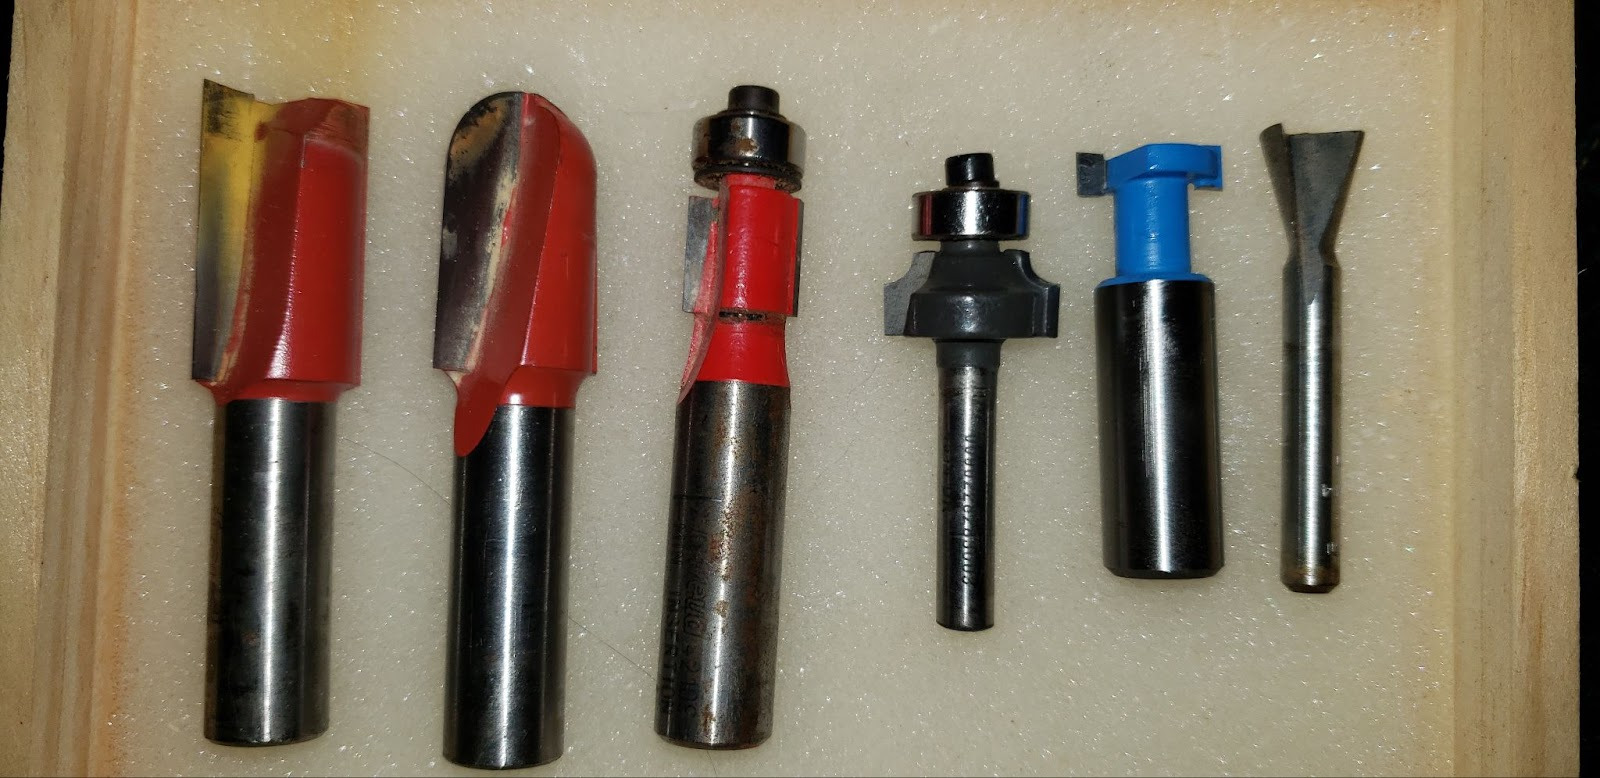
### Install the router bitSelect the collet that matches the shank size of the bit you have chosen. Most bits will be ¼”, but some larger bits may be ½”. Screw the collet nut lightly onto the router spindle.Insert the shank of the bit into the collet. The goal is to have as much of the shank gripped by the collet as possible, while not pushing the shank into the collet past where the polished surface is. You should be able to see a hair’s width of the polished shank protruding from the collet.Tighten the collet nut onto the router spindle as much as possible by hand. This just minimizes the amount of fiddling with wrenches that you have to do. Once the nut is snugged in place, use the two collet nut wrenches to simultaneously hold the spindle still and tighten the nut firmly in place. Finding the right angle for this can be tricky. Sometimes lifting the router to it’s highest position and using the wrenches from above the table is easiest, and sometimes dropping the router to it’s lowest point and accessing the nuts from below is more convenient. Care should be taken not to let the wrenches slip off of the nuts, as this will round off the edges of the nuts and wrenches making it increasingly difficult to get a good grip on the nuts.
### Install the appropriate throat plateChoose the throat plate that most closely matches the diameter of the cutter of your router bit. The router bit should pass freely through the throat plate, but there should be very little clearance between the cutter and the opening. It is critical to support the workpiece as close to the cutter as possible to help keep the workpiece level, and help mitigate catches at tearout.The router must be slightly below it’s highest position in order to make room for the throat plate. Place the throat plate into the throat and, using the throat plate spanner in the two small holes, lock the throat plate in place by turning it clockwise until it is seated and locked in place.
### Connect powerIf one is not already at hand, find an extension cord in the wood shop, often hanging behind the tool crib. Plug in both the router and the shop vac.
### CONSUMABLESEach member should be responsible for sourcing and maintaining their own router bits. Bits will dull over time, get lost or chipped, and cannot be relied upon to be in good shape when shared among many members.
## Basic Operation
### OPERATION CHECKLIST
1. Open dust gate
2. Power on Dust Collection
3. Set the depth of the cut
4. Determine the width of the cut
5. Initiate the cut
6. Feed the workpiece past the bit
7. Repeat cut to full depth
### OPERATION BREAKDOWN
### Set the bit depthAdjust the height of the bit. We will refer to this as the depth of the cut. You will likely need to utilize a ruler or a gauge block in order to determine the proper distance above the table the bit needs to be in order to match the depth of cut indicated in your plans.
### Determine the width of the cutHaving set the depth of cut, you must determine how far into the wood you want to cut. We will call this the width of the cut. Generally you do not want the width of your cut to be wider than half the cutter diameter, meaning the router bit will be at most half-way exposed out of the fence face. Wider cuts will generate more pulling forces on the wood fibers and lead to catching, chattering, and splintering. You will often make several shallow passes in order to achieve the full width of the profile. The exception to this guideline would be when you are cutting slots, where you must expose the entire width of the cutter profile to the wood. A good rule of thumb is to not cut more than ¼ square inches per pass.If using a fence to make straight cuts, set the fence so the appropriate amount of the bit is extending from the face of the fence.If you are not using a fence, you will need to control the width of each pass manually, and must take care not to cut too much at a time or risk the bit catching on the piece instead of cutting it. When using bits with guide bearings, you may need to make several free-hand passes until the bearing can meet the profile it will roll along.
### Initiate the cutIn a slow, controlled manner, bring the workpiece into contact with the bit. When working the edge of a workpiece, the bulk of the work should be to the left of the bit, and you should touch the bit to the workpiece about a quarter-inch away from the corner of the work, if there is a sharp corner like is found on all rectangular stock. The purpose of this is to avoid introducing a sudden wall to the approaching cutter. If the cutter impacts the workpiece at a 90 degree angle, it will be a forceful impact and can splinter the workpiece and throw it from the table, or pull the perpendicular edge of the workpiece into the cutter.Once you have established a cut at the appropriate width in the edge of your stock, slowly draw the workpiece to the right to cut away whatever is left of the quarter inch that was to the left of the bit. This small amount of cutting is done while feeding the stock in the same direction as the rotation of the cutting faces, and is known as ‘climb cutting’. Climb cutting is extremely risky in hand-fed operations (non-cnc), and should not be done on long faces as you can easily get into a runaway situation where the piece kicks violently in the direction the cutter is moving. Care should be taken not to feed from left to right except when there is no risk of the router running along the surface of the stock. In this situation, only a very small amount of wood should be to the left of the cutter, and if kickback were to occur, it would be a very low-force event.
### Feed the workpiece past the bitReverse directions, now pushing the bulk of the work from the right of the bit towards and past the bit. You are now feeding against the direction of the bit in a feed style known as ‘conventional cutting’, since it is the traditional and most common method, being safer and more controllable than climb cutting. If working freehand, be sure not to take too wide a cut as you feed the stock past the cutter. Maintaining solid control over the workpiece, keeping it flat to the table and feeding at an appropriate speed are key to getting a good cut. Chattering and bucking can indicate that the feed speed is too high, or that the bit is no longer sharp enough to produce a quality cut. Burning and scorching can indicate that the feed speed is not high enough, and the friction of the cutter riding on the surface of the wood instead of cutting it is building up unnecessary heat.Do not reverse the feed direction in the middle of an edge, even just to clean up a small mistake, as the bit can grab and kick violently when climb cutting. It is much safer to make a second pass using conventional cutting to clean up any inconsistencies in a profile.When completing a pass, take special care to keep your hands clear of the trailing edge of the workpiece. A common injury is to have your thumb or palm pushing on the wood at the point where the cutter emerges from the stock.
### Repeat the cut to full depthAfter completing a pass, determine how wide your next cut should be. If using a fence this may look like sliding the fence a quarter of an inch further back, exposing more of the router bit’s cutting profile. If free-handing, you will need to pick a new point of visual reference to keep track of how much of the bit is buried in the workpiece. A roller bearing can serve as a great visual indicator of how deep a bit is until you have cut far enough for the bearing to roll along the profile at the full cut width.
## Cleanup
### CLEANUP CHECKLIST
1. Unplug the router
2. Remove the bit
3. Store all accessories
4. Brush the dust from the surfaces
5. Sweep the floor around the table
6. Note any maintenance needs or concerns on the tag and at [protohaven.org/maintenance](http://protohaven.org/maintenance)
7. Recycle waste in the single-stream scrap bins
## Troubleshooting
### Common Issues
### Possible Causes
### Resolutions
Tearout when routing endgrain
Lack of support along the grain
Rout the end of the stock first, if possible, and then the sides to clean up any tearout that occurred.Use a backerboard to support the grain and prevent it from splintering.
Kickback
Dull bitClimb cutting
Check the sharpness of the bit and clean or replace as neededVerify that you are feeding against the direction the bit is cutting, not with it.
Bit drifts downward during use
The fine adjustment is unlocked
Use an allen key to lock the fine adjustment in place
The coarse adjustment does not move
The columns are not sufficiently lubricated
Submit a maintenance request to have the columns lubricated with a dry lubricant.
# General Woodshop - Table Saw
SawStop ICS53230 5HP & SawStop PCS31230 3HP
# Manual(s)
*Manuals and other reference materials from the manufacturer or other sources.*
# Member Notes
# Resources
*Where to obtain materials, consumables, and tooling.*
# Table Saw Tool Tutorial
The [Setup](https://docs.google.com/document/d/17EcbGEwKkG818tNUKk5cdq0zIsa00yW2ckNFUHO_Hk4/edit#heading=h.ex7lrkf7dm2k), [Operation](https://docs.google.com/document/d/17EcbGEwKkG818tNUKk5cdq0zIsa00yW2ckNFUHO_Hk4/edit#heading=h.w363ck6j8o52), and [Cleanup](https://docs.google.com/document/d/17EcbGEwKkG818tNUKk5cdq0zIsa00yW2ckNFUHO_Hk4/edit#heading=h.4s5ijlcmnku) Checklists of this guide are what instructors use to ensure that you can use the equipment according to community expectations.The tablesaw is the main workhorse of the modern workshop and can be used to cut nominally sized lumber to precise lengths and widths. Some of the most common uses are making rip and crosscuts on boards and cutting panels to size. With appropriate setups and jigs, more complex joinery can be accomplished like cutting dadoes and rabbets on panels, tenons, bridle joints, box joints, and splines.
## Usage Highlights
[Table Saw Clearance](https://www.protohaven.org/equipment/) or [Class Equivalent](https://wiki.protohaven.org/protohaven.org/classes) Required Before Use
### SAFETY
### CARE
### CLEANUP
1. Take all possible preventative measures to avoid kickback
1. Do not cut anything with uncured glue or resin
1. Place any accessories like miter gauges, featherboards and sleds back in their storage
2. Keep your hands at least six inches away from the blade.
2. Always run dust collection to prevent clogging the dust port
2. Brush off all machine surfaces
3. Keep a push-stick accessible at all times
3. Ensure that all nails and screws have been removed from any reclaimed materials
3. Sweep up the floor around the machine
4. Submit a [maintenance request](http://protohaven.org/maintenance) when needed
4. Check that the dust collection port below the blade is not clogged
## Personal Protective EquipmentSafety glasses must always be worn. Hearing protection is highly recommended in the workshop, especially when the dust collection fan is active.
## Tool Anatomy
### MACHINE ANATOMY
1. Power Box Switch - Switch for the electrical box. The yellow switch must be ‘on’ for the motor switch to work. Each time it is turned ‘on’, the box will go through a boot process. When the boot process is complete the green light will glow solid.
2. Start/Stop Paddle - Switch for the motor. Pull out to turn on, push to turn off.
3. Maintenance Tag - Manually tracks the usability status with Green/Yellow/Red cards
4. Table - This is precision ground cast iron and will rust and damage easily. Do not expose to moisture, use for hammering, or as a glue-up surface.
5. Blade - Can be raised and lowered, and tilted up to 45 degrees to the left.
6. Blade Guard - Covers the blade as a safety measure and has an integrated splitter. Cannot be used when making dadoes or rabbets, or for cuts very close to the fence.
7. Riving Knife - Used as a splitter that follows the height of the blade. Must be installed if not using the blade guard.
8. Throat Plate - Maintains a tight clearance between the blade and the table surface. There is a separate throat plate for use with dado stacks.
9. Brake Module - Sits below the blade and is activated whenever the blade senses something that might be contact with flesh.
10. Height Adjustment Crank - Raises and lowers the blade. Found on the front of the cabinet. Unlock the knob before turning, and lock the knob in place when adjustment is complete.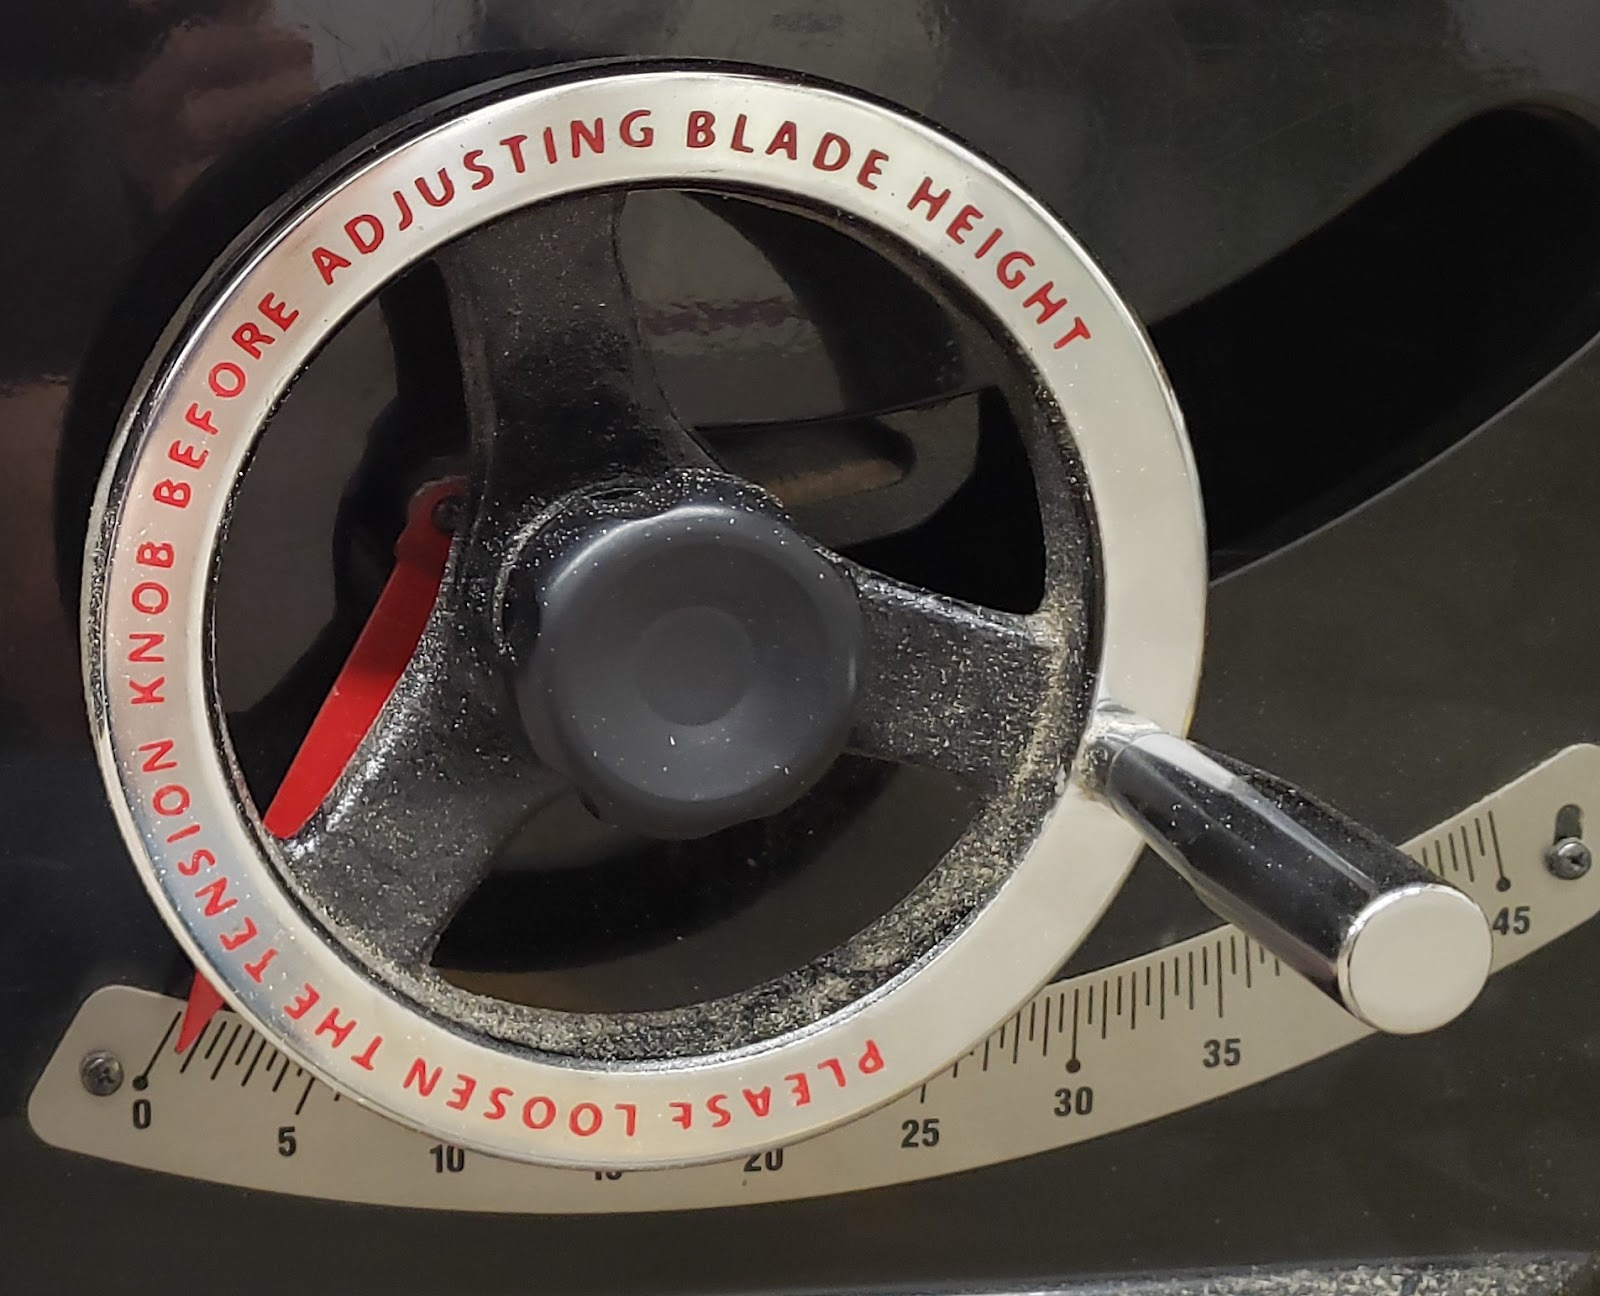
11. Angle Adjustment Crank - Tilts the blade between 45 degrees and 90 degrees from the table. Found on the side of the cabinet. Unlock the knob before turning, and lock the knob in place when adjustment is complete.
12. Fence - Provides a surface parallel to the blade to use as a reference when making long cuts. The fence should never be pushed up against the blade.
13. Miter Gauge - a small jig that allows cross-cuts and miter cuts.
14. Push Stick - A stick to help push stock through the saw to help keep your fingers away from the blade.
15. Featherboard - Flexible fingers that clamp into the miter slot and help push the stock against the fence.
## Tool Safety
### COMMON HAZARDSLacerations - The stories of fingers lost to tablesaws are plentiful. Keeping your fingers at least six inches away will help prevent accidental contact with the blade. Do not reach across the blade to prevent contact with your arms.Entanglement - Do not wear long sleeve shirts or bracelets. Tuck in any necklaces, and tie back long hair.Kickback - Anytime a workpiece binds on the blade it runs the risk of violently kicking the work out the front of the saw. When this happens it can pull the user’s hand into the path of the blade.There are several ways kickback can happen:
1. Kerf closing mid-cut. Due to internal forces in the wood, the stock may warp as it is cut, and the resulting pieces may close in on the path that the blade has made through the wood, known as the kerf. When the kerf closes on the blade, it will bind on the blade and stall the saw or eject the workpiece. If you feel the blade start to provide resistance as you cut, stop the saw immediately. Remove the workpiece from the blade and inspect the cut. It may be possible to re-make the cut now that some of the tension has been released.
2. Wood twisting mid-cut. If wood is not perfectly flat, it may tip back and forth as it is pushed through the cut. If the kerf tilts against the blade it will pinch and bind. Only use stock that lays perfectly flat to the table. 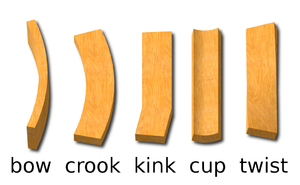
3. Stock rotating into the back of the blade will lift the stock with the rear tooth, then shoot it out the front of the saw. In order to prevent this, stock must be locked in place rotationally either by having one straight edge against the fence, or by holding the workpiece firmly using the miter gauge, a sled, or some other jig. Even with those aids in place, an unexpected shift while feeding due to a knot in the wood or some other hiccup may still result in the wood turning into the saw. To mitigate this risk a splitter must always be used, either the splitter built into the blade guard or if the blade guard is removed, the riving knife MUST be installed.
4. Stock riding on top of the blade - Sometimes the stock will be pushed up the front of the blade, and then be thrown when the teeth at the top of the blade re-engage with the stock. This can happen more easily when the blade height is very low to the table, creating a low ramp. A dull blade will also make it more likely that the stock will ride up the blade instead of being cut as expected. Make sure the blade is set to a minimum height of one inch when cutting very thin stock. Check the blade sharpness. Maintain firm downward pressure to keep the stock against the table at all time.
### PROHIBITED MATERIALSReclaimed wood often has embedded nails or screws which can damage the blade, cause the workpiece to kick, and can scratch the table. All reclaimed wood should be checked with the hand-held metal detector before being sawn.Reclaimed materials may be painted with lead paints. Lead paints are prohibited in the shop as the dust created is toxic.No metals shall be cut on the table saws. They will trigger the brake system, and potentially shatter the saw blade, throwing debris at the user.
## Initial Setup
### SETUP CHECKLIST
1. Check that the dust port below the saw blade is not clogged
2. Turn on the electronics box switch and allow the system to boot up
### SETUP BREAKDOWN
### Check the dust portRemove the throat plate and look past the blade to the bottom of the blade housing. The dust port should be visible with no dust build-up. If there is dust and debris blocking the port, unplug the saw and use a shop-vac to remove the blockage. It may be necessary to open the left access panel and remove the dust hose from the blade housing in order to remove heavy blockages from the hose itself.
### Turn on the electronics box switchTurning on the yellow switch will cause the electronics to boot up. The red light will flash slowly until the bootup process is complete, at which point the green light will go solid. If the electronics box finds a fault with the machine setup it will flash a series of lights. The light code can be looked up on the chart on the left side of the electronics box in order to determine the cause of the fault.
### CONSUMABLES
General purpose 10" diameter 1/8" thick blades are provided by the shop for member use. If you want a specific blade of a known sharpness or for specific work (fine cuts, etc.), members are encouraged to purchase their own blades.
Both table saws accept 10 inch blades with a 5/8 inch arbor hole.
If purchasing European blades, carefully check the clearance between the blade and the Sawstop brake cartridge after installation and before use. Some European blades can run slightly large, which can trip the brake and destroy the blade.
Check the [member-curated list of tool vendors](https://wiki.protohaven.org/books/materials-and-services/page/woodworking-tools "Tools") for places to buy blades.
## Basic Operation
### OPERATION CHECKLISTWhat is the [step-by-step walkthrough](https://docs.google.com/document/d/1hk9CXibUxjIdEQdUDZjjjpmLS72cxzbl5RBgFu6TEmQ/edit#heading=h.mzot45whhutj) of basic operation?
1. Open dust gate
2. Power on Dust Collection
3. Mark the cut line on the workpiece
4. Raise the blade to the proper height
5. Line up the cut line with the saw blade
6. Turn on the blade
7. Make the cut
8. Stop the saw blade
### OPERATION BREAKDOWN
### Check the dust gateVerify that the dust gate that corresponds to the table saw you are using is open.
### Turn on the dust collector
### Mark the cut line on the workpieceAt the back, bottom edge of the workpiece, make a mark at the start of the cut. Making the mark on the back, bottom edge will allow you to perfectly line up the edge of a blade tooth with your mark, which would be impossible to do if you make your mark on the top surface. It is good practice to indicate which side of the mark is the waste side so that you do not accidentally remove the kerf width from the piece you want to keep.
### Raise the saw blade to the proper heightPlace your stock on the table surface next to the blade and raise or lower the blade so that the entire tooth profile of the highest teeth completely clear the top of the workpiece.
### Line up the cut line with the saw bladeWith the workpiece held appropriately for whatever operation you will be performing (rip, crosscut, etc), line up the hash mark you made to delineate the cut with the frontmost tooth on the saw blade. Lock the fence in place if using the fence, otherwise move the fence out of the way. Be aware that locking the fence may cause the angle of the fence to shift, changing it’s distance from the blade. Double check your alignment after locking the fence and adjust if necessary.
### Turn on the bladeMake sure there are a few inches of clearance between the workpiece and the blade so it is not thrown as soon as the saw is turned on. Pull the red paddle gently towards you until it clicks and the blade turns on. Allow the blade to come up to full speed. If the blade does not turn on, check the lights for error codes and push the paddle back to its off position.
### Make the cutPush the workpiece at a constant speed into and past the blade. Be sure to keep your hands out of the path of the blade, and at least six inches away from the blade as you push the workpiece past the blade. As the blade reaches the front edge of the stock, the left and right halves of the cut will separate. If one of those pieces is between the blade and the fence, be sure to push that piece completely past the back tooth of the blade to prevent the piece from pinching and being ejected forcefully from the saw. Small pieces sitting next to the blade may be able to be knocked away from the blade by a push stick, but should not be picked up by hand unless the blade has come to a complete stop.Unless you are working with large stock it will be necessary to use a push stick to push the stock past the blade while keeping your fingers at a safe distance.
### Stop the bladePush the paddle back to its original ‘off’ position and wait for it to come to a complete stop.
##
## Cleanup
### CLEANUP CHECKLIST
1. Brush off all surfaces
2. Sweep the floor surrounding the machine
3. Note any maintenance needs or concerns on the tag and at [protohaven.org/maintenance](http://protohaven.org/maintenance)
4. Recycle waste in the single-stream scrap bins
### SCRAP BREAKDOWNPlace any scrap larger than 2”x4”x2’ in the black scrap bin next to the back door. Any scrap smaller than that in any dimension should be thrown in the trash. If you notice any unusable scrap or trash in the scrap bin, please move it to a trash can.
## Troubleshooting
### Common Issues
### Possible Causes
### Resolutions
The saw’s control box will not turn on
The machine does not have power
Check the wall plug, and on the 5HP machine, check the mains lockout switch on the left side.
The saw blade will not start
The paddle may have been turned on before the saw blade came to a complete stop.The right-side access door may be ajar, preventing the interlock switch from closing.
Return the paddle to the ‘off’ position and try again to turn on the blade.Check that the access door is completely closed and that the switch is activated.
Stock is hard to push through the bladeThe machine generates smoke while cutting
The blade is dull
Replace the blade with a fresh oneClean the pitch from the blade
## Special SetupsRound stock should be placed in a sled or v-block to prevent it from being spun by the blade.Dado stacks may be used, but the special dado brake for 8” blade stacks must be installed instead of the standard 10” brake module.
## Additional ResourcesTablesaw kickback prevention - Stumpy Nubs - (in-depth discussion of the causes of kickback) [https://www.youtube.com/watch?v=8f8VWwtaudU](https://www.youtube.com/watch?v=8f8VWwtaudU)
Tablesaw kickback - 42 fab - (accident breakdown of thrown sheet stock)
[https://www.youtube.com/watch?v=9hZ78pKoEwU](https://www.youtube.com/watch?v=9hZ78pKoEwU)
# Millwork - Drum Sander
# Manual(s)
*Manuals and other reference materials from the manufacturer or other sources.*
Grizzly G1066Z drum sander, new as of January 23, 2025
[drum sander g1066z\_manual\_trimmed.pdf](https://wiki.protohaven.org/attachments/214)
[drum sander\_g1066z\_data sheet.pdf](https://wiki.protohaven.org/attachments/157)
[drum sander\_g1066z\_parts list.pdf](https://wiki.protohaven.org/attachments/158)
# Member Notes
# Resources
- Motor brushes (P1066Z039V4-1) are considered to be consumable. They should both be replaced when they measure under 1/4" in length (they start at 5/8"), or when the motor no longer reaches full power.
# Tool Tutorial
## Drum Sander
The drum sander can be used to:
- Flatten a board face.
- Smooth a board face.
- Reduce the thickness of thin stock.
## Notes
### General
The maximum depth of cut is a 1/4 turn of the hight adjustment crank. A 1/4 turn of the height adjustment crank is equal to 1/64” (0.4mm).
The minimum safe size for workpieces is 9” x 2” x 1/8”.
The drum sander and the planer cannot be operated at the same time: there is a switch on the wall to select which machine will use the circuit.
Reduce snipe when sanding more than one board of the same thickness by feeding them into the sander with the front end of the second board touching the back end of the first board.
Run workpieces through at different positions left-to-right for even wear on the sandpaper.
A planer may be a better choice if a lot of material needs to be removed from a thick workpiece.
### Safety
Do not edge sand workpieces.
Do not stand directly in front of the sander’s infeed area. Workpieces may be kicked out of the drum sander at high speed.
Do not sand boards smaller than 9” x 2” x 1/8”. Small workpieces cannot be safely sanded.
Do not sand more than one board at a time in a parallel, side-by-side configuration. Any slight height variation in any of the boards may cause one or some of the boards to be kicked out of the front of the drum sander.
Do not let the motor draw excessive power. If the sanding load meter goes to 25 amps or above, immediately hit the emergency stop button to shut down the machine, and reduce the depth of cut or speed. Alert a shop tech if the load meter is difficult to keep under 25 amps. This could be from too fast of a conveyor speed, too deep of a cut, damaged sand paper, or something other than clean/dry wood being sanded.
Use a dust mask, hearing protection, and safety glasses.
### Common Hazards
Kickback is when a workpiece is propelled out of the machine by a spinning drum. Make sure that you and other shop members are clear of the front of the machine to be out of the way should kickback occur. Kickback can be caused by:
- Sanding more than one board at a time
- Taking too deep a cut
- Sanding a workpiece less than 9” x 2” x 1/8”
Fine dust left on the floor is a slip hazard. Always sweep the area after using the drum sander.
Excessively cupped, bowed, or twisted workpieces are unstable and unpredictable, and may be propelled from the machine.
### Materials
Only wood should be used. Do not put any other materials through the drum sander.
Workpieces must be free of all metal. Any nails, screws, staples, or other metal parts embedded in the wood can damage the machine. A portable metal detector is available at the front desk.
Do not cut wet wood. Workpieces over 20% moisture will clog the paper.
Do not sand boards with finish or uncured glue applied. Use a sacrificial piece of sandpaper to remove any uncured glue from the workpiece. Remove any layers of finish from the workpiece with the resaw bandsaw. Sanding boards with high resin content or applied finishes will quickly contaminate and clog sandpaper.
-Wood Glue can still be gummy after 24 hours, be sure it is totally dry.
-Resin can be soft for a week of more.
## Parts of the Drum Sander
### Full View
[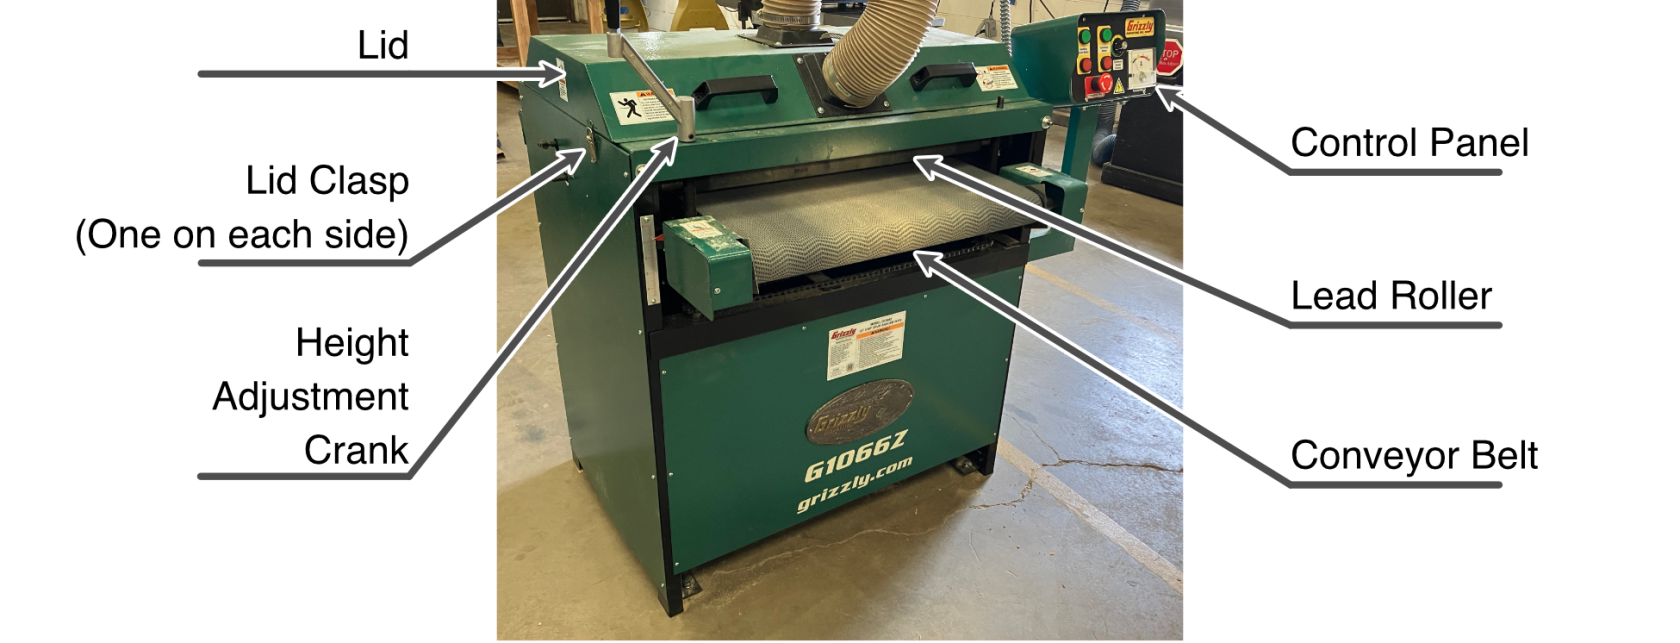](https://wiki.protohaven.org/uploads/images/gallery/2025-03/drum-sander-full-view-annotated.png)
An annotated full view of the drum sander.
### Control Panel
[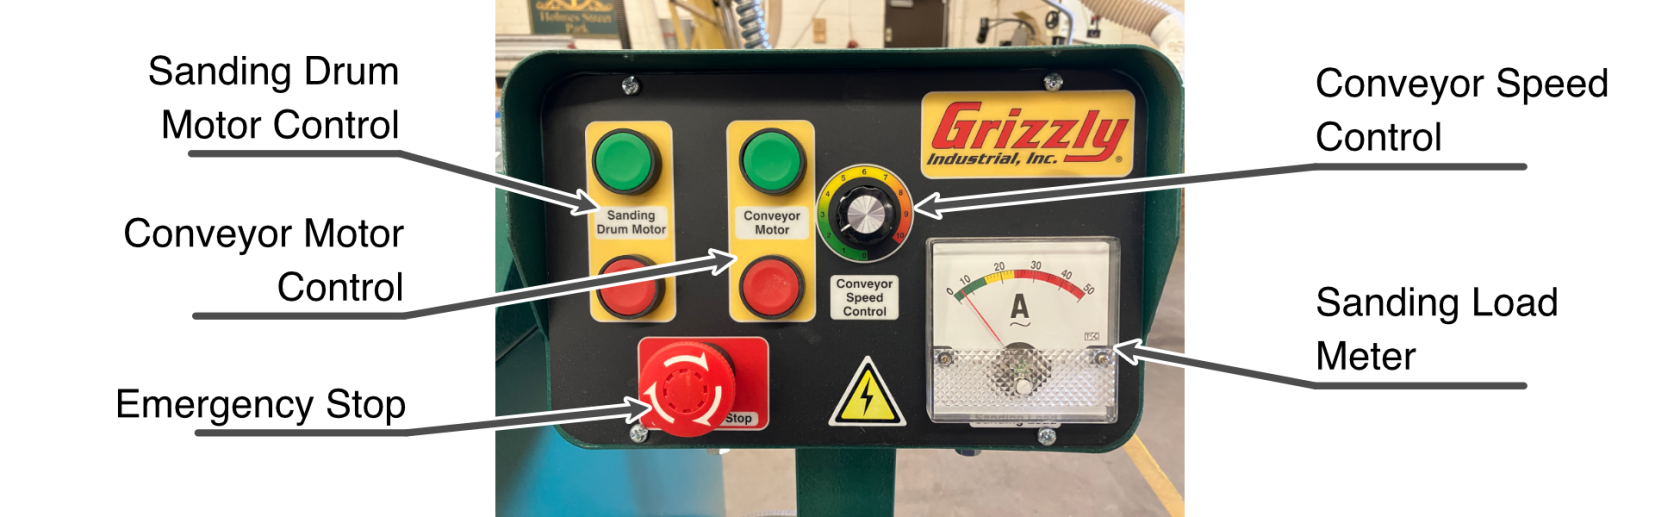](https://wiki.protohaven.org/uploads/images/gallery/2025-03/drum-sander-control-panel-annotated.png)
An annotated full view of the drum sander.
### Emergency Stop
Push in the emergency stop button to immediately stop all motors on the machine.
To release the emergency stop, twist the button clockwise until it releases.
### Sanding Drum Motor Control
Press the green button to engage the sanding drum motor.
Press the red button to stop the sanding drum motor.
Make sure the drum motor is turned on before feeding a workpiece into the machine.
### Conveyor Motor Control
Press the green button to engage the conveyor motor.
Press the red button to stop the conveyor motor.
### Conveyor Speed Control
Adjust the conveyor speed control to change how quickly a workpiece is fed beneath the sanding drums. Start cuts with the speed control set to low (in the green range, below 4).
Adjust the speed upward as needed. When increasing speed, monitor the sanding load meter the make sure that the power draw does not exceed safe operation.
### Sanding Load Meter
The sanding load meter reported the draw on the motors in amps. Keep the load below 15 amps for normal operation.
### Conveyor
The conveyor pulls the workpiece past the bottom of the sanding drums.
### Height Adjustment Crank
The height adjustment crank raises and lowers the conveyor table, adjusting the clearance between the sanding drum and the conveyor.
### Lid
The lid protects the top of the sanding drums, and helps with dust collection.
Only run the drum sander with the lid lowered and locked in place with the left and right clasps.
### Lid Clasps
There are two lid clasps, one each on the left and right sides of the lid.
Only run the drum sander with the lid lowered and locked in place with the left and right clasps.
### Sanding Drums
There are two sanding drums on the drum sander, using progressive grits (80 grit and 120 grit). The abrasives should be inspected before each use to ensure they are not clogged, torn, or loose on the drum.
## Basic Operation
### Setting Up
1. ##### Inspect the Sandpaper
1. 1. Undo the latches on the left and right sides of the cover.
2. Open the cover.
Hold the cover open: do not let it drop.
3. Inspect the sandpaper on both drums.
If there are any clogs or tears, file a maintenance report.
4. Close the cover.
5. Latch both sides of the cover.
2. ##### Set the wall-mounted power switch to Drum Sander.
*Do not change the switch position if the planer is in use.*
3. ##### Turn on dust collection.
*Dust collection must be enabled. If the drum sander is used without dust collection, the sandpaper will be immediately ruined.*
### Sanding
1. Use the height adjustment crank to set the height of the conveyor table.
*The workpiece should fit comfortably under the lead roller. This will ensure that the sander will take a cut less than 1/64”, as required.*
2. Turn on the sanding drum motor.
*Ensure the sanding drum is spinning before loading work into the sander.*
3. Turn on the conveyor motor, starting with a slow speed.
*The green areas of the speed control are recommended starting speeds.*
4. Make light test passes to find an appropriate conveyor speed.
- If the Sanding Load Meter gets too high (into the yellow or red above 15 on the scale), decrease the speed or reduce the cut depth.
- If the wood is burning, increase the speed or reduce the cut depth.
5. Do not adjust the height of the conveyor table by more than 1/4 turn per pass.
*Because of the spongy nature of the sand paper backing, adjusting the handle is not needed on every pass. Several passes can be taken for every adjustment of the handle.*
6. Feed the workpiece through until desired thickness is reached.
7. Turn off the conveyor motor and sanding drum motor.
- Turning off the sanding drum motor while there is still a work piece under one of the drums can result in permanent damage to the machine. Make sure all work has fed fully out of the machine before shutting down.
### Cleaning Up
1. Inspect the sandpaper for any clogs or tears (see Inspect the sandpaper, above).
*If there are any clogs or tears, file a maintenance report.*
2. Dust off and sweep up dust as needed.
3. Turn off the dust collection.
*If other members are still using the dust collector, leave it on.*
### Troubleshooting
If the drum sander does not power on, please check the following:
- The switch on the wall needs to be set to "Drum Sander", not "Planer" or in the middle position.
- The emergency stop may be engaged. Twist clockwise to reset the emergency stop.
- The sanding drum motor overload breaker may need to be reset. If this is the case, the conveyor motor will work, but the drums will not spin up. Please make a tech aware of the situation.
# Millwork - Jointer
# Manual(s)
*Manuals and other reference materials from the manufacturer or other sources.*
Laguna MJOIN 8020-0130 with ShearTec II cutter system
[manual](https://info.umkc.edu/innovation-studio/wp-content/uploads/2022/03/MJOIN-8020-0130_-8_-Platinum-Series-8_-Jointer-w_-Parallelogram-13-03-2015.pdf "https://info.umkc.edu/innovation-studio/wp-content/uploads/2022/03/MJOIN-8020-0130_-8_-Platinum-Series-8_-Jointer-w_-Parallelogram-13-03-2015.pdf")
# Member Notes
Stumpy Nubs - Jointer Introduction (comprehensive overview)
[https://www.youtube.com/watch?v=z8ey0z3bkUo](https://www.youtube.com/watch?v=z8ey0z3bkUo)
Woodworkers’ Guild of America - Jointer Safety - (some hand positioning tips) [https://www.youtube.com/watch?v=3d1qBxcnI0E](https://www.youtube.com/watch?v=3d1qBxcnI0E)
David Stanton - Jointer How To - (safety tips and shows eliminating rocking) [https://www.youtube.com/watch?v=OwbVIqOVMDk](https://www.youtube.com/watch?v=OwbVIqOVMDk)
Matt Estlea - How to use a Jointer Safely and Effectively - (more in-depth setup and theory, but uses a european style guard) [https://www.youtube.com/watch?v=lUCb-J8zP8U](https://www.youtube.com/watch?v=lUCb-J8zP8U)
Jointer Injury - Jonathan Katz-Moses - (Best case scenario outcome for a jointer injury & good safety and awareness talk) [https://www.youtube.com/watch?v=0t6SZZJAhms](https://www.youtube.com/watch?v=0t6SZZJAhms)
# Resources
*Where to obtain materials, consumables, and tooling.*
# Tool Tutorial
### Jointer Overview
A jointer is used to flatten irregular surfaces on solid wood. The jointer uses a cutting head with carbide cutters to create a perfectly flat and level surface on your board, removing any warping, twisting or cupping. A jointing operation is usually the first operation performed on any board in a fine woodworking project.
Generally, the face of a board is jointed first and then the face is held against the fence to joint the edge. Multiple passes may be needed to ensure a flat surface is machined. By creating two perfectly flat sides that are perpendicular to each other, future cuts, machining operations, and assembly will benefit.
[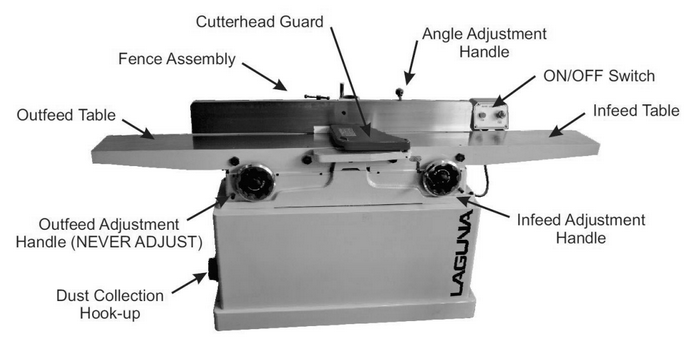](https://wiki.protohaven.org/uploads/images/gallery/2025-01/rsBimage.png)
1. Power Switch - on/off switch
2. E-Stop - Reserved for emergencies. To deactivate and reset, you must twist the spring-loaded knob.
3. Maintenance Tag - Manually tracks the usability status with Green/Yellow/Red cards
4. Infeed Table - Cut begins on the right side
5. Outfeed Table - Cut ends on the left side
6. Cutter head - Stock’s bottom is removed as it passes over the cutter
7. Guard - Covers the cutter when not in use
8. Infeed Height Crank - Adjusts the height of the infeed table (cut depth)
9. Cut depth gauge - Shows approximately how deep of a cut will be made
10. Outfeed Height Crank - Adjusts the height of the outfeed table (must match cutter head height at all times.)
11. Fence - Holds the stock at a specific angle when cutting the second face
12. Fence Lock - Locks the fence at a specific horizontal location
13. Fence Crank - Moves the fence horizontally when unlocked
14. Fence Tilt Lock - Locks the fence at a specific angle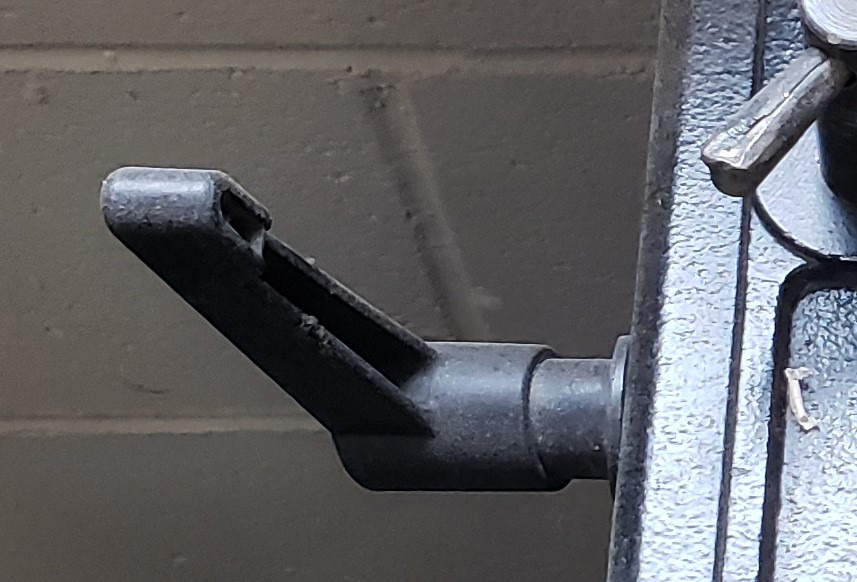
15. Fence Tilt Handle - Assists in moving the fence angle
16. Fence 90 degree stop - Assists in maintaining a repeatable 90 degree angle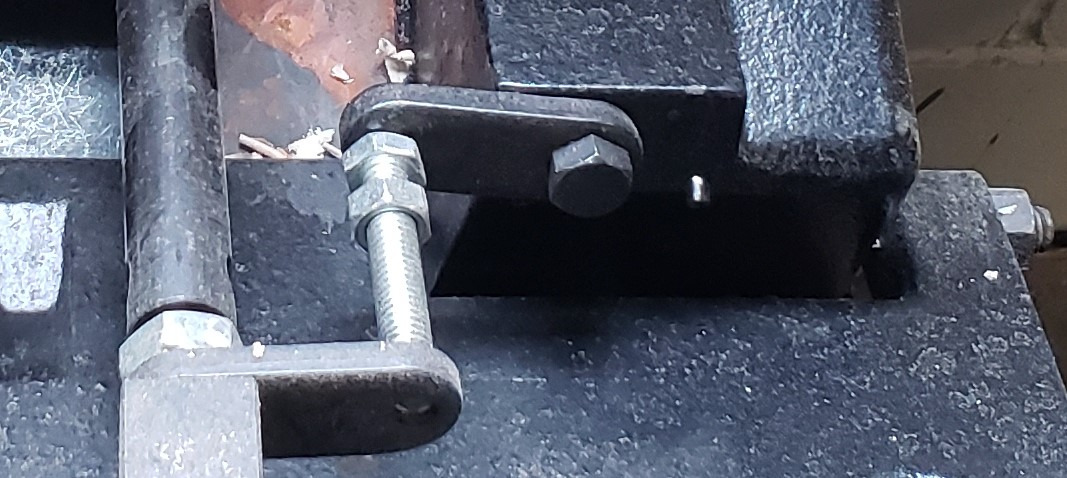
### Jointer-Specific Safety
As of 2026, the jointer is the tool that has received the most injury reports where blood has been drawn. Please pay extra attention to the specific safety instructions below.
- Even though the jointer blade has a guard to cover the
exposed cutting head, care should be taken to keep
hands, hair and clothing away from the cutting head.
Maintain 3” safety margin around the cutting head at
all times
[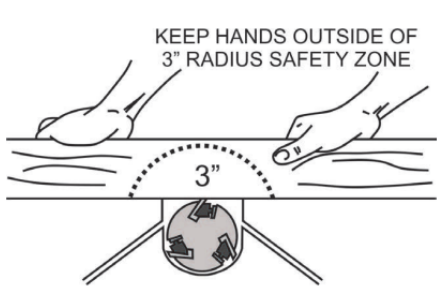](https://wiki.protohaven.org/uploads/images/gallery/2025-01/yt4image.png)
- Never apply downward pressure to the board directly over the cutting head
- Position your hands away from the very end of the board and practice pushing material through in a smooth motion
- Maintain a balanced stance at all times to avoid falling into the machine should the board slip
- Do not overreach or use excessive force to perform any operations
- Use pushing devices, such as push sticks or blocks, to keep hands clear of the cutting head
- Solid wood is the only material allowed on the jointer. Plywood, MDF, plastics and metals are not allowed. Consult a shop tech for advice when jointing exceptionally dense hardwoods
- Use good quality wood on the jointer. Avoid wood with loose knots, splits, nails, screws, paint or other foreign objects in or on it
- Wood should be more than 3” wide, 1/2” thick, and 12” long for use on the jointer
[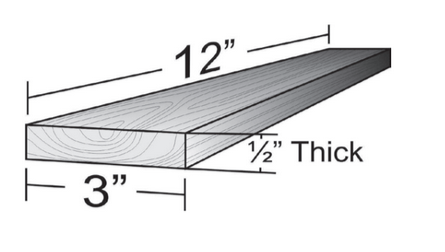](https://wiki.protohaven.org/uploads/images/gallery/2025-01/I69image.png)
- Never back a board out of the jointer. If the board becomes stuck, stop the machine before trying to remove it
- Joint in the same direction that the grain runs along the board to avoid kickbacks and poor surface finish. Consult a shop tech if cutting across the grain is necessary
- It’s easier on both machine and operator to make several small passes instead of one very large pass
- Check the cutting depth before beginning any work and set the cutting depth back to 1/16” when finished
- The cutting head takes a long time to spin down. Do not leave the machine or change any settings until it has come to a complete stop
### Prohibited Materials
Never use composite materials (plywood, chip-board, MDF, etc.). These materials can quickly splinter and throw debris when they come in contact with the cutting head. They will also cause premature wear on the cutters, especially plywood with it’s alternating end-grain.
Reclaimed wood often has embedded nails or screws which can damage the blade, cause the workpiece to kick, and can scratch the table. All reclaimed wood should be checked with the hand-held metal detector before being jointed.
Reclaimed materials may be painted with lead paints. Lead paints are prohibited in the shop as the dust created is toxic.
### Jointer Adjustments
#### Adjusting the Infeed Table Height
The height of the infeed table determines the thickness of the cut and the amount of material removed from your board. Depending on the width, density, and desired finish of your board, you may set the infeed table height higher or lower. A good starting point is 1/16” passes. Consult a shop tech for advice if things aren’t working out as you expect.
1. Turn the lock knob counter clockwise to unlock the height adjustment.
2. Flip the height adjustment handle out and rotate the height adjustment to your desired cut thickness.
3. Flip the height adjustment handle back in and lock the height adjustment by turning the lock knob clockwise until it is snug.
[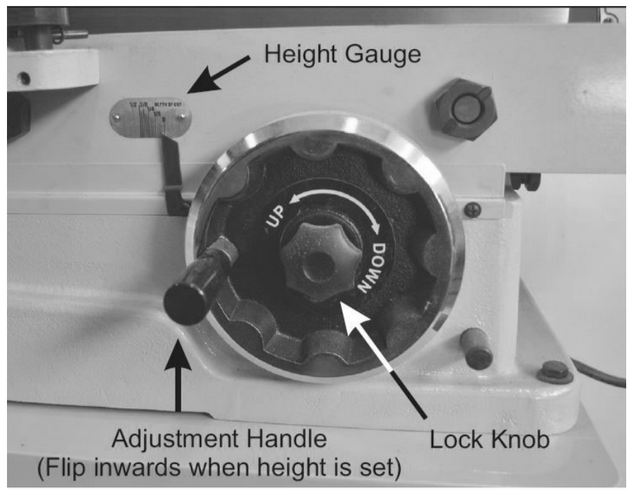](https://wiki.protohaven.org/uploads/images/gallery/2025-01/txYimage.png)
#### Adjusting the Jointer Fence
The jointer fence serves many purposes. Its main purpose is to hold your board perpendicular to the cutting head and tables. The angle can be changed to put a specific angle along the edge of a board and it can be moved across the machine to move the location of your board relative to the cutting head to help even the wear out along the teeth. Users can adjust the fence angle between 45 and 90 degrees. Consult a shop tech adjust the fence to angles less than 45 degrees. It’s good practice to check the fence angle before machining any boards.
##### Adjust the Fence Angle
1. Loosen the angle lock and flip the angle stop out of the way.
2. Use an angle gauge to set the fence to the desired angle.
3. Tighten the angle lock and double check the fence angle with the angle gauge.
##### Adjust the Fence Position
1. Loosen the lateral lock.
2. Turn the lateral crank handle until the fence is at the desired position.
3. Tighten the lateral lock.
[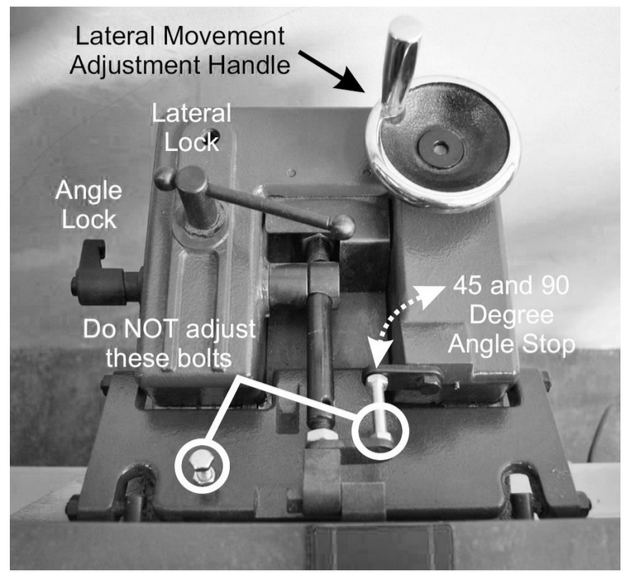](https://wiki.protohaven.org/uploads/images/gallery/2025-01/vJcimage.png)
### Basic Operation
**Check the dust chute first!** The chute that the chips slide down to get to the dust collection port often gets clogged during normal use. Disconnect the dust boot from the right side of the machine and clear any chips that may have accumulated on the ramp. It may be necessary to use a stick to dislodge impacted chips from the top of the ramp.
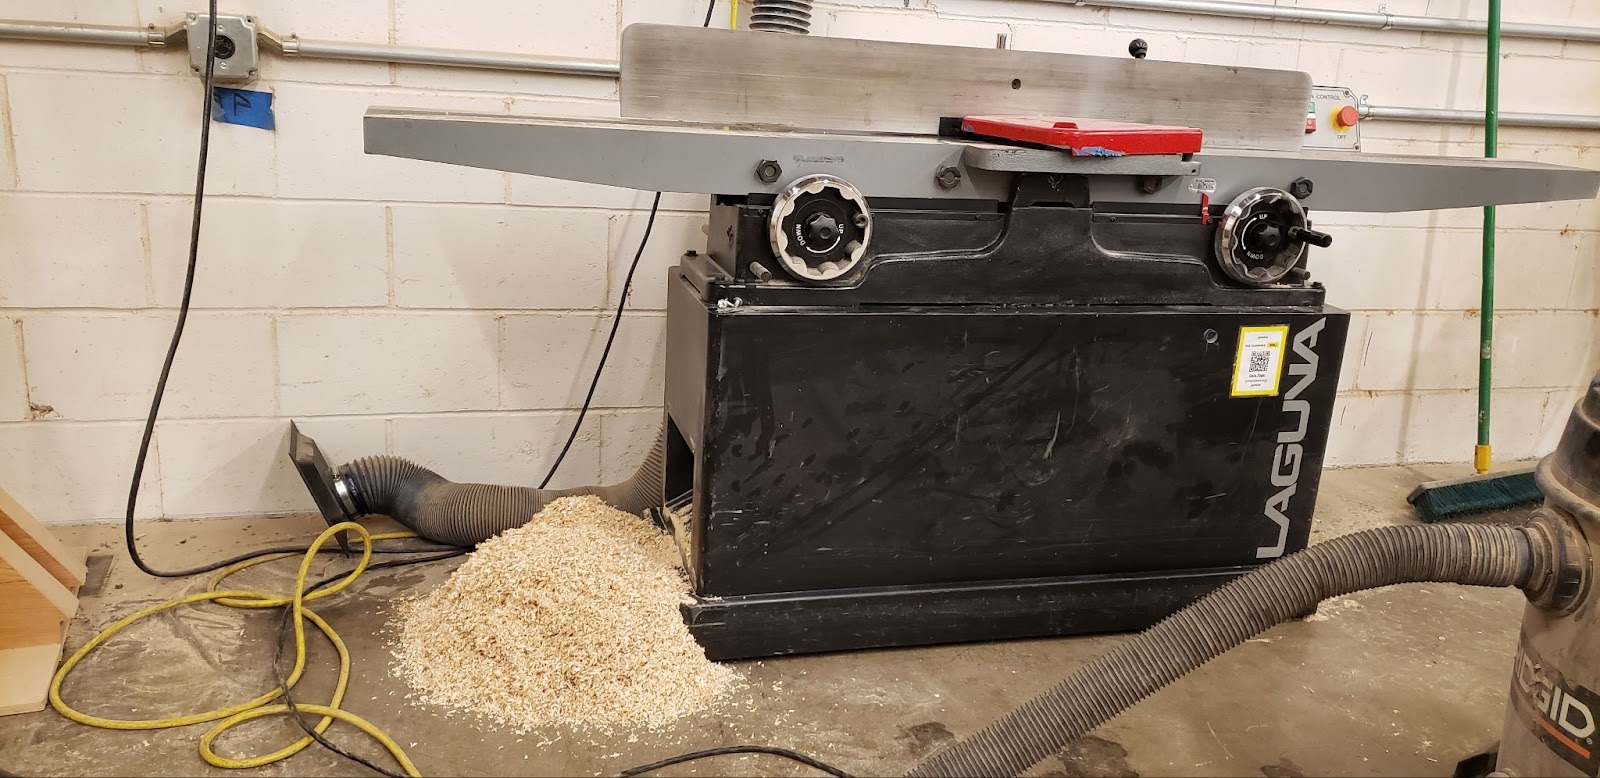
1. Stand along side the machine, opposite the fence. This position allows you to reach both the infeed and outfeed tables and keeps you safe from any kickbacks.[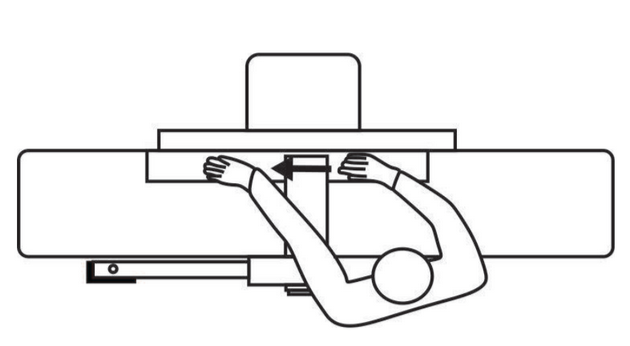](https://wiki.protohaven.org/uploads/images/gallery/2025-01/whBimage.png)
2. Turn the jointer on and let the cutting head get up to full speed.
3. Hold the board firmly against the infeed table and fence, a few inches away from the blade guard.
4. Hold the board to the infeed table with your left hand and feed it slowly and smoothly into the cutting head with your right hand.
[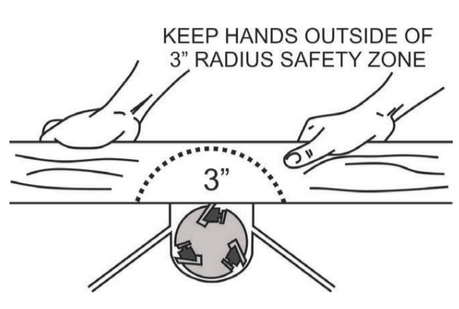](https://wiki.protohaven.org/uploads/images/gallery/2025-01/yHVimage.png)
5. Once there is about 6” of board on the outfeed table, move your left hand to hold the board firmly to the outfeed table and against the fence.
6. Continue feeding the board through the cutting head with your right hand, and keeping pressure on the outfeed side with your left. Try to keep the downward pressure on your board near the cutting head on the outfeed table.
7. When your right hand is near the cutting head, move to the outfeed table and pull the board the rest of the way through the jointer.
8. Continue making passes until the face is flat. Make a light pencil mark across the surface of your board as a visual reference. When the mark disappears fully, you’ll know the face is flat.
### Tips and Tricks
Perform a surfacing operation first, then hold the freshly machined surface to the fence and perform a jointing operation.
[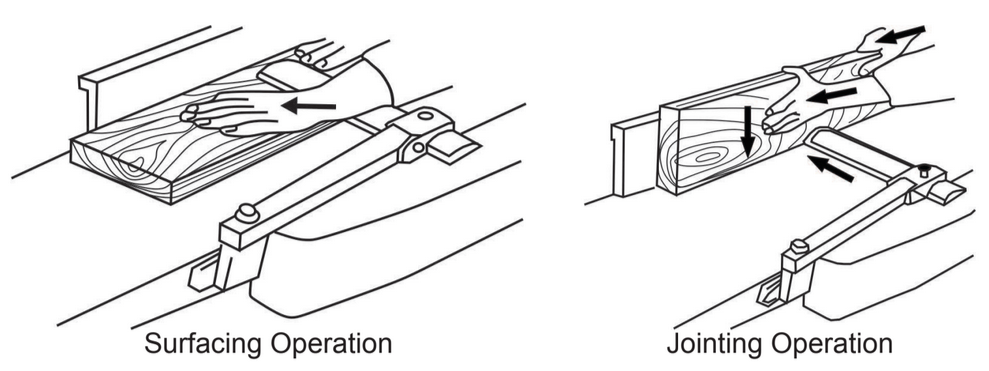](https://wiki.protohaven.org/uploads/images/gallery/2025-01/OF5image.png)
Grain direction may cause issues with feeding the board and surface finish. Machine with the grain of the board for a smooth surface and minimal chance of kickbacks.
[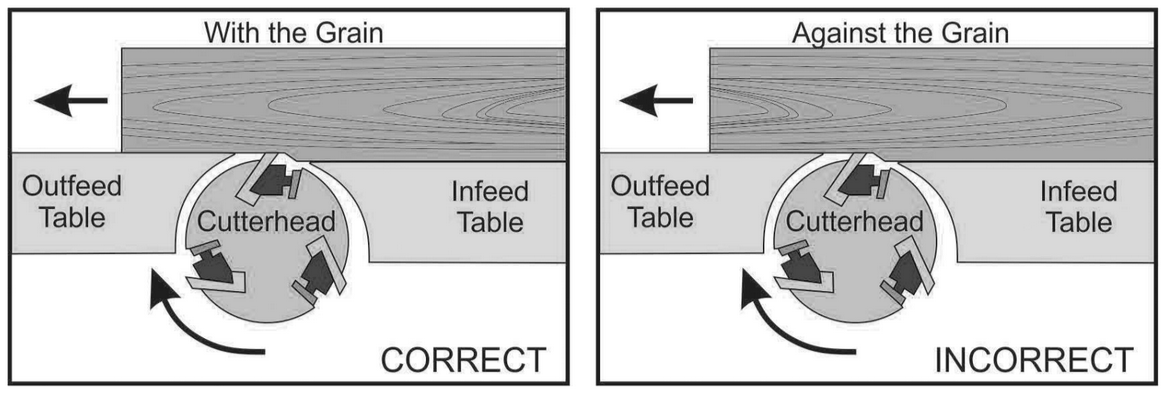](https://wiki.protohaven.org/uploads/images/gallery/2025-01/wjNimage.png)
Place the cupped or crooked side down on the jointer for the easiest side to machine flat.
[](https://wiki.protohaven.org/uploads/images/gallery/2025-01/4fNimage.png)
## Cleanup
### CLEANUP CHECKLIST
1. Brush the sawdust off of the machine surfaces
2. Vacuum dust out of the fence adjustment locking mechanisms.
3. Clear out the dust port.
4. Sweep the floor surrounding the bandsaw.
5. Note any maintenance needs or concerns on the tag and at [protohaven.org/maintenance](http://protohaven.org/maintenance)
6. Recycle waste in the single-stream scrap bins
## Troubleshooting
### Common Issues
### Possible Causes
### Resolutions
The jointed surfaces are not square to each other
The fence is out of alignment
Use a square to true up the fence angle
The workpiece always gets caught on the lip of the outfeed table
The outfeed table may be set higher than the cutter.
Check the height of the outfeed table.
The workpiece is always bowed upward after jointing
The outfeed table may be set slightly too high.
Check the height of the outfeed table.
The workpiece is always bowed downward after jointing
The outfeed table may be set too low.
Check the height of the outfeed table.
The jointer sounds like it is struggling, and the workpiece is hard to feed.
The depth of cut is too deepThe cutting head is dull
Raise the infeed table to lessen the depth of cut.Try moving the fence so you are using a different, possibly sharper, section of the cutting head. Submit a maintenance request to replace the cutter inserts.
# Millwork - Planer
# Manual(s)
*Manuals and other reference materials from the manufacturer or other sources.*
Laguna MPLAN1510-0120 with ShearTec II cutter system
[MPLAN1510-0120\_Platinum Series 16 Planer 16 03 2015.pdf](https://wiki.protohaven.org/attachments/201)
# Member Notes
# Resources
*Where to obtain materials, consumables, and tooling.*
# Tool Tutorial
### Planer Overview
A planer is used after the board has been jointed. By placing the flat surface created by the jointer on the table, the cutting head in the planer creates a parallel flat surface along the top of the board. It is also used to machine the board to the final thickness. The planer
uses a cutting head similar to the jointer. However, unlike the jointer, there are infeed and outfeed rollers to make the process much more automated. The rollers push your board flat against the table so it’s important to use the planer to have a flat side to push against.
[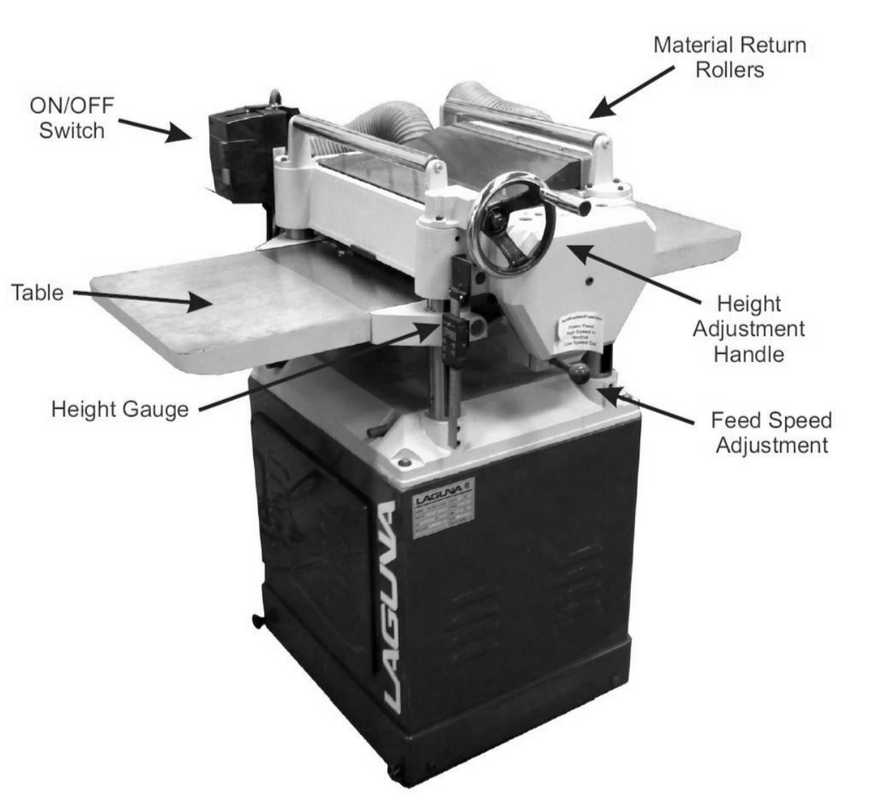](https://wiki.protohaven.org/uploads/images/gallery/2025-01/qnnimage.png)
### Planer-Specific Safety
- Solid wood is the only material allowed in the planer. Plywood, MDF, plastics and metals are not allowed. Consult a shop tech for advice when planing exceptionally dense hardwoods
- Use good quality wood in the planer. Avoid wood with loose knots, splits, nails, screws, paint or other foreign objects in or on it
- Stand to the side of the planer while feeding boards in to reduce chances of an injury from a kickback
### Prohibited Materials
Reclaimed wood often has embedded nails or screws which can damage the blade, cause the workpiece to kick, and can scratch the table. All reclaimed wood should be checked with the hand-held metal detector before being resawn.
Reclaimed materials may be painted with lead paints. Lead paints are prohibited in the shop as the dust created is toxic.
Do not use wood with uncured glue or resin as this will ruin the table and cutters.
Do not use engineered materials like plywood or MDF, as they lack the structural integrity to pass through the planer without disintegrating and becoming entangled with the cutter head or ejecting pieces.
Do not use wood that is badly checking or splintering, as the high forces the planer puts on the wood may break it apart, causing violent ejection of debris.
### Planer Adjustments
#### Table Height
Changing the table height changes the thickness that your boards will be machined to by changing the distance between the cutting head and table. After each pass, raise the table to cut more material. The machine is equipped with a digital height gauge that provides an accurate reading of the distance of the table surface from the blades.
The digital height gauge on the planer can be set to absolute or incremental mode. When the gauge is set to absolute, the display shows the distance between the cutting head and table. In incremental mode, the gauge can be zeroed at any location, which means it will show the distance to where you set the zero. Do not push the TOL or SET buttons or turn the device off, since the height gauge
will need to be recalibrated afterward.
It’s a good idea to make sure the digital height gauge is reading accurately once both sides of your board are flat and parallel. Machine a light pass on your board and check the board with a set of calipers.
Use heavy cuts of 1/16” (.062”) to get your board close to the final dimension and then light cuts of 1/32” (.013”) or less to get a good finish. Use calipers on several points of your board to find the thickest point and use that as a starting thickness for your first pass.
[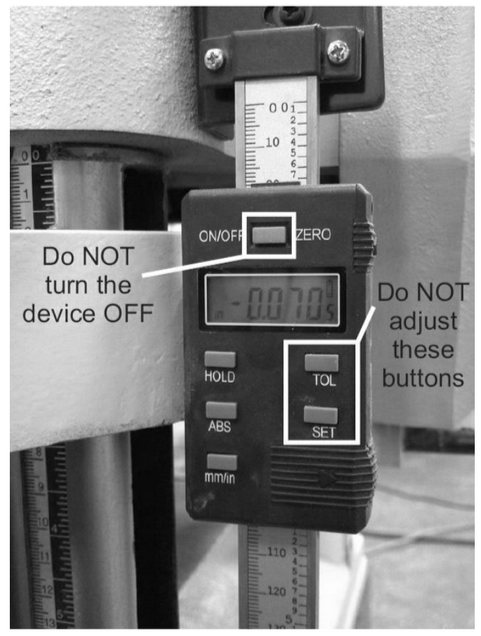](https://wiki.protohaven.org/uploads/images/gallery/2025-01/omximage.png)
#### Feed Speed
The planer has two feed speeds for cutting different types of wood. Hard woods should be cut at the low feed speed and soft woods can be cut at the high feed speed. For the best finish, use the slow feed speed on any type of wood. Adjust the feed speed only when the machine is running. Push the knob all the way in for high feed speed and pull the knob all the way out for low feed speed. If your board does not automatically feed into the machine, it’s possible the feed speed is set to neutral between the high and low positions.
[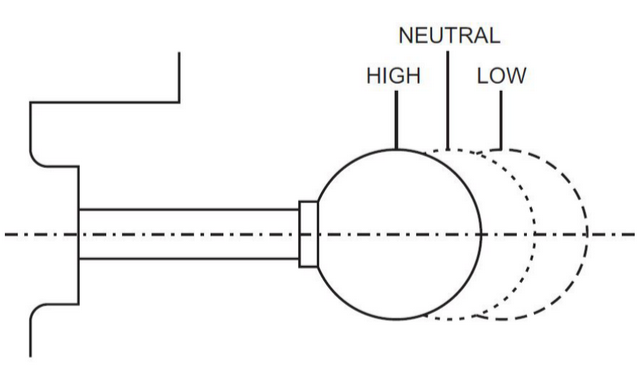](https://wiki.protohaven.org/uploads/images/gallery/2025-01/2CIimage.png)
### Basic Operation
1. Loosen the table lock knobs on the left side of the machine.
2. Turn the Table Height crank handle to set the table height to the same thickness as the thickest part of your board for the first pass and tighten the table lock knobs.
3. Turn on the dust collector and ensure the gates are open between the planer and collector. Close gates to any unused machine to increase the suction at the planer. Planers remove a massive amount of material with each pass that can quickly clog the dust collector tube and cause issues.
4. Turn the planer on and feed your board through. On the first pass, the rollers may not grab the board well so you may have to help feed the board in and pull it out.
**WARNING:** Do not put your fingers into the planer.
5. Loosen the table lock knobs and adjust the height up, 1/16” for a heavy cut, 1/32” for a light cut.
6. Tighten the lock knobs and feed your board through. Continue the process until your board is the desired thickness.
7. If you’re machining multiple boards to the same thickness, pass each one through before adjusting the table height.
### Tips and Tricks
- The rollers of the planer push the board flat against the table so it will not make a flat surface. If your board is warped, twisted or cupped, it will be pushed flat between the rollers in the planer and then spring back to its original shape after it is through the
machine
- Once both sides are your board are flat and parallel, flip the board every pass or two to remove equal amounts of material from each side. This helps ensure the board will not warp in a new direction after machining is complete
- As with the jointer, cut with the grain (rather than against it) in order to have a smoother finish with fewer tearouts
## Troubleshooting
### Common Issues
### Possible Causes
### Resolutions
The planer hums, but does not start
The start capacitor has been damaged.
Leave the machine off. Submit a maintenance request for a replacement start capacitor.
The motor bogs down when cutting
You are trying to make too deep a cut.The cutters may be dull.
Set the planer to cut a shallower cut, especially in hard woods.Set the initial height based on the thickest part of the stockSubmit a maintenance request to check the sharpness of the cutting inserts.
The first and last few inches of the cut are deeper than the rest.
This is called ‘snipe’, and occurs when the feed rollers engage and disengage from flexible stock.
Feeding boards through the planer next to each other in a staggered pattern so that at least one board is always under the cutter head can help reduce snipe.
The planer is leaving raised lines or streaks on the milled surface
There is a chip in a cutter insert, probably from hitting a nail.
Submit a maintenance request to replace a cutting insert. Indicate where along the width of the cutter head you are seeing the line.
The planer is leaving a rough surface
Milling against the grainCutters may be dull.
Cutting against the grain will cause the cutters to dig into the wood and pull the fibers out instead of cutting them off. Feed so the cutters slice the grain. Soft woods are particularly prone to tearout.Submit a maintenance request to check the status of the cutting inserts.
# Millwork - Resaw Bandsaw
JET 18" Woodworking Bandsaw JWBS-18QT-3
# Resources
Default blade: [137"L x 0.75"W x 0.035"T 2/3TPI blade by Timber Wolf](https://www.amazon.com/dp/B0D88MRSPK?ref=fed_asin_title) (1" also works)
# Throat Plate File
This file should be printed with PETG or other more durable plastic, with 100% infill
It also fits the regular bandsaw.
[JetPlate.step](https://wiki.protohaven.org/attachments/270)
# Resaw Bandsaw Tool Tutorial
The [Setup](https://docs.google.com/document/d/1qy9uY2W_LG45UihBzZ4Wwn_-z3zfOluqWMjK6UTNzjA/edit#heading=h.ex7lrkf7dm2k), [Operation](https://docs.google.com/document/d/1qy9uY2W_LG45UihBzZ4Wwn_-z3zfOluqWMjK6UTNzjA/edit#heading=h.w363ck6j8o52), and [Cleanup](https://docs.google.com/document/d/1qy9uY2W_LG45UihBzZ4Wwn_-z3zfOluqWMjK6UTNzjA/edit#heading=h.4s5ijlcmnku) Checklists of this guide are what instructors use to ensure that you can use the equipment according to community expectations.The resaw bandsaw is used to quickly and roughly resize lumber. It’s large tooth size and large opening between the drive wheels lets it cut through much thicker wood than would be possible on the table saw. Unlike the smaller bandsaw in the general woodworking area, the resaw bandsaw’s thicker blade is limited to straight cuts.
## Usage HighlightsMillwork and Joinery[ Clearance](https://www.protohaven.org/equipment/) or [Class Equivalent](https://www.protohaven.org/product-category/classes-events/) Required Before Use
### SAFETY
### CARE
### CLEANUP
1. Position hands so they will not contact the blade, even if they slip, or the workpiece feeds faster than expected.
1. Ensure the guide rollers are adjusted properly and locked in place.
1. Dust off all surfaces.
2. Ensure the workpiece has one flat surface to place against the table.
2. Only cut wood.
2. Clean out dust and debris from the bottom guides.
3. Position the blade guide at an appropriate height to support and guide the blade during the cut.
3. Feed slowly enough to let the blade do the work. Do not force the material through the saw.
3. Clean the dust from the bottom housing.
4. Have a push block at hand before beginning a cut, and use when appropriate.
4. Submit a [maintenance request](http://protohaven.org/maintenance) when needed.
4. Sweep the dust from the floor surrounding the saw.
5. Do not walk away from the machine until the blade has come to a complete stop.
## Personal Protective EquipmentSafety glasses must always be worn. Hearing protection is highly recommended in the workshop, especially when the dust collection fan is active.
## Tool Anatomy
### MACHINE ANATOMY
1. Power Switch - on/off switch. Push the illuminated green button to start the machine, and push the large red ring to stop the motor.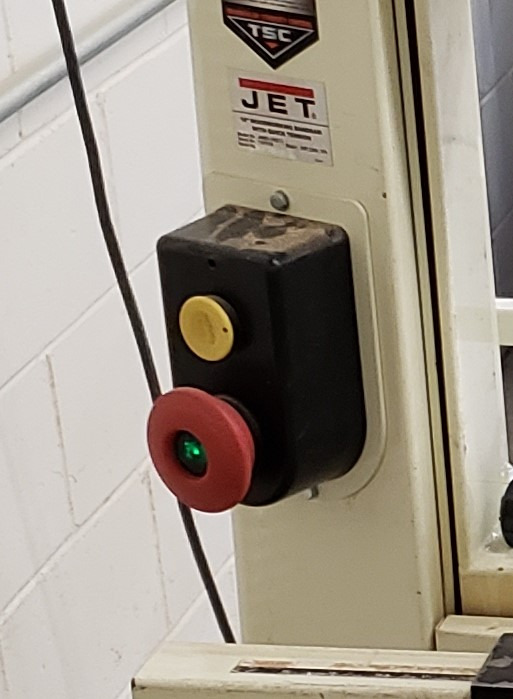
2. Maintenance Tag - Manually tracks the usability status with Green/Yellow/Red cards
3. Guard Doors - The upper and lower doors must be closed when operating the machine. They prevent accidental contact with the blade as well as contain the majority of the blade when the blade brakes or comes off the drive wheels.
4. Table - Precision ground to be flat, your workpiece should always have one flat surface against the table at all times.
5. Throat Plate - Provides a means for replaceable, small-clearance inserts to support the material near the blade.
6. Fence - Provides a means of guiding materials straight past the blade.
7. Resaw Bar - To help combat blade drift, this can be attached to the fence to allow the workpiece to pivot instead of being rigidly aligned to the fence.
8. Blade Guard - The blade guard should cover the portion of the blade between the upper drive wheel and the workpiece. This prevents accidental contact with the blade and also provides an adjustable mounting point for the upper blade guides. The Blade Guard should be adjusted so it sits approximately ⅛” above the top of the workpiece.
9. Blade Guard Lock Knob - Before moving the blade guard using the Blade Guard Adjustment Crank, this lock knob must be loosened to allow the Blade Guard to move vertically. Loosen it significantly to allow free movement of the Blade Guard along it’s entire travel. The knob must be locked back in place before cutting or the saw’s vibrations will cause the Blade Guard to work it’s way downward over time, and may pinch against the workpiece in the middle of a cut.
10. Blade Guard Height Crank - This raises and lowers the blade guard and guide block assembly. The lock knob MUST be loosened before using or the gears will be damaged. When raising the guard a significant distance, the crank may start to become hard to turn. Loosen the lock knob further to allow the mechanism to move smoothly.
11. Guide Bearings - The rollers to each side of the blade are designed to help prevent the blade from wandering over the length of a cut. They should be positioned as close to the blade as possible without touching the blade when the saw is idling. The front edge of the guide rollers should overlap as much of the blade as possible without contacting any part of the tooth profile. Be sure the teeth do not touch the guide bearings even when the blade is pushed backwards against the thrust bearing.
12. Thrust Bearing - The roller behind the blade helps the blade not get pushed off the back of the wheels during a cut. It is not designed to provide a lot of resistance, and care should be taken not to excessively push the blade against the bearing. It should sit approximately 1/32” behind the blade when the saw is idling.
13. Lower Guide Block - Just below the throat plate sit the lower blade guides, consisting of two Guide Bearings and one Thrust Bearing.
14. Tension Lever - The red handled-lever on the back of the saw is a quick-release tension lever used when changing the blade. This should generally be left in the 11 o’clock position. If the lever is pushed clockwise or counter-clockwise from 11, the tension on the blade will be released, and the blade may come off the wheels or break during a cut.
15. Tension Knob - Found under the top housing, this knob adds or removes tension from the blade. This should not be adjusted unless advanced training has been acquired.
16. Blade Tracking Knob - Found on the back of the saw, this knob tilts the top wheel forward and backward in order to adjust where on the wheel the blade rides. The blade should ride in the middle of the wheel. Only small adjustments should be made to the tracking, and should be made only when spinning the top wheel by hand, not powered by the motor. The guide bearings and thrust bearing will need to be readjusted after changing the tracking.
## Tool Safety
### COMMON HAZARDSThe most immediate hazard of the bandsaw is contact with the blade. Care should be taken to keep your hands out of the path of the blade. Plan for the end of the cut and how you will maneuver the trailing end of the workpiece past the blade as you finish the cut. Use a push stick when your fingers would have to get within 6” of the blade. Often lumber can be pulled from the rear of the saw to finish a cut.Another hazard is having lumber twist, tip, or shift in some other way, and bind on the blade. This can cause blade breakage, or forceful ejection of the workpiece which can strike the user or pull the user into the blade. Always keep a flat surface of the workpiece against the table. For round stock (imagine ripping a log down the middle) a special jig is required to prevent the stock from rolling. Having infeed and outfeed rollers is often needed to support the weight of the stock as it moves onto and off of the table surface.Reclaimed wood often has embedded nails or screws which can damage the blade, cause the workpiece to kick, and can scratch the table. All reclaimed wood should be checked with the hand-held metal detector before resawing.Every blade has the potential to fail catastrophically. If the blade does break during operation, you will hear a loud POP. The blade may stop moving but remain embedded in the workpiece, or the blade may be pulled into the housing. In the worst scenario the broken blade will get caught on the lower drive wheel and start thrashing around inside the lower housing. In any of these scenarios, immediately hit the off button and step away from the machine until everything has stopped. If it is unsafe to access the stop button, just step away from the machine. Unplug it if you can access the plug, or find the appropriate breaker to disconnect power to the machine. Alert a staff member and report a maintenance report.Sometimes prior to a blade failing, a crack will develop between two teeth and start propagating across the blade towards it’s spine. As the crack lengthens it will also start to open, which will push that part of the blade slightly forward from the rest of the blade. This will cause a rhythmic “shick shick shick” sound and the cutting action will feel choppy and uneven. If you experience this, stop the machine and inspect the entire length of the saw looking for a crack. Some blades are simply welded a little crooked and will have this symptom even when it is not cracked.
### PROHIBITED MATERIALSReclaimed wood often has embedded nails or screws which can damage the blade, cause the workpiece to kick, and can scratch the table. All reclaimed wood should be checked with the hand-held metal detector before being resawn.Reclaimed materials may be painted with lead paints. Lead paints are prohibited in the shop as the dust created is toxic.No metals shall be cut on the resaw bandsaw.Material that is not thick enough to engage with two full blade teeth should not be used. Thin wood can slip deeply into the gullet of a tooth, creating a rigid floor that the next tooth will slam down onto, causing tooth breakage. Once one tooth of the saw is broken, it creates a larger gap that wood can slip into, and the rest of the teeth will break off in short order.
## Initial Setup
### SETUP CHECKLIST
1. Make sure the blade tension is properly set, and the tension handle is locked into the 11 o’clock position.
2. Spin the top wheel by hand and check that the blade is tracking in the middle of the wheel.
3. Adjust the height of the blade guard. Be sure to unlock and relock it.
4. Adjust the guide bearings and thrust bearings.
5. Make sure you have appropriate roller stands set up if needed.
6. Make sure you have a push stick if needed.
### SETUP BREAKDOWN
1. Open the top blade guard door. Spin the top wheel by hand, being careful not to touch the blade or get your fingers caught between the blade and the wheel. Watch where the blade rides on the wheel. If it does not ride in the middle of the wheel, the blade tracking knob will need to be used to realign the tracking of the blade. To do so, loosen the lock nut on the knob and SLOWLY turn the knob while continuing to spin the top drive wheel. After making a small adjustment, continue to spin the wheel until the blade settles into it’s new position. Repeat this process until the blade is tracking properly. It may be necessary to move the thrust bearings backwards if they are preventing the blade from moving backwards while adjusting the tracking. Lock the tracking knob’s nut back in place and close the top guard door.
2. Loosen the blade guard knob to allow the blade guard to move freely. Use the blade guard crank to raise or lower the blade guard. It should be positioned so that it sits approximately ¼” above the highest part of the workpiece as it passes below the guide. The goal is to prevent your fingers from getting between the blade guard and the top of the workpiece while still allowing the workpiece to pass freely below the blade guard. Once the blade guard is positioned correctly, lock it back in place.
3. Adjust the guide bearings so that there is only a paper’s thickness of space between the blade and the bearings when the blade is idling. The bearings should not spin when not making a cut, but should be positioned closely so that when sideways pressure is put on the blade the guides will be there to prevent bowing of the blade. Similarly the thrust bearing should be a small distance away from the back of the blade, allowing the natural tension between the wheels to provide most of the forward cutting pressure. The thrust bearing should be close enough to prevent the blade from being pushed backwards on the drive wheels, but ideally should not be forcing the blade through the cut.
4. If making a long cut (one where more than half the workpiece will hang off the back of the table when finishing the cut), an outfeed roller stand should be positioned to help support the weight of the workpiece as it exits the saw. Positioning the roller stand at exactly the same height as the table is ideal, but slightly lower is better than slightly higher, allowing for a smooth exit without any hang-ups.
5. Have a push-stick at hand so that as you approach the end of the cut you can quickly pick it up and push the workpiece past the blade without stopping the operation or fumbling around at a critical moment.
### CONSUMABLESThe blade is the shop’s responsibility, but should be inspected each time you use the machine. Check to make sure there is not excessive pitch build-up, broken teeth, or cracks in the blade. Report any problems via a maintenance request.Users may wish to bring in their own saw blades, but should receive additional training in how to safely remove and install saw blades.
## Basic Operation
### OPERATION CHECKLIST
1. Open dust gate
2. Power on Dust Collection
3. Adjust the fence to the appropriate cut thickness if needed.
4. Position the workpiece on the table.
5. Turn on the machine.
6. Begin the cut.
7. Feed the workpiece through the cut.
8. Finish the cut.
9. Turn off the machine.
### OPERATION BREAKDOWN
### Open dust gate
### Power on Dust Collection
### Adjust the fence If using a fence to help create a uniform cut thickness, set it’s position now.
### Position the workpiecePlace the workpiece flat against the table a few inches in front of the blade, and firmly against the fence if needed.
### Turn on the machine.
### Start the cut.Gently bring the workpiece into contact with the blade.
### Feed through the cutWith firm, constant pressure, feed the workpiece past the blade, allowing the blade to cut away the material without excessive forward pressure. Let the machine do the work.
### Finish the cutAs you approach the end of the cut, use a push-stick to feed the workpiece completely past the blade without endangering your fingers. Maintain sideways pressure against the fence for as long as possible, but do not pinch the blade between the two sides of the cut. Push the pieces completely past the blade, making sure not to leave any part of the workpiece trapped between the blade and the fence if using.
### Turn off the machinePush the off button and allow the blade to come to a complete stop. The workpiece may be removed from the table with care while the blade is coming to a stop, but care should be taken to avoid contact with the blade. Small pieces should not be fished out with your hand from near the blade.If the blade needs to be stopped quickly, a sacrificial piece of wood can be fed into the blade in order to provide stopping friction by cutting.
## Cleanup
### CLEANUP CHECKLIST
1. Brush the sawdust off of the machine surfaces
2. Vacuum dust out of the fence guide rail, bottom guide structure, and bottom housing.
3. Sweep the floor surrounding the bandsaw.
4. Check the dust collection drum and recruit help in emptying it in the dumpster if it has reached the seam in the middle. Make sure to retain the rubber gasket.
5. Note any maintenance needs or concerns on the tag and at [protohaven.org/maintenance](http://protohaven.org/maintenance)
6. Dispose of small cutoffs in the trash, and place any large, project-usable scrap in the scrap bin.
### SCRAP BREAKDOWNThere is a large black scrap bin at the back of the shop. Maintaining this is a shared, communal responsibility.When you notice the scrap bins are full, sort through the items and clean out the least usable items. We generate more scrap than we use, so please throw away anything that is questionable, or requires processing (removal of nails, disassembly, etc).
## Troubleshooting
### Common Issues
### Possible Causes
### Resolutions
Blade pulls to one side or the other during a cut
Blade tracking is bad.Fence is not aligned to the bladeBlade is dull
Adjusting the blade tracking forward or backward on the wheel can slightly change the tilt of the blade with relation to the table.The fence may have been knocked out of true with the table. Using an appropriate allen wrench the fence can be adjusted a few degrees to the left and right to help correct for blade drift.Bolting a resaw bar to the fence allows the user to feed at virtually any angle.A blade that pulls badly to one side or the other may need to be replaced.
The saw ‘chirps’ when running.
A guide or thrust bearing that is worn out will make rattling and chirping sounds
This is mostly benign, but is an indication that the bearings should be replaced. Check the maintenance logs to see if the noise has been reported yet.
There is a grinding sound when the blade is moving
The blade is scraping against part of the saw housing.The top wheel is scraping against part of the saw housing.
Check the blade tracking to see if it has crept backwards past the back edge of the wheel.Check the top and bottom edges of the wheel to see if it is scraping against the housing.
The saw blade vibrates back and forth when idling
Insufficient blade tension
Adding some blade tension can reduce blade flutter. Be cautious and do not adjust blade tension without proper training.
## Special SetupsIt will be necessary to use a sled or v-block of some sort in order to safely feed round stock lengthwise through the bandsaw.
## Additional ResourcesWood Magazine - How to resaw lumber (resaw technique) [https://www.youtube.com/watch?v=hgTpsGDRRRo](https://www.youtube.com/watch?v=hgTpsGDRRRo)
Band Saw Clinic with Alex Snodgrass - (blade setup) [https://www.youtube.com/watch?v=wGbZqWac0jU](https://www.youtube.com/watch?v=wGbZqWac0jU)
AmericanWoodworker - The Flutter Test (blade tensioning) [https://www.youtube.com/watch?v=z8zZuDosSy0](https://www.youtube.com/watch?v=z8zZuDosSy0)
Matt Estlea’s Guide to Setting up a bandsaw (comprehensive setup) [https://www.youtube.com/watch?v=ugc85kJmos8](https://www.youtube.com/watch?v=ugc85kJmos8)
# Woodshop - CNC Router
Pro CNC 5’x10' with NEMA 34 Stepper Motors using GMT Air Cooled CNC Spindle 2.2kW 220/380V 24000 RPM (3HP)
Clearance: Required
# Manual(s)
*Manuals and other reference materials from the manufacturer or other sources.*
-
Model: [Pro CNC 5’x10' with NEMA 34 Stepper Motors](https://www.avidcnc.com/pro60120-5-x-10-cnc-router-kit-p-374.html "https://www.avidcnc.com/pro60120-5-x-10-cnc-router-kit-p-374.html").
-
Control Module: [NEMA 34 Plug and Play CNC Controller Rev 17.1](https://www.avidcnc.com/support/instructions/electronics/pnp/manual/17.4/systemOverview/ "https://www.avidcnc.com/support/instructions/electronics/pnp/manual/17.4/systemOverview/")
# Member Notes
**Vectric VCarve Pro Makerspace edition**
VCarve Makerspace Edition is a special version of VCarve that enables members of a makerspace to use VCarve Pro on their home computers to create projects to use with the Protohaven Avid CNC Router. Members can download the trial version of VCarve Pro and connect it to the Protohaven Makerspace connected Vectric account, allowing unlimited use of the trial version. Projects created on the Makerspace Edition can only be used in the Makerspace that they are connected to, but there are no other limits in terms of features or number of uses of the software. Follow the steps below:
- You must create a [Vectric account](https://login.vectric.com/signup). This is required to connect to Protohaven's Vectric Makerspace account.
- Please use the same email address for your Vectric account that you use for your Protohaven membership.
- Connect your Vectric account to the Protohaven Makerspace following these steps
- Go to this link [Makerspace Invitation](https://portal.vectric.com/organization/shared-invite/drirKlTg8Z0pkgQASuv0 "Protohaven Vectric Makerspace")
- Put in your email address for your Vectric account
- Open your email and look for an email from vectric.com with the subject "Vectric Makerspace Invitation".
- Open the email and click on the link in the message.
- Create an account with Vectric (or log into your existing one if you already have signed up).
- When you get to the page with a section titled "Pending Organization Invitation", click "Accept".
- Download and install the VCarve software from the link provided on the next page.
- Important Notes about running VCarve on your personal computer
- VCarve is only available for Windows, but it will run on Parallels desktop on a Mac.
- You must sign into the software or the files that you save will not be able to be used with the Protohaven VCarve Makerspace edition
- Exporting of vectors is not allowed in the trial version of the software
- You cannot save toolpaths on the trial version. You can create toolpaths, and save the file as a VCarve \*.crv file onto a flash drive and bring this to Protohaven. Once you open VCarve on the Protohaven CNC computer, and open your file you will then be able to save your toolpaths to Gcode for import into Mach3.
- Signing into VCarve on the CNC Computer at Protohaven.
- When you open VCarve it will ask if you are a "registered member" Meaning you have created a Vectric account and registered that account with the Protohaven Makerspace. Or an "unregistered member" Meaning you do not have an account. Unregistered members will be prompted to register on the spot.
- When you highlight "registered member" and click Next, there will be a dialogue that asks for your email associated with your Vectric account. Type your email, and click "Send One Time Code"
- Check your email for the one time code, and put it into the dialogue. Vectric will authenticate your account.
- A dialogue will confirm your name and the Makerspace Machine you are using.
- VCarve will open and you will be able to use your files designed on a trial version.
# Resources
*Where to obtain materials, consumables, and tooling*
End Mills
# Tool Tutorial
### CNC Wood Router (Avid Pro 60x120)
The Avid CNC router is used to run cutting and milling operations on various materials such as wood, plastic, and aluminum. The most common use is to use it to engrave and cut shapes out of plywood or hardwood. But the machine's capabilities go way beyond that, read on more lists of materials that can be cut on the tool, as well as some other uses discussed under special setups.
The Avid line of CNC routers is made by CNC Router Parts who does business as [Avid CNC](https://www.avidcnc.com/ "https://www.avidcnc.com/").
### Quick Facts
- Spindle Speed Range: 6000-24000 RPM
- 🚫 Don't exceed 85% of max speed: 20400 RPM
-
Max Cutting Speed: 500 IPM (Inches Per Minute)
-
Members need to supply their own cutting tools for the CNC Router
-
Composite nails are for sale at the front desk.
### Safety
-
⚠️ Operators must supervise the Avid CNC Router whenever it is in use.
-
⚠️ Operators must inspect and vacuum and clean the router table after each use.
-
🚫 Do not let the Router operate unsupervised.
-
🚫 Never put your hand near moving machinery, make sure to allow the machine to stop fully before entering the machines work area.
-
⚠️ Keep the spindle speed at or below 20400 RPM to prevent premature wear and tear.
#### Personal Protective Equipment
-
Hearing Protection and Eye Protection are required.
-
Closed toe shoes are required in the shop area.
-
Use Dust Collection and turn on the overhead air filter if needed.
#### Common Hazards
**Crush Risk** - The machine is quite powerful. If you get in its way it could crush a hand or other body part that is caught between it and where it wants to go. Keep yourself out of the operating area of the machine when it’s operating.
**Cut Risk** - Getting your body in the way of the cutting tool will have bad results. Follow the guidance above and stay out of the operating area of the machine.
**Flying Debris** - It’s possible for a tool to break and scatter shards, or for debris to be ejected from the cut. Wear eye protection when in vicinity of the machine as it’s operating.
**Loud Noise** - Some router jobs may take hours. The shop is a loud space and the router and its dust collector makes it even louder, save your hearing by wearing hearing protection.
**Incorrect Feeds and Speeds** - If you’re (spindle) speeds and motion feed(rates) aren’t appropriate for the material that you’re cutting it may break the cutting tool. Cause excessive heat build up that could lead to fire or premature wear on the spindle and cutting tool. Finding the right settings for your work is important, more on that below.
#### Prohibited Materials
The following materials are prohibited due to various reasons: can’t be adequately cut on this machine, may require liquid cooling to mitigate heat build up, may create problematic dust and chips, aren’t suitable for cutting on this machine.
-
🚫Fiberglass
-
🚫 Carbon Fiber
-
🚫 Steel, stainless or otherwise
-
🚫 Iron
-
🚫 Magnesium
-
🚫 Titanium
-
🚫 Lead
-
🚫 Aluminum or Brass of unknown alloy
-
🚫 Hard stone and precious gems
-
🚫 Glass
-
🚫 Silver chloride or other powdery materials
-
🚫 Chocolate, cheese, or other food products
#### Approved Materials
These materials are generally considered to be ok for use on the machine.
-
✅ Plywood
-
✅MDF/ LDF
-
✅Hardwoods / Most Softwoods
-
✅ Linoleum
-
✅ ABS
-
✅ Acrylic
-
✅ Polycarbonate
-
✅ Hard plastics (e.g., Delrin and HDPE)
-
✅ Machining wax
-
✅ Polystyrene Foam Insulation
-
✅ Brass (C360 alloy / free-machining)
-
✅ Aluminum (6061 alloy)
- ✅ Aluminum Composite Material (ACM)
If you're going to try to use metals please have a conversation about it on Discord first.
If you want to have materials evaluated for use that are currently unlisted ask in the [\#cnc channel on Discord](https://discordapp.com/channels/791673872529358869/1011721317524983818 "https://discordapp.com/channels/791673872529358869/1011721317524983818").
### Tool Anatomy
[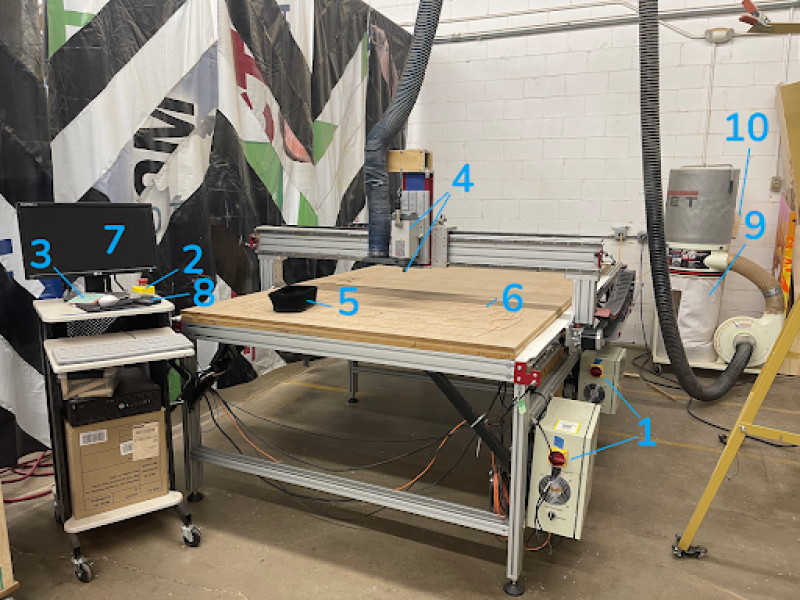](https://protohaven.org/wiki/_detail/tools/cnc_router_avid1.png?id=tools%3Acnc_router%3Astart "tools:cnc_router_avid1.png")
**1. Power Switches** - There are two power switches, the front one is for the motor electronics, the back one is for the spindle electronics. Both need to be turned on for use and off when cleaning up.
**2. Emergency Stop (E-Stop)** - Any time you start a job have this button at the ready in case the machine doesn’t do what you want. Use it when there is imminent risk of damage to the machine or the workpiece. Twist clockwise until it pops up to reset.
**3. Maintenance Tag** - Manually tracks the usability status with Green/Yellow/Red cards.
**4. Spindle / Collet** - The spindle drives the cutting tool. The collet is where cutting tools are installed.
**5. Dust Boot** - Magnetically attaches to the bottom of the spindle to help with dust collection, It should be used for jobs that run for more than a few minutes.
**6. Wasteboard** - The worksurface of the router where you fixture your workpiece and it is ok for your cutting tool to minimally cut into when doing through cuts. (When we say minimally we mean shoot for 1/16th of an inch or less.)
**7. Control Computer** - Runs Mach3 to send the cnc commands to the router. Also has vCarve Pro to set up toolpaths.
**8. Pendant** - Used for fine adjustment of the X Y Z axis of the router often when positioning the cutter to a job's desired zero/home position.
**9. Dust Collector** - The CNC Router has its own dust collection that must be turned on when using the Dust Boot.
**10. Air Hose** - Not visible in the picture but there is a hose hook on the wall behind the dust collector, use this hose with the composite nailer when fixturing your workpieces.
[](https://protohaven.org/wiki/_detail/tools/cnc_router_avid2.png?id=tools%3Acnc_router%3Astart "tools:cnc_router_avid2.png")
**11. CNC Router Tool Tray** - Box that holds the various items below, it is kept behind the sign-in desk on the wall.
**12. Composite Nailer** - The Green nailer is designed to use only the plastic composite brads, We use these so that if they are hit by your cutting tool won’t damage the tool. It is also kept behind the sign-in desk on the wall.
**13. Composite Brads** - These are consumables and can be purchased from a Shop Tech for $1 a stick. If there are brads in the nailer feel free to use them. If there are not, buy a stick. A link to buy your own box is listed below.
**14. Nailer Oil** - Like every pneumatic nailer, one drop of oil goes in the air inlet daily.
**15. Collets** - We have 4 sizes of Collets to hold cutting tools of ⅛, ¼, ⅜ , ½ in diameter.
**16. Collet Wrenches** - Two wrenches are meant to be specifically used for changing cutting tools and stay in the CNC Box
**17. Digital Calipers** - When you grab the CNC Router Tool Tray also grab a Digital Calipers from the shelf you’ll need this to measure the actual thickness of your material.
**18. Touch Plate** - You can use this touch plate with some macros in Mach 3 to zero the router to your workpiece. This is not currently deployed but we’re looking to add it.
#### Control Panel
The Controls for the CNC router are run through the Computer and the Mach 3 Software. Once in Mach 3 and connected you can control machine motion via the keyboard and the Pendant.
[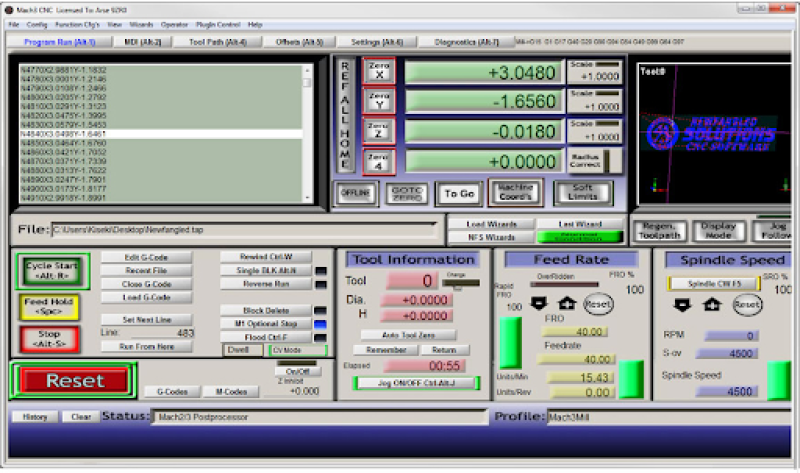](https://protohaven.org/wiki/_detail/tools/cnc_router_mach3.png?id=tools%3Acnc_router%3Astart "tools:cnc_router_mach3.png")
**On-Screen Reset Button** - Turns off Emergency Safe and allows the machine to be jogged. Also acts like an e-stop.
**Keyboard Arrow Keys** - Jog X and Y axis
**Keyboard PgUp PgDn Keys** - Jog Z axis
**REF ALL HOME Button** - This will command the machine to move to it's forward-most, left-most, and highest position. This position will be stored as the absolute zero coordinates of the machine.
**Zero X, Y, Z Buttons** - These buttons are used to set the zero position for a job, and can be set anywhere in the work area of the machine, and is different from the machine zero that is set by “REF ALL HOME”. This zero position should match the zero position you selected when creating your toolpath in your cam software.
**Cycle Start Button** - This button starts jobs and resumes after tool changes.
Feed Hold Button - Pauses the feedrate but not the spindle of the machine. It may not stop immediately, It will stop as soon as possible but still leaving the job in a resumable state. The machine could potentially travel several feet before stopping.
**Stop Button** - Stops the job but doesn’t lose position like the Reset button.
**Load Gcode Button** - Opens windows open dialog to load a saved file
**Rewind Button** - “Rewinds” the Gcode to the first line
**Jog On/Off Button** - If jogging does not work, make sure the “Jog ON/OFF” button is green, not red.
### Creating Toolpaths
The first part of Setup for the CNC router is to create the toolpaths appropriate for the machine. You can use vCarve Pro Makerspace Edition or you can use any other CAM software that you're familiar with. This section will cover generalities and speak towards vCarve Pro as that is what is taught in Class.
#### Toolpath Checklist
1.
⚠️ Measure workpiece accurately.
2.
⚠️ Verify through cut toolpaths are no more than 0.020“ deeper than the workpiece.
3.
Determine appropriate speeds and feeds for your tool.
4.
Create Toolpaths and save vcarve .crv file.
5.
Transfer .crv to CNC Router PC, open and save gcode.
#### Measure workpiece accurately
We have had a big problem with users cutting unnecessarily deep into the waste board. This can usually be attributed to carelessness in measuring the workpiece. **Three-quarter inch sheet goods are not 0.750”** You need to measure your material to know exactly how thick it is and set your tool paths appropriately.
#### Verify though cut toolpaths are no more than 0.020" deeper than the workpiece
After you've measured your workpiece in the previous step you should check all of your toolpaths and adjust through cuts so that they are 0.015-0.020“ (Fifteen to Twenty Thousandths) deeper than your workpiece. Going deeper unnecessarily mars the waste board. If you feel that 0.015-0.020” isn't appropriate for though cuts please have a discussion in the [\#cnc channel on Discord](https://discordapp.com/channels/791673872529358869/1011721317524983818 "https://discordapp.com/channels/791673872529358869/1011721317524983818").
#### Determine Appropriate Speeds and Feeds
Understanding appropriate speeds and feeds is the most involved portion of operating CNC routers and mills. If you go too fast you risk ruining your workpiece or breaking your tool, If you go too slow you will burn the edges of your workpiece, build up heat in the tool and shorten the tools life. Use the information below to work towards getting the right settings.
#### Definitions
-
Spindle Speed: Speed at which the spindle motor turns the cutting tool measured in RPM.
-
Feed Rate: Speed at which the tool moves across the workpiece. It is measured in IPM (Inches Per Minute) or MM/Min.
-
Chip Load: Thickness of a chip that a cutting tool is designed to produce from a single flute for a specific material. Measured in thousandths of an inch.
-
Pass Depth: Depth of a single cutting pass.
-
Step Over: Amount of the cutting tool diameter that is in new material when doing operations such as pockets with adjacent passes. Usually measured in percentage of tool diameter, can be measured in inches or mm as well.
-
Run Out: The amount of deviation a cutting tool as it makes it cut.
-
Stick Out: how far the cutting tool end is below the spindle collet.
-
Collet: device that captures cutting tools in the spindle.
#### Rules of Thumb
Use these recommended values until you know enough to know that you need to change them.
Spindle Speed: 6000 - 24000 RPM *Do Not exceed 20400 RPM (85% of max speed)*
-
Maximum Material Dimensions
-
Length: 120“
-
Width: 60”
-
Depth: 5 1/2“
#### Spindle Speed
If the documentation for your tool recommends spindle speeds feel free to use those. If you are looking for recommendations you can the rules of thumb listed above.
**WARNING: Do not exceed 20400 RPM.** This is 85% of the maximum spindle speed and it is recommended to not run the spindle any faster in order to prevent premature wear and tear.
#### Chip Load
Some manufacturers provide a chip load table for their cutting tools and others do not. You can use the chip load to help determine appropriate feed rates for a given spindle speed.
##### Estimating Chip Load
If your manufacturer does not provide chip load recommendations then you must estimate a chip load using general information found online. Here is a table of common diameters and materials that can be used to choose a chipload that should be reasonable for your tool.
**Note:** The chart below is not wrong but it's really aggressive and using the low end or even slightly below the low end should be considered. For example I find that .009” is a better target on 1/4“ tool on plywood. This reduces ringing on corners.
[](https://protohaven.org/wiki/_media/tools/cnc_router_chipload.png "tools:cnc_router_chipload.png") ([Source](https://nutekmachinery.com/chip-load-.html "https://nutekmachinery.com/chip-load-.html"))
#### Calculating Feed Rate
Once you have a chip load for your tool and material you can use a formula to calculate your feed rate. Use the recommended spindle speed unless you calculate a feed rate over 500IPM the maximum cut speed for the machine. Slow the spindle speed until you calculate a feed rate under 500IPM.
**chip load x number of flutes x spindle speed = feed rate**
One of the most common scenarios will be like this:
*Danny has a quarter inch flat endmill with two spiral flutes and is cutting Three-Quarter inch plywood. What spindle speed and feed rate should Danny use?*
Since the problem doesn't specify a spindle speed or chip load we'll consult the information above. for a 1/4” tool we'll choose an RPM of 18000. Also the table shows that 1/4“ tools in plywood have a chipload of 0.11-0.13”. If we apply for formula above we get:
**0.011“ x 2 flutes x 18000 RPM = 396 IPM**
and
**0.013” x 2 flutes x 18000 RPM = 468 IPM**
Therefore we know that we want to set our **feed rate somewhere between 400 and 450**. I'd start on the low side and see how it goes by listening to the machine and fine tuning to get optimal performance.
#### V-Carving Speeds and Feeds
V carving has a different set of considerations or rules for setting speeds and feeds.
You will want something more like 10000-14000 RPM at 40-60 IPM. I was unable to find a good guide with a good process to describe a confident method to figure out your v-carving feeds and speeds. If a better thing is found, point it out in the CNC channel on discord and we’ll update as appropriate.
### Generate Toolpaths
We’ll talk through some simple setups with v-carve pro. I recommend watching some tutorials on YouTube [like this one](https://www.youtube.com/watch?v=e-yXMXVVHgQ "https://www.youtube.com/watch?v=e-yXMXVVHgQ"). There is simply too much to tell you everything you need to know here.
#### Setup workpiece
When you start a new project it will want you to specify the size of your workpiece. Measure it accurately, especially the thickness with digital calipers. Spoilers: ¾” plywood is less than 750 thousandths of an inch.
Make sure you understand the zero origin setup for your workpiece. Is it the lower left corner? Center? Some other place? Is it the top of your workpiece or the bottom? It’s almost always top, but it is critical to get this right when setting up.
For more look at the [Job Se](https://docs.vectric.com/docs/V12.5/VCarvePro/ENU/Help/form/Job%20Setup%20Single/index.html "https://docs.vectric.com/docs/V9.0/VCarvePro/ENU/Help/VCarvePro.html#Drawing-uiSheetForm-Job-Setup")[tup section of the V-carve Pro manual.](https://wiki.protohaven.org/books/software-guides/page/vcarve-guides)
#### Designing in VCarve Pro
This document isn't going to get into how to design in VCarve Pro. But check out the [manual ](https://wiki.protohaven.org/books/software-guides/page/vcarve-guides)it covers a lot of good information.
**Special Note about Vectric Vcarve Pro Makerspace Edition:** VCarve Makerspace Edition is a special version of VCarve that enables members of a makerspace to use VCarve Pro on their home computers to create projects to use with the Protohaven Avid CNC Router. Members can download the trial version of VCarve Pro and connect it to the Protohaven Makerspace connected Vectric account, allowing unlimited use of the trial version. Projects created on the Makerspace Edition can only be used in the Makerspace that they are connected to, but there are no other limits in terms of features or number of uses of the software. Information on installing VCarve can be[ found here.](https://wiki.protohaven.org/books/software-guides/page/member-notes-EhO)
#### Saving Gcode
This step needs to be done on the computer that is connected to the cnc router, you can't do this on the makerspace edition trial versions of the software.
Open your .crv file that you've transferred to the computer and go to the toolpath section and click save toolpath.
There are 2 key considerations when saving gcode. The first is to ensure that you have all of your tool paths selected for saving, The second is to make sure you use the Avid CNC post processor.
Post processors ensure that the software makes the specific dialect of gcode that the specific machine can understand .
For more look at the [saving gcode section of the V-carve Pro manual](https://docs.vectric.com/docs/V9.0/VCarvePro/ENU/Help/VCarvePro.html#Toolpaths-Save-Toolpath-Save-Toolpath "https://docs.vectric.com/docs/V9.0/VCarvePro/ENU/Help/VCarvePro.html#Toolpaths-Save-Toolpath-Save-Toolpath").
### Setup
#### Setup Checklist
1.
⚠️ Measure workpiece accurately.
2.
⚠️ Verify through cut toolpaths are no more than 0.020“ deeper than the workpiece.
3.
Inspect waste board for items of concern.
4.
Inspect tracks, rails and pinions for debris and obstruction.
5.
Check dust collector bag empty if over half full.
6.
Check power cords on the wall are firmly inserted.
7.
Ensure no obstructions are inside the operating area of the machine.
8.
Power on both control boxes.
9.
Start Mach3 on the control PC and connect.
-
Note if Mach3 is already running, close it and restart Mach3 to ensure proper connection.
10.
Press the Reset Button in Mach3.
11.
**Click REF ALL HOME to home the machine.**
#### Measure Measure Measure
Mentioning this again since we have so many people cutting way too deep into the waste board.
Measure the thickness of your material with the digital calipers and **add no more than 0.020” more.**
#### Inspect Waste Board
Here is where you will want to take a look over the waste board area that you will be using. Make sure there are no composite nails sticking up that would cut your hand if you ran it over it. or would keep your workpiece from being fixtured level. Also ensure there isn't any major damage to the waste board, any screws or fixturing clamps that could cause a hazard to your job.
#### Inspect Motion Systems of the Router
Here you will want to inspect all of the tracks, rails, pinions, belts, and cable chains for the machine and to make sure they are unobstructed, that the machine will be able to move freely and safely.
Also check that there is a noticeable film of grease on the rails. If not a [maintenance request](http://protohaven.org/maintenance "http://protohaven.org/maintenance") should be made.
#### Check Dust Collector Bag
If the dust collector bag is over half full empty it.
The bag is held in place to the dust collector with a rigid rubber ring sewn into the top hem of the bag and it sets in a race where the red line decal is on the outside of the dust collector.
In order to remove the bag you will want to work your fingers up into the edge of the race and push the rubber ring so that it loses its rigidity and folds toward the center. Once it loses its circular shape it will be able to be easily removed from the collector.
Empty the bag into the large trash dumpster outside. Make sure you block the door open (there is a loop of rope on the railing out side that hooks onto the pull handle.) or you will have to walk around the building to reenter.
The dumpster has a small toggle on the locking bar that you swivel aside to swing the locking bar to open the lid.
#### Check Power Cords
There was an event in August where the power plug for the spindle worked itself loose and the spindle stopped working. Check both power plugs on the back wall and ensure they are fully inserted
#### Power on both control boxes
Turn on the power for both the motion control box and the spindle control box.
#### Start Mach 3 on the PC
Mach 3 is pinned to the taskbar or it’s in the start menu, open it up and let it connect to the router's control board.
#### Press the Reset button in Mach 3
First ensure the physical estop button is not activated then press the blinking reset button on the screen. This will enable jogging control of the router.
#### Press the REF ALL HOME in Mach 3
Stand clear of the machine and press the REF ALL HOME button on screen. This will command the machine to move to it's forward-most, left-most, and highest position and square the gantry. This position will be stored as the absolute zero coordinates of the machine. Some CAM software will use commands that reference the machine home position, and may crash the tool into the table if the machine is not properly initialized/homed.
### Operation
#### Operation Checklist
1.
Load GCODE into Mach 3
2.
Setup Workholding
3.
Install Cutting Tool
4.
Zero Tool
5.
Manually Frame Work (optional)
6.
Attach Dust Boot
7.
Start Dust Collection
8.
Start Job
9.
Supervise Job
#### Load GCODE into Mach3
Open Mach3 and then click “Load Gcode and find the file that you either saved from VCarve Pro or generated elsewhere.
#### Workholding
The primary method used to hold your work in place is to use the green nailer and composite nails and nail your workpiece to the waste board. 3 or 4 nails will do ya for sheet stock, you will want to make sure that roughly ⅜” of the nail penetrates the waste board.
Cutters with up-cut flutes will try to lift the stock off the table as it cuts. If there is too much space between the nails, and your material is flexible, it may cause excessive vibrations which could break the workpiece free from the table.
If you are unable to nail your work to the waste board there are some wood pieces for clamping down work in the plastic bin under the computer. See the section on Alternate Workholding under Special Setups.
#### Install Cutting Tool
When installing the cutting tool you will select the appropriate sized collet from the tool tray and insert your cutting tool. Minimize the amount of stick out so that as much of the non-cutting portion of the tool is recessed into the collet. Minimizing stick out will help with accuracy and reduce runout, (the wobble the tool has when it spins decreasing accuracy).
Thread the collet into the spindle until it is finger tight then use the two wrenches to tighten the collet. I like to arrange the wrenches so that I can grab them with one hand and squeeze them together. It helps you apply less lateral forces to the spindle.
#### Zero Cutting Tool
When you setup your toolpaths in your CAM software you picked an origin or zero for the job. Recall the zero location that was set when the toolpaths were made and zero the cutting tool the same relative to your workpiece. IE. the top, left, front, corner if that is was was set in CAM.
-
Jog the machine to a central portion of the workpeice that is representitive of it's average z height.
-
Use the arrow keys on the keyboard to get close, PgUp / PgDn for Z moves.
-
Use the pendant to make fine adjustments in position.
-
Shine the flashlight from your phone across the workpiece to help see when the cutting tool and its shadow meet.
-
Press Home Z in Mach3
-
Raise the tool (PgUp) an inch or so and move the cutting tool to where your X and Y origins are.
-
Press Home X and Home Y in Mach 3
#### Automatic Zeroing with Touchplate
##### Overview
The touchplate is a tool that can be used for zeroing your workpiece on the CNC router. This tool is configured in Mach3 and can be accessed directly from that software. It works by grounding an electrical signal through the tool that is placed in the spindle. It can produce a repeatable and consistent zero that is useful when working with a design that uses multiple tools.
The touchplate resides on the front of the CNC table in a fixed holster. It has a long black wire to the control box, and also has a short red wire connected to a magnet. This should be kept neatly in the holster when not in use, with the wires not tangled or sharply bent. It is best practice to place the magnet on the touchplate screws to protect it from damage.
The touchplate consists of an aluminum cube with two brass plates with a spring between the plates. One side of the cube has a raised corner that can be used to zero X, Y, and Z axes. The opposite side of the cube is flat for zeroing Z axis only.
##### Use
These steps should be performed after you have referenced home, loaded your g-code, and secured your workpiece.
**Finding the X, Y, and Z axes**
1. Place the tool you will be using (or the 1/2" rod, see tool shape below) in the spindle.
2. Using the lip on the touchplate, align the touchplate on the corner of your workpiece that corresponds the WCS coordinates in your g-code file. This should be on the top of your workpiece..
3. Move the spindle so that it is aligned within the brass area of the touchplate, and the bottom of the tool is no more than 2" above the brass plate.
4. Place the magnet on the collet, tool, or spindle.
5. Open the dialogue "auto tool zero" in Mach3 (add screenshot)
6. Check boxes for x, and y axes, and complete the dialogue accordingly
7. When you hit enter the spindle will move the tool to contact the brass plate for the z axis zeroing. **Keep your hand by the E-Stop at this time.**
8. Next the tool will move to zero the x axis, and finally the Y axis. This will be in the opposite direction of what you might think - to ensure the touch plate does not get pushed off the workpiece.
9. Remove the magnet and touchplate from your workpiece, and replace in the holder.
The offsets for the tool are programmed into Mach3. Your tool will be zeroed to the corner of where the touchplate was placed
**Finding Z axis only**
1. Place the tool you will be using (or the 1/2" rod, see tool shape below) in the spindle.
2. Place the touchplate with the flat side down on the surface corresponding to your design file indicates your z zero point. This should be on the top of your workpiece.
3. Move the spindle so that it is aligned within the brass area of the touchplate, and the bottom of the tool is no more than 2" above the brass plate.
4. Place the magnet on the collet, tool, or spindle.
5. Open the dialogue "auto tool zero" in Mach3 (add screenshot)
6. Z axis will be grayed out, as it is automatically selected.
7. When you hit enter the spindle will move the tool to contact the brass plate for the z axis zeroing
##### Common Issues
Magnet wire / ground connection can fail which will result in a signal failure. This can cause the tool to not stop when it reaches the brass plate and result in a broken tool and damage to the touchplate and spindle.
The shape of the tool might not be suitable for use with the touchplate, such as a V bit or tapered bit. In this case the X and Y can be zeroed on the touchplate using the 1/2" rod that is part of the router kit.
Z distance too short. The auto tool zero travels a maximum of 2" on the Z axis before it stops. Therefore, you should ensure there is less than this distance between the touchplate and your tool.
No accurate corner on workpiece. If you are working with a round or non-square workpiece, then you would not be able to get an accurate corner on which to align the touchplate.
No remaining surface area for Z. You must not mill away the entire surface of your workpiece if you will need to change tools. you must leave an area from which to zero your Z after a tool change.
#### Dry run techniques
Here are two dry run techniques that you can use to gain better confidence that your project is set up properly.
##### DIY "Frame"
If you're framiliar with the frame option in lightburn, Mach 3 does not have a frame button, but you can manually view the extents of your project in the tool path viewer in Mach 3. After you're zeroed the tools x and y the preview window will zoom to the extents of your project. when you jog it shows where the spindle is in relation to the tool paths in your gcode. You can jog the spindle to the extents of your toolpaths and see how they align to your workpiece.
It's a great way to see how the X Y of your project aligns with your workpiece but it doesn't do much for double checking Z that is where you might want to look into an Air Carve.
##### Air Carve
After you've set up your zeroing you can easily offset your z a few inches high and start running your project. once you're confident that the plunges what you expect you can stop the air carve and return to the proper Z. The process looks like this:
1.
Get your workpiece, workholding, and cutter in place, and Z zeroed.
2.
*Go to the MDI tab*, and enter this into the console box: `G0 Z2` This tells the router to go to Z 2 inches above zero.
3.
*Click the Zero Z button*. This will adjust your Z to be 2 inches above your workpiece. That should be safe for an air carve in most situations. Make sure it's safe for you.
4.
Go back to the main tab, and start your job. Watch closely to confirm that the machine moves within the expected XY area, that the Z movements seem reasonable, and feed rate seems reasonable.
5.
Once you are confident that things are as wished, you may press the yellow *FEED HOLD button*. Wait for XYZ motion to stop. Then press the red *STOP button*. Use MDI commands to return the cutting head to a known safe starting point. I often choose `G0 X0 Y0`.
6.
Again on the MDI tab, type `G0 Z-2`, and watch with excitement (or horror) as the bit zooms down to the top of of the workpiece, and stops perfectly. (whew)
7.
Return to the main tab, and press *Zero Z button*.
8.
If necessary, Press *REWIND Gcode* to bring the G-code file back to the beginning.
9.
*Press START* with a much greater expectation that the job will run properly.
#### Attach Dust Boot
Raise the cutting tool about 5 inches so that you can get the dust boot under the tool. Notice on the top side of the dust boot you should see 2 circular holes about ⅜ inch in diameter with shiny metal at the bottom. Those are the magnets that hold on the dust boot. Make sure those holes aren’t obstructed with sawdust. When the boot is on properly the black frame of the boot should be totally inside of the black frame of the boot holder.
#### Start Dust Collection
Use the green start button on the side of the dust collector to start dust collection.
#### Start Job
Press the start button on Mach3. It will almost certainly start blinking the tool change / confirm tool warning at you. Once you’re sure the tool number selected in CAM software matches the tool loaded press start again.
When starting a job, be on the ready with the Emergency Stop button in case your setup isn’t what the computer expects and bad things start happening.
#### Supervise Jobs
You must supervise your job. Under no circumstances is the router to be left operating unsupervised. If you need to step away from the router you must pause your job (feed hold, then stop) or ask someone who is cleared on the router to supervise it until you return. This rule must be followed and if a Shop Tech finds that a job is running unattended they are instructed to stop the job and report a safety incident.
*Do not let the Router operate unsupervised, Ever.*
#### Resuming Jobs
️The machine may not protect you from executing unsafe moves. If you tell it to do a move that will crash it into your workpiece it probably will.
Do not assume that the machine will protect you from yourself. If you tell it to do a move that is obstructed it probably will do your bidding and crash your cutting tool into your workpiece.
I’ve had this happen to me when it returns to executing the job it does a straight line to where it needs to be and routes a groove across the surface of your workpiece. Go look at the drill press table for an example of that. To avoid this. Always jog the machine to roughly where it was before the manual move and raise the bit up high enough that the machine finishes the x and y portions of the move before the z move gets close to the work piece.
If you had to hit e-stop and the cutting tool is in a cut, if you don’t manually raise the tool out of the cut before telling it to home the machine likely will take a straight line path to home and risk breaking if the sides of the cut or other parts of the workpiece are in the way. Always raise the tool plenty far up before executing commands like go to zero.
Setting Safe Z helps in some but not all situations.
### Cleanup Checklist
-
Remove cutting tool and return collet to tool tray
-
Vacuum any chips left over from job
-
Chisel off any protruding composite nails
-
Empty dust collector if it is over half full
-
Reset any modified computer settings to default
-
Turn off power to control boxes
-
Note any maintenance needs or concerns on the tag and at protohaven.org/maintenance
-
Return the tool tray and Nailer to the front desk.
#### Scrap Breakdown
There is a scrap bin by the dust collector that you can put your scrap into.
When you notice the scrap bins are full, it’s time to take it to the dumpster out back. Feel free to enlist a helping hand.
If you notice valuable material while emptying the bins, use your judgment to selectively save a few pieces or take it home for your personal use.
### Troubleshooting Common Issues
#### Machine won’t Jog
-
Probable Causes
-
Emergency Stop Activated
-
Safety Lockout in Mach 3
-
Jog on/off is off
-
Mach3 isn't the application with keyboard focus.
-
Resolutions
-
Reset Emergency Stop by twisting clockwise until it pops up.
-
If Reset Button is blinking red/green and scrolling a message about safe mode, press Reset Button
-
If Jog off/on isn't lit press that button
-
Ensure you have Mach3 as the focused application
#### Spindle won’t spin up
-
Probable Causes
-
Power Cord came loose from wall
-
Back control box is off.
-
Resolutions
-
Check the power cord on the back wall ensuring that it’s plugged in.
-
Ensure control box is in.
#### Dust boot falls off
-
Probable Causes
-
Dust buildup in the recesses where the magnets are on the dust boot.
-
Resolutions
-
Ensure there isn’t any debris in the pockets on the dustboot where the magnets are.
#### Pendant slow to switch from X, Y, Z modes
-
Probable Causes
-
Button pushes are too quick.
-
Resolutions
-
Switching from X, Y, Z on the pendant takes a long and deliberate push.
#### Tool gouges deeply into workpiece when starting
-
Probable Causes
-
May have tool path zero set to top of work, but zeroed to the table's surface.
-
Resolutions
-
Check your toolpaths origin setup and compare to where you have your tool zeroed to
#### Tool cuts progressively deeper as the job cuts what should be a single depth.
-
Probable Causes
-
Tool may not be properly tightened in the collet, causing it to slide slowly out of the collet during the cut.
-
Resolutions
-
Check tool to see if it can slide or twist in collet.
-
Tighten tool
### Special Setups
#### Tool Changes
When you set up a cut job that uses multiple different tools, i.e. if you are doing a roughing pass and a detail pass. Or an engraving pass and a profiling pass you will need to execute a tool change. [This video does an excellent job of showing how to manage tool changes in VCarve Pro and Mach3](https://www.youtube.com/watch?v=QYAU27ddXjg "https://www.youtube.com/watch?v=QYAU27ddXjg").
#### Alternate Workholding
The default method of workholding for the router is to use the composite nailer to attach your workpiece to the wasteboard. In some cases your entire workpiece is part of your finished project and you won’t want to drive holes in it. In these cases there are some clamping fixtures in a plastic bin in the computer stand. These can be nailed or screwed to the wasteboard with brass screws. If you think you need these and aren’t confident on how to employ them ask in the #CNC channel on Discord.
#### Pen Holder
You can install a pen holder in the collet and use the cnc router as a large pen plotter. [Here is a productized one](https://www.nextwavecnc.com/shop/SHARK-CNC-SHARK-TOOTH-DRAWING-TOOL-p181352418 "https://www.nextwavecnc.com/shop/SHARK-CNC-SHARK-TOOTH-DRAWING-TOOL-p181352418") that is a bit pricey, and [here is one that you can 3D print](https://www.thingiverse.com/thing:1847711 "https://www.thingiverse.com/thing:1847711") that mimics the idea.
#### Engraving Drag Bit
You can use a drag bit mounted in the collet and engrave on many materials like Aluminum, Brass, Glass, Granite. You will need to supply your own drag bit, a spring loaded / floating tip drag bit is strongly recommended. [Here is one on Amazon](https://www.amazon.com/RDZ-DEGREE-DIAMOND-ENGRAVING-TOOL/dp/B082S332GZ/ref=sr_1_6?keywords=diamond+drag+bit&qid=1663022176&sr=8-6 "https://www.amazon.com/RDZ-DEGREE-DIAMOND-ENGRAVING-TOOL/dp/B082S332GZ/ref=sr_1_6?keywords=diamond+drag+bit&qid=1663022176&sr=8-6")
### Additional Resources
#### Machine Tuning
[Check out this doc on tuning the router for maximum accuracy](https://protohaven.org/wiki/tools/cnc_router/tuning "tools:cnc_router:tuning").
#### Selecting Cutting Tools
[Here is a brief overview video](https://www.youtube.com/watch?v=d1qub6r3G3A "https://www.youtube.com/watch?v=d1qub6r3G3A") of some common cutting tools. It’s a decent video except that it doesn’t have anything about spiral end mills.
[This hour long video](https://www.youtube.com/watch?v=wdQ-_hllmKY "https://www.youtube.com/watch?v=wdQ-_hllmKY") goes into much more detail and is a good primer on cutting tools, the different types, materials and price ranges.
The main thing that video doesn’t cover is compression end mills. These are end mills that have a small upcut portion at the bottom and the majority of it is downcut. It is useful for profile cuts that go the whole way through the workpiece and gives a good surface finish on both sides.
#### Speeds And Feeds
[This article](https://makezine.com/article/digital-fabrication/machining/cnc-routing-basics-toolpaths-and-feeds-n-speeds/ "https://makezine.com/article/digital-fabrication/machining/cnc-routing-basics-toolpaths-and-feeds-n-speeds/") has a good basic primer of how to set your spindle speed and feed rate. [This video](https://www.youtube.com/watch?v=NZ9Ko62GcJg "https://www.youtube.com/watch?v=NZ9Ko62GcJg") has a simplified explanation and some rules of thumb to help you get started [This page](https://cutter-shop.com/chip-load-chart/ "https://cutter-shop.com/chip-load-chart/") has a chip load chart for your cutting tool and material that you intend on using. If you want to dig into it a little more [this article is pretty good](https://calbryant.uk/blog/cnc-routing-speeds-and-feeds/ "https://calbryant.uk/blog/cnc-routing-speeds-and-feeds/#").
#### Gwizard CNC Cookbook
It was suggested to have a section on this in the document. Looking for volunteers familiar with it to document it.
#### VCarve Pro
[This Tutorial Video](https://www.youtube.com/watch?v=e-yXMXVVHgQ "https://www.youtube.com/watch?v=e-yXMXVVHgQ") covers a lot of the basics to set up tool paths for using with the router. You can also dig into the [Vcarve Pro Manual.](https://docs.vectric.com/docs/V12.5/VCarvePro/ENU/Help/form/how-to-get-started/index.html "Vcarve Manual")
#### Mach3
[This Mach3 Tutorial](https://cncphilosophy.com/mach3-cnc-software-tutorial/ "https://cncphilosophy.com/mach3-cnc-software-tutorial/") will give you an overview.
### Staff Use
#### CNC Router Checkout/Checkin
Below are the items that are to be checked for the CNC router checkout procedure.
*Work in progress*
##### Check Out
-
Get Check out box from Class storage room
-
Unlock power switch on router
-
Observe cleanliness of
-
Spoilboard
-
Computer Workstation
-
Floor around Router
-
Dust Collector
-
Rails. and cable trays on router.
-
Observe spoilboard with member of current state of the spoilboard.
##### Check In
-
Ensure Machine has been cleaned up
-
Observe new spoilboard condition
-
TBD how do we identify and access penalties for abuse?
-
If dust collector shows dust above level of viewport have it emptied.
-
If dust collector is dirty with MDF dust or the like have it cleaned.
-
Lock up machine
-
return checkout box to classroom
# Work Holding, Clamps, and Jigs
## Work holding
In general, **no hard metal hold downs** are safe for the CNC, like screws or metal clamps, because of the risk of ejecting shrapnel out into the shop.
### Strategies
**Brass screws and composite nails** may be used, and are available in the shop. Be sure to remove them after use!
- Brass screws are good for attaching from the top (easier) or bottom (if the top surface must be preserved) and provide the best overall strength and reliability.
- Composite nails are quick to attach into waste material from above.
**Cam and wedge clamps** work well and can be easily customized for stock that has square edges. Several are available near the machine.
- Great for work without waste material, engraving, and repeat setups.
- It's better to make a block that fits just right rather than use too many pieces in one direction, or the assembly may buckle outward.
- Avoid too much upward pressure by using a down-cut endmill or making shallow passes with standard up-cut endmills and engraving tools.
**Wooden peg based "7"-shaped hold fasts and clamps** may be used on the grid of holes in the spoilboard, but still take care to avoid when programming.
- Great for holding fragile work, pieces that cannot easily be held from the sides or below, and for projects which need to resist more upward forces.
- Steel holdfasts may not be used.
## Files
We can always cut more clamps and jigs! If you make something for the CNC, consider sharing models or drawings here.
Corner jigs and clamps: [CNC Workholding Clamps + Jigs.f3d](https://wiki.protohaven.org/attachments/271)
# Woodshop - Mortiser
Powermatic #701
# Manuals
- [1791310\_man\_en\_8678.pdf](https://wiki.protohaven.org/attachments/564)
# Woodshop - Pantorouter
# Manual(s)
[pantorouter\_howto\_guide.pdf](https://wiki.protohaven.org/attachments/233)
[pantorouter\_assembly guide.pdf](https://wiki.protohaven.org/attachments/234)
[Pantorouter+Cart+Plans.pdf](https://wiki.protohaven.org/attachments/305)
# Member Notes
# Resources
*Where to obtain materials, consumables, and tooling.*
[https://www.pantorouter.com/](https://www.pantorouter.com/)
# Tool Tutorial
[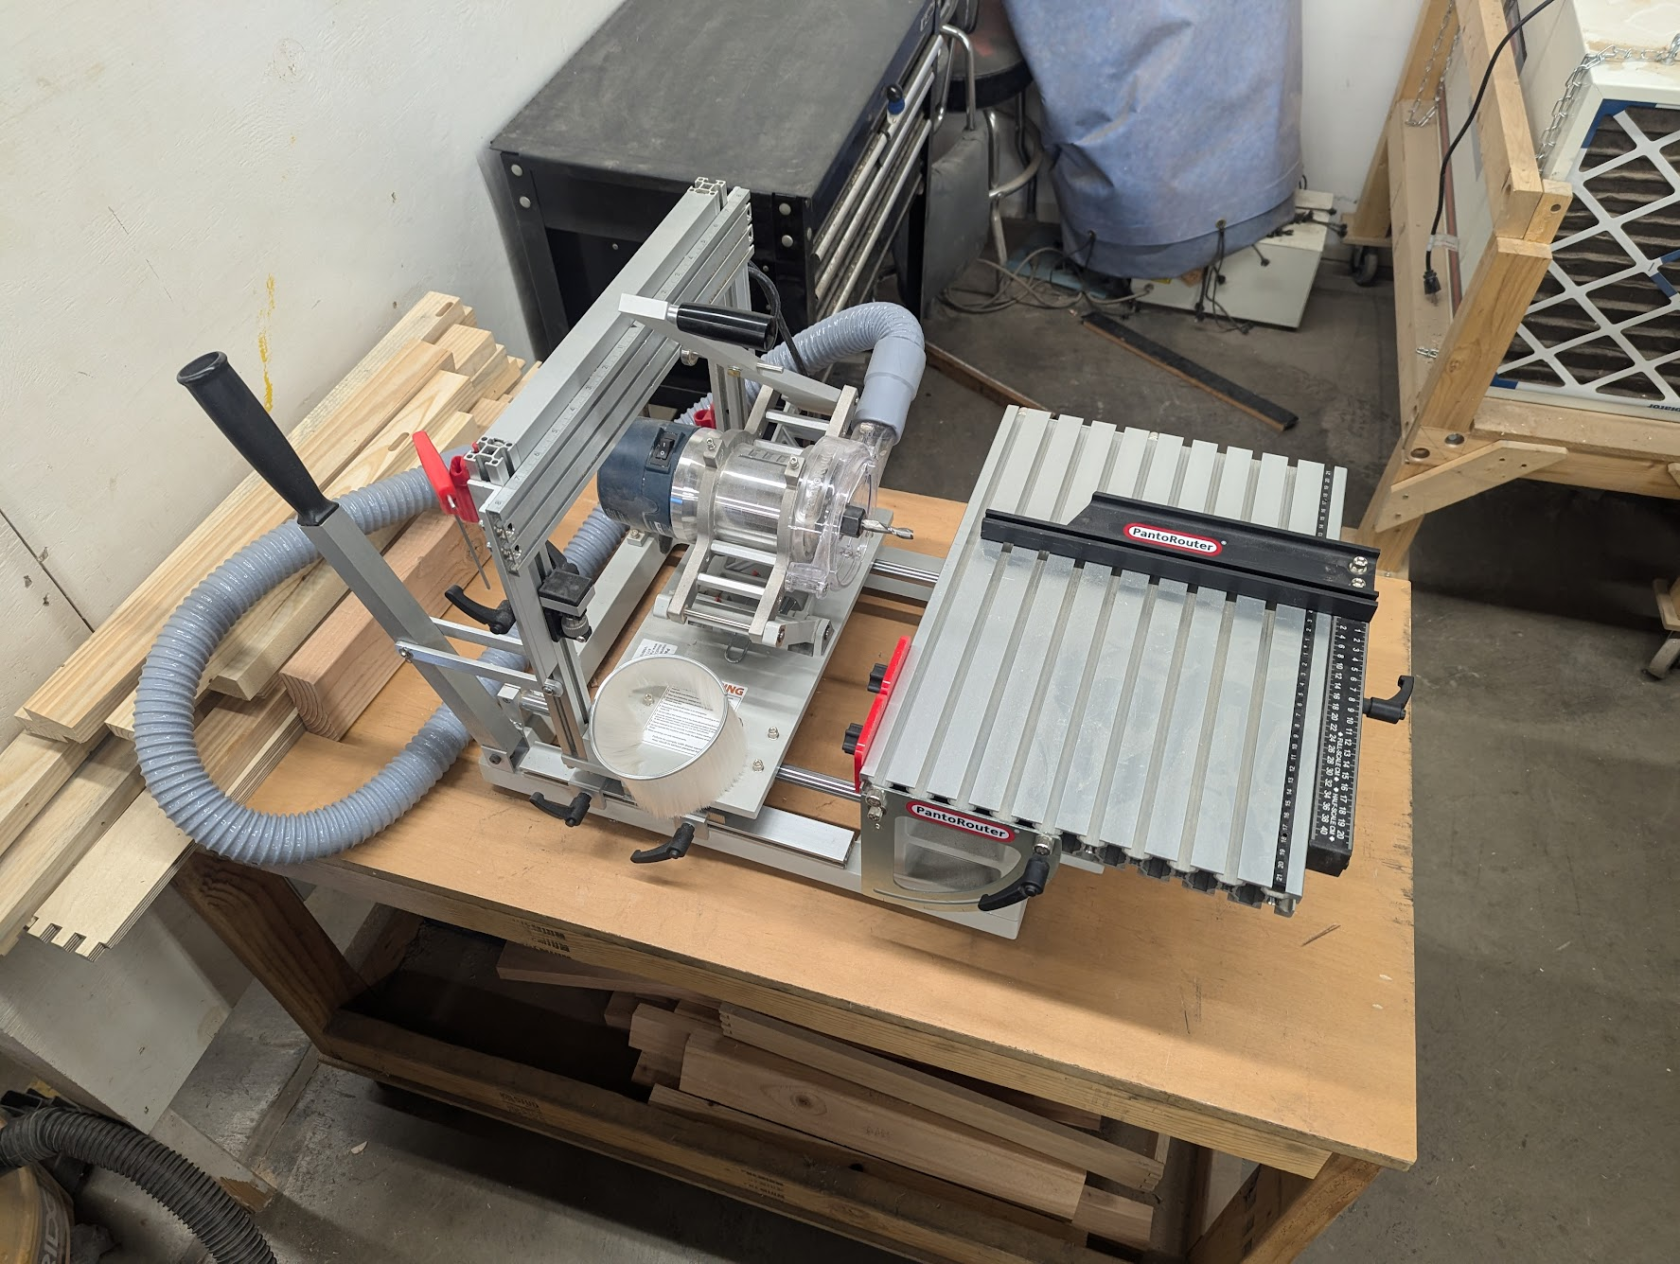](https://wiki.protohaven.org/uploads/images/gallery/2025-03/m1Simage.png)
This tutorial outlines how to use the Pantorouter for making repeatable, accurate, and even non-orthogonal joints in wood—including box joints. Follow these guidelines to set up, operate, and maintain the tool safely and efficiently.
### Overview
The Pantorouter is designed for precise woodworking joinery. It allows you to cut mortises, tenons, and box joints with high repeatability. Its features, including a programmable table and adjustable templates, enable both standard and custom joinery operations.
The Pantopouter is extensively [documented](https://www.pantorouter.com/getting-started) on their website, including a [video tutorial](https://www.pantorouter.com/video-library-overview-and-how-to) library for particular operations. You should use them!
### Controls & Components
#### Table & Movement
- **Table:**
- Holds the workpiece securely and can be angled as needed.
- Equipped with a lockable miter gauge for repeated operations.
- **Axes of Motion:**
- **Plunge Axis:** Controls the router’s vertical movement.
- **XY Axis:** Provides horizontal movement with a 2:1 reduction (1 inch on the template equals ½ inch of router movement).
#### Template Holder & Templates
- **Template Holder:**
- Fixed to the Z slide with vertical height adjustment.
- Templates are stored in the rolling cart.
- **Templates:**
- Feature a centered hole for using a stylus or pin to align with the template holder.
- Internal steps allow for extremely fine adjustments by varying the stylus depth.
- Tapered exterior edges permit adjustment of the final tenon width.
#### Miter Gauge
- **Dual Unit Scales:**
- Includes full and half-size scales.
- To center a board for tenon cutting, measure its width with the full scale and adjust the gauge so that the zero mark aligns with the measurement.
- **Note on Gauges:**
- The opposite side of each gauge uses different units (inch/mm), so verify your settings before proceeding.
---
### Operating Procedures
#### Preparation & Setup
**Bearing selection:** p13 and p14 of the how-to guide is copied below for reference:
[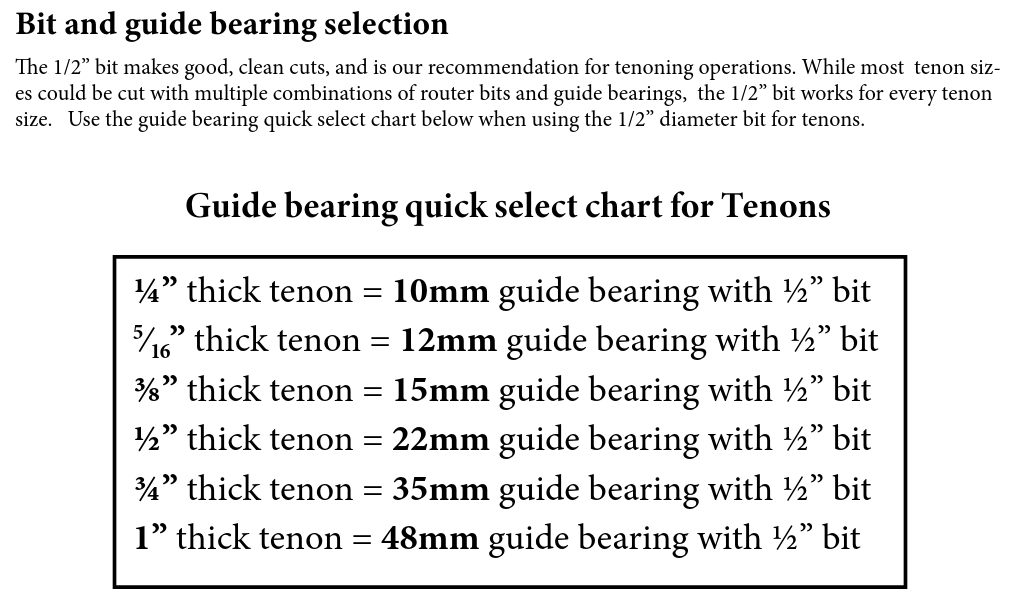](https://wiki.protohaven.org/uploads/images/gallery/2025-03/image.png)
[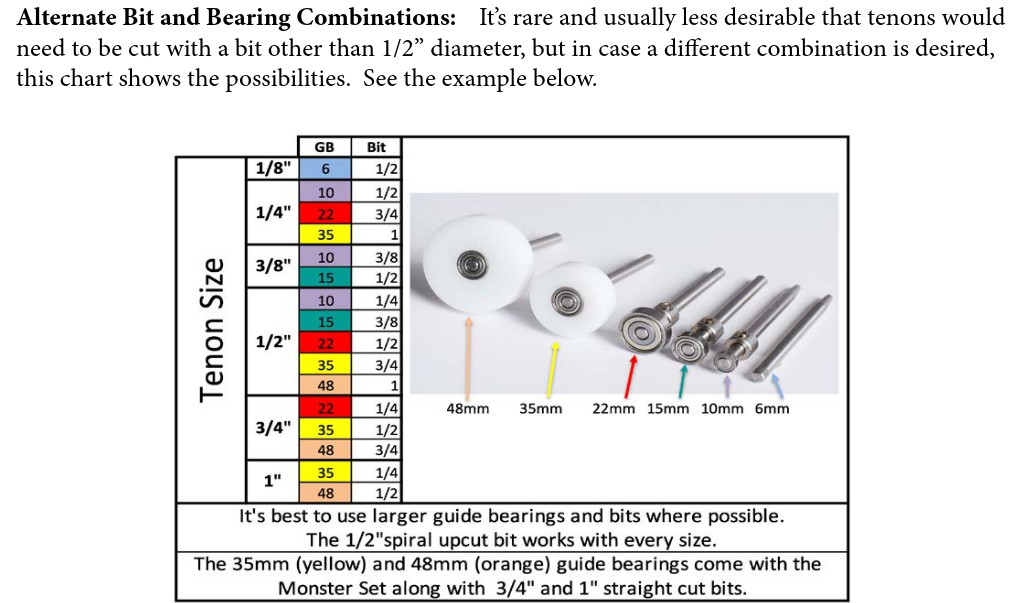](https://wiki.protohaven.org/uploads/images/gallery/2025-03/Qizimage.png)
[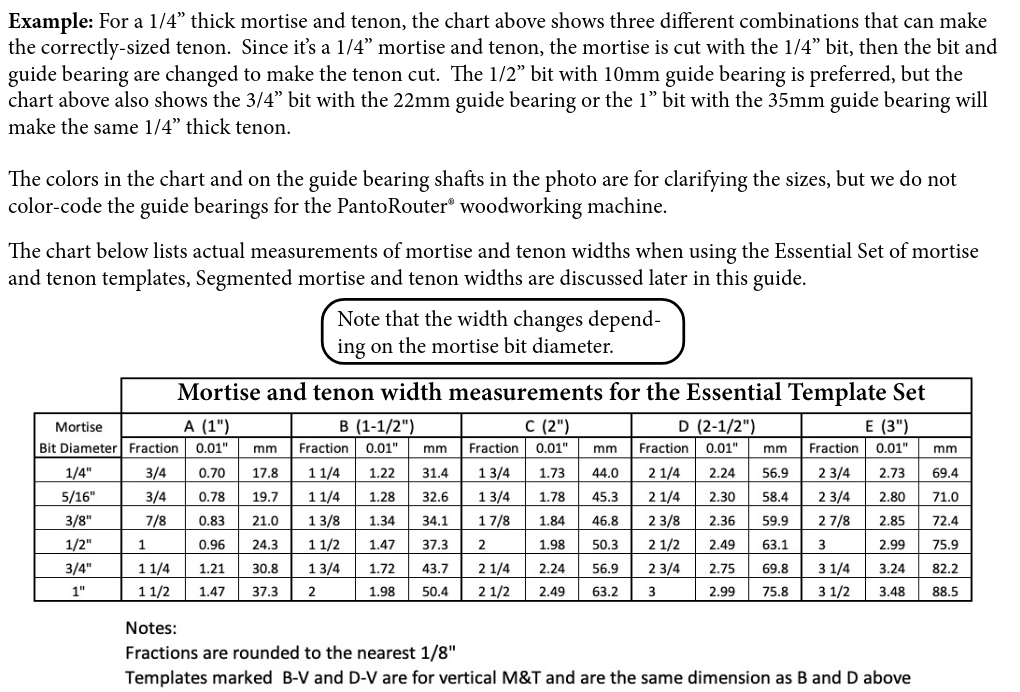](https://wiki.protohaven.org/uploads/images/gallery/2025-03/F5oimage.png)
**Workpiece Positioning:** Place the board against the front fence to zero the depth for a mortise, or place your piece against the miter gauge with some stickout for a tenon.
Always secure your part with at least two clamps, otherwise the force of the router can cause your part to shift.
**Template Positioning:** Insert the board into the vertical height adjustment section to properly set the template holder.
Do not fine adjust the vertical axis unless experienced. This can lead to misalignment when cutting your piece.
#### Cutting Operations
1. **Sequence:**
- **First:** Cut the mortises.
- **Next:** Cut the tenons.
2. **Cutting Process:**
- Make several passes into the wood rather than trying to cut the full depth in one go.
- For tenon cuts, start with the largest setting (closest to the template holder) and then fine-tune gradually while checking with a precut mortise.
- Use the end mill with the “retracted” plunge depth stop to set the starting height by aligning the wood against the machine when the router is at its limit.
#### Dust and Spindle Access
- **Dust Cover:**
- Open the hinged dust cover at the top to access the back of the spindle.
- **Collet Adjustment:**
- Use the provided pair of wrenches to loosen or tighten the collet.
- **Dust Collection:**
- Attach the dust boot to the outside of the plastic guard (behind the lip) and use a shop vac to collect dust during operation.
### Tool Anatomy, Safety, and Care
- **Tool Anatomy:** Detailed diagrams are available in the full [manual](https://wiki.protohaven.org/attachments/233).
- **Tool Safety:** Always follow standard woodworking safety procedures.
- **Tool Care:** Regular maintenance ensures long-term precision.
- **Allowed Materials:** Refer to the material guidelines provided in the [manual](https://wiki.protohaven.org/attachments/233).
- **Basic Operation:** This tutorial covers the fundamental steps; consult the [manual](https://wiki.protohaven.org/attachments/233) for complete operational details.
### Future Enhancements & Extra Tasks
- **Documentation:**
- Add a laminated chart (pages 13 and 14 of the walkthrough guide) near the tool. This chart helps decide on the guide bearing and bit size for various tenon sizes.
- **3D Printed Accessories:**
- Create a holder for guide bearings that arranges them in order and displays their sizes.
- **Tool Accessories:**
- Consider fabricating a cover for the fine vertical adjustment on the template holder.
- Label slide locks to indicate the “mortising” region.
- Use bright colors for collet wrenches for better visibility.
- **Dust Collection:**
- Obtain or fabricate an adapter to connect the Pantorouter dust collector hose to available shop vacs.
- **Template** **Design:**
- Design a template and create one with 3D printing or similar.
# Woodshop - Tool Grinder
# Manuals
[Kodiak Instruction Manual.pdf](https://wiki.protohaven.org/attachments/192)
[Tool Rest Instruction Manual.pdf](https://wiki.protohaven.org/attachments/193)
[JET slow speed wet sharpener.pdf](https://wiki.protohaven.org/attachments/260)
[Rikon Bench Grinder.pdf](https://wiki.protohaven.org/attachments/261)
# Tool Tutorial
## Woodshop grinders
These grinders can be used to sharpen steel hand tools like gouges, hand planes, and chisels. Using these machines safely is not difficult, but achieving sharp edges takes patience and technique.
### Parts of the grinding setup
1. Slow speed wet stone wheel
2. Leather strop wheel
3. Dry CBN wheel grinder
4. Power strip
5. CBN wheel accessories
[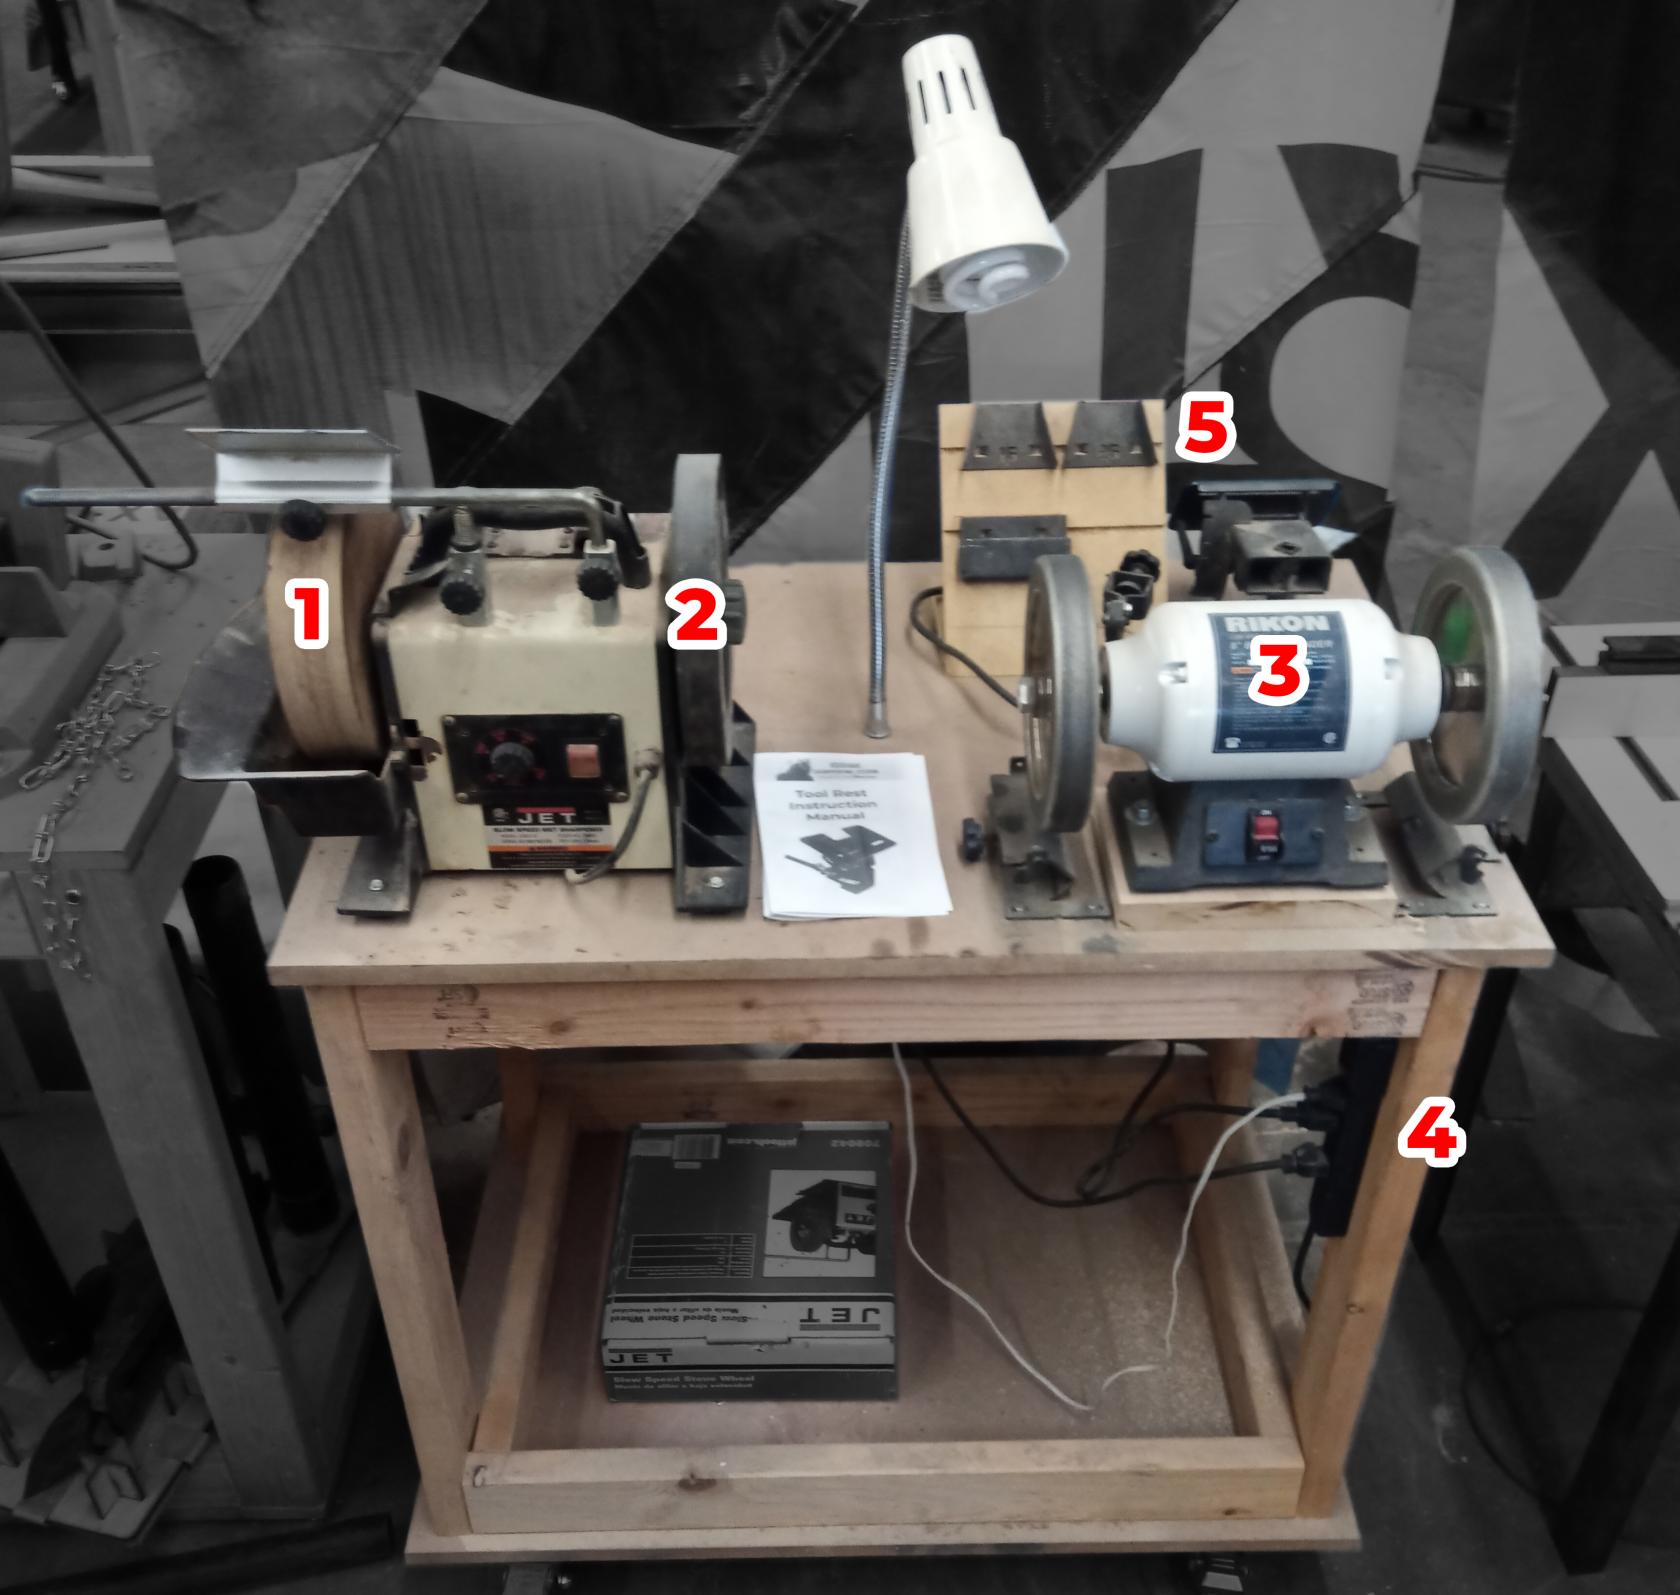](https://wiki.protohaven.org/uploads/images/gallery/2025-04/b3Pimg-20250403-105348-726.jpg)
### General
This cart may be moved to a suitable location to be plugged in.
#### Safety
- As with most spinning tools, do not use the grinders with loose hair, gloves, or clothing.
- Be aware that it is top-heavy, and be careful when navigating over cords.
### Wet stone grinder
This grinder was a used donation, whose wheels arrived out of true. The stone wheel was trued and may be improved, but the leather stropping wheel is permanently wobbly.
This wheel is for putting a finer edge on woodworking tools like chisels and hand planes. It must be used with enough water in the trough to reach the wheel and create a wet surface.
The only accessory available for this grinder is the tool rest and F-shaped mounting bracket, which is adjustable using the screws at the top. It can be positioned vertically or horizontally.
### CBN wheel grinder
CBN wheels are nearly as hard as diamond, and can be used to dry-grind tools. They remove material quickly, and are good for removing large chips from cutting edges. The current finest grit is 350, which can be sharp enough for some applications. Tools like chisels and plane irons will benefit from additional sharpening on a wet stone.
They are less likely to heat up and burn your tools, but it is still possible. Very little pressure is needed to make a cut.
The CBN grinder has its own accessories, whose use is detailed in the instruction manuals.
# Woodshop - Wood Lathe
Powermatic 4224B
Clearance: Required
# Manual(s)
*Manuals and other reference materials from the manufacturer or other sources.*
-
- [cug3418cc\_4jaw\_chuck\_man.pdf](https://wiki.protohaven.org/attachments/174)
- 3" faceplate
- [https://www.amazon.com/dp/B0D2ZXVLJ7](https://www.amazon.com/dp/B0D2ZXVLJ7?smid=AL62EORNFTGMY&th=1)
# Member Notes
Glossary: www.woodturnersresource.com/extras/lathe\_terms/lathe\_terms.htmlWhy you don’t use a Spindle Roughing Gouge on bowls: [www.youtube.com/watch?v=IOhHeyoZLaY](http://www.youtube.com/watch?v=IOhHeyoZLaY)
Understanding Woodturning Catches: [www.youtube.com/watch?v=jOvF5f1phhY](http://www.youtube.com/watch?v=jOvF5f1phhY)
Jimmy Clewes Turns a Square Oriental Box: [www.youtube.com/watch?v=Vmz5BKXBGLA](http://www.youtube.com/watch?v=Vmz5BKXBGLA)
# Resources
*Where to obtain materials, consumables, and tooling.*
-
Read Pages 22-28 of the manual There is some good stuff in there.
-
Youtube has tons of great info. I've learned tons from Kent at [https://turnawoodbowl.com](https://turnawoodbowl.com).
- The STEP file for the 3d printed light rings: [Light Ring.step](https://wiki.protohaven.org/attachments/316)
Glossary: www.woodturnersresource.com/extras/lathe\_terms/lathe\_terms.html
Why you don’t use a Spindle Roughing Gouge on bowls: [www.youtube.com/watch?v=IOhHeyoZLaY](http://www.youtube.com/watch?v=IOhHeyoZLaY)
Understanding Woodturning Catches: [www.youtube.com/watch?v=jOvF5f1phhY](http://www.youtube.com/watch?v=jOvF5f1phhY)
Jimmy Clewes Turns a Square Oriental Box: [www.youtube.com/watch?v=Vmz5BKXBGLA](http://www.youtube.com/watch?v=Vmz5BKXBGLA)
Other Info:
Turning basics: [https://www.youtube.com/watch?v=SFs\_JmDtCUc](https://www.youtube.com/watch?v=SFs_JmDtCUc) (Transcript: [https://www.thesprucecrafts.com/learn-the-basics-of-woodturning-3536931](https://www.thesprucecrafts.com/learn-the-basics-of-woodturning-3536931))
Offset turning: [https://www.pbs.org/video/the-woodwrights-shop-offset-turning/](https://www.pbs.org/video/the-woodwrights-shop-offset-turning/)
Using the woodworm: [https://www.youtube.com/watch?v=EI-utYAfXJI](https://www.youtube.com/watch?v=EI-utYAfXJI)
Mounting bowls with the chuck and the faceplate: [https://www.youtube.com/watch?v=5KHkkws9lWA](https://www.youtube.com/watch?v=5KHkkws9lWA)
# Tool Tutorial
### Wood Lathe
A wood lathe is a machine that rotates a piece of wood on an axis and allows the operator to shape it with various cutting tools. Wood lathes are used for making furniture, bowls, musical instruments and other objects. However, working with a wood lathe can also pose some risks, such as injury from flying wood chips, contact with sharp tools or entanglement with the rotating spindle. Therefore, it is important to follow some safety guidelines before using a wood lathe. This document will provide an overview of the main components and functions of a wood lathe, the personal protective equipment (PPE) and precautions that are necessary for safe operation, and the basic steps for setting up and using a wood lathe.
**Flying wood chips or dust that can damage the eyes, skin, or respiratory system.** To prevent this, always wear safety glasses or a face shield, and a dust mask when working with a wood lathe. Also, keep the work area clean and well-ventilated by turning on the nearby air filter.
**Risk of entanglement of clothing, hair, jewelry, or fingers in the rotating wood or the lathe spindle.** This can cause cuts, bruises, fractures, or amputations. To prevent this, always wear tight-fitting clothes, tie back long hair, remove any jewelry. Also, consider using the guard to cover the spindle and the chuck.
**Risk of kickback of the wood piece due to improper mounting, alignment, speed, or tool pressure.** This can cause the wood to fly off the lathe and hit the operator or bystanders. To prevent this, always check that the wood is securely mounted and balanced on the lathe before turning it on. Also, adjust the speed and the tool pressure according to the size and shape of the wood. Never force a tool into the wood or apply too much pressure.
**Risk of vibration or noise that can affect the operator's concentration, hearing, or balance.** This can lead to errors or accidents. To prevent this, always use sharp and well-maintained tools that cut smoothly and reduce friction. Also, wear ear protection and avoid distractions when operating a wood lathe.
### Tool Anatomy
The below image is taken from the manual and illustrated the various parts of the lathe.
[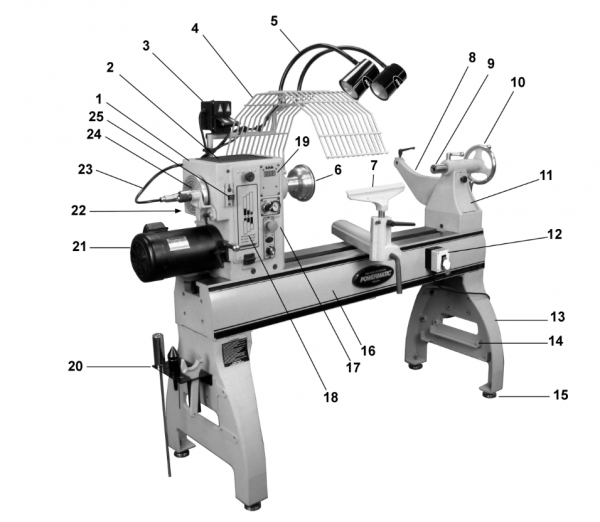](https://protohaven.org/wiki/_detail/tools/lathe_anatomy.png?id=tools%3Awood_lathe%3Astart "tools:lathe_anatomy.png")
### Description of Parts
#### Headstock
The headstock is the part of a lathe machine that holds and rotates the workpiece. It consists of a spindle, a chuck, a motor, a pully and belt system and controls.
##### On/Off Switch
Red button that looks like a small emergency stop on the control panel of the lathe. Pull the knob to turn the lathe on. Push the knob in to turn the lathe off. Both this switch and the remote emergency switch need to be on for the lathe to run.
##### Speed Control Knob
This knob will change the speed at which the spindle spins. turning it clockwise increases the speed.
##### Digital Speed Readout
LED display on the control panel that reads out the current RPM of the spindle. It reads the actual rpm measured so you will notice a lag between turning the speed control knob and the readout equalizing at the new speed.
##### Spindle Direction Selector
Forward causes the top of the work to rotate towards you, and is the standard direction when working the outside of a piece. Reverse causes the top of the work to rotate away from you, and is mostly used when sanding.
##### Spindle Lock
Number 25 in the diagram it's a steel button that when pressed in will lock the spindle from rotating.. This is primarily for when you want to unscrew chucks and plates from the spindle.
##### Spindle Speed Control
Inside the Head Stock the belt can be moved to different pulleys to change the speed range at which the lathe operates.
-
Low Speed – 40-970 RPM
-
Medium Speed – 80-2000 RPM
-
High Speed – 135-3500 RPM
##### Vacuum Chuck Switch and Pressure Gauge
At the top of the control panel there is a switch and a gauge that are used when the vacuum chuck is in use. See the section on the vacuum chuck for more details.
##### Spindle
The spindle is a hollow shaft that supports the workpiece and transfers the rotational motion from the motor. It is not called out in the photo but it's between 6 and 24.
#### Tailstock
A lathe tailstock is a part of a lathe machine that supports the other end of the workpiece that is not held by the chuck. It can also hold tools such as drills, reamers, or taps for cutting holes in the workpiece. The tailstock can slide along the bed of the lathe and be locked in any position.
##### Slide Lock
There is a lever not pictured under the handwheel (10) that operates a clamp under the tailstock that allows you to set where it is positioned on the ways. It is loose when the lever handle is vertical and tight when it is pressed either to the front or back.
##### Handwheel
Illustrated as number 10 this wheel will turn a screw drive to extend and retract the quill.
##### Quill
Illustrated as number 9 the quill holds your tailstock tool and extends and retracts using the handwheel. The hole in the end of the Quill is a tapered fitting called a Morse Taper, these come in various sizes. the size used on the lathe is MT2.
##### Quill Lock
There is a small lever on the top of the tailstock that will clamp the quill into position.
##### Comparator Bracket
The comparator bracket can be used to hold spindles near the workpiece so that the workpiece can be made similarly to the compared piece.
#### Bed / Ways
This flat machined surface is precision ground, and supports the tail stock and banjo. Do not set things on this surface as they may cause damage to the machined surface. Anything placed there is likely to get bumped or vibrate off, which in the case of lathe tools can cause damage to the cutting edge.
#### Banjo & Tool Rest
##### Tool Rest
A lathe tool rest is a metal bar that supports the cutting tool when working on a lathe. It is attached to the lathe bed and can be adjusted to different positions and heights. The tool rest helps to stabilize the tool and prevent vibrations that could affect the quality of the workpiece.
##### Banjo
A lathe banjo is a part of a wood lathe that holds the tool rest. It is mounted on the lathe's bed and can be adjusted to different positions. The lathe banjo allows the woodturner to use the turning tool in the best way to shape the spinning wood. Not numbered in the above illustration it's the part between the tool rest (7) and the ways (16)
#### Remote Emergency Stop
This magnetic switch (#12 in the diagram) can be attached to any magnetic surface. Keep it close at hand especially when working on a large piece so that you always have a way to turn the lathe off in an emergency. Pull to turn on the lathe, push to turn off. Both this switch and the switch on the headstock need to be on for the lathe to run.
### Work Holding Accessories
The work holding accessories that follow have different designs and methods in which they function, but they all share the same purpose of supporting the workpiece in the lathe.
#### Drive / Spur Center
A spur center is a type of woodturning tool that is used to hold a workpiece on a lathe. It consists of a metal shank with one or more sharp spurs that dig into the wood and prevent it from slipping. A spur center is usually mounted on the headstock of the lathe and driven by the motor. A spur center is suitable for turning spindles, bowls, and other round objects.
##### 4 Spur Drive Center
[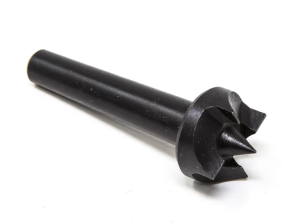](https://protohaven.org/wiki/_media/tools/lathe_spur_center.png "tools:lathe_spur_center.png") A 4 spur center is typically used for standard spindle turning. It has more aggressive teeth or dogs to make a strong connection with the workpiece. you may want to use a 4 spur drive center when you are working with smaller and lighter workpieces such as spindles.
##### Crown Drive Center
[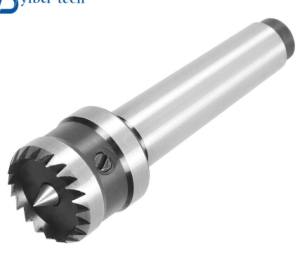](https://protohaven.org/wiki/_media/tools/lathe_spur_center2.png "tools:lathe_spur_center2.png") A crown drive center is a type of lathe center that has a circular serrated edge and spring-loaded center point to prevent splitting the wood when under pressure. It is typically used for bowl turning and other projects where the workpiece is large and heavy.
##### Knock Out Rod
Pictured in the accessory tray (#20). The knock out rod is fed though the spindle from the outside so that it can contact the inside of the drive center taper and knock it out of the spindle.
#### Face Plate
A faceplate is a circular metal plate used for holding workpieces in a lathe. You can use a faceplate when you need to attach a workpiece directly to the lathe spindle with screws or bolts. This method is simple and versatile and works well for large bowls with thick bottoms where the screws won’t interfere with turning.
You may want to use a faceplate on a lathe when you need to hold an unbalanced workpiece that is difficult to hold with a traditional chucking method or drive spurs/dogs.
#### 4 Jaw Chuck
Using a four-jaw self-centering lathe chuck is an easy and effective way to secure bowl turning blanks and small spindle turning blanks on a wood lathe. Another effective way to mount a bowl turning blank is with a screw chuck insert. This deep thread screw is secured in the lathe chuck and the bowl blank is threaded onto the screw chuck 2.
You will find the [PSI Utility Grip™ 4-Jaw Lathe Chuck](https://www.pennstateind.com/store/CUG3418CCX.html "https://www.pennstateind.com/store/CUG3418CCX.html") in the lathe checkout kit. It's a 3 inch 4 jaw chuck with 4 sets of jaws.
#### Vacuum Chuck
A vacuum chuck is a type of lathe chuck that uses suction to hold workpieces in place. It is used to hold workpieces that cannot be held by other types of chucks.
#### Live Center
A live center is a tool used in woodturning that is mounted on the tailstock of a lathe. It is designed to rotate freely and support the workpiece while it is being turned. The live center has a point that is inserted into the end of the workpiece and rotates with it.
To remove the live center from the tailstock use the handwheel to fully retract the quill, this will push the live center loose.
#### Tailstock Drill Chuck
A drill chuck that has a morse taper which slots into the taper on the tailstock and it holds tools like drill bits and forstner bits. The tailstock handwheel can be used to advance the tool into the workpiece.
To remove the drill chuck from the tailstock use the handwheel to fully retract the quill, this will push the live center loose.
### Cutting Tools
**Note:** This tool tutorial focuses on carbide scrapers as that is the tool that is shop supplied for members and that beginners are trained on. Not everything mentioned here will be appropriate for other kinds of cutting tools.
Carbide scraper tools are an essential part of wood turning. They are used to shape and smooth the surface of the workpiece. Carbide scrapers are made from tungsten carbide, which is an extremely hard and durable material that can withstand the rigors of wood turning.
Carbide scrapers are also great for beginners because they are easy to use and require less sharpening than traditional high-speed steel tools. This makes them ideal for those who are just starting out with wood turning and want to focus on learning the basics before moving on to more advanced techniques.
Lathe tools commonly come in 3 different lengths, for a full size lathe 24“ tools are used for all but fine detail work.
#### Shop Supplied Scrapers
[Savannah 7586 Carbide Turning Tool Large Size 3 Piece Set](https://a.co/d/8qAdyTp "https://a.co/d/8qAdyTp"), Diamond Shape, Round and Square Turning Tools With Comfort Grip Handles
[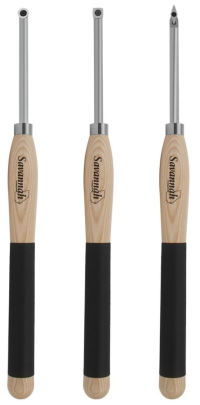](https://protohaven.org/wiki/_media/tools/lathe_tools_1.png "tools:lathe_tools_1.png")
[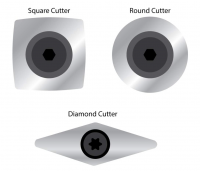](https://protohaven.org/wiki/_media/tools/lathe_tools_2.png "tools:lathe_tools_2.png")
##### Radiused Square
You'll notice that the square scraper has rounded flats and less aggressive corners. These are easier to use than straight square inserts as the corners are swept back and not as sharp. This design makes blending much easier.
Straight Square inserts can fit in this tool as well and are good when you're removing a lot of material and not trying to have a smoothly blended surface.
##### Round
These are used for concave features on both the exterior and interior sides of the project. They also work well for finishing cuts as you can have fine control over a narrower contact area to take light scrapes.
##### Diamond
These are versatile cutters for doing acute features. Dovetails on tenons and mortices, for light scraping along the front edges.
##### Replacement Inserts
Here you can find [Matched Replacements](https://a.co/d/bKos2of "https://a.co/d/bKos2of"). But there are bulk packs if the same size scrapers available from various places.
### Safety
Operating a wood lathe without proper training, safety equipment, or attention can result in severe injuries or even death. Ensure that you acknowledge the [hazards and risks](https://protohaven.org/wiki/tools/wood_lathe/start#warnings "tools:wood_lathe:start ↵") of using the lathe.
#### Personal Protective Equipment
-
Users must wear Eye Protection. A full face shield is strongly recommended. Dust, shavings, chips, fragments, shards, chunks can all come loose from the workpiece when turning wood.
-
Hearing protection recommended. Operating the Lathe isn't a loud activity. But there are plenty of loud tools in the woodshop that others may be using. Note that listening to the sound of the lathe and workpiece can be important when operating the lathe so finding a safe balance is helpful.
-
**Secure loose clothing. Remove hand and arm jewelry, tie up long hair, and roll up long sleeves. Tuck in hoodie strings. Do not wear full gloves while operating machines with rotating parts. Fingerless gloves to protect hands from shavings is permitted.**
#### Maintain a Safe Working Area
-
**Never reach over the lathe** to get something behind it. On our case the main thing a tall person might try to do is to reach over the lathe to plug it it or unplug it. DON'T do this! Building a habit of never reaching over the lathe is a key prevention to getting clothing or other items wrapped around the spindle. Similarly we should never put any kind of storage shelf on the wall behind the lathe to prevent [happenings like this](https://www.youtube.com/watch?v=NdS6of0akwM "https://www.youtube.com/watch?v=NdS6of0akwM").
-
Maintain a clean work space. Periodically sweep during and upon completing your project. Shavings and sawdust can cause you to lose your footing.
-
Be aware of your surroundings, If people are using nearby tools make sure you're both working complimentary with each other and are aware of each others actions.
-
Keep the rotation speed at the recommended values. And that there is no vibration.
-
Always stand to one side and out of the *firing line* when starting the machine
-
The safety guard can be lowered into place to help reduce the chance of being struck by the workpiece if it or a fragment of it becomes dislodged from the lathe.
#### Inspect Tools
##### Lathe Inspection
Before plugging in the lathe make sure you preform the following inspections
-
Both power switches pushed in.
-
Speed knob turned to the left.
-
Set the rotation direction switch to forward.
-
Inspect Morse Tapers on Spindle and Tailstock, Clean if necessary.
-
Inspect Indexing Handwheel to insure it's not locked and that nothing is inserted into the spindle hole.
-
Verify that the Belt is set at the intended speed.
-
Verify the operation Banjo and Tailstock are well adjusted and move and lock as expected.
Once those inspections are complete the lathe can be plugged in.
#### Cutting Tool Inspection
Inspect cutting tools before use use, especially if they are shared tools where you may have not been the last user. For Carbide scrapers like the shop shared tools:
-
Check for loose inserts.
-
Check cutting side of insert for chips or nicks.
-
Check the shaft is not loose in the handle.
-
Check that the handle has no cracks.
Sharp cutting tools is a paramount consideration for wood turning. You will want to make sure you're using sharp tools / inserts. Dull tools will chatter, catch on the workpiece, kick back, and may dislodge the workpiece from the lathe.
##### How to spot a dull insert
When a carbide scraper is getting dull, you may notice that it is not cutting as cleanly as it used to. The surface of the wood may become rougher and the scraper may start to produce dust instead of shavings.
Another sign that the carbide scraper is getting dull is that it may start to produce a lot of heat when you use it. This can be dangerous and can cause the scraper to become damaged if it gets too hot.
#### Other Safety Considerations
Make sure cutting tools are introduced at or slightly above the centerline of the spindle. Make sure you take into account the distance from the part of the tool that contacts the rest to the cutting edge. This is covered more later.
Stabilize wood that shows signs of cracking, splitting, or contains knots.
Running the spindle in reverse can cause the work holding tools to unscrew from the head stock.
Lathe tooling should always be supported by two hands, one controlling the tool’s tip at the tool rest, and one on the lathe tool’s handle. If possible (i.e. if the lathe tool handle is long enough), use your side or waist to help control the lathe tool as you cut.
Do not allow your fingers to be between the tool rest and the workpiece, or between the tool rest and the lathe tool. Your finger will probably be amputated if the tooling catches in the workpiece.
Never leave a lathe running unattended.
Always turn the lathe off when not actively using it.
### Operation
#### Support the Workpiece
One of the most important aspects of woodturning is how to support the workpiece on the lathe. There are different methods and devices for holding and securing various types of wood, depending on the shape, size and orientation of the grain. In this introduction, we will briefly review some of the most common ways to support workpieces on a wood lathe, such as using a spur center, a live center, a faceplate, a chuck or a mandrel.
#### Spur Center / Live Center
1.
Mark the center of the workpiece on both ends with a center punch or an awl.
2.
Make sure the morse tapers in the headstock and tailstock are clean.
3.
Insert the spur center on the headstock spindle and the live center in into the tailstock.
4.
Mount the workpiece on the spur center by aligning the center mark with the tip of the cone and pushing it firmly onto the spurs.
5.
Support the other end of the workpiece with a live center or a dead center on the tailstock. Adjust the tailstock position and pressure until the workpiece is held firmly and rotates smoothly.
6.
Lock the tailstock in place and check for any wobble or misalignment of the workpiece. If necessary, adjust the spur center or the tailstock until the workpiece is centered and balanced.
7.
Spur centers will tend to dig in as you start to turn the piece, the tail stock should be re-tightened shortly after starting your work, and checked periodically.
Sometimes you may want to set the spur center into the workpiece with a hammer. if you do this ONLY use a wooden or deadblow. A metal hammer will flare or chip the taper of the center.
Do not hammer on anything installed on the lathe as it will damage the bearings.
#### Face Plate
A faceplate is usually the most sturdy option for mounting workpieces. they are good for work where using the live center would be cumbersome. The downside is that you have to contend the screws when cutting and the holes that they leave afterwards.
1.
Ensure the side that you want to attach the face plate to is flat
2.
Mark the center of the workpiece drilling a small hole at the center will help with later alignment.
3.
Align the centers of the faceplate and the workpiece.
4.
Use #12 wood screws or sheet metal screws to secure the workpiece to the face plate. Make sure the screws are long enough to penetrate the workpiece but not too long to interfere with the cutting tool.
5.
Check the balance and clearance of the workpiece and adjust if necessary.
6.
Turn on the lathe and test the rotation speed. If there is excessive vibration, reduce the speed or re-balance the workpiece.
##### Face Plate Tips
-
Drywall screws have deep, sharp threads but aren't hardened don't use them.
-
Wood Turners like sheet metal screws because they are case hardened with deeper and sharper threads than wood screws.
-
If you don't want screw holes in your workpiece you can glue a spoil piece to it and screw the face plate into that. Use wood glue only on dry wood, if you gluing green wood you will want to use CA glue. The spoil piece can be cut off after turning.
#### 4 Jaw Chuck
The PSI 4 Jaw Chuck is a lathe chuck system that is designed to hold workpieces securely in place while you work on them. It has 4 sets of jaws to accommodate various sizes of workpieces.
1.
Thread the chuck onto the lathe headstock.
2.
Open the jaws
3.
Insert the end of the workpiece into the jaws.
4.
Insert the tightening posts into the holes on the rings of the chuck.
5.
Rotate the rings to tighten the posts.
Jaw Style
Gripping Dowell Interior Diameter
Gripping Hole Exterior Diameter
\#1 Step Jaws
11/16” to 3-3/8“
0” to 1-7/8“
\#2 Round Jaws
2” to 3-7/8“
1-1/2” to 3-3/8“
\#3 Wide Jaws
3-1/16” To 4-3/8
N/A
Pin Jaws
1/4“ to 1”
7/8“ to 1-5/8”
This chuck requires the 1 1/8“ to 1” adapter to be able to attach to the spindle.
##### Gripping Round Stock
Consult the table above for the size ranges of each jaw set. The strongest grip is with the jaws about 1/4“ separated from each other. If you look carefully you will see that the jaws circle is most circular with a gap between the plates. When it's closed the whole way it's more of a rounded diamond.
##### Gripping Square Stock
The jaws can grip square stock where the corners exit the gaps in the jaws.
##### Cutting A Tenon
[Check out this video](https://youtu.be/zhu-PQuOdS8 "https://youtu.be/zhu-PQuOdS8") for cutting a perfect tenon, there is nothing I can add.
##### Cutting a Mortise
You can use the forstner bits in the tailpiece drill chuck holder to cut a mortise. Then use the detail scraper to add a dovetail to it.
#### Mandrel
The 4 jaw chuck also has a mandrel that can clamp into the center of the jaws. You can drill a hole in the center of your workpiece and screw it onto the mandrel until it's snug up against the top of the jaws.
#### Vacuum Chuck
The vacuum chuck consists of a few parts. There is the chuck cup itself that threads onto the spindle. It has a gasket on the cup side that seals against the workpiece. The second part is the spindle vacuum adapter. This is inserted into the spindle at the handwheel and held in place with the green painted holding bracket. Once that is installed it's time to attach the hoses. The female air hose coupler that is on the back of the headstock goes into the spindle vacuum adapter. The male air hose coupler from the headstock plugs into an shop air compressor line.
Any time that the shop air line is connected to the lathe it will be consuming a significant amount of shop air and will cause the air compressor to cycle on frequently. Don't leave it connected needlessly.
On the control panel there is a knob/switch and a pressure gauge. When the switch is set to off the venturi vacuum system inside bypasses the air and it is just exhausted into the shop. This is why you don't want to keep the hose connected when not actively working. When the switch is turned to on. it enables the vacuum. Hold your workpiece up against the cup until it starts to hold.
The recommended air supply pressure for the chuck is 90 psi.
The manual does not supply any tips on what vacuum pressure readings on the guage are sufficient or tips on how to use the chuck, These can be added here as more knowledge is gained.
The gasket on the chuck is attached with contact cement. If it needs to be redone there is contact cement in the back and the gasket and the cup can be cleaned with acetone.
Consider using tape to prepare the surface of your workpiece so that the vacuum chuck has a smoother surface that is less air permeable to hold onto. Painters/Masking tape helps slightly but isn't ideal. Other kinds of tapes should be tested.
### Check Balance
Once your workpiece is supported you will want to check the balance of of the lathe. Before powering on the lathe with a new workpiece spin it by hand and make sure everything looks ok. Then you can rotate the lathe at a slow speed and observe the rotation.
After checking balance if you're using a spur center check the tension on the live center. You will likely need to tighten it several times as you start working the piece and the spur center digs into the wood.
### Setting Tool Rest
Once your workpiece is supported and rotation is checked in the lathe you can set the tool rest.
#### Distance From Workpiece
You want the tool rest as close as you can get it to the workpiece that still allows you room to maneuver the tool along the rest. 1/2” is the ballpark that you want to be in. 3/4“ is usually too far away and it should be adjusted.
[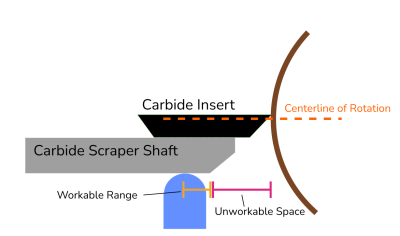](https://protohaven.org/wiki/_media/tools/lathe_toolrest_1.png "tools:lathe_toolrest_1.png")
Having the tool rest too close can be problematic as there is not enough room to maneuver the tool along the rest before it contacts the workpiece. Tools like Carbide Scrapers have some distance from the tip of the cutting insert to where the bottom of the shaft becomes flat. You will want to ensure that you have enough space that you can set the flat shaft on the rest without contacting the workpiece.
As you advance the cut you will need to adjust the tool rest many times to keep the optimal distance from the workpiece.
Having the rest too far away from the workpiece will increase the leverage that the workpiece has on the tool against you. The cutting edge of the tool won't be as stable and will increase risks of rough cutting and catches.
Always stop the lathe when adjusting the rest. Having a corner or high spot of a spinning piece hit the rest is a hazardous situation that could dislodge the workpiece forming a projectile. Or it could break the post off the rest.
When roughing out a piece you may have high spots or uneven rotation to contend with. Always rotate the piece by hand after adjusting the rest to ensure none of the high spots contact the rest.
#### Horizontal Position of the Tool Rest
Always leave a margin on the end of the tool rest 3/4” past the area that you're working. Running the tool off the end of the rest can be hazardous. In the diagram above the tool rest will need to be moved to finish the work on the right side.
[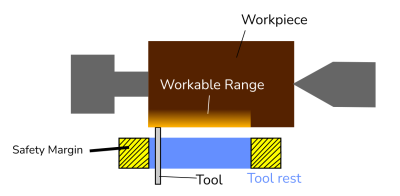](https://protohaven.org/wiki/_media/tools/lathe_toolrest_3.png "tools:lathe_toolrest_3.png")
#### Height of the Tool Rest
The ideal spot to engage with the workpiece is slightly above the centerline of the spindle rotation. Project a horizontal plane out from the center of the spindle and then aim for roughly 1/8“ above that line. The actual distance above the center of rotation will vary based on personal preference, diameter, and material of the workpiece.
[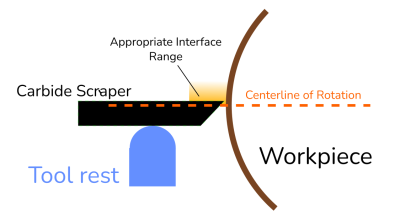](https://protohaven.org/wiki/_media/tools/lathe_toolrest_2.png "tools:lathe_toolrest_2.png")
When setting the height of the tool rest you need to take into account any additional height that the cutting tool adds above the rest.
Introducing the tool below the centerline will increase the risk of a catch. With the material moving angularly away from the tool it will have a tendency to grab the tool and pull it deeper into the work.
Angling the scraper up into the workpiece will have a similar effect to raising the tool rest but there is an increases risk of tool kickback as the forces aren't perpendicular to the tool rest.
If the tool is too high the workpiece might not engage the cutting edge rather riding the bevel and failing to make a proper cut.
[](https://protohaven.org/wiki/_media/tools/lathe_toolrest_6.png "tools:lathe_toolrest_6.png")
**Once the position of the tool rest is set spin the workpiece by hand and ensure the clearance is appropriate.**
### Starting Lathe
When starting a wood lathe with a newly mounted workpiece, you should turn on the power and start the lathe. Keep one hand on the E-Stop and immediately stop the machine if there is any vibration or wobble from the spinning workpiece. You should adjust the speed as appropriate for turning technique, workpiece material, and configuration.
When starting on a new workpiece, stay out of rotational plane of the workpiece incase the work holding isn't sufficient.
Start slow for roughing based on the info in the table below and keep an aye out for vibration and remember to check the tension on the live center a few times.
#### Recommended Lathe Speeds
The table provided here is from the Powertech Manual
Diameter of Work
Roughing RPM
General Cutting RPM
Finishing RPM
Under 2”
1520
3000
3000
2“ - 4”
760
1600
2250
4“ - 6”
510
1080
1500
6“ - 8”
380
810
1125
8“ - 10”
300
650
900
10“ - 12”
255
540
750
12“ - 14”
220
460
640
14“ - 16”
190
400
960
16“ - 20”
175
325
450
20“ - 24”
175
260
375
##### Too Fast?
An unbalanced workpiece spinning at the wrong speed can cause the lathe to shake and become unbalanced. High RPM can dislodge the workpiece, whereas a low RPM can lead to a poor surface finish. Flawed wood can break apart due to the centrifugal force created by excessive speeds1. Excessive lathe speed generates too much friction, which results in heat. Heat can cause the wood to check, and it causes the sandpaper to breakdown. Excessive lathe speed also can cause dust to build up between the sandpaper and the wood, which prevents wood abrasion
Also when turning bowls there is a rule of thumb to keep it under 1000 RPM. According to [a FAQ on turnawoodbowl.com](https://turnawoodbowl.com/bowl-turning-basics-faq-10-questions-answered/ "https://turnawoodbowl.com/bowl-turning-basics-faq-10-questions-answered/"), you should keep the lathe speed under 1,000 RPMs when turning wood bowls. The bowl blank will fall from the lathe at this speed. Speeds faster than 1,000 RPMs can send the bowl upward.
### Holding Cutting Tools
Proper holding of the tools will help you be safe, have better control, and become less fatigued while turning.
1.
Always hold tool with 2 hands.
2.
Hold tool handle against body for optimal rigidity and stability.
3.
Ensure tool shaft is resting against the tool rest.
4.
Front hand on shaft behind lip of tool rest.
1.
Underhand grip ideal for detail work
2.
Overhand grip for roughing work. Additional stability is created by applying pressure down into tool rest.
5.
Move your body to move the tool, keep handle against your body for maximum support.
### Starting a Cut
I'll be describing how to use a carbide scraper as those are the shop supplied tools. Techniques vary with other tools and are not in the scope of this document.
1.
Ensure the workpiece spins freely and does not contact the tool rest
2.
Start the lathe and bring it toe the appropriate RPM for the task at hand, if you are starting it for the first time stay out of the plane of rotation until you have confidence the workpiece is well supported.
3.
Observe any high spots on the workpiece and where you can place the scraper on the reset without it contacting the workpiece.
4.
Place the shaft of the tool on the tool reset horizontal to the ground.
5.
Slowly advance the scraper into the workpiece, If using a square cutter it is often better to only engage 1/3 to 1/2 of the width of the cutter at the edge of the workpiece to reduce the risk of a catch.
6.
Work the scraper across the tool rest slowly and remove material.
There is a good trick for monitoring your progress, instead of trying to look at the wood where you have the cutter, look at the top side of the workpiece you can often better see the cut on the top side.
Running the lathe in reverse may make the threads on the spindle want to unscrew. Please do not run the lathe in reverse when hollowing out the inside of a bowl, especially if no set screw is preventing the workpiece from unscrewing from the spindle.
### Tool Care
#### Clean up
Cleaning is the name of the game with the lathe. It makes a terrible mess when in use. And dust, dirt, chips, etc can cause problems.
-
Dirt in the morse tapers can lead to unreliable support of the workpiece potentially leading to damage of the spindle or quill
-
Dirt and chips on the bed ways can jam up the banjo or tailstock and causing their clams to need accelerated maintenance.
-
Excessive Dirt on the ground can lead to unstable footing.
Keep things clean and you will be happier.
#### Sharp Tools
Having tools that are less than sharp is a huge contributor to issues when using the lathe. one instantaneous catch can ruin hours of work. It can be hard to know when your scraper needs to be changed and I'll keep looking for ways to document but follow the guidance above.
#### Inspection
Before you start using the printer you are expected to do an initial inspection of the printer and access its readiness for use.
### Troubleshooting
#### Lathe won’t start
-
No incoming power. Check power supply, lead connections
-
Remote switch stop is active. Reset remote switch.
-
Problem with inverter. Have a tech file a tool report and suggest contacting Powermatic Technical Service.
#### Motor or spindle stalls or will not start
-
Excessive cut. Reduce depth of cut.
-
Improper belt adjustment, or worn or broken belt. Adjust or replace belt as needed.
-
Improper cooling of motor. Blow out sawdust from motor housing fan.
Workpiece warped, out of round, has major flaw, or was improperly prepared for turning. Correct problem by planing or sawing workpiece, or discard entirely and use new workpiece.
-
Worn spindle bearings. Replace spindle bearings.
-
Worn drive belt. Replace drive belt.
-
Motor mount lock handle is loose. Tighten lock handle.
-
Lathe on uneven surface. Adjust leveling feet.
#### Tools tend to grab or dig in
-
Dull tools. Keep tools sharp.
-
Tool support set too low. Reposition tool support height.
-
Tool support set too far from workpiece. Reposition tool support closer to workpiece.
-
Improper tool being used. Use correct tool for operation.
Lathe bed and tailstock mating surfaces are greasy or oily. Remove tailstock and clean surfaces with a cleaner/degreaser.
# General Woodshop - Scroll Saw
Hawk MB-26 Precision Scroll Saw
# Scroll Saw Tool Tutorial
The [Setup](https://docs.google.com/document/d/11YckNio17cOd22ke0vjOIDuMbnWGNvOODKmT0rMaxeI/edit#heading=h.ex7lrkf7dm2k), [Operation](https://docs.google.com/document/d/11YckNio17cOd22ke0vjOIDuMbnWGNvOODKmT0rMaxeI/edit#heading=h.w363ck6j8o52), and [Cleanup](https://docs.google.com/document/d/11YckNio17cOd22ke0vjOIDuMbnWGNvOODKmT0rMaxeI/edit#heading=h.4s5ijlcmnku) Checklists of this guide are what instructors use to ensure that you can use the equipment according to community expectations.Scroll saws excel at making tight curves with small kerf. Ideal for making jig saw puzzles, architectural scrollwork, and ornaments. The scroll saw is able to make interior profile cuts, which are impossible on the band saw.
## Usage Highlights
[Scroll Saw Clearance](https://www.protohaven.org/equipment/) or [Class Equivalent](https://www.protohaven.org/product-category/classes-events/) Required Before Use
### SAFETY
### CARE
### CLEANUP
1. Ensure proper blade tension
1. Do not start the machine unless a blade is installed
1. Brush off the machine surfaces
2. Keep material flat to table and use the pressure foot.
2. Only start the machine at a medium speed to prevent burning out the motor or damaging the armatures
2. Sweep up the floor and surrounding area
3. Keep fingers clear of the blade
3. Submit a [maintenance request](http://protohaven.org/maintenance) when needed.
## Personal Protective EquipmentEye protection should be used while operating this machine.
## Tool Anatomy
### MACHINE ANATOMY
1. Power Switch - on/off switch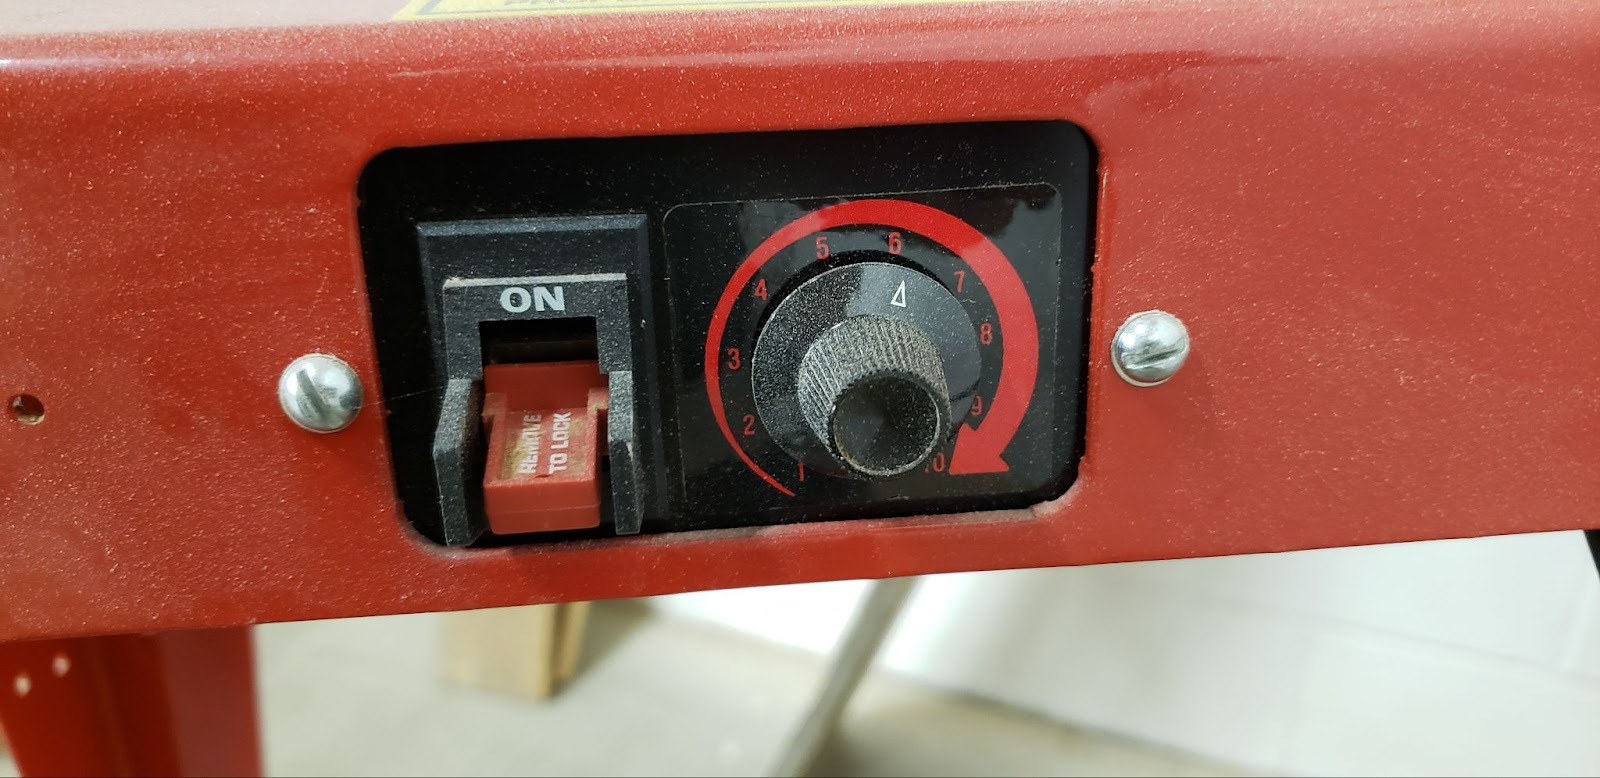
2. RPM Knob - Adjusts the motor speed, which changes how fast the blade oscillates.
3. Table - Supports the workpiece. Keep all work flat to the table.
4. Pressure Foot - Keeps workpieces securely pushed against the table to prevent vibration in the workpiece.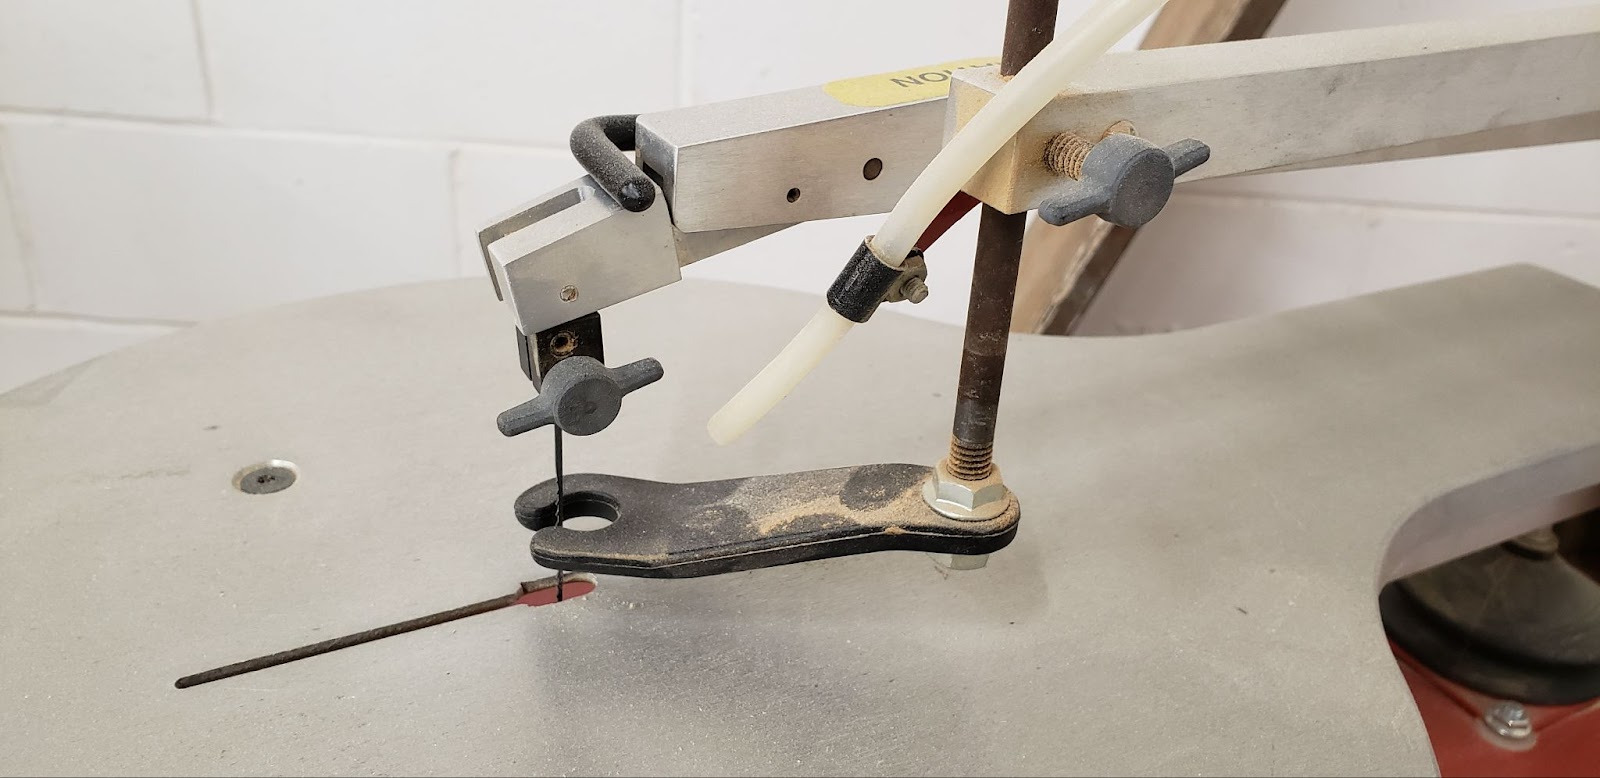
5. Top Blade Holder - Holds the top portion of the blade above the table. Be careful not to get your hand pinched under any part of the arm while the machine is running.
6. Bottom Blade Holder - Holds the bottom portion of the blade below the table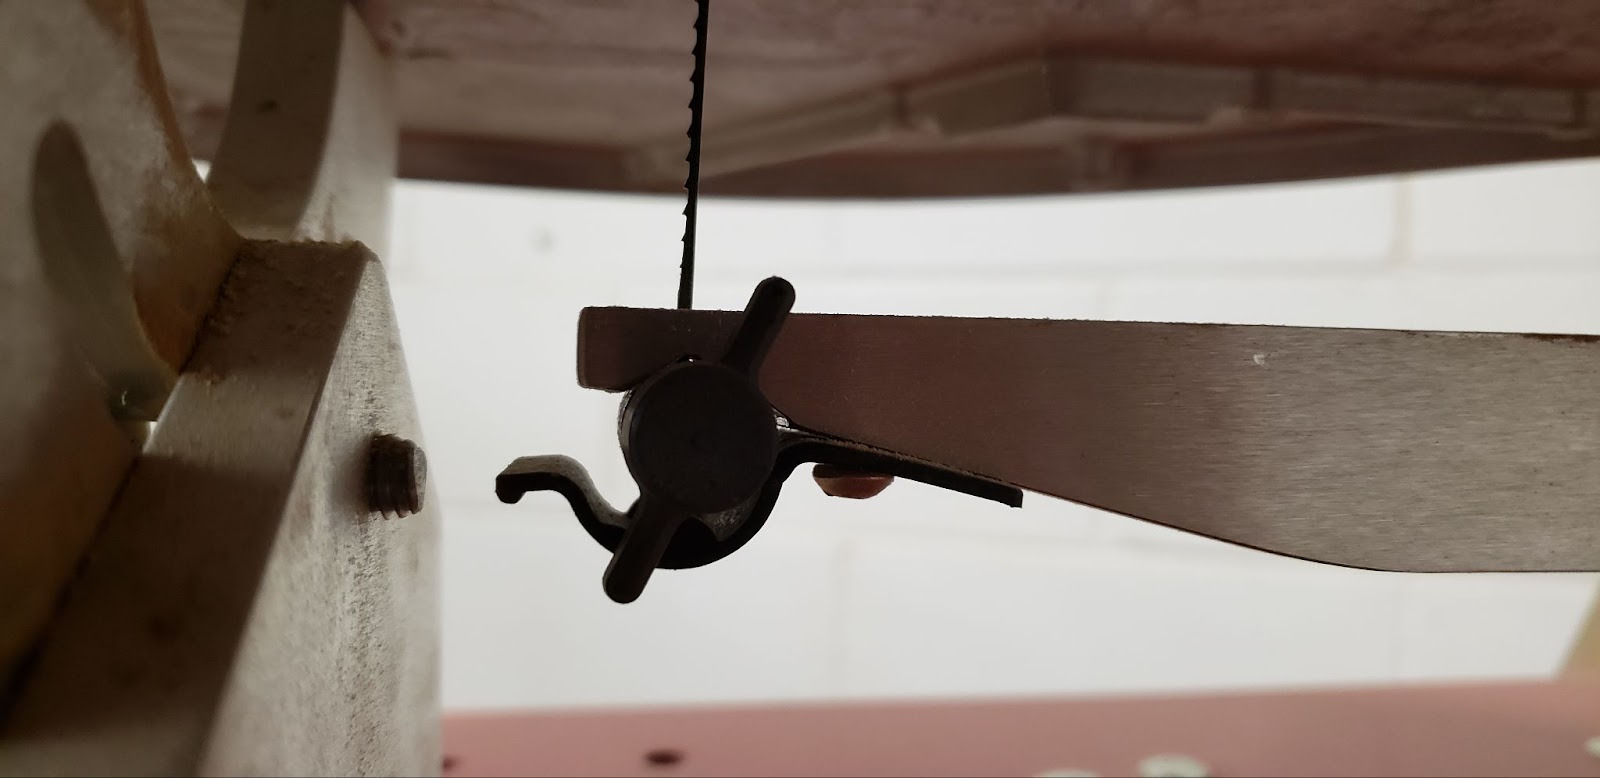
7. Blade Tension Adjustment Knob - Determines the tension on the blade when the tension release lever is engaged. This is not normally unlocked or adjusted when changing the blade, but is used to fine-tune the machine if the blade tension is slightly too tight or slightly too loose.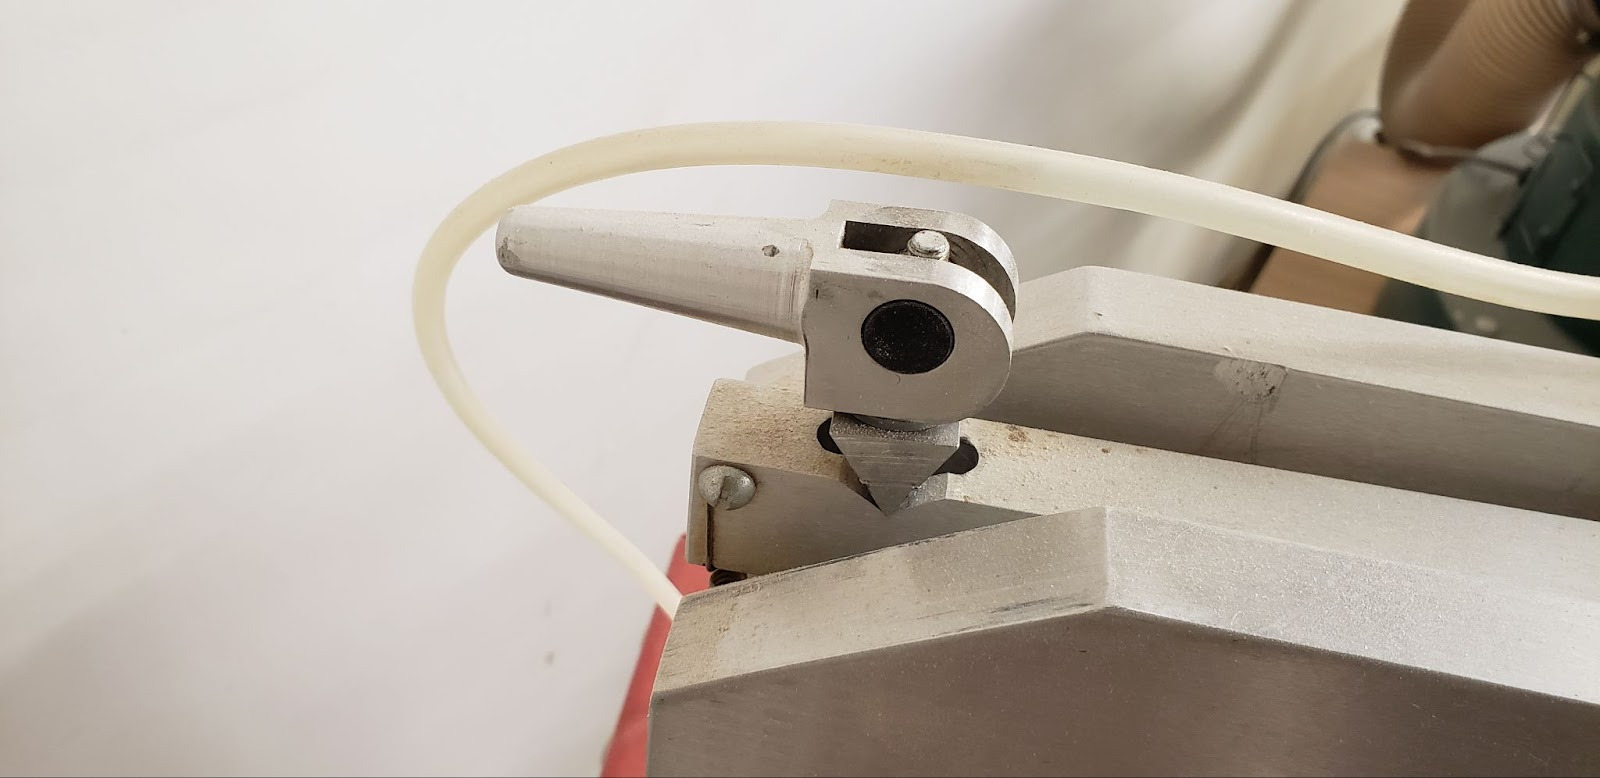
8. Blade Tension Release Lever - Unlock this quick-release lever to release the tension on the blade during installation.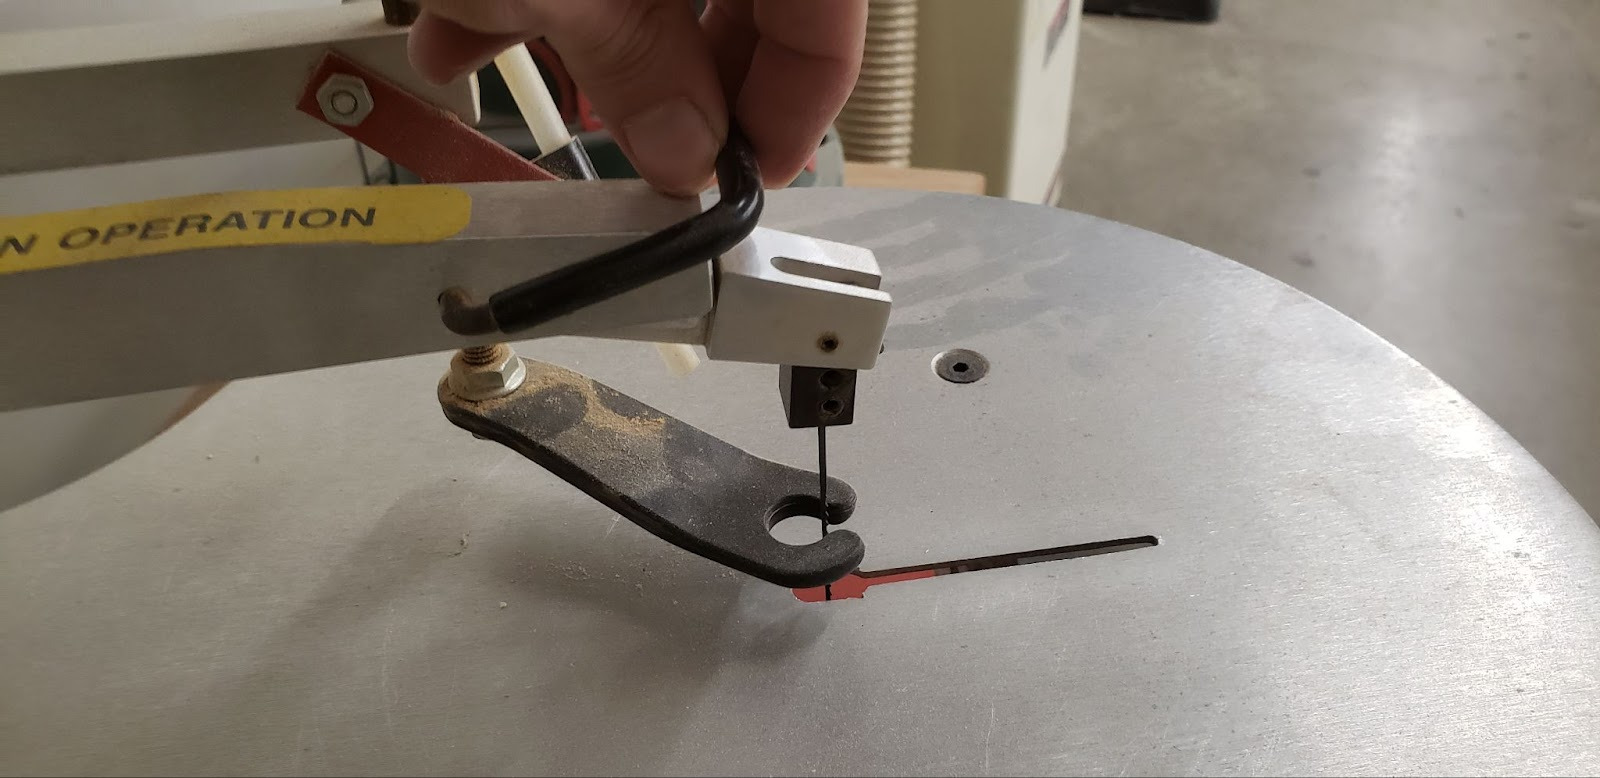
9. Air Hose - The built-in bellows provides a constant air stream while the machine is operating in order to clear sawdust away from your marked cut line.
10. Maintenance Tag - Manually tracks the usability status with Green/Yellow/Red cards
## Tool Safety
### COMMON HAZARDSContact with the blade can cause severe lacerations. Keep your fingers clear of the blade.The reciprocating arms above and below the table can bruise or crush body parts. Keep your hands and arms clear of the reciprocating arms during operation.The reciprocating action of the blade can cause the workpiece to shake vertically, and be lifted from the table. It is possible to get fingers pinched beneath the workpiece if it lifts, or lose control of the work if it is shaking. Use the pressure foot to keep the workpiece firmly against the table.The arms may be unstable if the machine is run while no blade is installed. Do not turn on the machine if there is no blade installed, and turn off the machine as soon as possible when a blade breaks.Turning on the saw at a high speed may over-stress the motor and linkages. Turning on the saw at a low speed may cause the motor to seize and overheat. Always set the motor to a medium speed when turning it on, then adjust to the desired operating speed.
### PROHIBITED MATERIALSLead paint should never be cut or sanded in the workspace.
## Initial Setup
### SETUP CHECKLIST
1. Install a blade into the lower holder
2. Install the lower holder into the saw
3. Install the blade into the top holder
4. Engage the tension lever
5. Adjust the tension
6. Adjust the pressure foot
### SETUP BREAKDOWN
### Install a blade into the lower holderSelect a blade from your collection. Remove the lower blade holder from it’s cradle in the lower arm below the table. Insert the bottom tip of the blade into the lower blade holder and tighten the knob. You may need to use a 5/16” wrench to stabilize the blade holder while tightening the knob.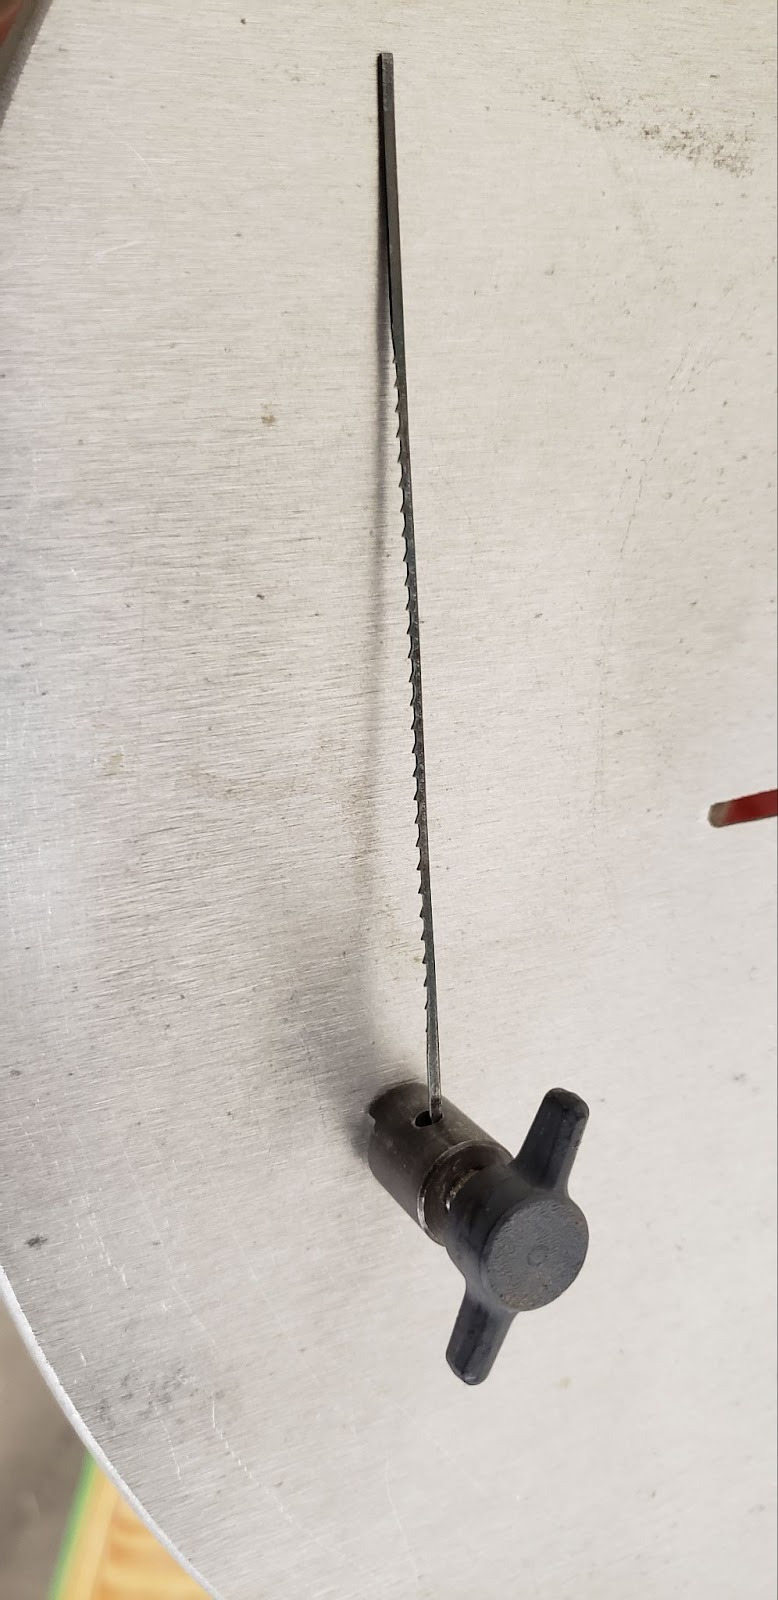
### Install the lower holder into the sawFeed the free end of the blade upward through the throat of the table, and place the lower blade holder into it’s cradle. The blade should point straight up from the holder, through a slot in the cradle, and then up through the throat.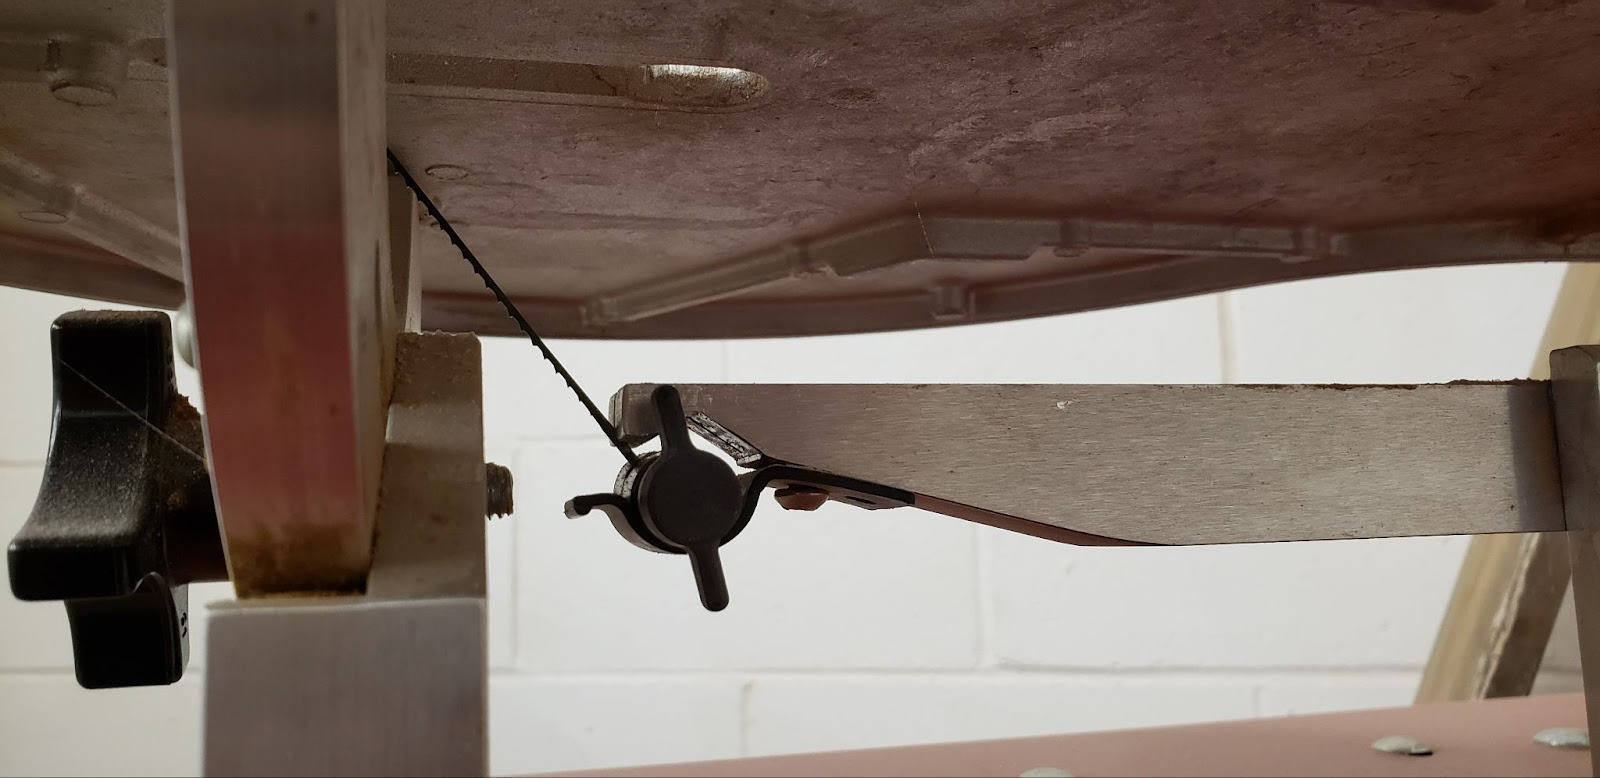
### Install the blade into the top holderPlace the top tip of the blade into the top blade holder and tighten the knob. The blade should sit firmly against the top and back of the slot cut into the top blade holder. Failing to seat the blade properly will lead to poor clamping forces, and the blade may pull free during operation. The edges of the top holder should be parallel square to the blade when viewed from the side, not tilted. If the blade seems too short to install, make sure it is not broken, and check that the tension lever is in it’s released position.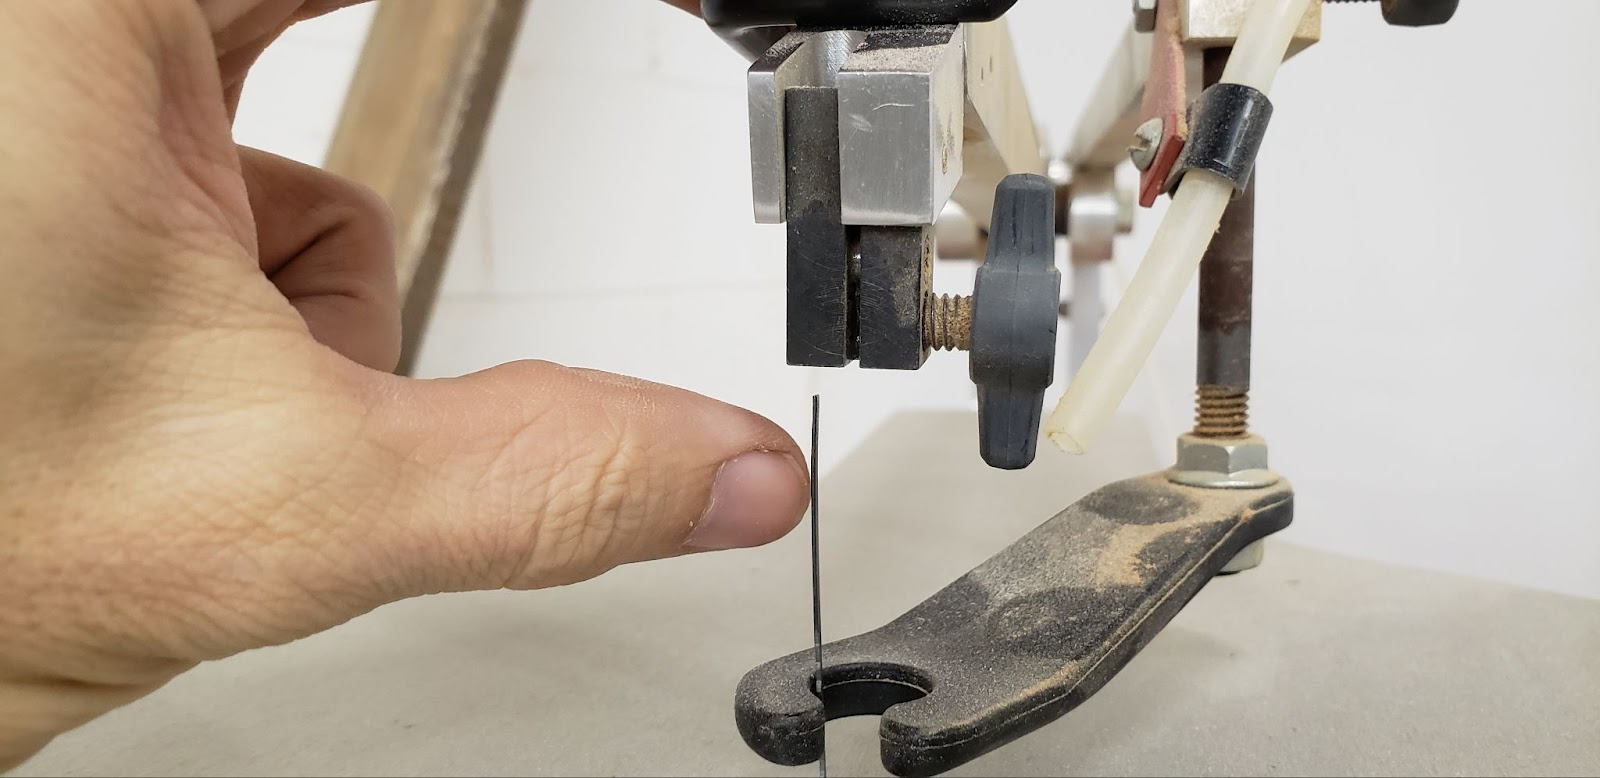
### Engage the tension leverOnce satisfied with the installation of the blade in the holders, pull the tension lever forward to place tension on the blade.
### Adjust the tensionPluck the blade to test it’s tension. Proper tension will be learned with practice, but you should get a musical twang. A very high pitched not indicates too much tension, and a deep rattly note indicates too little tension. At the back of the top arm is a small lever/knob which can be released, then turned to add or remove tension. Release the tension lever at the blade before making any adjustments at the rear, and make sure this lever/knob is engaged before starting the machine.
### Adjust the pressure footUnlock the pressure foot and adjust it so it presses lightly against the top of your material without restricting it’s lateral movement. Lock it firmly in place.
### CONSUMABLESMembers are expected to provide their own 5” pinless scroll saw blades. Pinned blades cannot be installed in this machine.
## Basic Operation
### OPERATION CHECKLIST
1. Set the motor speed to a medium speed
2. Turn on the motor
3. Adjust the speed to the desired operating speed
4. Make your cut
### OPERATION BREAKDOWN
### Set the motor speed to medium. If the speed is set too low, the motor will not turn and will quickly burn out. If the speed is set too high, the machine may start violently, causing damage to the armatures and linkages.
### Turn on the motorTurn the power switch on and allow the motor to come up to speed before making adjustments.
### Adjust the speedOnce the machine is running, you can freely adjust the speed up or down to reach the desired cutting speed. The faster the blade moves, the more aggressive you can be with your cuts. The thickness, type of material you are cutting, and blade speed will all affect the cutting speed and cut quality. Avoid extremely fast cutting speeds as it will cause premature wear on the machine.
### Make your cutBring your material into contact with the blade slowly. Continue your cut smoothly, always providing some forward movement any time you are turning the piece. It is possible to back out of a cut slightly and then move forward again while eating away at the side of your previous cut, creating a small hollow space which you can rotate freely around the blade in order to make very tight corners in the middle of a cut. As you finish a cut, make sure you keep your fingers clear of the blade.To make an interior profile cut, drill a hole through your workpiece, and then pass your blade through that hole when installing the blade. You can then cut the interior profile as you would any other line, and remove the blade again in order to release your workpiece from the saw.
## Cleanup
### CLEANUP CHECKLIST
1. Turn off the machine
2. Remove your blade if you wish to keep it for future use
3. Brush off the surfaces of the machine
4. Sweep the floor and surrounding area
5. Note any maintenance needs or concerns on the tag and at [protohaven.org/maintenance](http://protohaven.org/maintenance)
### SCRAP BREAKDOWNThere is ablack scrap bin in the back corner of the wood shop. Maintaining this is a shared, communal responsibility.Please do not throw trash or unusable items into the scrap bin. If you have generated scrap that you think would be a significant help to a future project, please place it in the bin. If you need some scrap while working on a project, please take whatever you need from the bin. We generate significantly more scrap than is used, so please throw away anything that is not project-worthy.If the scrap bin is full, please enlist the help of other members in emptying it into the dumpster behind the building, keeping just a few of the best pieces.
## Troubleshooting
### Common Issues
### Possible Causes
### Resolutions
The blade broke
Blade tension too highBlade tension too low
Adjust the blade tension at the rear of the saw.
Motor will not turn on
Motor speed too low
Make sure the motor is set to a medium speed when turning on, then lower the speed if needed.
Material shakes when cutting
The pressure foot is not keeping the material flat to the table
Lower the pressure foot to add more pressure to the material.
## Additional ResourcesManufacturer’s website:
[https://stores.bushtonhawkstore.com/bm-26-precision-scroll-saw/](https://stores.bushtonhawkstore.com/bm-26-precision-scroll-saw/)
Scroll saw blade instructional material:
[https://scrollsawer.com/2017/09/06/choosing-the-right-blade/](https://scrollsawer.com/2017/09/06/choosing-the-right-blade/)
Introduction to scroll saw skills:
[https://www.youtube.com/watch?v=8WYw855pI04](https://www.youtube.com/watch?v=8WYw855pI04)
Blade preparation and tensioning:
[https://www.youtube.com/watch?v=2tKojGCeUkQ](https://www.youtube.com/watch?v=2tKojGCeUkQ)
# General Woodshop - Drill Press
Jet Step Pulley Drill Press JDP-20MF
# Woodshop Drill Press Tool Tutorial
The [Setup](https://docs.google.com/document/d/1fgGf_ZLOqwlQTx1YIZ9nFxD17Jf7r4HzAWGljEqGrEk/edit#heading=h.ex7lrkf7dm2k), [Operation](https://docs.google.com/document/d/1fgGf_ZLOqwlQTx1YIZ9nFxD17Jf7r4HzAWGljEqGrEk/edit#heading=h.w363ck6j8o52), and [Cleanup](https://docs.google.com/document/d/1fgGf_ZLOqwlQTx1YIZ9nFxD17Jf7r4HzAWGljEqGrEk/edit#heading=h.4s5ijlcmnku) Checklists of this guide are what instructors use to ensure that you can use the equipment according to community expectations.Provides a stable setup to drill repeatably vertical holes.
## Usage Highlights
[Woodshop Drill Press Clearance](https://www.protohaven.org/equipment/) or [Class Equivalent](https://www.protohaven.org/product-category/classes-events/) Required Before Use
### SAFETY
### CARE
### CLEANUP
1. Always clamp workpieces to the table
1. Be careful not to drill into the metal table
1. Brush chips off of the surfaces
2. Keep hands away from spinning bit
2. Unlock the table before turning the height adjustment crank
2. Sweep chips from the floor
3. Unplug the machine when changing belts
3. Submit a [maintenance request](http://protohaven.org/maintenance) when needed.
## Personal Protective EquipmentSafety glasses must always be worn. Hearing protection is highly recommended in the workshop, especially when the dust collection fan is active.
## Tool Anatomy
### MACHINE ANATOMY
1. Power Switch - on/off switch
2. Maintenance Tag - Manually tracks the usability status with Green/Yellow/Red cards
3. Table - Features clamp rails and sacrificial table inserts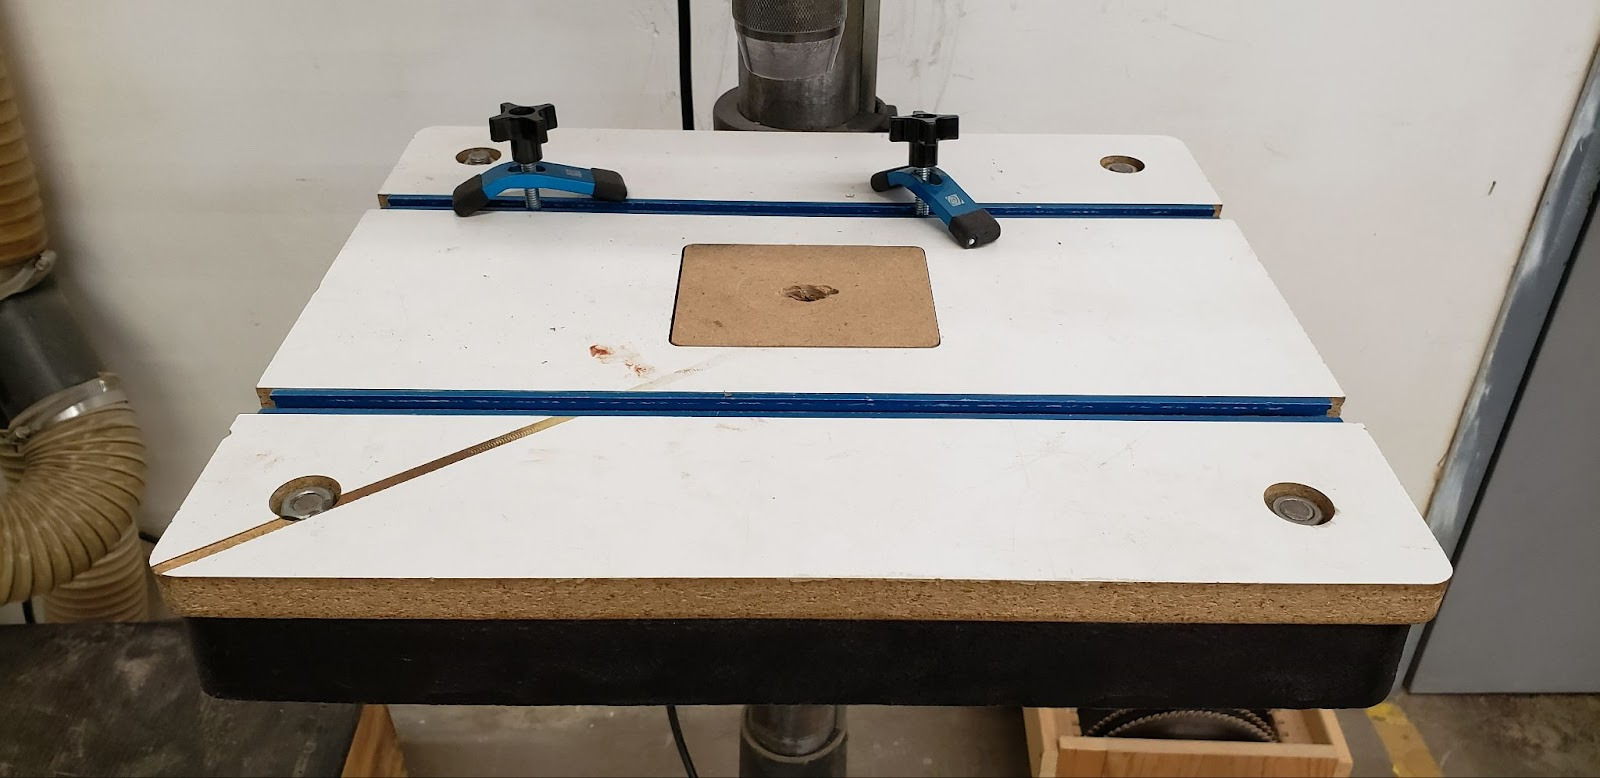
4. Chuck - 3-finger chuck opens and closes by hand to hold drill bits
5. Feed Handle - Used to lower the drill into the workpiece
6. Depth Stop - Can be used to limit the depth of a drilling operation
7. Drive Belts - Used to transmit the power of the motor to the chuck at varying RPMs
8. Belt Tension Lever - Adds or removes tension from the drive belts
9. Belt Tension Locks - Locks the belt tension in place
## Tool Safety
### COMMON HAZARDSIf a drill gets stuck in a workpiece during a drilling operation, it can spin the workpiece violently, causing broken fingers or other injuries. Always clamp workpieces to the table and never rely on holding a workpiece by hand.Spindle entanglement can occur when fabric gets caught by or wrapped around the chuck or spindle. Never wear gloves while using a drill press, and keep loose clothing and hair away from moving parts.
## Initial Setup
### SETUP CHECKLIST
1. Install a bit
2. Adjust the RPMs
3. Adjust the table height
4. Clamp the workpiece
### SETUP BREAKDOWN
### Install a bitChoose a bit sized appropriately for your project. Open the fingers of the chuck by using two hands to twist the top and bottom knurled pieces. Place the bit into the chuck centered between the three fingers. Close the jaws of the chuck by using two hands to twist the knurled pieces. As the jaws close, double-check that the bit is held by all three fingers and not caught between just two fingers.
### Adjust the RPMsDepending on the diameter of the bit, you may need to adjust the RPMs at which it is spun. Wood is generally forgiving about drill speed, and a medium speed will do for most jobs, but drilling with large forstner bits will require slower speeds due to the forces required for the high material removal rate. Similarly, very small bits will need faster speeds in order to cut properly.Unplug the machine before adjusting the drive belts. After unplugging the machine, open the belt cover at the top of the machine. Loosen the tension lock knobs found towards the rear of each side of the machine’s head. Once loosened, pull the tension lever toward the front of the machine to remove tension from the drive belts.Remove both belts from the pulleys. Start with the highest belt and remove it from the top of the ‘pyramid’ pulley, then the ‘tornado’ pulley. Repeat for the second belt.Look up the desired RPMs on the chart provided inside the lid of the belt housing. Reinstall the drive belts as shown on the chart, starting by installing the lowest belt first, ‘tornado’ pulley first, then ‘pyramid’. Do the same for the second belt.Standing behind the drill press, pull the lever towards the rear of the machine. As you pull, check that tension is added evenly to both belts. Some shaking of the middle pulley may be needed to get the tension to be even. Maintaining the tension on the lever with your left hand, lock the far tension lock knob with your right hand. Finish by locking the near lock knob. Close the pulley cover.
### Adjust the table heightUnlock the table with the table lock found where the table hooks to the vertical column. Turn the height adjustment crank to raise or lower the table so that the travel of the chuck will allow the entire depth of the hole to be drilled. Note that the table can also be rotated around the column while the table is unlocked. Lock the table in place when it is appropriately positioned.
### Clamp the workpiece to the tableUsing the blue clamps and the clamp rails embedded in the table, securely attach the workpiece to the table. The drilling operation can not only spin, but lift a workpiece, so make sure it is completely immobilized. If the blue clamps are too small to clamp your workpiece, utilize the bar clamps available in the woodshop to clamp around the edge of the table to secure your workpiece to the table.
### COMMON SETTINGSN/A
### CONSUMABLESWhile there are often drill bits in the wood shop tool bins available for general use, it is considered the responsibility of each member to provide their own bits. This ensures that each member will have sharp bits that are the size they need.
## Basic Operation
### OPERATION CHECKLIST
1. Position the workpiece
2. Drill the hole
3. Turn off the machine
### OPERATION BREAKDOWN
### Position the workpiecePlace the workpiece on the table and position the location where you want the hole directly below the tip of the drill. It is often useful to not only mark the position of the hole, but punch the location so that the drill does not wander or walk away from the correct position when it touches the surface of the work. The wider the tip of the drill is, the more likely it will be to wander. For large bits it is often useful to drill a smaller pilot hole first that the larger bit can then follow in a second pass.Lock the clamps and table in place to keep the piece solidly positioned below the drill throughout the process.
### Drill the holeTurn the motor on and slowly lower the drill to the surface of the material using the feed handle. Once you are at the surface, slowly lower the drill into the material. After a half-inch or so of drilling, pull the drill back out of the hole to clear any chips that are building up in the flutes of the drill. Continue this ‘drill then clear’ pattern until you reach the desired depth or break through the bottom of the workpiece.
### Turn off the machineSlowly return the drill to its highest position and turn the motor off.
## Cleanup
### CLEANUP CHECKLIST
1. Brush any chips from the surfaces of the machine
2. Sweep any chips from the floor around the machine
3. Note any maintenance needs or concerns on the tag and at [protohaven.org/maintenance](http://protohaven.org/maintenance)
## Troubleshooting
### Common Issues
### Possible Causes
### Resolutions
The fingers of the chuck aren’t moving
The chuck is unscrewing in the middle
Tighten the smooth core of the chuck against the lower knurled portion of the chuck, then operate normally.
The bottom of each hole splinters badly
Lack of support is causing blowout
Use a backer board to support the bottom of the workpiece.
# General Woodshop - Spindle Sander
# Manual(s)
[Grizzly\_g0723\_m.pdf](https://wiki.protohaven.org/attachments/409)
# Spindle Sander Tool Tutorial
The [Setup](https://docs.google.com/document/d/1O4AmBGWHejMy7hC4f8CCHpcwF5eL-6RUennlkPMko1w/edit#heading=h.ex7lrkf7dm2k), [Operation](https://docs.google.com/document/d/1O4AmBGWHejMy7hC4f8CCHpcwF5eL-6RUennlkPMko1w/edit#heading=h.w363ck6j8o52), and [Cleanup](https://docs.google.com/document/d/1O4AmBGWHejMy7hC4f8CCHpcwF5eL-6RUennlkPMko1w/edit#heading=h.4s5ijlcmnku) Checklists of this guide are what instructors use to ensure that you can use the equipment according to community expectations.The spindle sander is necessary to sand concave profiles that you may cut with a bandsaw or router. The belt/disc sander is not capable of sanding concave profiles.
## Usage Highlights
[Spindle Sander Clearance](https://www.protohaven.org/equipment/) or [Class Equivalent](https://www.protohaven.org/product-category/classes-events/) Required Before Use
### SAFETY
### CARE
### CLEANUP
1. Keep materials flat to the table
1. The top knob is reverse threaded.
1. Brush the dust from the machine surfaces
2. Use the appropriate throat plate for the installed drum
2. Do not use pliers to tighten or loosen the top knob.
2. Vacuum out any sawdust from the throat.
3. Do not install a washer larger than installed drum
3. If an abrasive sleeve spins freely on a drum, stop and address the problem.
3. Sweep the floor surrounding the machine
4. Submit a [maintenance request](http://protohaven.org/maintenance) when needed.
## Personal Protective EquipmentSafety glasses must always be worn. Hearing protection is highly recommended in the workshop, especially when the dust collection fan is active.
## Tool Anatomy
### MACHINE ANATOMY
1. Power Switch - on/off switch. Pull to turn on, push to turn off.
2. Maintenance Tag - Manually tracks the usability status with Green/Yellow/Red cards
3. Drums - These fill the space between the spindle and the abrasive sleeves.
4. Abrasive Sleeves - These consumables slip over the drums.
5. Throat Plates - These prevent the workpiece from dropping between the table and the abrasive.
6. Top Washers - Keep the abrasive sleeve from sliding off the top of the drum during operation.
7. Top Knob - Keeps the washers and drums attached to the spindle. This is reverse threaded, and loosens by turning clockwise.
## Tool Safety
### COMMON HAZARDSIf a washer larger than the drum is installed below the drum, it will bump the bottom of the throat plate as the spindle oscillates up and down. This can cause the throat plate to become dislodged and contact the abrasive, potentially jamming the throat plate or injuring the user. Once the throat plate has become dislodged, the workpiece may enter the throat and become trapped, causing damage to the machine and potentially damaging the user. Never install a washer that is bigger than the drum below the drum.If a washer larger than the drum is installed above the drum, it can cause a pinching hazard as the spindle oscillates up and down. If the workpiece is thicker than the washer’s lowest point in the oscillation, it will crush against the top of the workpiece, causing damage to the spindle and the oscillating drive below the table. Even if the washer will not contact the top of the workpiece when oscillating, it poses a crush hazard if the user’s hand gets between the over-sized washer and the workpiece or table. Never install a washer that is bigger than the drum on top of the drum.The workpiece may fall into the throat if there is a gap between the throat plate and the abrasive. Always use the appropriate throat plate for the installed drum to ensure a minimal gap.
### PROHIBITED MATERIALSMaterials that are reclaimed may be painted with lead paint. Do not sand any materials that might possibly contain lead.Metals are not permitted on the wood shop sanding equipment. Sparks generated pose a fire hazard due to the sawdust around the machine and in the dust collection system. Metals will also quickly wear out the abrasives and the graphite platen found behind the belt sander.
## Initial Setup
### SETUP CHECKLIST
1. Remove any installed abrasives
2. Select the appropriate size drum
3. Install new abrasive on drum
4. Install drum on spindle
5. Install throat plate
### SETUP BREAKDOWN
### Remove any installed abrasivesEven if the abrasive installed is the size you want, it is best to disassemble the abrasive sleeve and drum from the spindle to ensure the previous owner did not install something improperly.Unscrew the top knob by turning it clockwise. This is OPPOSITE the usual direction you would use to unscrew something.Lift off the drum and any washers you find on top or beneath the drum.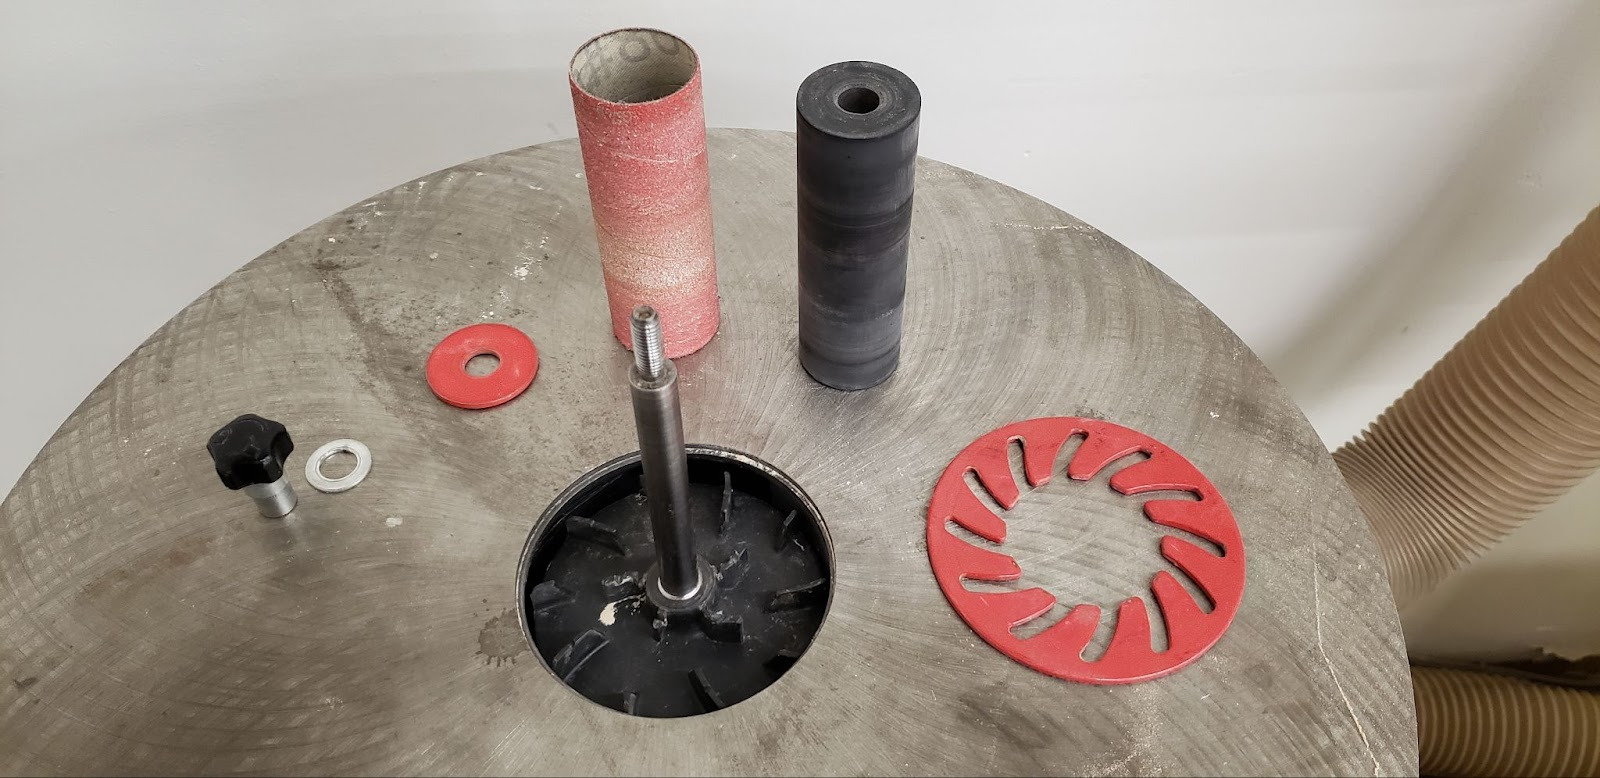
### Select the appropriate size drumYou will need to use an appropriate diameter drum for the radius of the curves on your project. Generally, the larger the diameter of the drum, the smoother the resulting surface will be. Smaller diameter drums can get into tighter spaces, but it can be challenging to use them without leaving a choppy surface finish.
### Install abrasive on drumSlide an abrasive sleeve onto the drum. The sleeve should fit very snugly on the drum, and you should not be able to easily spin the sleeve on the drum. With use, the abrasive sleeves will stretch slightly, and their fitment will become looser. If there is too much play between the sleeve and the drum, you can try wrapping the drum in painters’ tape to take up the extra space, or get a new sleeve that hasn’t been stretched.
### Install drum on spindleSlide the drum onto the spindle, letting it bottom out on the black plastic under the table. Loose abrasive sleeves in the past have worn away portions of the impeller below the table, so sanding with loose sleeves can cause them to slide downward on the drum. In an effort to combat this slippage, it is possible to put a washer THE SAME SIZE as the drum onto the spindle before installing the drum to provide a platform to support the sleeve from below. Do NOT install a washer larger than the drum below the drum.Once the drum has been slid onto the spindle, place a retaining washer THE SAME SIZE as the drum on top of the drum. This prevents the drum from sliding upwards off of the drum while sanding. Do NOT install a washer larger than the drum below the drum. There are not currently enough washers to place one both on top and below the drum. When forced to choose, place the retaining washer on top of the drum.In an effort to increase the gripping pressure of the drum against the inside of the abrasive sleeve it is common to place a secondary washer smaller than the diameter of the drum between the drum and the top retaining washer. This is acceptable and does not pose a danger to the user or the machine.Screw the top knob onto the spindle. It is reverse-threaded and needs to be turned COUNTER-CLOCKWISE, to tighten. The knob should have a small silver washer that sits between the retaining washer and the shoulder of the knob.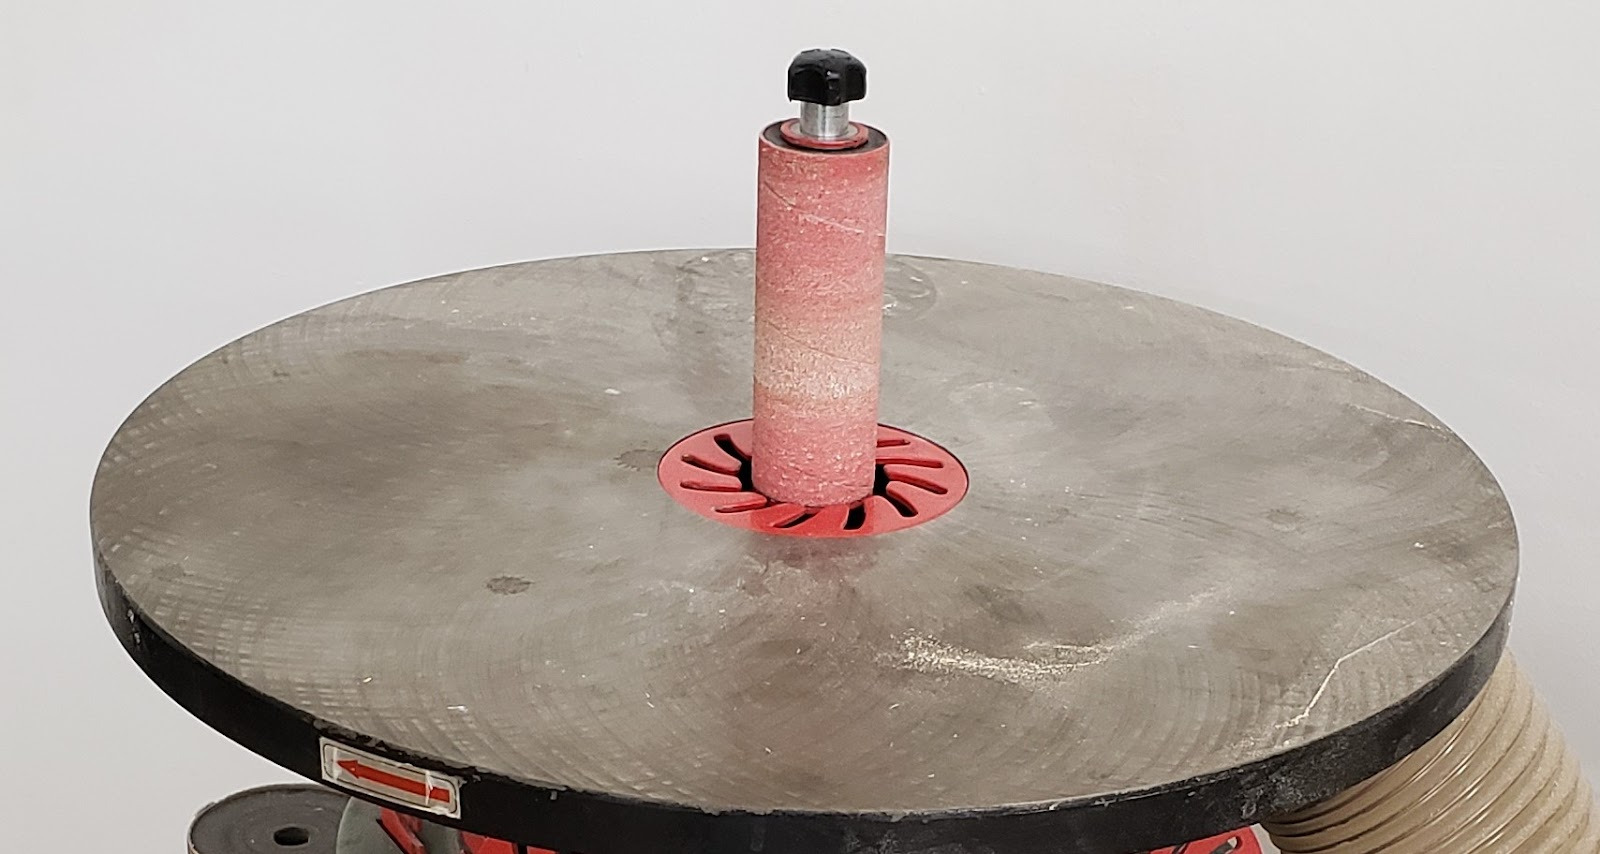
### COMMON SETTINGSN/A
### CONSUMABLESUsers are responsible for providing their own abrasive sleeves. These sleeves wear out quickly, and one cannot rely on the previous user leaving a sleeve in usable condition. An effort will be made to keep a supply of sleeves available for purchase in the store, but it is wise to purchase what you need from a third party in advance.
## Basic Operation
### OPERATION CHECKLIST
1. Open dust gate
2. Power on Dust Collection
3. Place the workpiece on the table
4. Touch the workpiece to the abrasive
5. Clean the abrasive as needed
### OPERATION BREAKDOWN
### Open dust gate
### Power on Dust Collection
### Place the workpiece on the tableSet the piece flat on the table and make sure you have free range of motion to complete your task.
### Touch the workpiece to the abrasiveAllow the spindle to oscillate, and gently bring your workpiece into contact with the abrasive. With smooth, sweeping motions, pass your workpiece across the spindle. It is best to pass the workpiece from right to left, pushing against the direction the abrasive is spinning. Passing from left to right may cause the worpiece to kick back, pulling it from your hands.Special care should be taken when sanding inside cutouts or deep contours as a loss of control can cause the workpiece to “helicopter”, causing bodily injury.
### Clean the abrasive as neededKeep an eye on the abrasive as you sand, and use the eraser to pull the sawdust out of the abrasive if it begins to get clogged.
## Cleanup
### CLEANUP CHECKLIST
1. Brush the dust off of the machine surfaces
2. Sweep the dust from around the machine
## Troubleshooting
### Common Issues
### Possible Causes
### Resolutions
The abrasive does not sand as fast as it should
Clogged abrasive
Use the eraser to unclog the abrasiveInstall new sleeve
Sleeve is creeping up off the drum
Improper installation of retaining washer
Install proper retaining washer on top of drum
Sleeve is creeping down off the drum
Inadequate interface between the drum and the sleeve
Tighten the top knobInstall a new sleeveWrap the drum in painters’ tapeAdd a retaining washer the same size as the drum (if available) below the drumAdd a small washer between the top of the drum and the retaining washer to help squish the drum out against the sleeve.
# General Woodshop - Downdraft Table
Grizzly H2936
# Manual(s)
[https://www.grizzly.com/products/grizzly-28-x-39-downdraft-table/h2936](https://www.grizzly.com/products/grizzly-28-x-39-downdraft-table/h2936)
[Grizzly H2936 Manual.pdf](https://wiki.protohaven.org/attachments/407)
[Grizzly H2936 Data Sheet.pdf](https://wiki.protohaven.org/attachments/408)
# Sheet Metals - Shear
# Sheet Metal Shear Tool Tutorial
The hydraulic shear is used to cut sheet metal to accurate dimensions quickly. This is a powered machine that uses a blade to shear the metal with hydraulic force. It is operated by a foot pedal so the operator’s hands are away from the blade when shearing operations are performed. The machine has a fence to create continuous and accurate cuts at user specified dimensions.
[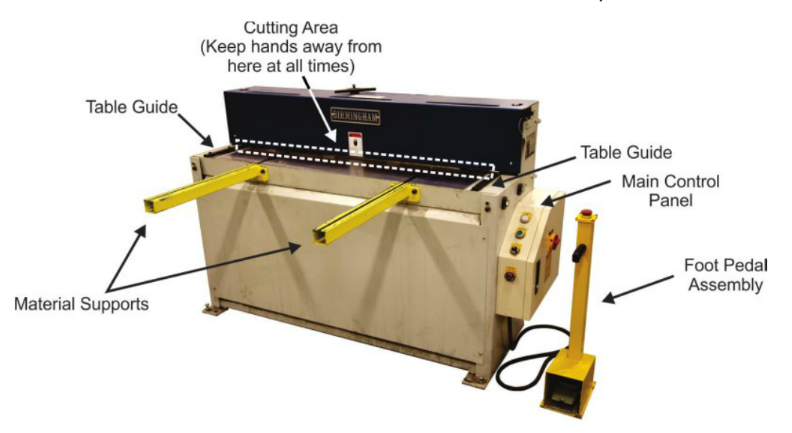](https://wiki.protohaven.org/uploads/images/gallery/2026-07/4yBimage.png)
## Safety Precautions and Features
- Keep hands away from pinch points and clear of all cutting areas.
- Sheet metal has sharp edges and gloves are suggested when working with sheet metal.
- Do not exceed the maximum capacity (16ga aluminum or mild steel)
- Leave foot off the pedal until hands are clear and you are ready to operate the machine
- Do not put your hands under your material. They can be crushed under your material even if away from the blade
When shearing small pieces of material use a push stick. Do not have your hands under push sticks when shearing as they could be crushed.
- Do not push pieces of metal (that did not fall out the back after being cut) through with your fingers.
- Always use a push stick to push pieces through the cutting area
- Never have your fingers under the cutting area.
- Before operating the machine make sure that no one is behind it or in an area of danger
- The sheared metal will have a sharp burred edge. Use gloves to handle the sheet metal.
[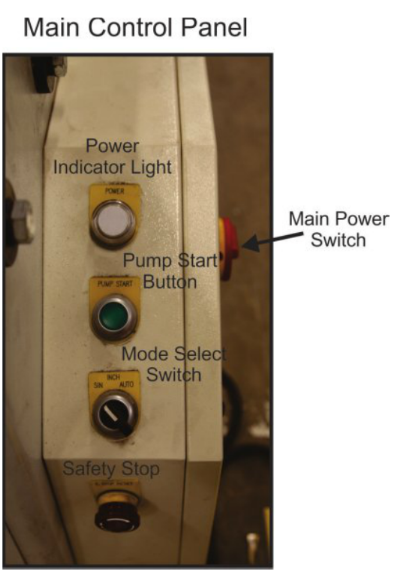](https://wiki.protohaven.org/uploads/images/gallery/2026-07/R6Simage.png)
## Adjustments
#### Adjusting the Fence
1. Release both work stop locks to allow fence movement.
2. Turn the crank handle until the yellow gauge reads at the dimension that is desired.
3. Ensure that the desired position is reached on both measurement points on the fence.
4. Tighten both work stop locks to ensure this position does not move.
[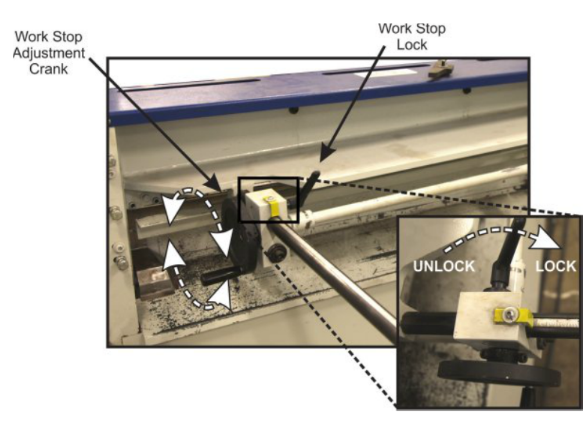](https://wiki.protohaven.org/uploads/images/gallery/2026-07/xOhimage.png)
Do not rely on the fence for shearing precision dimensions. Expect slight variation between the dimension measured with the fence and the actual cut dimension.
#### Adjusting Modes
The hydraulic shear has 3 different cutting modes: SIN, INCH, and AUTO.
- **SIN** is short for single. In this mode when you depress the foot pedal the shear will complete one complete cutting cycle and then park at the top position.
- **INC** is short for incremental. When the pedal is tapped the blade will lower incrementally. If the pedal is depressed fully it will contiually run through cutting cycles.
- **AUTO** - The shear will keep running through cutting cycles as long as the pedal is depressed.
## Basic Operation
1. Adjust work stop fence to desired location.
2. Turn machine ON by rotating the main power switch to the ON position.
3. Start the pump by pressing the PUMP START button on the main panel.
4. Select the desired mode cutting mode: SIN, INCH, or AUTO.
5. Release the stop on the main panel by rotating it clockwise. It is released when it pops out.
6. Place material on the machine table and ensure that it is pushed all the way back against the work stop fence and aligned square with the table guide.
7. Release the stop on top of the foot pedal assembly by rotating it clockwise. It is released when it pops out.
8. Ensure that everything is clear of the cutting area other than your material and that your hands are not located under your material.
9. Push down on the foot pedal.
10. Release the foot pedal.
11. Remove material.
12. When all operations are complete, activate the main panel and foot pedal assembly stops by pressing them in.
13. Stop the pump by pressing the pump start button once more.
14. Turn main power switch to the OFF position.
15. Clean up scraps behind the machine.
## Notes
- Angles can be cut if a fixture is used to set against the table guide at the desired angle. This piece would then guide your work to be cut at the desired angle. Find a shop tech for assistance in setting up a fixture for cutting angles.
- Malleable plastics can also be cut on the hydraulic shear such as PETG, polycarbonate, polypropylene, and Delrin as long as the thickness is under 1/8”
- Cut a test piece first to ensure your work stop distance is accurate enough for your needs
- Use a push stick on top of your material to hold it down
- Clamp to the material supports to prevent material from shifting.
# Sheet Metals - Turret Punch
# Turret Punch Tool Tutorial
The turret punch provides a fast, accurate and flexible method of punching holes in sheet metal up to 16 gauge thickness. Twelve
replaceable punch and die sets are located in two turrets, which can be positioned by a special spanner wrench that synchronizes the rotation of the turrets. Each punch and die set is labeled alphabetically. A single lever action lock pin mechanism locks the turrets in place during punching operations and permits quick reset of the turrets between punching operations. Each revolving turret punch and die can be replaced separately.
Each punch and die station will accommodate a variety of special punches that are made available by the manufacturer.
[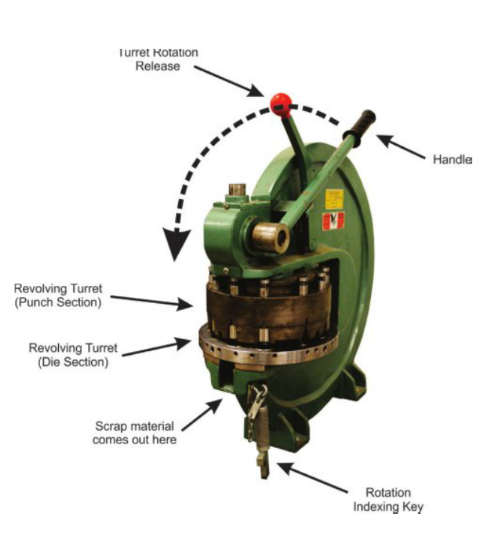](https://wiki.protohaven.org/uploads/images/gallery/2026-07/bzAimage.png)
## Safety Precautions and Features
- Always line up the same sized punch with the same sized die. All punches and dies are lettered.
- Keep your hands clear of the punching area when operating the machine
- Do not have your fingers under material when punching. Your fingers could get crushed
- Do not operate the machine in excess of its rated capacity (16 gauge steel or 1/8” aluminum)
- Beware of protruding machine elements or assemblies
- Avoid any pinch-points created by the movement of the machine’s components
- If normal pressure applied to the punch handle fails to punch through the material, do not use additional leverage techniques to make further attempts. Either the punch and die are misaligned or you have exceeded the machine’s capacity
## Adjustments
#### Setting the Hole Size
1. Push back on the turret rotation release lever.
2. If the punch and die letters are not aligned move either the punch or die turret until the letters align.
3. Insert the rotation indexing key to align the punch and die turrets.
4. Move to the desired sized punch and die set.
5. Release the turret rotation release lever.
6. Move the indexing key left and right slightly until the turrets click or lock into place (if the indexing key does not move either way the turrets are already locked).
7. Check to see if the punch and die letters match.
## Basic Operation
1. Set up the machine so that the desired punch and die set is located in the punching area on the machine.
2. Place material into the gap between the two turrets.
3. Make sure your fingers are safe from pinch points.
4. Smoothly pull the punch handle towards the front of the machine to its maximum extent.
5. Return the handle to its resting location.
6. Remove your material.
7. When all operations are complete clean up scrap material on the machine and surrounding floor area.
## Notes
To remove material without warping the surface of thin materials use an ejector plate. If none is present one can be made easily using the corner notcher and a piece of scrap.
1. Cut a 90 degree V piece out of scrap sheet metal.
2. Place this piece over your material.
3. Push the handle back to its resting position. As the punch retracts, the ejector plate will serve as a stop and eject your material without damaging it.
[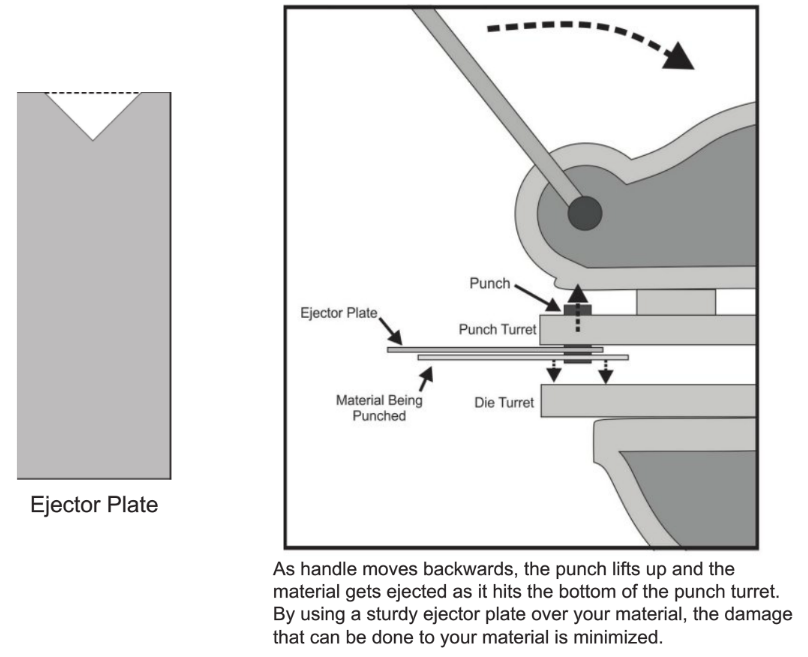](https://wiki.protohaven.org/uploads/images/gallery/2026-07/DSlimage.png)
# Sheet Metals - Notcher
# Notcher Tool Guide
The corner notcher is a versatile, heavy- Handle duty bench tool for shearing, notching and piercing work. This tool is used for making specific angled cuts in sheet metal. Notches of more than 90° can be accomplished in two operations. The shearing capacity of this tool is 16 gauge sheet metal.
[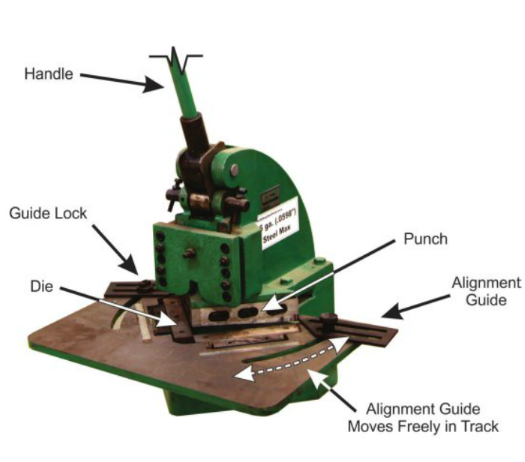](https://wiki.protohaven.org/uploads/images/gallery/2026-07/UW1image.png)
## Safety Precautions and Features
- Keep guards in place and in working order
- Keep all body parts away from moving parts
- Do not exceed maximum capacity of the notcher (16 gauge steel)
- Don’t force the machine. It will do the job better and more safely at the rate for which it was designed
- Don’t over reach. Keep proper footing and balance at all times
- Sheet metal has sharp edges. To prevent cuts, use caution when handling
- Keep hands and fingers clear of the shear
## Adjustments
The blade’s edges will dull over time. If you believe the blades have become dull please find a shop tech for assistance.
The alignment guides allow for specific angles to be cut. To adjust the alignment guides, loosen the guide lock and set the alignment guide to the desired angle. Relock the guide lock.
## Basic Operation
1. Adjust the blade guides appropriately according to the size of your material.
2. Hold the operating handle in the UP position and place material on the table.
3. Align material for the desired cut.
4. Pull the lever downwards and follow through with the cut.
5. Raise the handle and remove material.
6. When all cuts are finished, clean up scraps on the table and surrounding work area.
## Notes
Many angles can be cut on this tool. The following graphic illustrates some of the possibilities when setting up the alignment guides for different angles:
[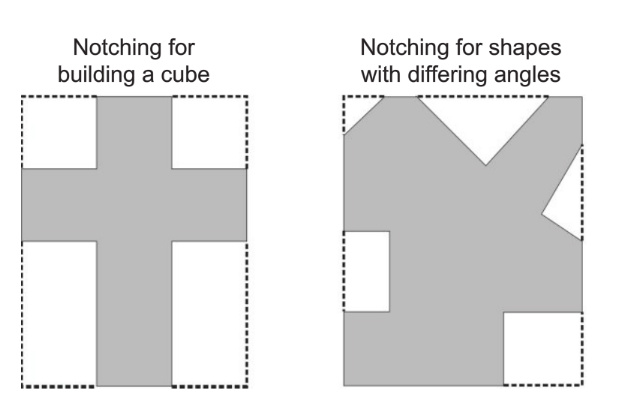](https://wiki.protohaven.org/uploads/images/gallery/2026-07/nf7image.png)
# Jewelry - Shear
# Jewelry Shear Tool Tutorial
The straight or slitting shear is a bench tool used to make manual straight cuts in sheet metal. It consists of two -
blades that shear material when a lever is pulled and the blades come together.
The shearing capacity of this tool is 16 gauge sheet.
TODO image needed
## Safety Precautions and Features
- Keep guards in place and in working order
- Keep all body parts away from moving parts
- Do not exceed maximum capacity of the shear (16 gauge sheet)
- Don’t force the machine. It will do the job better and more safely at the rate for which it was designed
- Don’t over reach. Keep proper footing and balance at all times
- Sheet metal has sharp edges. To prevent cuts, use caution when handling
- Keep hands and fingers clear of the shear
### Materials
- Materials must be thinner than 16 gauge - sheet and wire are both fine
- Materials must be soft - hard silver or softer
- Precious metals as well as brass, copper, nickel, and titanium are permitted
- All other metals are not permitted - specifically stainless and carbon steels and aluminum
- Wood and plastics are prohibited
- Use of cutting fluids is prohibited
## Adjustments
The blade’s edges will dull over time. If you believe the blades have become dull please find a shop tech or staff member for assistance.
The workholding pressure foot can be used to support material while performing cutting operations.
## Basic Operation
#### Cutting flat stock and sheet metal
1. Lift the handle to open blades.
2. Insert material and lower the workholding foot to support the material (this will prevent the material from pivoting from the force of the shearing action.
3. Hold material on one side to keep it in place.
4. Pull the handle downwards and follow all the way through with the cut.
5. When all cuts are finished, clean up scraps on the table and surrounding work area.
# Sheet Metals - Finger Brake
# Finger Brake Tool Tutorial
A finger brake, also called a box-and-pan brake, is used for making bends in sheet metal. The brake consists of a flat surface onto which the material is placed, and a clamping bar which will come down and hold the material firmly during the bend.
The clamping bar consists of a series of removable metal fingers. These fingers may be removed and rearranged to permit bending of restricted areas of a piece of sheet metal or of already partially formed pieces.
The front plate of the machine is hinged and may be lifted, forcing the material extended over a straight edge to bend to follow the plate. Bends can be made up to any angle with a practical limit of about 120 degrees.
Maximum bending capacity is 16 gauge steel.
[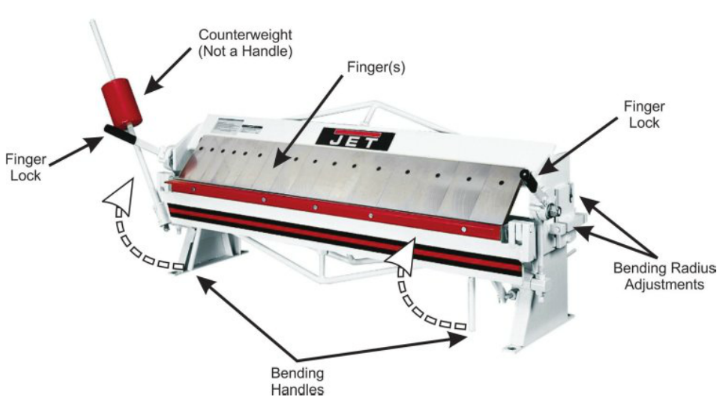](https://wiki.protohaven.org/uploads/images/gallery/2026-07/S9oimage.png)
## Safety Precautions and Features
- Keep guards in place and in working order
- Keep all body parts away from moving parts and pinch points
- Do not use the counterweight as a handle
- Take care when removing fingers as they are sharp
- Do not exceed maximum capacity of the brake (16 gauge steel)
- Don’t force the machine. It will do the job better and more safely at the rate for which it was designed
- Don’t overreach. Keep proper footing and balance at all times
- Sheet metal has sharp edges. To prevent cuts, use caution when handling
## Adjustments
Adjustments can be made to change the bend radius and compensate for material thickness. Find a shop tech to assist with these adjustments.
To remove the fingers for clearance bends use the attached Allen wrench. Loosen the bolt and the finger will come off. Place the fingers below the machine on the base shelf and replace them when bending operations are complete.
## Basic Operation
1. Unlock both finger locks.
2. Adjust to the desired radius and compensate for material thickness. Find a shop tech for assistance with these adjustments.
3. Remove necessary fingers for the bend you are making if applicable.
4. Place your material flat on the work table surface.
5. Align material for the bend location you desire.
6. Lock both finger locks.
7. Smoothly pull bending handles upwards to create the desired bend angle (travel beyond the bend you desire by a few degrees to compensate for the material springback.
8. Return the bending handle to its original location.
9. Release finger locks and remove material.
10. Replace fingers if applicable.
## Notes
- Always bend a few degrees beyond the angle you desire. This will compensate for the natural springback of the metal and your bend will end up at the angle you desire.
- Some bends cannot be made in one movement and must be made incrementally with other bends to reach the desired result.
- Generally, you want to bend from the outside of the part inwards.
- Every parts bending sequence can be quite unique. Take the time to think through the order of operations.
- Materials like aluminum need a larger bend radius as the material can crack with a very tight bend radius.
- The bend radius should be kept the same on all bends if possible to minimize setup time changes.
- For most materials, the ideal inner radius should be at least one material thickness.
- For complex sheet metal geometry, use a 3D program such as Autodesk Inventor to build your part in 3D and then have the software unfold it for you. You can then use this 2D information for layout to create your part in the metal shop. Inventor will do quite a bit of the number crunching for you in regard to bend radiuses and material thickness compensation, and this will be reflected in the 2D drawing you use for layout.
# Welding - Spot Welder
# Spot Welder Tool Tutorial
A spot welder is part of a metal joining process in which parts to be welded are held together under pressure by electrodes. Current is then applied and the resistance between the 2 sheets of metal causes a bonding only at the contact point and creates a small weld. The weld is made by a combination of heat, pressure, and time. The spot welder will weld steel of 16 gauge or thinner.
[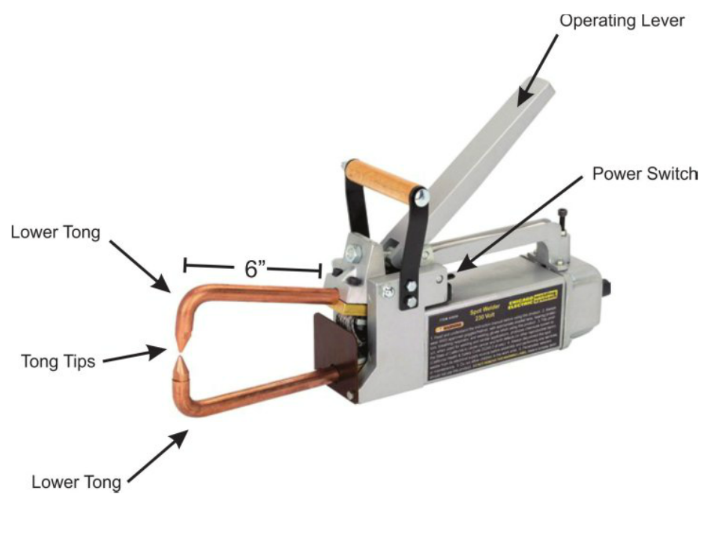](https://wiki.protohaven.org/uploads/images/gallery/2026-07/7P6image.png)
## Safety Precautions and Features
- Do not touch live electrical parts
- Remove all flammables within the area of the weld
- Do not spot weld where flying sparks can strike flammable material
- Watch for fire, and keep a fire extinguisher nearby
- After completion of work, inspect the area to ensure it is free of sparks, glowing embers, and flames
- Do not exceed the equipment rated capacity
- Wear dry, hole-free insulating gloves and body protection
- Keep cords dry, free of oil and grease, and protected from hot metal and sparks.
- Frequently inspect the input power cord and ground conductor for damage or bare wiring
- Turn off all equipment when not in use
- Do not touch hot parts bare handed
- Do not breathe the fumes
- Do not put hands between tips
## Adjustments
The tong tips will become distorted and will flatten out from the heat and pressure involved during operation. The tips will need to be
dressed by a staff member or shop tech.
[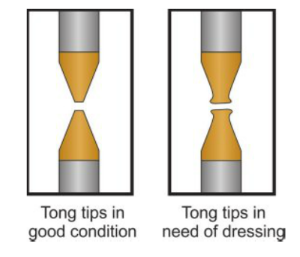](https://wiki.protohaven.org/uploads/images/gallery/2026-07/1cBimage.png)
Adjustments can be made to adjust tong pressure. Find a staff member or shop tech to adjust these settings.
**Here is what to look for to determine if the tong pressure is too weak or too strong:**
- If the tongs pressure is too weak, and the workpieces are loose when the tongs close, severe
arcing will occur between the workpieces and no weld can be made
- If the tongs pressure is too strong, the weld will dimple, and material will splash out around the
weld area
## Basic Operation
1. Brush the metal to remove oxidation.
2. Clamp both pieces together with a C-clamp.
3. Plug spot welder in.
4. Push the operating lever down so the tongs apply pressure directly to the spot where a weld is desired.
5. Flip and hold the power switch to the left or right and hold until the metal becomes red hot.
6. Release the power switch and then release the operating lever.
7. Unplug the spot welder when all welding operations are complete.
## Notes
Here is a matrix for basic troubleshooting with the spot welder. Find a staff member or shop tech for any adjustments that need to be made to the spot welder. Do NOT attempt to make these adjustments yourself.
**Problem**
**Solution**
No Weld Output
Replace Line fuse or reset line circuit breaker.
Reset circuit breaker and check power/start switch.
Clean material to be welded and clean tongs and tong holders.
Longer than normal weld time required
Dress or replace tips
Clean workpieces
Adjust tong pressure
Clean ends of tongs and tong holders
Burn through at point of weld
Shorten weld time
Adjust tong pressure
Dress or replace tips
Realign
# Sheet Metals - Electric Slip Roll
# Electric Slip Roll Tool Tutorial
A slip roll uses three rolls to form light gauge sheet metal into curves and pipe. The two front rollers of a slip roll, or pinch rollers, are used to feed the sheet metal into the rear bending, or forming, roller that places the arc in the sheet metal. By adjusting the position of the bending roller, you can change the diameter of the curves produced. Once you’re finished forming, the top roller is hinged so you can “slip” the metal off the roller. The slip roll can roll up to 16 gauge sheet metal.
[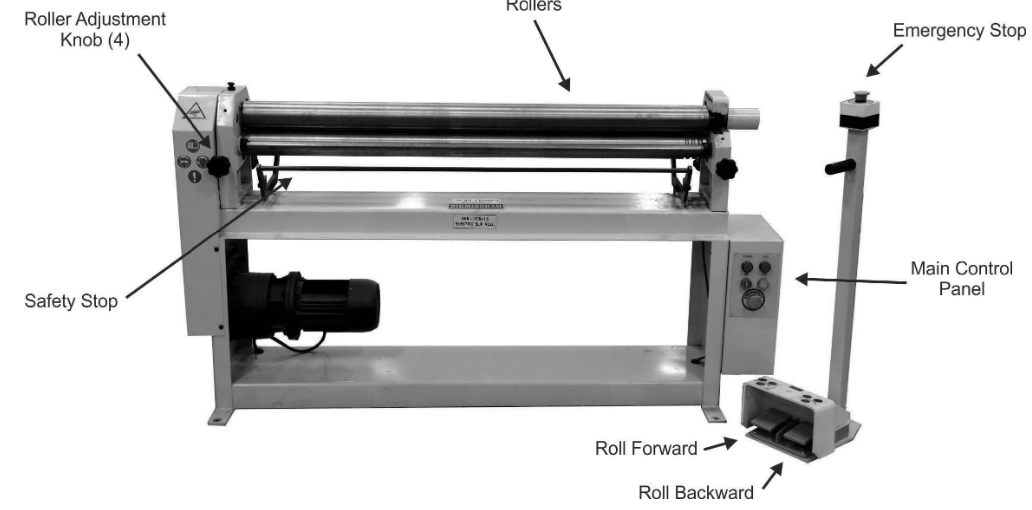](https://wiki.protohaven.org/uploads/images/gallery/2026-07/7aZimage.png)
## Safety and Procedures
- Keep hands and fingers away from the rollers during operation, so that your hands are not pulled in and crushed.
- Use the blue safety to stop the machine movement.
- Do not attempt to roll metal thicker than 16 gauge.
- Keep your foot OFF the control pedals until your hands are clear of the machine.
- The rollers are extremely heavy. When lifting the top roller, make a firm grip, since dropping the roller may damage it or cause serious injury. Ask a shop tech for assistance if you need it.
- When setting the top roller back in place, make sure your fingers do not get pinched.
## Adjustments
#### Pinch Rollers
The pinch rollers are used to feed your material into the machine so that it can be formed by the bending roller. Your material must be held tightly in order for it to feed into the machine consistently.
Use the scales on each end of the roller to create even tension, or you can offset the tension to roll cones.
[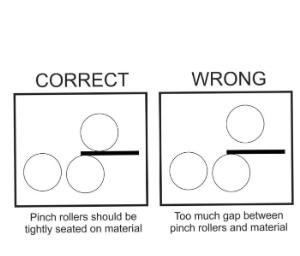](https://wiki.protohaven.org/uploads/images/gallery/2026-07/23himage.png)
#### Bending Roller
The height of the bending roller determines the curve radius that will be produced. Each side of the bending roller moves independently, so be sure to move them the same amount for accurate curves. Raising the bending roller produces tighter curves.
You must start with the bending roller top surface level with the material you are feeding through. Raise the bending roller each time you run your material through, until you reach your desired bend radius.
[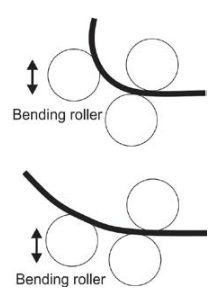](https://wiki.protohaven.org/uploads/images/gallery/2026-07/Ok9image.png)
## Basic Operation
1. Rest your metal on the bottom pinch roller and push the metal into the slip roller.
2. Turn the front knobs directly below the bottom pinch roller until the sheet metal is held tightly between the rollers.
3. Turn the machine on and release all E-stops by gently turning the knobs.
4. Make sure your hands are clear of the rollers, then press the forward feed pedal to feed your metal into the machine until it is just in front of the bending roller.
5. Adjust both knobs that move the bending roll until it is slightly higher than the sheet metal.
6. Press the forward feed pedal to run your sheet metal over the bending roll and curve the metal. Feed your sheet metal all the way out of the machine.
7. Raise the bending roll slightly, using the scales on each side to make both ends the same height.
8. Run your sheet metal back through the slip roll.
9. Repeat the process of raising the bending roll and running the sheet metal through the slip roll until you achieve your desired curve.
## Tips and Tricks
- Tight curves require several passes through the machine. If you’re forming multiple pieces of sheet metal, you may wish to run all the pieces through at the same setting, then move the bending roller up to continue the process of forming
- Complex curves can be created by feeding your sheet metal into the machine at an angle
- Cones and tapered curves can be formed by setting one end of the bending roller lower than the other end to change the bending radius
- The grooved section of the rollers can be used to form round stock.
- All round stock must be smooth and free of burrs. Rebar is not allowed on this machine
- Be sure to use the groove size that corresponds to your round stock size
[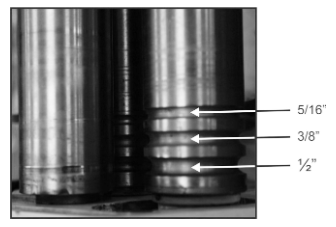](https://wiki.protohaven.org/uploads/images/gallery/2026-07/Jhvimage.png)
# Welding - Oxy-Acetylene Torch
# Oxy-Acetylene Torch Tool Tutorial
Oxygen and Acetylene in conjunction with a torch setup are used for cutting and welding steel and other metals. Some other fuel gasses can be used with Oxygen for cutting, but many cannot be used for welding.
[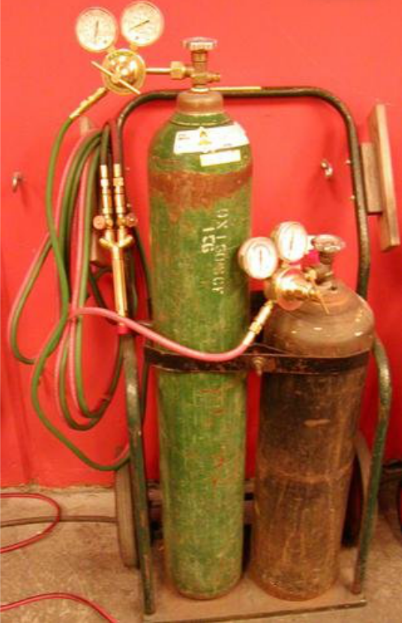](https://wiki.protohaven.org/uploads/images/gallery/2026-07/Biiimage.png)
## Safety
OXYGEN AND ACETYLENE RIGS POSE THE RISK OF FIRE, EXPLOSION, SERIOUS INJURY OR DEATH UNLESS USED CORRECTLY. PLEASE FOLLOW ALL PROCEDURES STRICTLY TO ENSURE SAFETY.
BE SURE all connectors on the whole welding rig are tight to avoid leaks and potential fire or explosion.
#### Gas Cylinders
COMPRESSED GAS CYLINDERS CAN CAUSE SEVERE PROPERTY DAMAGE, INJURY AND DEATH. STRICT SAFETY PROCEDURES MUST BE FOLLOWED.
- Compressed gasses are under high pressure. Tanks should be kept upright and strapped or chained, and bottles should be capped or attached to a regulator. If you find any tanks in an unsecure condition, please notify staff or shop tech immediately.
- Only shop techs and staff should move or change tanks. Notify the nearest shop tech if a tank is empty.
- Keep all sparks, heat, electricity and heavy activity away from tanks.
- Never EVER weld or cut a gas cylinder, even if you think it is empty.
- Oxygen is under extremely high pressure in the tank, and can cause other materials to spontaneously combust and explode. Always make sure the tank is handled gently and is in a secure position, as described above.
- Acetylene, while not under high pressure, is very unstable and prone to explosion. It should never reach over 15 p.s.i. hose pressure or under 40 p.s.i. tank pressure.
- Always make sure that tank valves are closed when not in use and never open both Oxygen and Acetylene tank valves at the same time unless you are lighting the torch.
#### Regulators
- Regulators should be attached to gas cylinders. Only staff and volunteer leadership should change out or install regulator systems.
- Regulators should be kept clean and dry at all times. They can be wiped down with dry rags only.
- If you suspect a leak, you can check yourself or ask a shop tech to do so. If you do it yourself, use Leak Check Solution to spray on regulators and look for continual bubbling. **Do NOT use soapy water,** as the ingredients in some soaps can act as fuel. Notify a shop tech on duty of any leaks that are not solved by tightening the bolting surface or are present on hoses or anywhere that is not a bolted joint.
- All hose lines should be bled and all valves closed after use. If you see a regulator not in use that shows its needles above zero, please bleed the lines or notify the tech on duty.
- If needles do not return to zero upon attempting to bleed the lines, notify the tech on duty.
#### Hoses
- Hoses should continually be checked for damage, and always kept out of harm’s way. Coil excess hose on the rig; do not keep it loose on the floor.
- Do not use a hose that looks damaged for any reason. If a hose appears damaged, shut down the rig and notify the shop tech on duty immediately.
#### Torch
- Torch should be very clean and not show any damage. If soot or damage is present, shut down the rig and notify the shop tech on duty.
- Torch can be wiped down with a dry rag only. **Do not use water or solvents on the brass parts**.
- Check all tips for soot, damage or clogged holes. If holes are clogged or unclean, use the tip cleaner while the tip is off of the torch.
- Check all torch knobs and connections to ensure they are closed before use. Bolted connections should not be able to be turned with fingers.
- Bolted connections should be closed lightly with a wrench after they have been made finger tight. The threads need to be sealed, but should not be tightly closed, as over tightening can damage them.
- Make sure that all hand turned knobs are closed when not in use. Never open both Oxygen and Acetylene valves at the same time unless lighting the torch.
- Keep all Oxy-Acetylene equipment away from your clothes and body. You can damage the more delicate parts by leaning against them, and leaking gases can collect near you and create fire and explosion.
## Equipment Controls
#### Tank & Regulators
[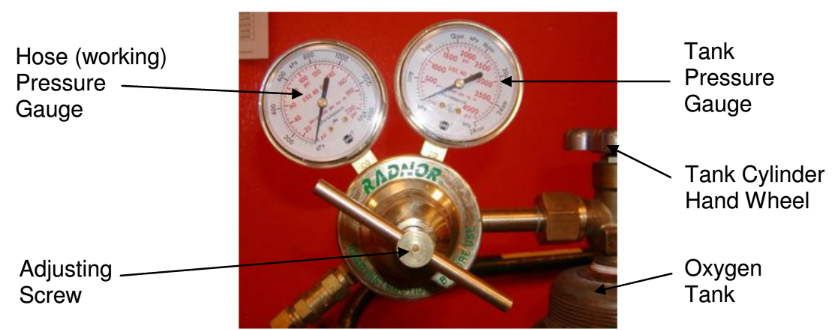](https://wiki.protohaven.org/uploads/images/gallery/2026-07/7qPimage.png)
#### Torch
[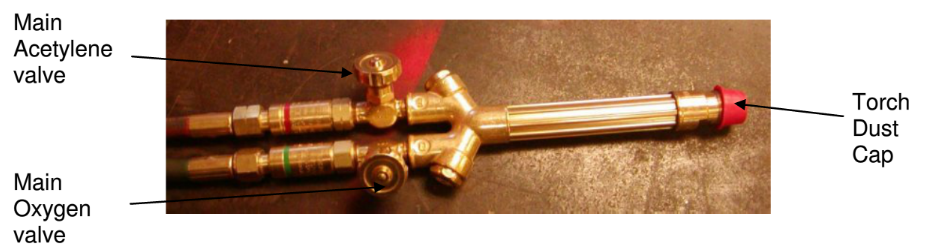](https://wiki.protohaven.org/uploads/images/gallery/2026-07/KnXimage.png)
Cutting Attachment - see page 4-21 in Victor Welding, Cutting and Heating Guide
Cutting Tip - see page 4-23 in Victor Welding, Cutting and Heating Guide
Welding Tip - page 4-24 in Victor Welding, Cutting and Heating Guide
## Basic Operation
#### Safety Check
During the safety check, if you find anything not to the specifications below, it presents a potentially disastrous situation. Notify the shop tech on duty and do not use the Oxy Acetylene rig.
- Make sure tanks are upright, securely chained or strapped, and regulators are securely fastened.
- READ THE LABELS on the tanks. If there is no label or the tanks do not read oxygen and acetylene, do not use them and notify the shop tech on duty immediately.
- The gases should be attached as follows:
- The oxygen should be attached to a regulator with tank pressure numbers that reach to 4000 and to a green hose that leads to a valve on the bottom right of the torch labeled “O” or “OXY”.
- The acetylene should be attached to a regulator with tank pressure numbers that reach to 400 and to a red hose that leads to a valve on the bottom left of the torch that reads “F” or “FUEL”.
- Look for excessive dirt or grease anywhere, and any damage or missing parts on the regulators.
- Check that all connections to torch, hoses, regulator, and tank are tight.
- Regulator screws should turn with one finger, indicating that the regulator valve is closed.
- All needles on gauges should be all the way down, touching the pin, not registering any pressure. If they are registering pressure, you can bleed the lines yourself or have a shop tech do it for you. If the needles do not fall after being bled, there may be regulator damage.
- Check the hoses thoroughly on both sides for any burns, deep cracks, or holes.
- The torch should have all valves closed.
OXYGEN AND ACETYLENE ARE SAFE WHEN USED CORRECTLY, BUT CAN START FIRES AND CAN BE HIGHLY EXPLOSIVE. FOLLOW ALL INSTRUCTIONS CAREFULLY AND DO NOT DEVIATE FROM SAFE OPERATION
#### Torch Settings for CUTTING
[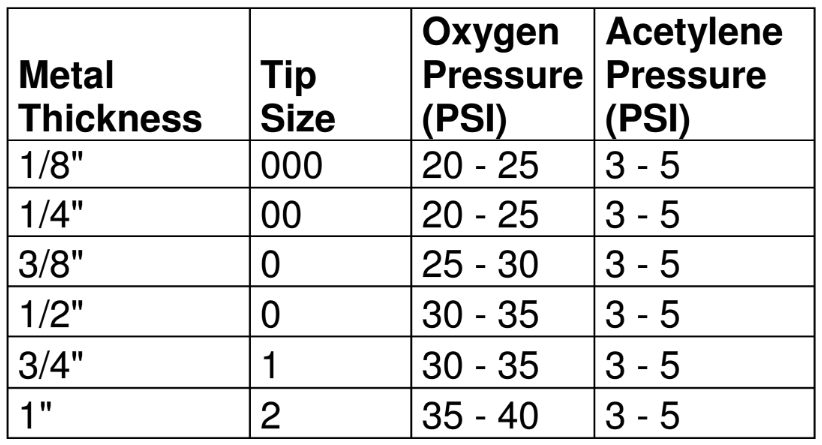](https://wiki.protohaven.org/uploads/images/gallery/2026-07/6Puimage.png)
#### Torch Settings for WELDING
[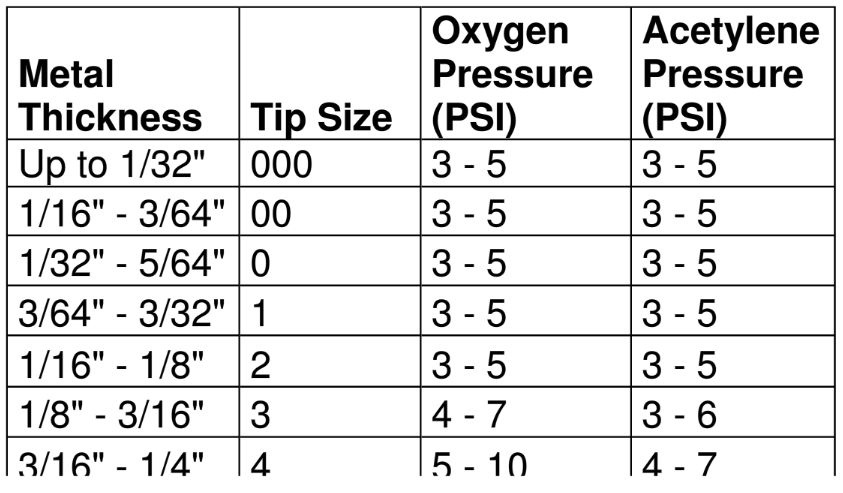](https://wiki.protohaven.org/uploads/images/gallery/2026-07/xzRimage.png)
### Assembling the torch
- Check all mating surfaces for dents or damage, and all o-rings for cracks or melting. Notify the nearest shop tech and do not use the torch if these are damaged.
- All threaded attachments should be screwed on finger tight and then tightened gently with a wrench until they reach a stopping point.
**For Cutting:** Bolt the top of the cutting attachment to the bottom of the torch body. Choose a cutting tip based on the thickness of the metal and attach it to the top of the cutting attachment.
**For Welding:** Choose a welding tip based on the thickness of the metal, and bolt it directly to the torch body.
### Setting the gas pressure
Always stand to the side of the regulator when opening the tank hand wheels.
**Oxygen**
1. Crack open the oxygen tank valve, and open it all the way (do not back off, leave it at the end of travel). Do not put your hand on top of the knob; turn the knob from the side to avoid injury. If the needle does not stay still, does not rise at all, or reads at a number above 2500 PSI, shut down the rig and notify the shop tech on duty.
2. Turn the adjusting screw clockwise until the needle on the working pressure gauge reaches the numbers listed for your tip size on the chart.
1. If your metal thickness is on the high side for your tip range, use the higher numbers on the gas adjustment range. Use the low range if the thickness is low or in the middle (keeping numbers on the low side for the thickness usually helps to result in a cleaner cut).
2. **NEVER USE NUMBERS OUTSIDE THE RANGE OF YOUR TIP,** regardless of the thickness of your metal.
3. To get true working pressure, turn adjusting screw while the oxygen is flowing. Open both bottom and top valves on the cutting torch, or just the one valve for the welding tip. **TURN OFF ALL VALVES WHEN COMPLETE.**
**Acetylene**
1. Crack open the acetylene valve and open it 1/4 - 1/2 turn ONLY. If the needle does not stay still, does not rise at all, or reads at a number above 2500 PSI, shut down the rig and notify the shop tech on duty.
2. Turn the adjusting screw clockwise until the needle on the working pressure gauge reaches the number listed for your tip size on the chart.
1. If your metal thickness is on the high side for your tip range, use the higher numbers on the gas adjustment range. Use the low range if the thickness is low or in the middle (keeping numbers on the low side for the thickness usually helps to result in a cleaner cut).
2. **NEVER USE NUMBERS OUTSIDE THE RANGE OF YOUR TIP,** regardless of the thickness of your metal.
3. To get true working pressure, turn the adjusting screw while the acetylene is flowing. Open the acetylene knob slightly on the bottom left of the torch. **MAKE SURE ALL TORCH VALVES ARE CLOSED WHEN COMPLETE.**
### Lighting the Torch and adjusting the Neutral flame
- Use Striker to light torch — NO OTHER starter
- \#5 shade eye protection must be worn
- When assembling torch and tips at bolting surfaces, tighten with fingers until snug, then use wrench to ensure seal by turning until it stops.
## Cutting
1. Check to ensure all knobs on the torch are turned fully counterclockwise.
2. Open the lower Oxygen knob all the way.
3. Point the torch away from you and anything flammable. Open the Acetylene knob on the bottom left just a little (note: you may detect a garlic like smell that indicates the acetylene is flowing).
4. Click the striker and light the torch.
5. Turn the Acetylene knob counter clockwise SLOWLY until the turbulent part of the flame is approximately TWO INCHES from the Cutting Tip
6. Reach up to the top Oxygen valve and turn it counter clockwise until all secondary flames disappear and preheating cones are both as bright and as sharp as possible. Be careful not to add too much Oxygen; the torch should sound quiet, with no hissing.
7. Using the instructions on pages 7-49 through 7-50 of the Victor Welding, Cutting and Heating Guide, position the torch against the material and guide it to cut through the steel, ideally in one continuous motion.
8. If you lose the cut at any point, lift the torch and release the Oxygen Jet, then return the torch to the very end of the cut, and resume the cut as though you were starting from the beginning.
9. If you do not get through the material at any point in the first pass, DO NOT go over the cut again, as you will only further heat the steel and allow it to slump and weld together.
10. When the cut is complete, you can move to begin another one or shut down the torch.
Never put the torch down when it is lit!
#### Turning off the torch:
1. Turn off the acetylene knob on the bottom left, then the top oxygen knob.
2. You may leave the oxygen knob on the bottom left open until you leave the area or finish the cutting session.
## Welding
1. Check to ensure all knobs on the torch are turned fully counterclockwise.
2. Point the torch away from you and anything flammable. Open the Acetylene knob on the bottom left just a little (note: you may detect a garlic like smell that indicates the acetylene is flowing).
3. Click the striker and light the torch.
4. Turn the Acetylene knob counter clockwise SLOWLY until the turbulent part of the flame is approximately ONE INCH from the Welding Tip.
5. Turn the oxygen valve on the right counter clockwise until all secondary flames disappear and the preheating cone is both as bright and as sharp as possible. Be careful not to add too much Oxygen; keep the cone bright.
6. This flame will be more noisy than the one for cutting.
See also pages 5-33 through 5-34 of the Victor Welding, Cutting and Heating
Guide for a different technique for adjusting the neutral flame and diagrams of
the neutral flame.
Welding:
1. Select a piece of copper coated steel filler rod, size 3/32” in diameter. The alloy code on the package should read R45, indicating a rod for gas welding mild steel without flux.
2. Place the 2 pieces of metal you are going to weld sided by side on the foundry brick, with a gap about 1/32” at the starting end, and about 1/16” at the trailing end. With this thickness of material, the gap on the trailing end will close as the filler metal contracts while it cools during the welding process
[](https://wiki.protohaven.org/uploads/images/gallery/2026-07/L9Zimage.png)
An alternate way of tacking the metal in place is described on page 6-35 of the Victor Welding, Cutting and Heating Guide.
#### Turning off the torch:
1. Turn off the acetylene knob on the bottom left, then the top oxygen knob.
2. You may leave the oxygen knob on the bottom left open until you leave the area or finish the cutting session.
## If a leak or flashback occurs
#### Leak
1. Turn off all valves on the torch and tank and notify the shop tech on duty.
2. Do not use this equipment until it is repaired and cleared.
#### Flashback
A flashback is when flames appear anywhere on the torch or hoses, or you hear a loud whistling sound.
1. Turn off torch valves immediately (you can skip the bottom oxygen if you are using the cutting torch).
2. Turn off tank valves.
3. Notify the shop tech on duty, and do not use this equipment until cleared.
## Cleanup
#### Bleeding the lines at the end of your working session
1. Make sure all torch valves are closed by checking the knobs to ensure they are turned clockwise all the way.
2. Bleed the lines ONE GAS AT A TIME ONLY.
1. Turn off the tank valve by turning it clockwise all the way.
2. Find the knob(s) of that same gas on the torch and crack them open until both needles on the gauges fall counterclockwise back to the pin. Close the knobs.
3. Turn the adjusting screw of that regulator counterclockwise until it becomes noticeably looser and you can turn it with one finger.
4. Repeat with the other gas.
Never let both gases flow through the torch at once unless you are lighting it.
#### General cleanup
1. Carefully hook the hoses onto the hose hanger.
2. Return all tools and safety equipment to their proper locations.
3. Sweep your work area thoroughly. Put all sweepings and hot metal in the steel scrap bucket, not in the regular trash.
## Brazing
Brazing is a metal joining process utilizing gas/fuel torches and filler metals which melt above 840° F and below the melting point of the base metals. The filler metal is drawn into the joint by capillary attraction producing a sound, leak-proof connection. For most applications requiring high strength, high temperature bonds, which also provide a clean and neat final appearance brazing techniques offer quick and economical solutions. It’s about selecting the right tools and materials for a given application. Doors open, new possibilities come to light. Join dissimilar metals, work on a larger scale, add color and texture to your work. All this is possible with relatively inexpensive materials and equipment.
[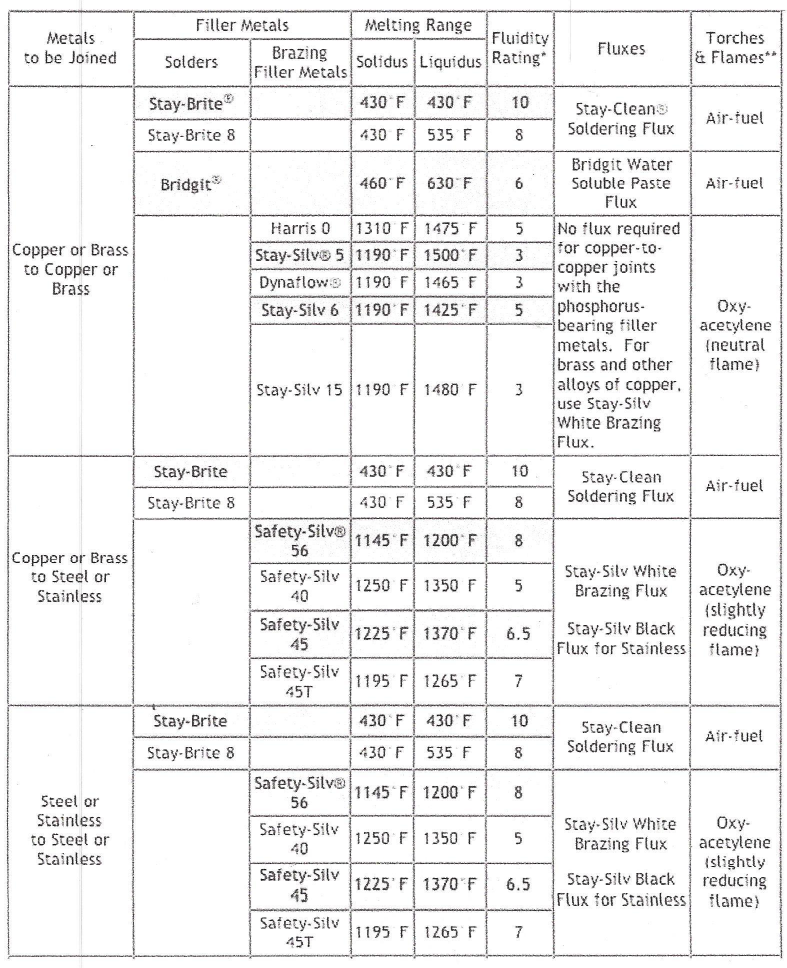](https://wiki.protohaven.org/uploads/images/gallery/2026-07/hDwimage.png)
# Resources
### COOL LINKS
American Welding Society - http://www.aws.org
#### Charts and Equipment
Victor Equipment
[http://www.thermadyne.com/victor/](http://www.thermadyne.com/victor/)
#### Education
Wikipedia - http://en.wikipedia.org/wiki/Oxy-fuel\_welding\_and cutting
ESAB Welding OxyFuel Handbook - http://www.esabna.com/EUWeb/OXY \_handbook/5890oxy1 1.htm
### BOOKS
Oxyfuel Gas Welding
Bowditch/Bowditch (129 pages)
Goodheart/Wilcox ISBN #1-56637508-8
#### Welding Project Ideas
Miller Welding
[http://www.millerwelds.com/interests/projects/](http://www.millerwelds.com/interests/projects/)
Lincoln Electric
[http://www.lincolnelectric.com/community/projects/](http://www.lincolnelectric.com/community/projects/)
# Graphics - Vinyl Cutter
# Vinyl Cutter Tool Tutorial
A vinyl cutter is used to cut vinyl of varying thicknesses. With the vinyl cutter you can make professional looking signage, stencils, banners and vehicle signs. You can also make paint or sand blasting masks. You will import your designs from a variety of different graphic and text tools like Adobe lllustrator, CoreIDRAW or simple Text tools, and apply the cut vinyl to other surfaces.
[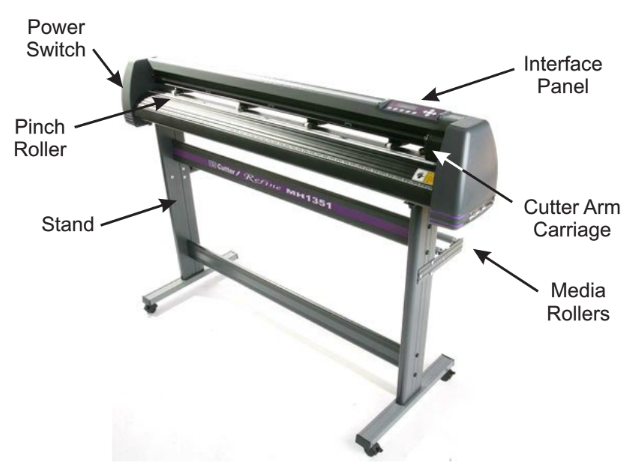](https://wiki.protohaven.org/uploads/images/gallery/2026-07/HMPimage.png)
## Basic Operation
#### Setup
1. Turn the vinyl cutter on — the switch is on the left side of the machine.
2. Unlatch the pinch-roller levers by pulling them downward.
3. Insert the vinyl from behind, face up, between the two media rollers and push the pinch-roller levers up to lock the vinyl in place, allowing 1” at the top of the piece of vinyl. Make sure to leave a distance of 1”-2” from the untextured section of the roller.
4. Set your origin to the lower right hand corner of the vinyl by selecting pressing the OFFLINE/PAUSE button, moving to the desired location with the arrow keys and pressing the ORIGIN button to set the current location as the origin. Make sure the blade height is set correctly by running a test pattern on the vinyl cutter (see "Performing a Test Cut" below).
Avoid moving the cutting head by hand; this back-drives the motor and can damage the internal electronics of the cutter.
#### Cutting
1. Open Sure Cuts a Lot software (see below) to load and edit your design.
2. When you've finished adjusting your design, Press the Send button to cut the vinyl.
3. Unload and weed your vinyl, then apply it to your project using transfer paper
#### Cleanup
1. Place any reusable scraps of vinyl in the box and dispose of all other scraps
2. Put all tools away where you found them
3. Make sure your area is clean. A broom and dustpan are located nearby at a rolling trash can.
## Adjustment
#### Adjusting the Blade Height
The blade holder holds the blade that cuts the vinyl. The blade magnetically locks within the housing which allows it to swivel while cutting. There are two screw rings which adjust and lock the blade height.
[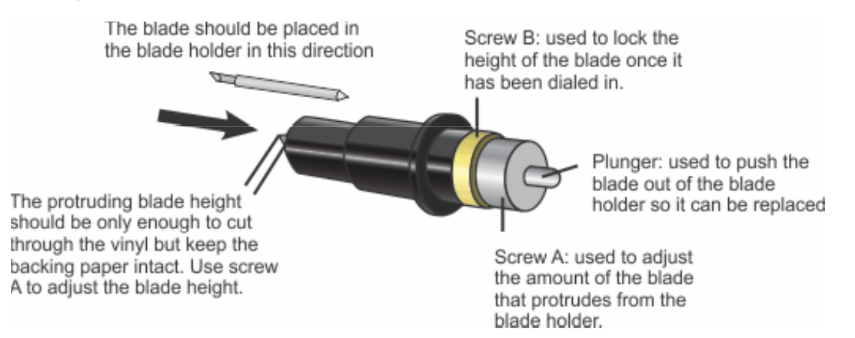](https://wiki.protohaven.org/uploads/images/gallery/2026-07/5tpimage.png)
To test the blade depth, scratch the blade holder on a scrap piece of vinyl. If the blade goes through the entire thickness of the vinyl then you need to reduce the protrusion of the blade. Readjust the blade until your result resembles Example A below
[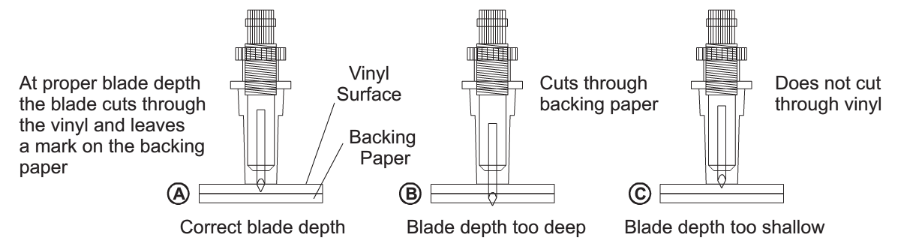](https://wiki.protohaven.org/uploads/images/gallery/2026-07/rniimage.png)
#### Installing the Blade Into the Carriage Assembly
The carriage assembly moves from left to right along the cutting area of the machine. The carriage will hold the blade holder
for cutting vinyl or the pen tool holder for drawing. Take great care to use the rear slot for the blade holder. Using the front
slot for the blade holder will not produce desirable results. To insert the blade holder, loosen the locking knob and place
the blade holder in the slot. Make sure the blade holder is seated all the way in the slot. Tighten the lock knob until the tension becomes moderate. Do not over tighten.
[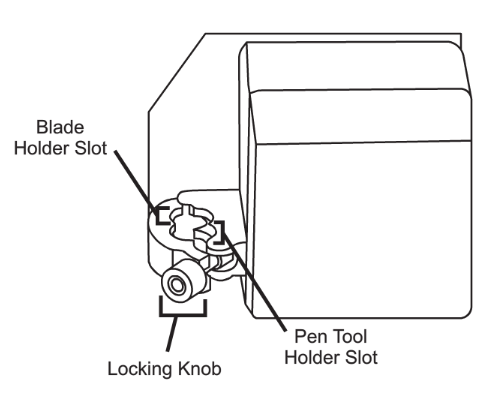](https://wiki.protohaven.org/uploads/images/gallery/2026-07/0ajimage.png)
#### Loading the Vinyl
You can use rolled vinyl or single cut pieces:
1. For rolled vinyl, place the roll on the two aluminum rollers with the vinyl coming off the back of the roller, vinyl side up.
2. Unlatch the pinch-roller levers by pushing upward gently.
3. Insert the vinyl from behind, face up, between the two media rollers and make sure to push the pinch-roller levers down.
[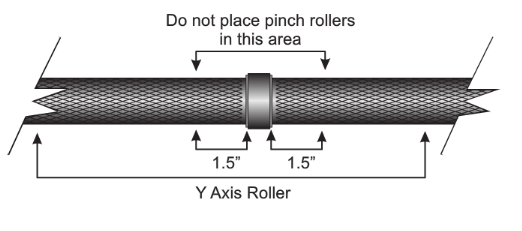](https://wiki.protohaven.org/uploads/images/gallery/2026-07/VHYimage.png)
The cutting area on the plotter is 48” or 4'.
Do not clamp a pinch roller near an untextured portion of the Y axis roller; leave at least a 1”-2” buffer.
### The Interface Panel
The interface panel is where all non-mechanical adjustments will be made to the machine. Operations such as changing the blade pressure and speed, moving in the X and Y axes, and resetting the origin location will all be performed within the interface panel.
[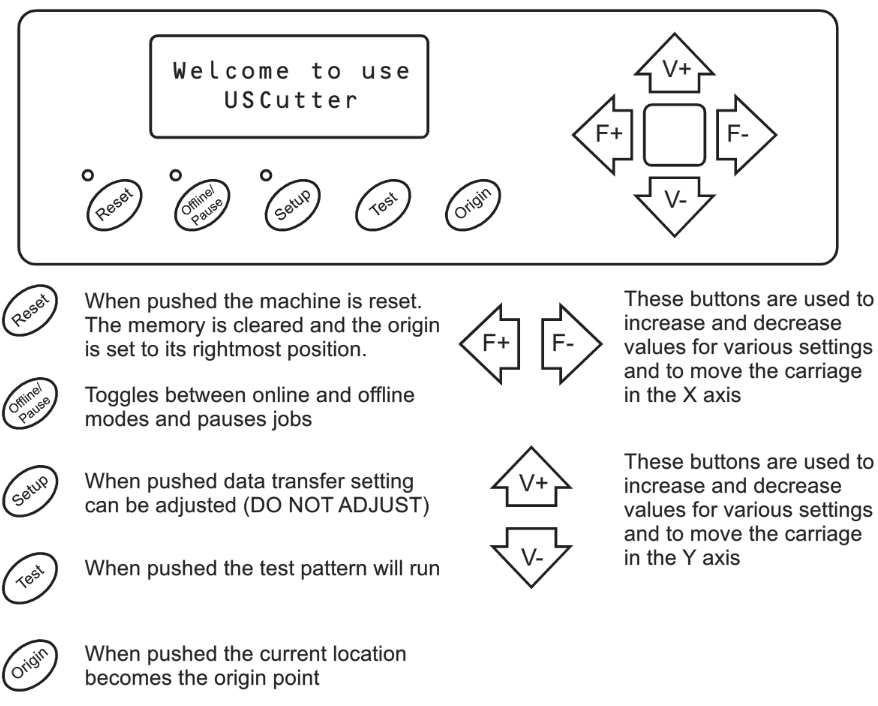](https://wiki.protohaven.org/uploads/images/gallery/2026-07/TuIimage.png)
#### Setting the Origin Location
[](https://wiki.protohaven.org/uploads/images/gallery/2026-07/4uZimage.png)
You will need to set the Origin Point each time you set up for a job on the vinyl cutter. To set a new origin location you will first push the Offline/Pause button. The offline mode allows you to move the position of the vinyl. You will then use the directional arrow keys to navigate to your desired location. Once you have reached the desired location you will press the origin button and the current location will be set as the origin.
#### Adjusting Cutting Speed
[](https://wiki.protohaven.org/uploads/images/gallery/2026-07/P7fimage.png)
The cutting speed will determine the speed at which the job is completed as well as the level of quality of the cuts. Sixteen inches per minute is a good default starting point for good quality and medium speed. When on the main menu the V+ and V- buttons will change the cutting speed.
#### Adjusting Blade Pressure
[](https://wiki.protohaven.org/uploads/images/gallery/2026-07/AZ3image.png)
The downward pressure of the blade can be adjusted. A blade pressure of 100g is a good general starting place to work from when trying to determine the force needed for a specific material. All materials will require testing to determine the amount of force to use. When on the main interface menu the F+ and F- buttons will adjust the cutting speed.
#### Performing a Test Cut
[](https://wiki.protohaven.org/uploads/images/gallery/2026-07/rgKimage.png)
Press the test button to cut a small test shape to test the current force and speed settings. This can used to determine the proper cutting speed and force settings needed for different materials without wasting time and material by cutting full designs.
## SCAL3 Vinyl Cutting Software
We use [Sure Cuts a Lot 3](https://surecutsalot.com/software/software_scal.php), which is a software program that takes image files and turns them into commands which are sent to the vinyl cutter to cut your material.
SCAL3 offers several useful [video tutorials](https://www.craftedge.com/tutorials/tutorials_scal3_video.php); we are also working to develop [our own software guide for SCAL3](https://wiki.protohaven.org/books/software-guides/chapter/sure-cuts-a-lot).
## Weeding
Weeding is the process of removing the extra vinyl around the graphic. This is not much of a challenge with large graphics, but can be trickier with letters. For example, if you are weeding the words “P-R-O-T-O-H-A-V-E-N,” you are removing the unnecessary vinyl that surrounds and flows in between each letter, like the centers of the P and the O. The smaller the letters, the more difficult the weeding process will be.
The biggest mistake made during the weeding process is trying to go too fast. The secret is to use the best possible equipment and take your time. If your pick or knife is dull or you did not set the force to cut deep enough, you won'’t get a clean cut and weeding is more difficult.
Using a pointed tool, like a dental pick or a box knife, carefully peel away the excess vinyl around your project.
#### Tips for Successful Weeding
- Work on a clean, flat surface
- Work slowly. Patience is important here!
- Peel the material off a little bit at a time
- Rock the material back and forth and try to get a good angle as it comes away from the top and bottom of the individual letters
- Try turning the piece around and working from another side if it will not release at the angle you are working
- It is easy for the vinyl you are removing to get stuck back down in undesirable places like the middle of your work, so, try dividing the piece into sections. The weeding cut lines in the vinyl to allow you to isolate sections for easier removal
## The Transfer Process
The vinyl you just cut has an adhesive back; however, it is often difficult to keep text and complex graphics aligned properly if you just peel the vinyl off of the backing and place it one by one onto the receiving surface. To make this process easier, you will use transfer paper, a lightly sticky-backed semi-transparent paper that you place on the face of the piece to transfer it to the receiving surface in one whole piece.
1. Cut a piece of transfer paper a little larger than your cut vinyl piece.
2. Place the transfer paper on the face of your object and smooth it out with the squeegee.
Be sure to press firmly on each letter and remove all bubbles.
3. Peel the paper backing away carefully, picking up your cut vinyl on the transfer paper as you go.
The back of the vinyl is very sticky and is not forgiving when you stick it down. Using RapidTac, an adhesive solution that allows you to move your piece around on the final mounting surface for a minute or so before it sticks in place, works great on smooth surfaces like glass, painted metal, etc.
1. Spray RapidTac on your receiving surface and place the vinyl cut piece approximately where you want it. Move it quickly to the final location and smooth and press firmly with a squeegee, removing all bubbles.
2. Carefully pull away the transfer paper using a squeegee behind the transfer paper. Pull at a sharp angle away from the vinyl letters.
## Tips for Success
- The vinyl cutter likes curves and dislikes sharp corners in small objects
- Vinyl sheets need to be wrinkle-free
- Use vinyl sheets that are whole rectangles. It's OK to use small pieces (min. 6” x 6”), but don’t use pieces that have sections cut out from prior jobs—this can present a problem as the sheet is fed back and forth
- Test LOTS before creating your final piece
- Check the back of the sheet for pressure lines or cuts after your test piece
- Make sure the origin is set away from the traction rollers
- Blades get dull and vinyl brands differ, so, you will need to test often and adjust the cutting speed and cutting force
# Resources
#### Useful Links
[http://forum.uscutter.com/index.php?/forum/61-vinyl-cutters/](http://forum.uscutter.com/index.php?/forum/61-vinyl-cutters/) - Vinyl cutter manufacturer online discussion forum
[http://www.productsignsupplies.com/](http://www.productsignsupplies.com/) - Online store with a huge variety of vinyl types
# Electronics - Multimeter
Rigol DM3058E
# Multimeter Tool Tutorial
Multimeters are the workhorse of the electronics measurement world. They can perform three basic measurements: Voltage, Resistance, and Current. Many multimeters have extra measurement features such as capacitance, a continuity tester, and diode tester. The difference between a handheld multimeter and our desktop multimeter is that the desktop multimeter is much
more accurate and has more features than the handheld multimeter, including four wire measurements.
The meter uses probes, also called leads, (the red and black wires) to make contact with the circuit you are measuring.
[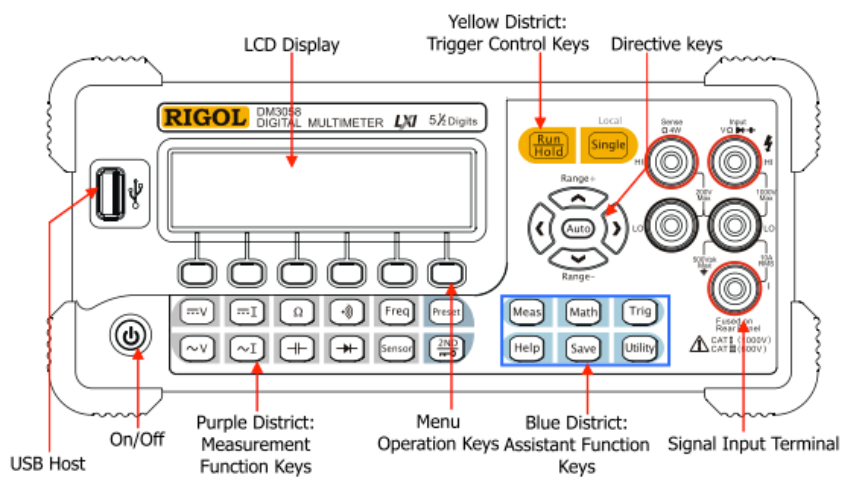](https://wiki.protohaven.org/uploads/images/gallery/2026-07/dGHimage.png)
## Controls
The primary controls you will use on the desktop Rigol DM3058 are:
• On/Off Button
• Measurement Function Keys
[](https://wiki.protohaven.org/uploads/images/gallery/2026-07/Pb9image.png)
### DC Voltage Measurement
Voltage is measured in volts (V). These instructions use a battery as an example system to measure:
1. Turn on the desktop multimeter and press the DC Voltage button and the Auto button.
2. Take the leads from the handheld multimeter and touch the red probe to the positive end of the battery and the black probe to the negative end of the battery. The meter should display a value between 1.2 and 1.6 depending on the charge of the battery.
3. Now touch the black probe to the positive end of the battery and the red probe to the negative end of the battery. The multimeter should display a value between -1.2 and -1.6, this shows how these are relative measurements and depending on where you place the probes you can have different values.
### Resistance Measurement
Resistance is how much a measured component resists the flow of electricity and is measured in ohms (Ω). Note that the desktop multimeter is auto-ranging, so any resistance value can be measured when in "Ohm" mode.
1. Take a bundle of 10k resistors from the resistor pile. If the color-coding on the resistors are the same that means the resistors are the same value, but we can test that with our multimeter.
2. Press the ohm button on the multimeter to enter resistance measurement mode.
3. Touch the probes to each end of one of the resistors and wait for the shown value to stabilize. This is the measured resistance.
### Current Measurement
Current measurements measure how much energy is being used in a circuit and is measured in amperes (A). Current measurement is different from voltage and resistance measurements in two main ways:
- The circuit must be actively running while you make the measurement, such as having a light lit or motor running.
- The multimeter replaces a wire in the circuit so that the current flows through the multimeter.
If you try to measure too high of current you can blow a fuse in the multimeter which then needs to be replaced.
1. On the multimeter, press the measure DC current button.
2. Refer to the [Bench Power Supply Tool Tutorial](https://wiki.protohaven.org/books/tool-guides/page/bench-power-supply-tool-tutorial "Bench Power Supply Tool Tutorial") to set up a simple DC circuit running through a resistor (e.g. 3V running through a 1kOhm resistor)
3. Disconnect one side of the resistor and touch the probes to each end. The multimeter will display the current flowing in
the circuit.
4. Adjust the voltage on the power supply and see how the current changes. Avoid going higher than 100mA.
## Cleanup
1. Turn the multimeter off.
2. Gently wind the probes and wires so there are no tight bends in the wire that could break the wire over time.
3. Clean up the table and floor around where you worked.
# Electronics - Bench Power Supply
GW Instek adjustable, 32V, 5A
# Bench Power Supply Tool Tutorial
Power supplies allow you use different levels of voltage and current, and do not run down like batteries. This allows you try different voltage levels on the circuit and see what works best and then either use a set power supply or batteries for the final design.
[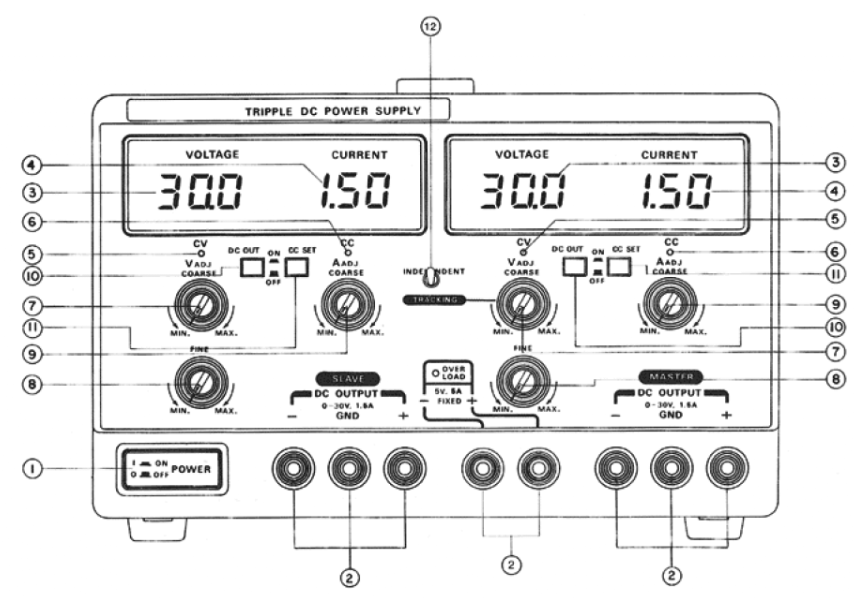](https://wiki.protohaven.org/uploads/images/gallery/2026-07/bvTimage.png)
## Controls
The main controls for the power supply are:
- Power on/off (1)
- Coarse voltage control (7)
- Fine voltage control (8)
- Coarse current control (9)
### Voltage Control
In the shelf of spare electronics parts by your workbench, find a tackle box labeled "LEDs" and take one out.
1. Turn on the power supply with nothing connected to it to check the settings.
2. Set the voltage on the master side to 1 volt by turning the coarse voltage control down.
3. Now check that the DC output is turned off, as you do not want to make connections with the power supply on, it can cause sparks.
4. Attach wires from the Master DC OUTPUT with the black wire connect to one end of the LED and the red wire connected to the + plug to the other end of the LED.
5. Turn the power supply back on.
6. Begin increasing the voltage on the power supply until the LED lights up. If you've passed 4 volts and the LED hasn't lit, back it down to zero volts and reverse the LED before trying again.
7. Make a note of the indicated current, for use in the "Current Limit" section below.
8. Continue increasing voltage; stop when the LED turns off.
Congratulations, you have now burned out an LED by putting too much voltage through it! Turn down voltage to 1 V, turn off the power supply, and replace the LED.
### Current Limit
1. Turn off the DC output on the power supply and adjust the coarse current control to be half of the current value recorded during the Voltage limit section.
2. Press down the CC Set button to select the current limited mode, the CC light should now be lit.
3. Press the DC Out button to turn on the power. The light will be dimmer than before.
4. Increase the current limit by adjusting the coarse current control. At some point the value of the measured current will stop increasing even if you turn the coarse current control higher since this only sets the maximum value of the current unlike voltage control which sets the voltage to a fixed level.
## Cleanup
1. Always turn down the voltage and turn off the output before turning off the main power.
2. Gently wind the probes and wires up so there are no tight bends in the wire that could break the wire over time.
3. Clean up the table and floor around where you worked.
# Electronics - Function Generator
Rigol DG1022A
# Function Generator Tool Tutorial
Function generators are basically very fast power supplies. They allow you to switch the power from positive to negative very fast at a controlled frequency and control the shape of how it switches. It also can generate pulses with a controlled width.
[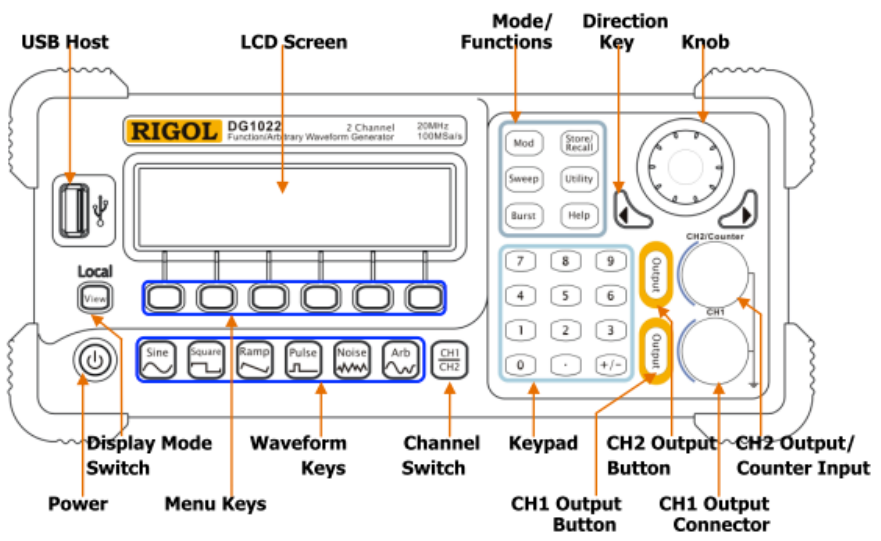](https://wiki.protohaven.org/uploads/images/gallery/2026-07/uEwimage.png)
## Controls
The main controls for the power supply are:
- Power on/off
- Waveform Keys
- General purpose knob
### Amplitude and Frequency Control
Let’s explore the function generator by making it produce sound. To do this we will connect a piezobuzzer to the CH1 output connector but first we will make sure the voltage is low enough so we do not destroy it.
1. Turn on the function generator and check that you have selected CH1, if not press the channel select button to select CH1.
2. Press the sine wave button .
3. Using the knob turn down the voltage to 1V.
4. If the CH1 output button is lit, press it to turn it off and then connect your piezobuzzer to CH1.
5. Use the menu keys to select frequency and then use the knob to turn the frequency to 100 Hz.
6. Press the CH1 output button to turn on the output. Your piezobuzzer should start singing to you very badly.
7. Adjust the frequency of the function generator to hear how high pitched and annoying can you make it.
8. Adjusting the voltage to make it even loud or quieter, do not go above 3V as you do not want to kill your piezobuzzer buddy.
### Waveform Types
There are different types of waveforms other than the sine wave.
1. Press the square wave button and hear how the sound changes. The square wave has another option to try - the duty cycle, which determines what percentage of the each cycle is high and what percentage is low.
2. Press the ramp button and hear how it sounds. The ramp waveform is also referred to as a sawtooth waveform. A new option on the ramp waveform is the symmetry option which controls how fast the wave rises and falls.
3. Press the pulse button. This waveform is similar to the square wave but is designed to be easier to generate more spread out pulses. To try this, change the settings so that your piezobuzzer is clicking once a second.
4. Press the noise button, this sends random noise to the output, with controls on the amplitude and bandwidth of the signal.
5. The "Arb" button is a more advanced function that allows you to create an arbitrary waveform.
## Cleanup
1. Always turn down the voltage and turn off the output before turning off the main power.
2. Gently wind the probes and wires up so there are no tight bends in the wire that could break the wire over time.
3. Clean up the table and floor around where you worked.
# Electronics - Oscilloscope
Rigol DS1204B
# Oscilloscope Tool Tutorial
Digital oscilloscopes are very powerful and useful tools in diagnosing electrical signals. When you have a signal changing very fast the oscilloscope can view that signal and take measurements of that signal. This section will go over the basics of using a digital oscilloscope. The Oscilloscope Manual is a great resource for getting into the more advanced features once you are comfortable using the scope.
[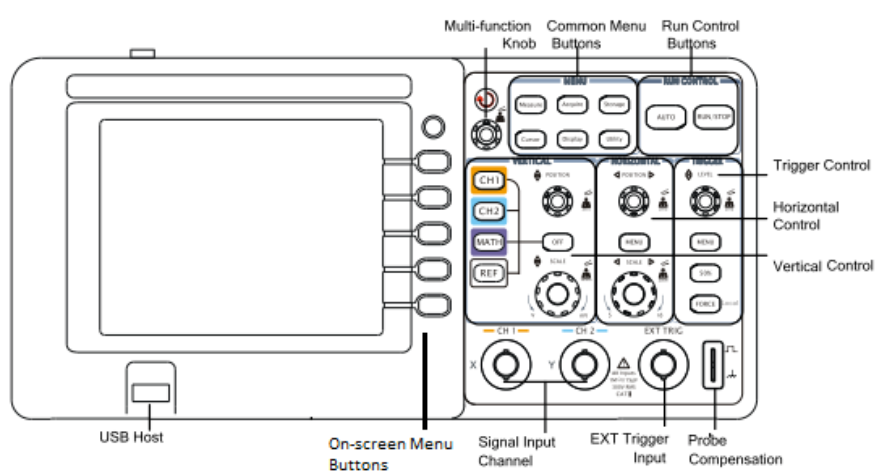](https://wiki.protohaven.org/uploads/images/gallery/2026-07/er6image.png)
## Controls
The main controls for the digital oscilloscope are:
- Power on/off
- Multi-function knob
- Common Menu Buttons
- Measure
- Acquire
- Storage
- Cursor
- Display
- Utility
- Run Control Buttons
- Auto
- Run/Stop
- Vertical Control Area
- CH1
- CH2
- MATH
- REF
- Position Knob
- Scale Knob
- Horizontal Control Area
- Position Knob
- Scale Knob
- Trigger Control Area
- Level Knob
- Menu Button
- 50% Button
- Force Button
### Probes
To connect what you are measuring to the oscilloscope you need probes. These probes have a selection of 10x on them, which means that when the 10x is selected the voltage input to the oscilloscope will be 10 times smaller. This is useful if you need to measure higher voltages.
For any measurements under 30V you will not need the 10x selection, the oscilloscope can go to 40V but to be safe only go to 30V before using the 10x selection.
1. Check that the function generator is set to less than 30V (since it goes to 20V that should not be hard) and connect the function generator output CH1 to the oscilloscope input CH1.
### Time Divisions
From this point on, we use the function generator to generate signals for us to observe on the oscilloscope. See the [Function Generator Tool Tutorial](https://wiki.protohaven.org/books/tool-guides/page/function-generator-tool-tutorial "Function Generator Tool Tutorial") for details on how to use the function generator.
1. Turn on the oscilloscope and check that CH1 button is lit up.
2. Set the function generator to a sine wave at 5V and 100Hz. The screen should be displaying a signal.
3. Change the function generator to 10kHz.
4. The signal should now be hard to see.
5. Use the Scale Knob in the Horizontal Control area and turn the knob so that the waveform stretches out on the screen.
The signal is still the same; you are just zooming in by changing the time divisions. The current time division is displayed at the bottom of the screen next to the word Time. This value is the horizontal size of one box in the grid on the display. The horizontal scale knob controls both CH1 and CH2 signals at the same time.
### Voltage Divisions
1. Decrease the voltage on the function generator to 1V.
2. Use the Scale Knob in the Vertical Control area to increase the displayed size of the waveform.
The vertical scale for each of the channels is separate so if the scale is not changing make sure you have CH1 selected. The current value of the vertical scale is displayed at the bottom of the screen where it says CH1 or CH2 and then a value in volts.
3. Decrease voltage on function generator and change the voltage divisions so that the waveform is more visible.
### Triggering
On the display the signal looks like a stationary wave, this is due to the triggering. Triggering determines where on the waveform the oscilloscope considers the starting point.
1. Turn the Level Knob and you will see a horizontal line, that is the trigger level and when the waveform crosses this line the oscilloscope uses this as fixed point on the display.
2. Adjust the Level Knob so that the trigger level is above the waveform, the waveform will now starting moving on the display. This is due to the oscilloscope no longer triggering off of the waveform and triggering based on a timeout.
3. Use the 50% button in the Trigger Control Area to return to triggering off of the waveform.
4. Turn off the output on the function generator and disconnect the function generator from the oscilloscope.
5. Attach the piezobuzzer to the oscilloscope, tap on it and you should see something flash by on the display.
What flashed by was the signal from the piezobuzzer. Since it is just a short pulse you will need to set up the oscilloscope to freeze and hold the image of that pulse.
6. Press the Menu button in the Trigger Control Area.
7. On the onscreen menu, select the Sweep and change it to single. In the Run Control Area the Run/Stop button should now be green.
8. Tap the piezobuzzer again - it should display and hold the signal and the Run/Stop button will turn red.
9. Tap the piezobuzzer again and nothing will happen, but if you press the Run/Stop button again it will go green and it will be ready to trigger again.
10. In the Sweep option, change it to the normal mode - it will trigger on every signal that meets the threshold but will not timeout trigger as it does in auto mode.
### Measuring Amplitude
One of the main uses of the digital oscilloscope is to get accurate measurements of signal. This digital oscilloscope has a variety of amplitude measurement options. Appendix A shows the types of amplitude measurements that the Rigol DG1052 can perform, we will be using the voltage peak to peak (Vpp) for this example.
1. Reconnect the function generator to the oscilloscope, turn on the output and set the oscilloscope to auto trigger.
2. In the Common Menu Buttons area, press the Measure button.
3. In the on-screen menu, check that the source is CH1 and use the Voltage option to select Vpp.
The measurement of the signal should now display on the screen.
4. Change the function generator voltage and see how it tracks the changes.
5. Turn off the function generator and disconnect it from the oscilloscope.
6. Set the oscilloscope to a single trigger, connect the piezobuzzer to the input and give the piezobuzzer a good smack.
This should give you a nice waveform to measure.
7. If the Vpp measurement is no longer on the screen, repeat the steps above to bring up the measurement.
This shows how you can measure captured waveforms the same way as repeating waveforms.
### Measuring Time
Time values are the other important measurements that can also be measured on the digital oscilloscope. Appendix B shows the types of time measurements that the Rigol DG1052 can perform; we will be using the frequency measurement
for this example.
1. Reconnect the function generator to the oscilloscope, turn on the output and set the oscilloscope to auto trigger.
2. In the Common Menu Buttons area, press the Measure button.
3. In the on-screen menu, check that the source is CH1 and use the Time option to select Freq.
4. The measurement of the signal should now display on the screen.
5. Change the function generator frequency and see how it tracks the changes. Then turn off the function generator and disconnect it from the oscilloscope.
6. Set the oscilloscope to a normal trigger, connect the piezobuzzer to the input and sing to your piezobuzzer to make up for smacking it!
7. When you get a good signal on the display, press the Run/Stop button to freeze the signal.
8. If the frequency measurement is no longer on the screen repeat the steps above to bring up the measurement.
Now you can measure how much in tune (or out of tune) your singing is!
## Cleanup
1. After you are done using a power supply or function generator, always turn down the voltage and turn off the output before turning off the main power.
2. Gently wind the probes and wires up so there are no tight bends in the wire that could break the wire over time. This is especially important with the oscilloscope probes to keep them in proper working order.
3. Clean up the table and floor around where you worked.
# 3D Printing - 3D Scanner
This page covers the use of the MAF (Matter and Form) THREE 3d scanner.
# MAF (Matter and Form) THREE
## Introduction
This 3D scanner is used to take photos of objects from many angles and combine them into a mesh that can be imported into any standard 3D editing software. It can include color data, UVs, and exports high density meshes. This tool comes with a turntable to effectively capture small objects. Capturing large objects will take more manual involvement to get the images required.
Located behind the front desk.
## Notes
The THREE comes built in with a camera, computer and software to manage your 3D scans. **The software is accessed via a web interface transmitted over wifi, so it is recommended that the user brings their own laptop or mobile device with wifi capabilities.** The desktop computers at protohaven do not have wifi capabilities, and may take additional setup to connect to the scanner.
No computation is done on your device and it requires no installs, it only needs to be able to run a modern web browser and download files (if you want to save your scans).
### Safety & Care
The THREE is a precision machine that carries more risk of damage *from* you than risk of damage *to* you.
- The main scanning component is an entire computer, and it is important to take care handling it gently
- The included tripod is not the most stable, so ensure that it is secure and watch elbows and rotating objects to avoid knocking it over
- Do not press on the turntable, or scan exceptionally heavy items
- Keep the work area free of debris, dust and grime
- Watch out for power cables and other dangling components. Be mindful of others using the space.
### Use
Official tutorial/walkthrough: [https://www.youtube.com/watch?v=EzM5n-IZTg0](https://www.youtube.com/watch?v=EzM5n-IZTg0)
Official product help pages: [https://matterandform.zendesk.com/hc/en-us/categories/28126481059341-THREE](https://matterandform.zendesk.com/hc/en-us/categories/28126481059341-THREE)
### Materials
Some surfaces do not effectively 3D scan. Trying will not damage the cameras, but you may not get a good result.
- Very shiny surfaces, such as mirrors, metals, glossy plastics
- Transparent or semi-transparent surfaces, such as glass, clear plastic, gemstones
- Very dark colors
- Moving objects (a hamster, a pinwheel)
There are some techniques to paint or powder uncooperative materials, if you must scan them.
## Parts of the Tool
[](https://wiki.protohaven.org/uploads/images/gallery/2026-09/image.png)
[](https://wiki.protohaven.org/uploads/images/gallery/2026-09/ksUimage.png)[](https://wiki.protohaven.org/uploads/images/gallery/2026-09/4Xmimage.png)
## Basic Operation
### Setting Up
[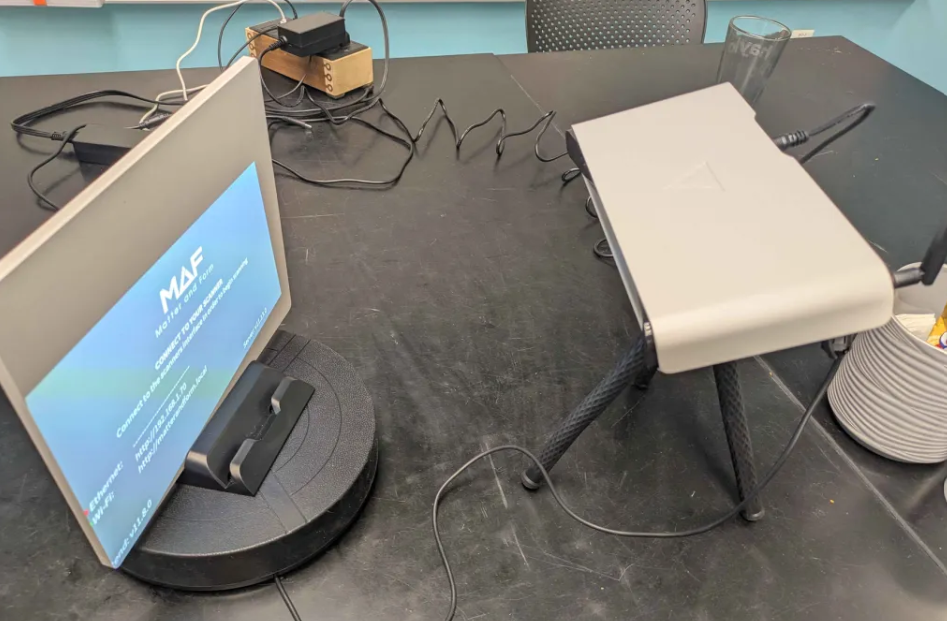](https://wiki.protohaven.org/uploads/images/gallery/2026-09/TODimage.png)
- Attatch the scanner onto the tripod and the antennae onto the scanner.
- Plug in the scanner to an outlet, and the turntable to the scanner
- Press the red power button to turn on the scanner
- Enter the address shown into your browser to access the scanner software
- The software should walk you through the scanning process
### Cleaning Up
- Wipe down any dust with a dry paper towel
- Replace all components back in the box they came in
- **REMOVE THE ATTENEA** before putting the scanner back in the box
- Make sure the manual returns to the box as well
- Return the box to the Tech at the front desk
###