| **Needle Type** (shape of the point) | **Needle Size** (Fine to heavy) | **Fabric Type** | **Thread Size** (Measured in Tex, Denier, mm and weight) |
|---|---|---|---|
| Universal R or DP | 70 up to 230 | Light to heavy woven | Light to medium |
| Ballpoint RG, FFG, G | 100 to 125 | Light to medium knits, jerseys, stretch, bulky knit | Light to medium |
| Jeans R | 100 - 110 | Medium to Heavy | Medium to Heavy |
| Leather/Vinyl LR, LL, P, PCL, S, D, GH | Range of sizes | Heavy/Layers | Heavy |
| [](https://protohaven.org/wiki/_detail/tools/imported/wf_machine_overview.jpg?id=tools%3Asewing_walking_foot%3Astart "tools:imported:wf_machine_overview.jpg") |
| [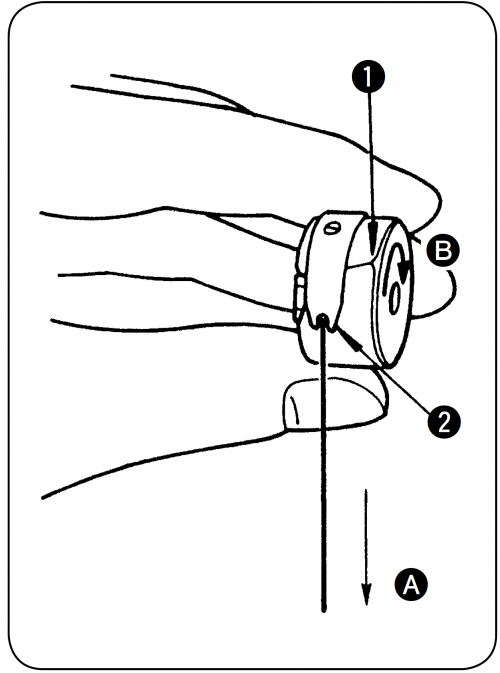](https://protohaven.org/wiki/_detail/tools/industrial_walking_foot_image22.png?id=tools%3Asewing_walking_foot%3Astart "tools:industrial_walking_foot_image22.png") | Set the bobbin into the bobbin case. Pass the thread around the thread slit (1), and pass it under the tension spring (2) Adjust so that the bobbin rotates in direction B when thread is pulled in direction A |
| [](https://protohaven.org/wiki/_detail/tools/industrial_walking_foot_image19.jpg?id=tools%3Asewing_walking_foot%3Astart "tools:industrial_walking_foot_image19.jpg") | Orient the lower knob (1) of the bobbin case to the indented part (2) of the bobbin housing’s inner hook. Push the bobbin case until it clicks. |
| [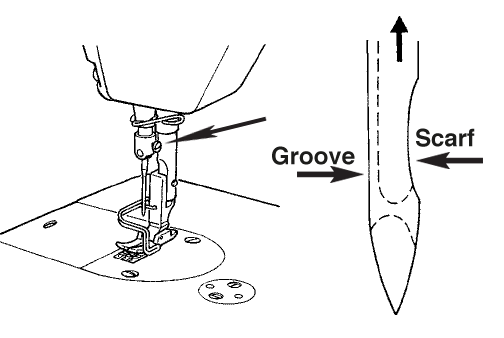](https://protohaven.org/wiki/_detail/tools/industrial_walking_foot_image7.png?id=tools%3Asewing_walking_foot%3Astart "tools:industrial_walking_foot_image7.png") | Turn the handwheel forward until the needle bar is at the highest position - Loosen the needle clamp screw and hold the needle so that scarf is to the right and the long groove in the needle is exactly to the left. - Insert the needle (1) into the clamp hole until it will go no further. - Tighten the needle clamp screw firmly (monkey tight—not gorrilla!) |
| [](https://wiki.protohaven.org/uploads/images/gallery/2025-04/tension-and-check-spring.jpg) | [](https://protohaven.org/wiki/_detail/tools/industrial_walking_foot_image12.jpg?id=tools%3Asewing_walking_foot%3Astart "tools:industrial_walking_foot_image12.jpg") |
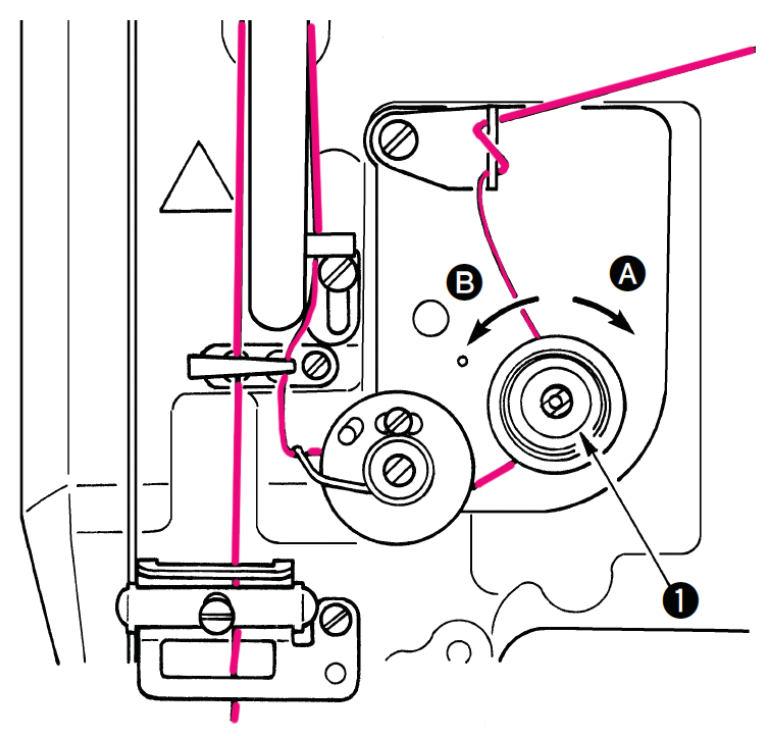
| Ensure the presser foot is UP. While holding the thread taught on either side, pass the thread between the tension discs, between the spring guide, and above the spring. Insert "check spring click" photo here You will hear a light click as the thread crosses over a small hook on the inside of the disc. (just visible through the hole next to the spring) | Please Note: Do not adjust the check spring knob (#6)! Its function is to keep the thread taught while the take up arm moves to the highest position. Loosening the nut will disable the spring, causing the machine to come unthreaded or tangle while sewing. This spring should always have enough tension to pull the thread down. |
| [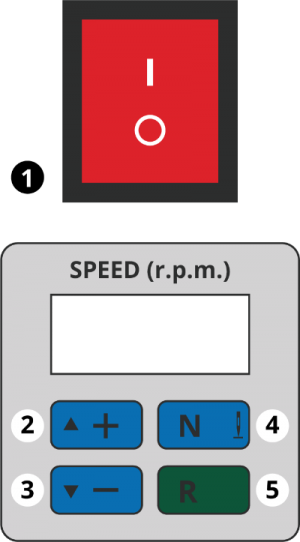](https://protohaven.org/wiki/_detail/tools/industrial_walking_foot_image16a.png?id=tools%3Asewing_walking_foot%3Astart "tools:industrial_walking_foot_image16a.png") | 1. On/Off Switch: Main power to the machine 2. Increase Speed: Increase r.p.m. 3. Decrease Speed: Decrease r.p.m. 4. Needle Position Mode: Set the needle to up / down position 5. Rotation: FOR AUTHORIZED MAINTENANCE ONLY |
| [](https://protohaven.org/wiki/_detail/tools/imported/needle_up_down.jpg?id=tools%3Asewing_walking_foot%3Astart "tools:imported:needle_up_down.jpg") |
| [(EN.ES.FR).cdr")](https://protohaven.org/wiki/_detail/tools/industrial_walking_foot_image9.jpg?id=tools%3Asewing_walking_foot%3Astart "tools:industrial_walking_foot_image9.jpg") | [(EN.ES.FR).cdr")](https://protohaven.org/wiki/_detail/tools/industrial_walking_foot_image4.jpg?id=tools%3Asewing_walking_foot%3Astart "tools:industrial_walking_foot_image4.jpg") | [(EN.ES.FR).cdr")](https://protohaven.org/wiki/_detail/tools/industrial_walking_foot_image20.jpg?id=tools%3Asewing_walking_foot%3Astart "tools:industrial_walking_foot_image20.jpg") |
| Normal tension for straight stitch sewing. | Too loose for straight stitch sewing. | Turn the dial clockwise to increase tension. |
| [](https://protohaven.org/wiki/_detail/tools/industrial_walking_foot_image15.jpg?id=tools%3Asewing_walking_foot%3Astart "tools:industrial_walking_foot_image15.jpg") | Press down the reverse feed control lever (1). Release the lever and the machine will run in the normal feed direction |
| [](https://protohaven.org/wiki/_detail/tools/industrial_walking_foot_image18.png?id=tools%3Asewing_walking_foot%3Astart "tools:industrial_walking_foot_image18.png") | 1. Cut away the knot near the needle, remove the fabric. 2. Open the bobbin housing and remove any stray thread, be sure the bobbin is not stuck. 3. Press in the safety button (1) and turn the hand wheel away from you till it clicks, and the button pops up. 4. Turn the wheel towards you. You may hear another click. Continue turning till the take-up lever is at its highest position. 5. Re-thread and continue sewing. |
| **Common Issues** | **Possible Causes** | **Resolutions** | |
| Machine stops working after a jam—the hand wheel will not turn, or the hook does not rotate around the bobbin. | The safety mechanism has locked the hook. | Power off and drain the machine. (see Safety Reset above) Remove the jam near the needle and below, inside the bobbin housing. [Reset the safety](https://www.google.com/url?q=https://www.youtube.com/watch?v%3DMKlGOzQdMXM&sa=D&source=editors&ust=1676742692834008&usg=AOvVaw2faDfrwedVI1Eup6lq0sKc "https://www.google.com/url?q=https://www.youtube.com/watch?v%3DMKlGOzQdMXM&sa=D&source=editors&ust=1676742692834008&usg=AOvVaw2faDfrwedVI1Eup6lq0sKc"). | |
| Thread comes out of the tensioners | The thread around the check spring disk isn’t pulled up until it clicks. | Re-thread the machine with the presser foot raised to take tension off during threading. See [Critical Threading](https://protohaven.org/wiki/tools/sewing_walking_foot/start#criticalthreading "tools:sewing_walking_foot:start ↵") | |
| The check spring disk may be loose. | Make a maintenance request at [http://protohaven.org/maintenance](http://protohaven.org/maintenance "http://protohaven.org/maintenance") and notify the tech on duty. | ||
| Missed stitches | The needle is inserted improperly. | Be sure that the scarf is to the right | |
| The needle is threaded right to left | Re-thread left to right | ||
| The needle is bent or broken | Replace the needle | ||
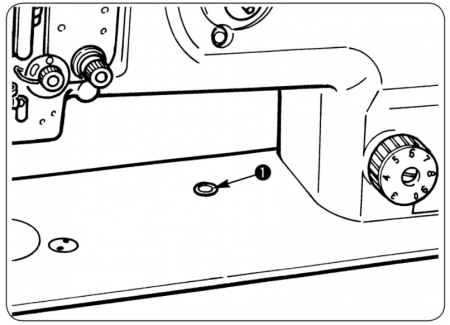
| Loud noise while winding the bobbin | The presser foot is down. | Use the manual lever to pick it up. Unthread the needle, (preferable take it out) be sure nothing can roll towards the drive shaft. | |
| Thread seems stuck—can’t pull stitched fabric away from the presser foot after sewing the seam. | The tensioners are not dis-engaged | Push the knee pedal HARD to the right to dis-engage the tension. |