# Textiles - Embroidery Machine
Stabber: Brother PR-620
Clearance: Required
# Manual(s)
*Manuals and other reference materials from the manufacturer or other sources.*
- [Operation Manual, Brother PR-620](https://download.brother.com/welcome/doch000126/pr620ug01en.pdf)
- [Quick Reference Guide, Brother PR-620](https://download.brother.com/welcome/doch000127/pr620qg01ennlfrdeites.pdf)
- [User's Guide, Cap Frame for Brother PR-620](https://download.brother.com/welcome/doch000120/pr620600_2upg_capugenfres.pdf)
# Member Notes
# Resources
### Thread
For best results, use [\#40 Madeira polyester embroidery thread](https://www.madeirausa.com/polyneon/).
Note that using rayon thread in particular can be prohibitively slippery for the tension we've calibrated the machine at.
#### *Repair files*
*Spool Holder 3d print file: [CNC Embroidery Spool Holder.step](https://wiki.protohaven.org/attachments/344) (print laying on its side for most strength)*
# Tool Tutorial
##
[](https://protohaven.org/wiki/_detail/tools/cnc_embroidery_image3.png?id=tools%3Acnc_embroidery%3Astart "tools:cnc_embroidery_image3.png")
[](https://protohaven.org/wiki/_detail/tools/cnc_embroidery_image1.png?id=tools%3Acnc_embroidery%3Astart "tools:cnc_embroidery_image1.png")
---
[](https://protohaven.org/wiki/_detail/tools/cnc_embroidery_image2.png?id=tools%3Acnc_embroidery%3Astart "tools:cnc_embroidery_image2.png")
## Making Adjustments
Members are ONLY permitted to adjust the following screws and knobs on the device:
- Embroidery frame holder knobs (grey thumbscrews)
- Operation panel arm knobs (grey thumbscrews)
Adjustment of the following by members without the guidance of a shop tech are specifically prohibited:
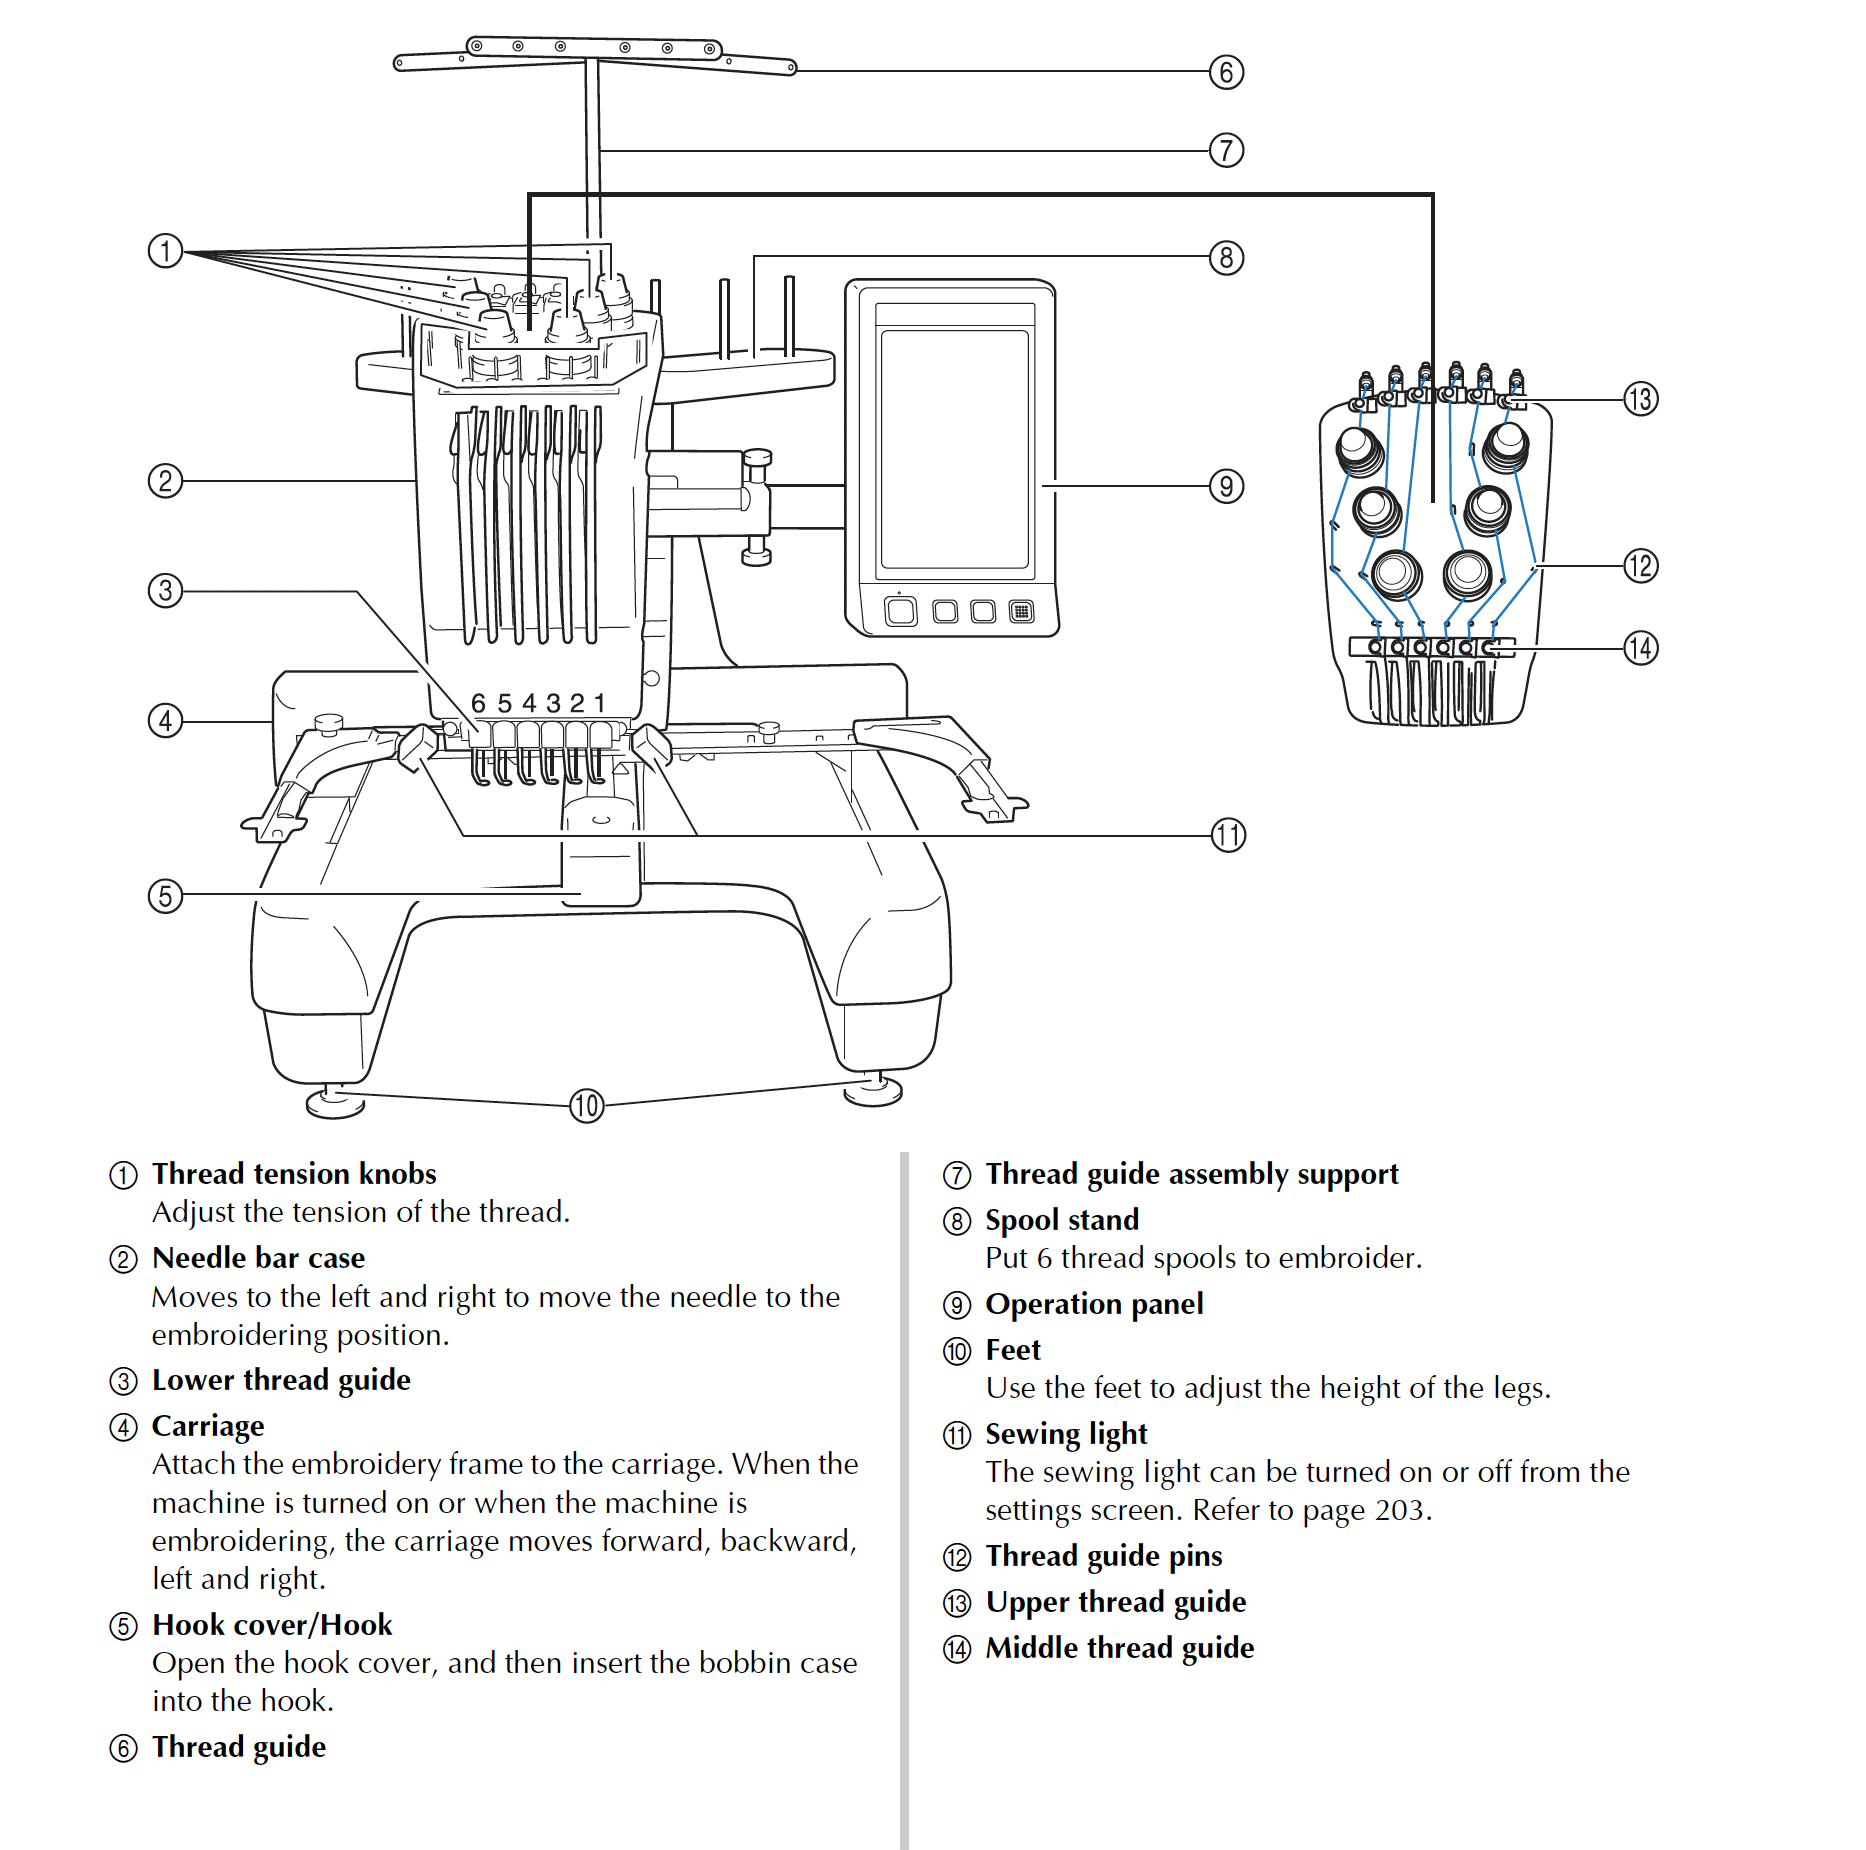
- All knobs on the top of the machine (including the thread tension knobs and the black guides behind them)
- The bobbin case screw (for bobbin tension)
Thread tension adjustment knobs in particular have been expensive for us to repair. In the past, members have damaged the machine both by over-tightening (cracking internal parts of the assembly) and under-tightening (releasing internal springs and washers). Please respect our rules and do not adjust these knobs (see "Troubleshooting" below for ways to solve tension problems)
## Using correct thread
40 embroidery thread must be used in the embroidery machine - **non-embroidery thread (e.g. standard sewing machine thread) is expressly forbidden**, as use over time will damage parts of the machine it comes in contact with. See the [Resources](https://wiki.protohaven.org/books/tool-guides/page/resources-lea) page for recommended thread brands to give best results.
**Only our bobbins (available in the store) are permitted for use on the embroidery machine.** We use specific pre-wound bobbins with high-grade thread to prevent tangling, breakage, and damage to the machine. Please trust us on this - you **will** have a bad time if you try to wind your own or buy off-brand.
## Troubleshooting
When in doubt, troubleshoot the following in order BEFORE reporting problems with the machine:
1. Your fabric and hooping technique (e.g. using stretchy/poor fabric, some gaps in stabilizer when hooping)
2. Your thread and bobbin (are you using the recommended thread above?)
3. Your design (have you tried a basic I-test using your fabric and thread, before attempting something more complex?)
If you think the machine is out of calibration or not working properly in some way, **ask a tech to run an "I-test" using our maintenance kit.** This kit contains known good thread and fabric and can rule out machine problems as part of your project.
## Needle breakage
Occasionally, a problem will occur which breaks one of the needles on the machine. **Please report this to the shop tech on duty when it happens.**
**Do NOT attempt to change a needle by yourself** as incorrectly loaded needles have broken the auto-threading system and caused internal damage to the machine in the past.
## Operation sequence
- Install Bobbin
- Turn on machine
- Select embroidery pattern
- Edit embroidery pattern
- Specify embroidery settings
- Check previewed image
- Hoop the fabric in embroidery frame
- Attache embroidery frame to the machine
- Check the embroidery area
- Thread the upper threads
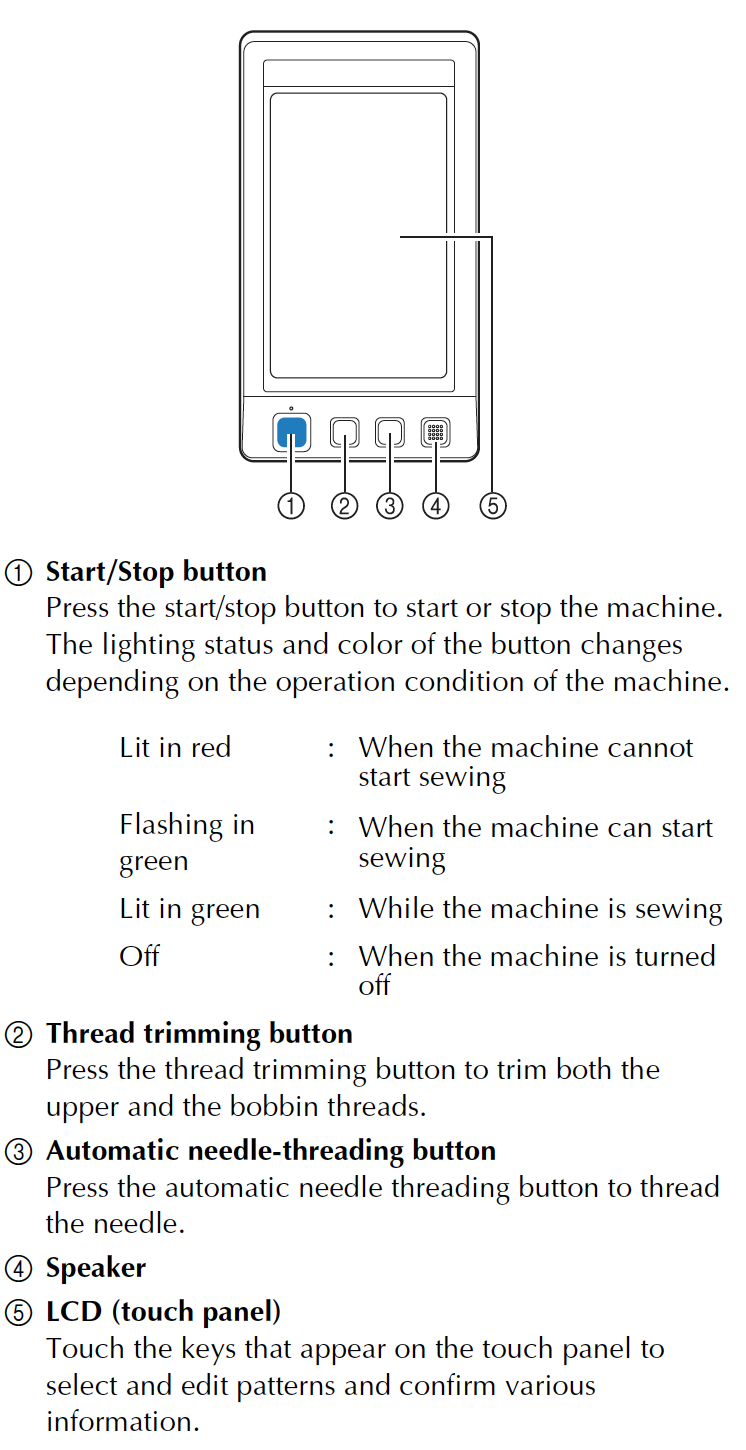
- Unlock the machine, then press the start/stop button to begin embroidering. (Machine automatically stops at pattern completion)
- Check thread tension
- Remove the embroidery frame, then remove fabric from frame
- Turn off the machine